How to Create an Animatic in Adobe After Effects: A Comprehensive Guide for Video Designers
Introduction: Bring Your Ideas to Life with an Animatic in After Effects
Are you a video designer looking to bring your ideas to life? If so, you’ve come to the right place! In this guide, we’ll show you how to create an animatic in Adobe After Effects. Animatics are a great way to pre-visualize your animations and refine your ideas before diving into the final production process.
Get 10% off when you subscribe to our newsletter

Before we start, make sure you’re familiar with the basics of After Effects, such as its interface, layers, and keyframe animation. Having this knowledge will make the process much easier.
Let’s get started on your animatic! Here are the steps to follow:
1.Gather your assets:
Collect all the images, audio files, text overlays, and other elements you want to include in your animatic. Organize them into separate folders for easy access.
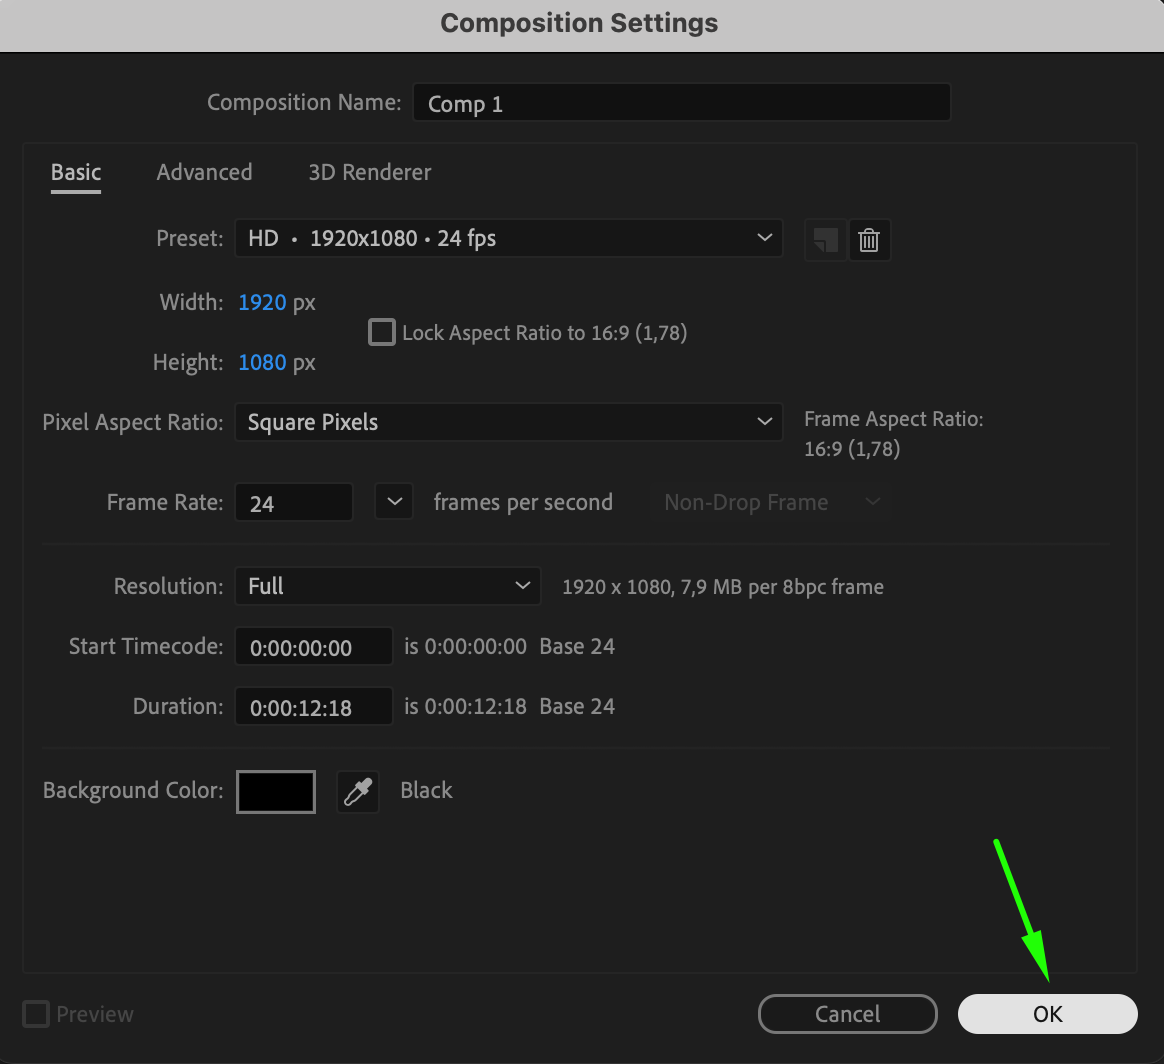
2.Create a new composition:
Open After Effects and go to “Composition” > “New Composition.” Set the dimensions, frame rate, and duration for your animatic.
 3.Import your assets:
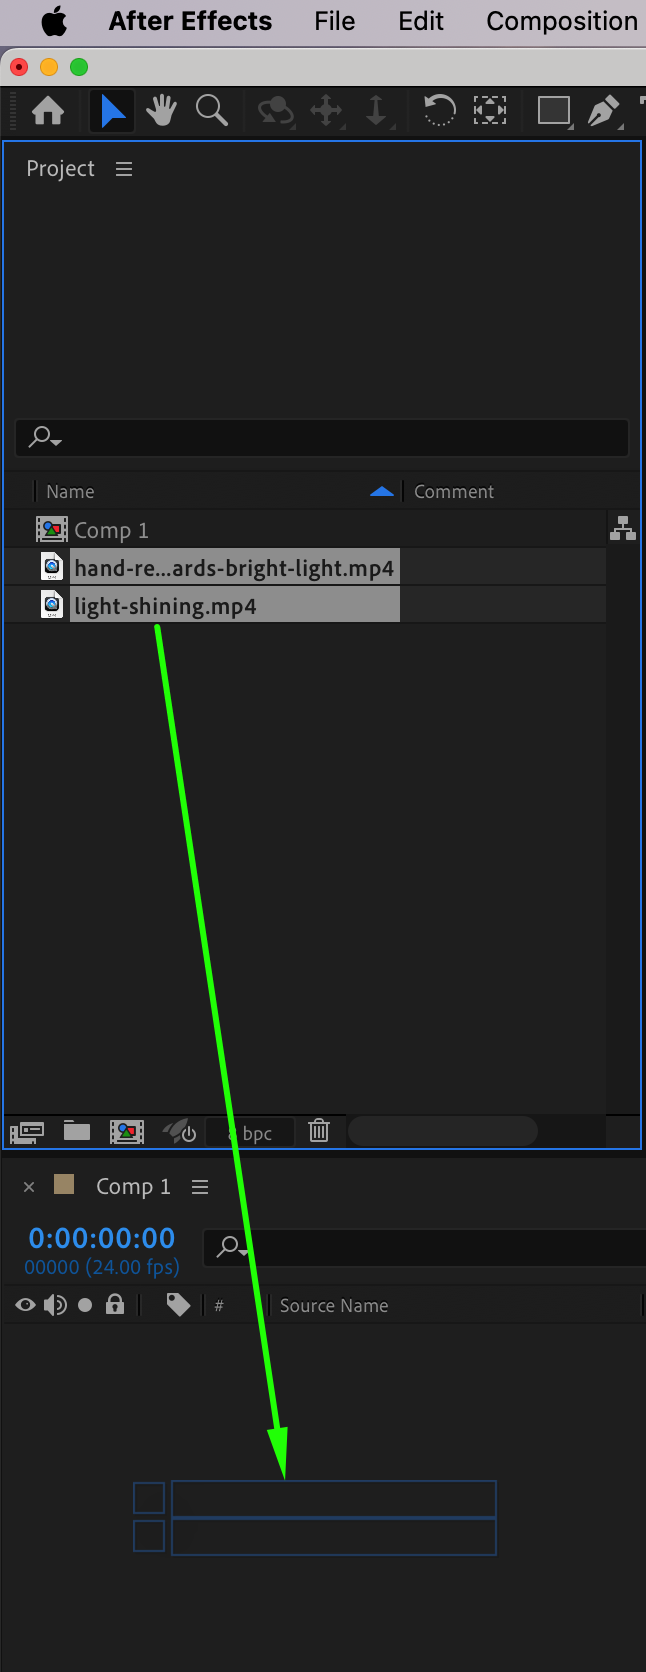
Use the “File” > “Import” > “File” option to import your assets into the project panel. You can also drag and drop the files directly into the panel.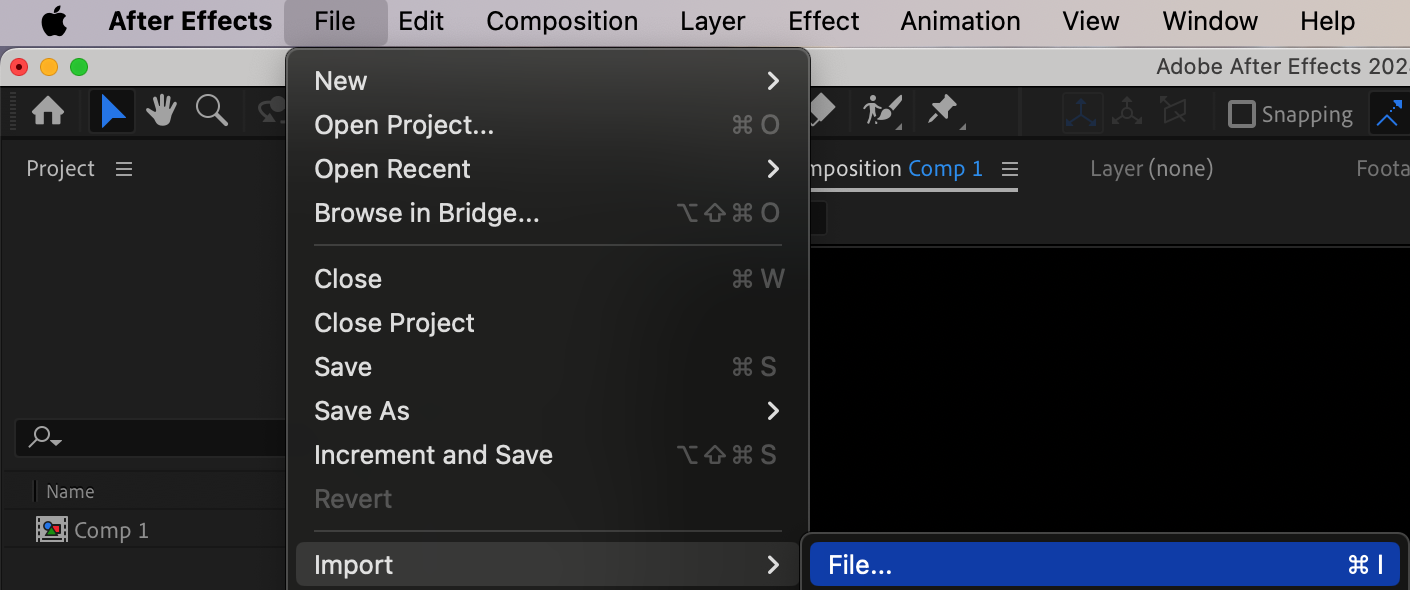 4.Arrange your layers:
Drag your assets from the project panel into the composition timeline. Arrange them in the order you want them to appear in your animatic.

 5. Add keyframes and adjust timing:
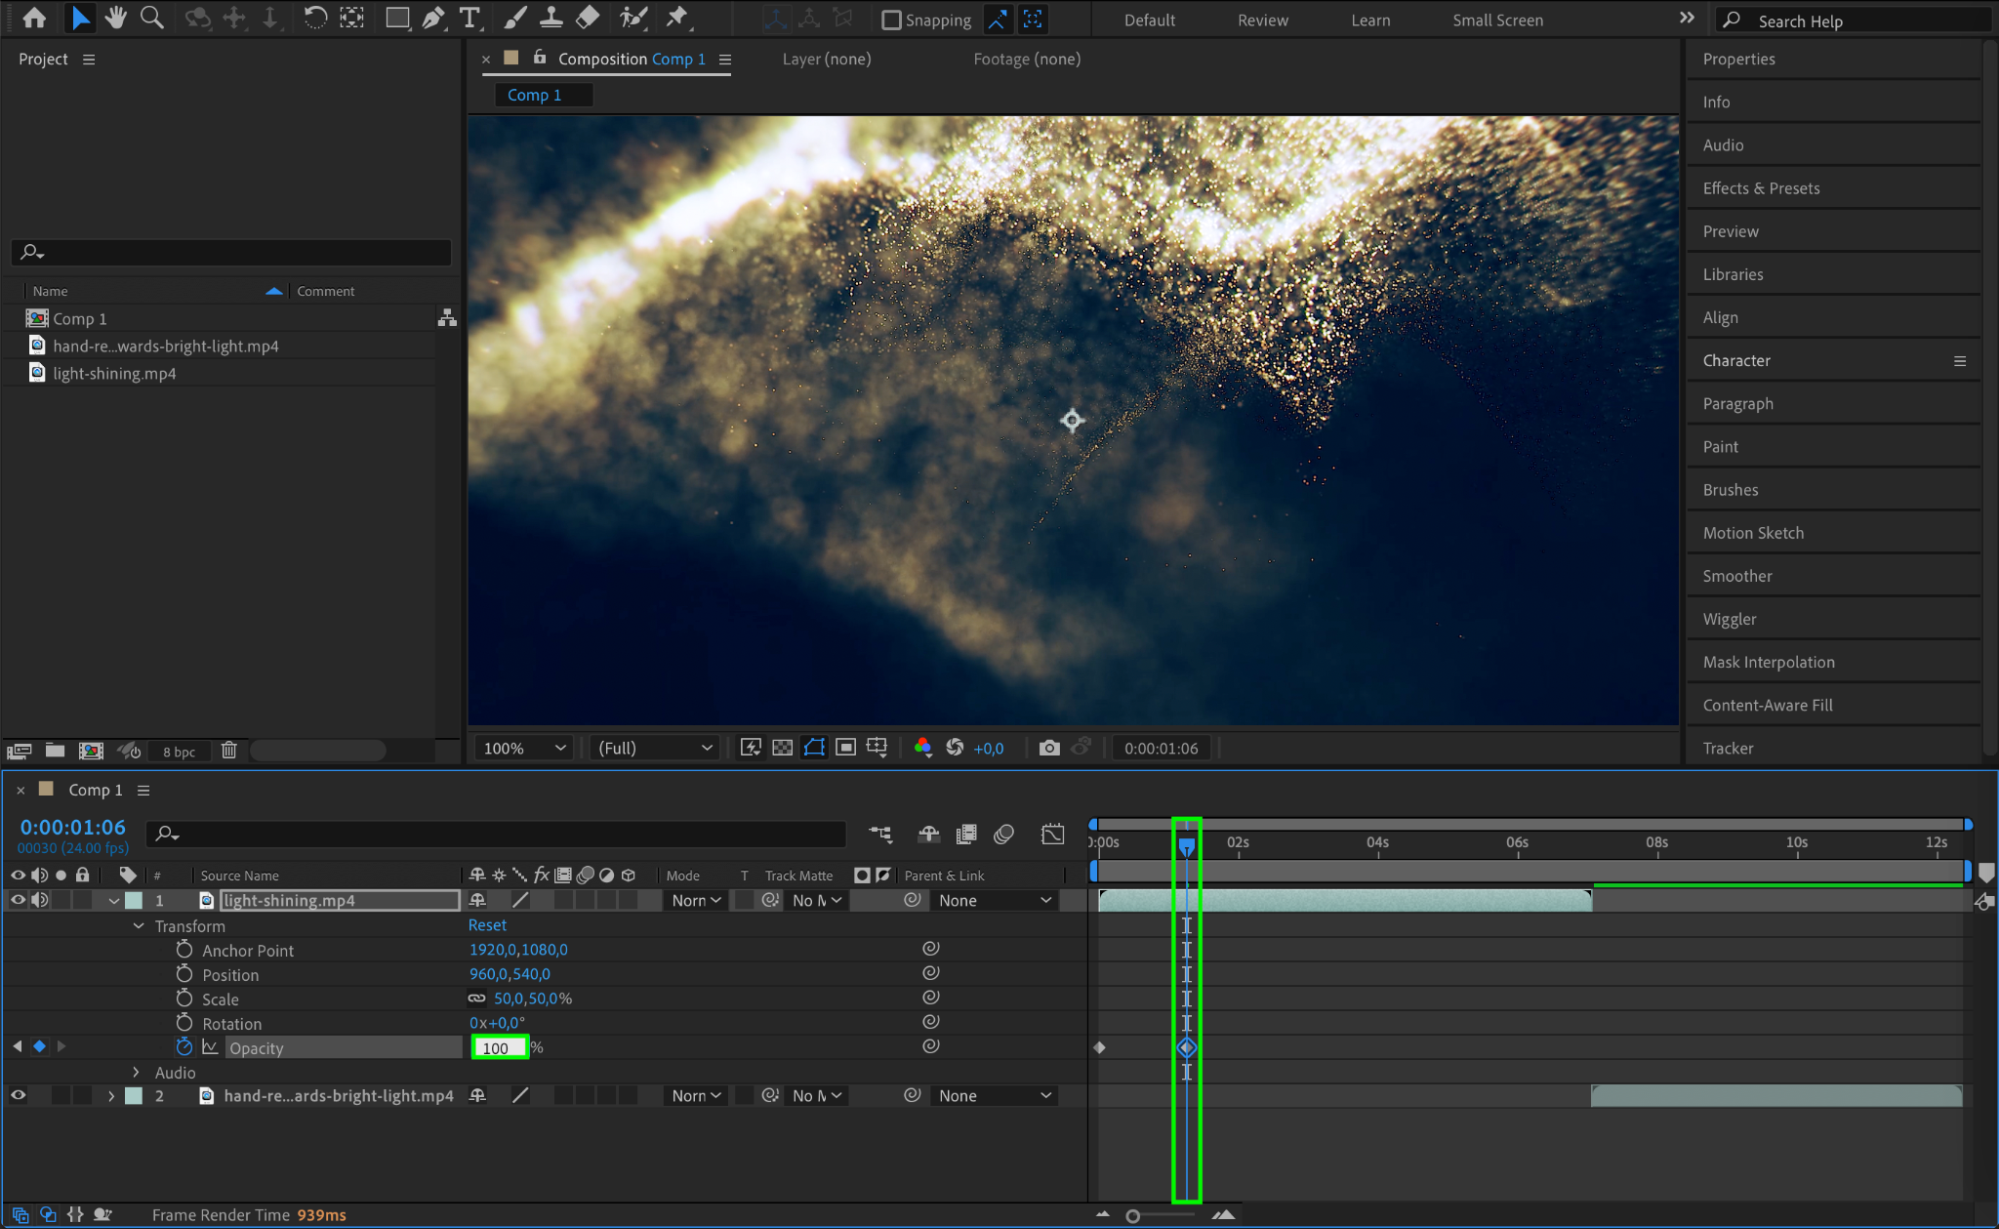
To animate your assets, position the playhead at the desired frame, select an asset, and adjust its properties like position, opacity, scale, or rotation. Enable animation by clicking the stopwatch icon next to the property in the Timeline panel, creating keyframes at appropriate intervals. Repeat this process for each asset and adjust the timings for smooth transitions and movements.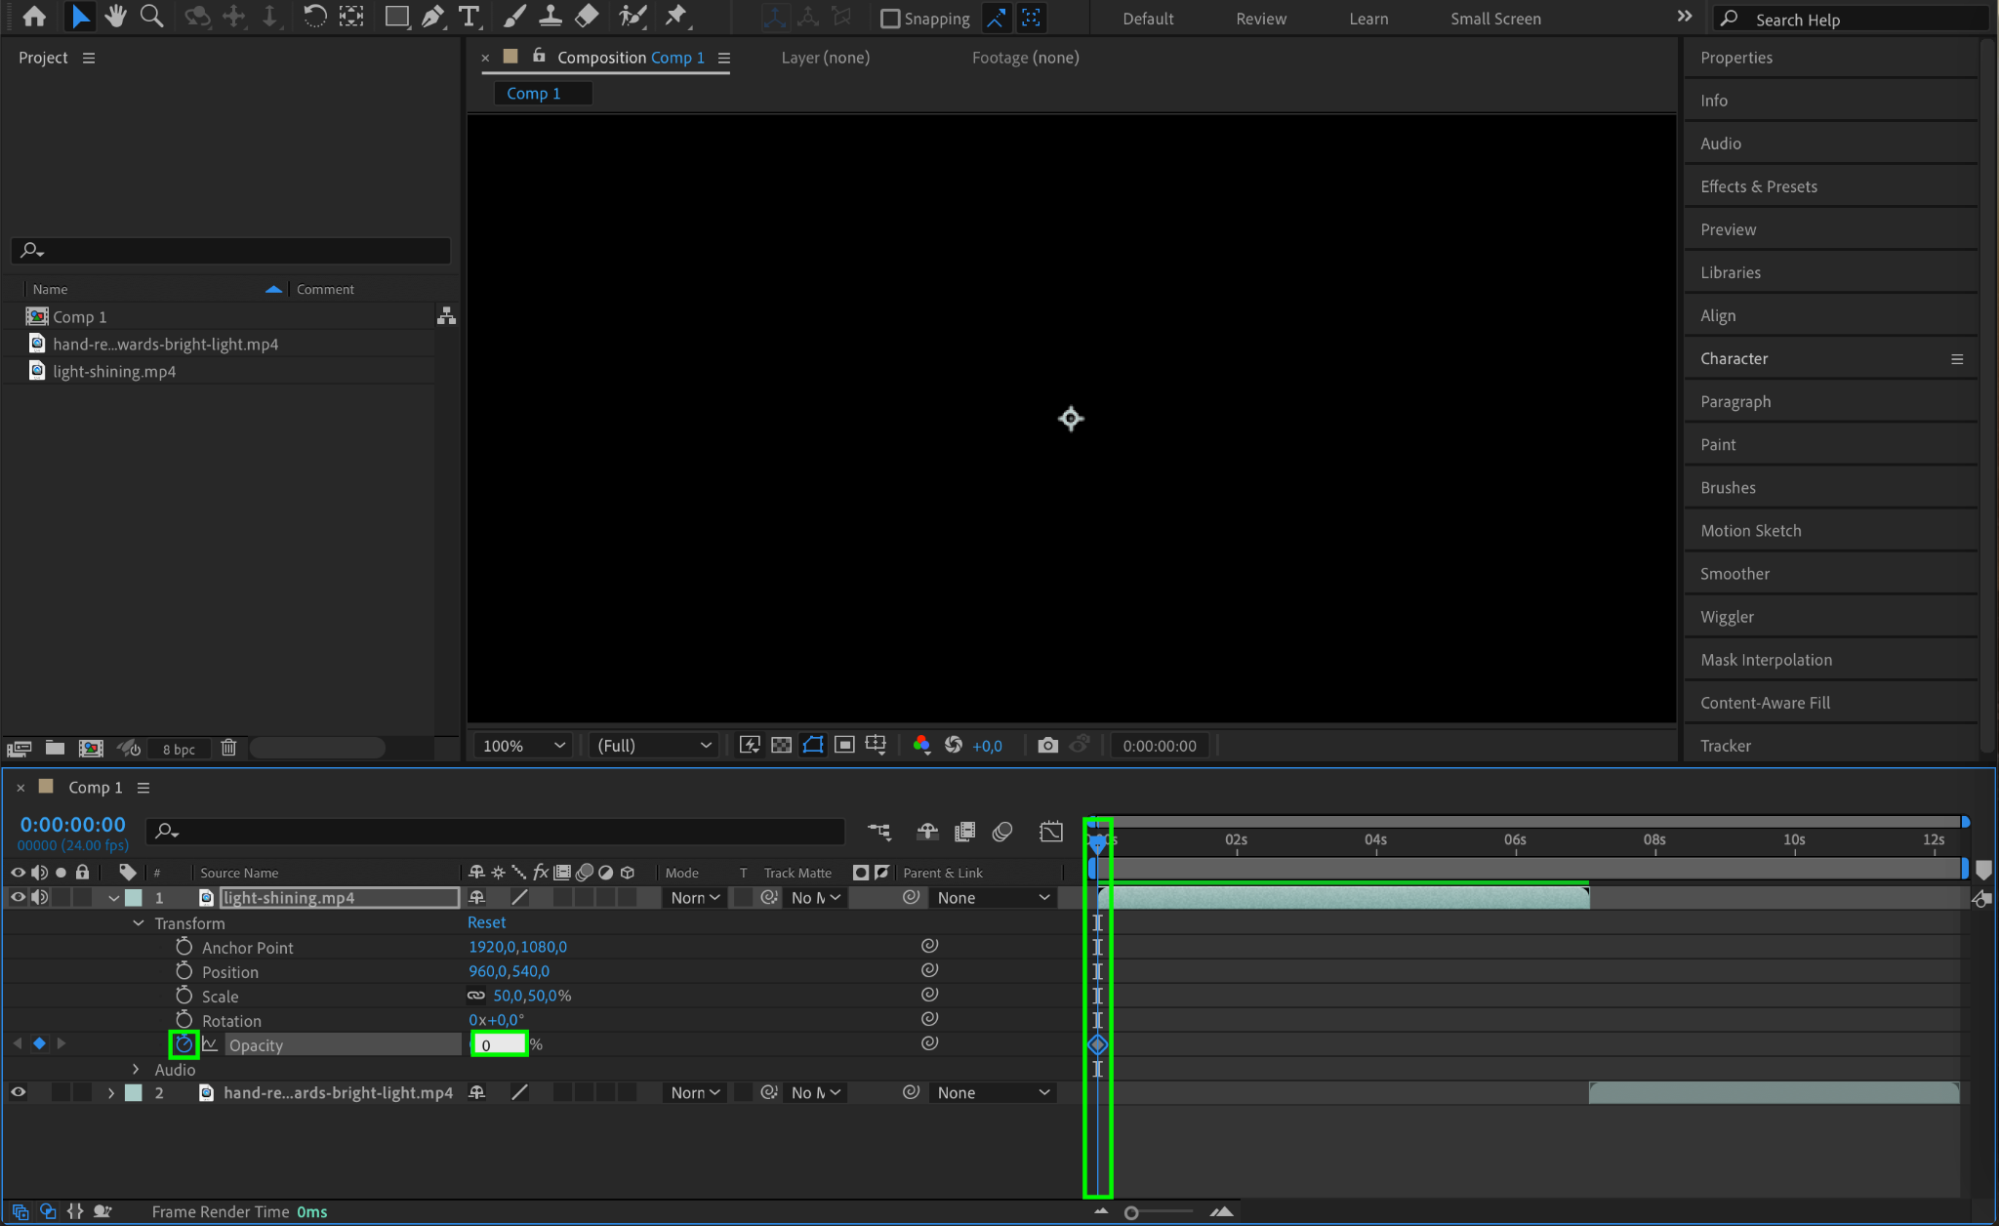
 6. Incorporate audio:
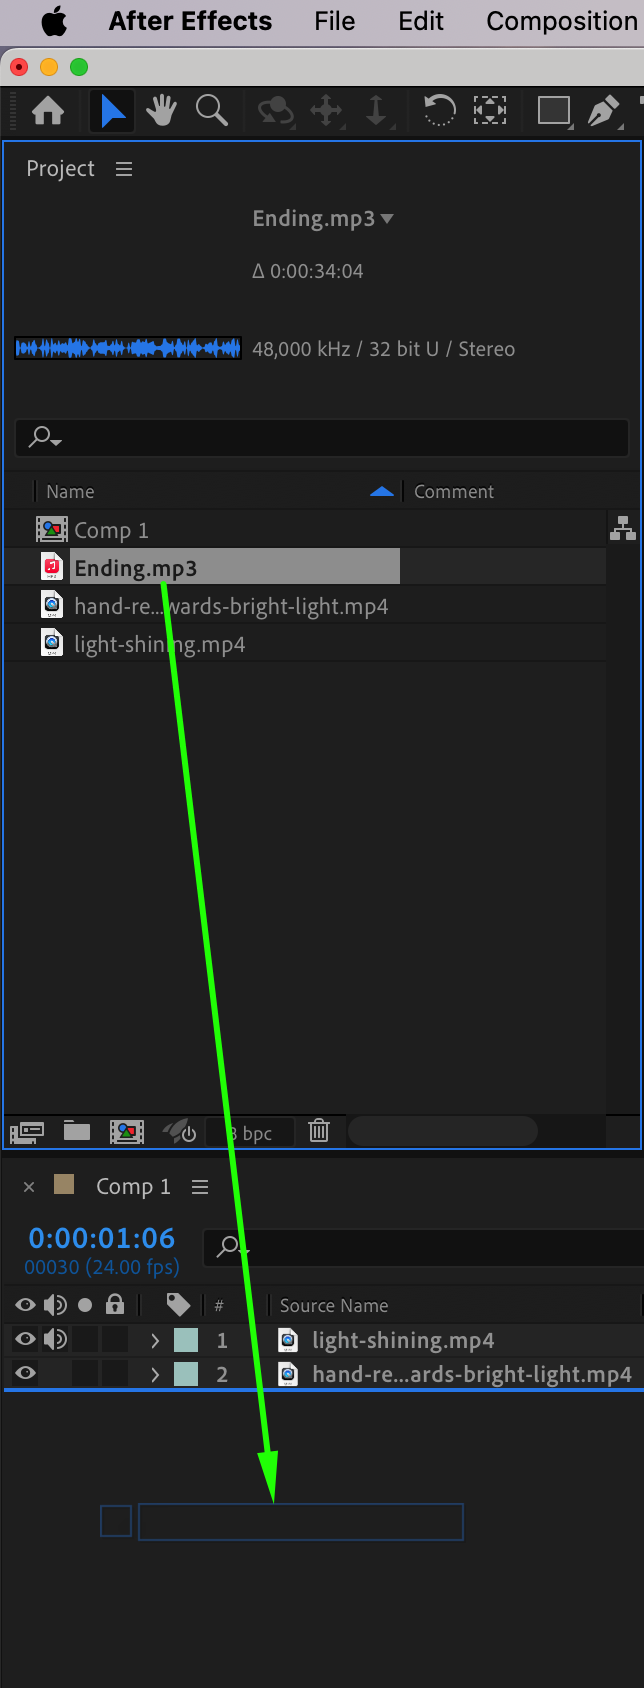
To enhance your animatic, import audio files into your project panel and drag them onto the timeline. Adjust the audio levels and sync them with the visuals for a seamless experience.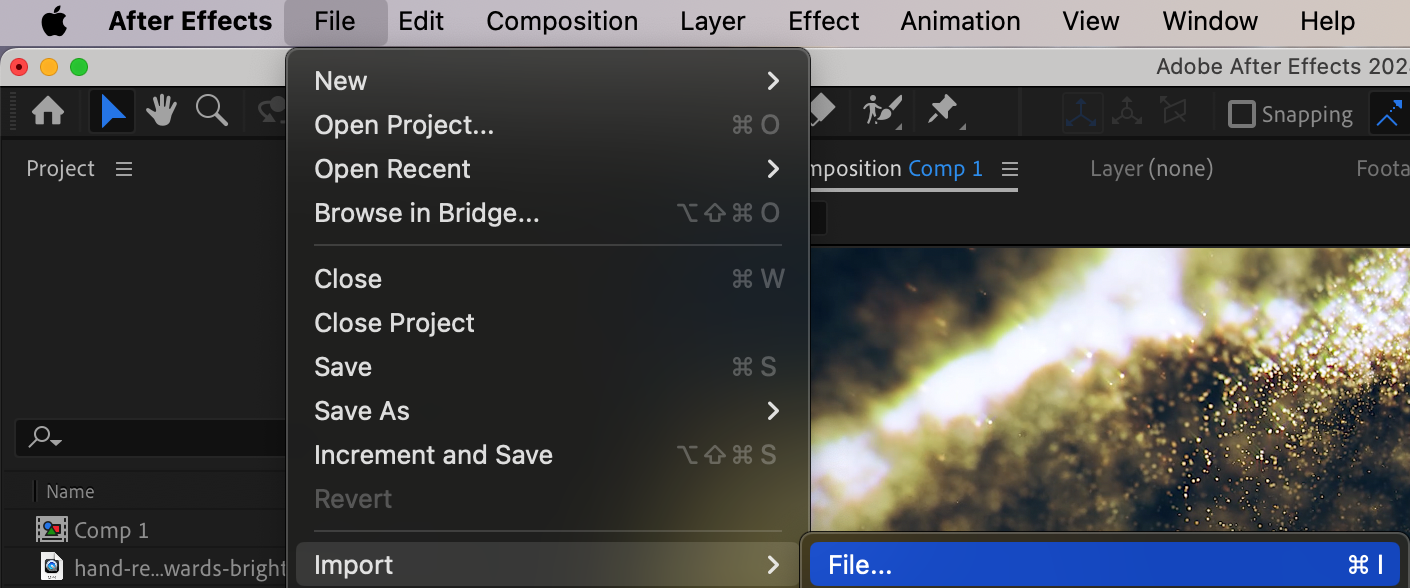

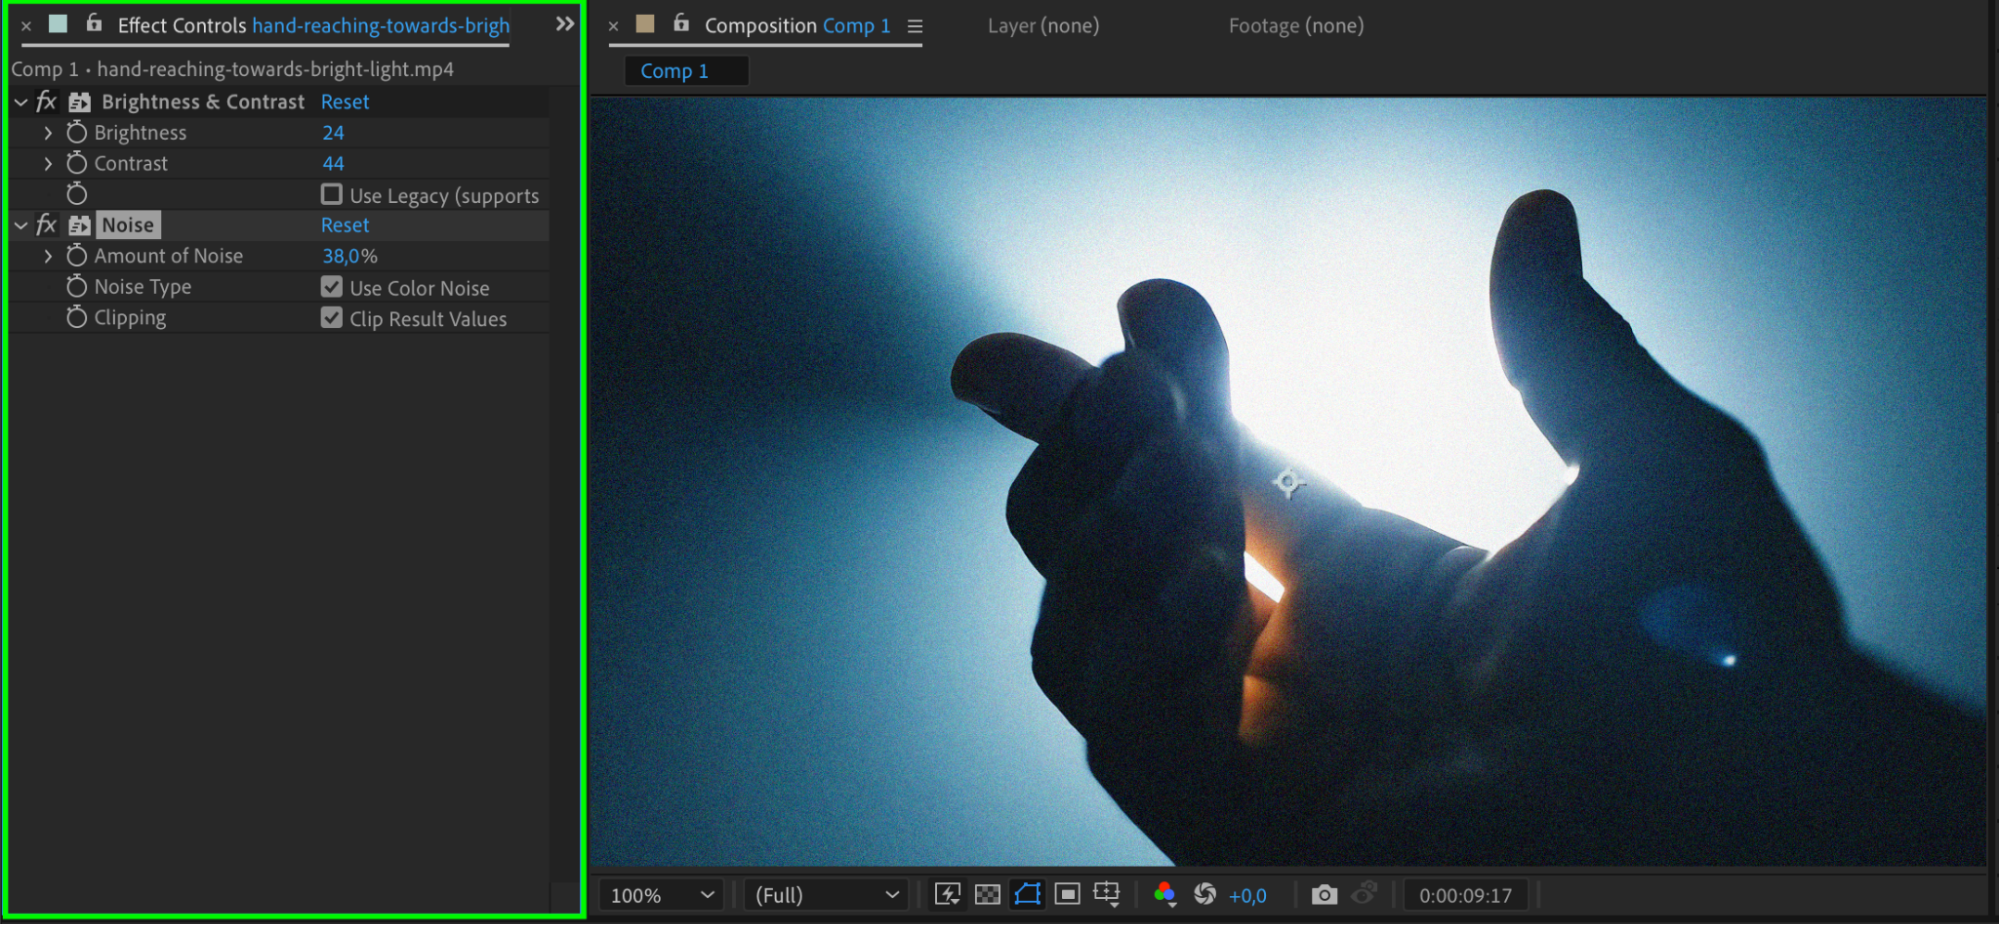
 7.Experiment with effects and presets:
After Effects offers a wide range of effects and presets to enhance your animatic, such as color grading, transitions, and motion blur. Feel free to explore and add these effects to make your animation more visually appealing.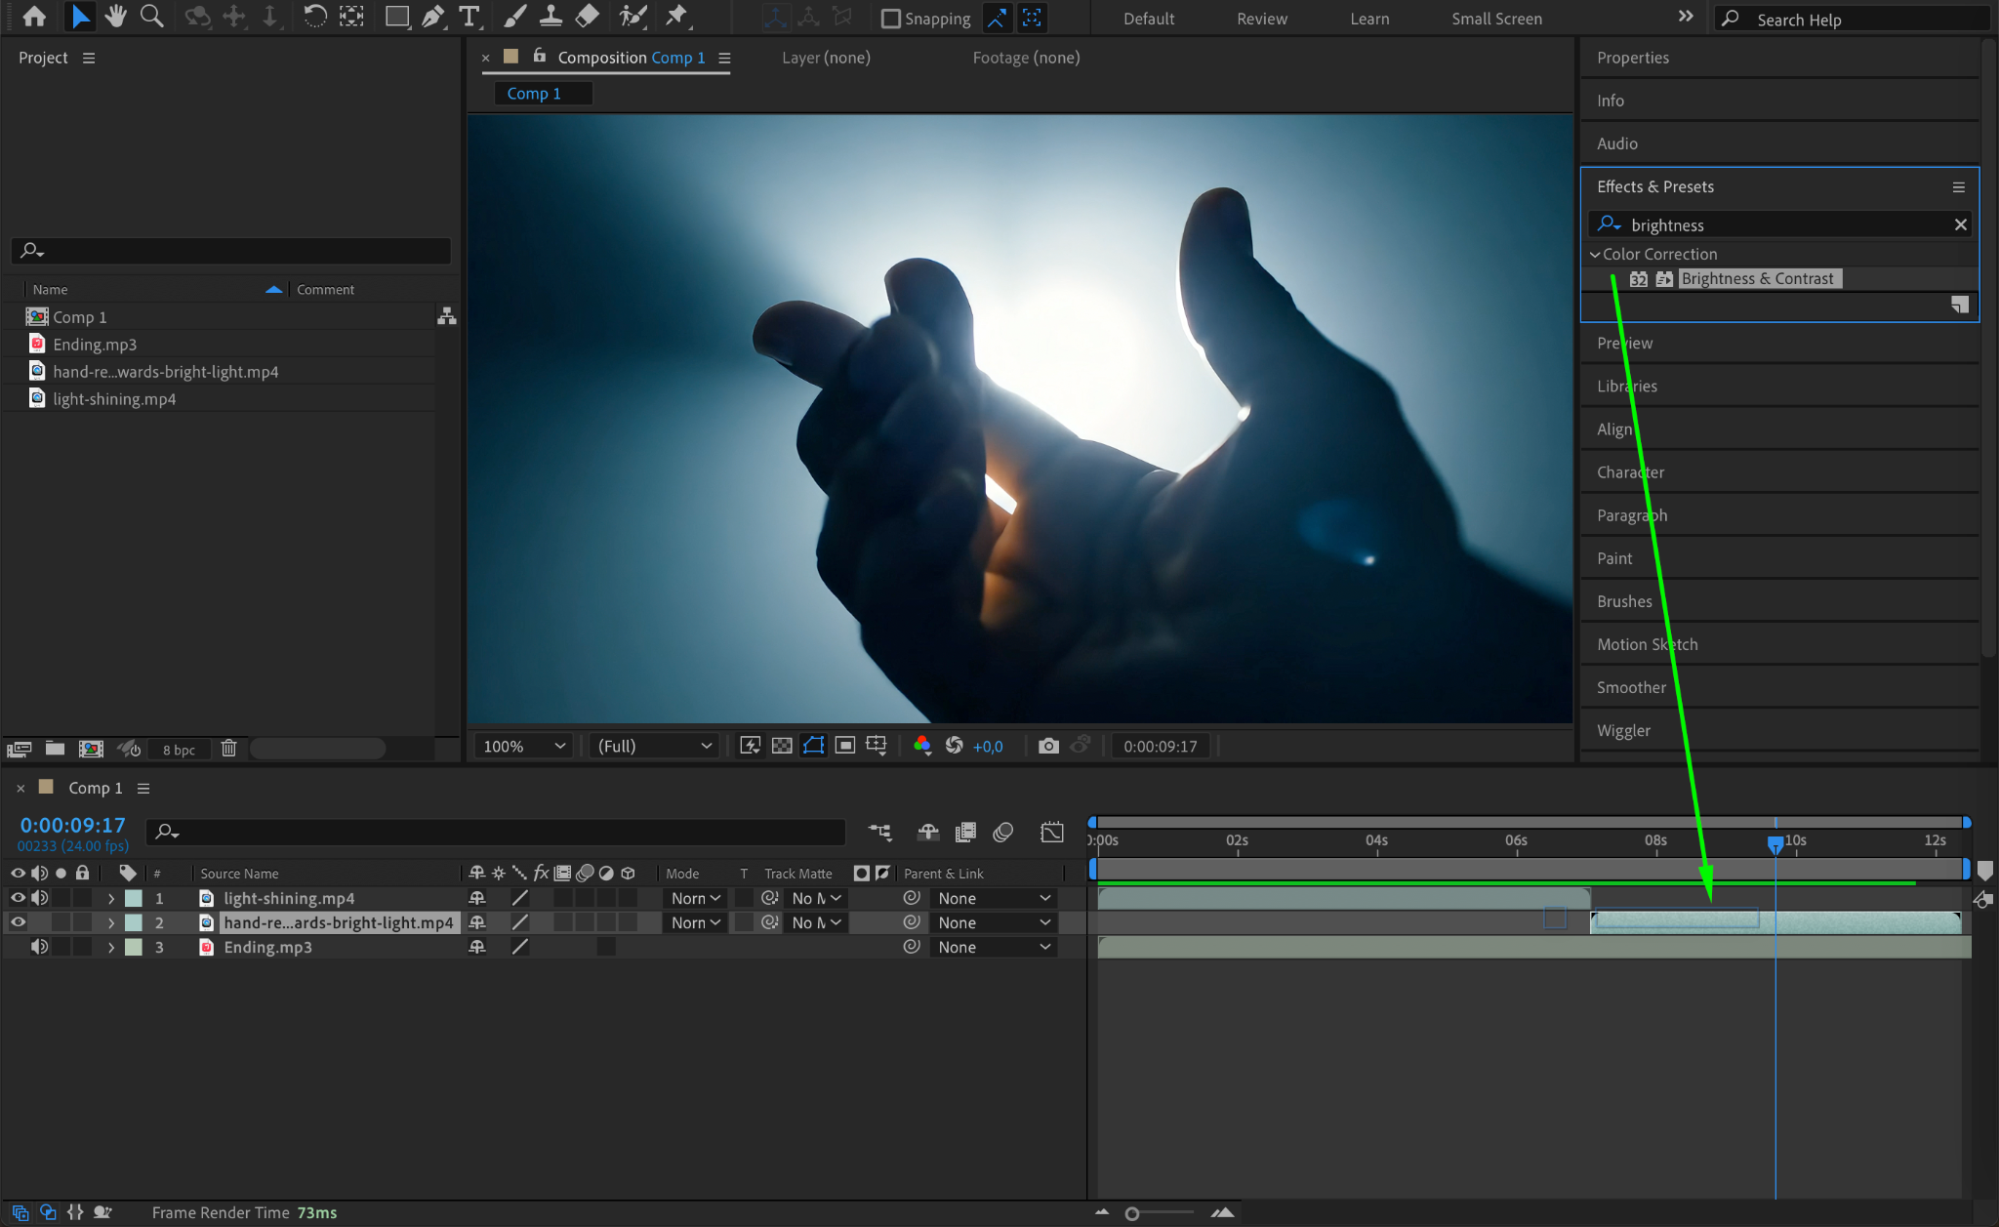
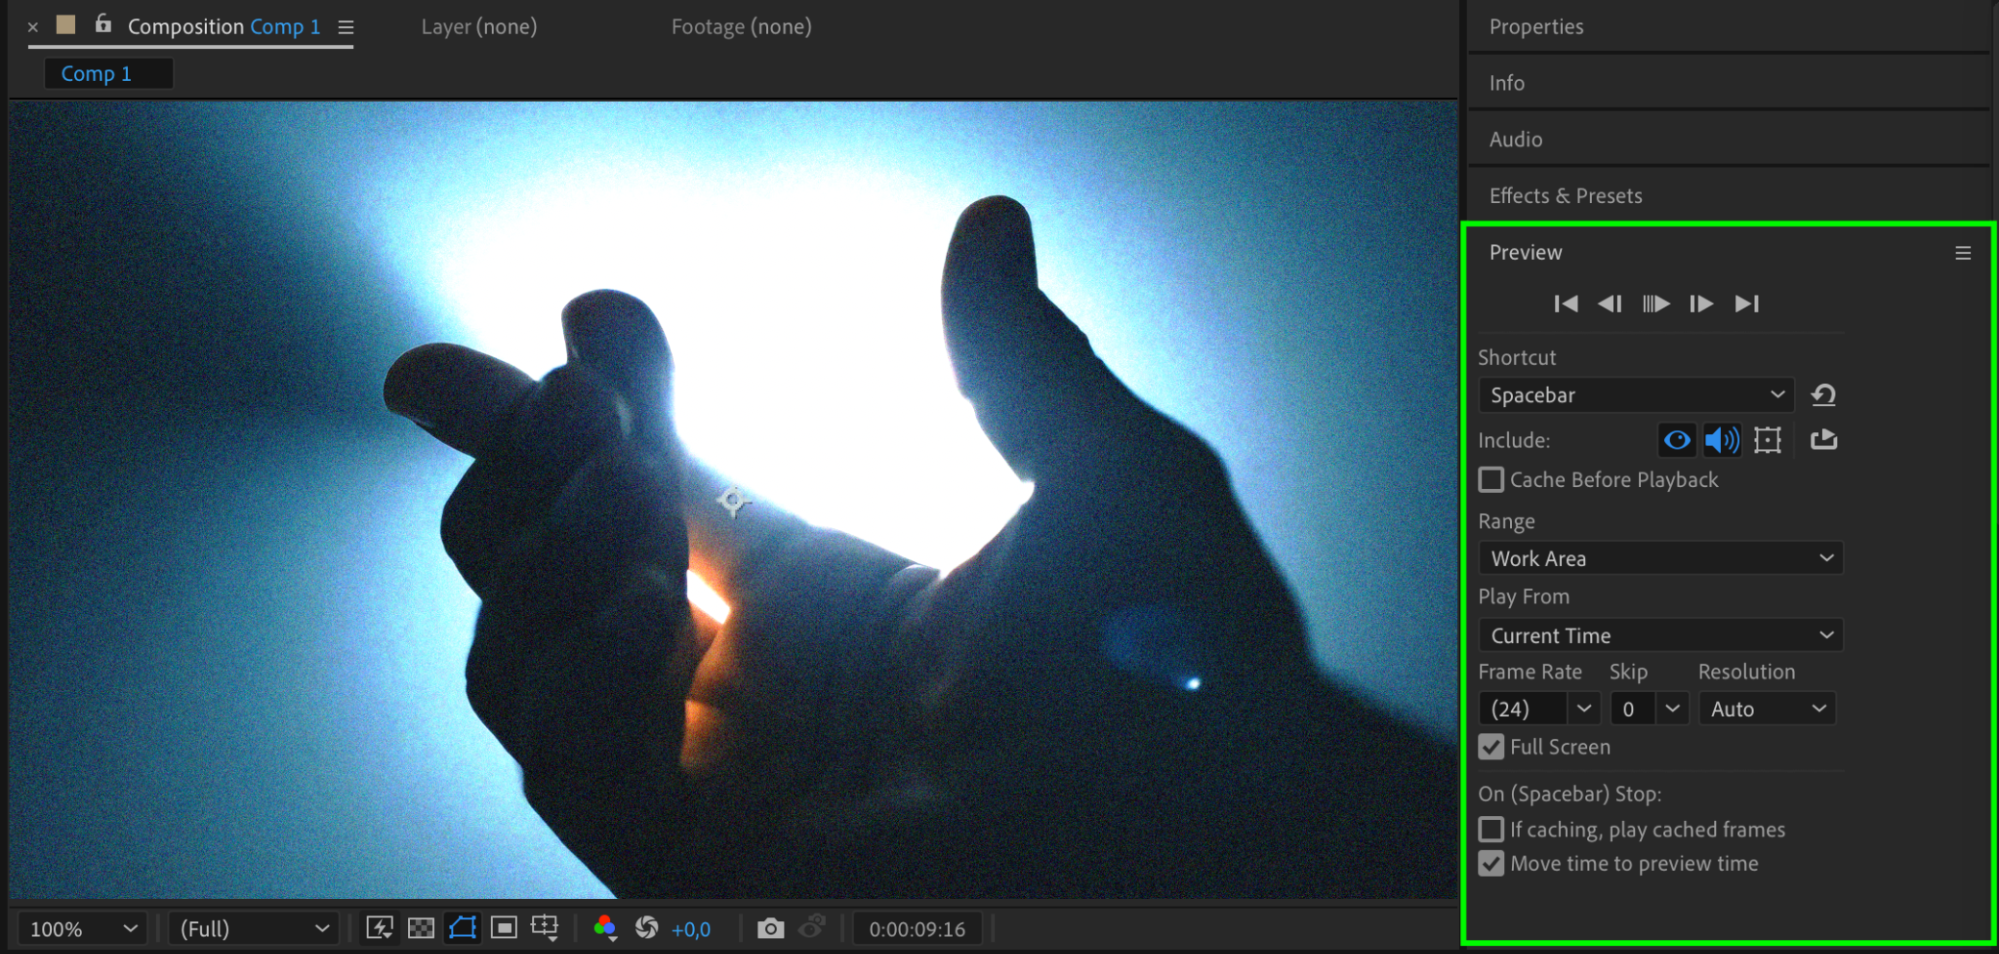
 8.Preview and refine:
To see how your animatic looks, click the Play button in the preview panel. Take note of any areas that need adjustments and make refinements as necessary.
 9.Export your animatic:
Once you’re happy with the final result, go to “Composition” > “Add to Render Queue.” Set the output settings, such as resolution and format, and click “Render” to export your animatic.
 Conclusion
Congratulations! You’ve successfully created an animatic in After Effects. Now you can share your work with clients or team members, or use it as a guide for your final animation production.
Creating an animatic allows you to experiment, refine, and iterate on your ideas before diving into the final animation. With After Effects’ powerful features at your disposal, you have the creative freedom to bring your vision to life in a dynamic and captivating way.
We hope you found this tutorial helpful. Stay tuned for more tutorials and tips on video design and animation techniques. Happy animating!


