Adding a Snow Effect in After Effects
Introduction to Creating a Snowfall Effect in After Effects
Winter effects like snow can add an enchanting quality to your videos. After Effects offers a versatile tool for creating snowfall with the CC Snowfall effect. This guide will walk you through adding a realistic snow effect to any scene using customizable settings.
Step 1: Import Your Video File
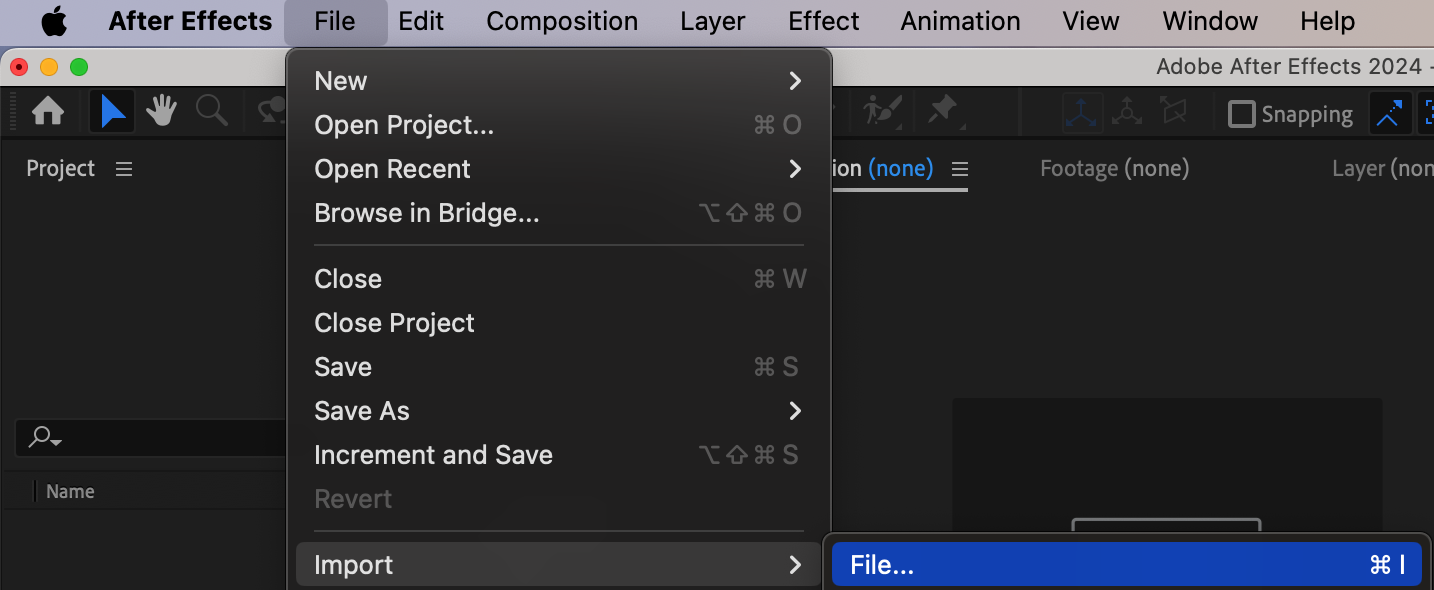
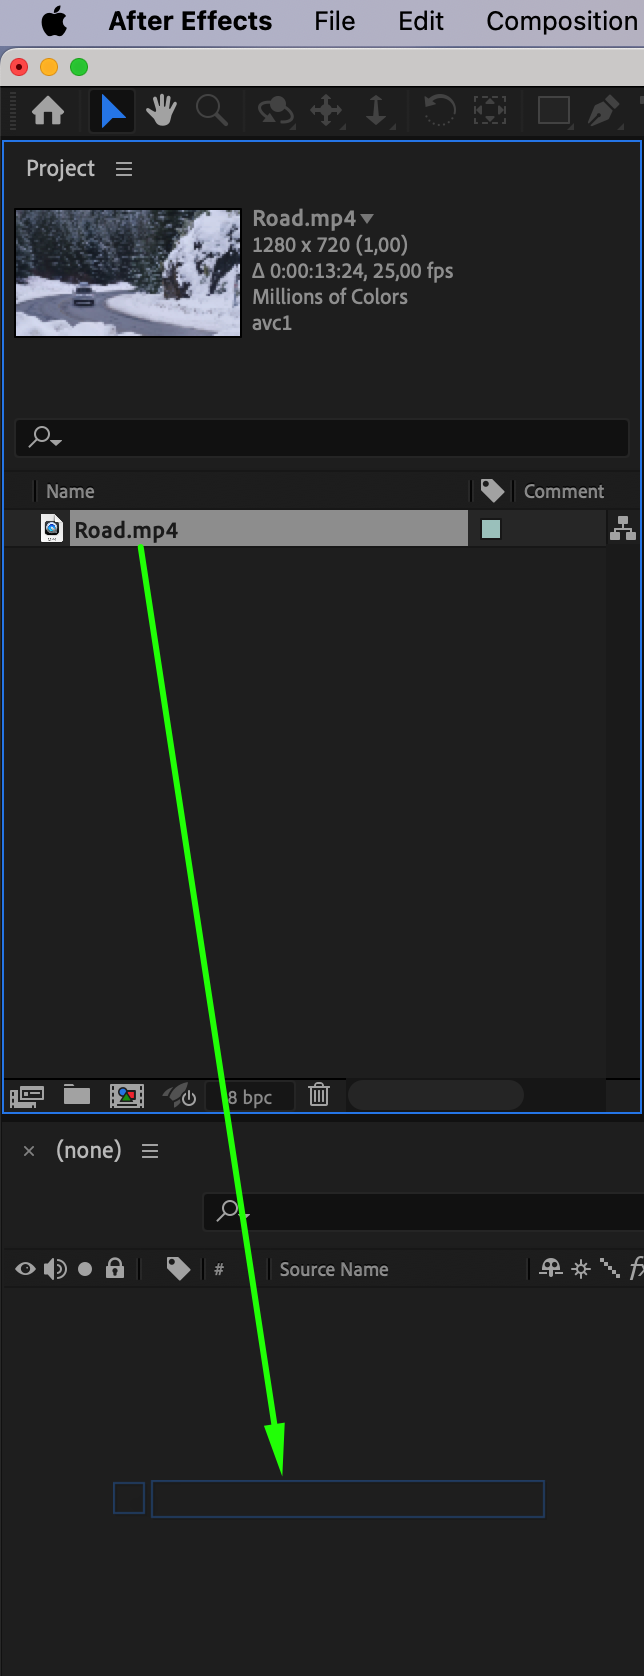
To get started, import the video you want to enhance with a snow effect. Go to File > Import > File and select your video. Once imported, drag the video file to the Timeline panel to start editing. Ensure the video is positioned correctly in the timeline so that you can easily apply effects.
Get 10% off when you subscribe to our newsletter

Step 2: Create a New Black Solid Layer
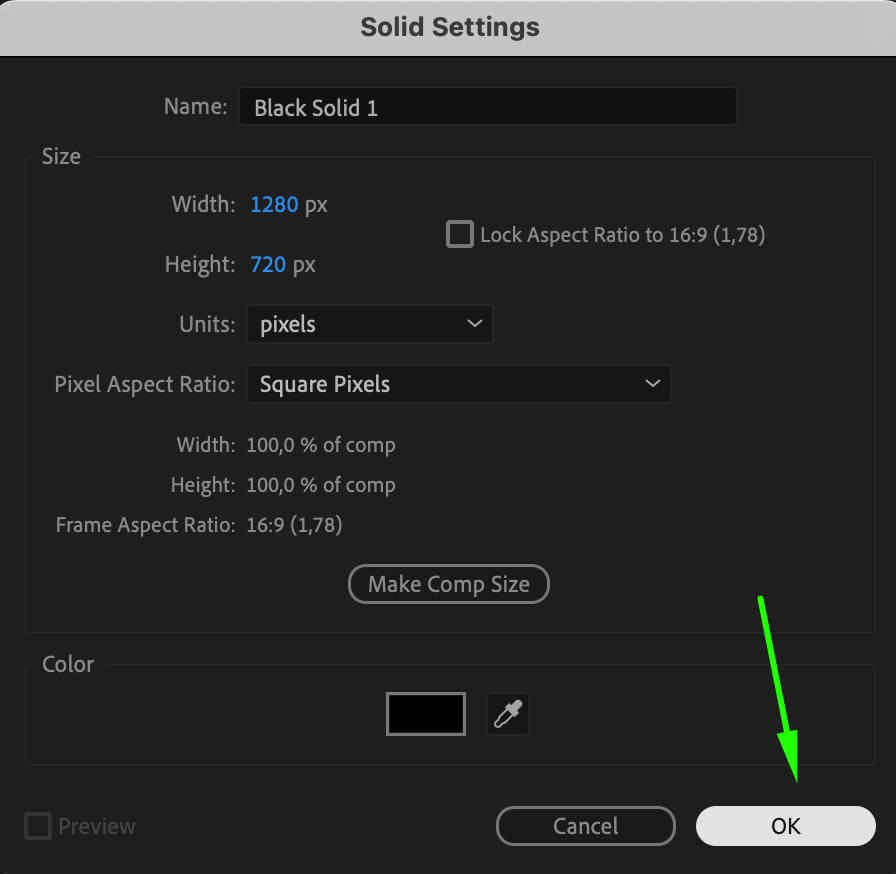
With your video file on the timeline, create a new solid layer that will host the snow effect. Go to Layer > New > Solid and choose a black color for the solid. This layer will serve as the base for the snow effect. Click OK to add it to your composition.
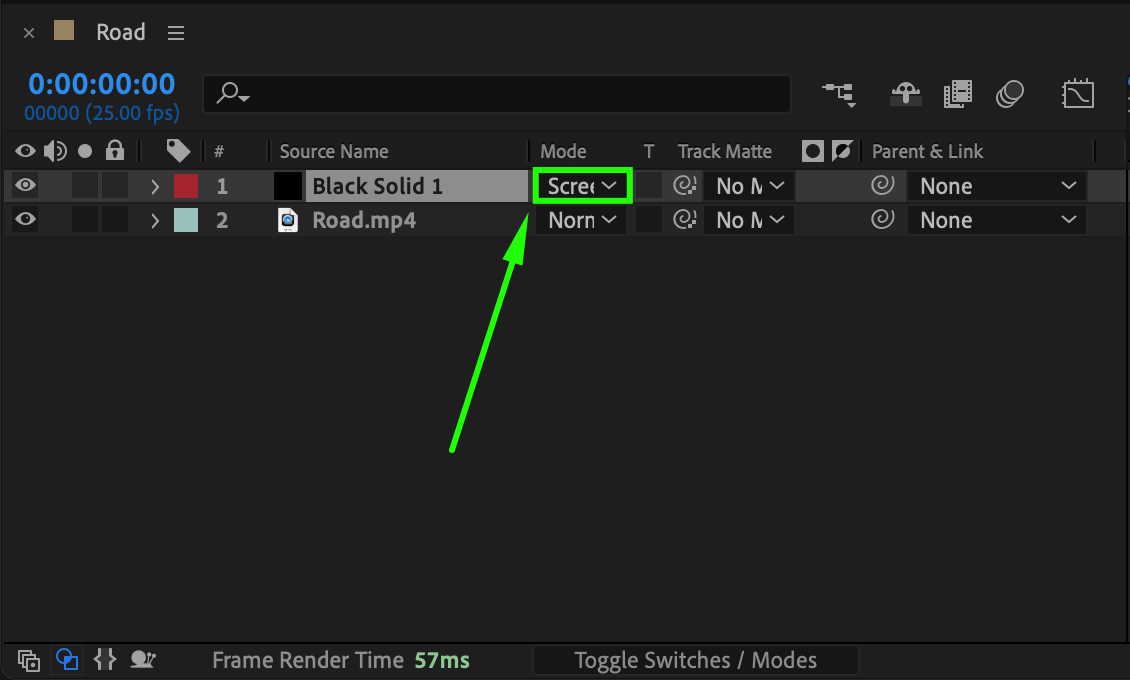
 Step 3: Set the Black Solid Layer to Screen Mode
Next, change the blending mode of the solid layer to make the snow visible on top of your video. In the Timeline panel, set the solid layer’s mode to Screen. This will make the black background invisible while allowing the snow effect to appear over your video.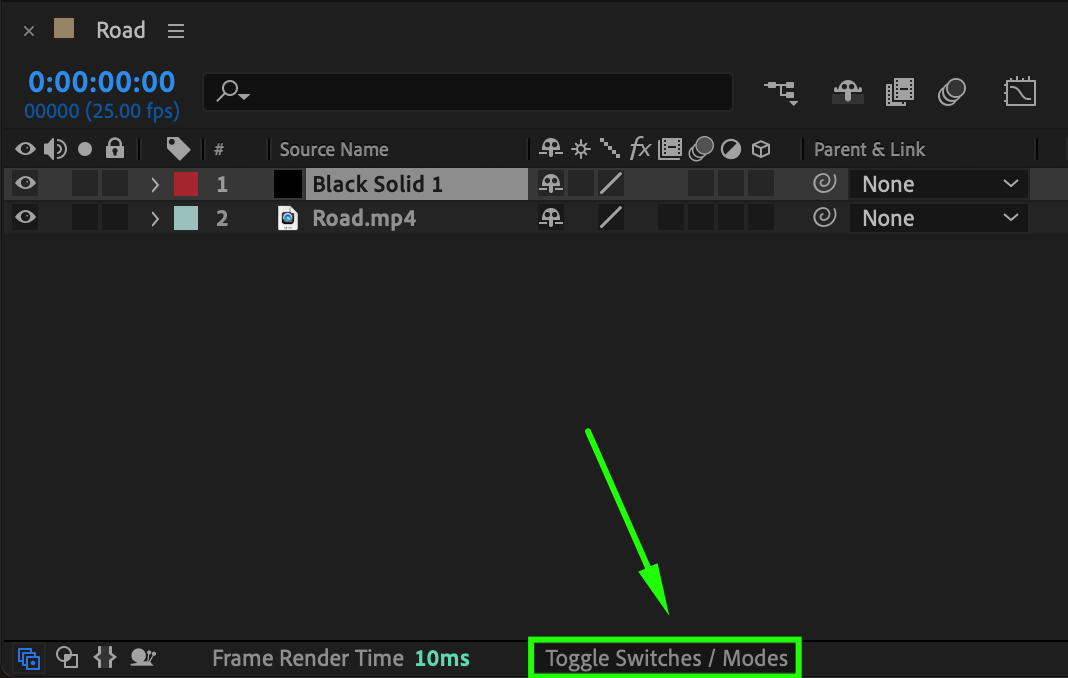
 Step 4: Apply the CC Snowfall Effect to the Solid Layer
Select the black solid layer, then go to Effect > Simulation > CC Snowfall. This will apply a snow effect to the layer. CC Snowfall is a powerful tool for generating realistic snow with customizable settings, perfect for creating a wintery atmosphere in your scene.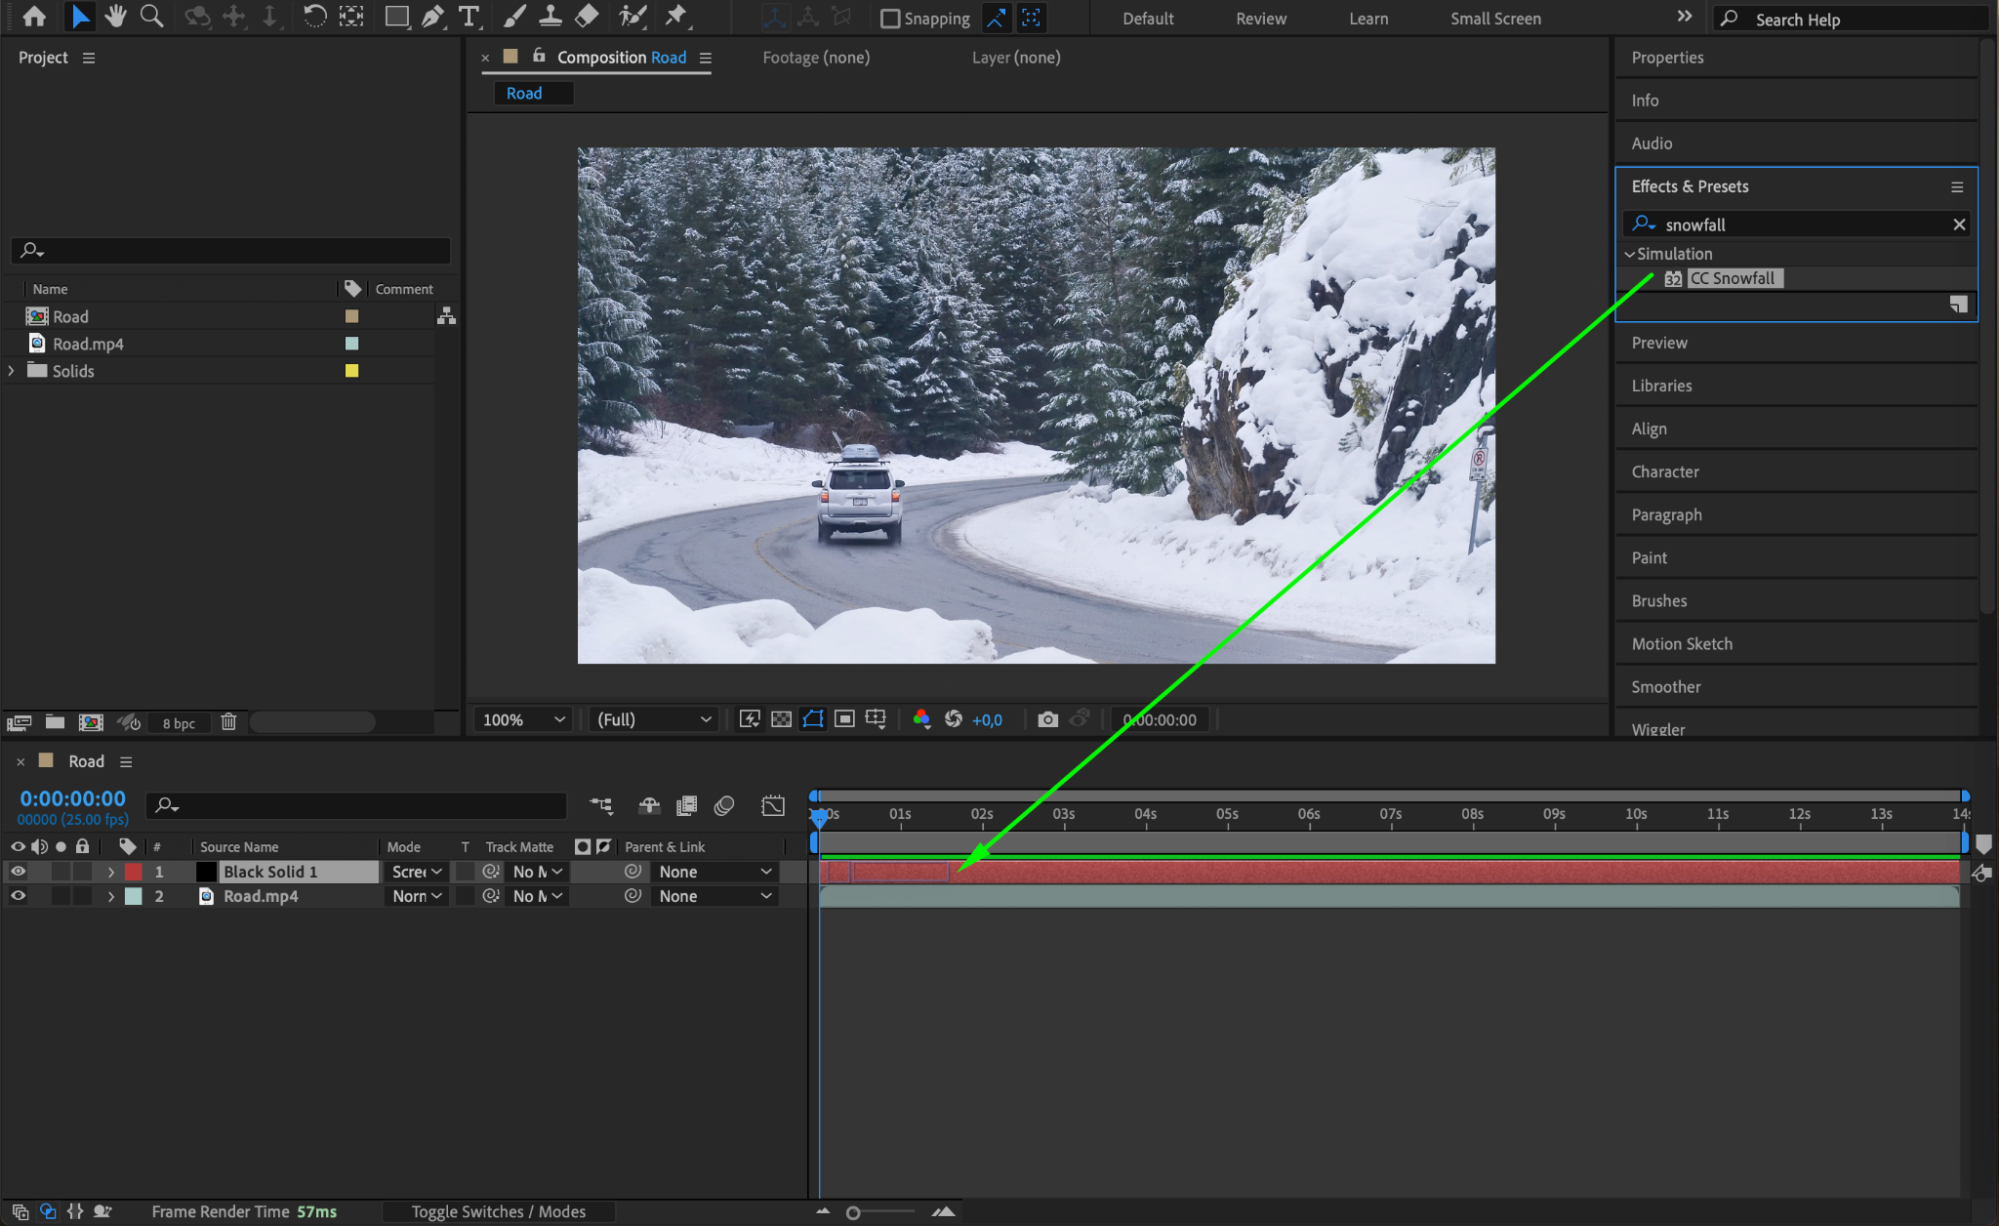 Step 5: Adjust CC Snowfall Effect Settings
Now it’s time to refine the snowfall. In the Effect Controls panel, set the following parameters for a realistic snowfall effect:
Flakes: 1200 — This controls the number of snowflakes.
Size: 6 — Adjusts the size of the snowflakes for better visibility.
Size Variation: 46 — Adds variety to the snowflake sizes for a natural look.
Scene Depth: 3350 — Controls the depth perspective, making snow appear in layers.
Speed: 750 — Adjusts the speed of the falling snow.
Wind: -156 — Sets the wind direction to create a drift effect.
Speed Variation: 0 and Wind Variation: 0 — Keeps speed and direction consistent.
Spread: 15 — Distributes the snow evenly across the frame.
Opacity: 70 — Controls the transparency of snowflakes.
Influence: 70 — Balances the effect with the rest of the scene.
These settings will give a realistic, gentle snowfall effect. Feel free to tweak these parameters to achieve the desired look.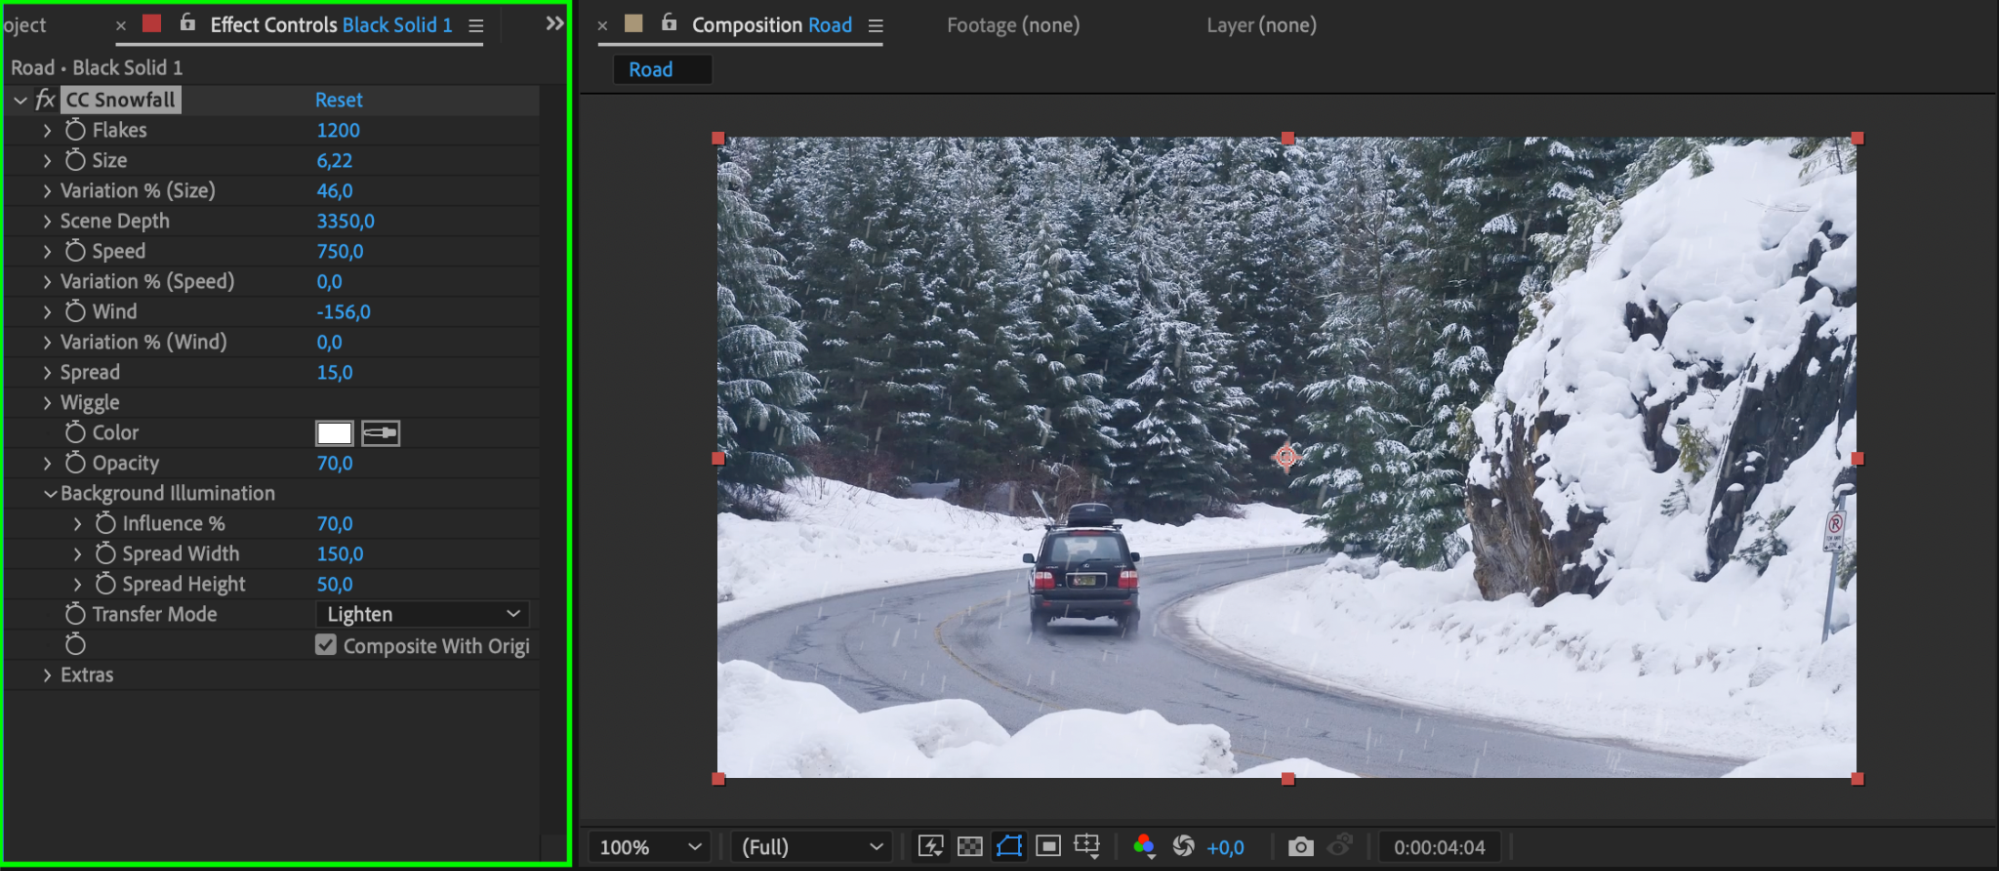 Step 6: Preview the Effect
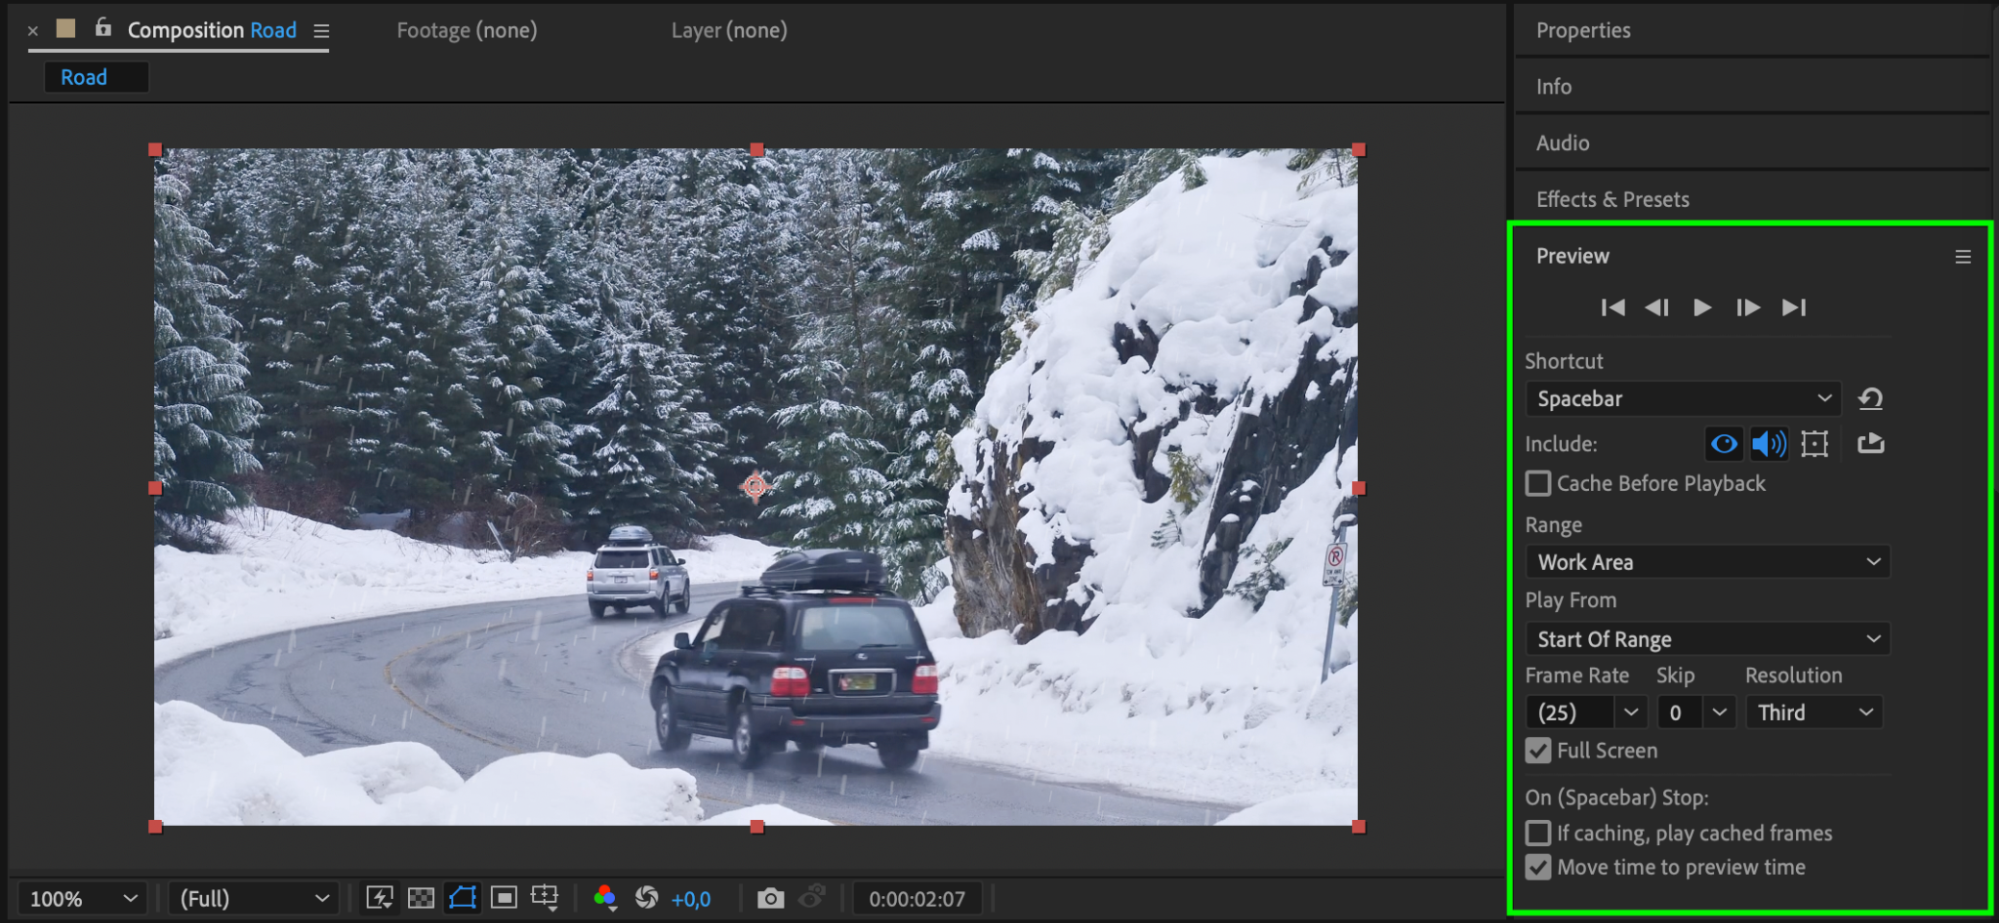
To see the effect in action, preview your video by pressing Spacebar. Watching the snowfall effect in real-time helps ensure that it blends well with the scene. Make adjustments to settings if needed for an ideal snowfall effect.
 Step 7: Render Your Video
Once you’re satisfied with the snow effect, it’s time to render the final video. Go to Composition > Add to Render Queue. Set your desired format and output settings, then click Render to create a video with your new snow effect.
 Conclusion
Adding a snow effect in After Effects can enhance the mood and atmosphere of any winter scene. By adjusting the CC Snowfall effect settings, you can customize the snowfall to fit your project perfectly. With these simple steps, you’ll create a captivating snow effect that brings a realistic touch to your videos.


