Introduction
This tutorial explains how to create an animated text effect where text slides into a frame that is drawn on screen. You’ll use text layers, shape layers, Trim Paths animation, masking, and easing to achieve a clean and professional result.
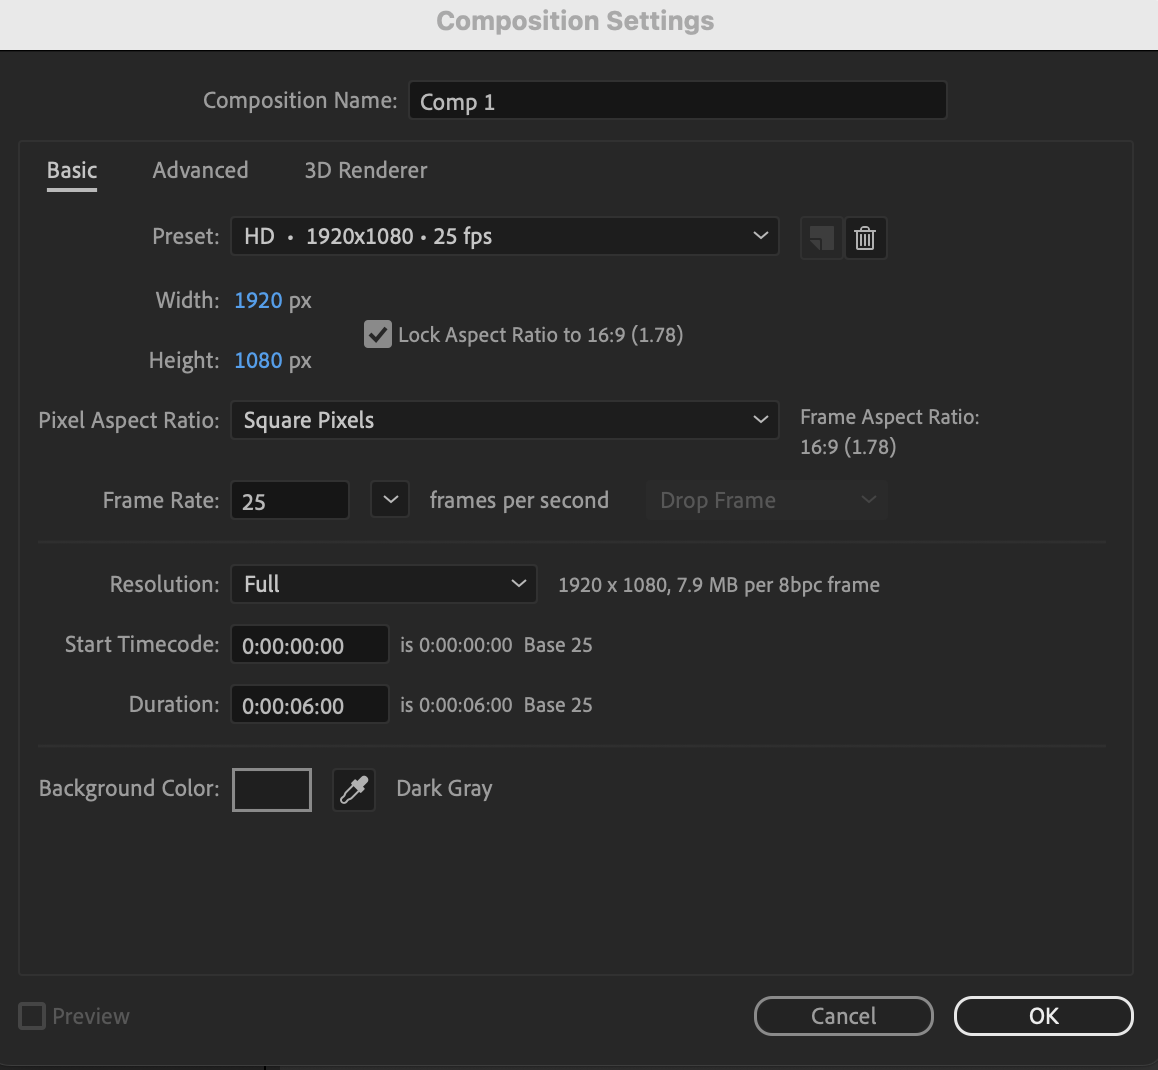
Step 1: Create a New Composition
Create a new composition with your desired resolution and frame rate.
 Step 2: Create the Text Layer
Select the Type Tool (Ctrl / Cmd + T) and click in the Composition panel to create a text layer. Enter your desired text.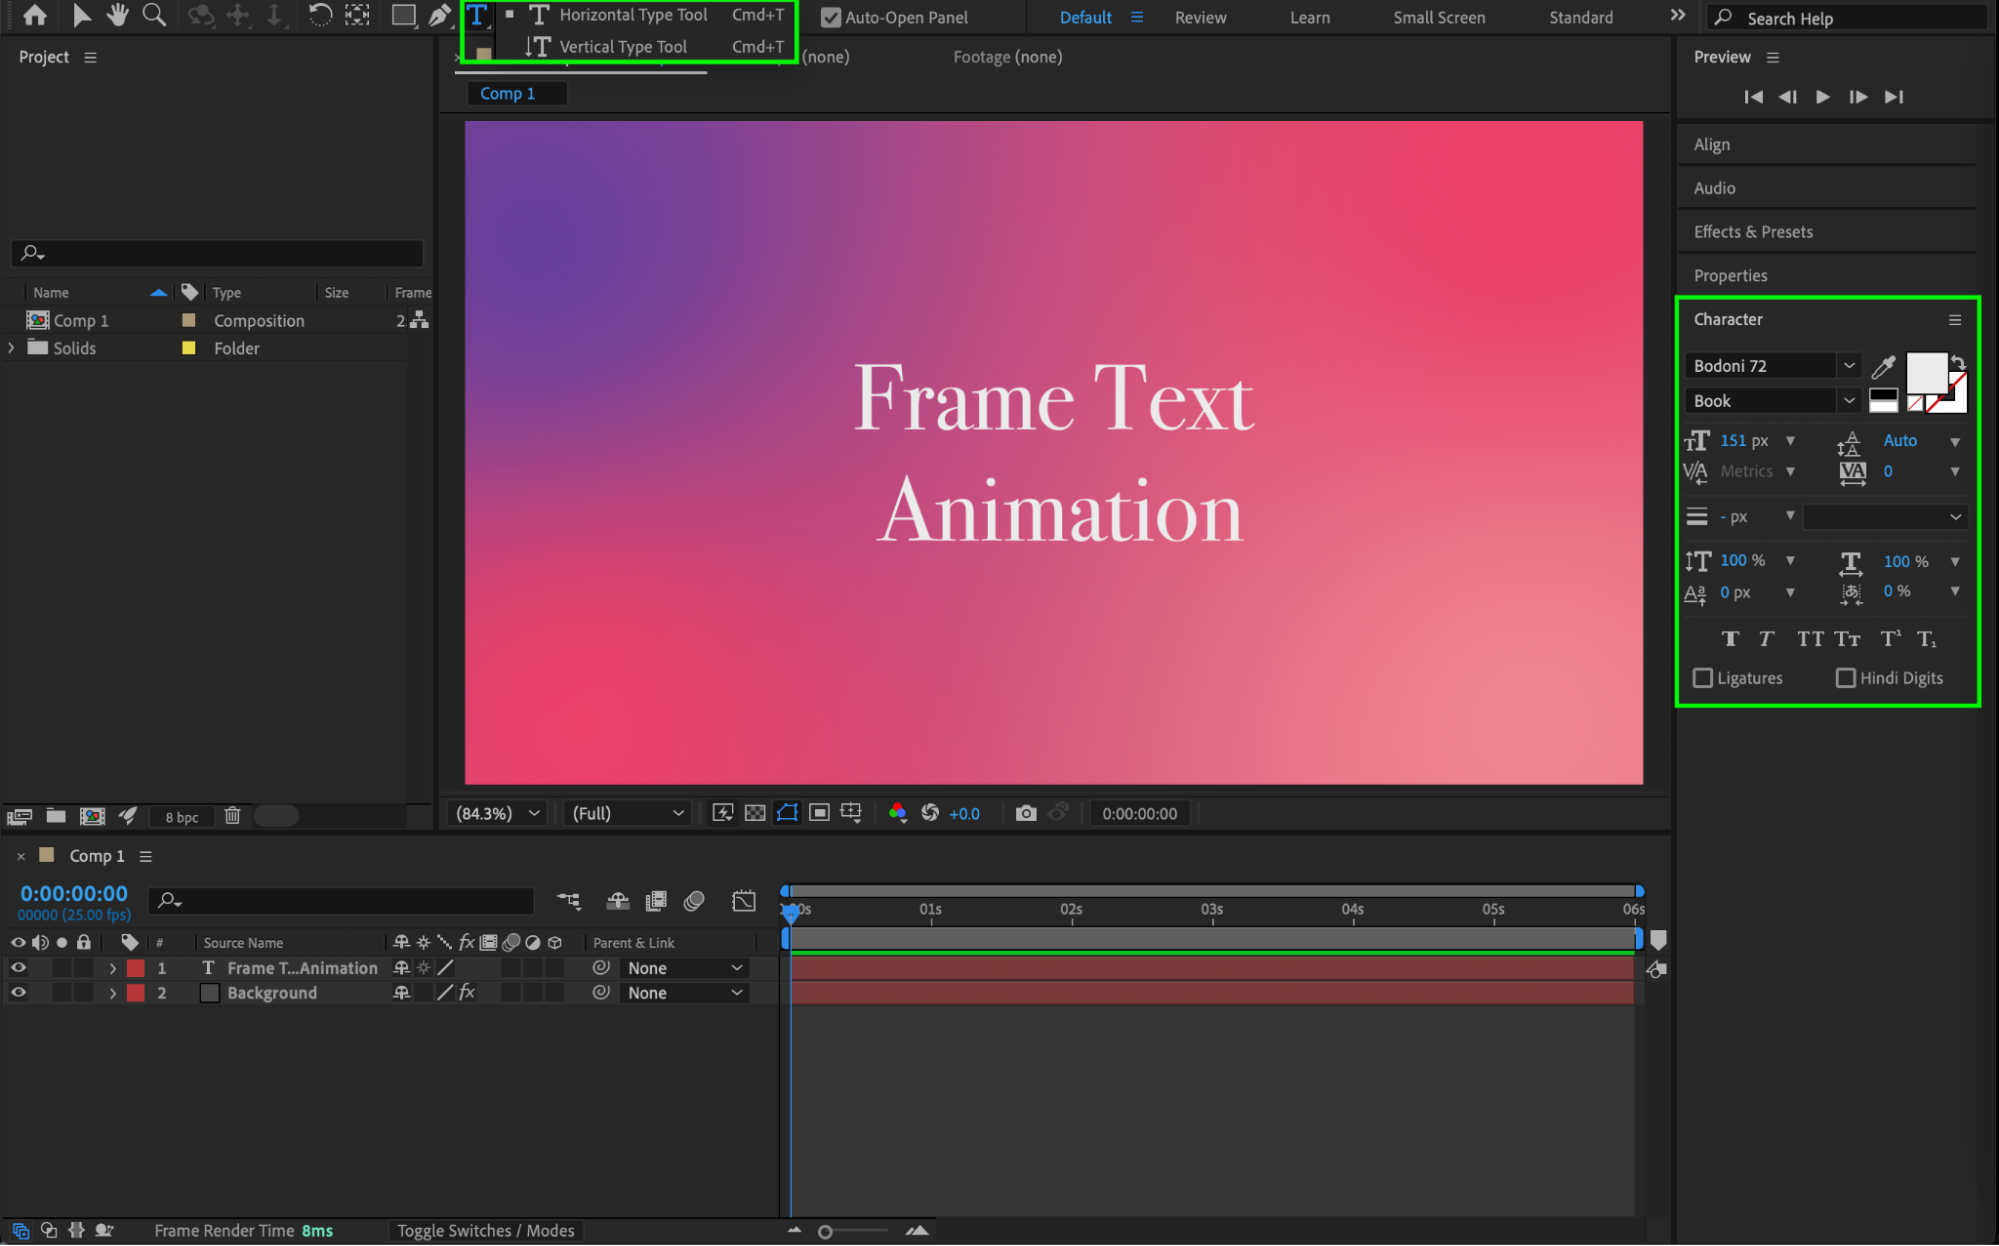 Step 3: Create a Frame Around the Text
Select the Rectangle Tool (Q) and draw a rectangle around the text. In the Shape Layer settings:
Set Fill to None
Enable Stroke
Choose the desired stroke width and color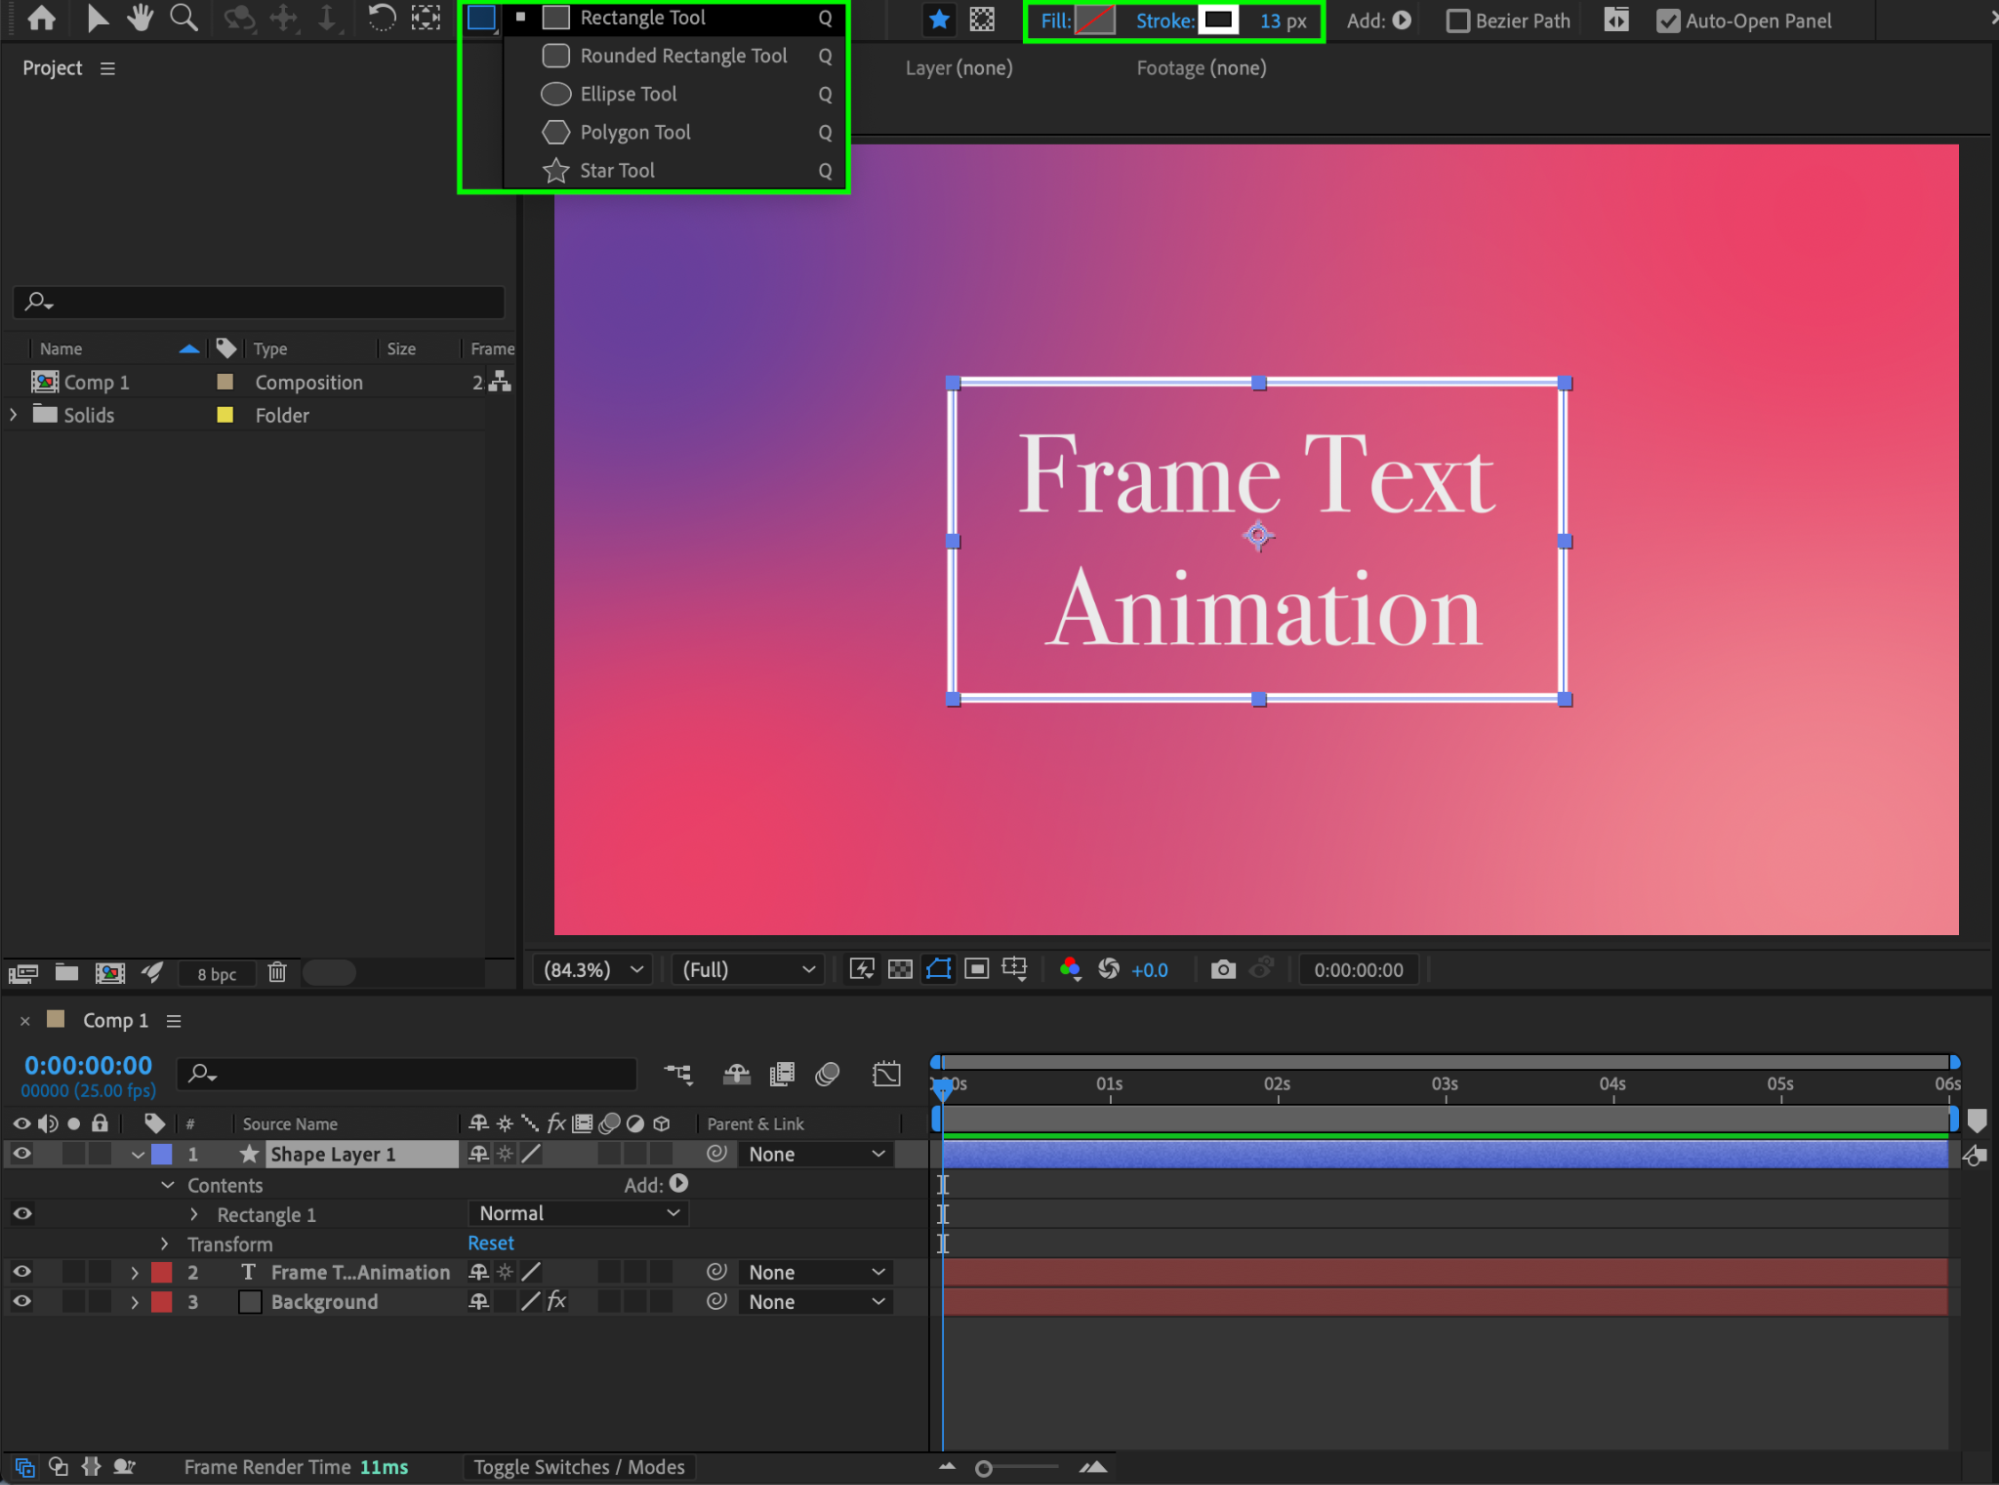
Get 10% off when you subscribe to our newsletter

Step 4: Set the Final Position of the Text
Move the CTI (Current Time Indicator) to the point where you want the text animation to finish. Click the Position stopwatch on the text layer to create a keyframe.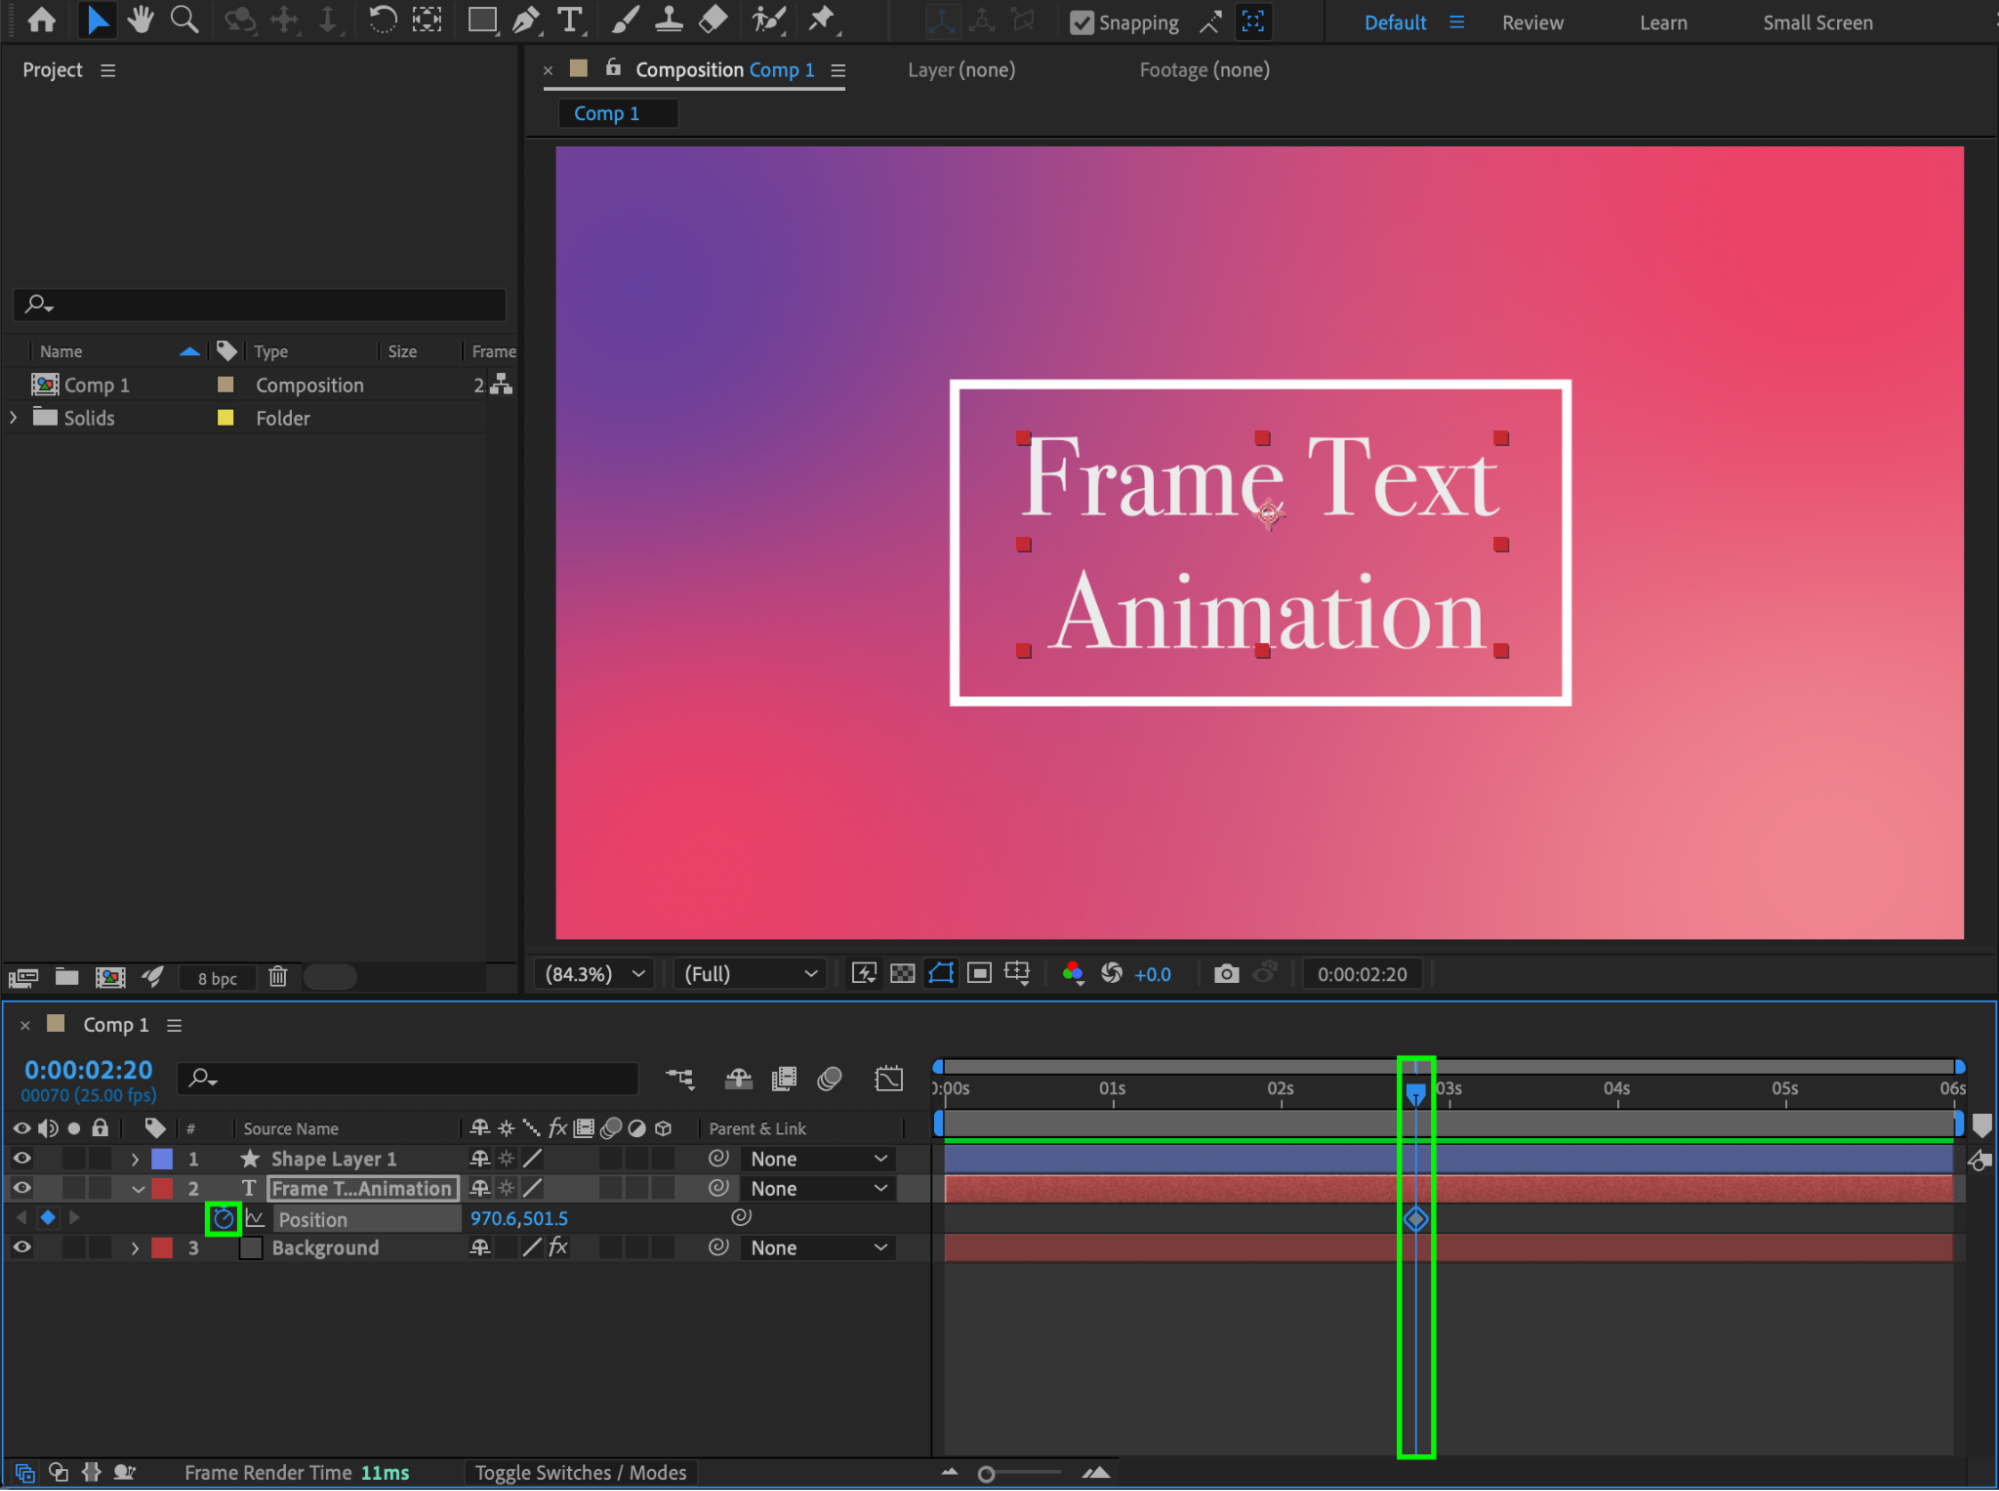 Step 5: Animate the Text Entry
Move the CTI to the beginning of the composition. Adjust the X Position so the text starts outside the rectangle. Step 6: Add Trim Paths to the Rectangle
Expand the Rectangle shape properties. Select Rectangle 1, then choose Add > Trim Paths.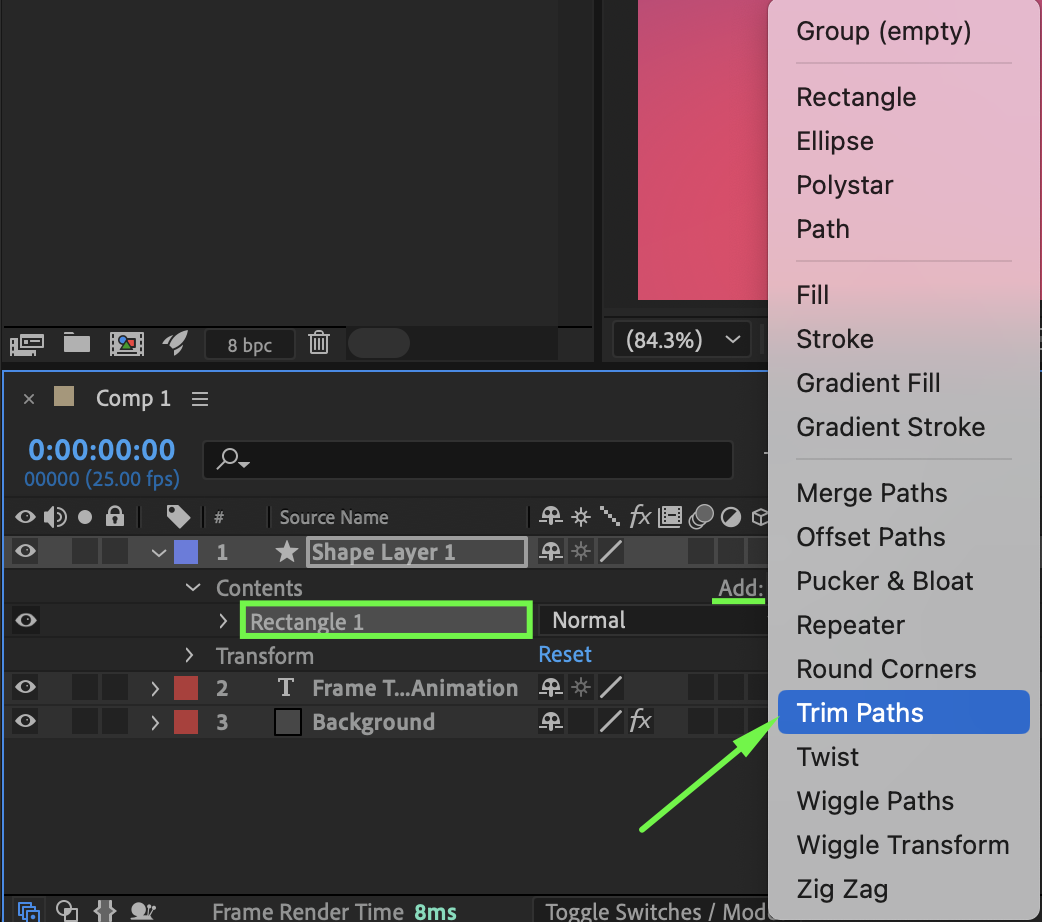 Step 7: Animate the Frame Drawing
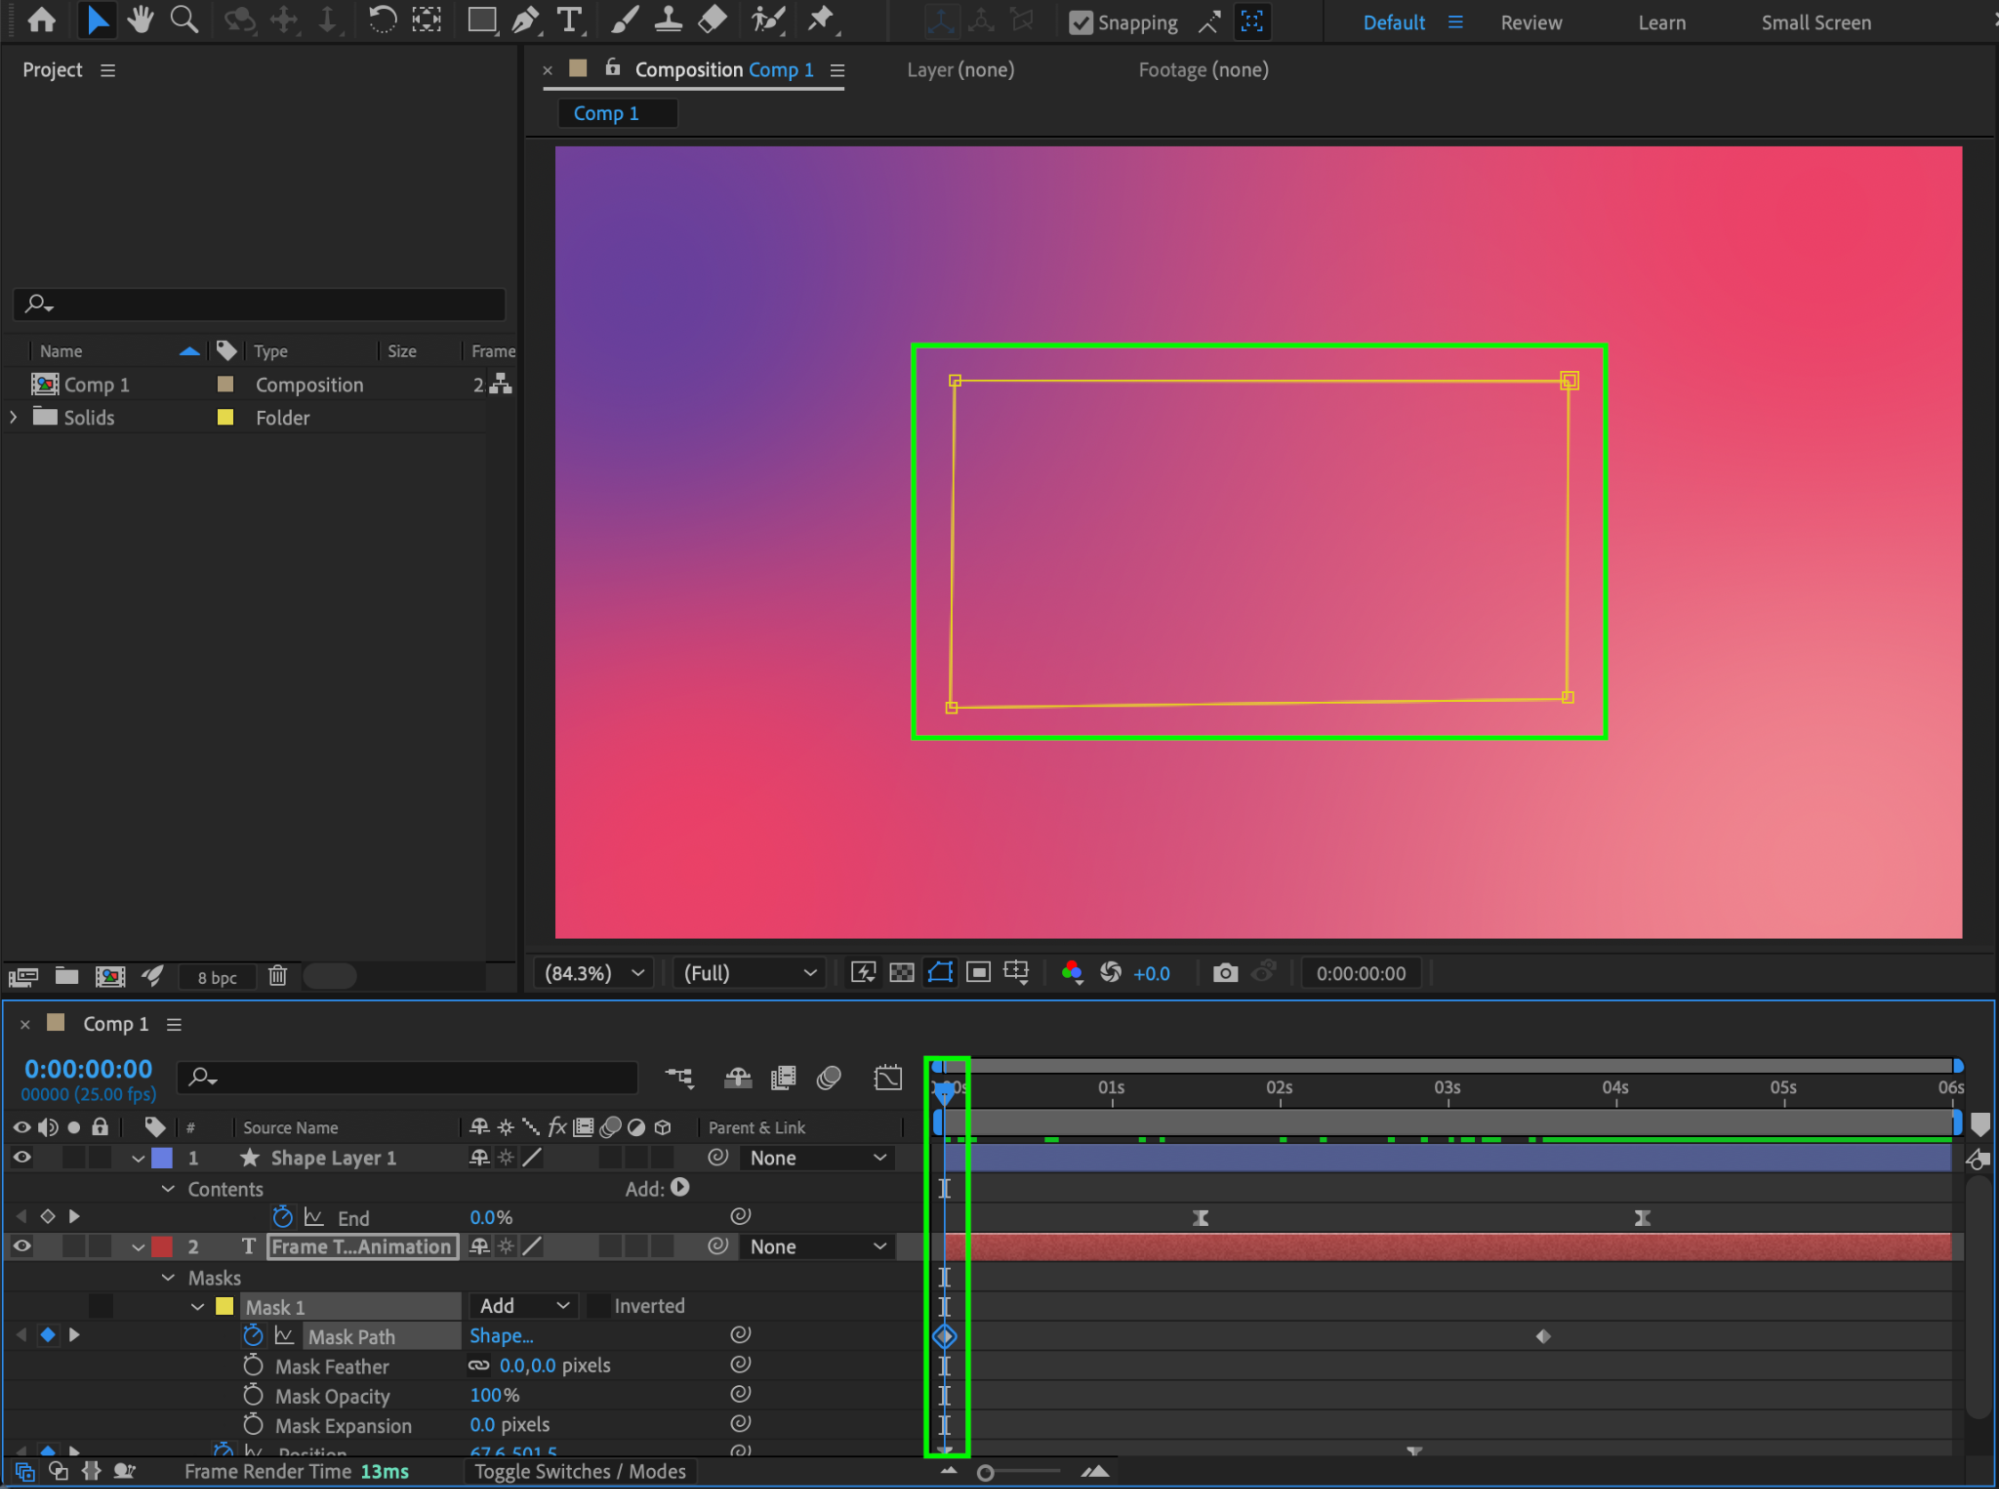
Animate the End parameter of Trim Paths:
Set End = 0% at the start of the animation
Set End = 100% at the end of the text animation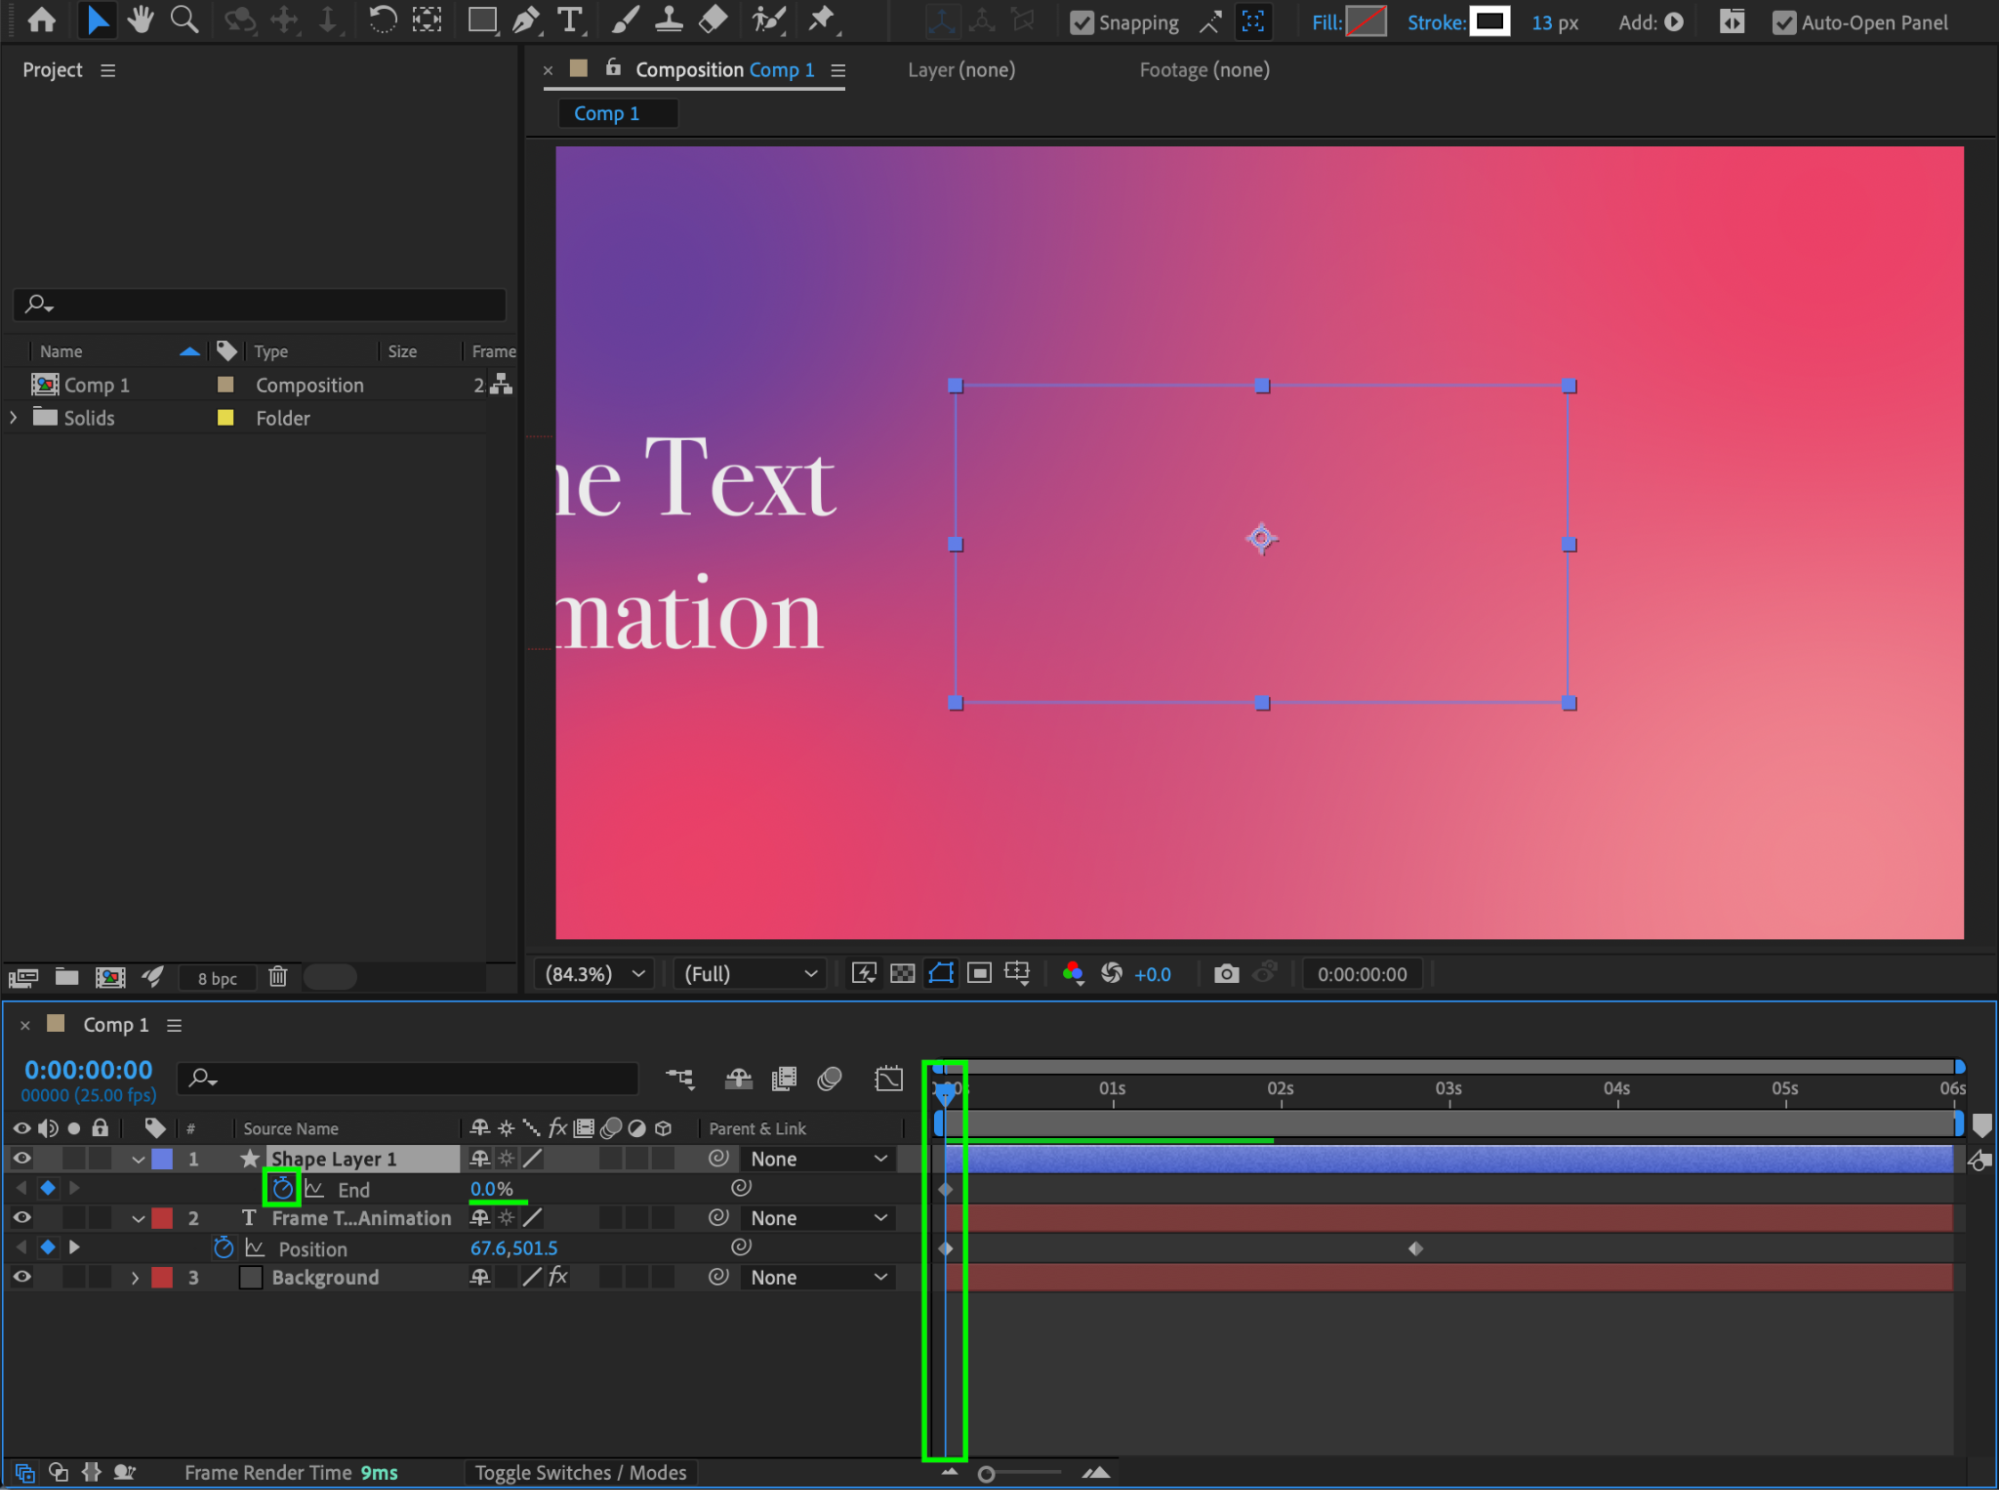

Step 8: Apply Easy Ease
Select all keyframes and apply Easy Ease to smooth the motion.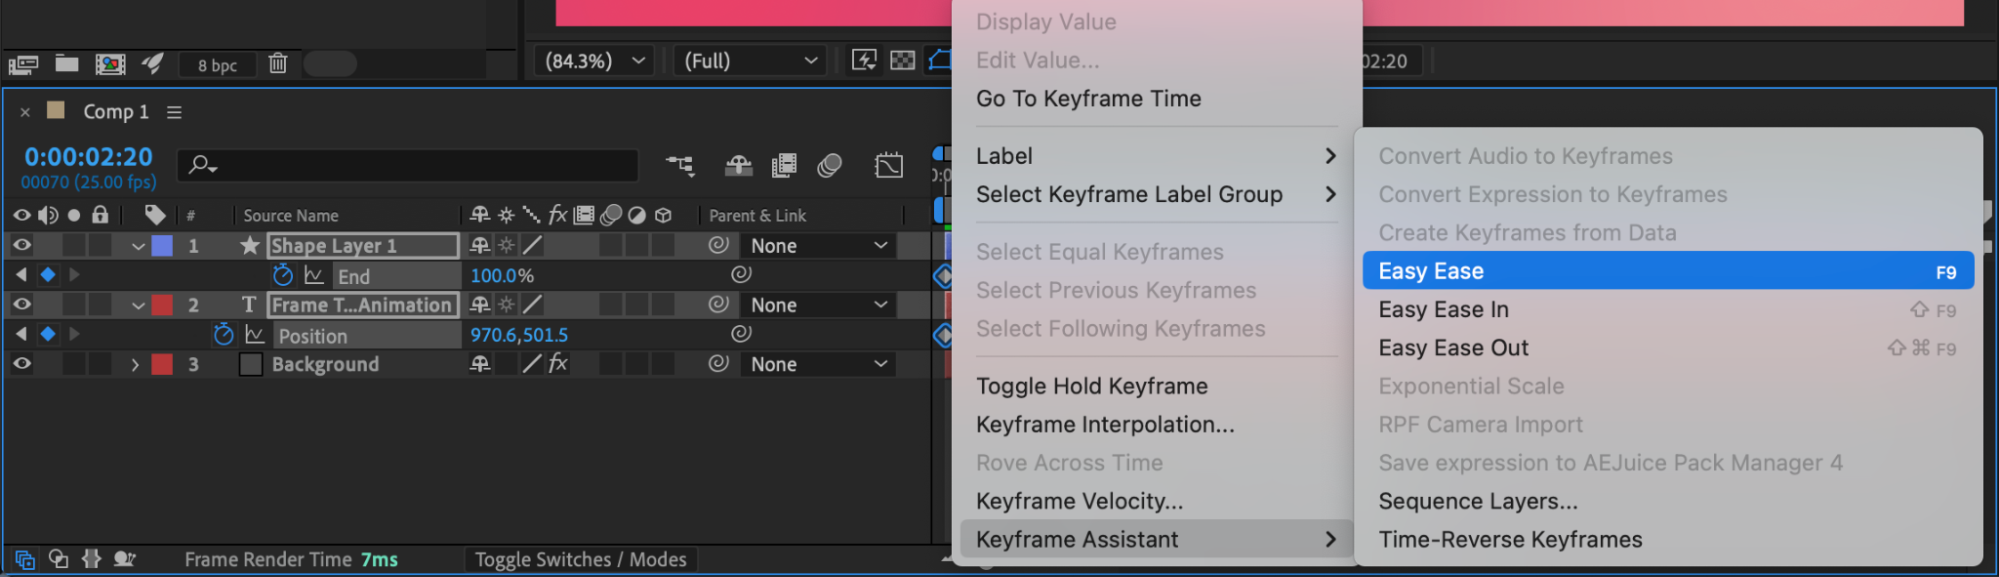
Step 9: Offset the Rectangle Animation
Move a few of the rectangle keyframes slightly to the right on the timeline to create a natural delay between the frame and text animations.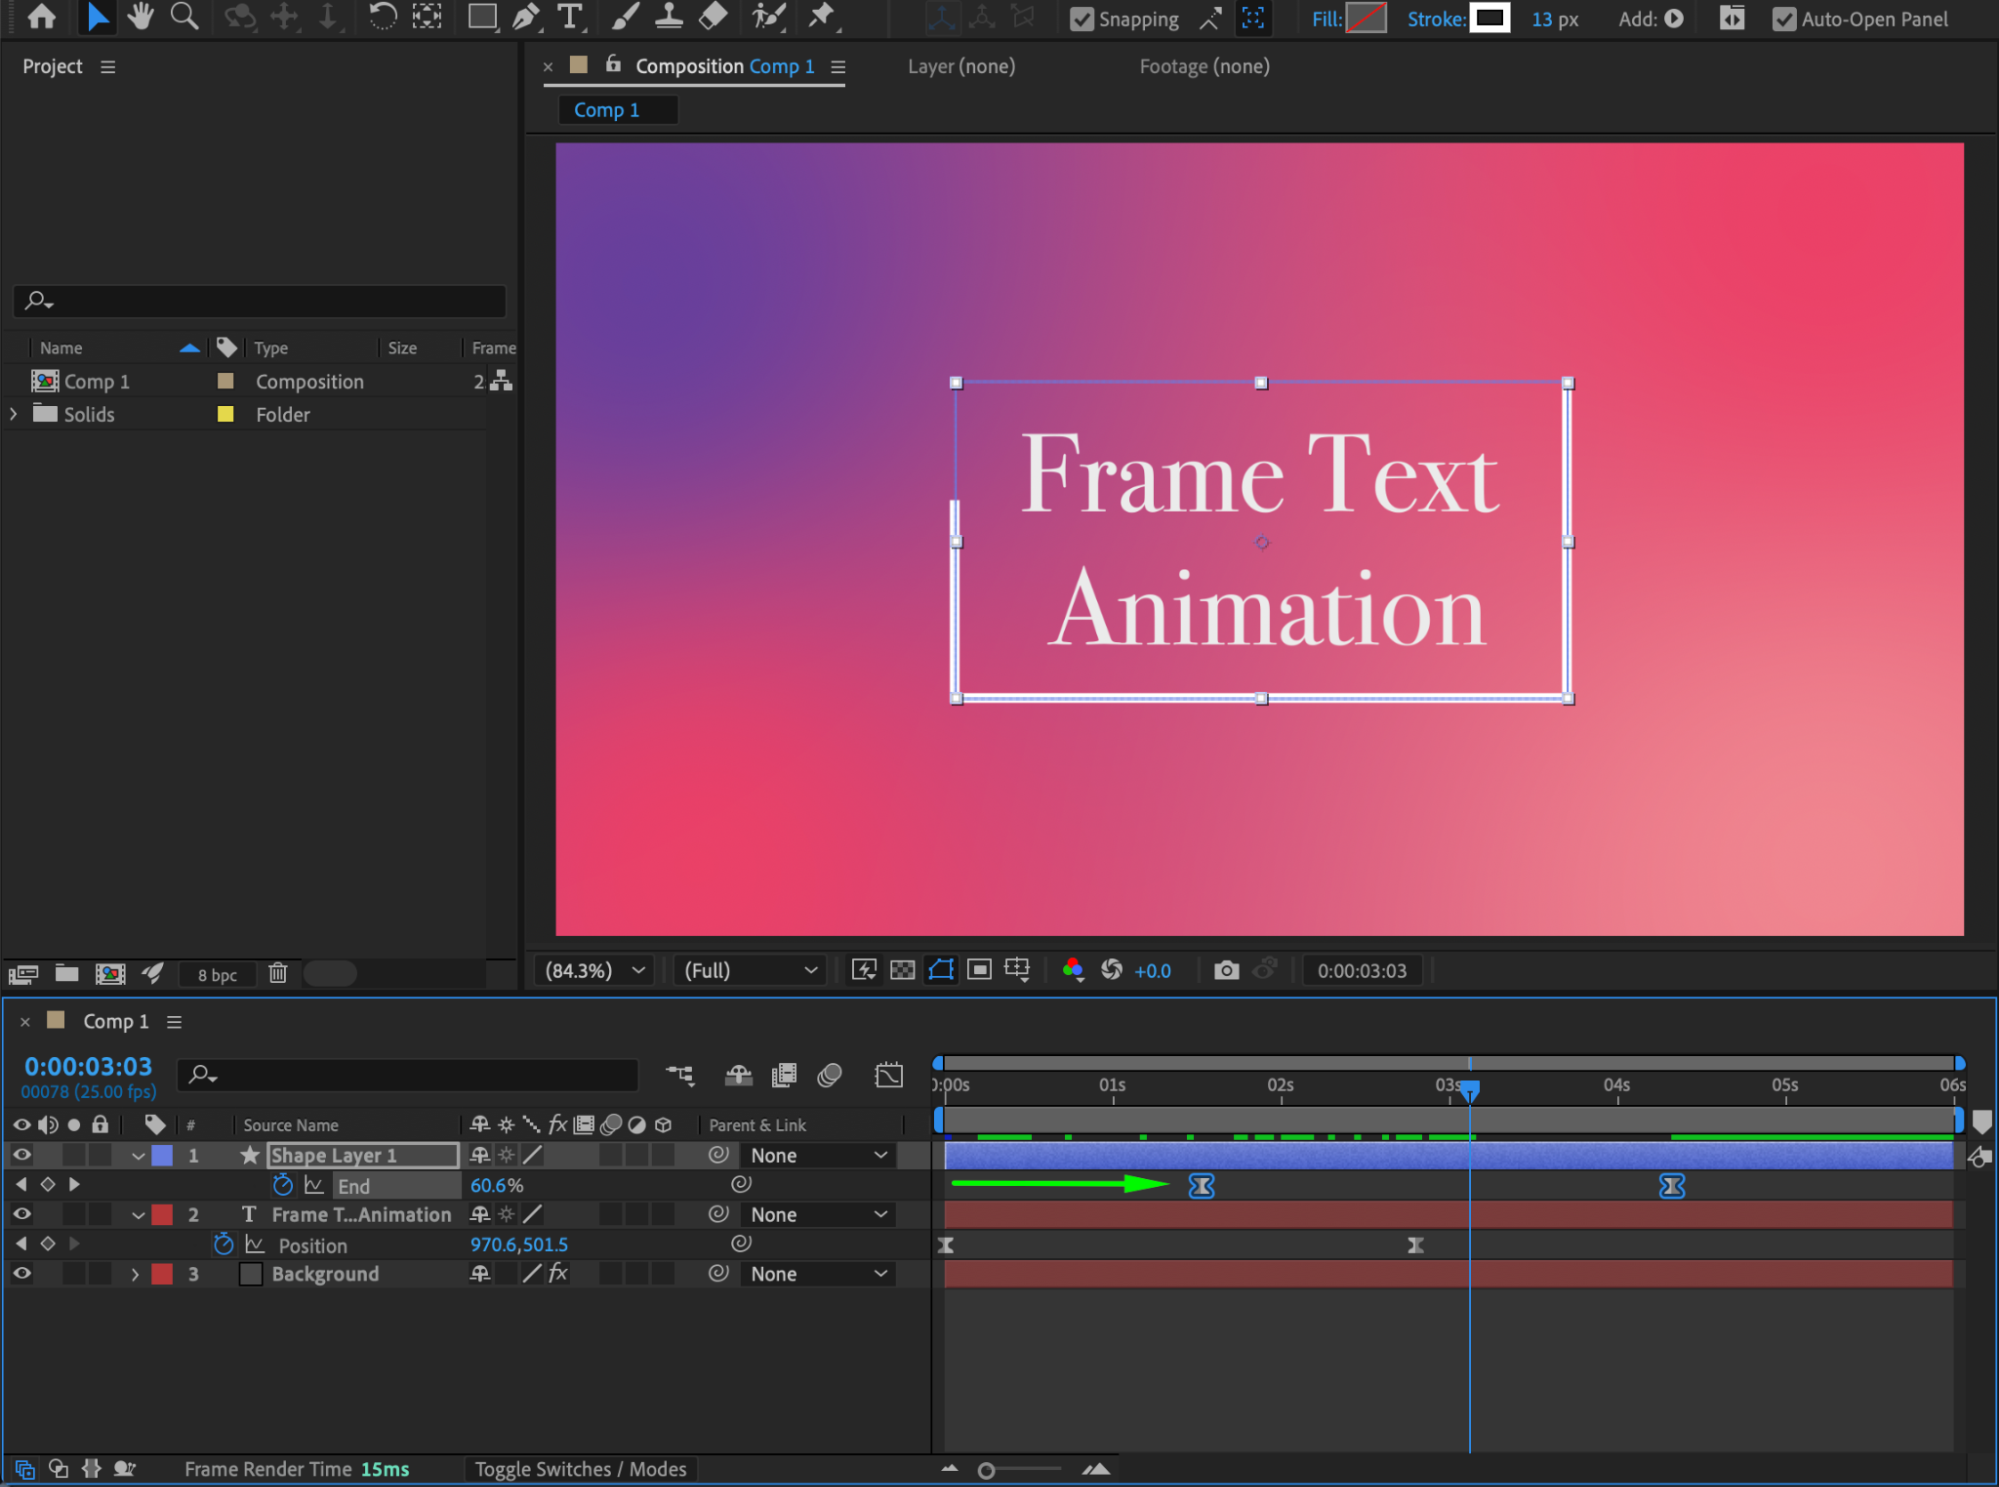 Step 10: Create a Mask for the Text
Select the Rectangle Tool (Q) and draw a mask around the text.
Move the CTI to the end of the text animation and click the Mask Path stopwatch.
Move the CTI to the beginning and adjust the mask so it aligns with the rectangle.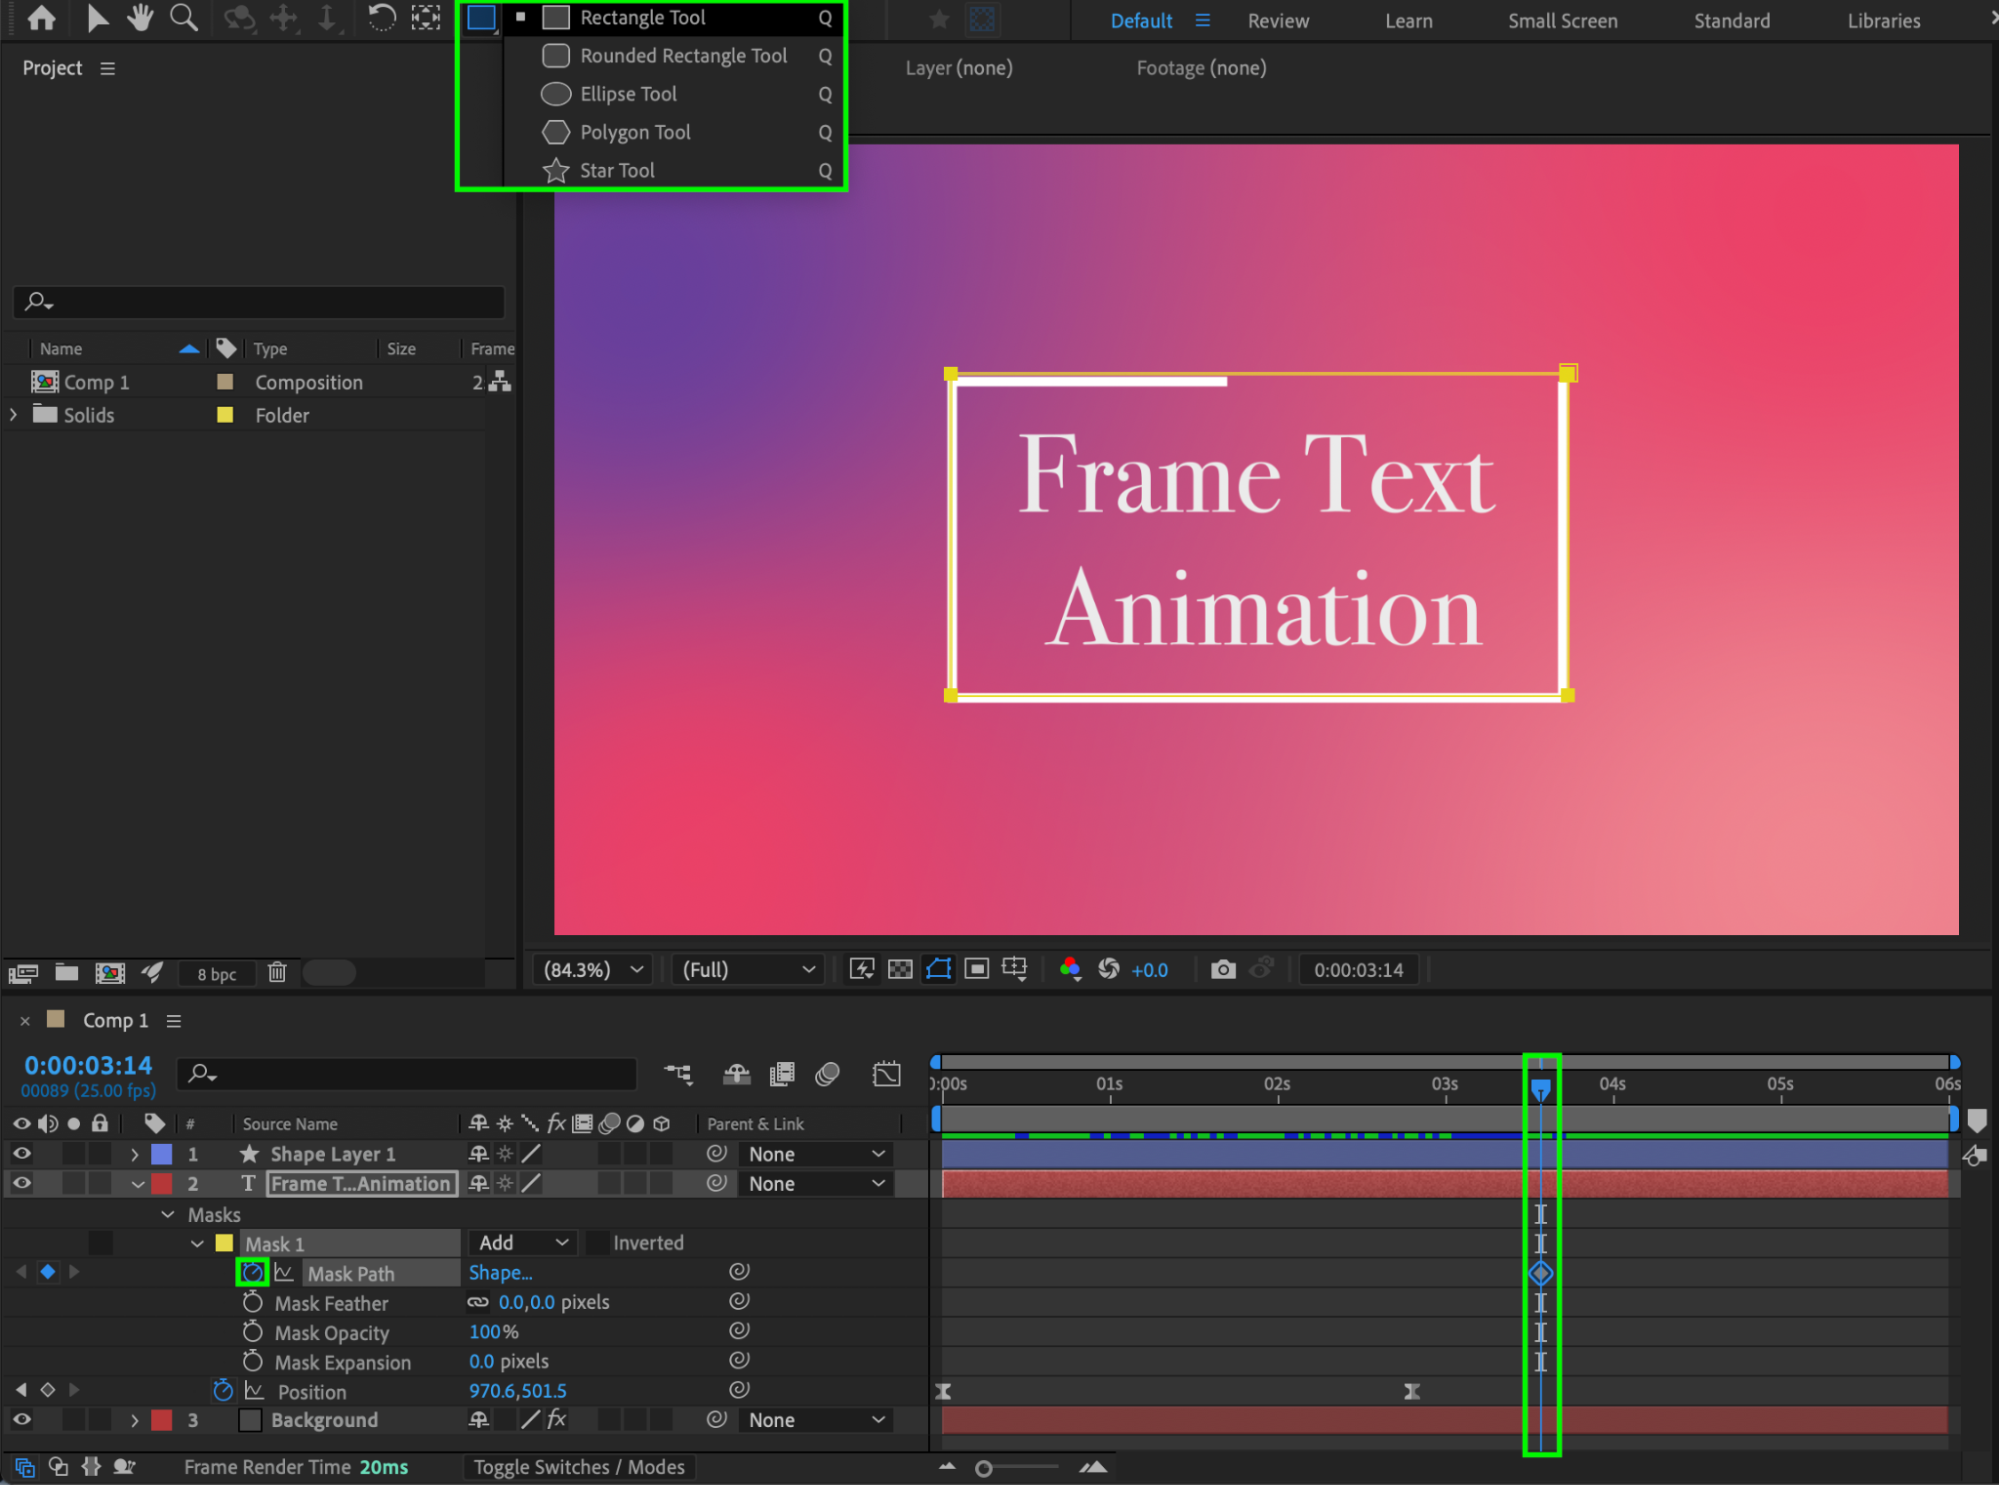
 Step 11: Enable Motion Blur
Enable Motion Blur for the text and shape layers, and turn on Motion Blur for the composition.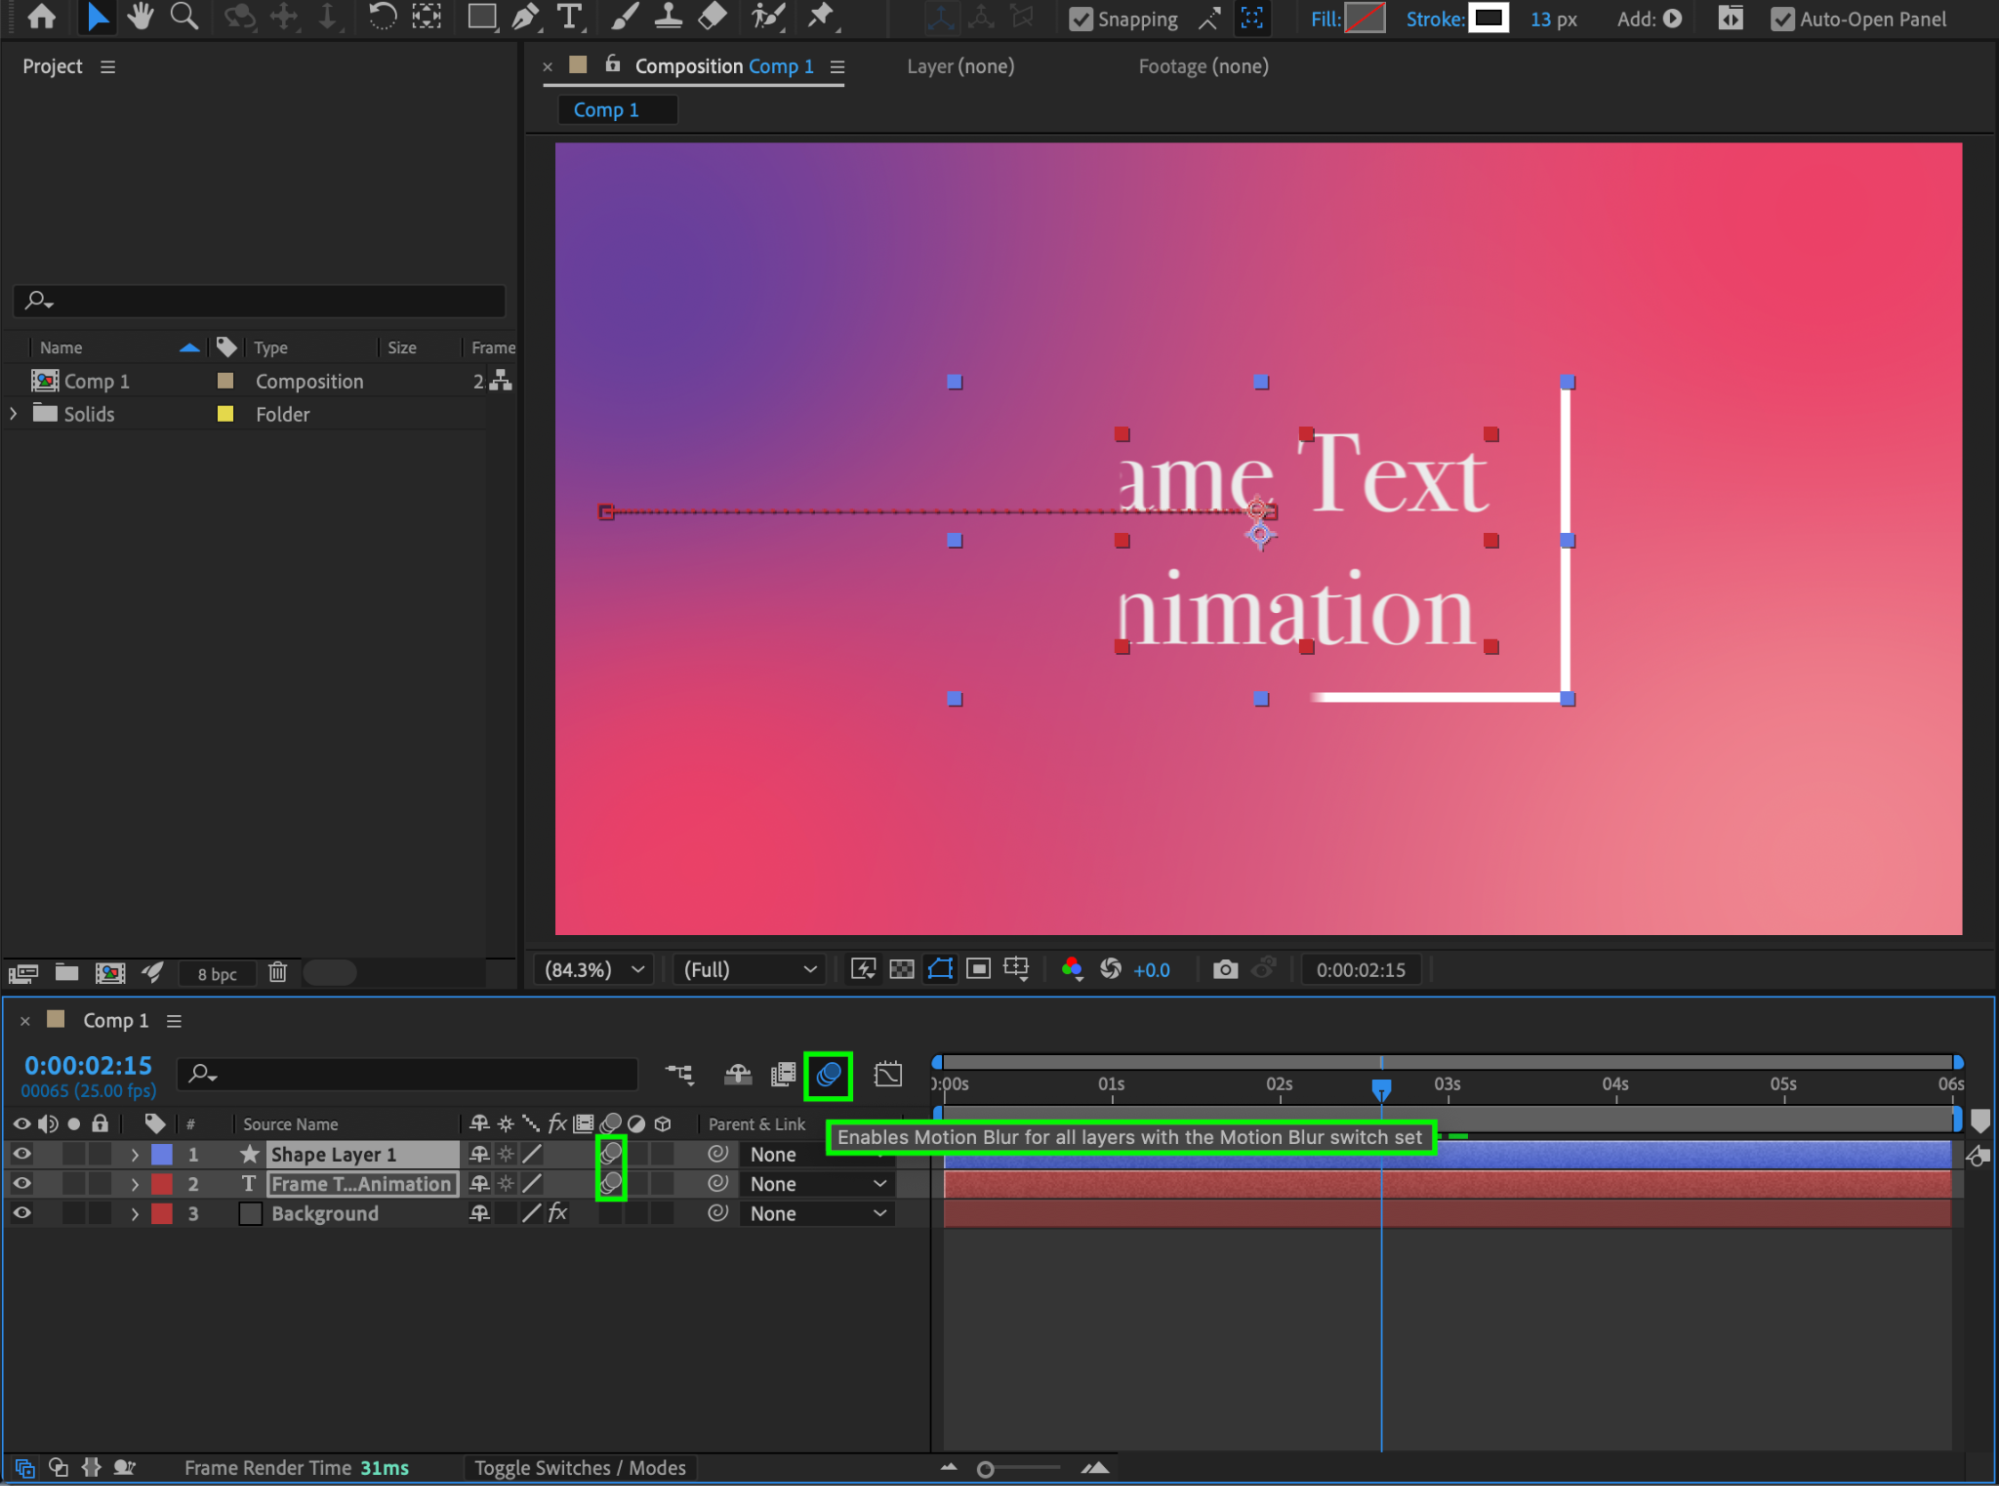 Step 12: Preview and Finalize
Preview the animation and make any final timing or easing adjustments.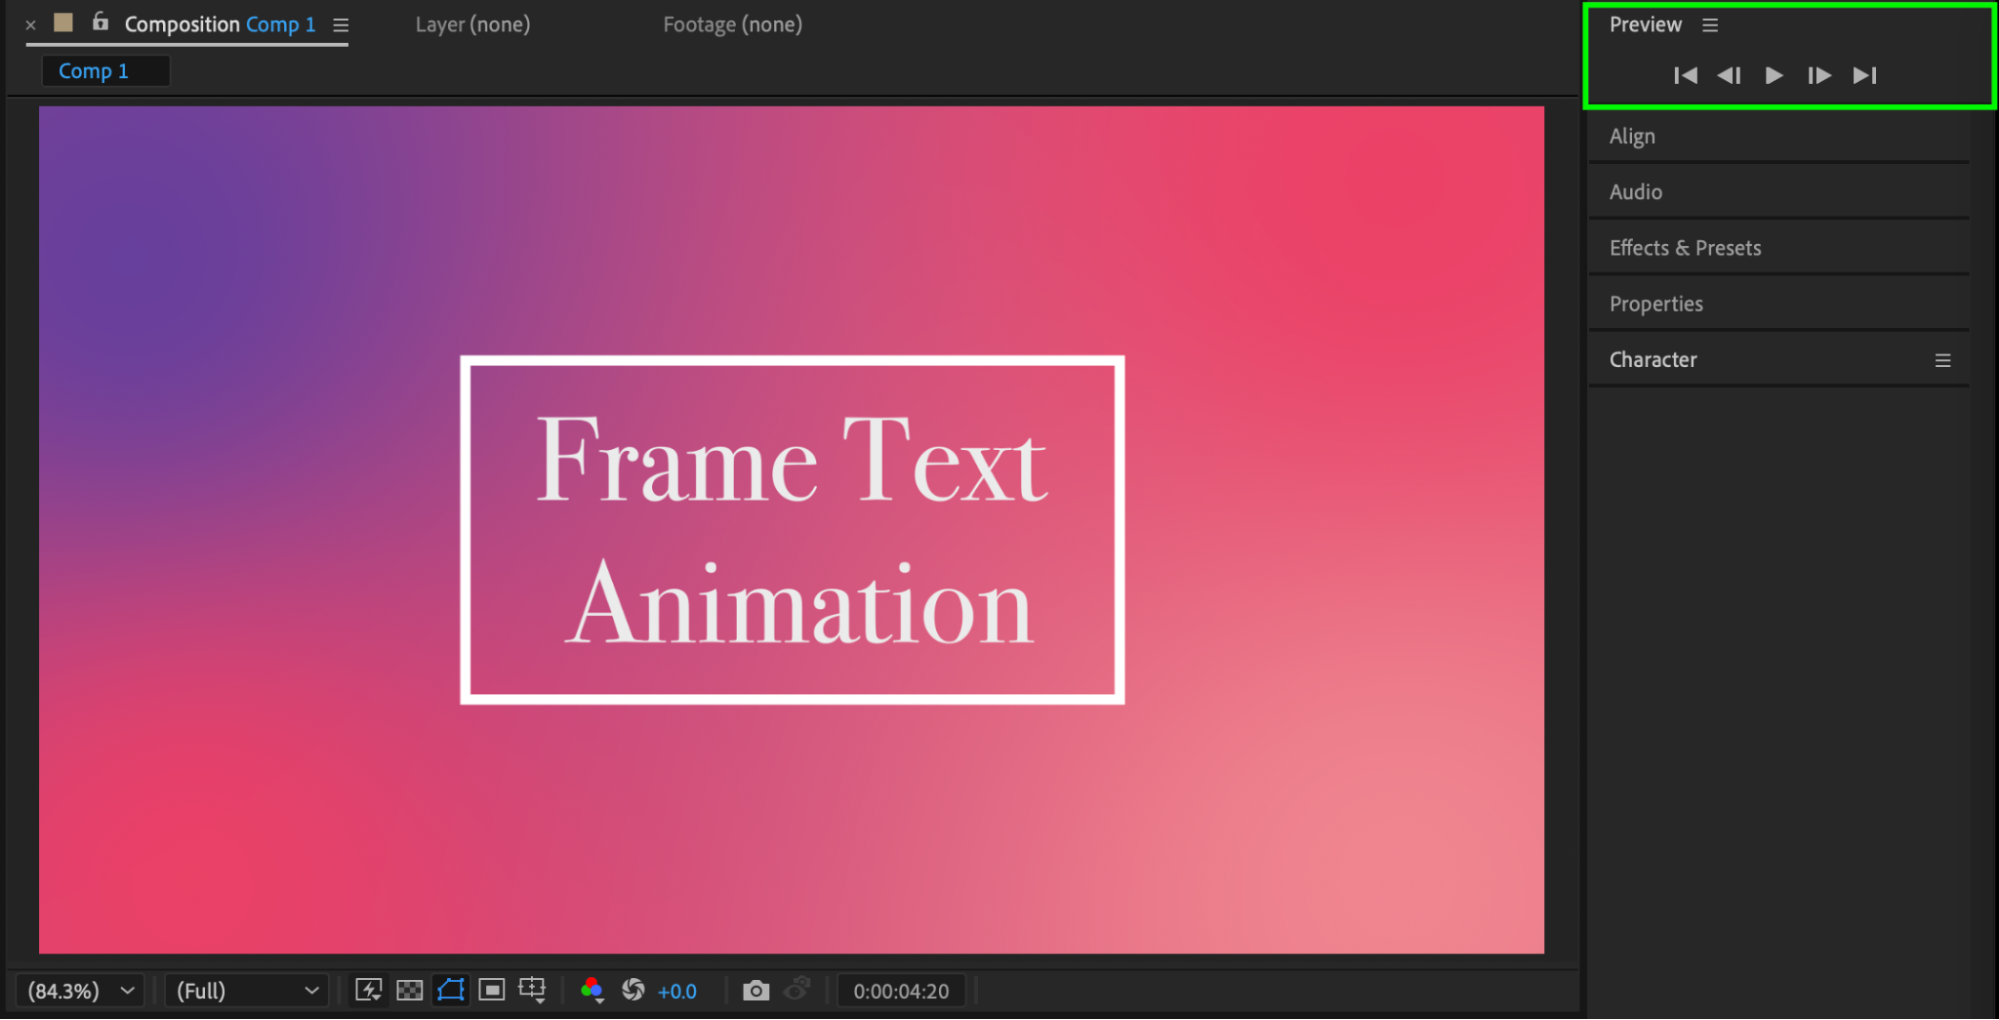
Conclusion
By combining text animation, shape layers, Trim Paths, and masking, you can create a clean animated text-in-frame effect in After Effects. This technique works well for titles, lower thirds, and modern motion design projects.
Our Bestsellers


