Adding Dynamic Motion to Text in After Effects
Introduction – Bringing Your Text to Life with Motion
Would you like to learn how to make your text come alive in your videos? Adobe After Effects offers a wide range of tools and features that can help you add dynamic motion to your text, making it visually captivating and engaging. Whether you’re a professional video designer or a beginner exploring the world of motion graphics, this tutorial will guide you through the step-by-step process of making text move in After Effects.
Get 10% off when you subscribe to our newsletter

Step-by-Step Guide to Making Text Move in After Effects:
Step 1: Create a New Composition
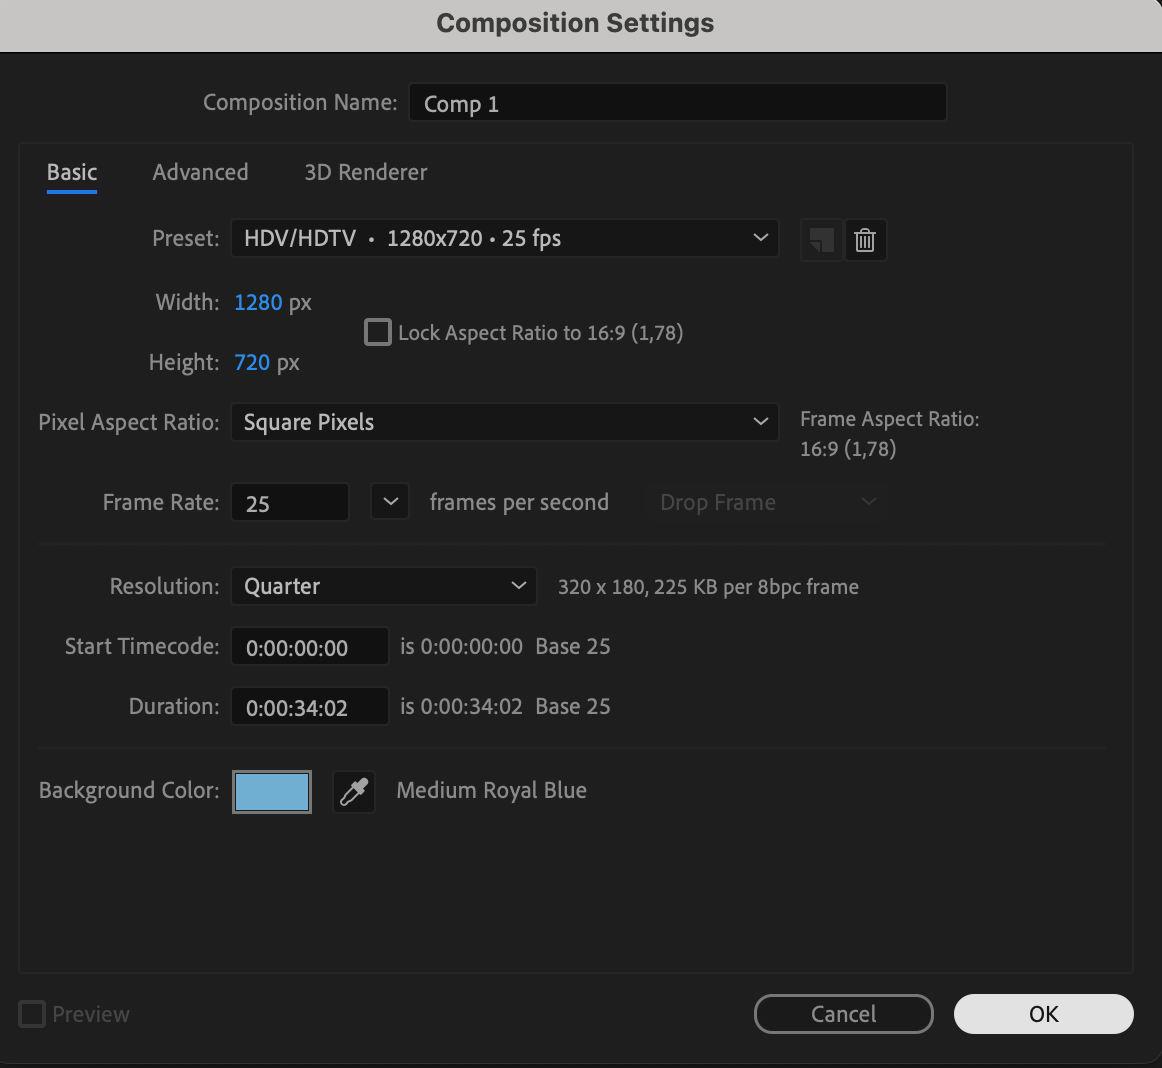
To begin, open After Effects and create a new composition by clicking on Composition > New Composition. Here, you’ll set your desired settings, such as the frame rate, resolution, and duration. These settings are crucial as they will dictate how your final animation appears. Once you’ve adjusted these parameters to your preference, click OK to proceed.
 Step 2: Add Text to the Composition
Get 10% off when you subscribe to our newsletter

Next, select the Text tool from the toolbar (shortcut: Ctrl/Cmd + T) and click anywhere on the composition panel to create a text layer. Enter your desired text and customize its appearance using the Character panel. You can adjust the font, size, color, and other text attributes to match the style you want for your project.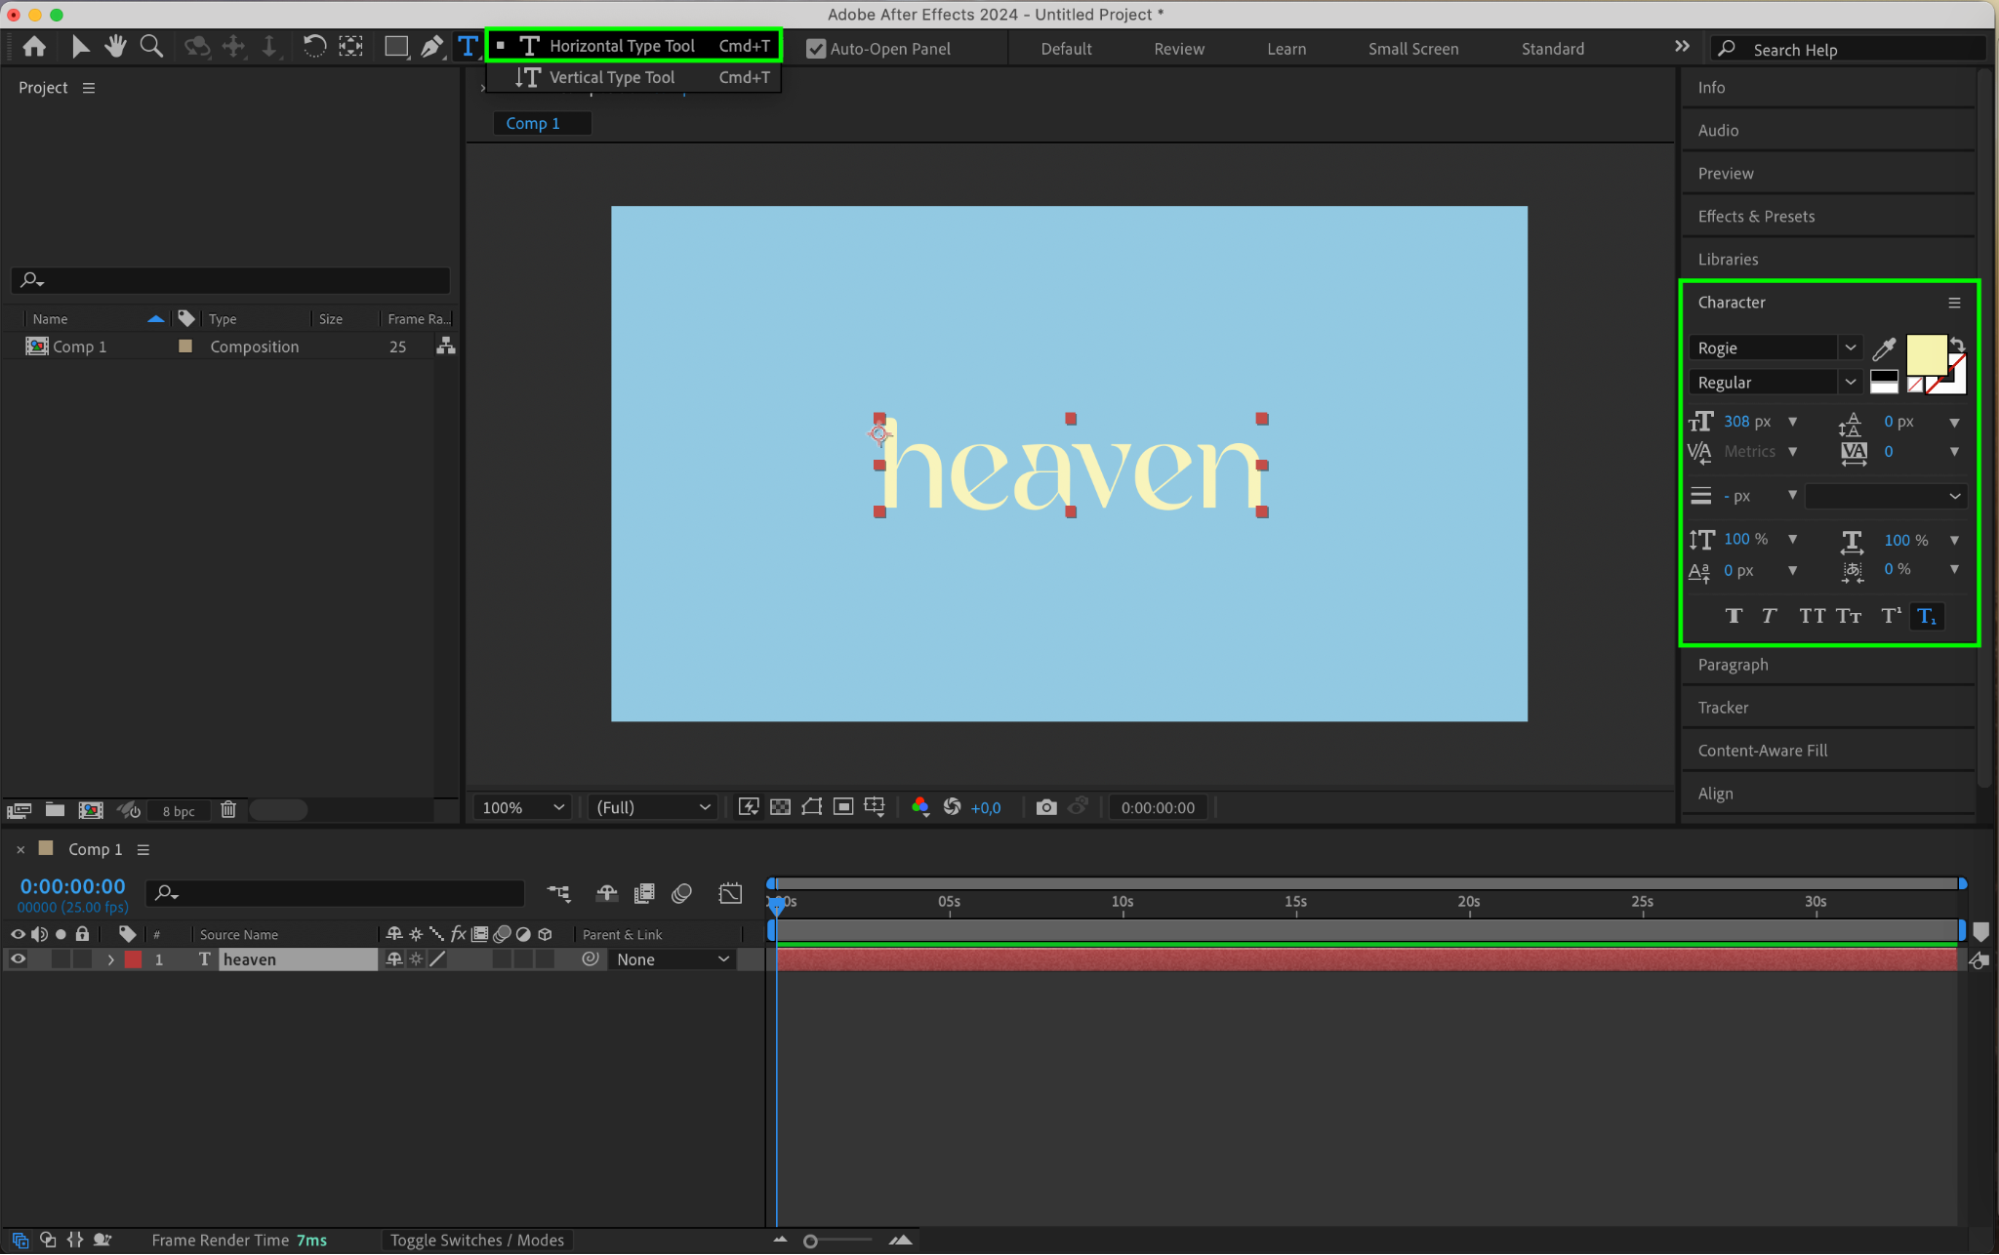 Step 3: Position and Scale the Text
With the text layer selected, use the Selection tool (shortcut: V) to position the text within the composition. Alternatively, you can expand the layer’s properties and edit parameters like Position and Scale to fine-tune its appearance. This step allows you to place your text precisely where you want it on the screen and at the appropriate size.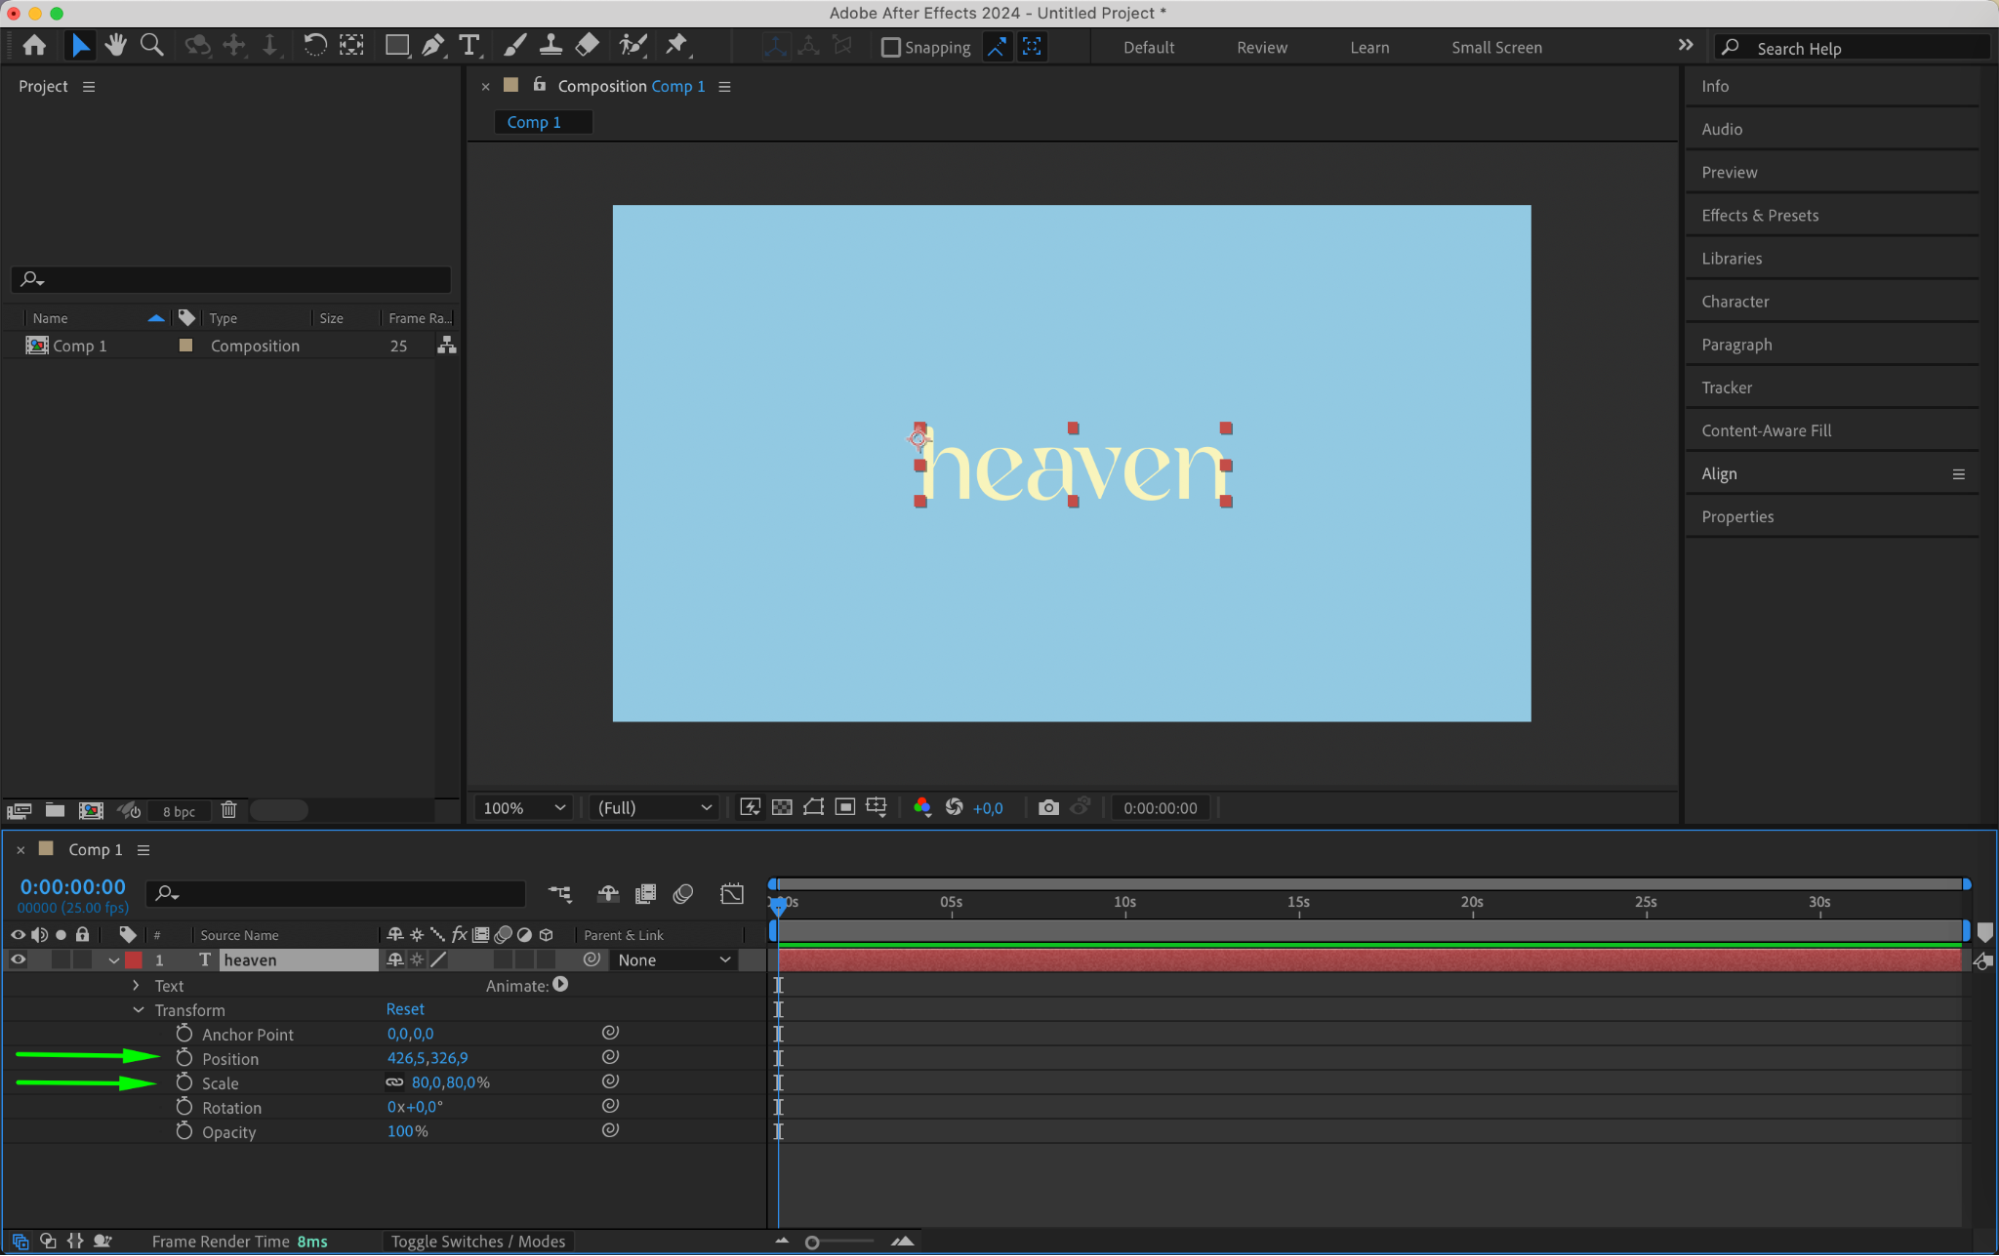 Step 4: Apply Text Animation Presets
Get 10% off when you subscribe to our newsletter

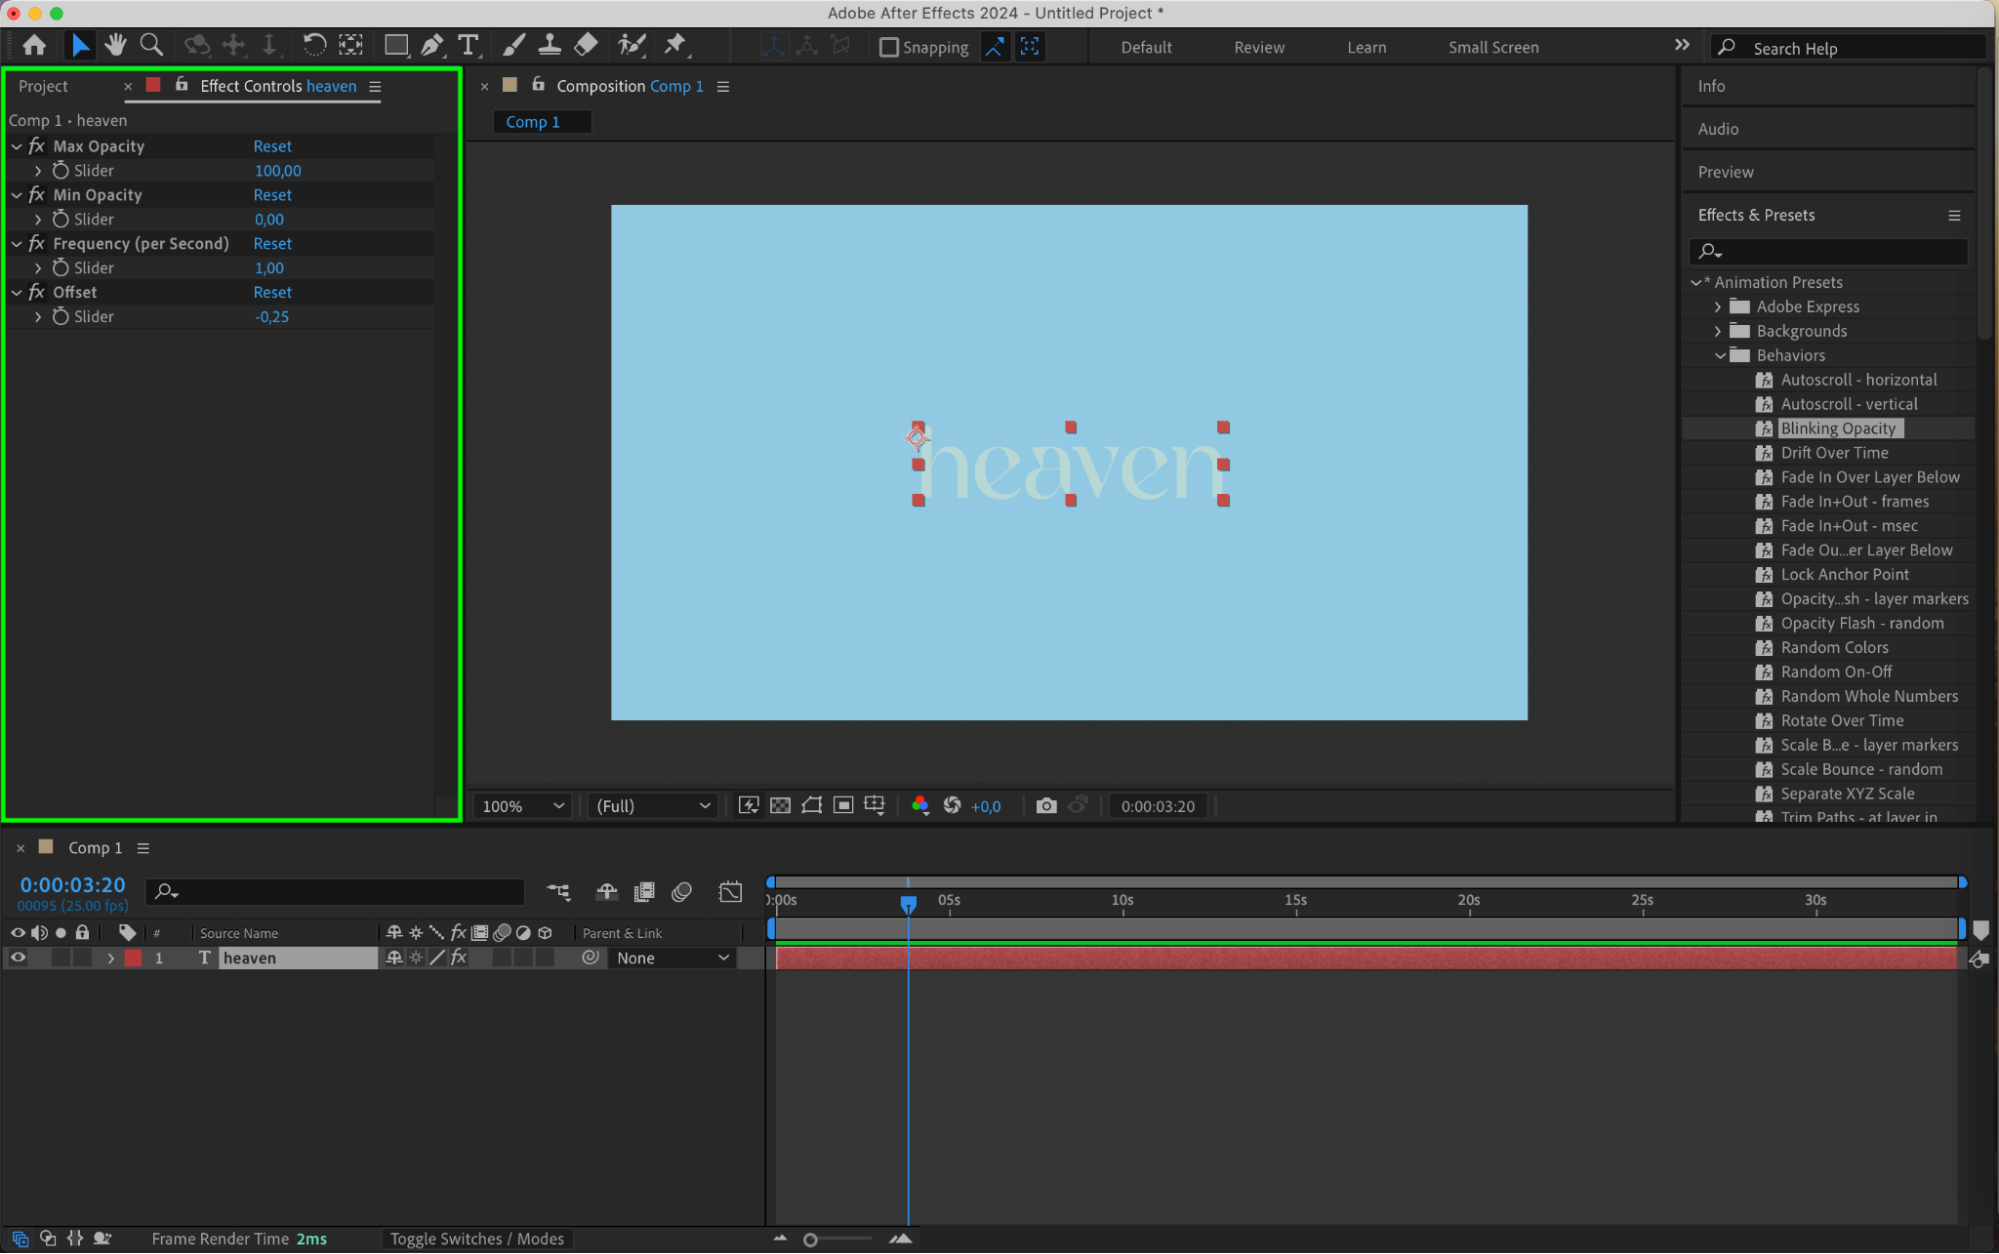
After Effects provides a variety of built-in text animation presets that can instantly animate your text. To apply a preset, go to the Effects & Presets panel, find the animation preset that suits your project, and drag it onto your text layer. Once applied, you can customize the preset further by adjusting parameters in the Effect Controls panel to better fit your creative vision.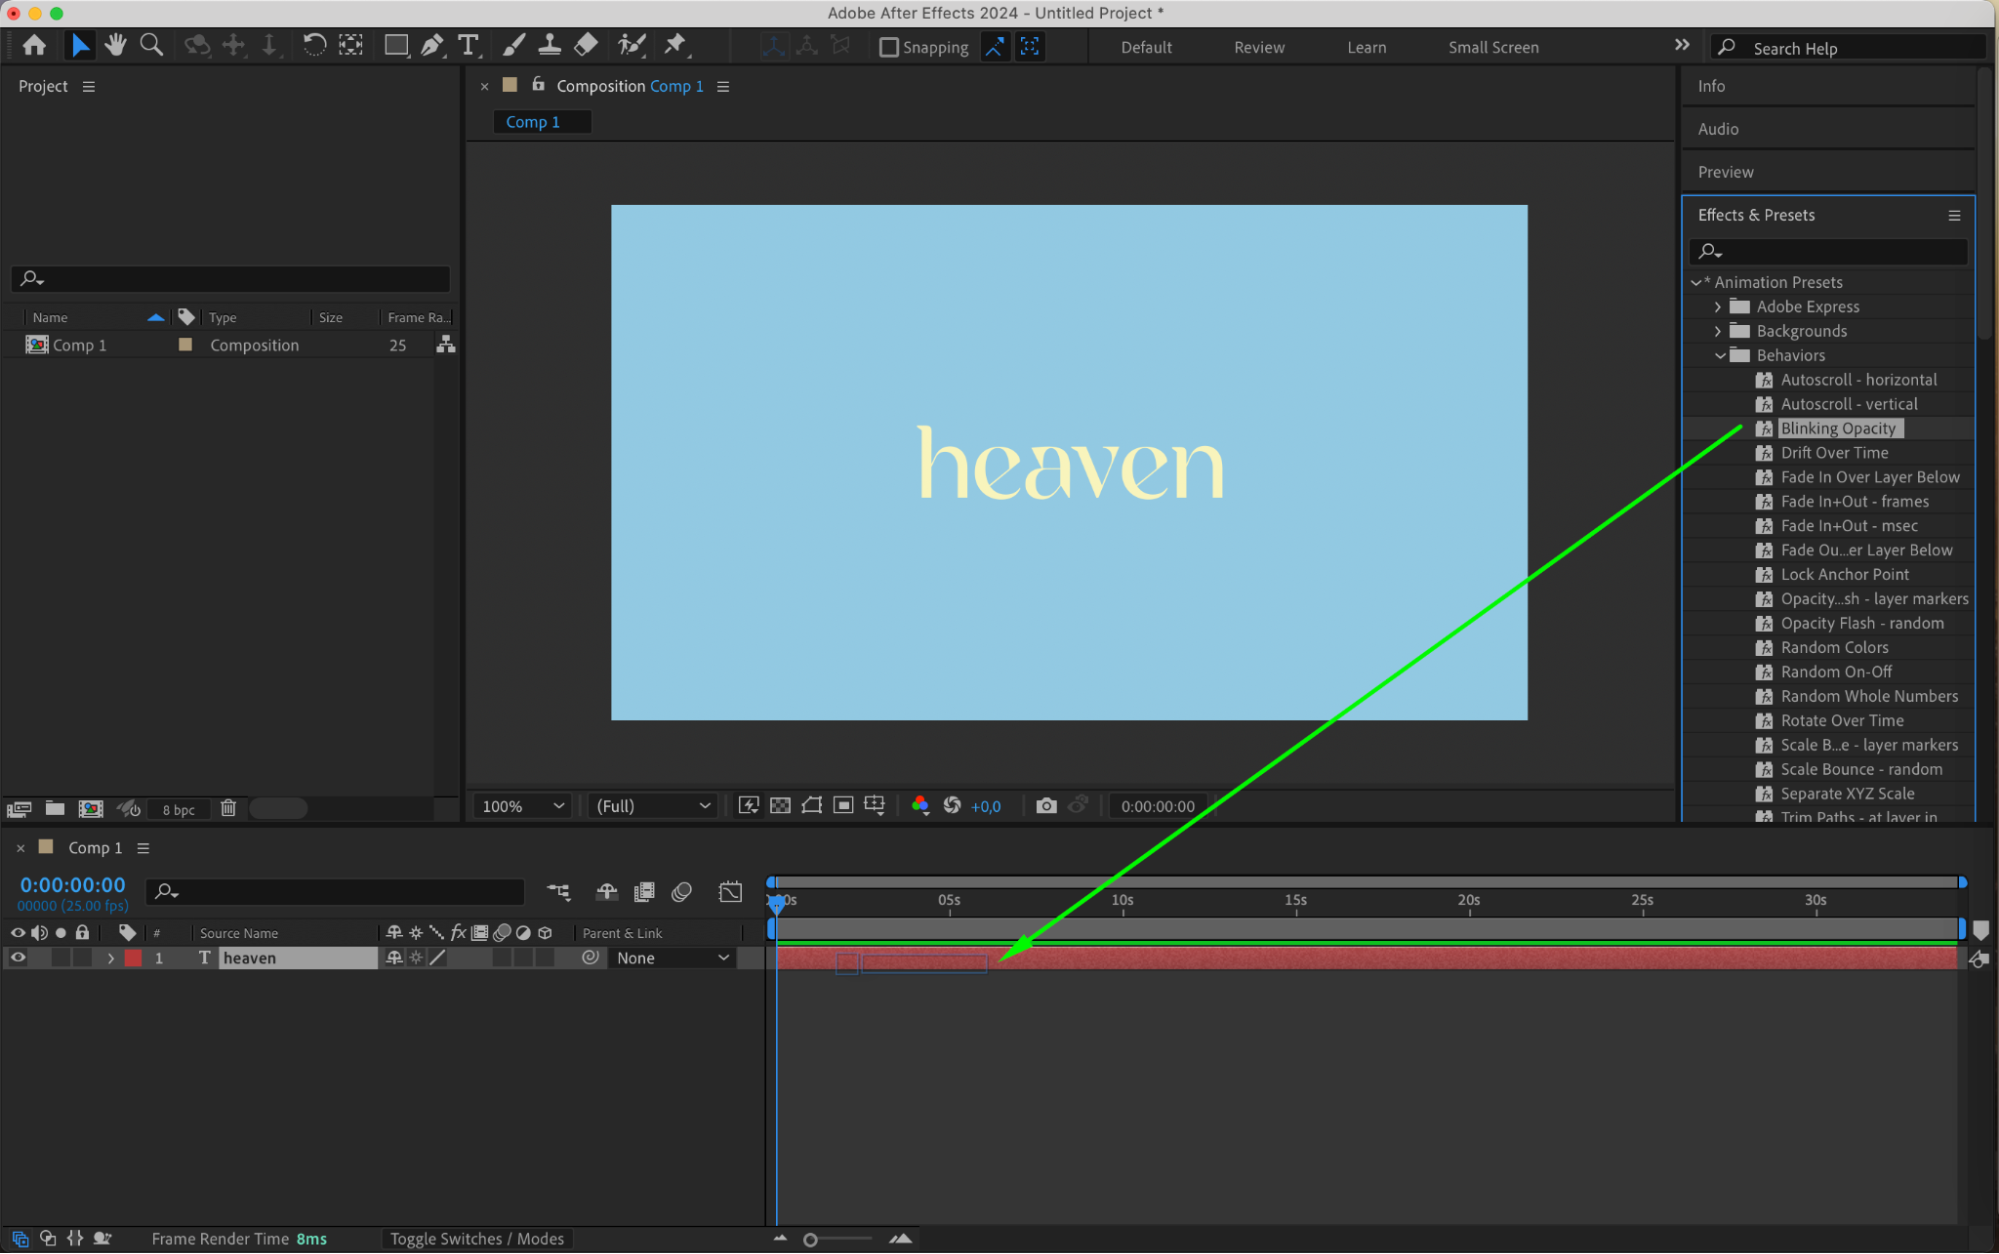
 Step 5: Keyframe Text Properties
Get 10% off when you subscribe to our newsletter

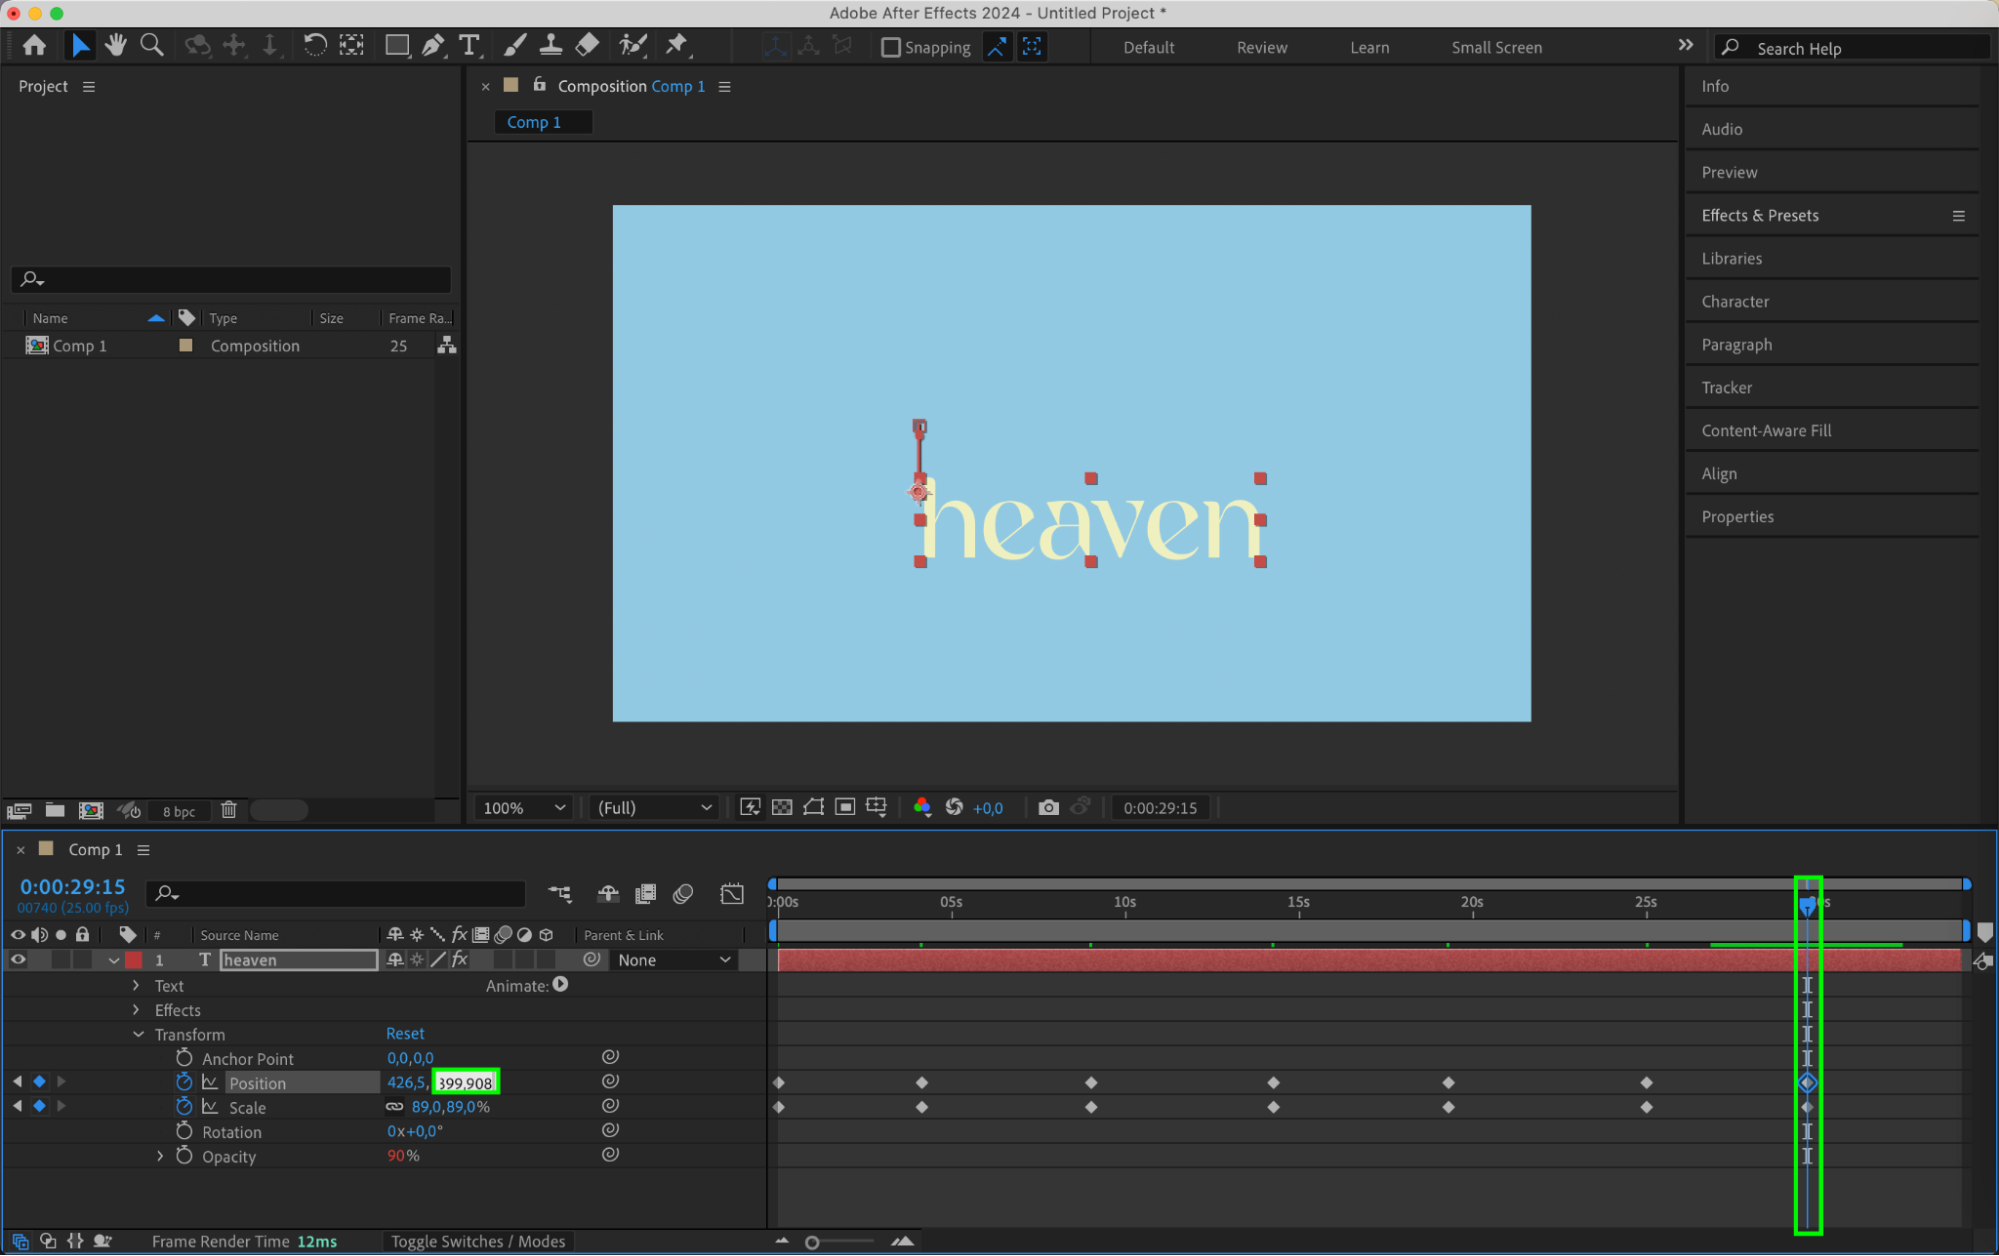
For more control over your text animation, you can manually keyframe the text properties. Select the text layer, then click on the stopwatch icon next to a property like Position, Scale, or Opacity to create a keyframe. Move the current time indicator (CTI) along the timeline to a new point and adjust the property values to set another keyframe. This method allows for precise, customized animations, giving you the flexibility to create exactly the movement you envision.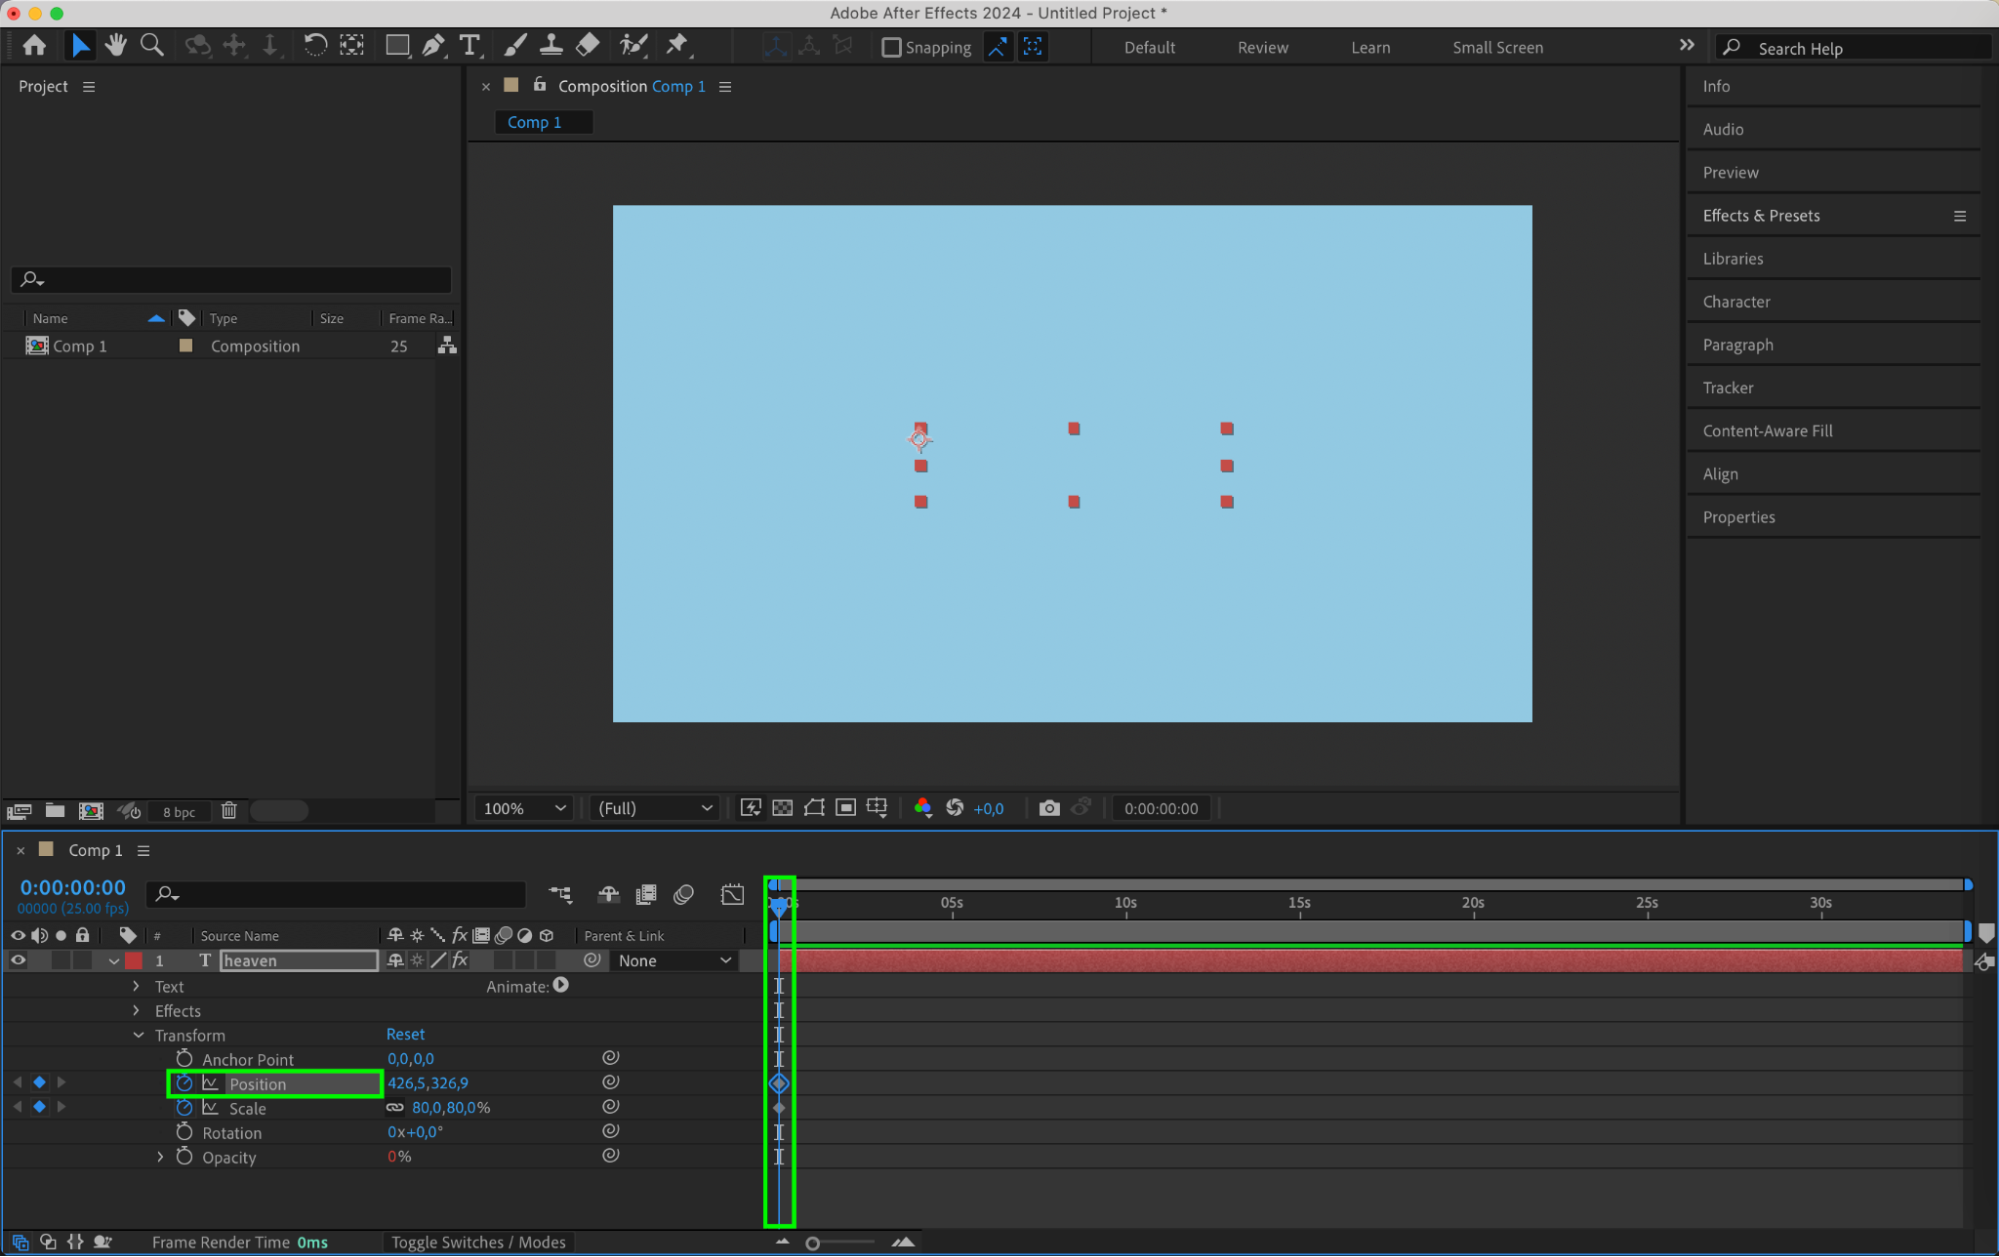
 Step 6: Add Effects and Expressions
Get 10% off when you subscribe to our newsletter

To create more advanced text animations, you can apply effects or use expressions in After Effects. Effects like Wiggle or Transform can add dynamic movement to your text, while expressions allow you to create complex animations using mathematical operations or random values. Experiment with different effects and expressions to achieve your desired result.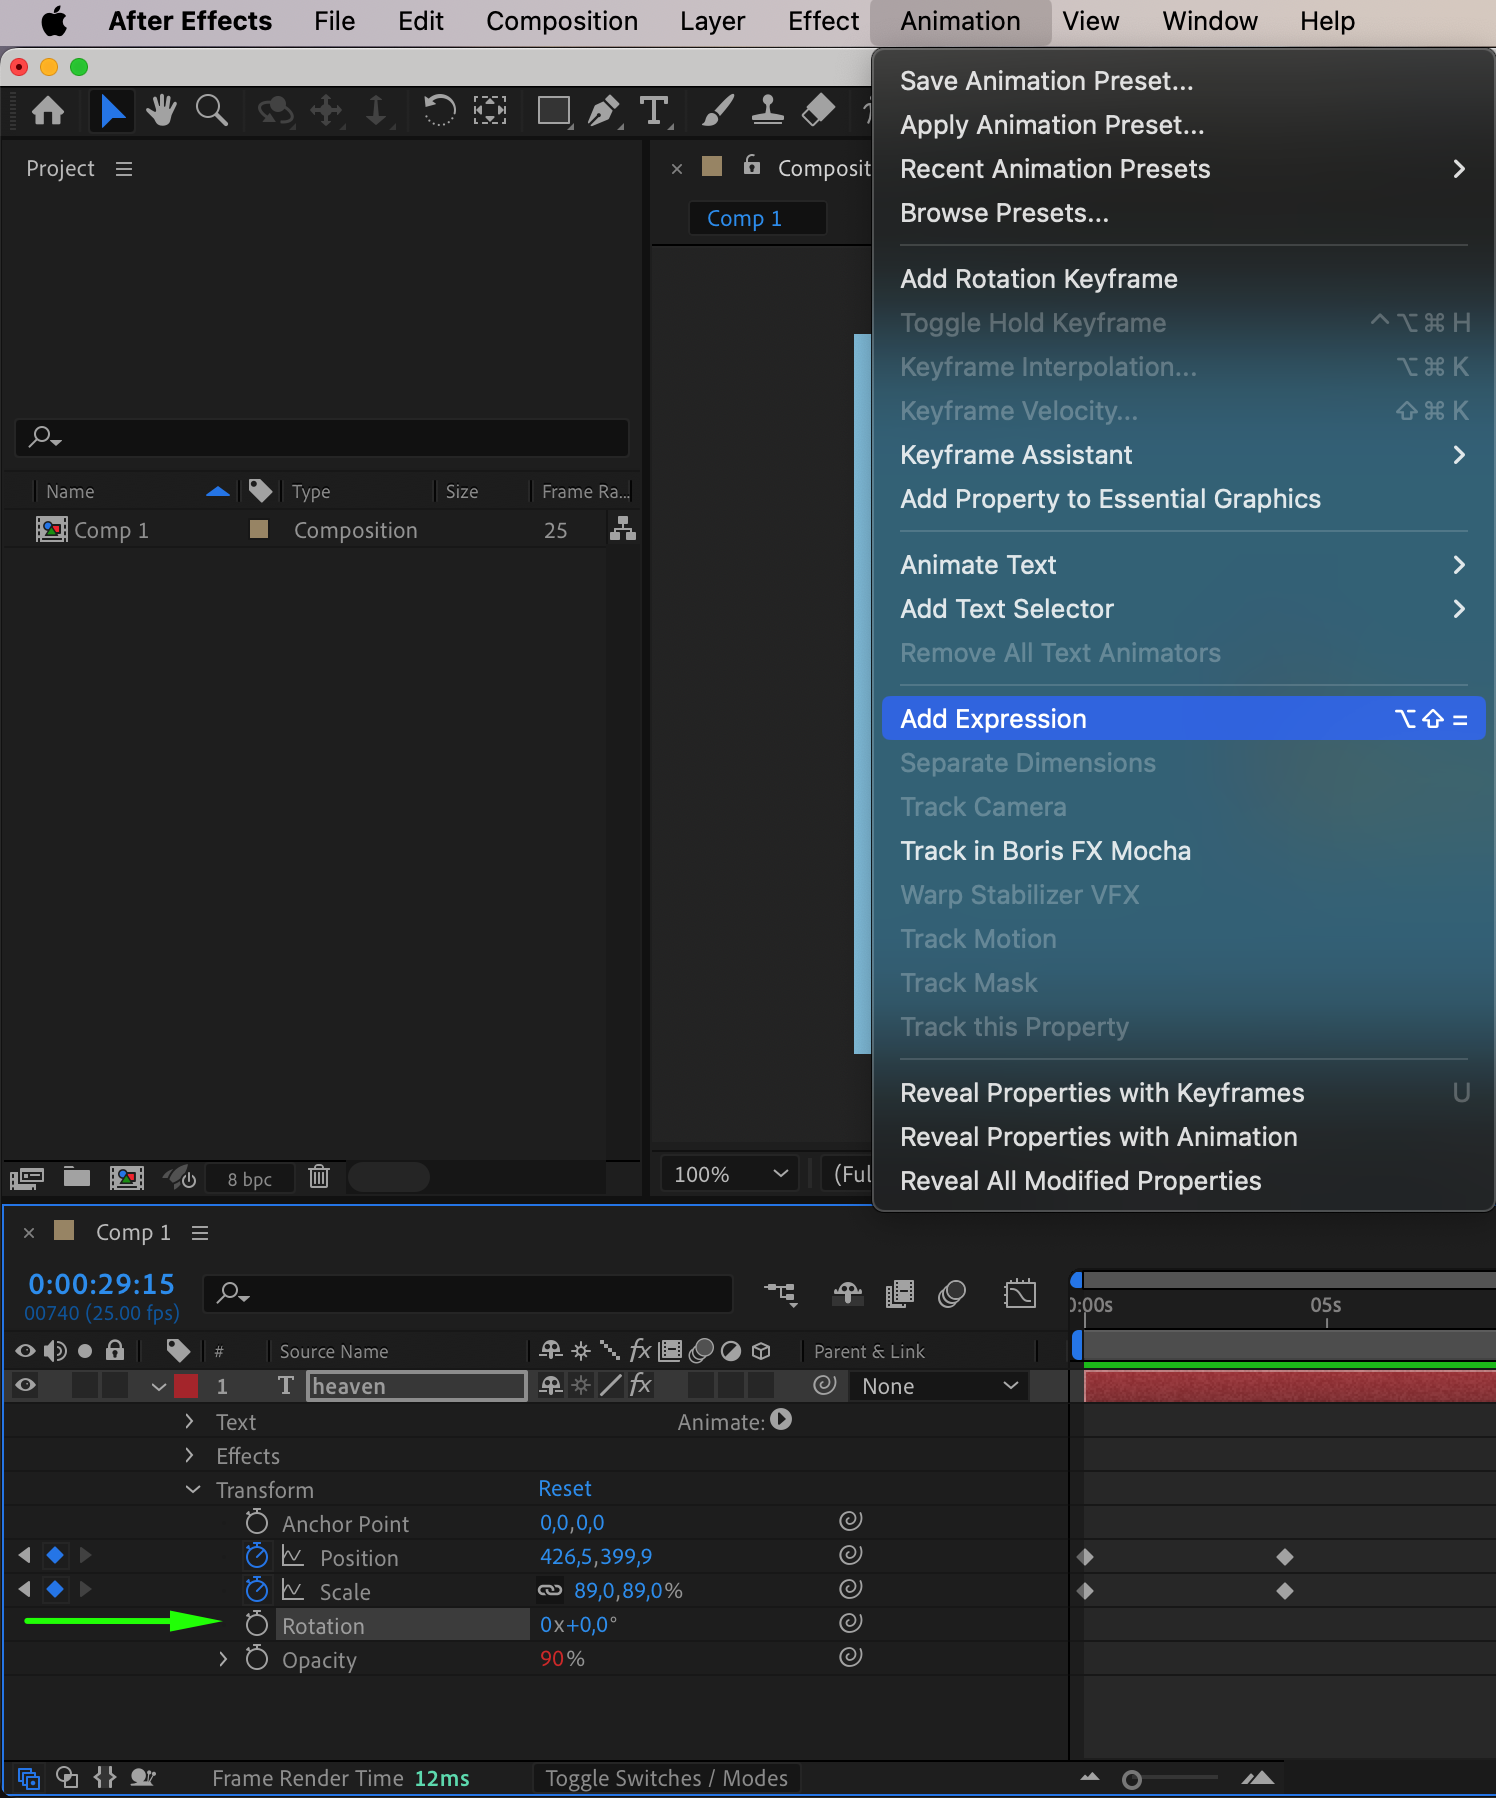
 Step 7: Fine-Tune and Preview the Animation
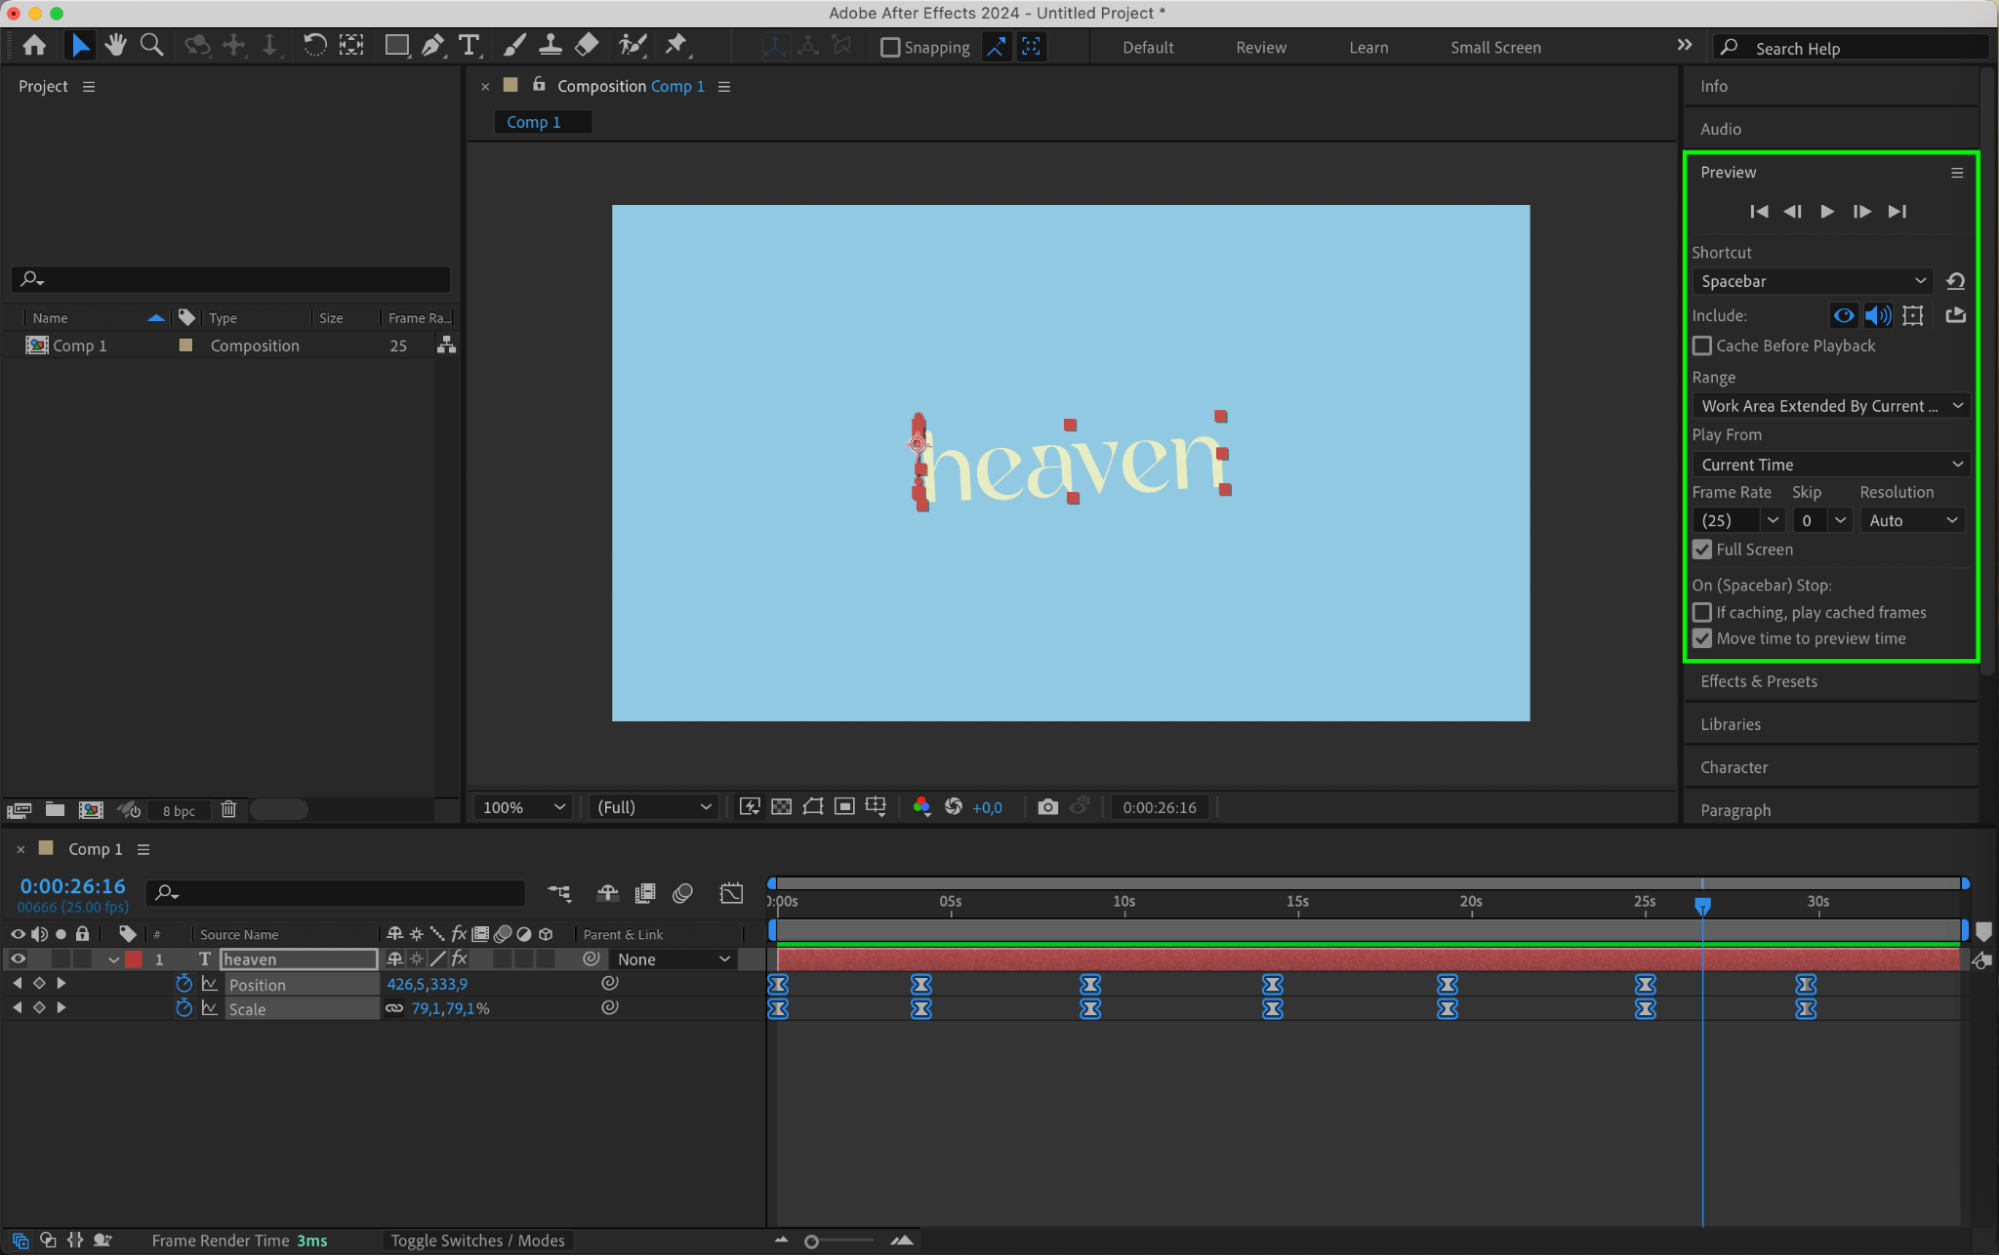
Refine your text animation by using the Graph Editor to adjust the timing and easing of your keyframes. The Graph Editor gives you precise control over the animation’s speed and acceleration. Additionally, use the Preview panel to check how the animation looks in real-time. Make further adjustments as necessary until you’re satisfied with the result.


 Step 8: Render and Export
Once you’re happy with your text animation, it’s time to render and export your video. Select Composition > Add to Render Queue, adjust the output settings, and click on Render to start the rendering process. After Effects will generate the final video file with your animated text.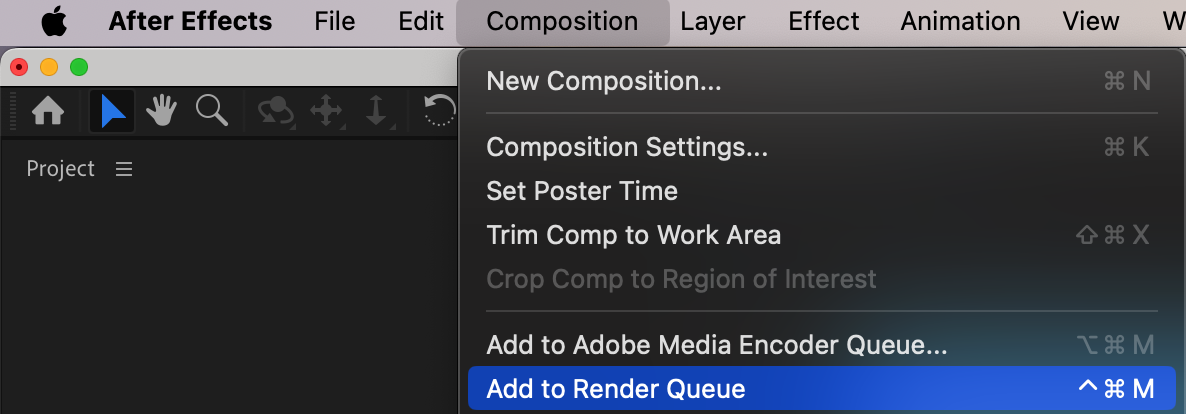
 Conclusion
By following these step-by-step instructions, you can create stunning and captivating text animations in After Effects. With practice and experimentation, you’ll explore even more advanced techniques and achieve unique effects. So go ahead, unleash your creativity, and bring your text to life in After Effects!


