Step-by-Step Guide to Adding Lens Flare in After Effects
Getting Started with Lens Flare Effects in After Effects
Adding lens flare effects to your videos can instantly enhance the visual appeal and create a cinematic look. In this step-by-step guide, we will explore various techniques and tools to help you achieve professional-looking results in After Effects.
Step 1: Import Your Video
Start by importing your video file into After Effects by going to File > Import > File and selecting your video. Next, create a new composition and drag your video from the Project panel to the Timeline panel.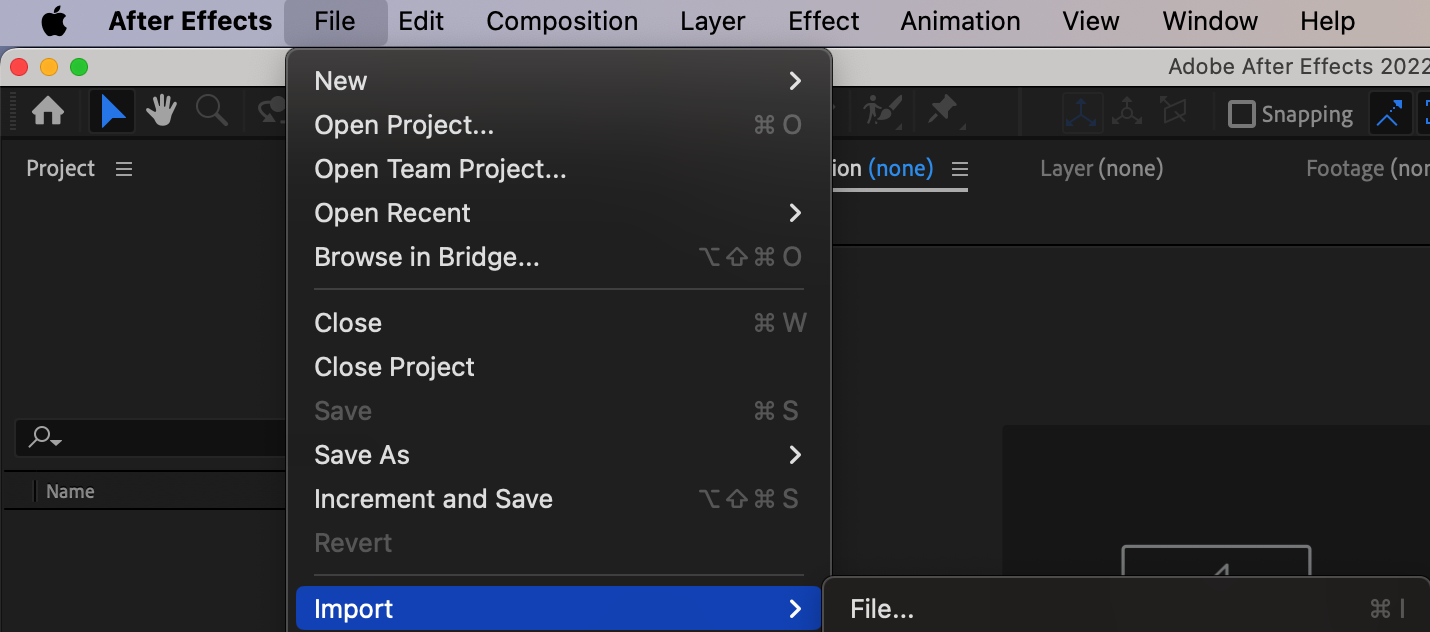
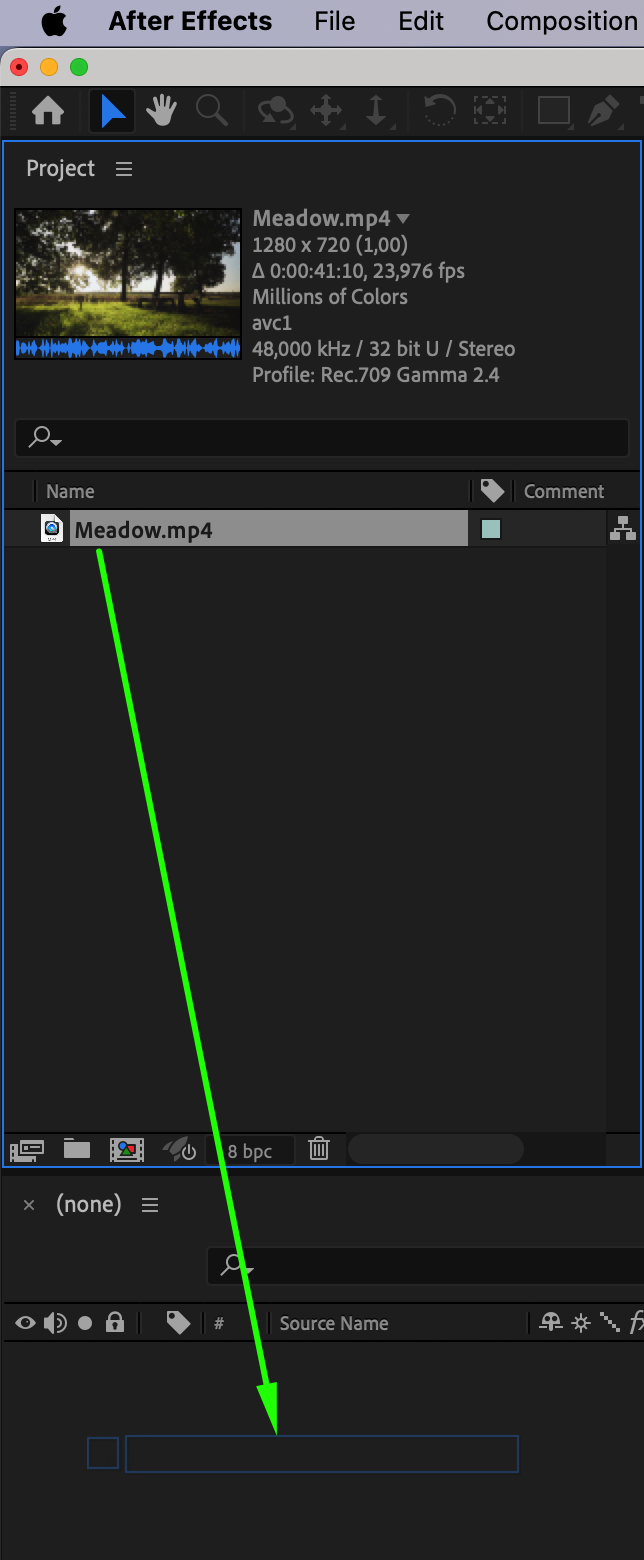 Step 2: Apply the Lens Flare Effect
Get 10% off when you subscribe to our newsletter

To add a lens flare effect, go to the “Effects & Presets” panel and search for the “Lens Flare” effect. Drag and drop this effect onto your footage layer in the composition.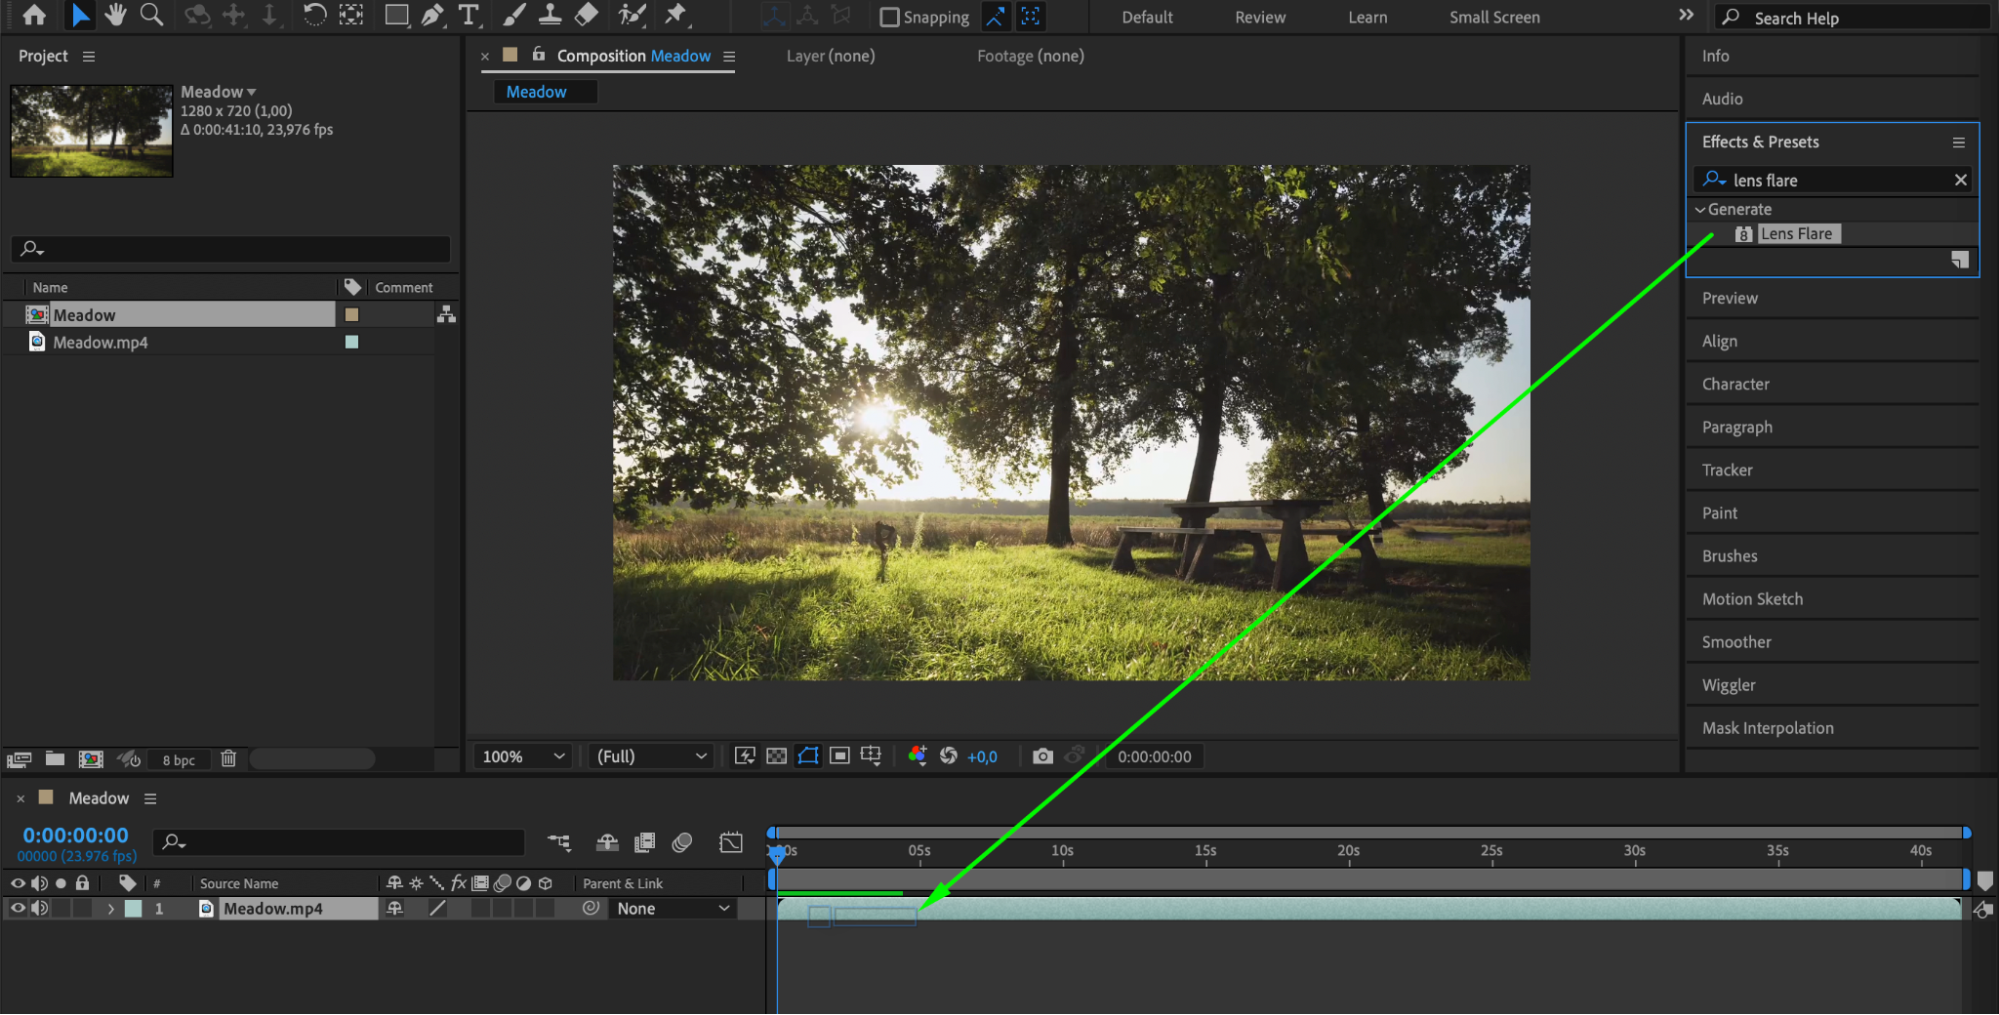 Step 3: Customize the Lens Flare
Customize the lens flare by adjusting parameters such as Flare Center, Flare Brightness, Lens Type, and Blend With Original in the “Effects Controls” panel. Play around with these settings until you achieve the desired look and mood for your video.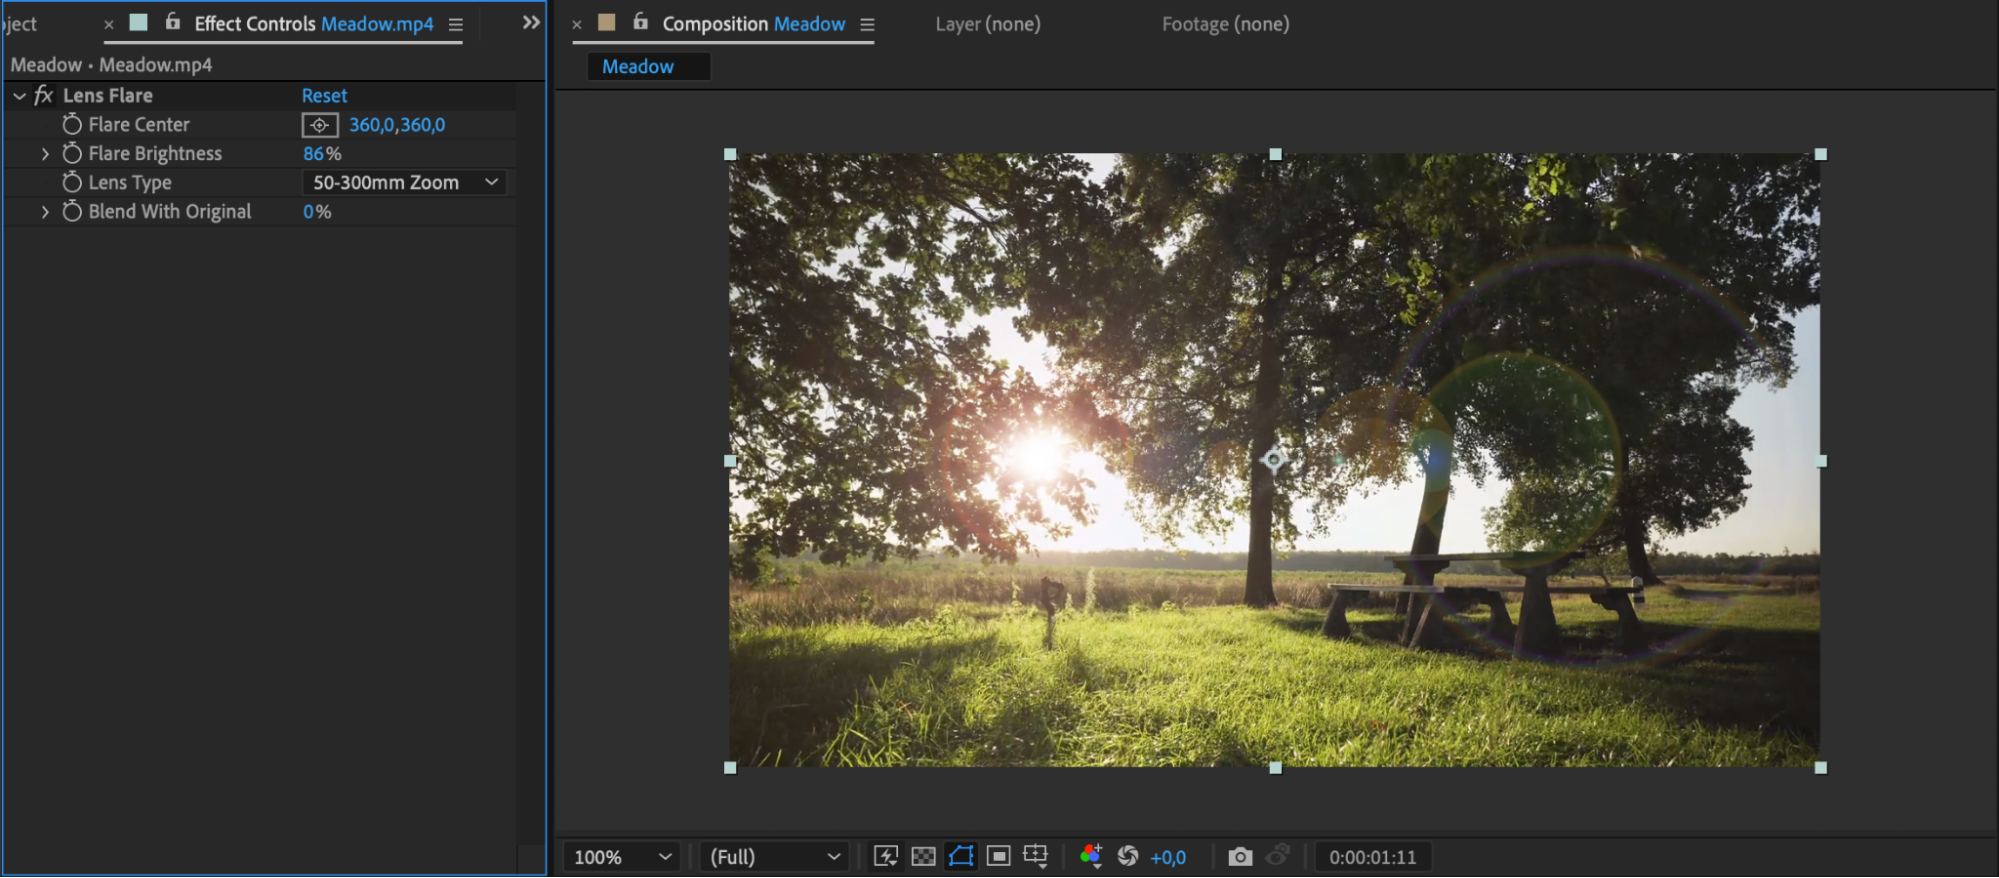 Step 4: Position and Track the Lens Flare
Get 10% off when you subscribe to our newsletter

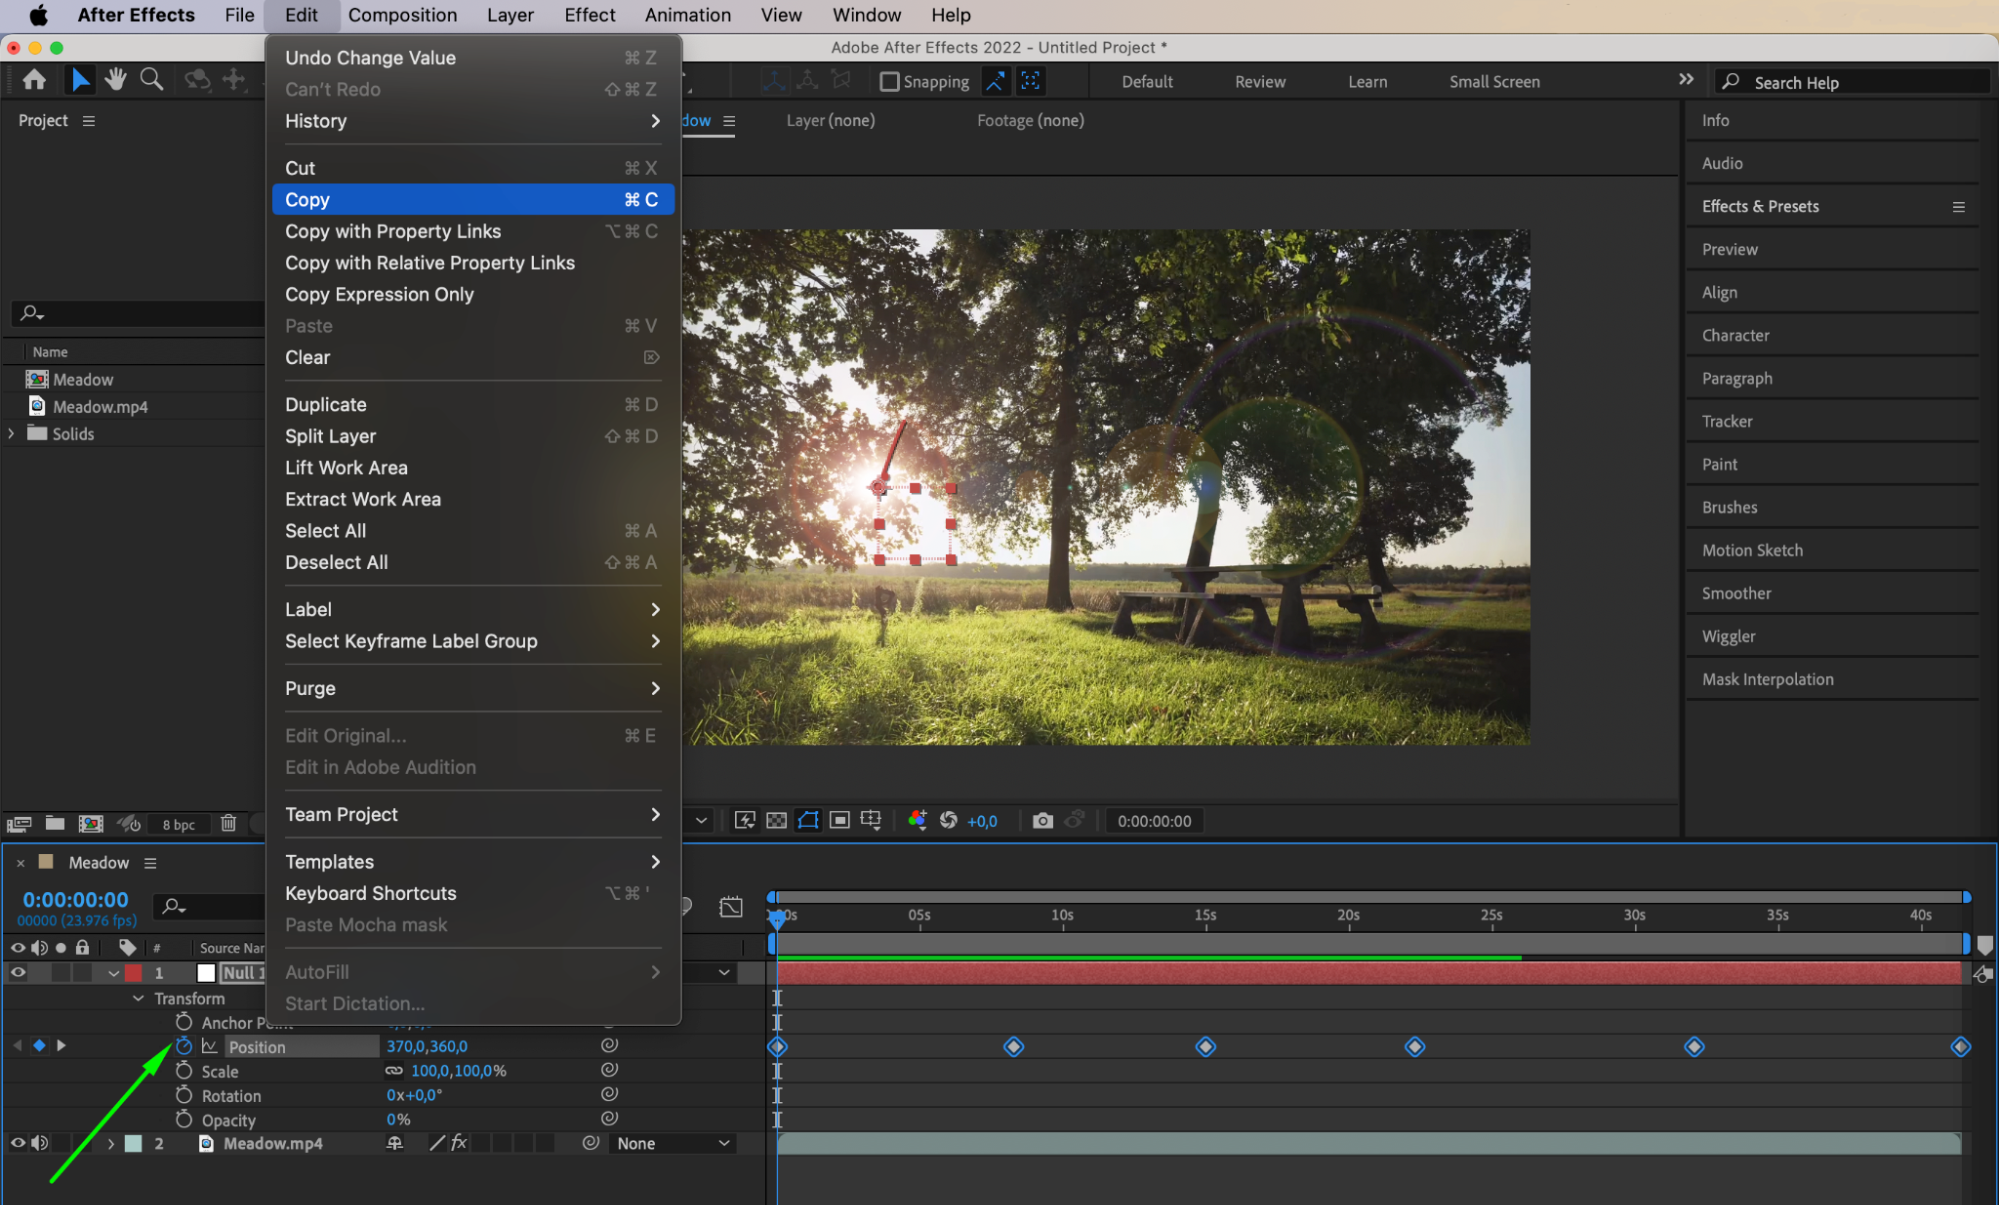
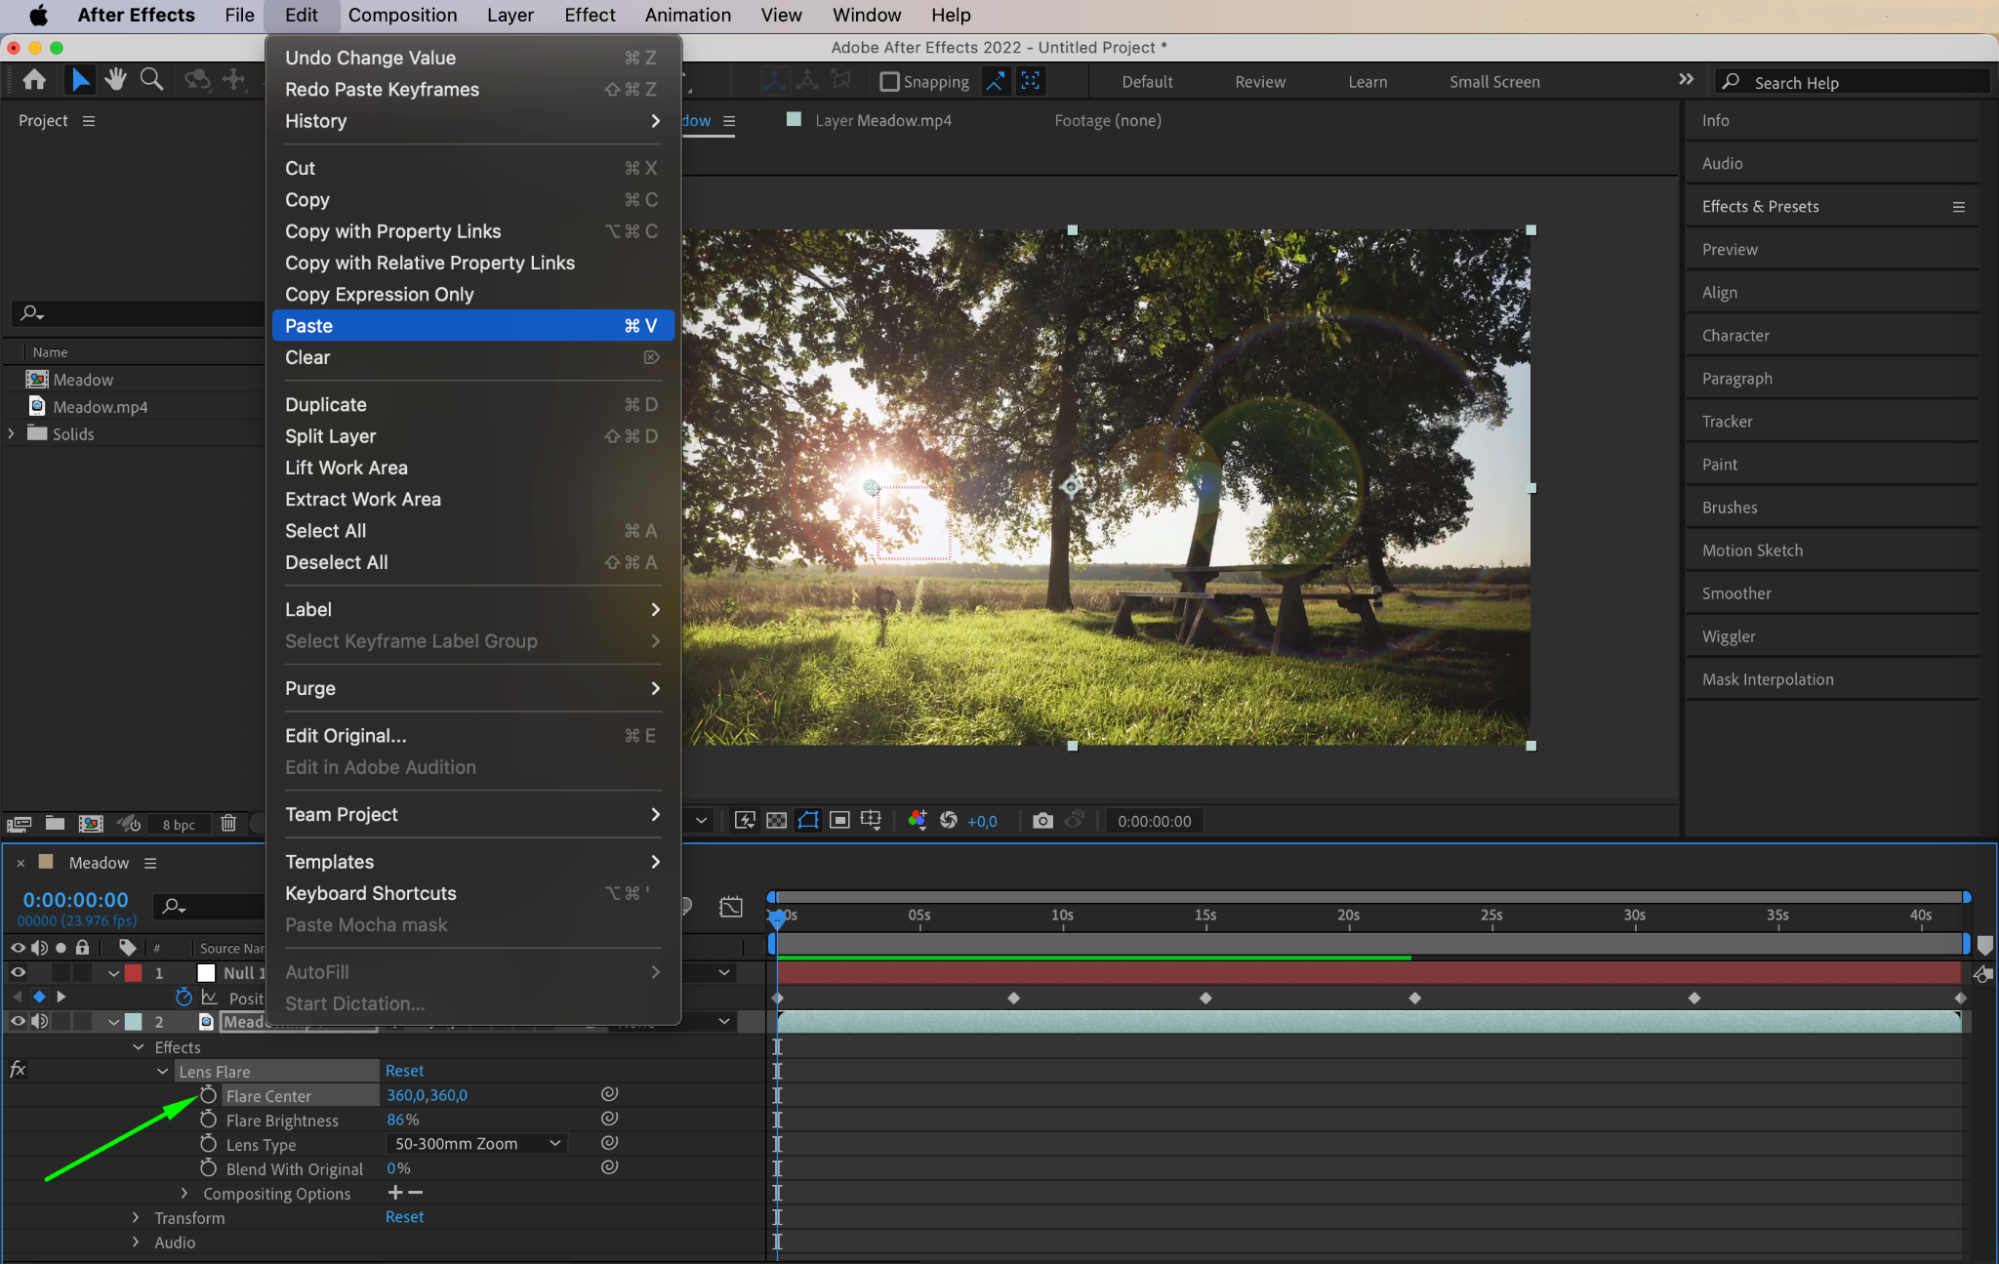
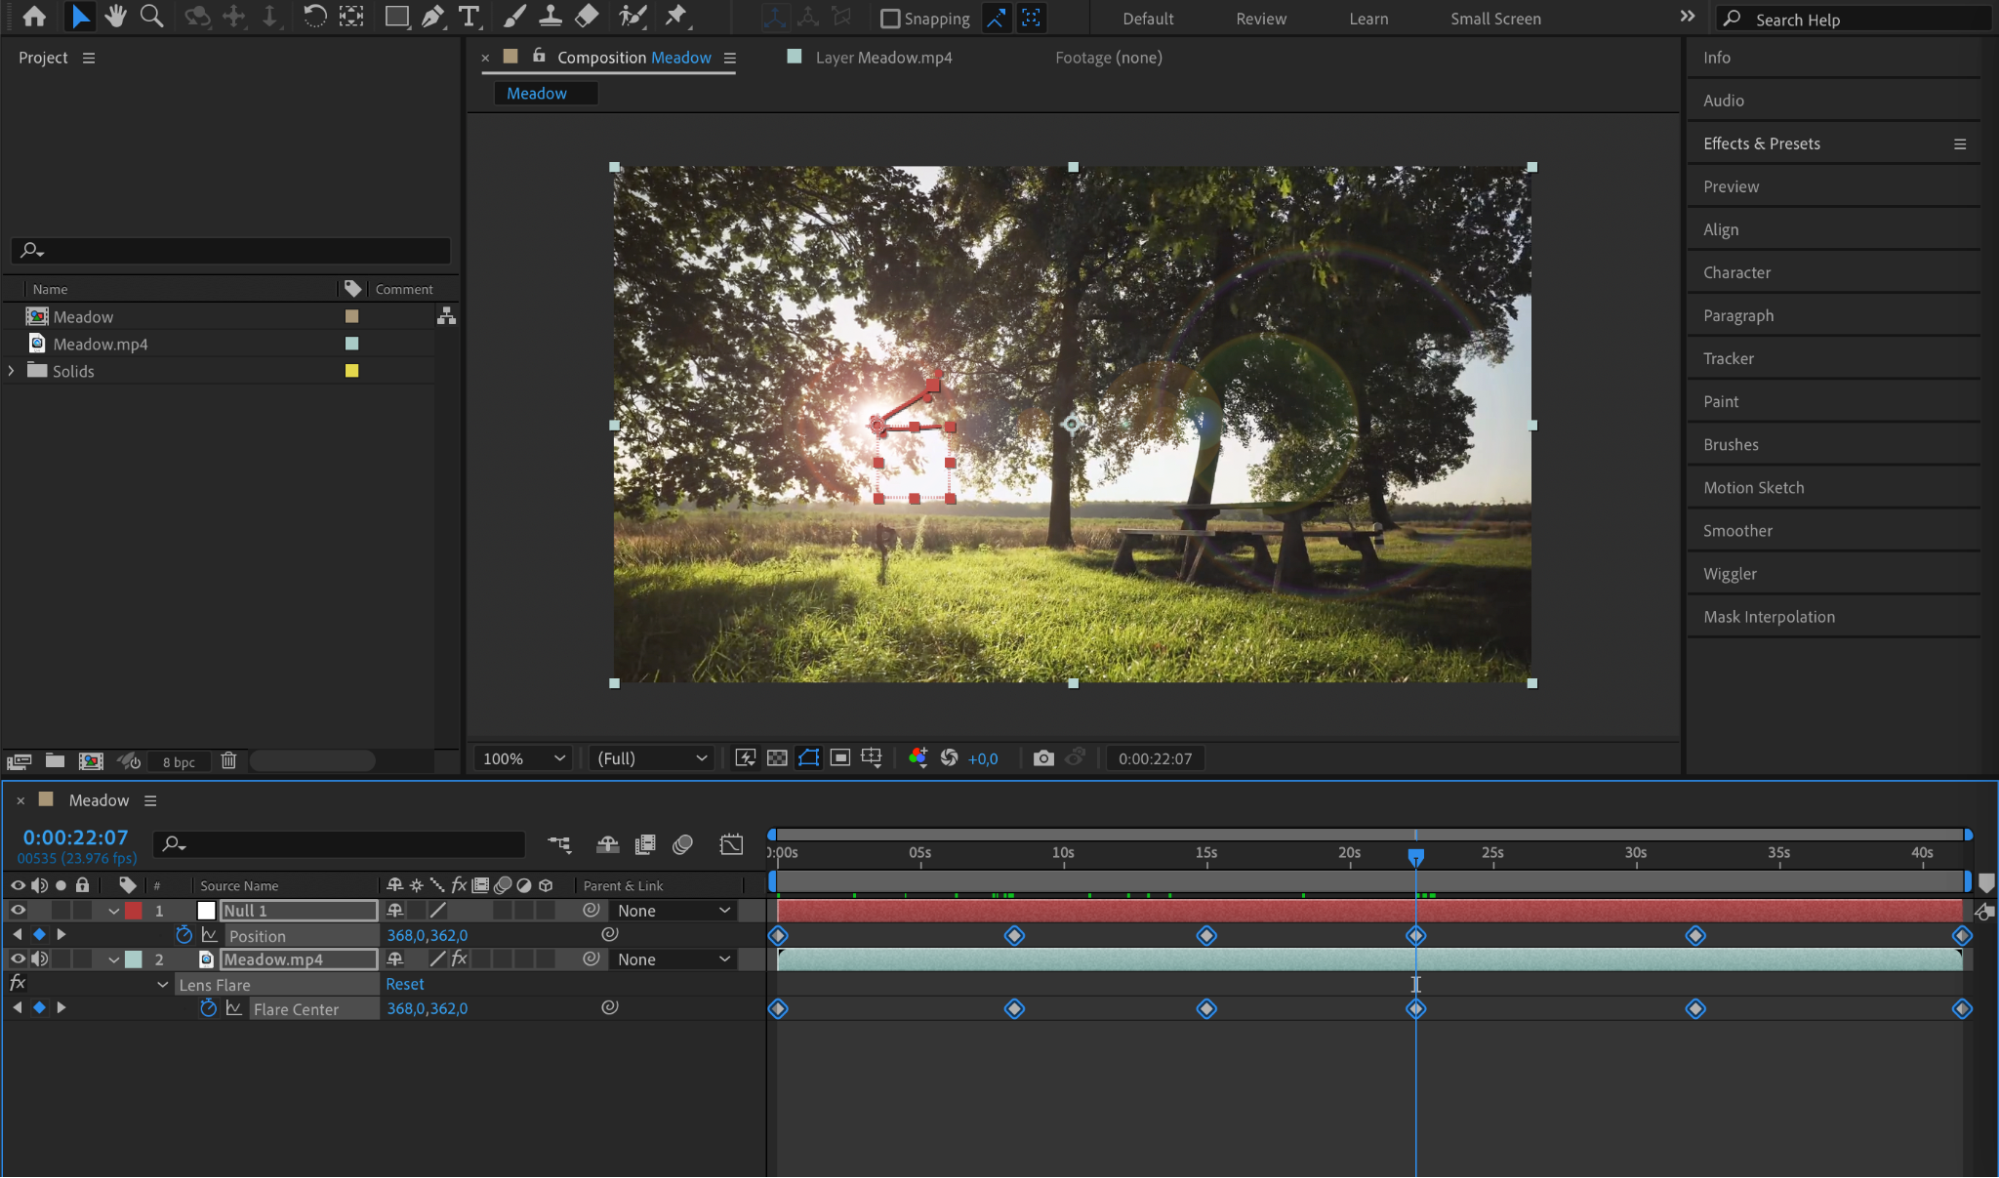
For a realistic effect, position and track the lens flare to your footage using After Effects’ tracking tools. Use the Motion Tracking feature or the Null Object method to ensure that the lens flare moves in sync with your footage.
 Step 5: Preview and Render
Get 10% off when you subscribe to our newsletter

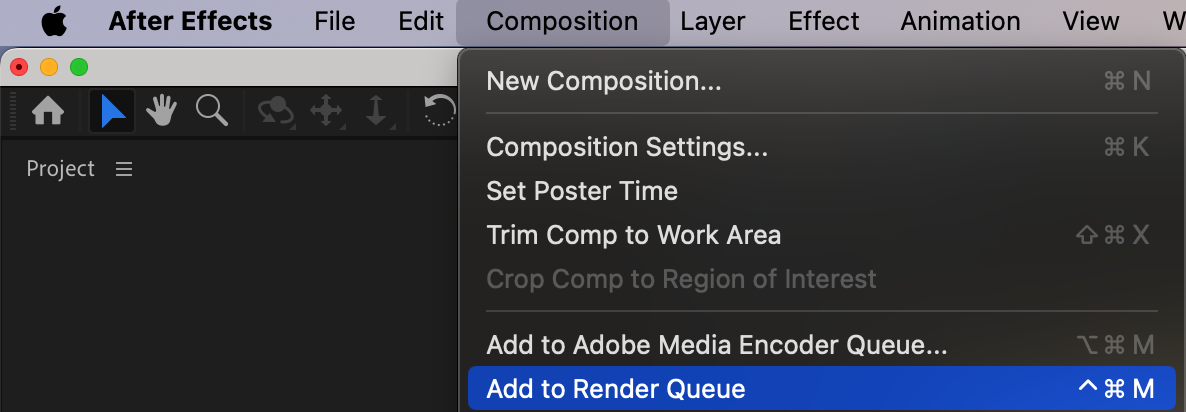
Once you are satisfied with the lens flare effect, preview it by pressing the spacebar or using the RAM Preview function. If everything looks good, it’s time to render your final video. Go to the “Composition” menu and select “Add to Render Queue.” Choose the desired output settings and click “Render.”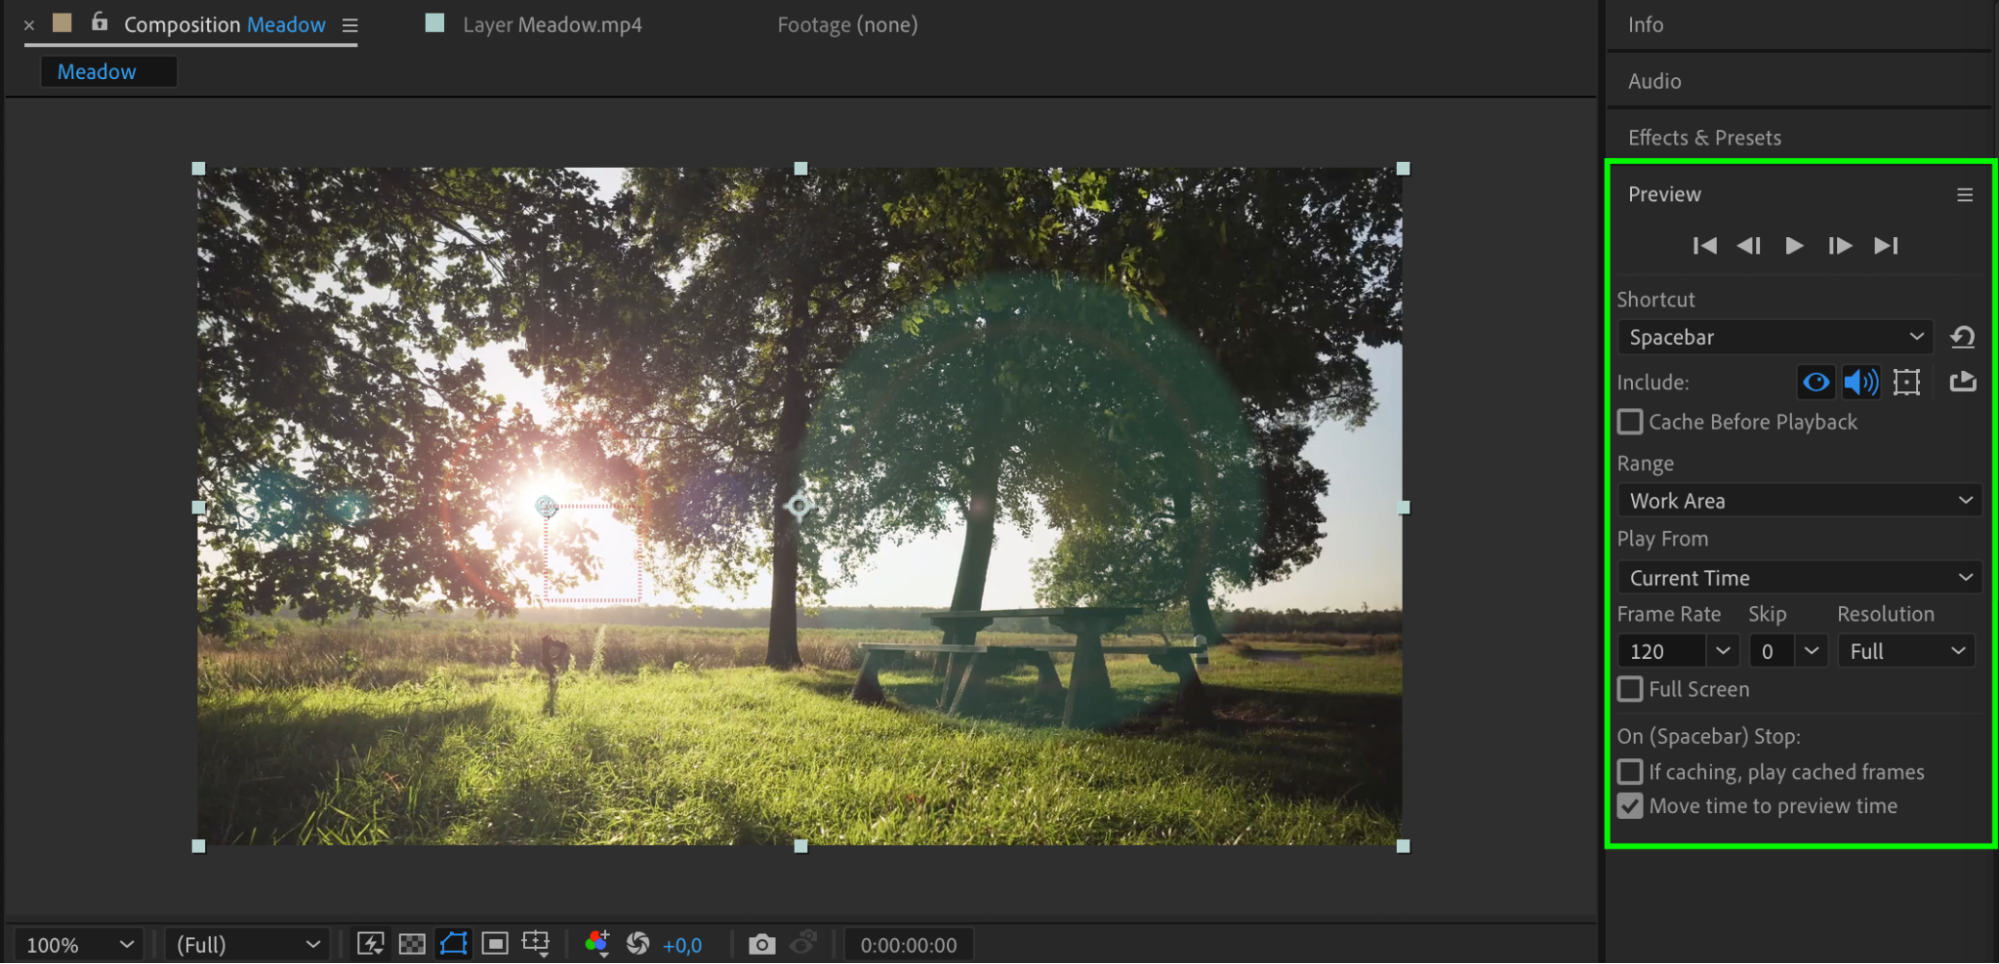
 Conclusion
Get 10% off when you subscribe to our newsletter

Congratulations! You have successfully added lens flares to your video in After Effects. Remember to practice and experiment with different settings and techniques to develop your own signature lens flare style. With time and experience, you’ll be able to add stunning lens flare effects to any footage and make your videos shine.


