Step-by-Step Guide to Adding Light Rays in After Effects
Introduction to Creating Light Rays in After Effects
Are you trying to add a touch of magic and enchantment to your videos? Light rays can be the perfect effect to achieve that. Whether you want to create a dreamy atmosphere, a mystical scene, or simply make your footage stand out, adding light rays in After Effects can take your videos to the next level.
Get 10% off when you subscribe to our newsletter

In this tutorial, we will guide you through the step-by-step process of adding light rays to your videos using Adobe After Effects. By following these simple techniques, you will be able to create realistic and visually appealing light rays that will transform your footage.
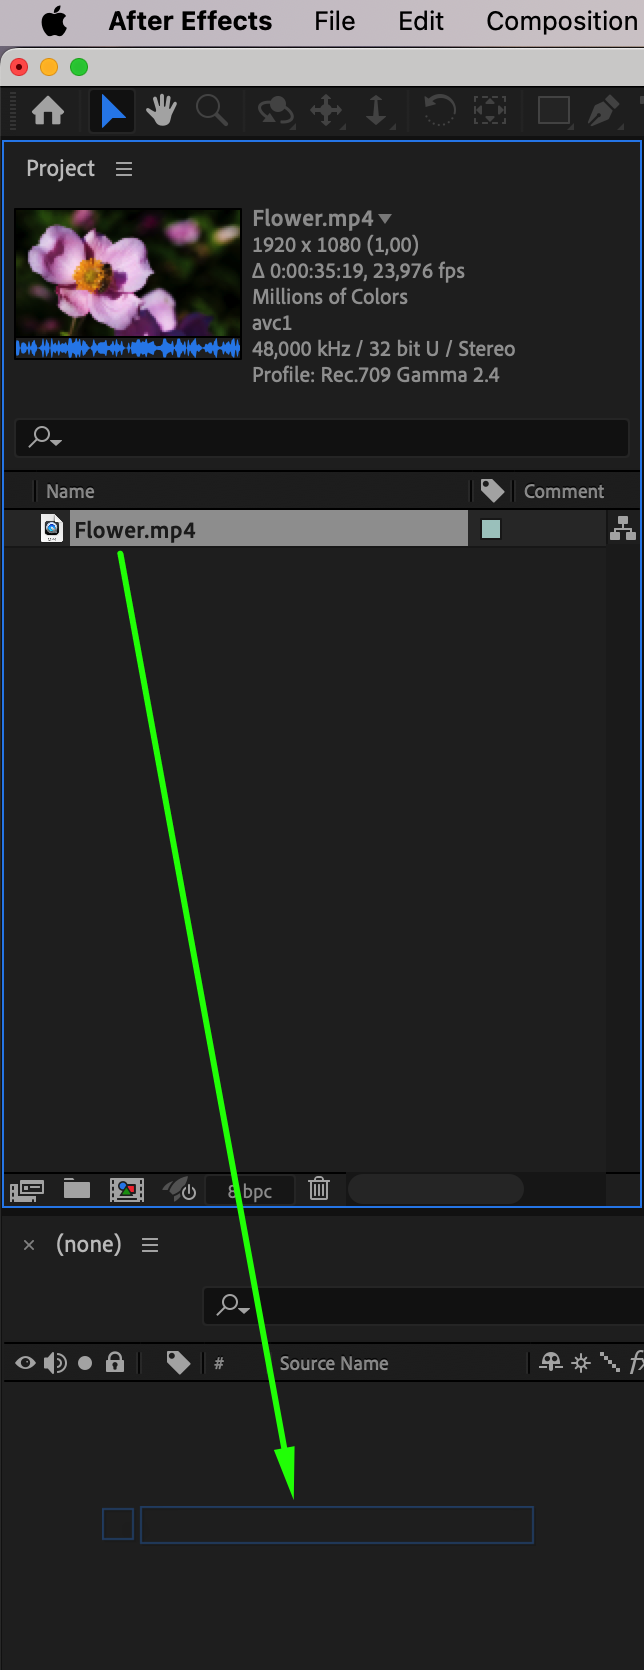
Step 1: Import Your Footage
To begin, start by importing your video footage into After Effects. You can do this by going to File, selecting Import, and then choosing the file you want to work with. Drag your file into the timeline panel.
 Step 2: Create an Adjustment Layer
Create a new adjustment layer by going to Layer, selecting New, and then choosing Adjustment Layer. Step 3: Apply the CC Light Rays Effect
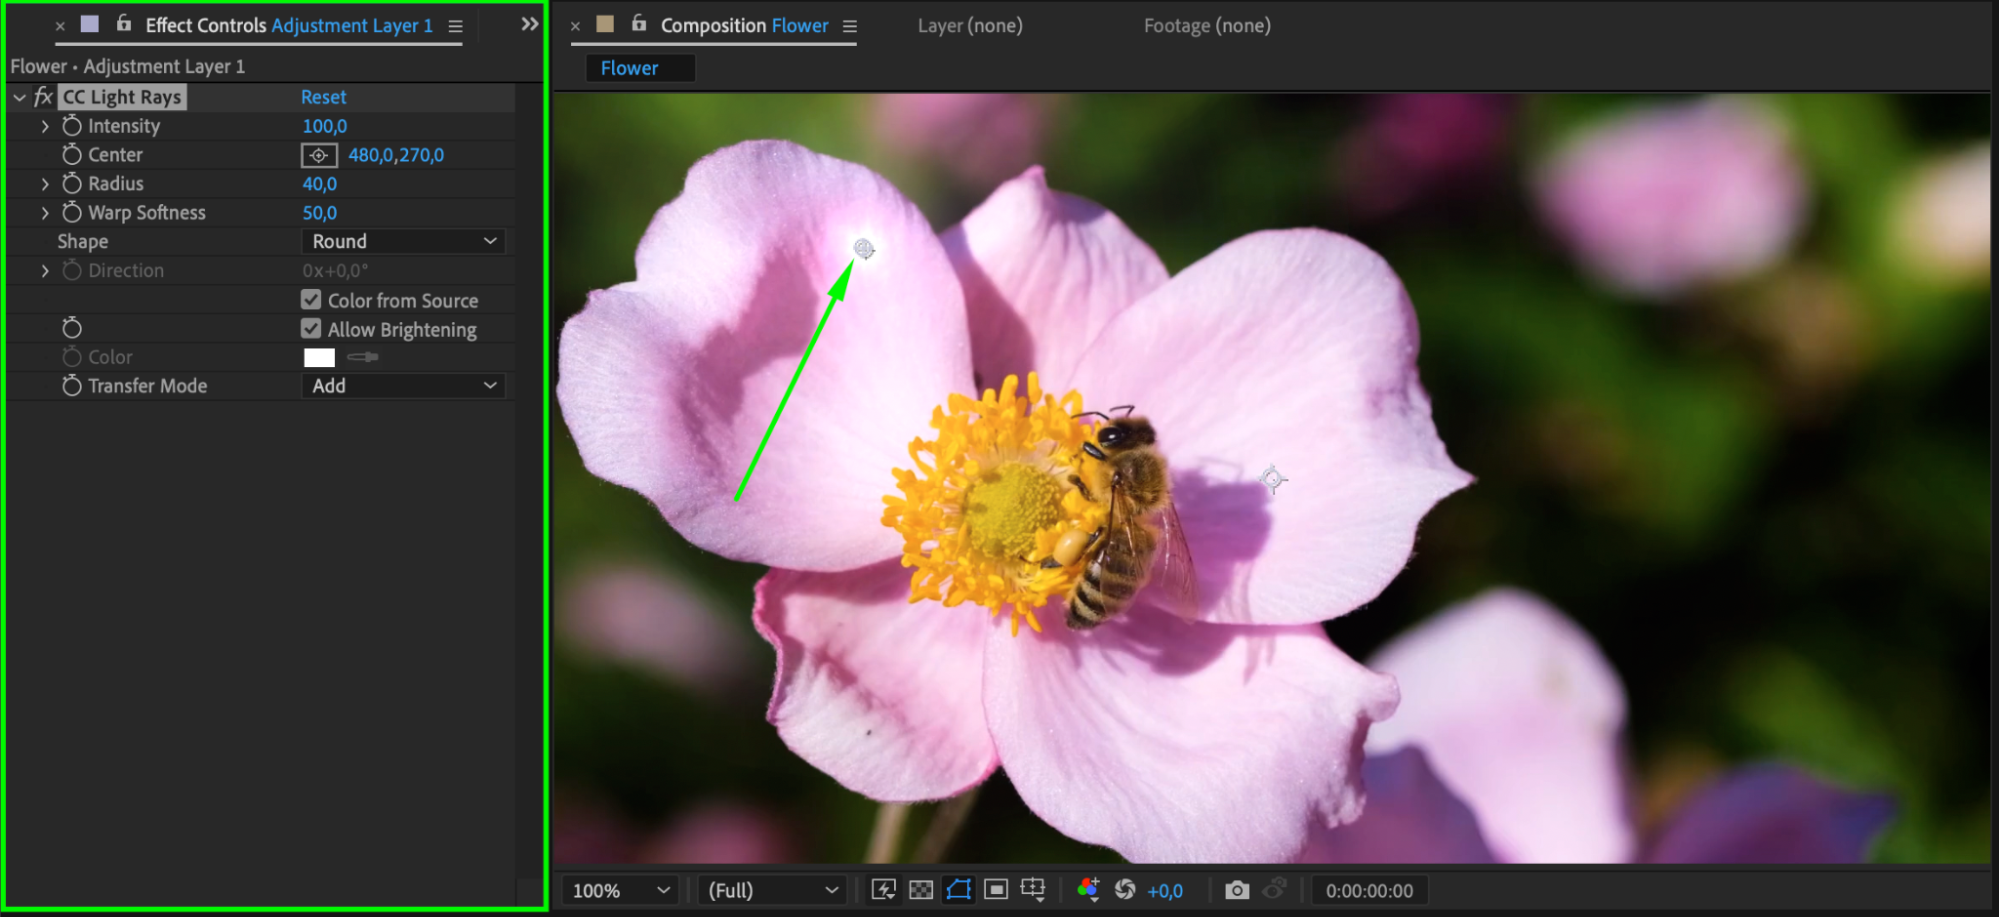
Now, select the adjustment layer and go to the Effect & Preset panel. Choose CC Light Rays. This effect will generate the light rays in your composition. Adjust the settings to your liking, controlling the intensity, radius, warp softness, and color of the rays to achieve the desired effect.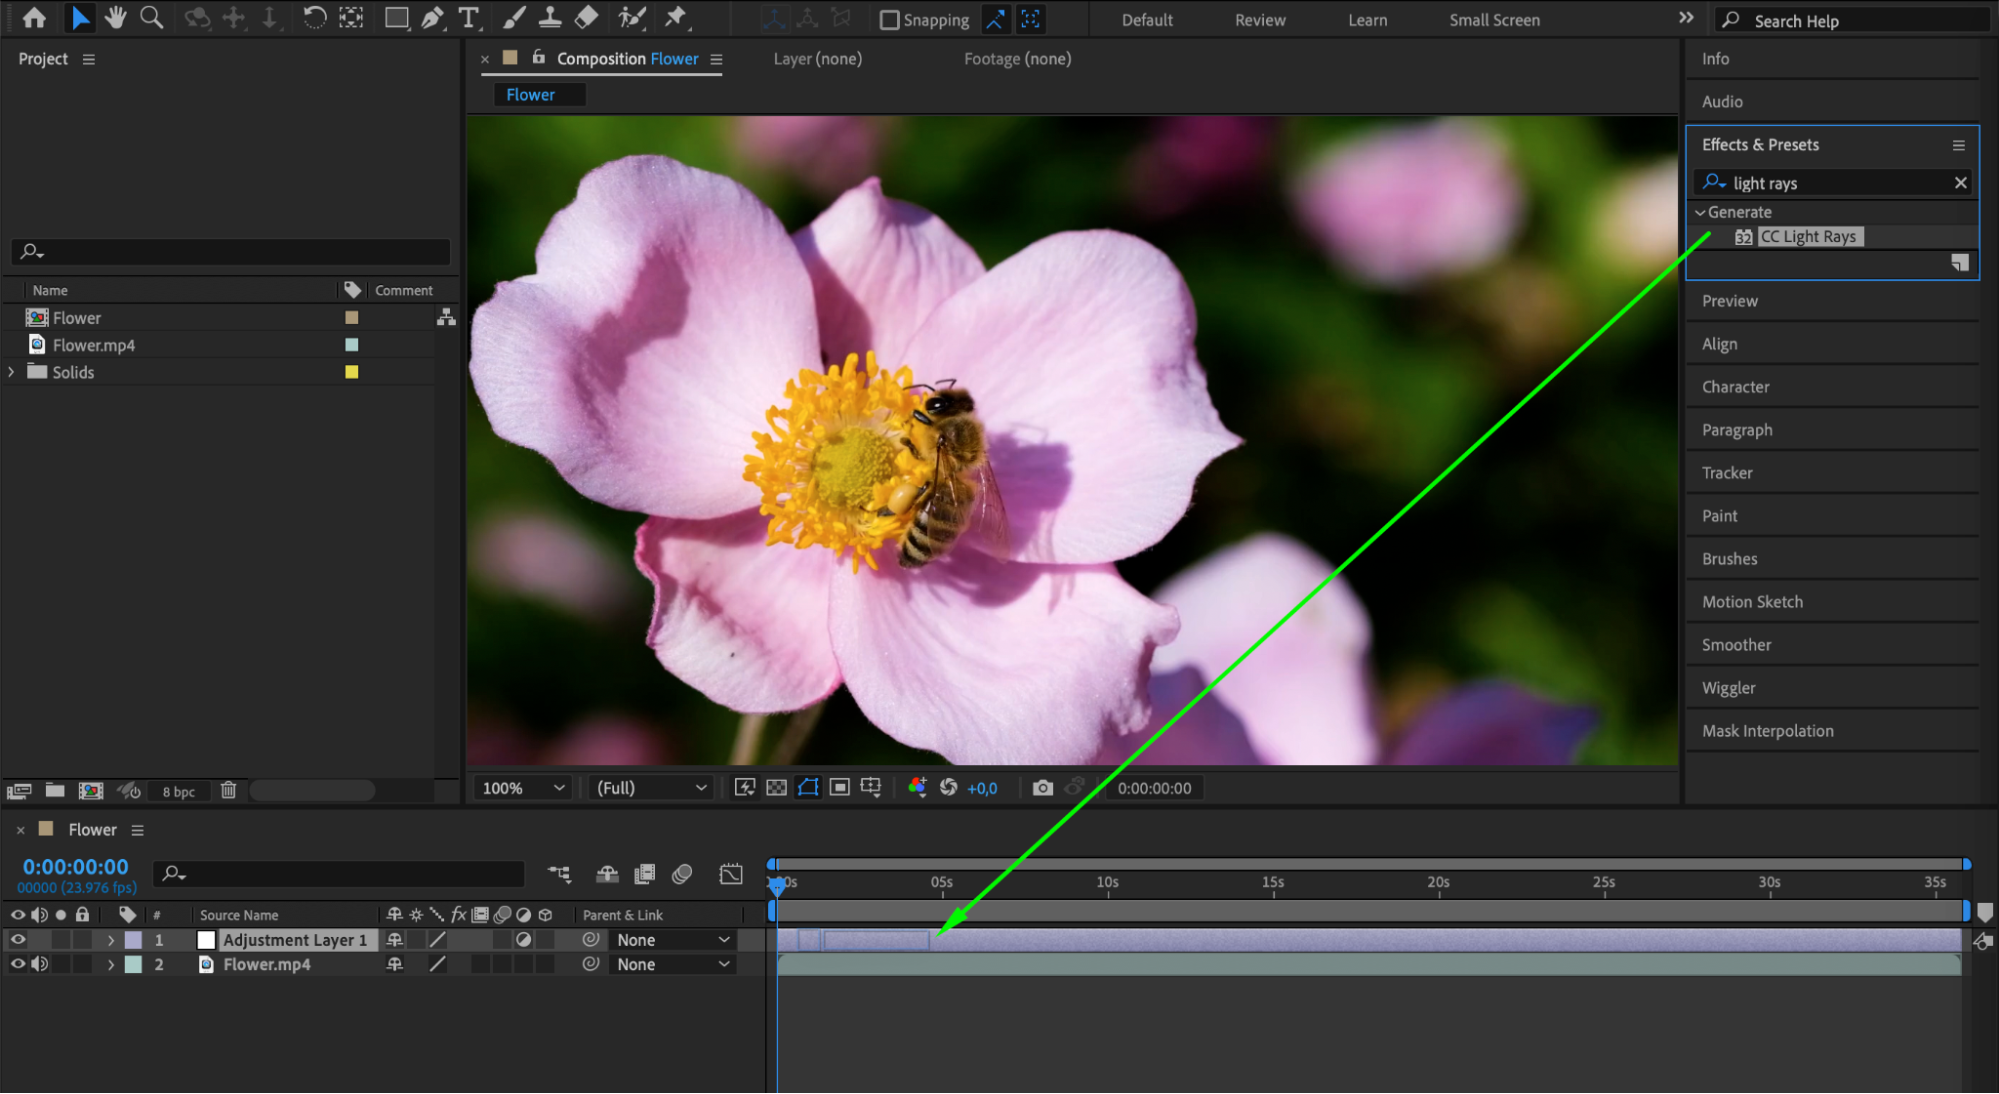
 Step 4: Mask the Light Rays
To make the light rays appear more realistic, we need to mask them to match the natural light sources in your video. Apply a mask to the adjustment layer, covering the areas where the light rays should be visible. You can use the Pen tool or the Mask tool to create and manipulate the mask shape.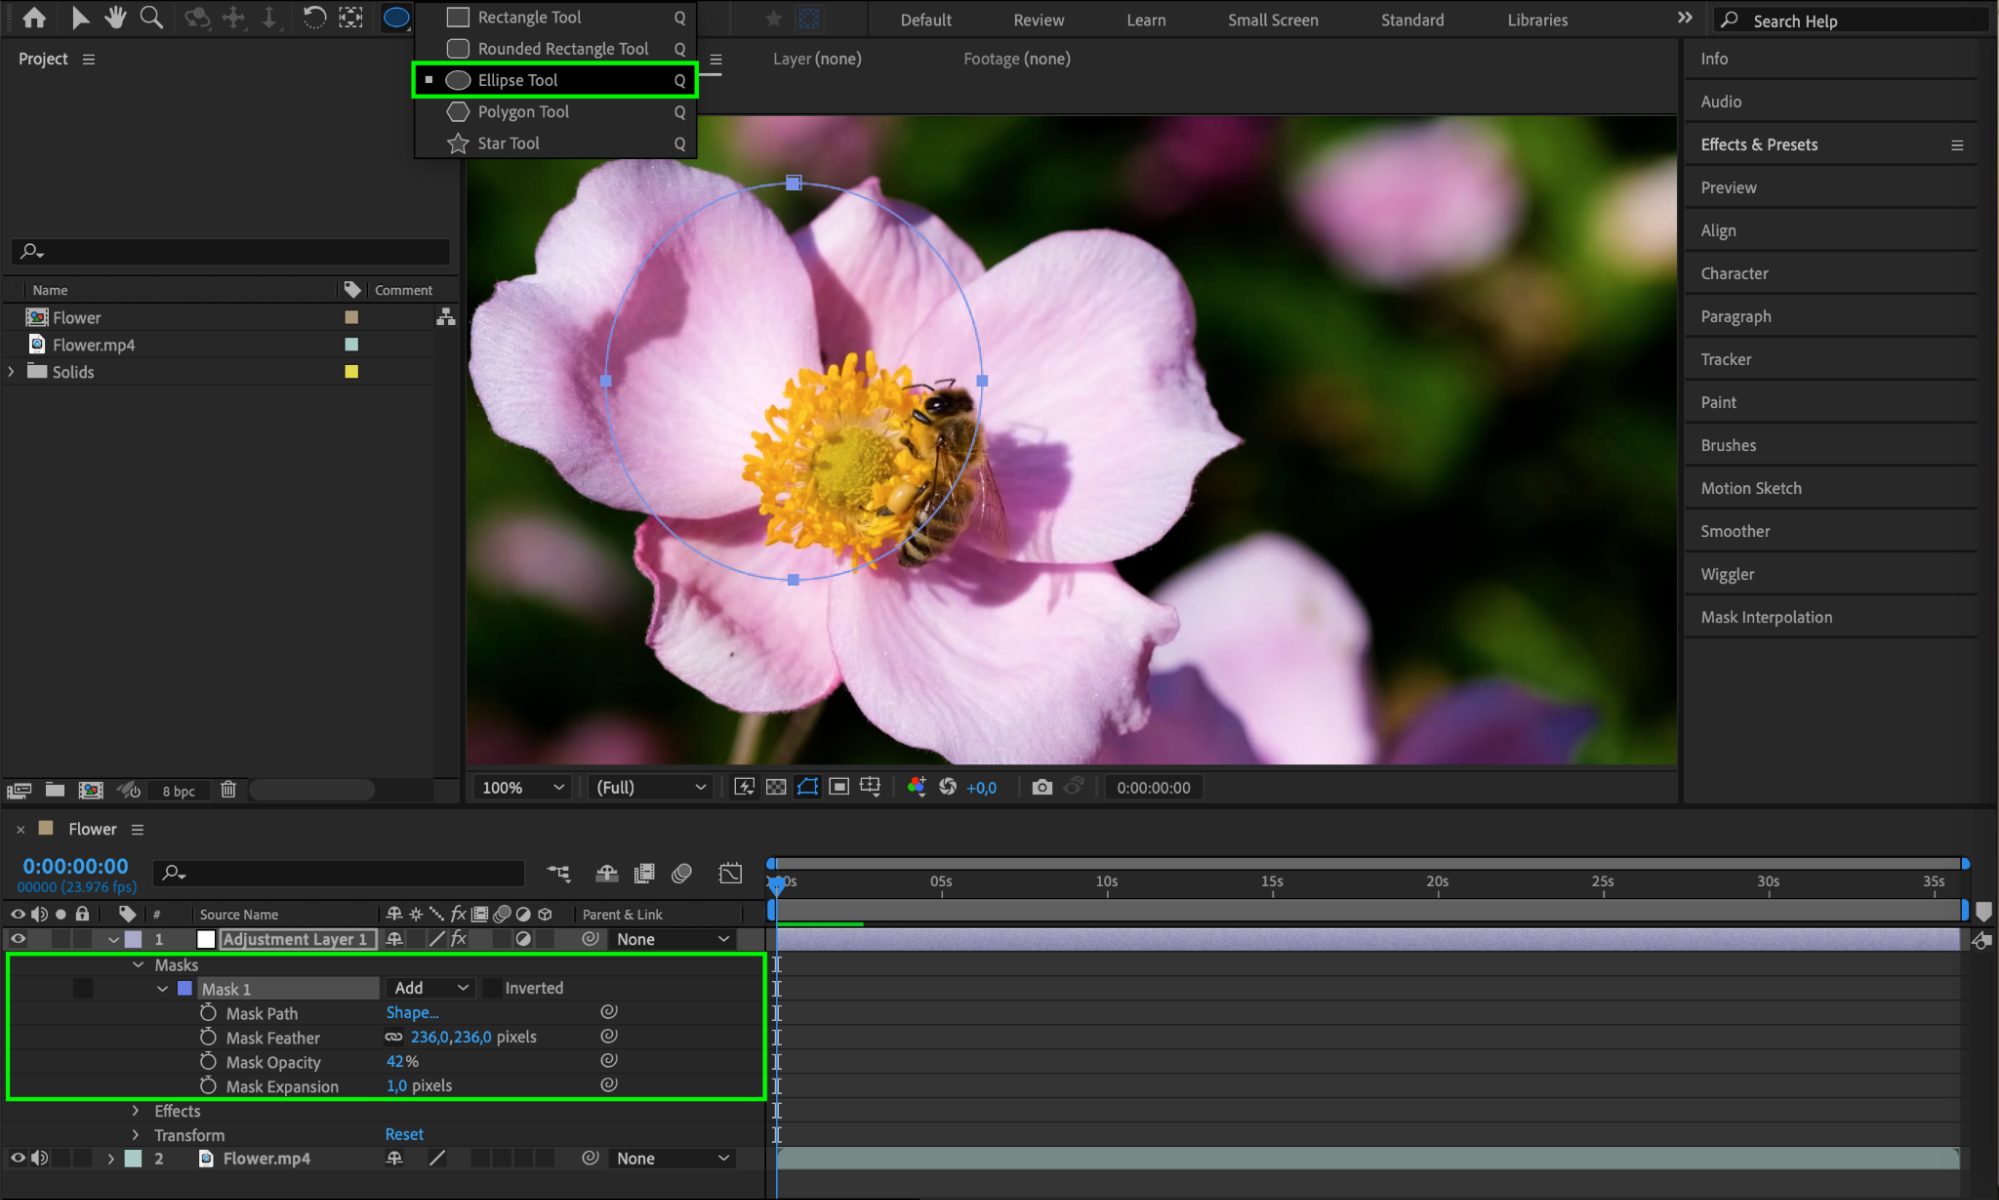 Step 5: Adjust Opacity and Blend Modes
Get 10% off when you subscribe to our newsletter

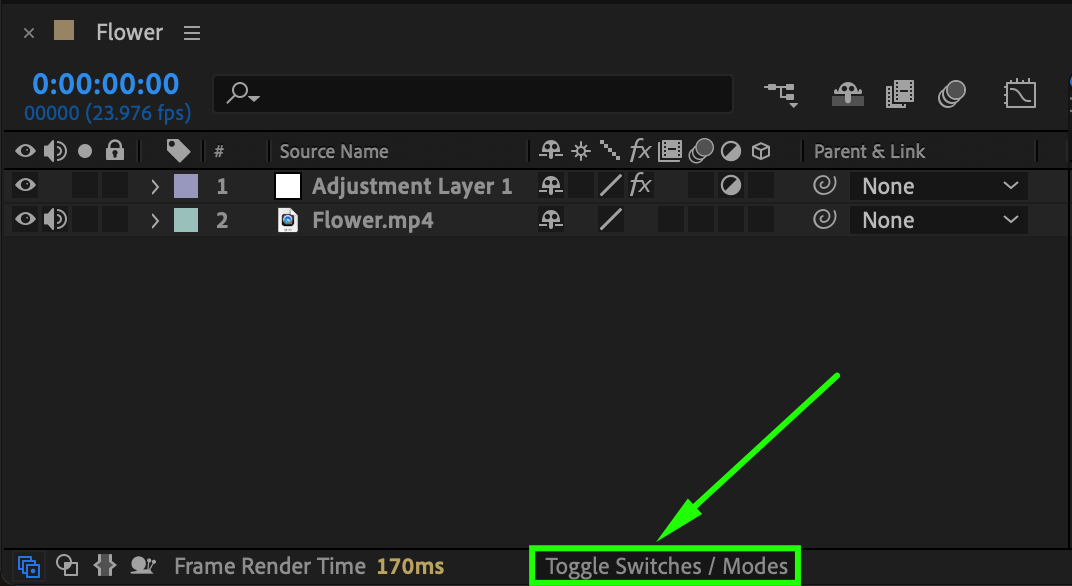
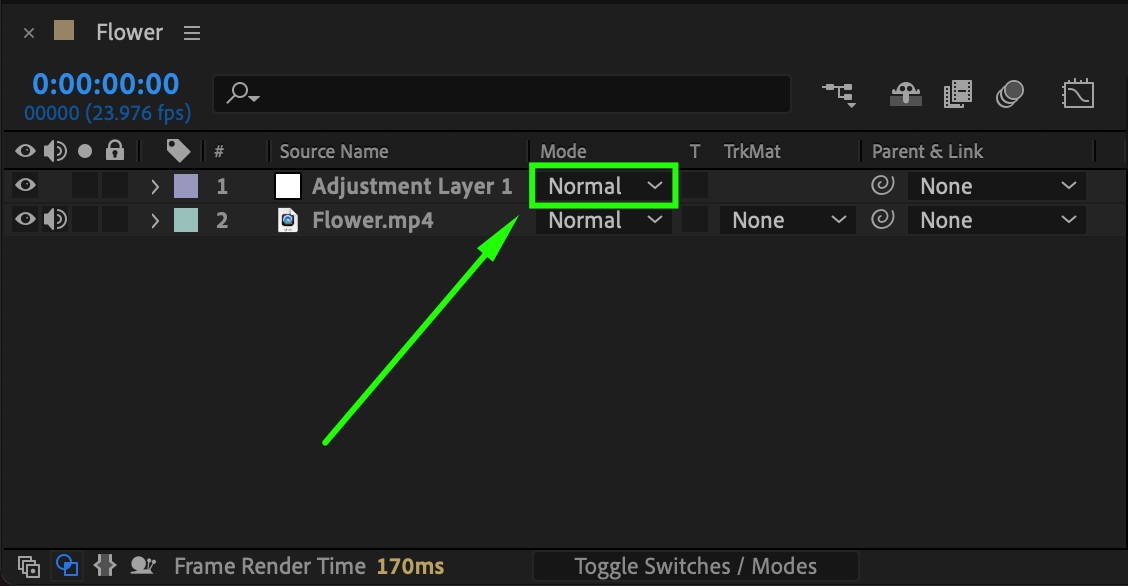
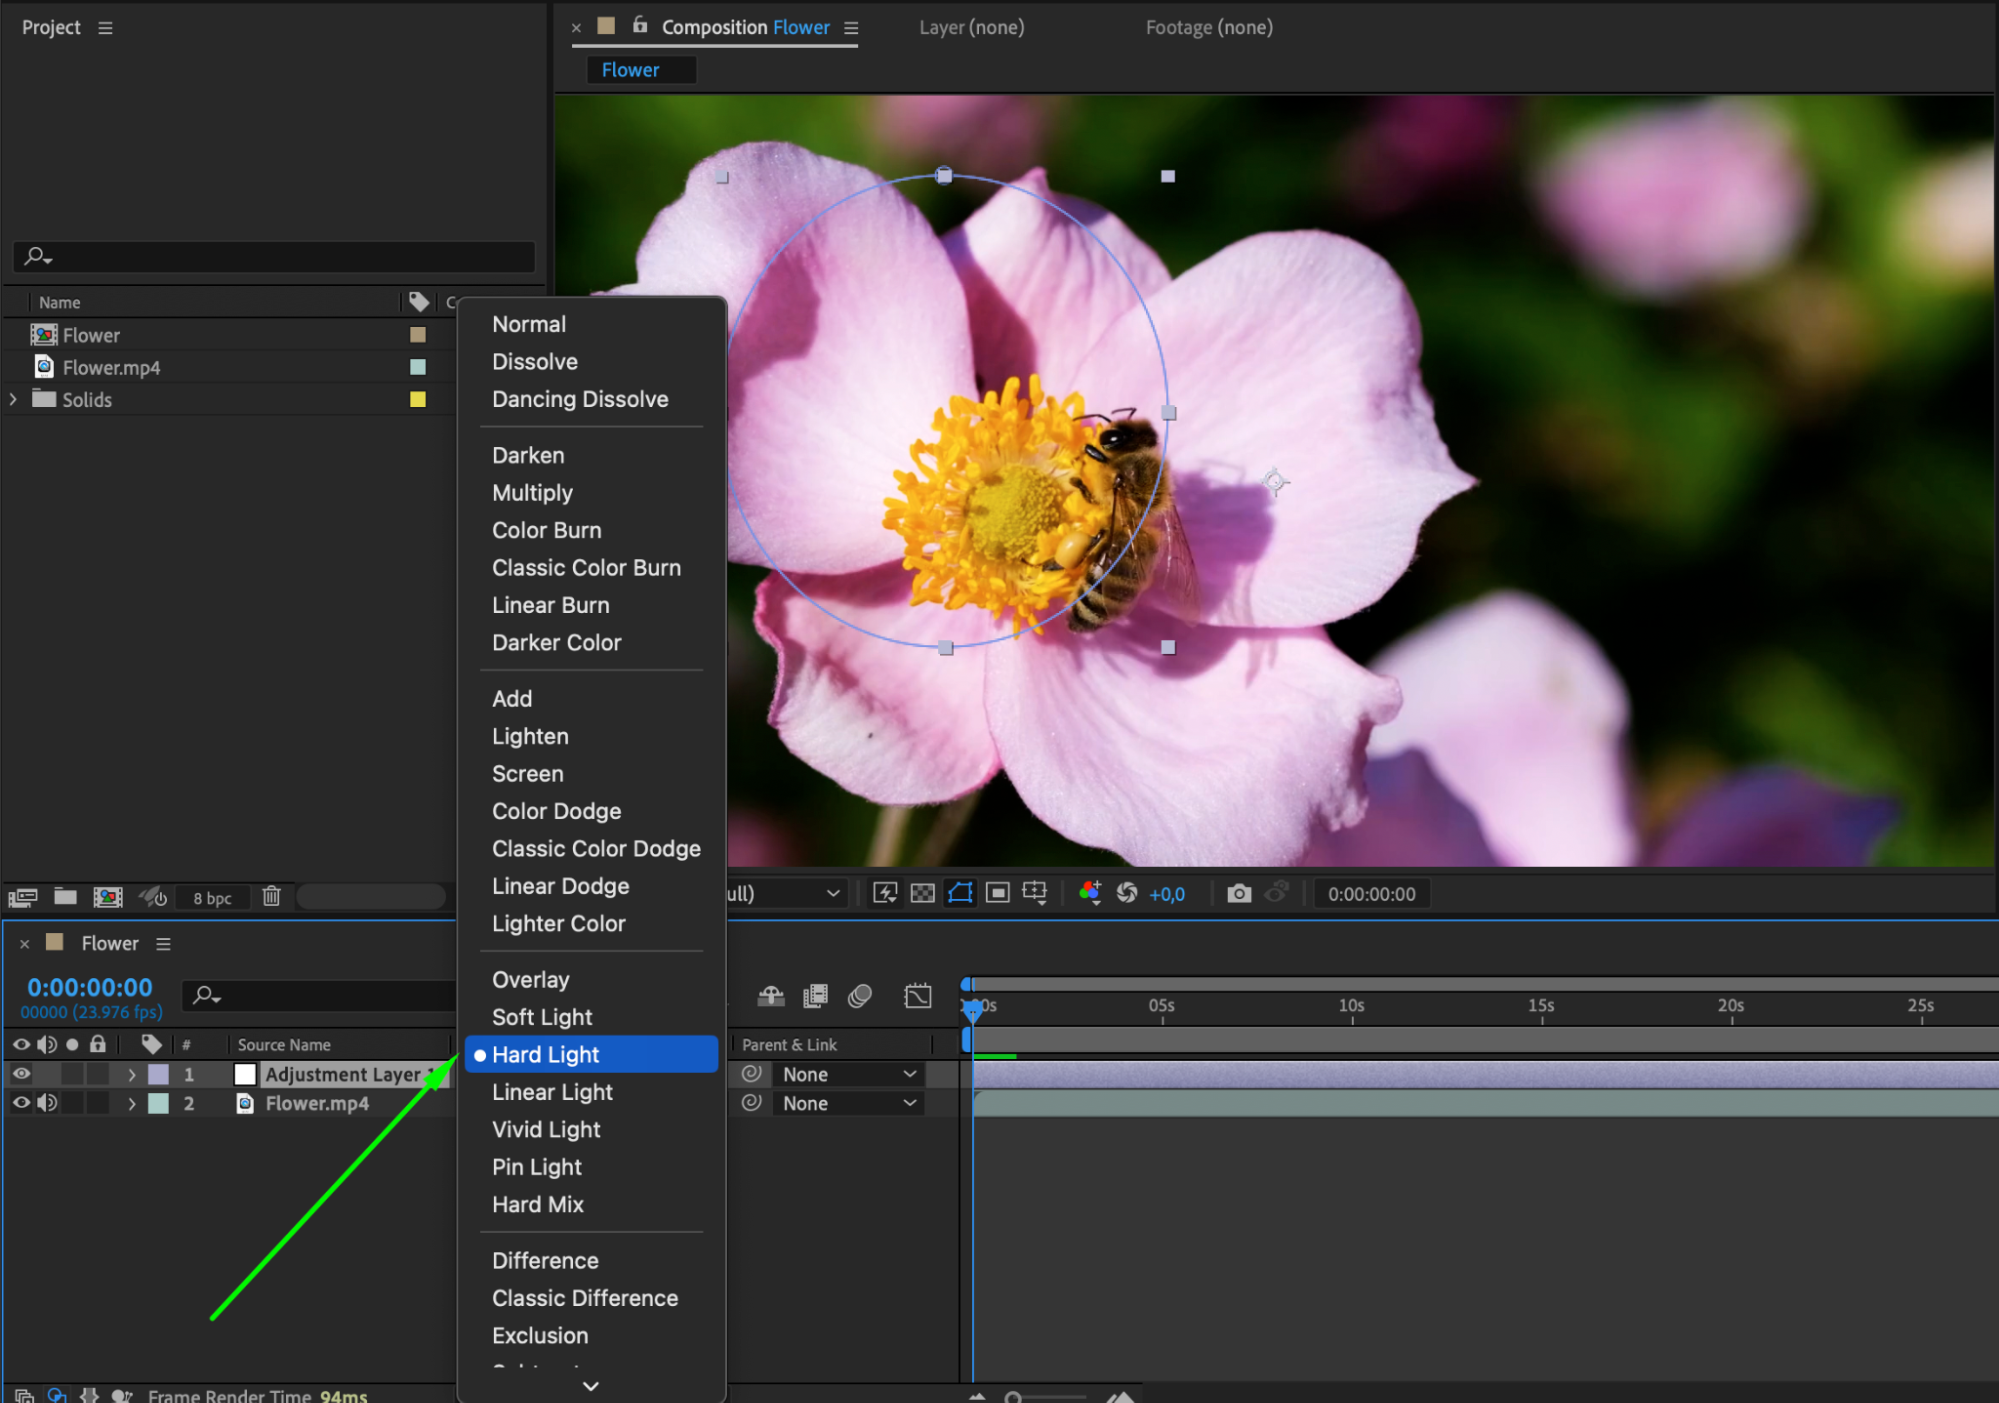
To further enhance the realism of the light rays, adjust the opacity of the adjustment layer to blend them seamlessly with your footage. Experiment with different blend modes, such as Screen or Add, to achieve the desired look.
 Step 6: Duplicate and Customize Layers
Get 10% off when you subscribe to our newsletter

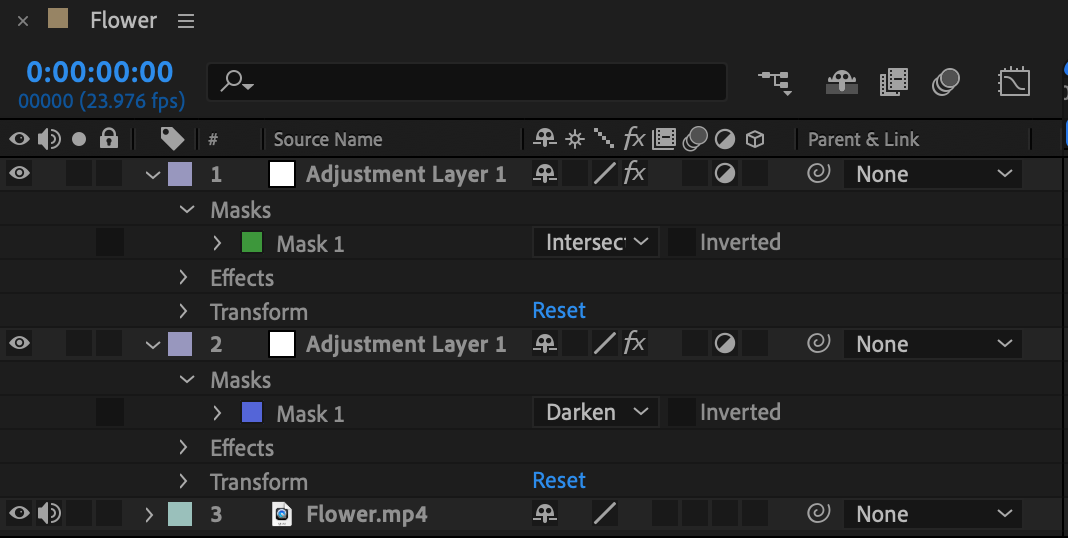
For added depth and complexity, you can duplicate the adjustment layer and adjust the settings of each duplicate. Play around with the position, angle, and color of the duplicated layers to create a more intricate and dynamic effect.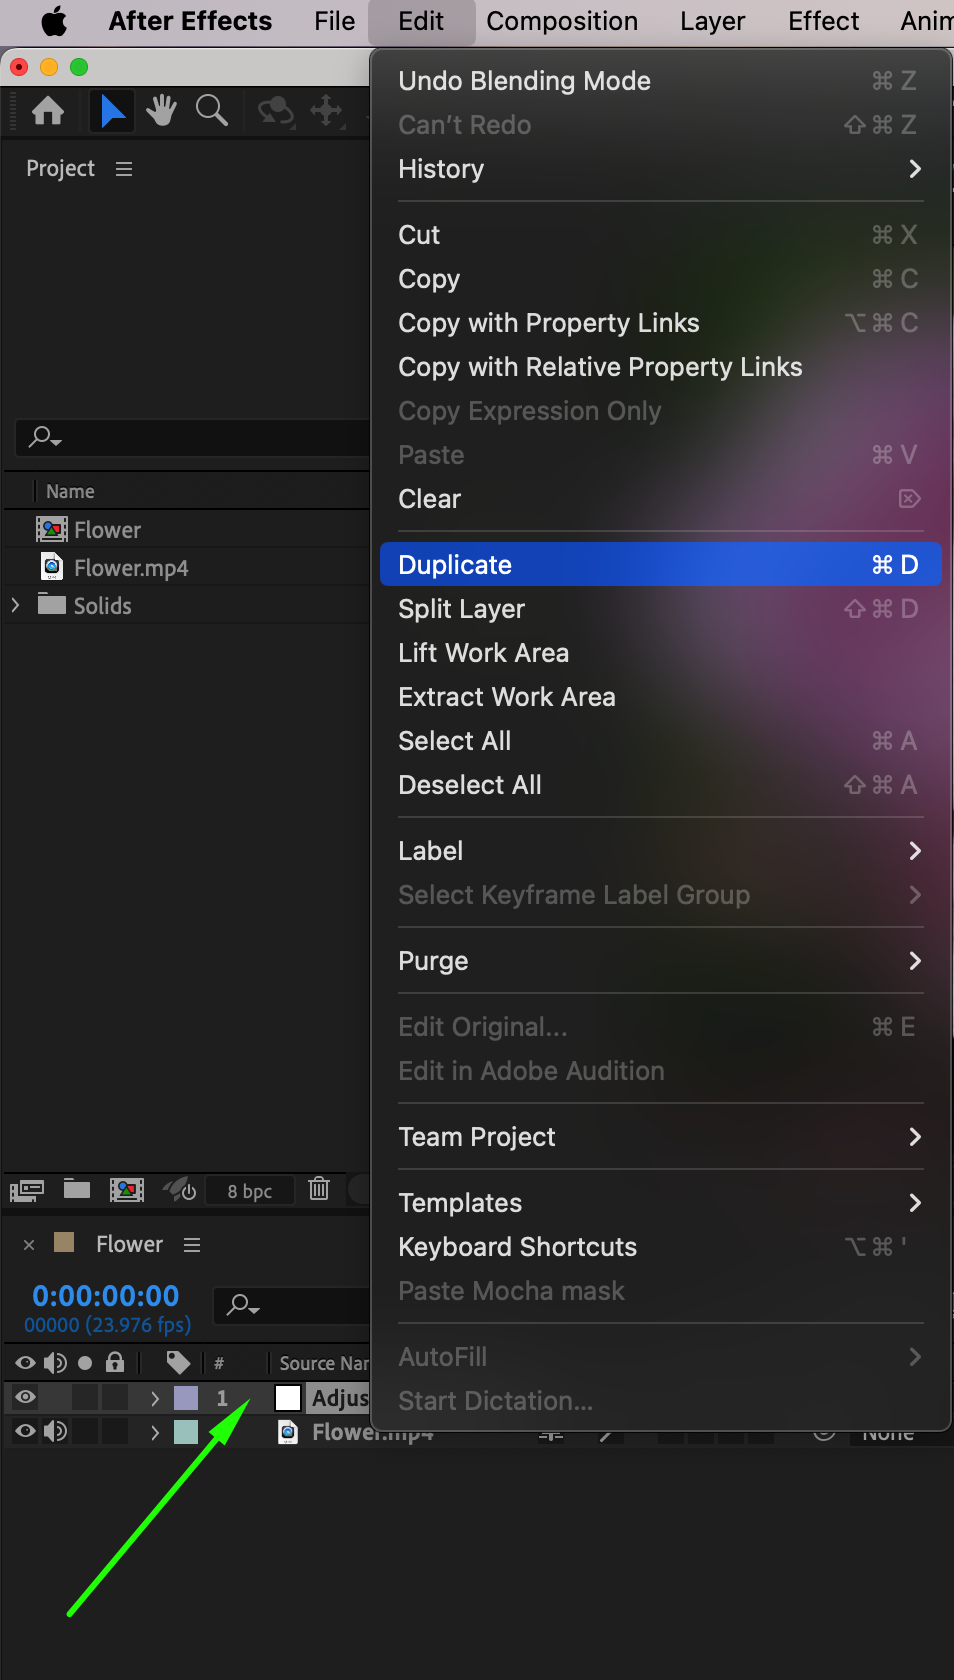
 Step 7: Add Additional Effects and Preview
Get 10% off when you subscribe to our newsletter

If you want to take your light rays to the next level, you can also add additional effects. For example, you can apply a blur effect to create a soft and dreamy look, or use the Glow effect to make the light rays more vibrant and glowing. Experiment with different effects and settings to achieve the desired result. Once you are satisfied with your light rays effect, preview it in the composition panel and make any necessary adjustments to the settings or layers.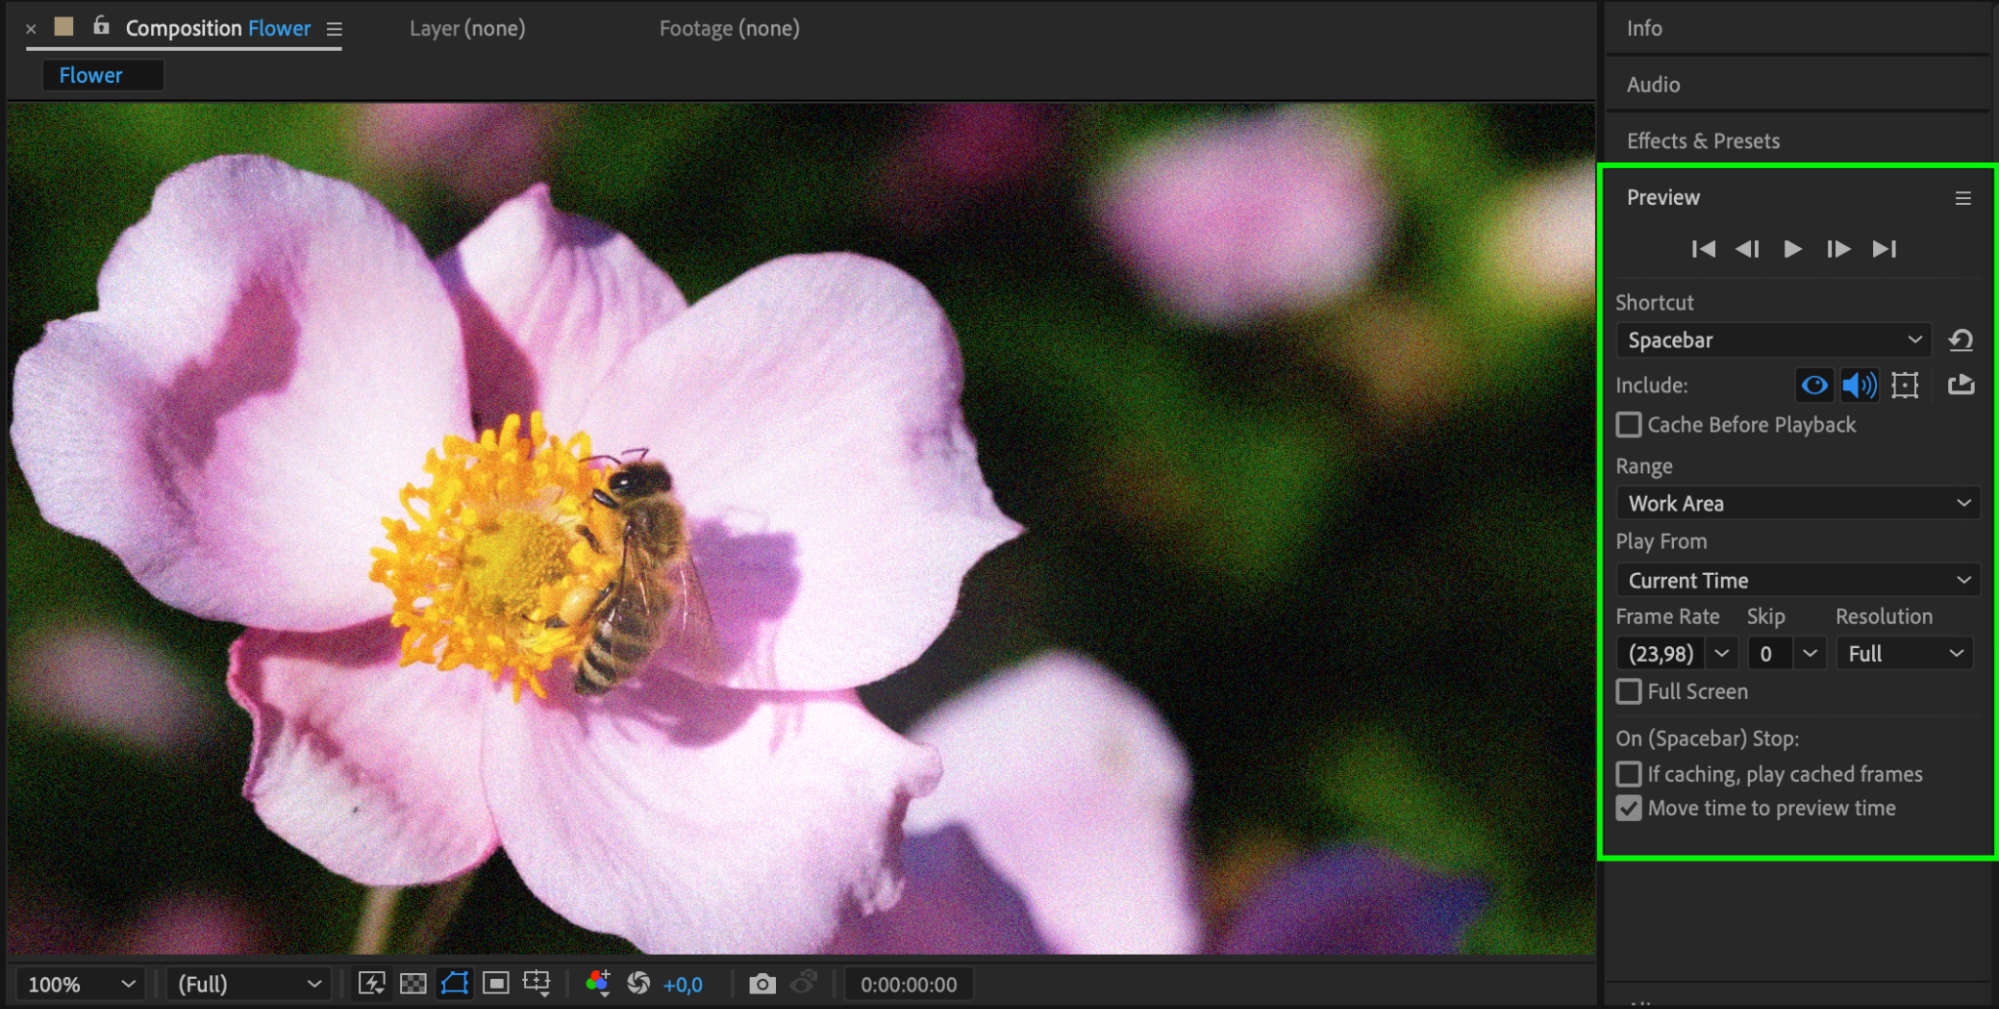 Step 8: Render and Export
When you are ready to export your video, go to Composition, select Add to Render Queue, adjust the settings according to your needs, and click Render.

 Conclusion
In conclusion, adding light rays in After Effects is a creative way to elevate your videos and make them stand out. By following these simple steps and experimenting with different settings and effects, you can create stunning light rays that will captivate your audience and add a touch of magic to your footage. So, unleash your creativity and start transforming your videos into visual masterpieces with light rays in After Effects.

