There are many reasons why you might want to add text to your After Effects project.
For instance, to include text in a title sequence or credit roll, to add text to a lower third or other graphic elements. Additionally, you can use text in After Effects to create text animations, such as a typewriter effect or scrolling text.
To add text in After Effects, follow these steps:
1. Select the text tool by clicking the “T” button in the toolbar or use the keyboard shortcut Ctrl + Alt + Shift + T (Win) or Command + Option + Shift + T (Mac)
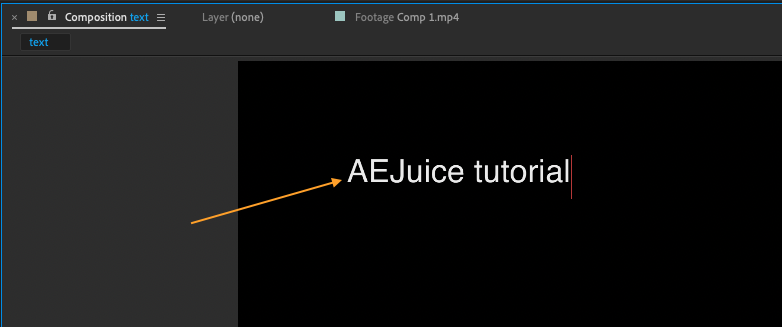
 Add a new text layer to your composition by clicking anywhere within the composition window
 2. To add more text to your After Effects project, simply repeat the steps outlined above.
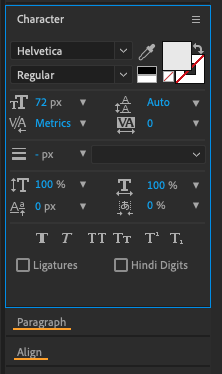
Once you have your text layer added to the composition, you can use the various formatting options available to customize the appearance of your text.
This includes things like font, color, size, and alignment. You can also use the text animator options in After Effects to add movement and other effects to your text.
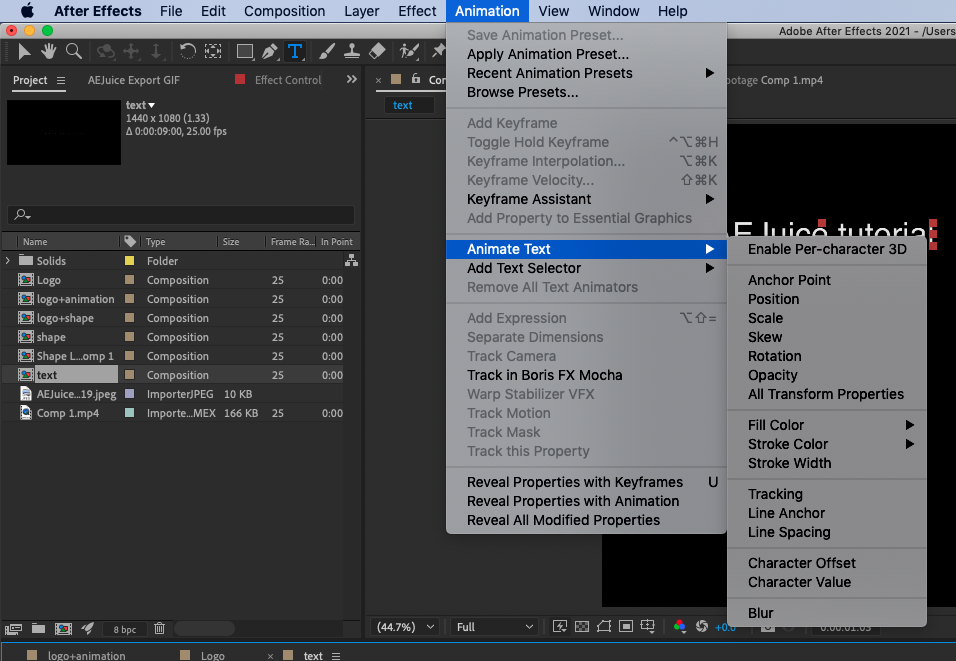
Select your text layer, go to Animation > Animate Text From there, you can choose from a variety of animation options, such as position, scale, and rotation, and customize the settings to achieve the desired effect.
Add a stroke, or outline, to your text to make it stand out against the background.
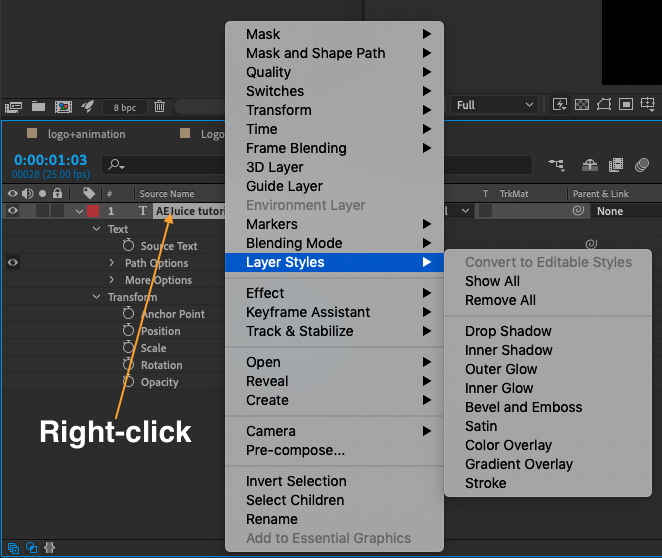
To add a stroke, simply right-click your text layer and navigate to the “Layer Styles” section. From there, you can click the “Stroke” button to add a stroke to your text.
You can also add a drop shadow to your text to give it a more three-dimensional look.

Remember, the text tool in After Effects is a powerful tool that can be used to add professional-looking text to your projects. So don’t be afraid to experiment and see what you can create!

