Introduction
Animating the horizontal scale of text in After Effects is a great way to make your titles appear more dynamic and expressive. You can use this effect to stretch, squash, or emphasize text elements as part of your motion design.
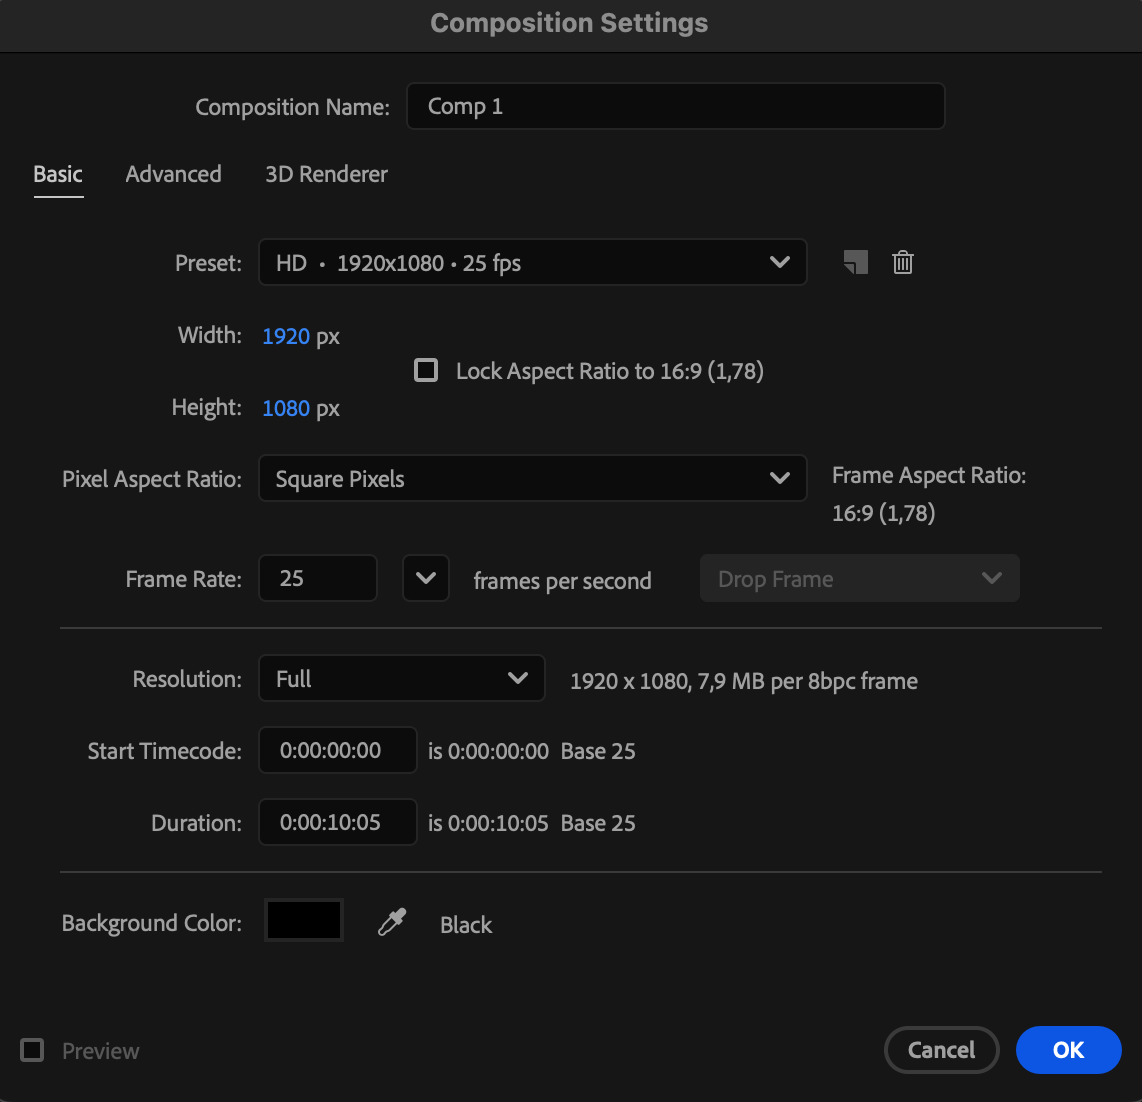
Step 1: Create a New Composition
Open After Effects and go to Composition > New Composition. Set your resolution, frame rate, and duration, then click OK.
 Step 2: Create Your Text Layer
Select the Type Tool (Ctrl/Cmd + T) and click in the Composition panel to type your text. Customize the font, size, and alignment using the Character panel.
Get 10% off when you subscribe to our newsletter

Step 3: Open the Scale Property
Select the text layer and press S on your keyboard to open the Scale property. You’ll see two values — the first controls horizontal scale, and the second controls vertical scale. Click the link icon (the chain symbol) to unlink the values, allowing you to adjust the horizontal and vertical scales independently.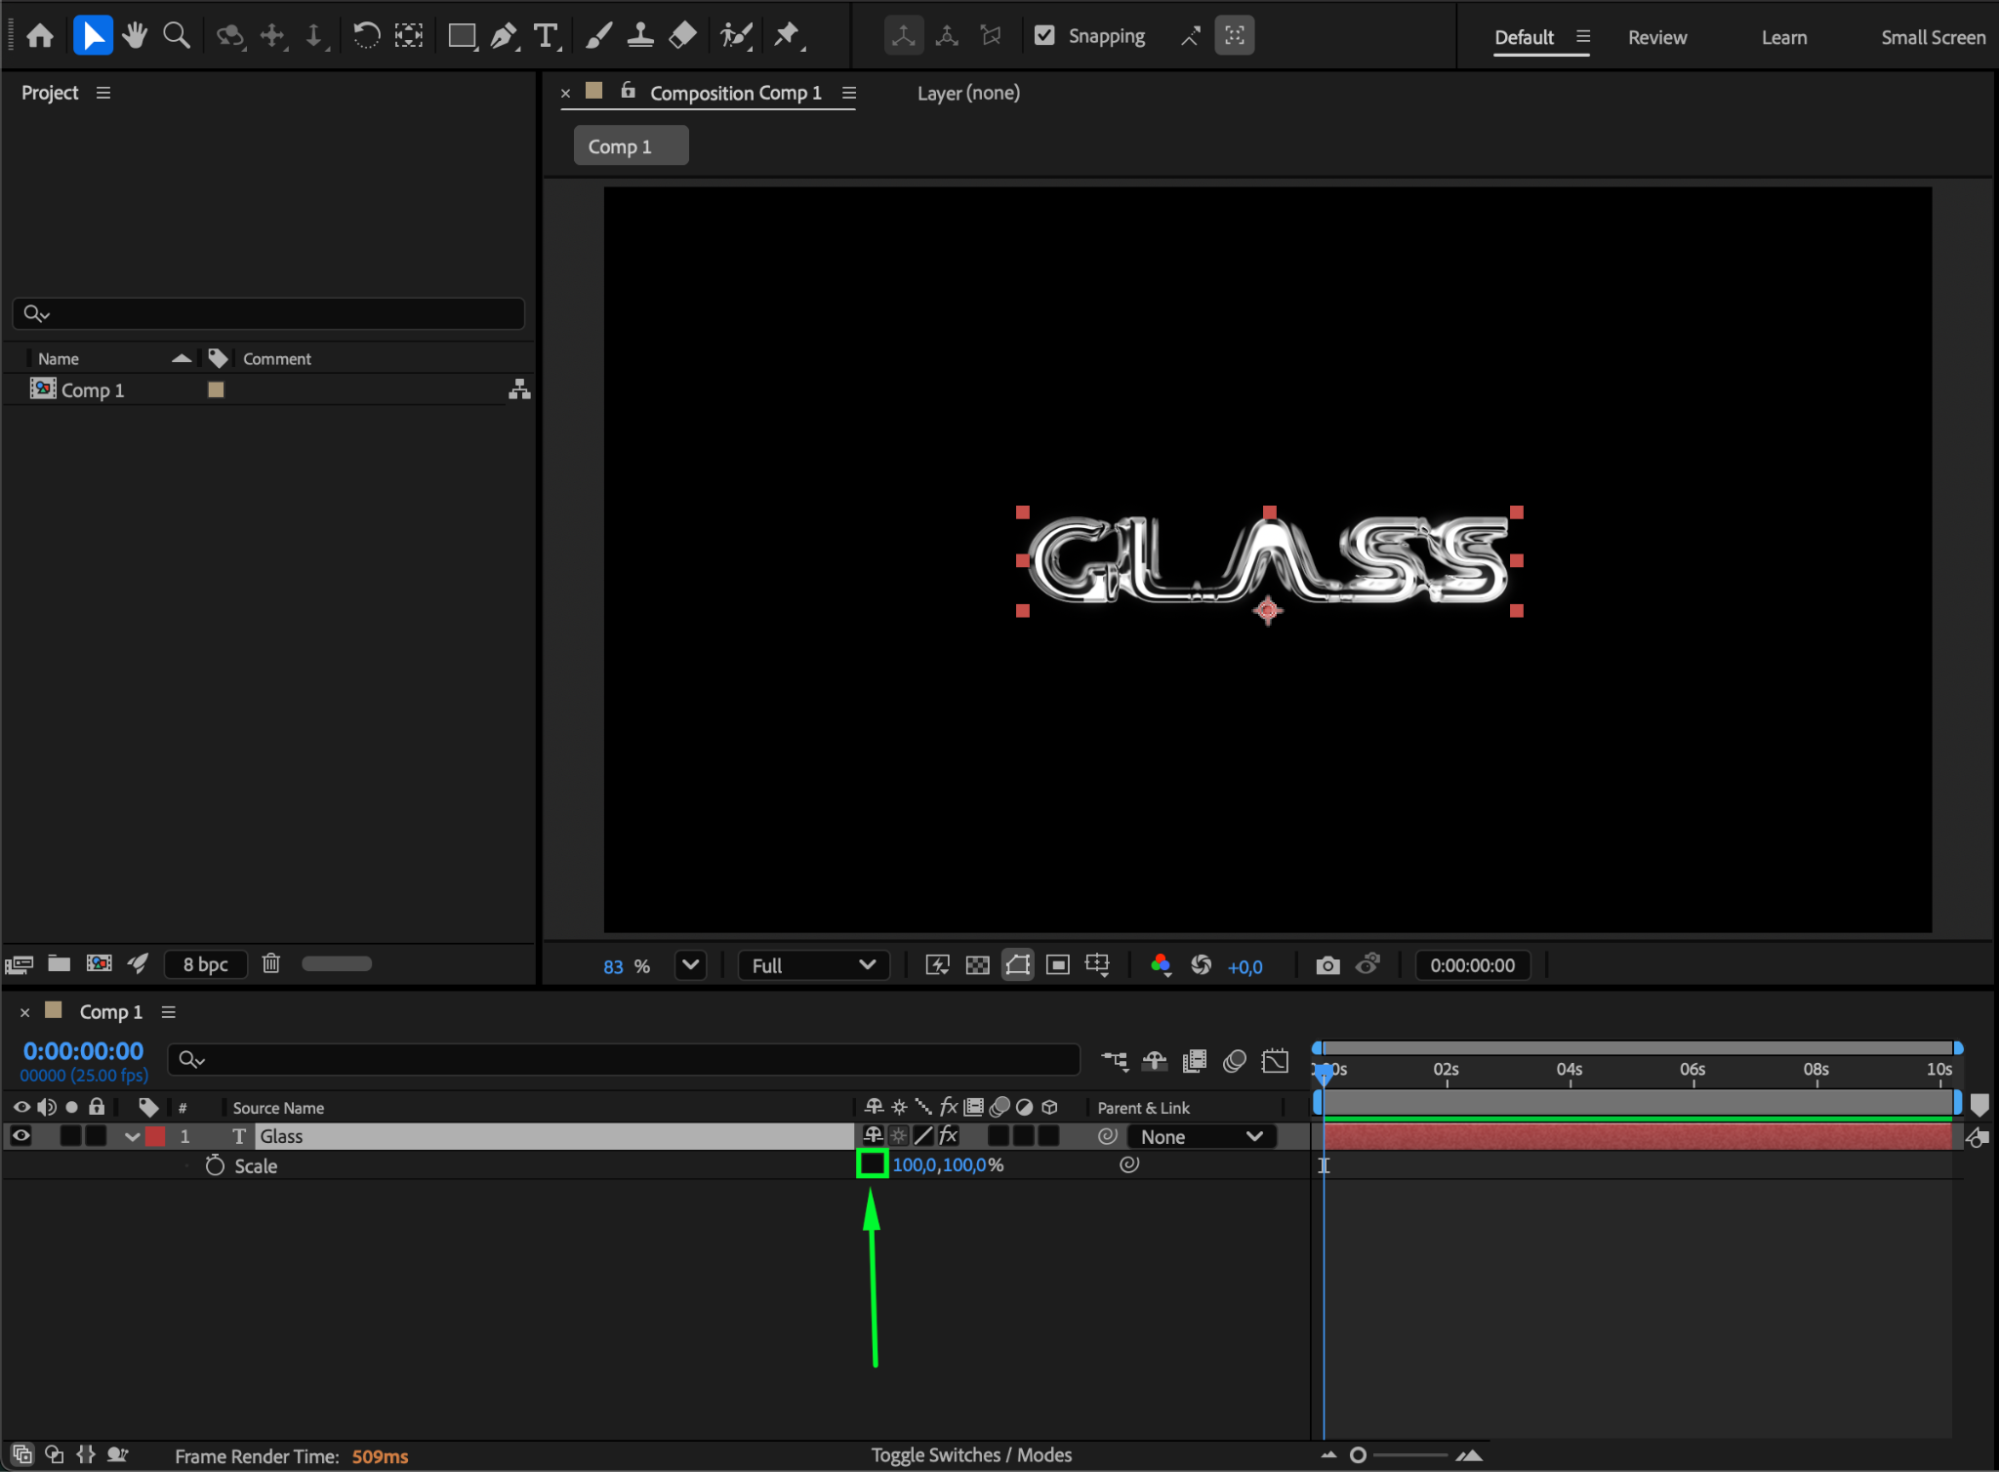
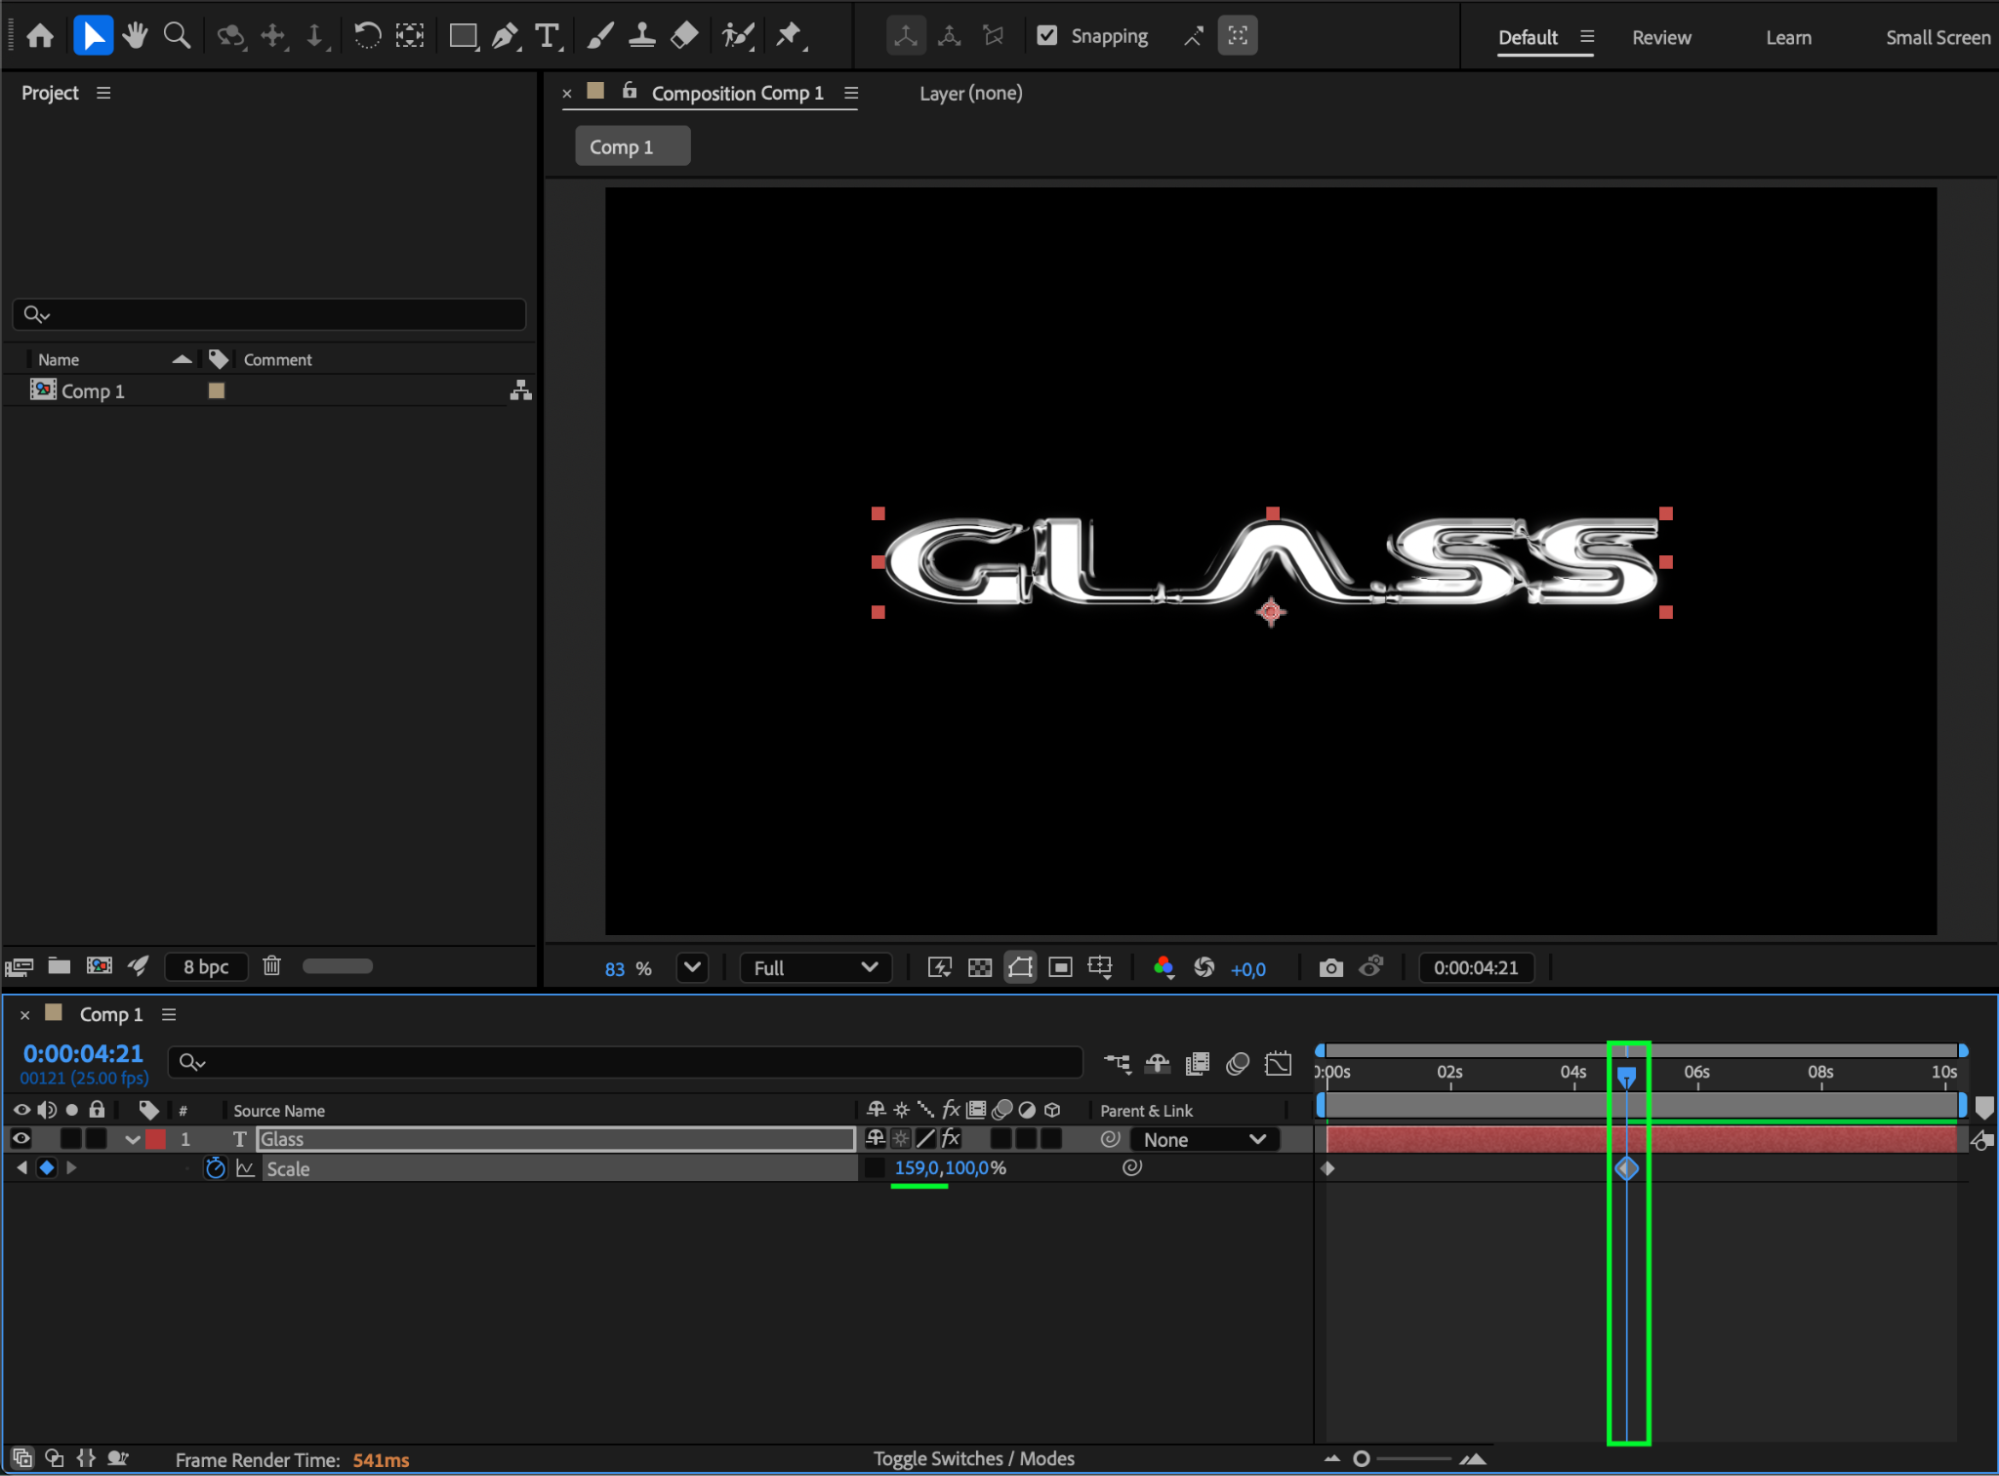
Step 4: Animate the Horizontal Scale
Move the CTI (Current Time Indicator) to the start of the composition and click the stopwatch next to Scale to create your first keyframe. Then move forward in time and change the first value (horizontal scale) to make the text stretch or compress horizontally.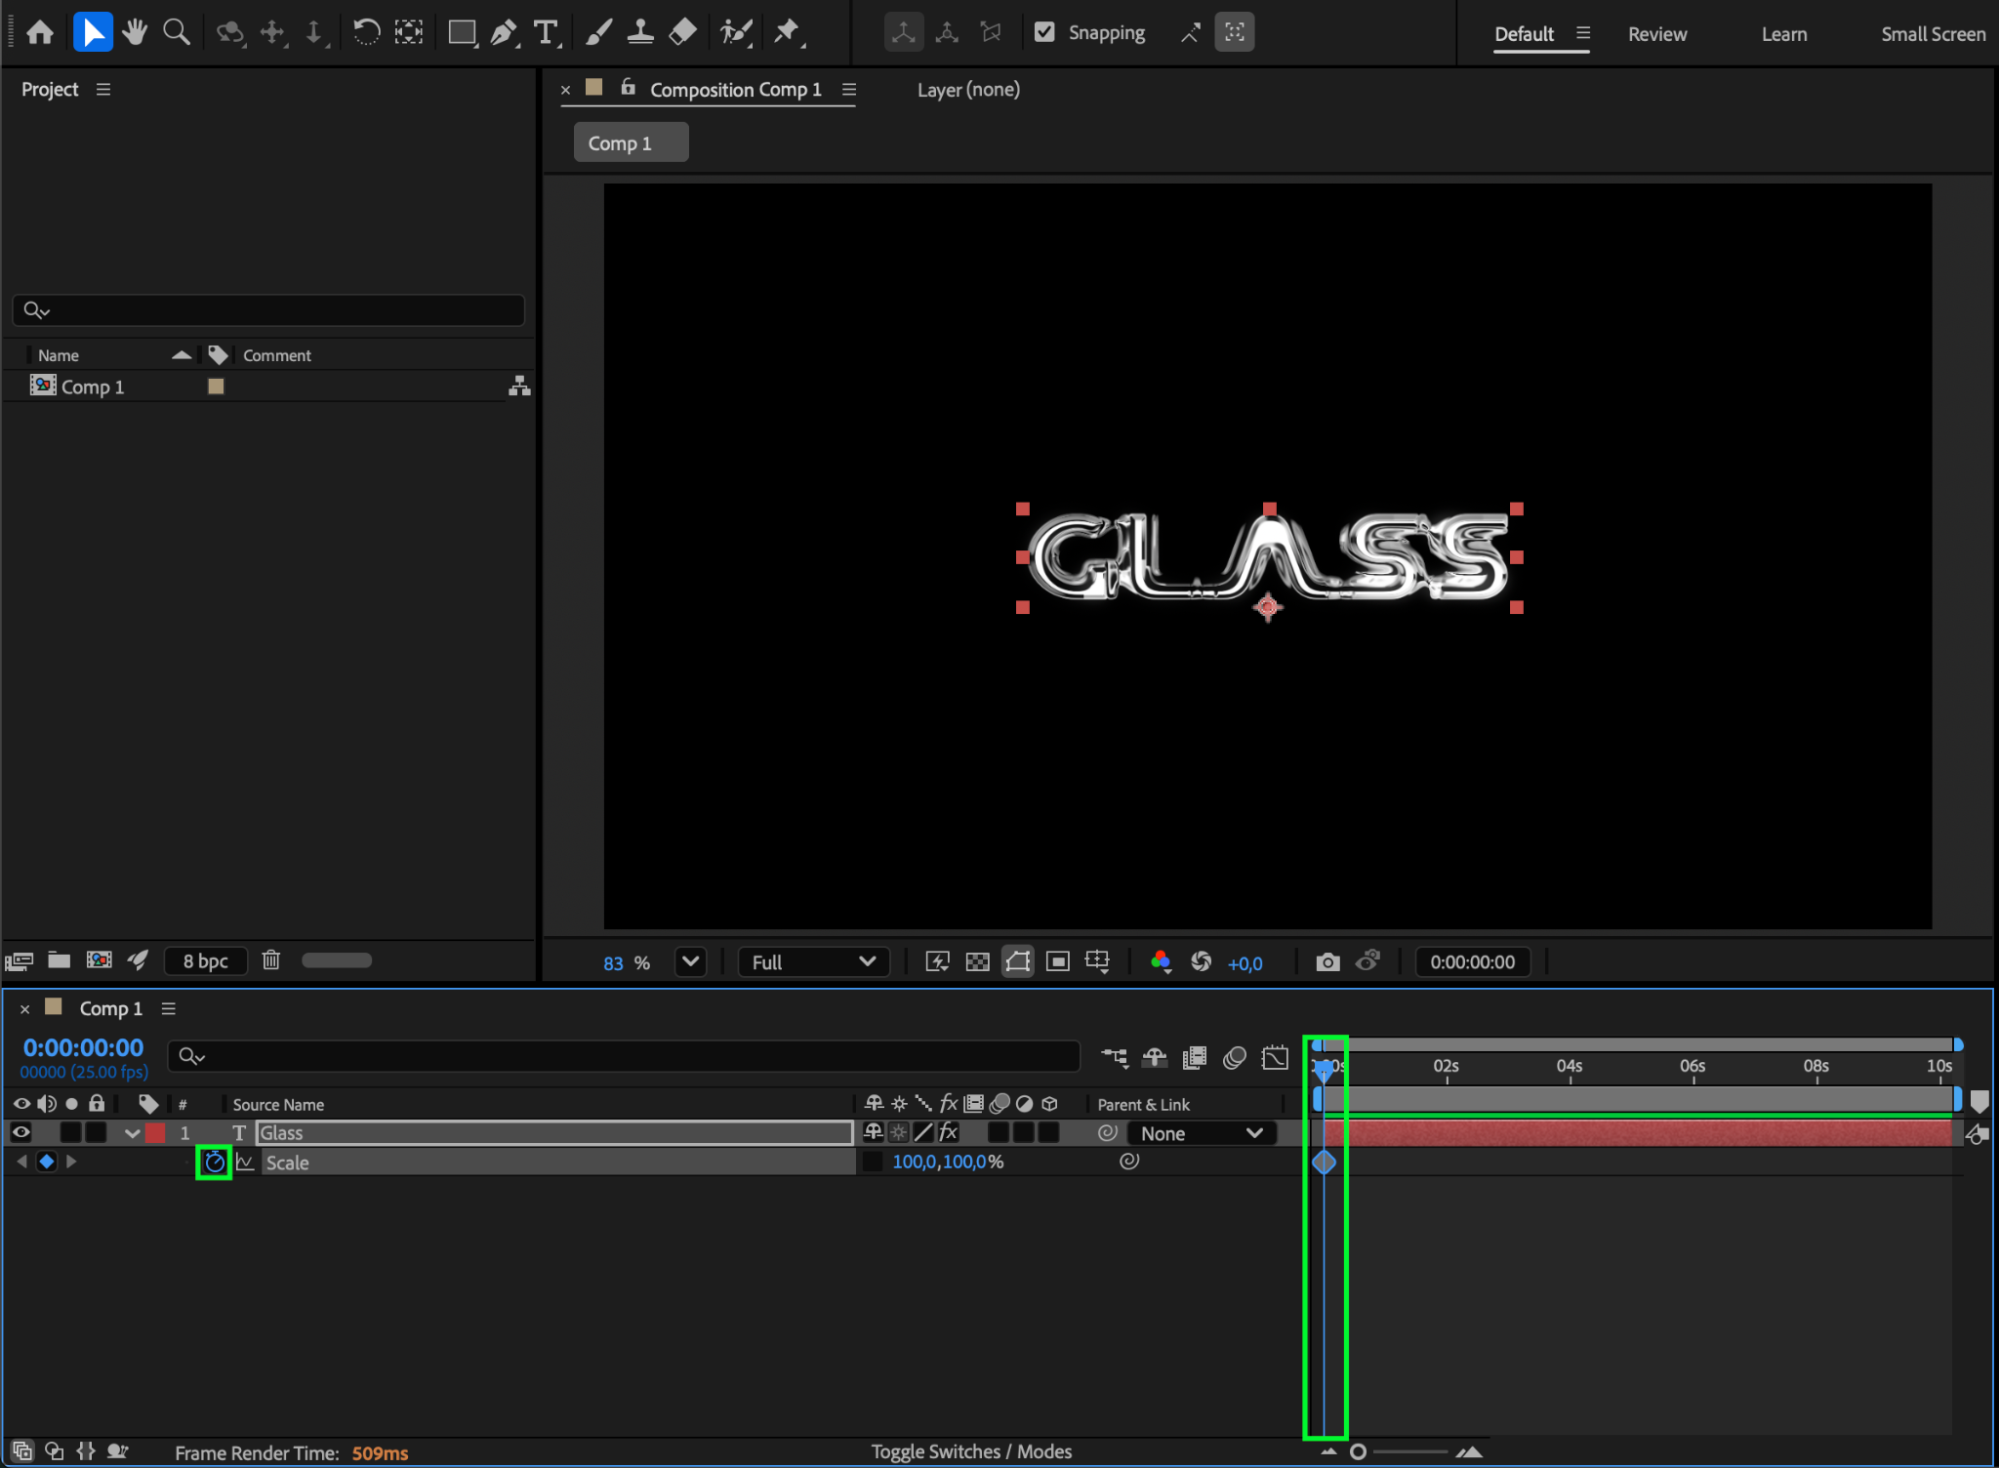
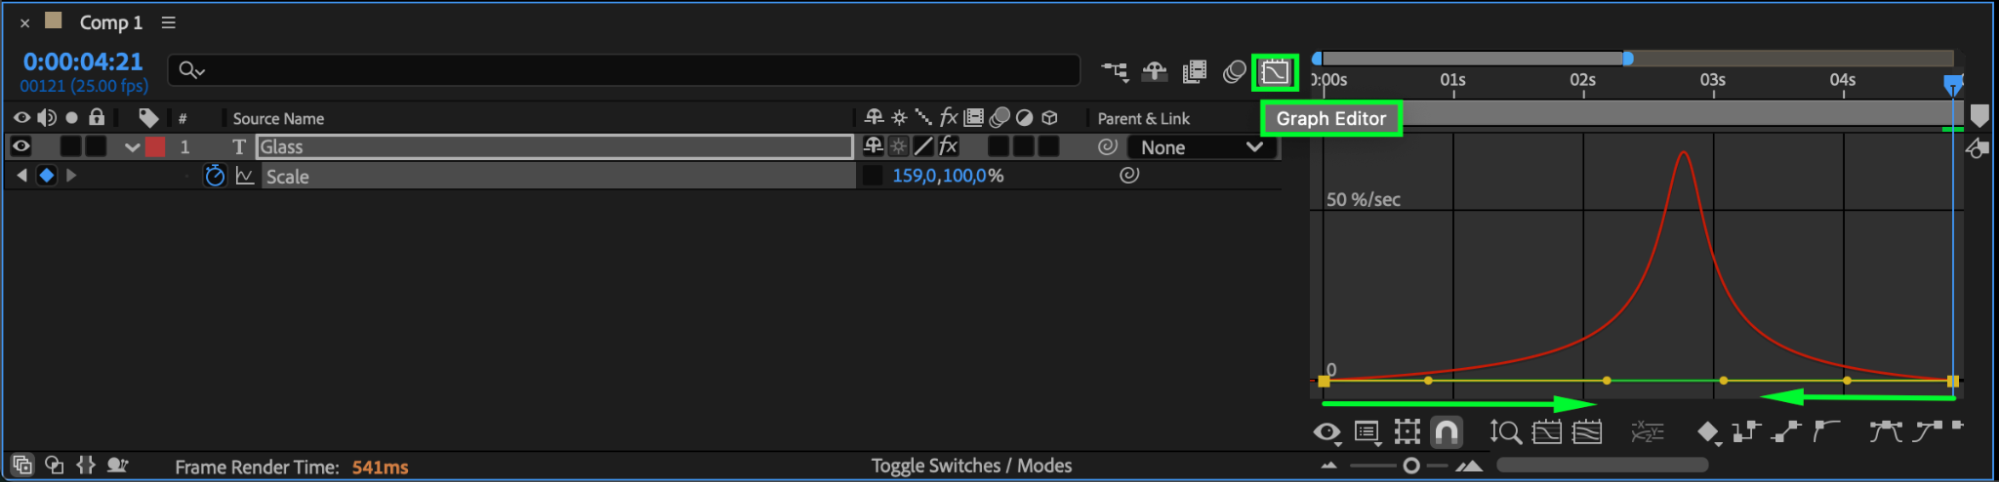
Step 5: Refine with Easy Ease
Select the keyframes, right-click, and choose Keyframe Assistant > Easy Ease to smooth out the animation. You can also open the Graph Editor to adjust the motion curve for more natural movement.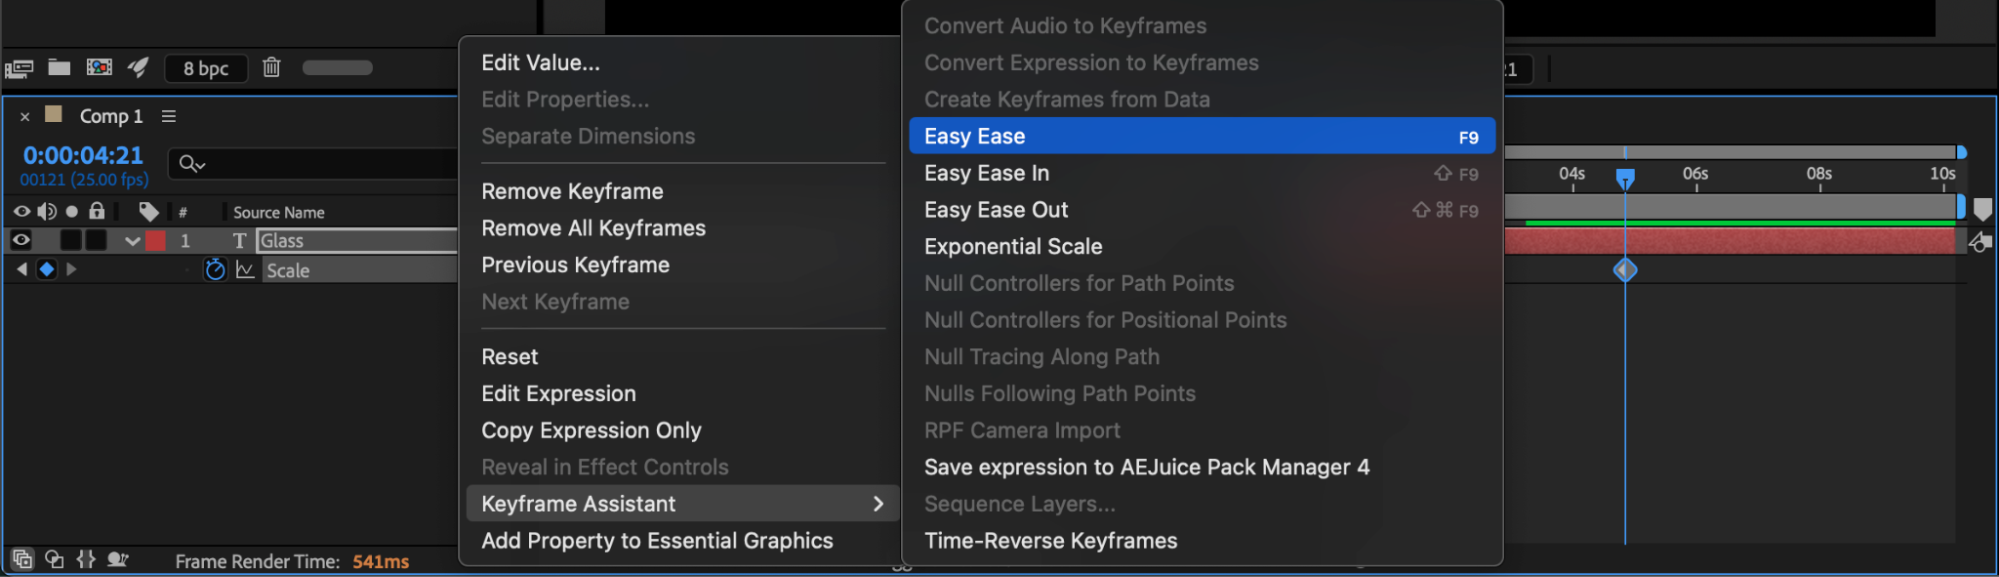
 Step 6: Preview and Adjust
Press Spacebar to preview the animation. Adjust keyframe timing or scale values until the motion feels balanced and fits your project’s style.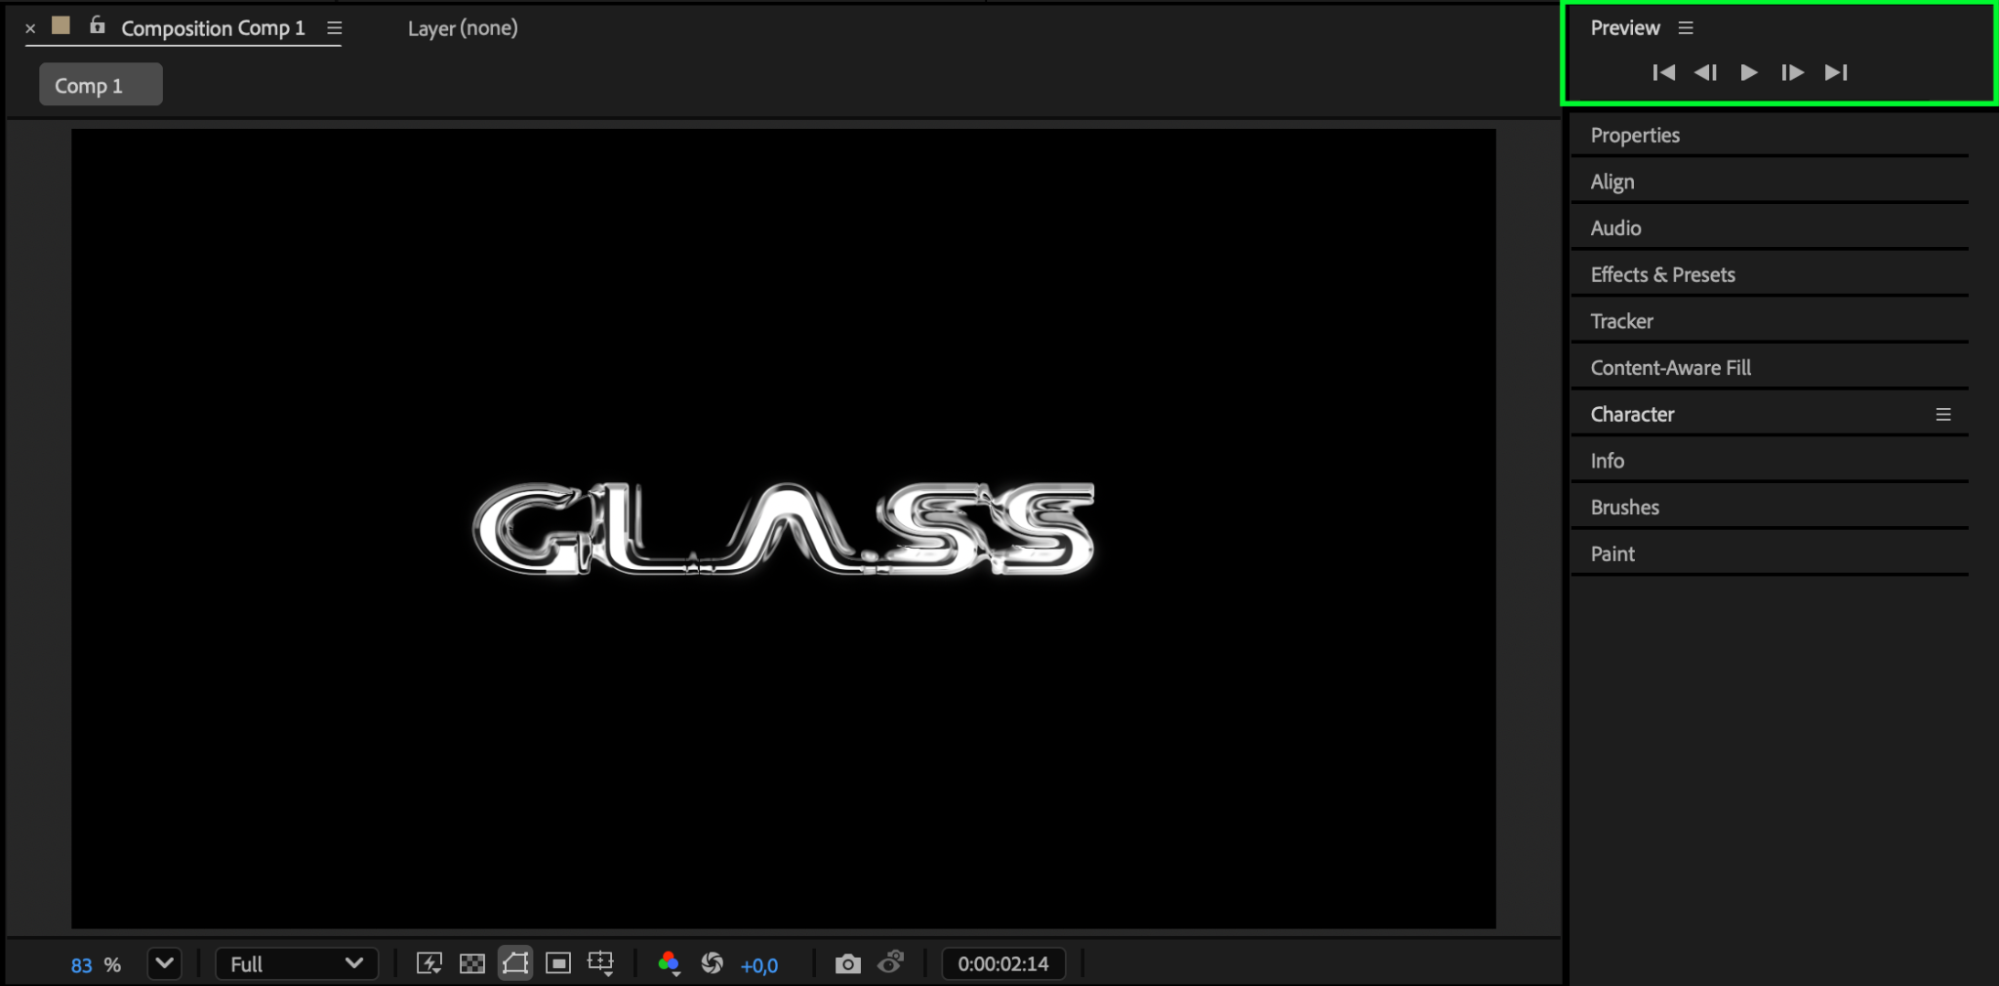 Conclusion
Animating the horizontal scale of text in After Effects adds energy and style to your motion graphics. Whether you’re creating bold stretching effects or subtle text shifts, this simple technique helps make your titles more engaging and professional.
Our Bestsellers


