Are you experiencing sluggish performance or encountering rendering issues with Adobe After Effects? If so, your cache might be the culprit. As you work on projects in After Effects, the software automatically creates and stores temporary cache files to improve playback and render times. However, over time, these cache files can start occupying a significant amount of storage space and even cause performance bottlenecks.
In this article, we will walk you through a step-by-step guide on how to clear the cache in After Effects. Whether you’re looking to optimize your workflow, free up storage space, or resolve common issues caused by cache accumulation, we’ve got you covered. By clearing your cache, you can ensure smoother playback, faster renders, and overall enhanced performance within Adobe After Effects.
So, let’s dive into the process of clearing the cache and get your After Effects running at its best!
Clearing Cache in After Effects: Step-by-Step Guide
Clear your cache to boost efficiency and get your Adobe After Effects workflow back on track. With these easy and quick steps, we’ll show how:
Clearing the cache in After Effects is a simple and effective way to boost your workflow and optimize performance. Follow these step-by-step instructions to ensure a smooth process:
1. Locate the Disk Cache folder:
Get 10% off when you subscribe to our newsletter

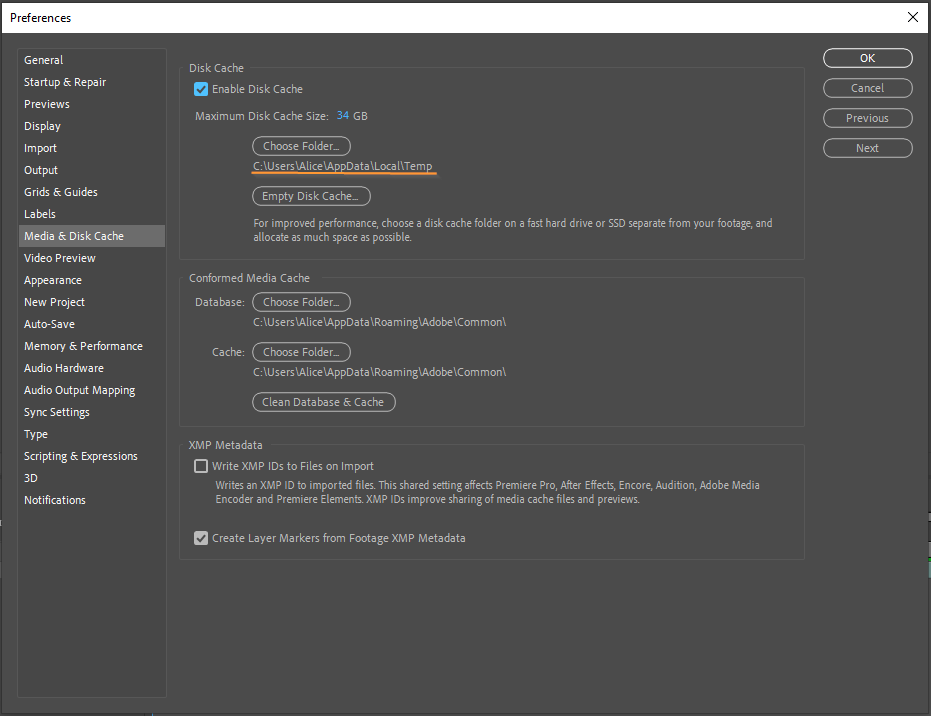
To find your Disk Cache folder, navigate to Edit > Preferences > Media & Disk Cache. This will display the location of your Disk Cache folder. 2. Close Adobe After Effects:
Make sure to close After Effects before you begin clearing the cache. This will prevent any conflicts or interruptions during the cache clearing process.
3. Delete cache files manually:
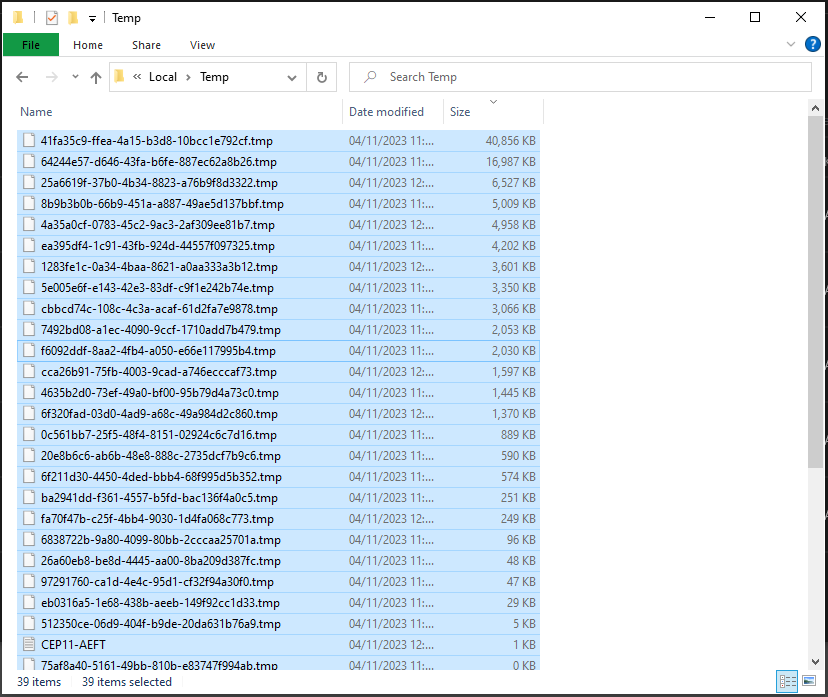
Manually delete the files from the Disk Cache folder to clear the cache. You can select and delete all files present, in your Disk Cache folder by pressing Ctrl+A (or Command+A for Mac users). After selecting all files, use the delete key or right-click and choose the “Delete” option.
 4. Clear cache using Adobe After Effects:
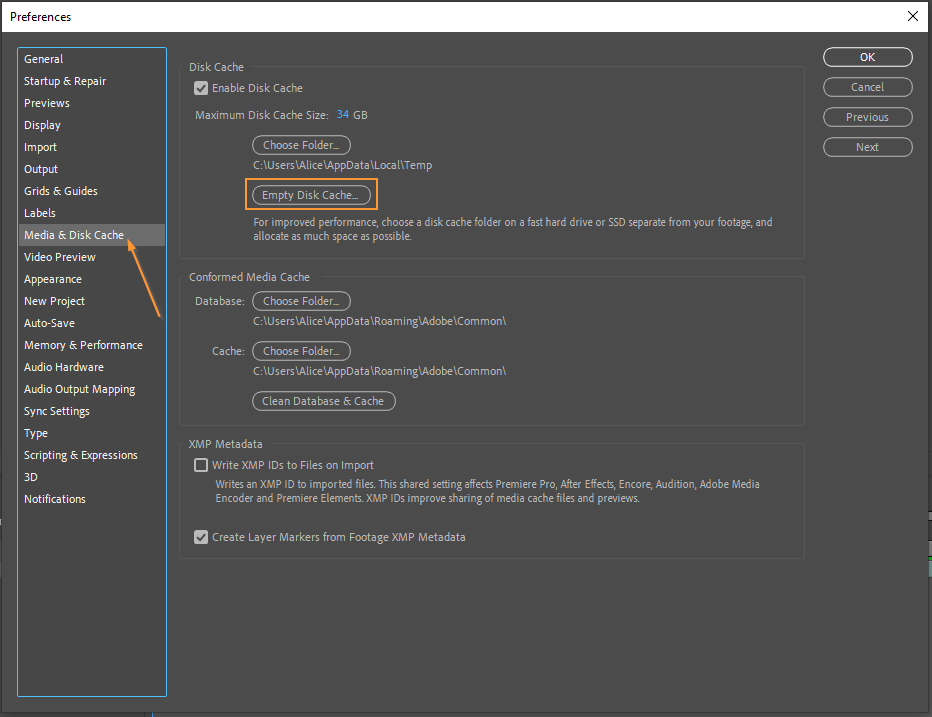
To clear the cache directly from After Effects, you can use a handy hotkey. Press Ctrl+Alt+; (semicolon) or Command+Option+; (semicolon) for Mac users to open the Preferences dialog box. From there, navigate to the “Media & Disk Cache” tab and click on the “Empty Disk Cache” button. This action will remove all the cache files from the Disk Cache folder.
5. Change cache settings for future projects:
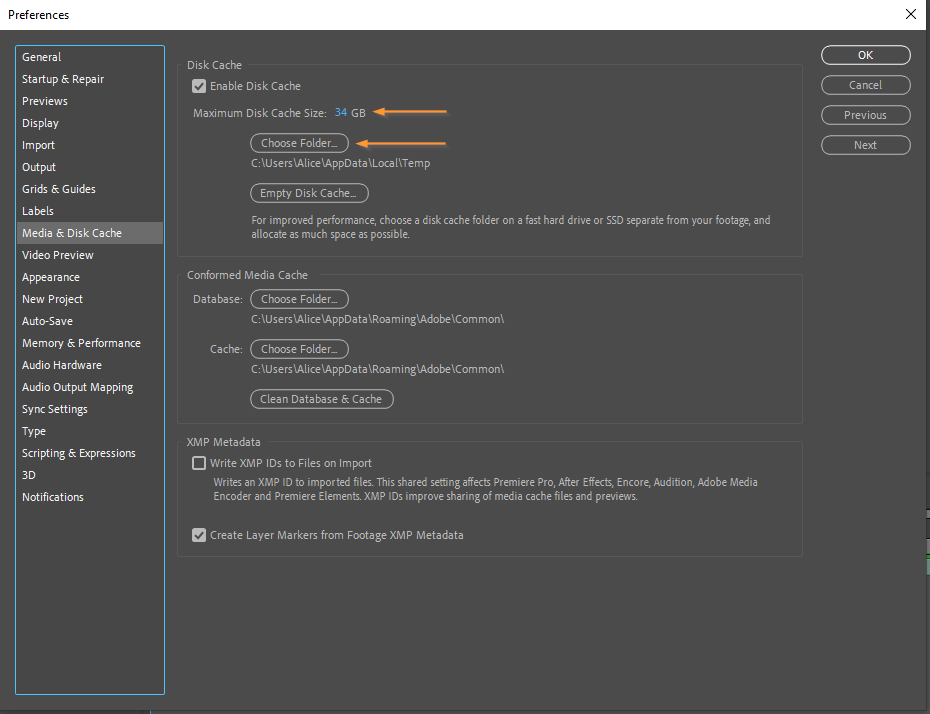
Additionally, you can modify the cache settings to ensure efficient management in future projects. In the Preferences dialog box, go to the “Media & Disk Cache” tab. Here, you can adjust the maximum amount of disk space used for the cache or choose to limit the cache to a different drive if desired.
6. Restart After Effects:
After clearing the cache, restart After Effects for the changes to take effect. Opening a new project will initiate the creation of fresh cache files, promoting optimal performance.
By following these steps, you can clear the cache in Adobe After Effects and enjoy improved playback, faster render times, and seamless performance.
Conclusion
Clearing the cache in Adobe After Effects is a vital maintenance task that can significantly enhance your workflow and optimize performance. By following the step-by-step guide outlined in this article, you have learned how to easily clear the cache files manually or directly from After Effects itself.
Regularly clearing the cache not only frees up valuable storage space but also ensures smoother playback, faster renders, and a more efficient overall experience when working on your projects. Remember to also modify your cache settings for future projects to maintain optimal performance.
With the knowledge gained from this guide, you now have the power to take control of your cache in After Effects. Don’t underestimate the impact of a clean and well-managed cache on your creative process. Happy editing!


