Mastering the Art of Combining Multiple Videos in After Effects
Introduction to Video Merging with After Effects
Have you ever wanted to combine multiple videos into one seamless composition? With Adobe After Effects, you can easily merge different video clips, add transitions, effects, and even enhance them with audio and text elements. In this guide, we will walk you through the step-by-step process of combining videos using After Effects.
Step-by-Step Guide to Combining Multiple Videos in After Effects
Step 1: Import Your Videos
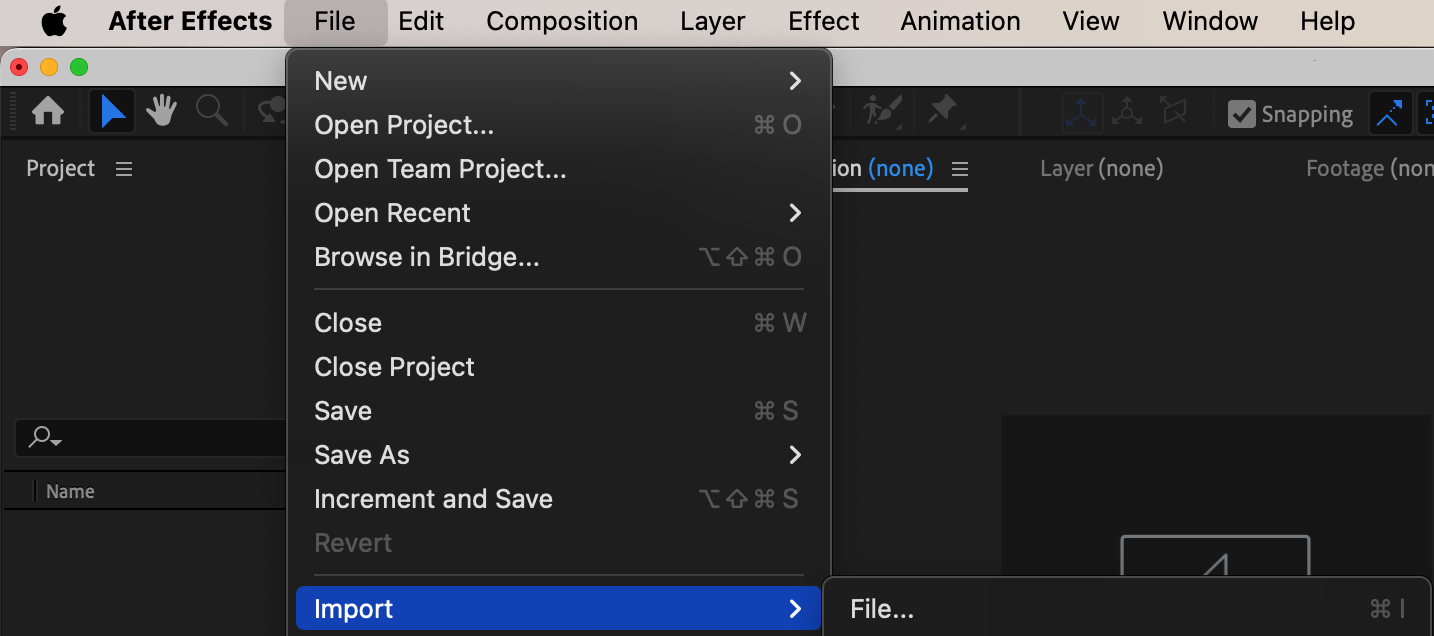
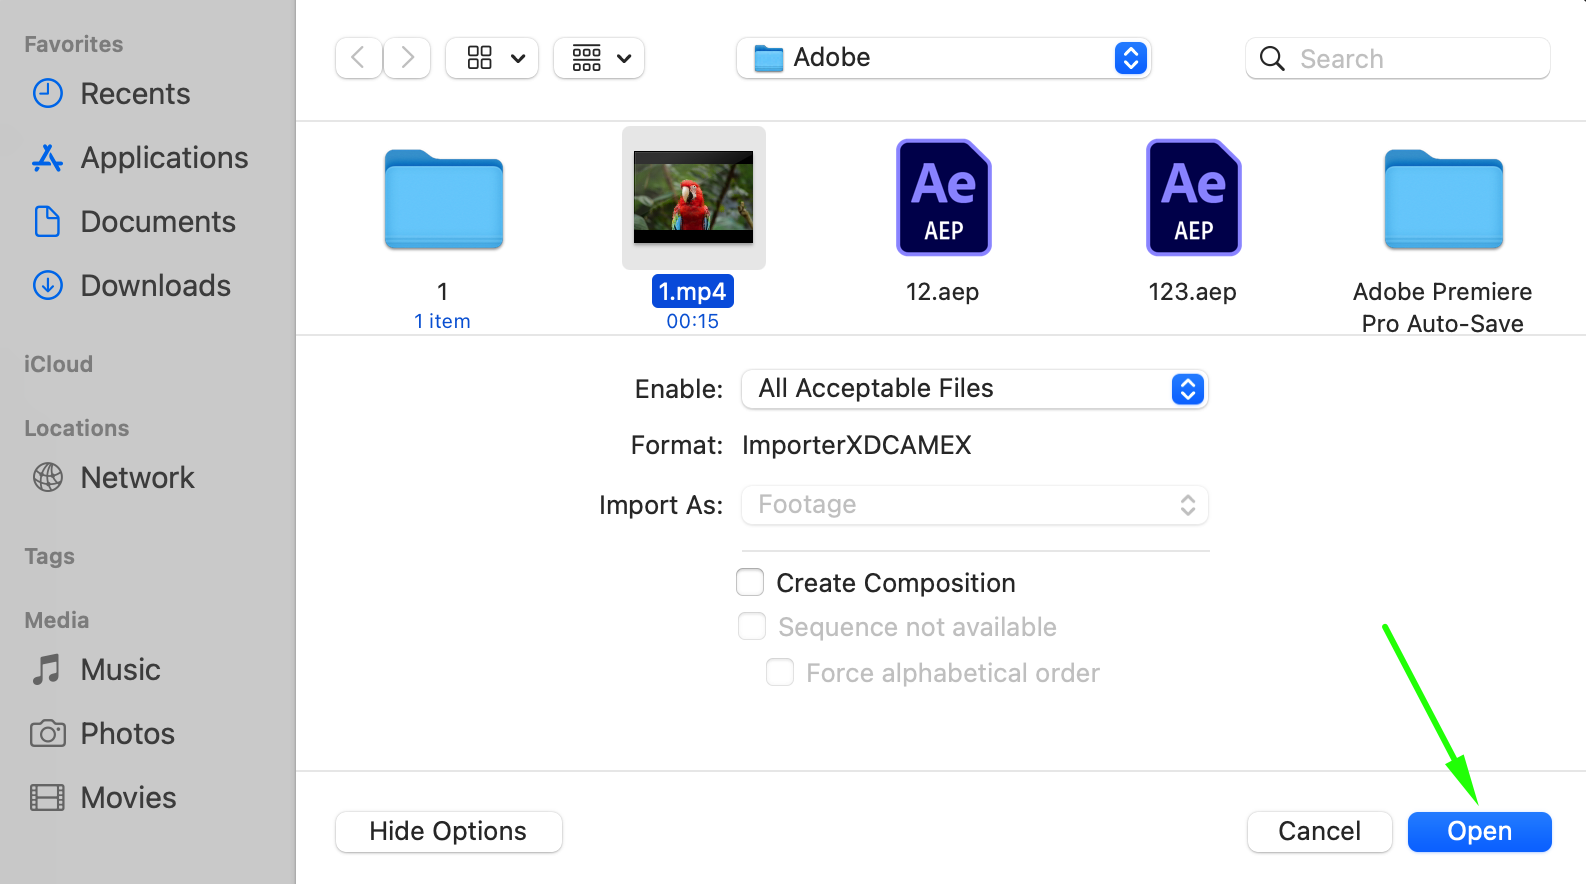
To start, import your videos into After Effects by going to the “File” menu and selecting “Import”. To select multiple videos, hold the Ctrl (Cmd on Mac) key each time you choose a new video. Once all desired videos are selected, click the “Open” button. Organize your videos in the project panel for easy access during the editing process.
 Step 2: Create a New Composition
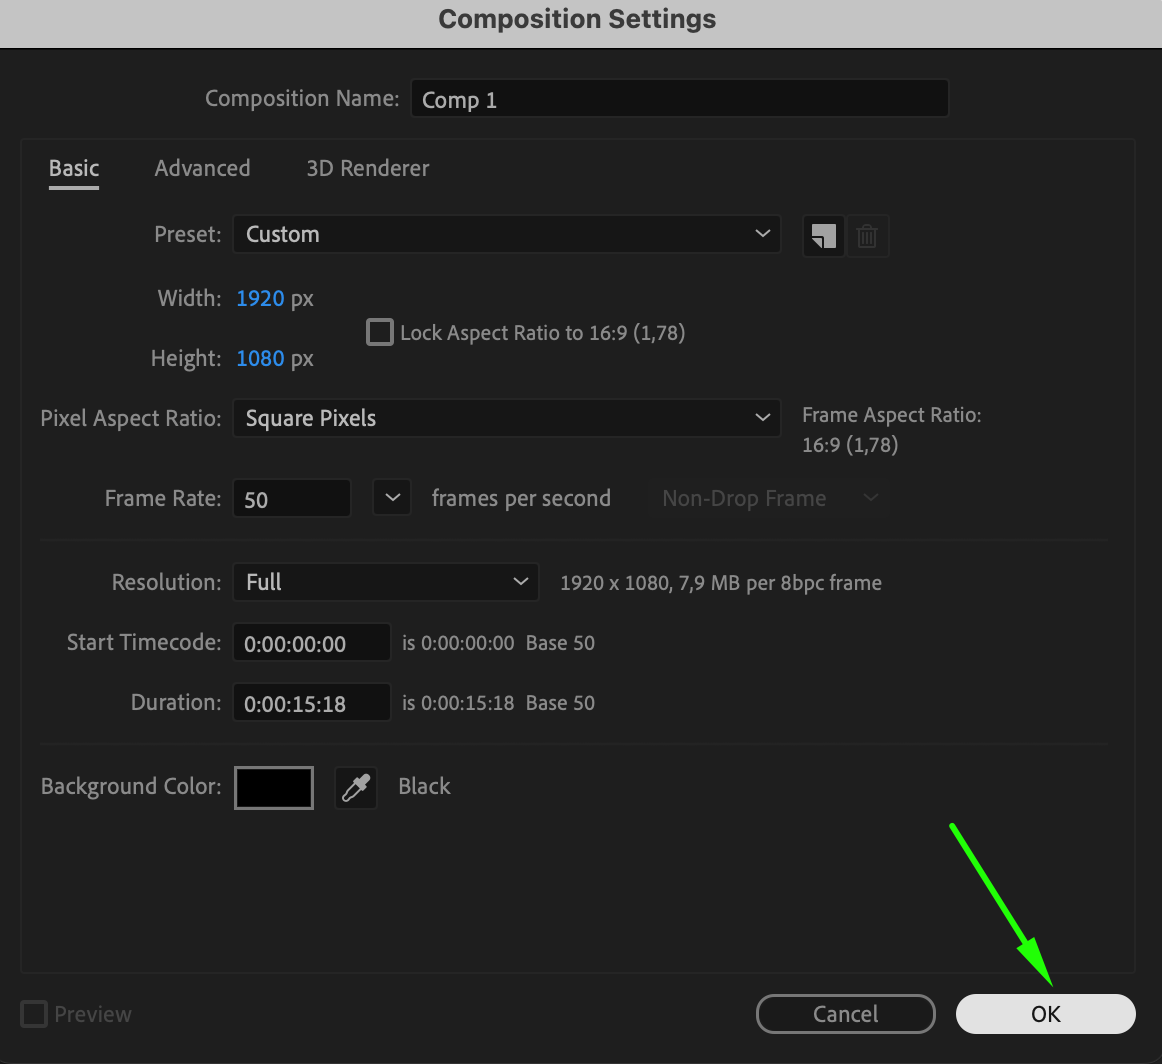
Next, create a new composition by going to the “Composition” menu and selecting “New Composition”. Set the dimensions and duration for your composition, ensuring they match the resolution and frame rate of your videos.
Get 10% off when you subscribe to our newsletter


 Step 3: Arrange and Resize Your Videos
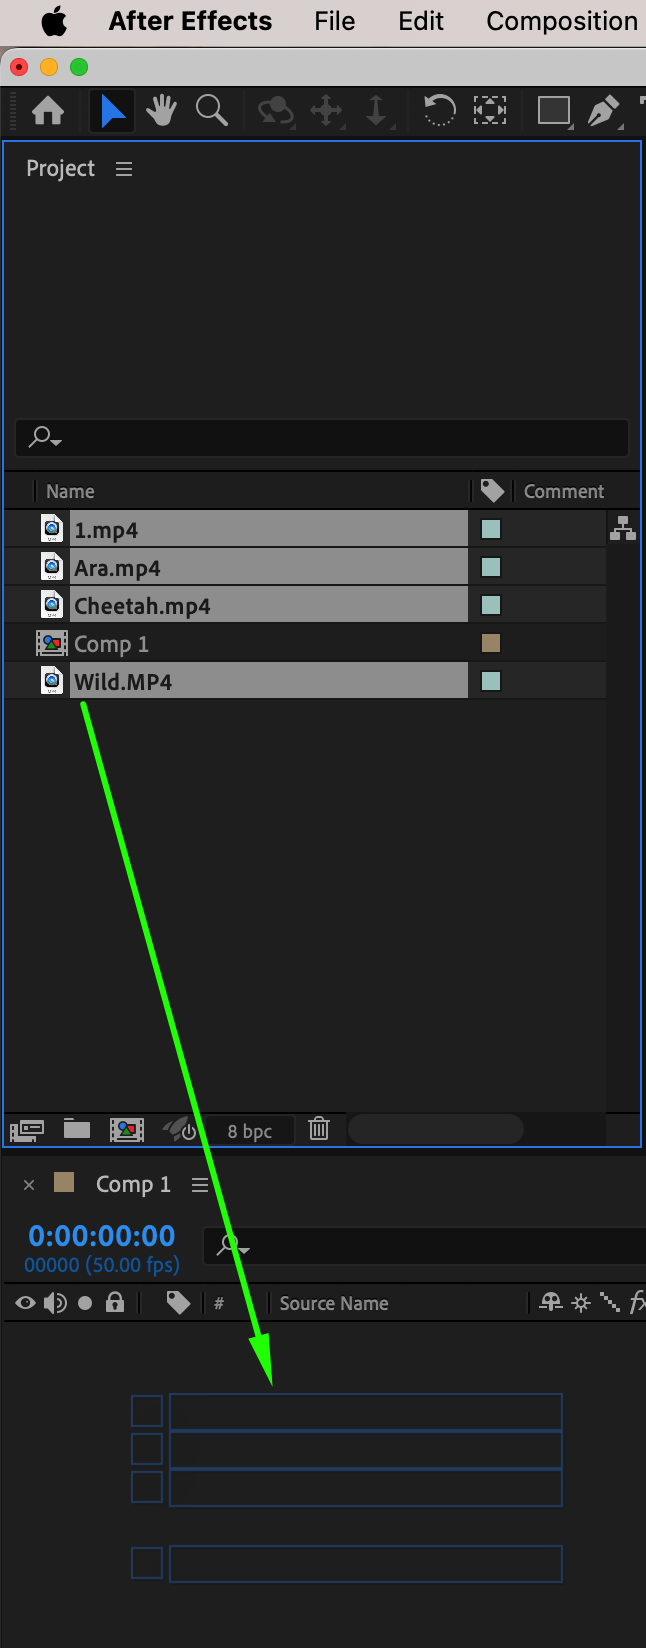
Now it’s time to arrange and resize your videos. Simply drag and drop your videos from the project panel into the composition timeline. Arrange them in the desired order and position them on the timeline accordingly. Use the current time indicator and the shortcuts “Alt/Option + [” and “Alt/Option + ]” to trim your layers.


 Step 4: Resize Your Videos
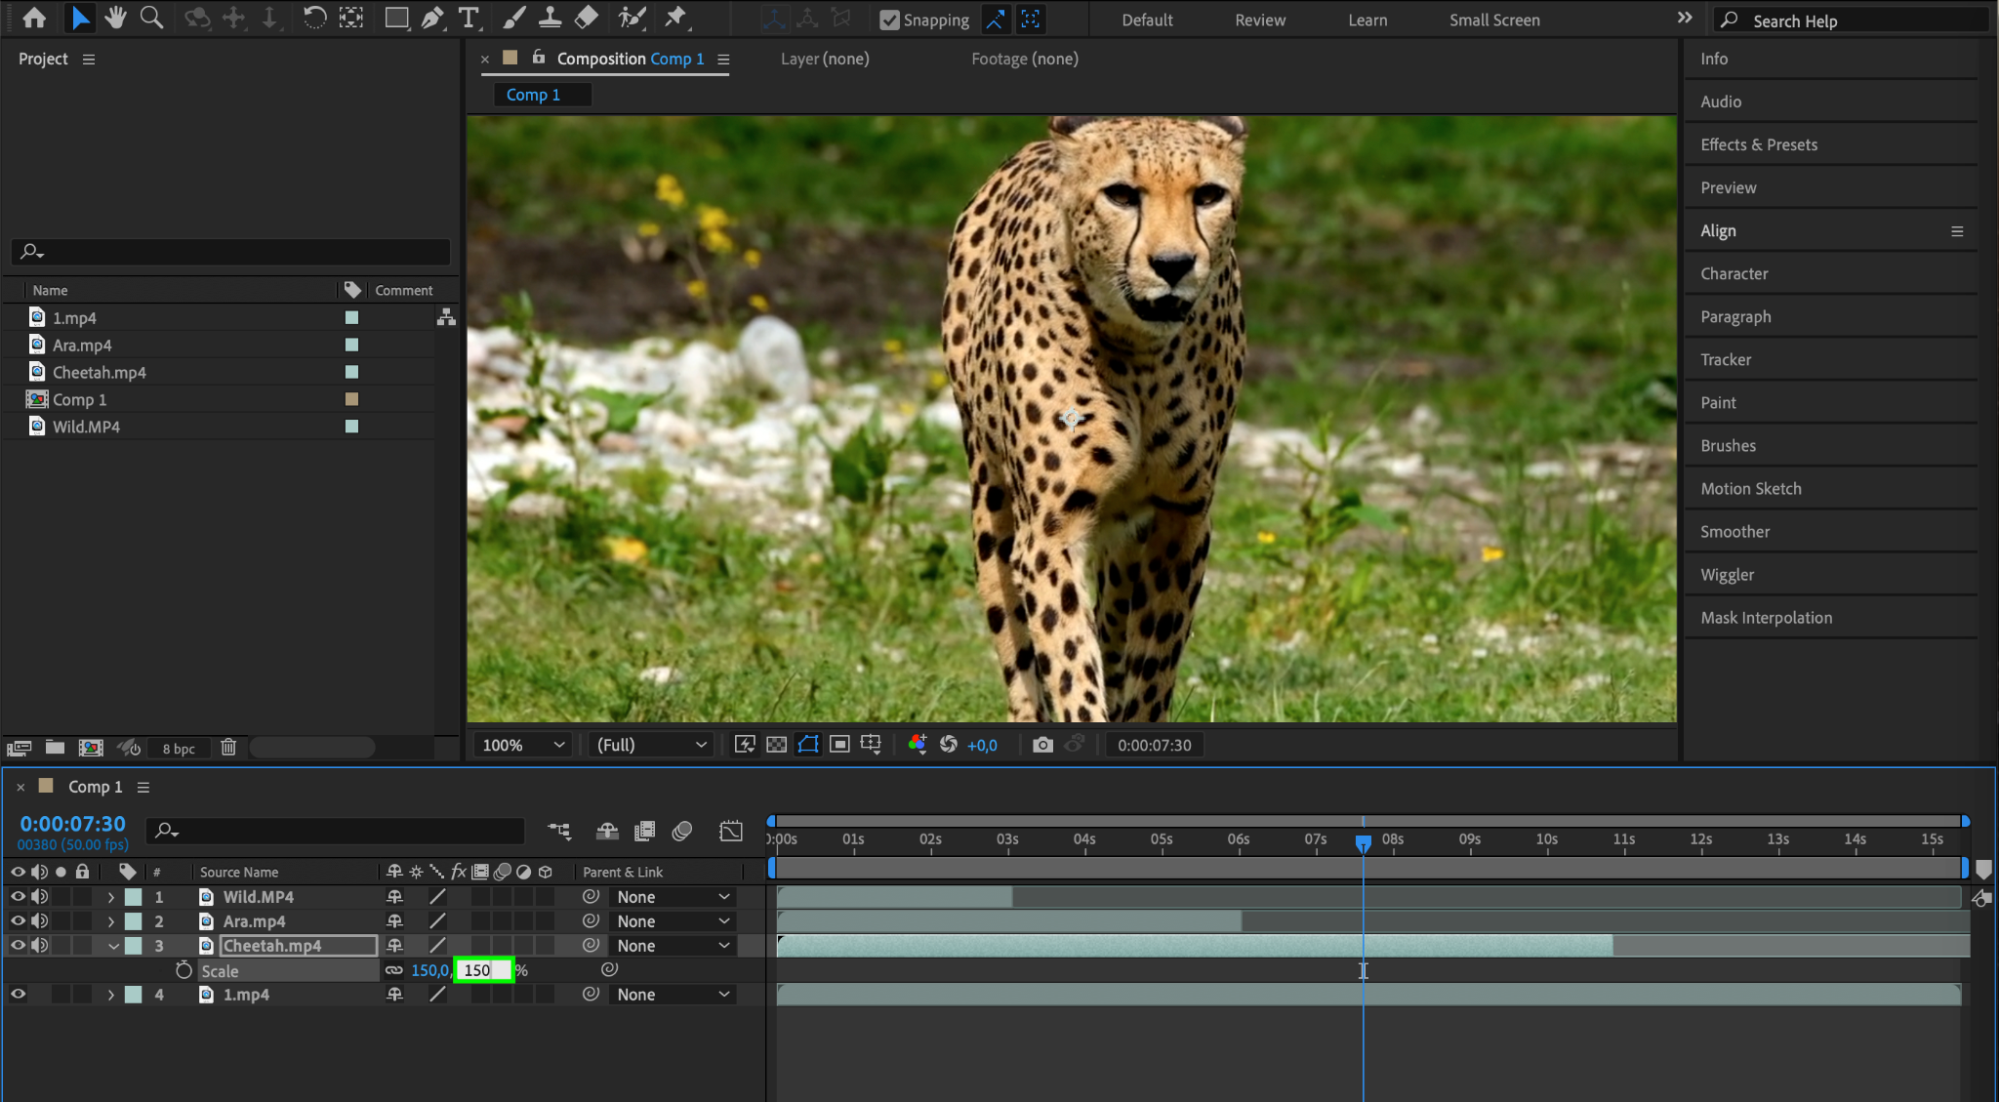
To resize your videos, select the video layer and press the “S” key to open the scale parameter for the chosen layer. Enter the desired value to adjust the size of the video.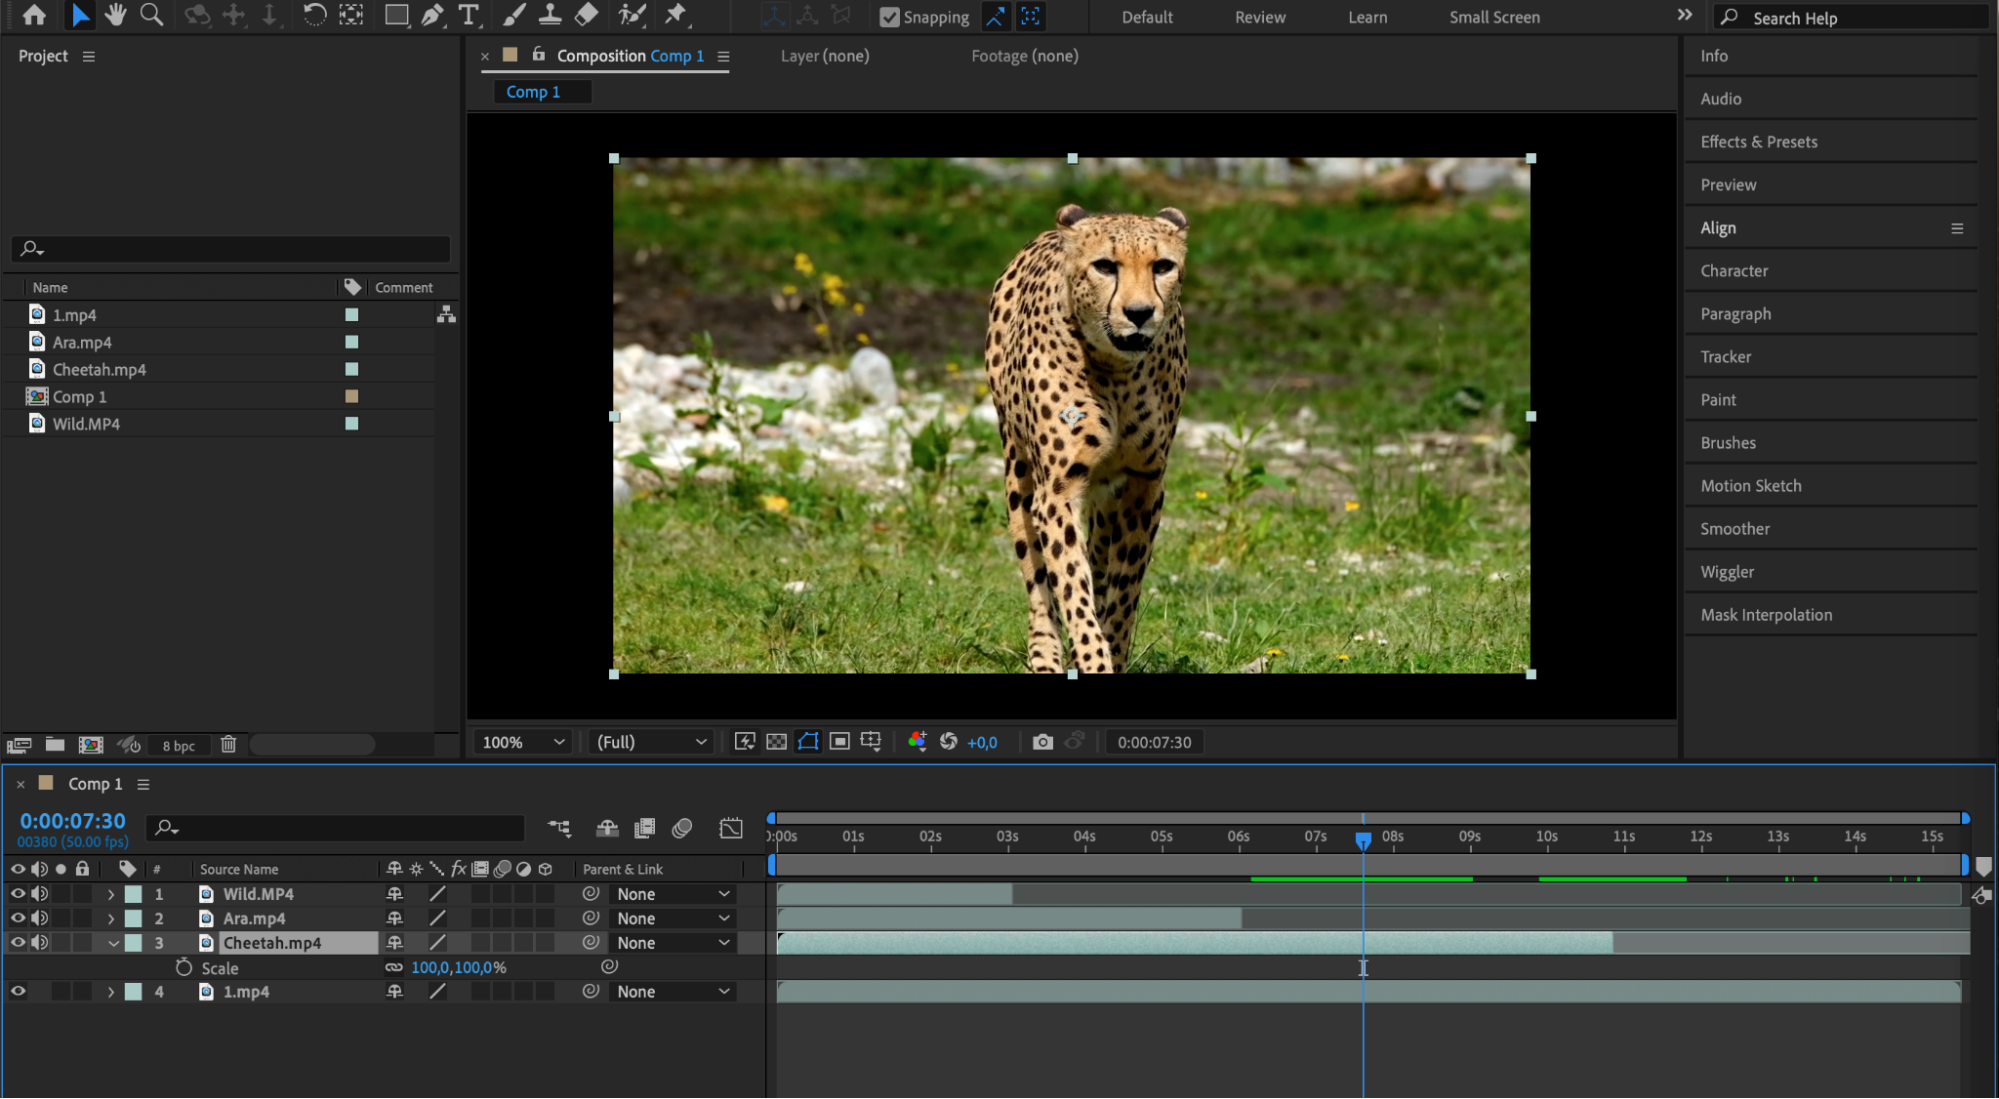
 Step 5: Apply Transitions and Effects
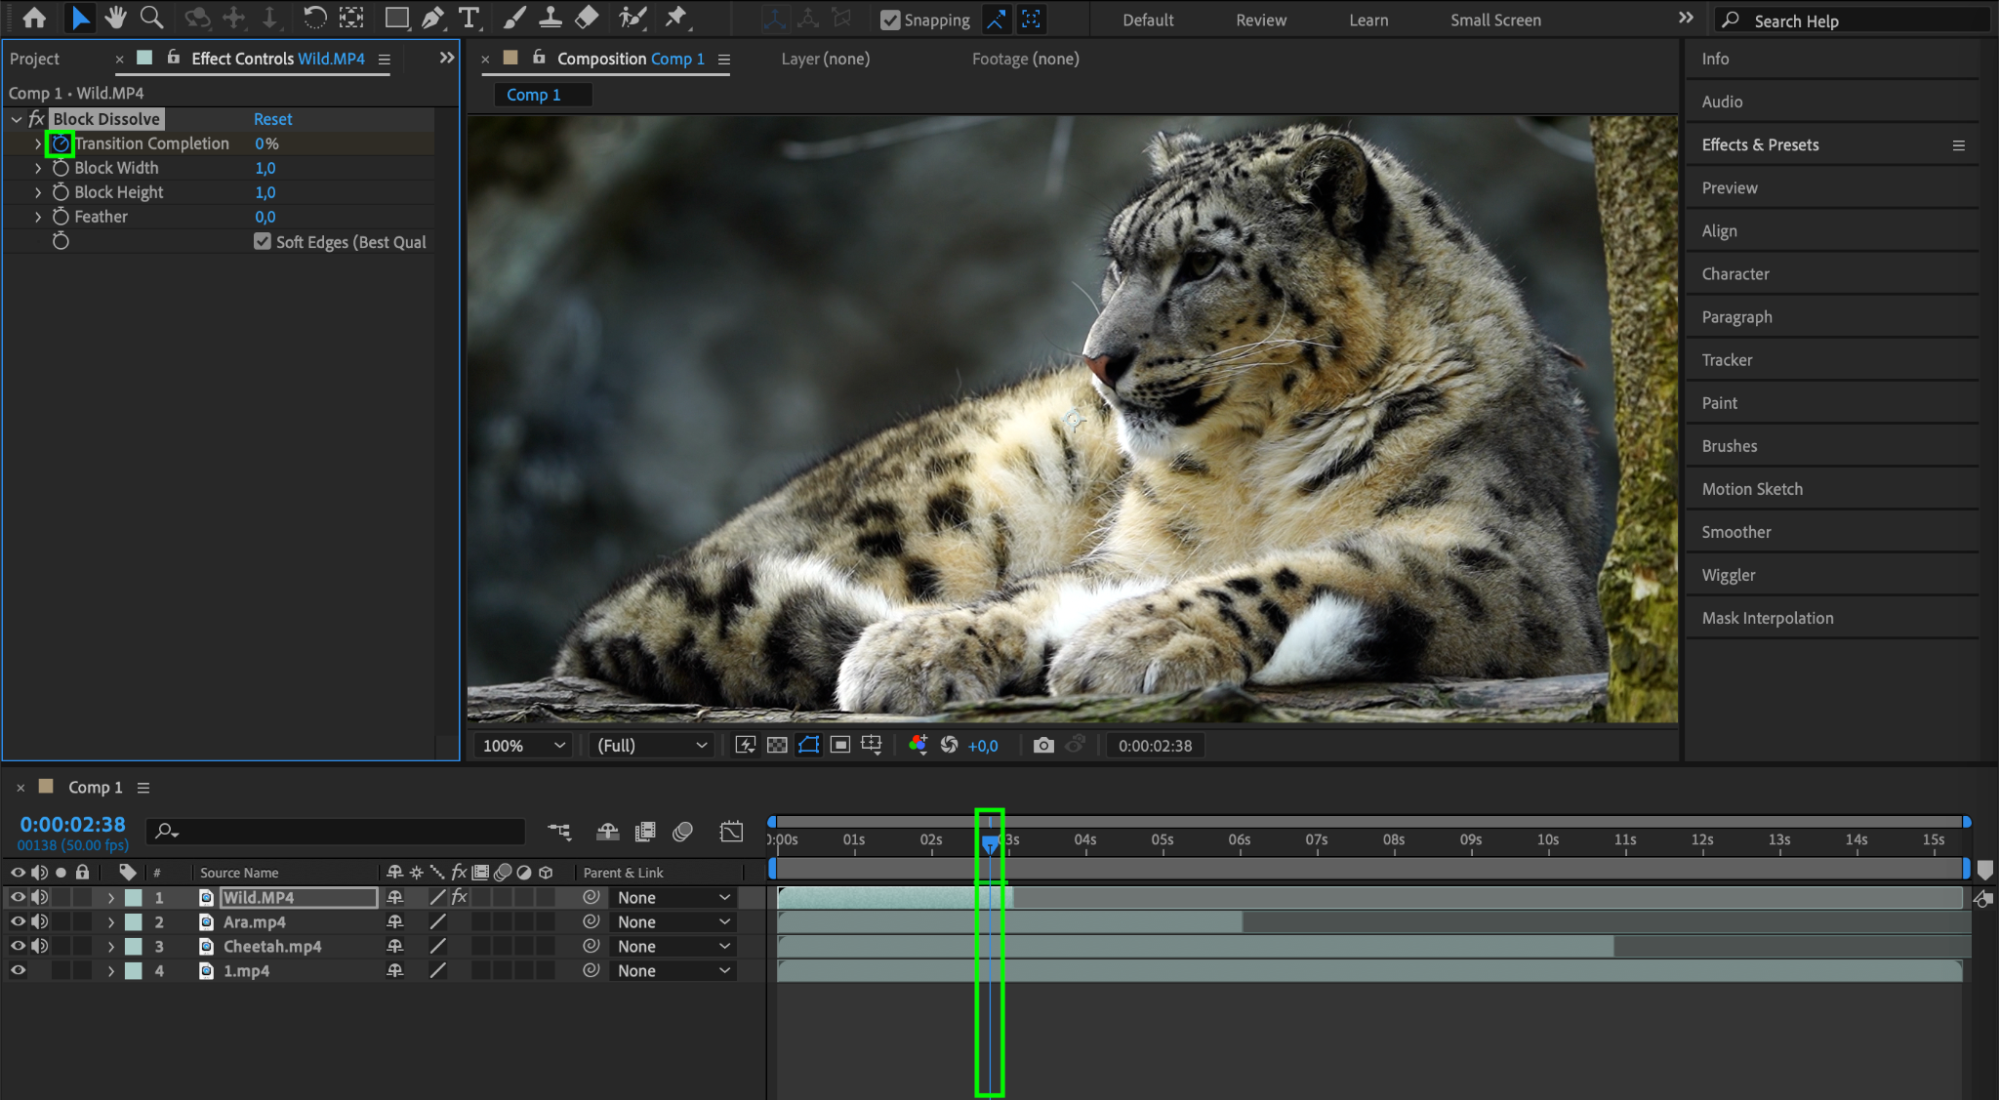
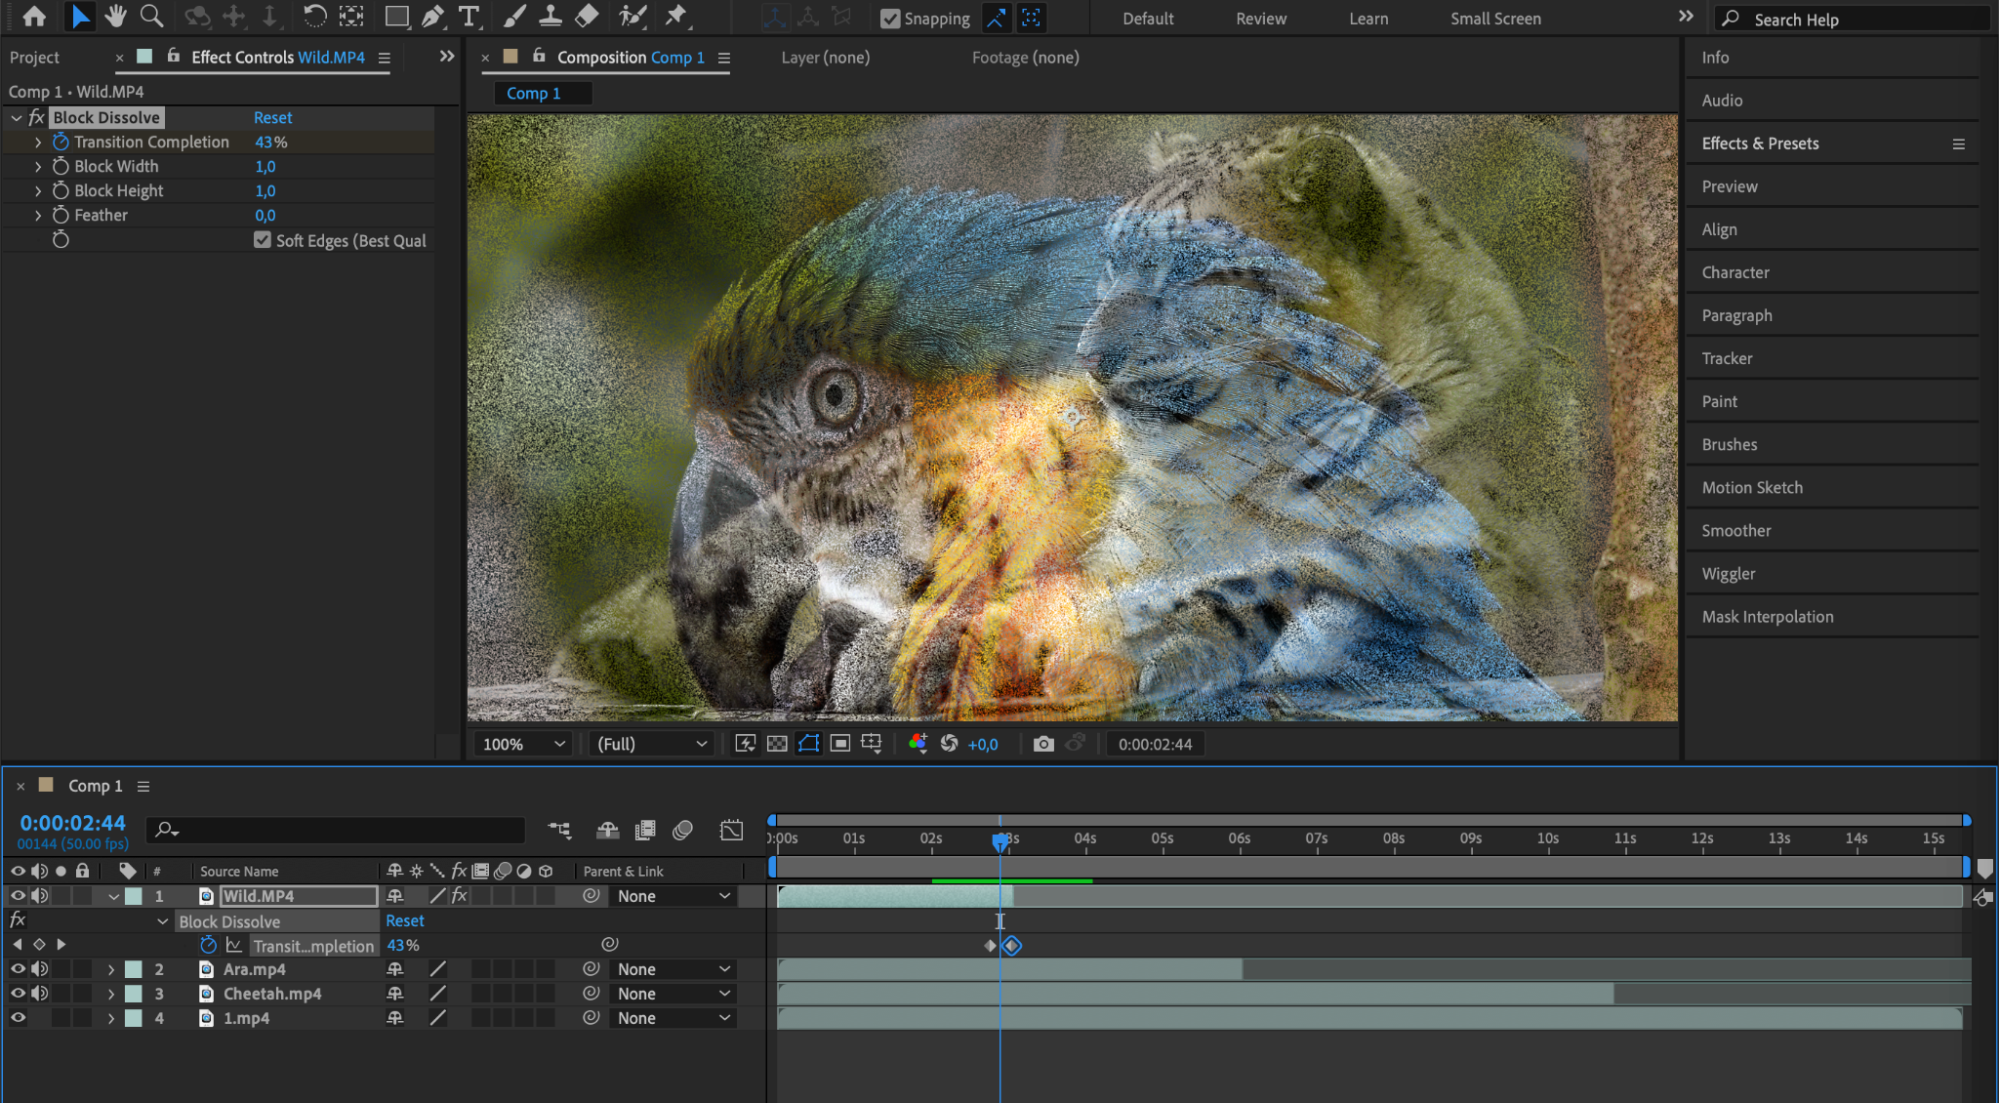
To make your composition more engaging, apply transitions and effects. After Effects offers a wide variety of built-in transitions and effects to choose from. Go to the “Effects & Presets” panel, select the desired transition, and drag it onto the layer where the transition should occur. Customize the duration and properties of the transitions and effects in the “Effect Controls” panel. Use the stopwatch icon next to the “Transition Completion” parameter to create keyframes and edit the transition process.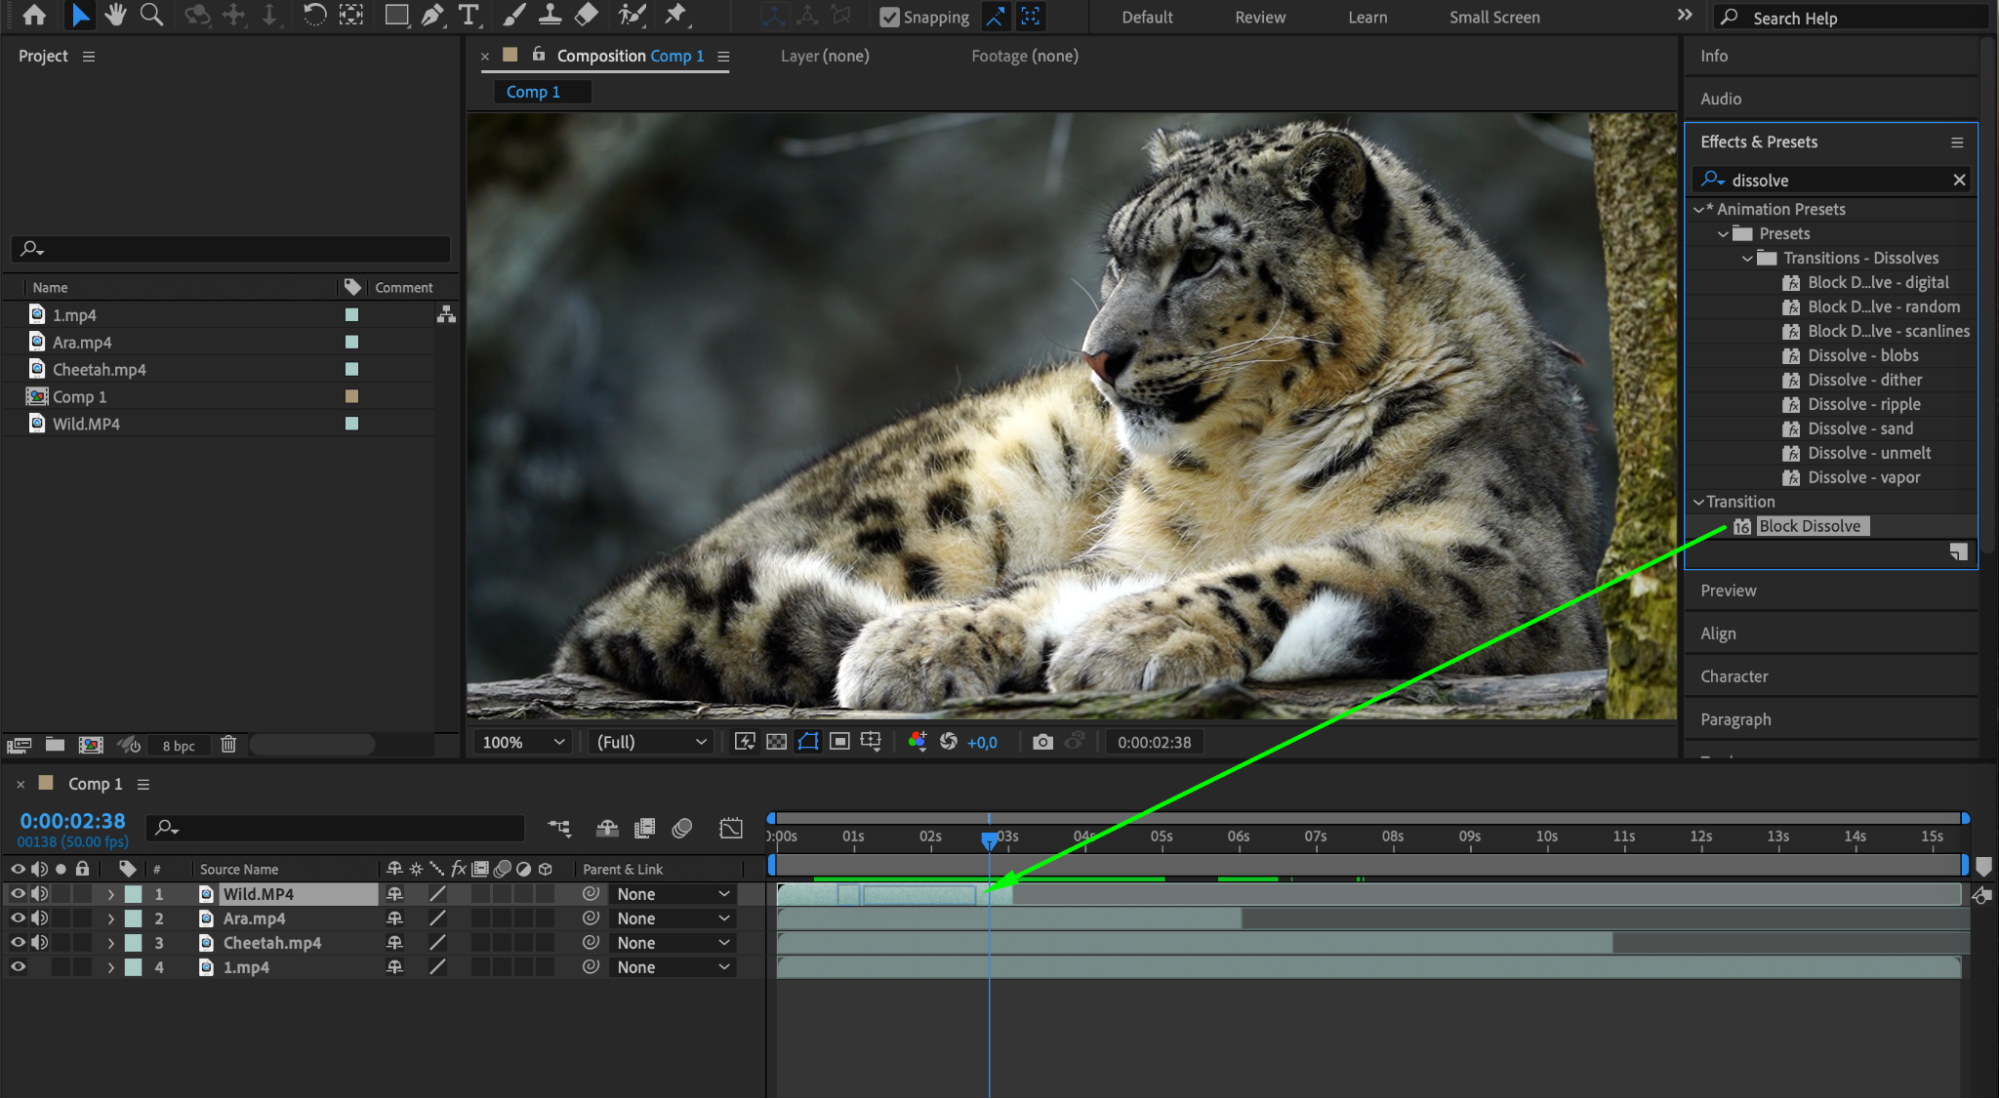

 Step 6: Enhance Your Composition with Audio
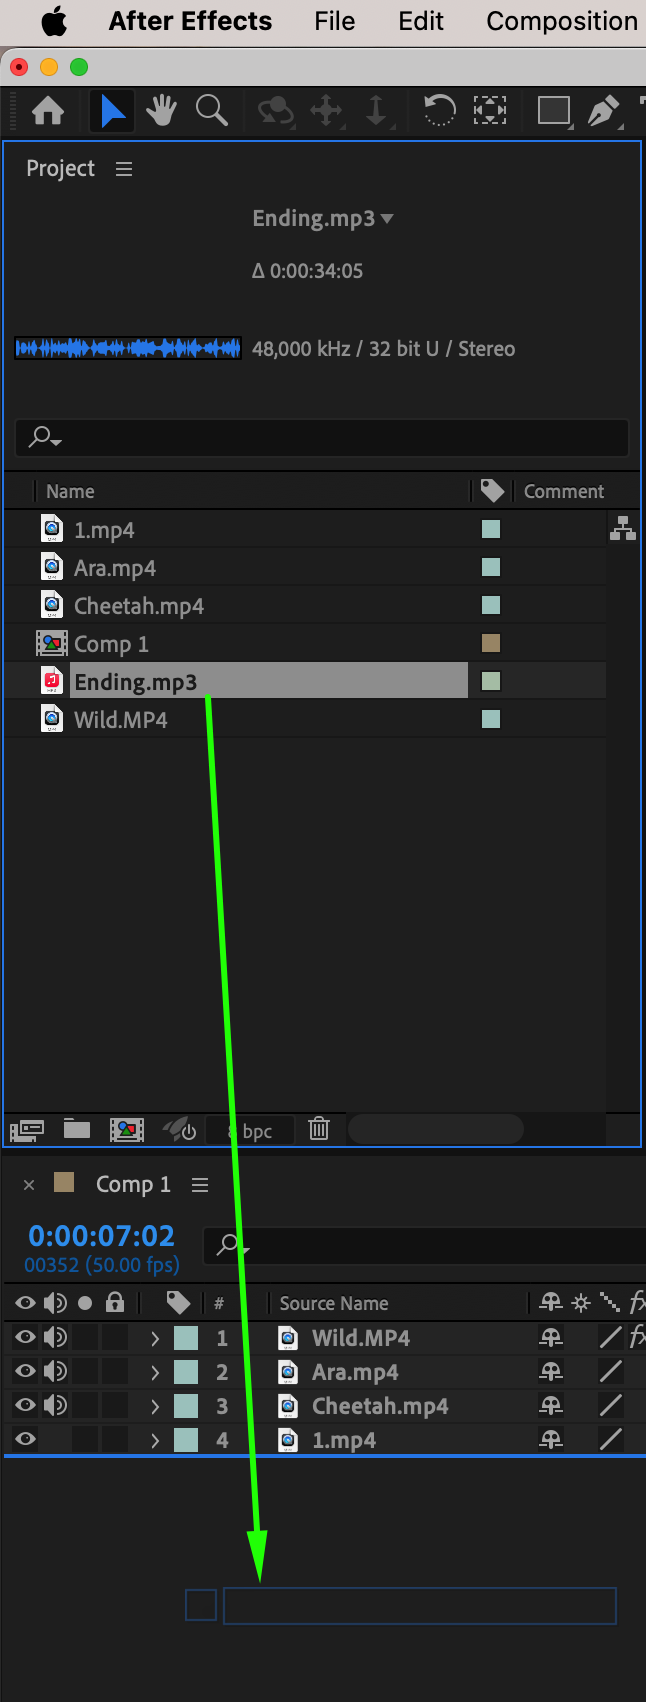
Enhance your composition with audio by importing and syncing audio files. Go to the “File” menu, select “Import”, and browse for your audio file. Drag and drop the audio file into your composition timeline and adjust the keyframes for the “Audio Levels” parameter to create gradual volume changes with each new layer. Experiment and use the “Waveform” section to precisely manipulate the audio.
 Step 7: Add Text Layers
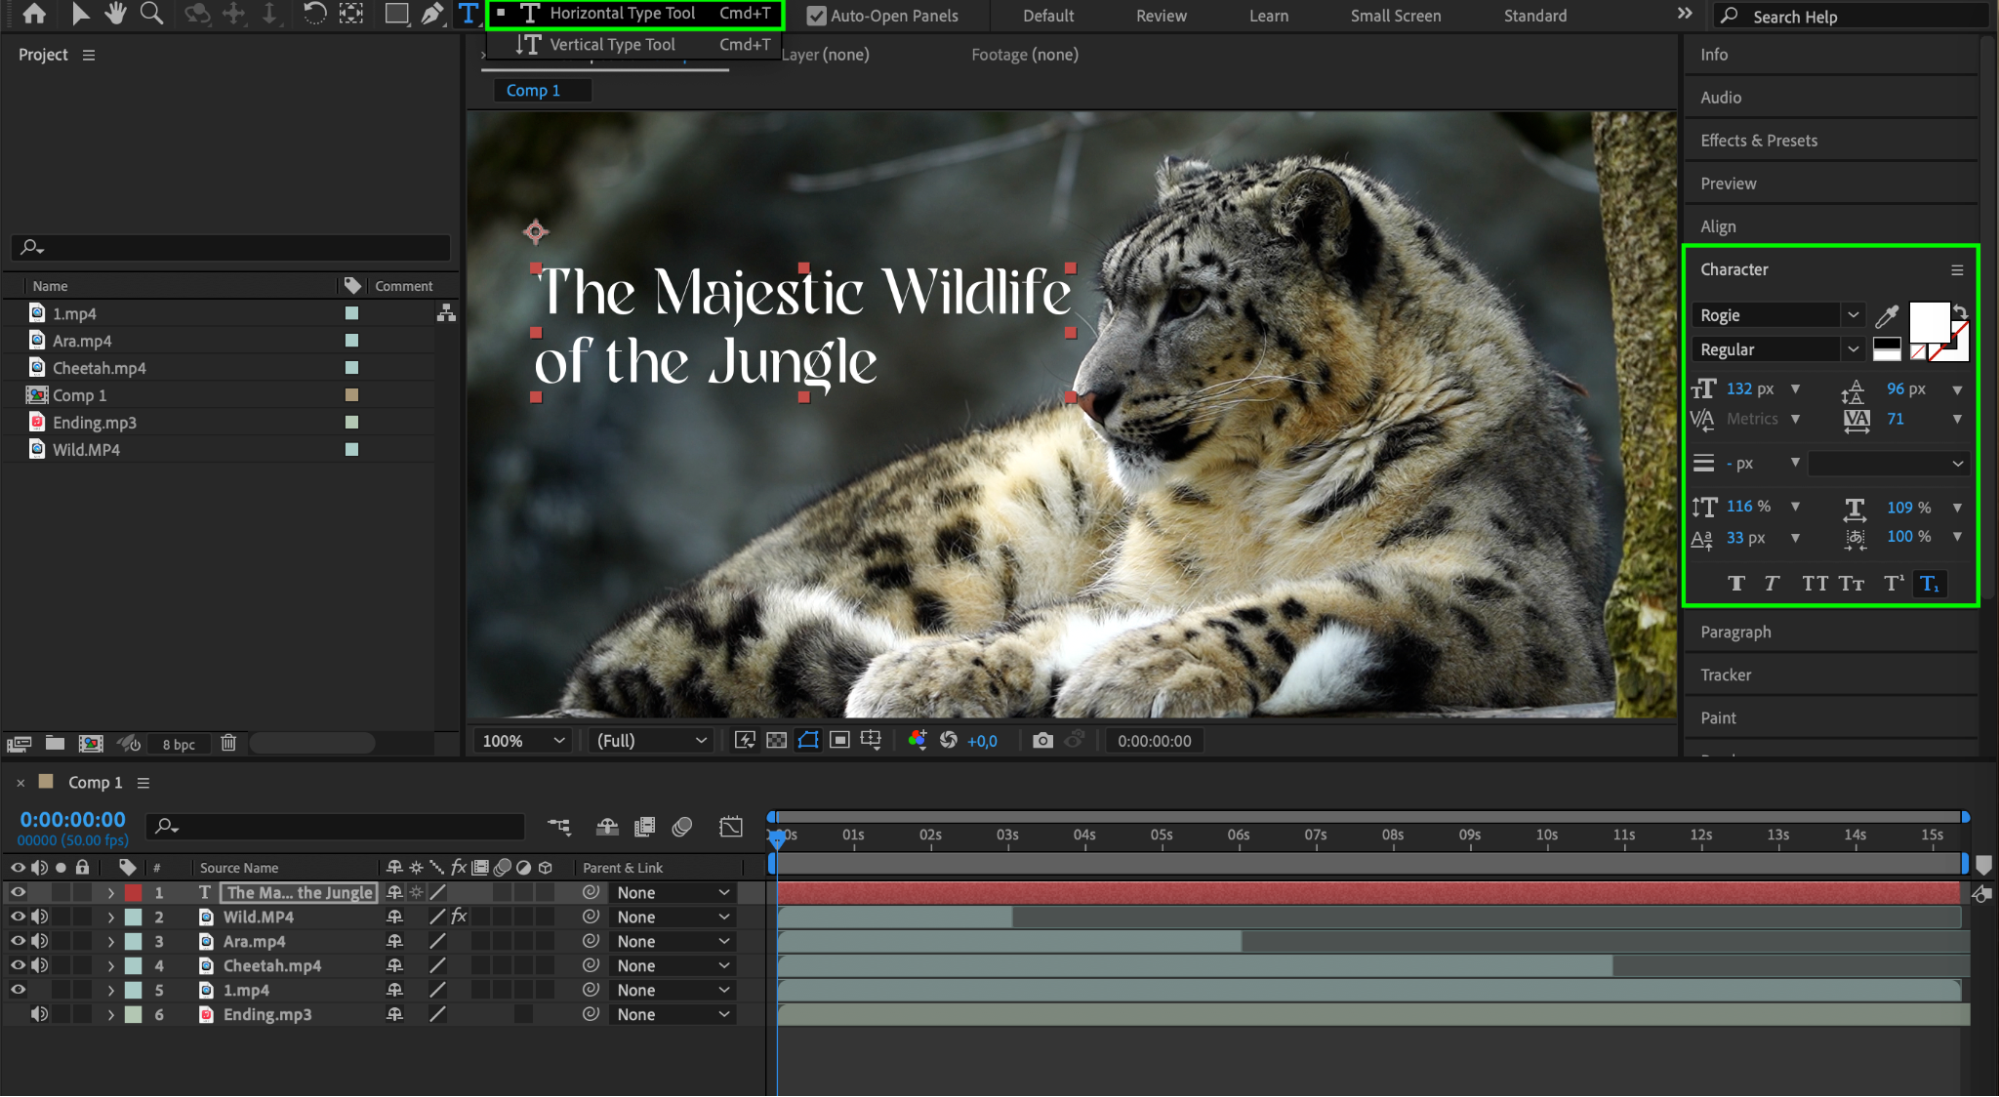
Add text layers by going to the “Layer” menu, selecting “New”, and then “Text” or use the type tool from the toolbar to create text. Customize the appearance of your text using the options in the “Character” panel.
 Step 8: Export Your Final Composition
Once you are satisfied with your combined videos, it’s time to export your masterpiece. After Effects offers a range of export options, such as MP4 and MOV. Go to the “Composition” menu, select “Add to Adobe Media Encoder Queue”, and in Adobe Media Encoder, set the desired export settings and choose the location to save your final video.
 Conclusion
Combining multiple videos into one using After Effects allows you to create impressive and professional-looking videos. Follow these steps and explore the various features and effects available to unleash your creativity and captivate your audience. So, let’s get started and merge those videos into a seamless composition that leaves a lasting impact!


