How to Composite 3D Wireframe Text in Adobe After Effects
Introduction
Creating a wireframe text effect in Adobe After Effects can give your motion design a futuristic or technical look. By using 3D layers, effects like Find Edges, and lighting techniques, you can simulate the appearance of a glowing wireframe mesh. This tutorial will guide you step-by-step through the process.
Step 1: Create a New Composition
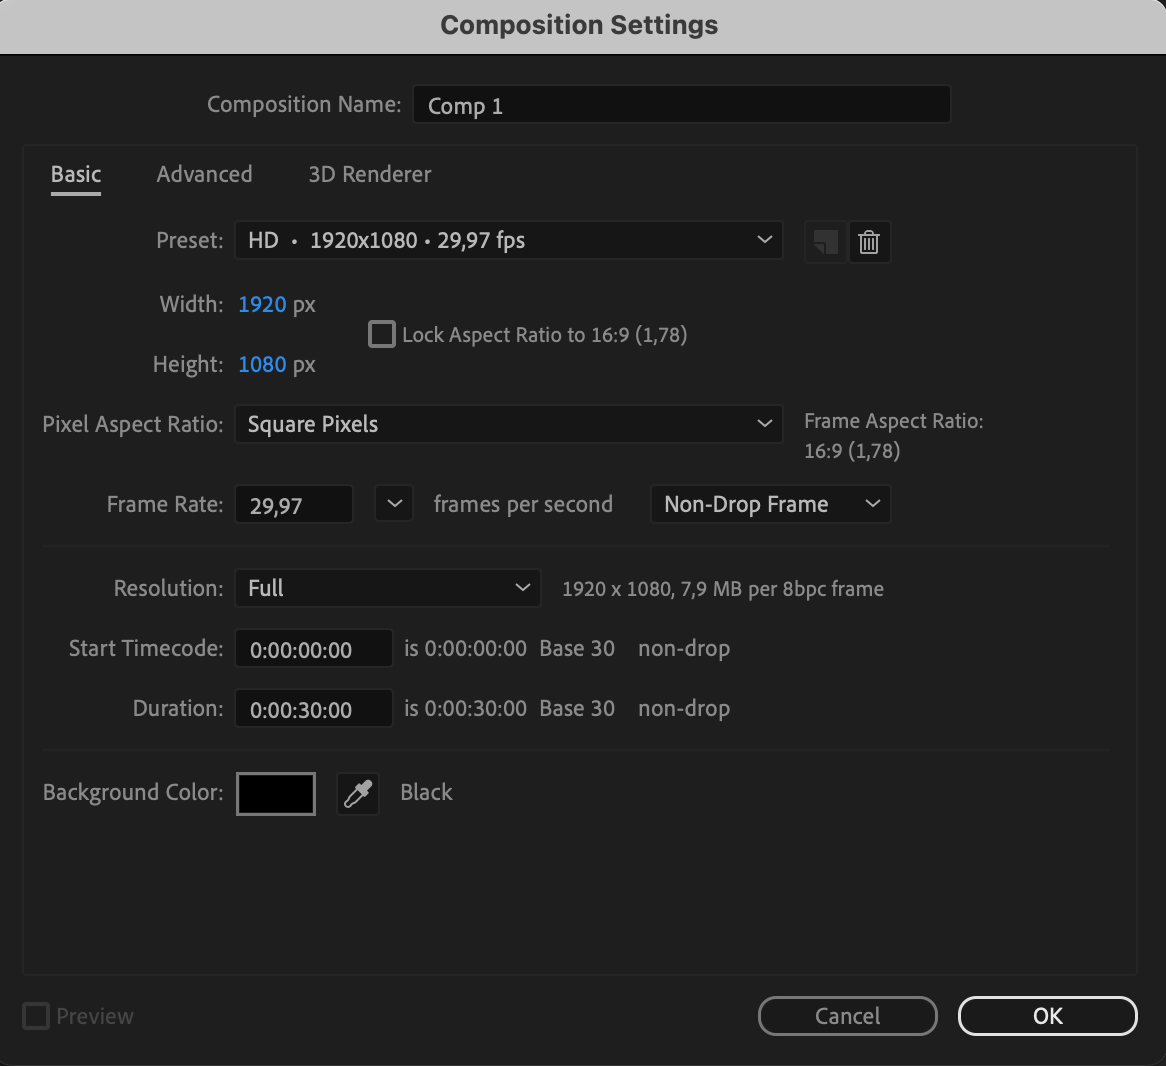
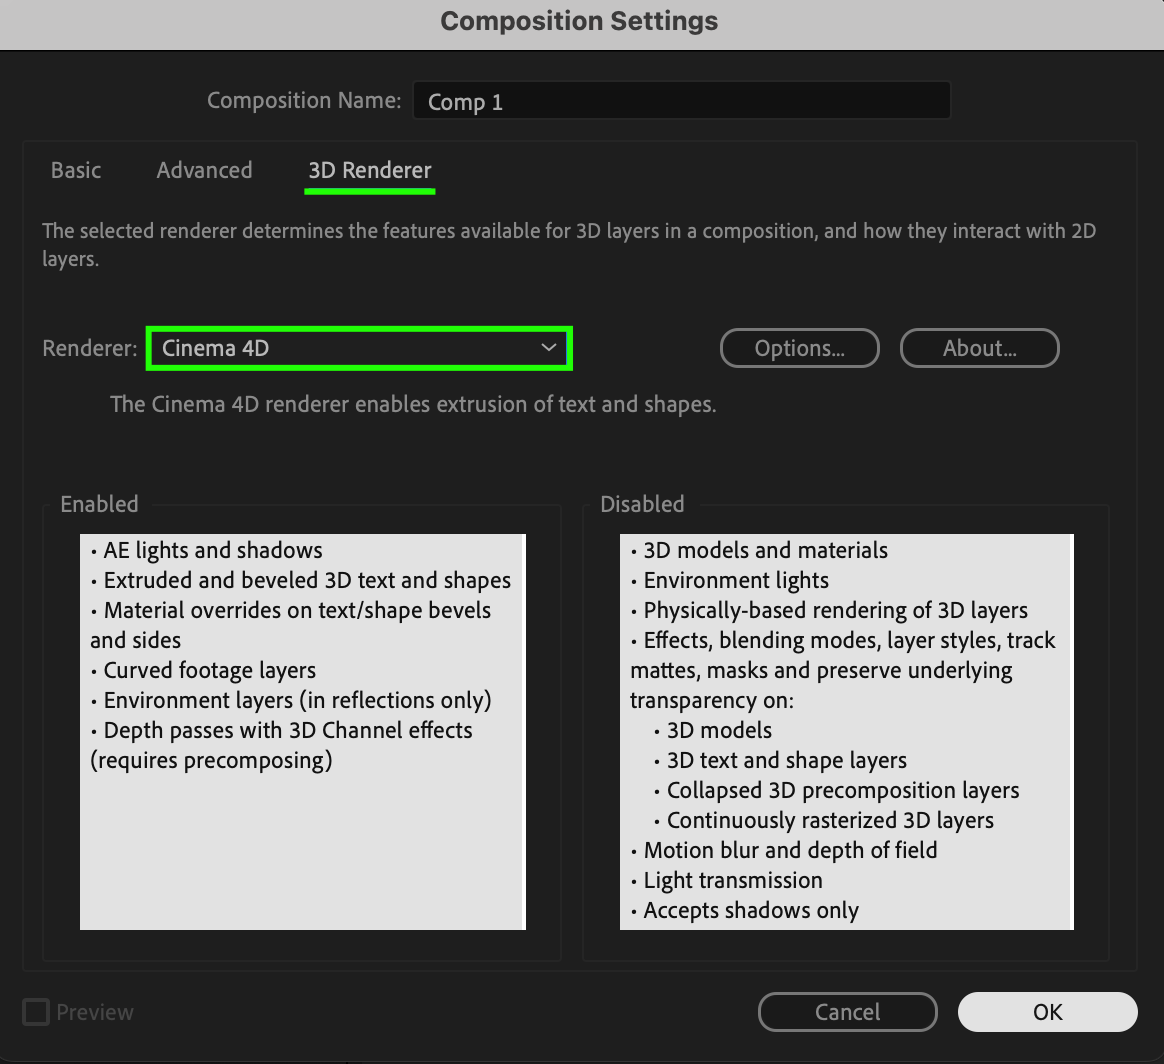
Start by creating a new composition. Go to Composition > New Composition. In the composition settings, change the Renderer to Cinema 4D. This allows you to extrude 3D text and access additional 3D features in After Effects
 Step 2: Add and Convert Text to 3D
Use the Type Tool (Ctrl/Cmd + T) to create your text. After typing, enable the 3D switch for the layer. Then, go to the Character panel or Geometry Options in the Timeline and increase the Extrusion Depth to around 107 to make the text three-dimensional.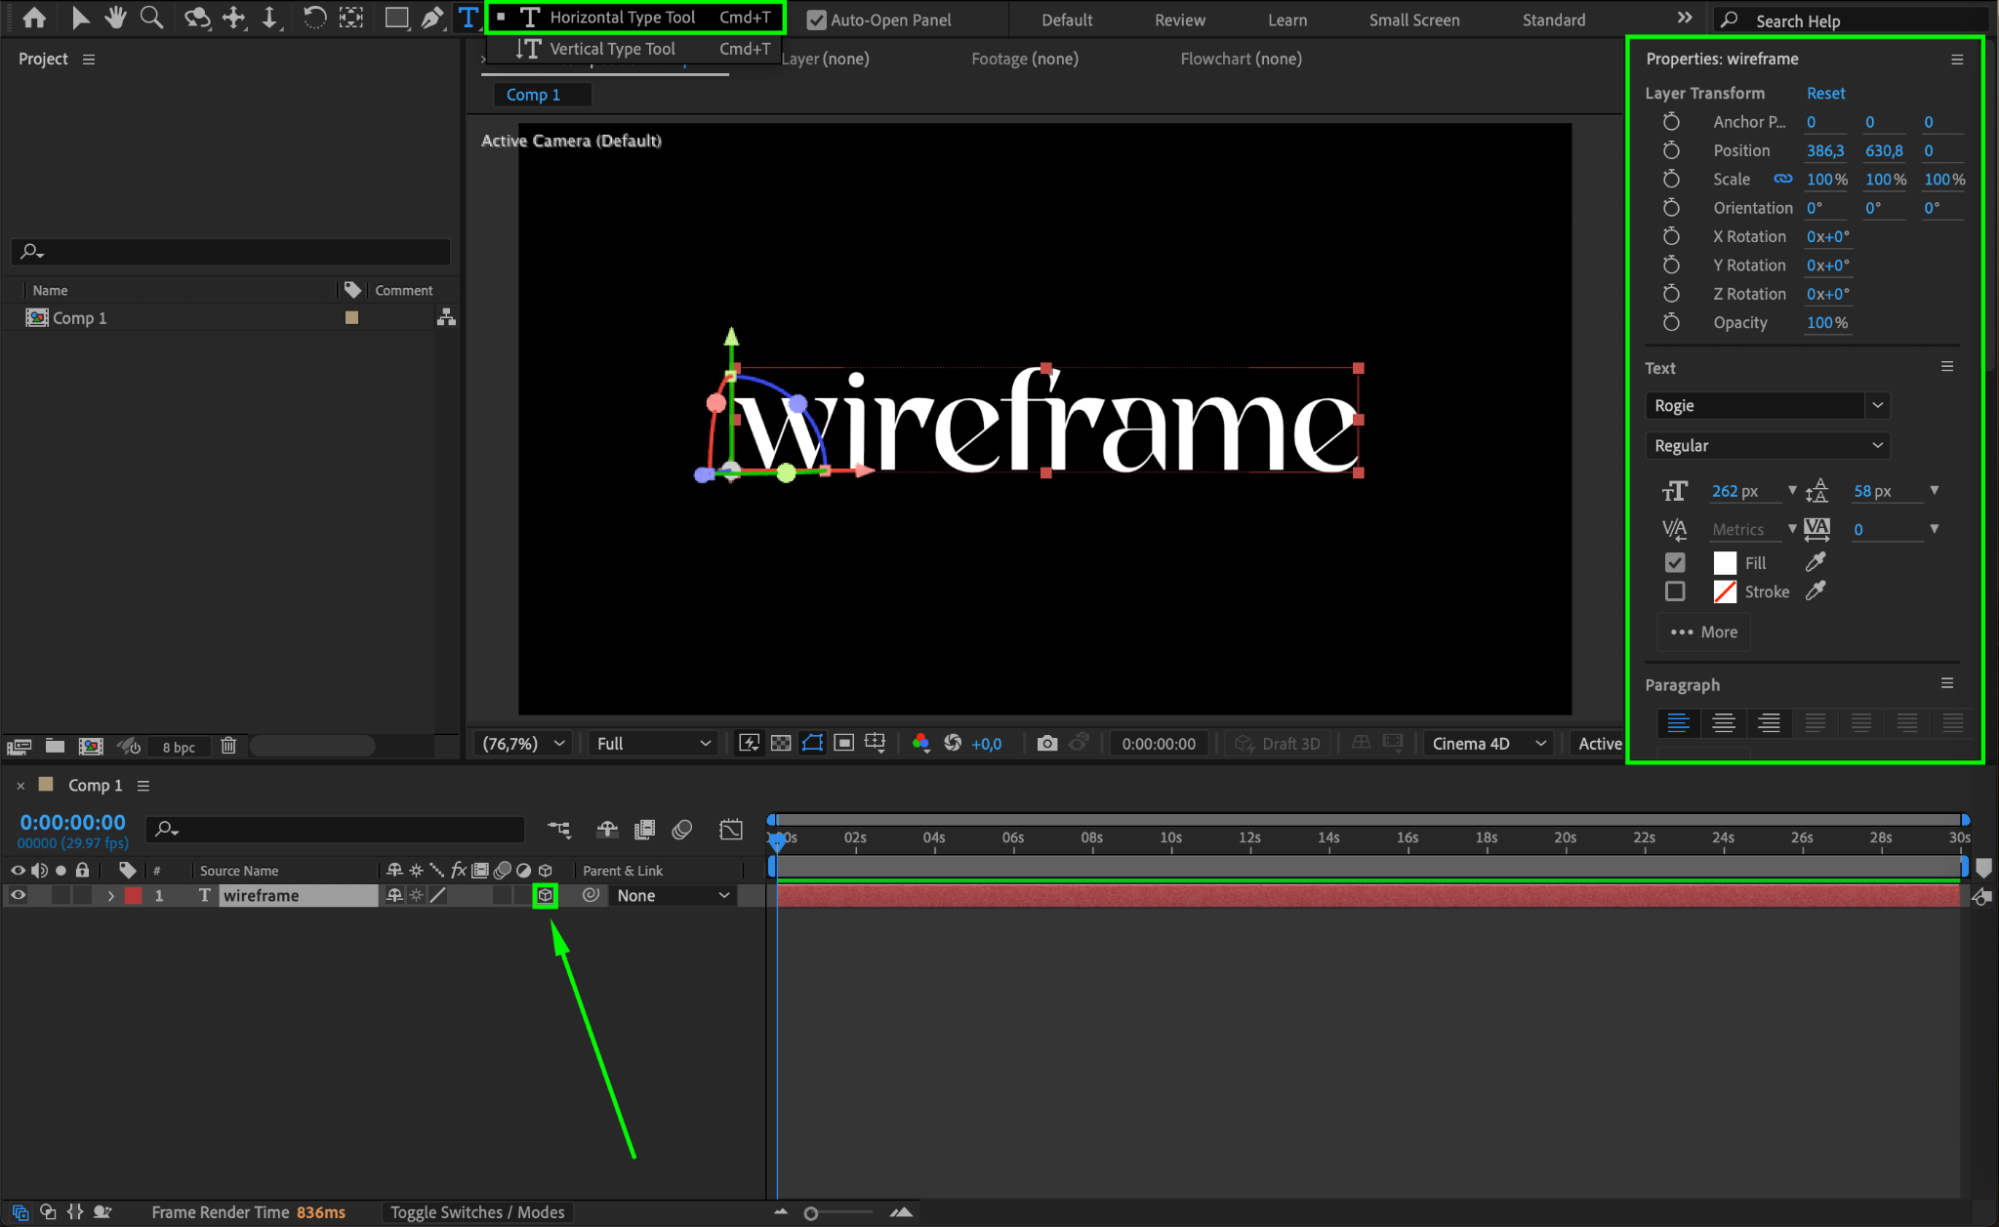
Get 10% off when you subscribe to our newsletter

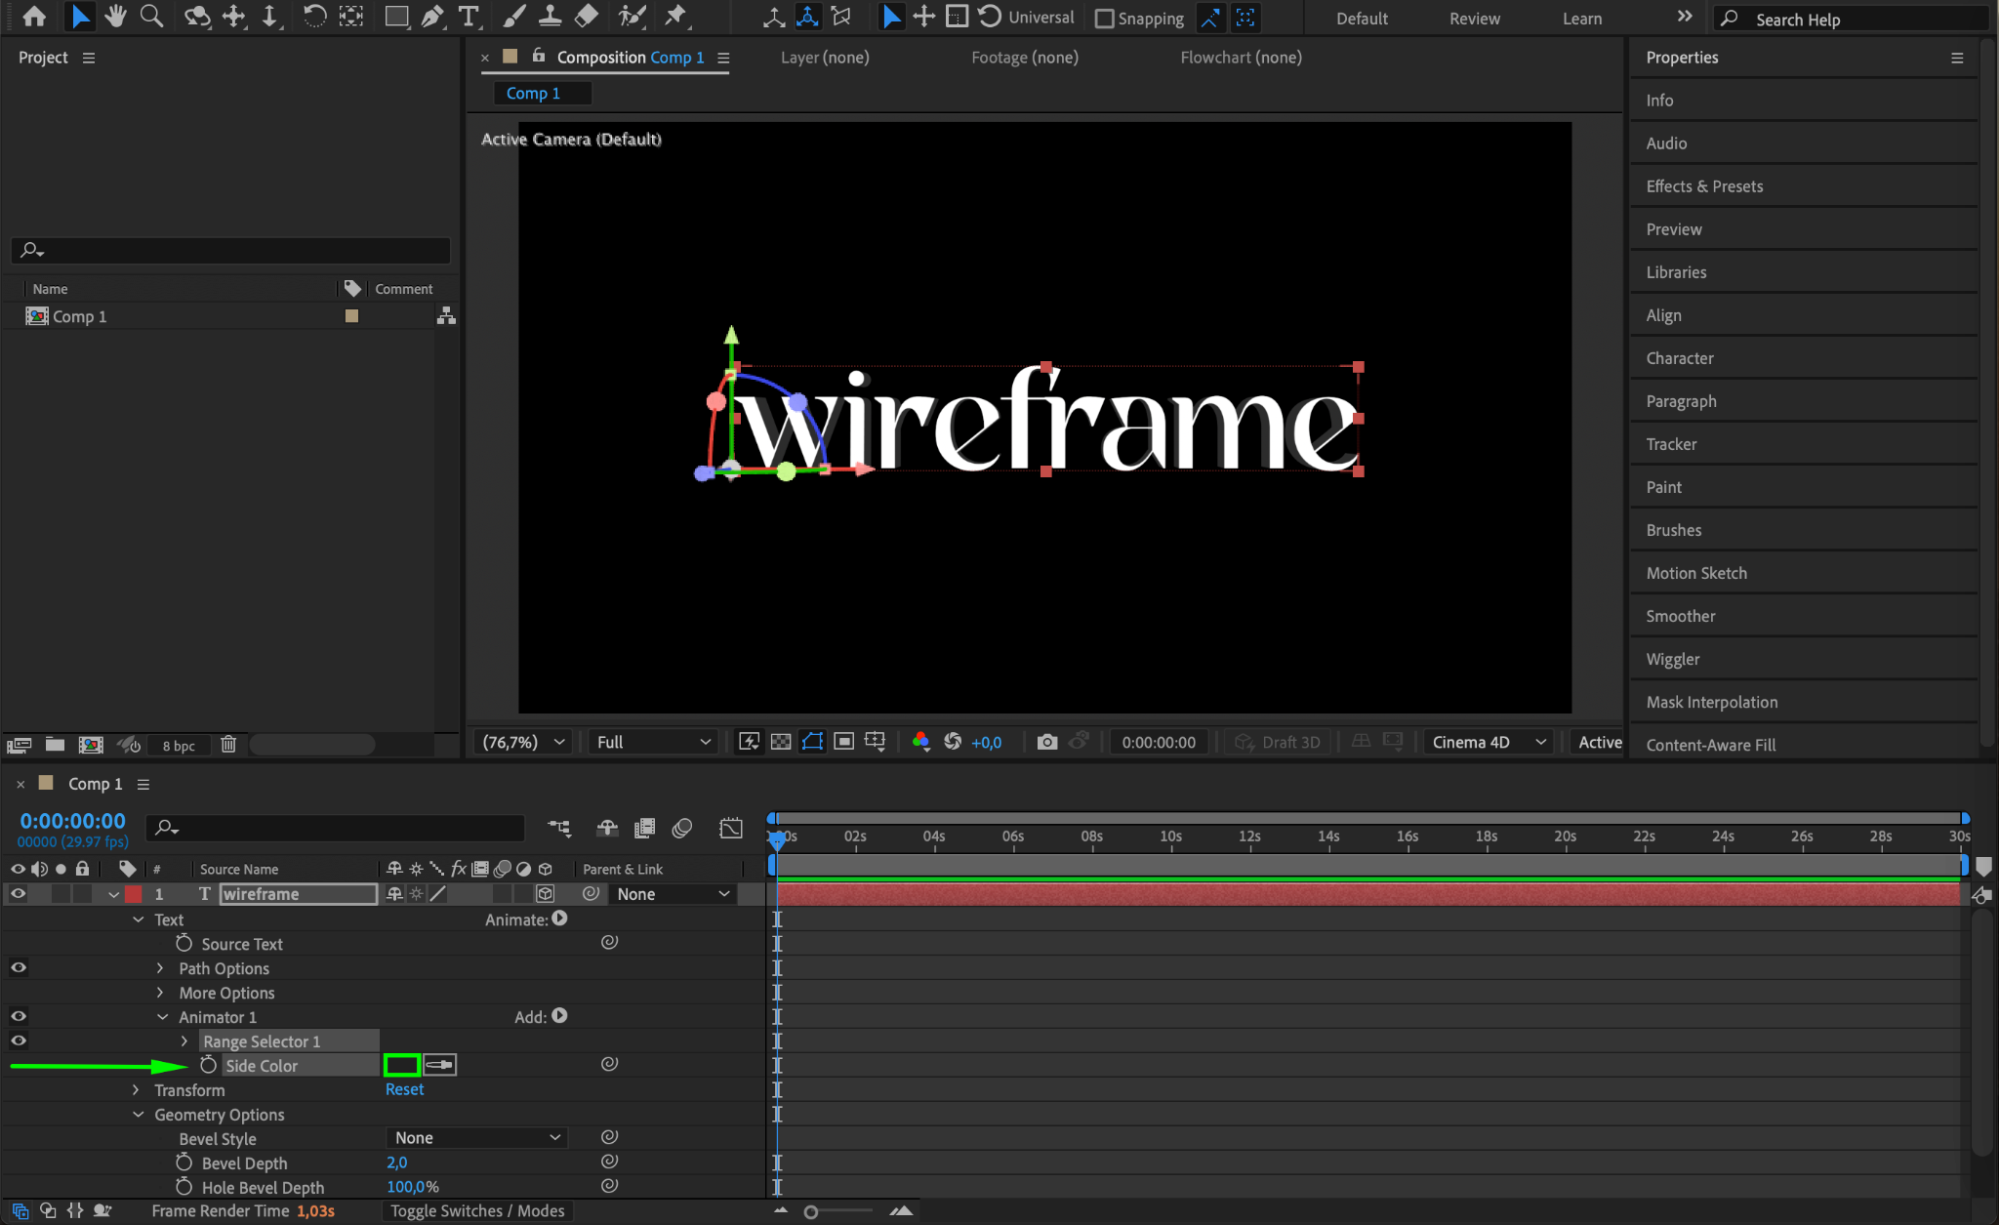
Step 3: Animate Color and Apply Side Color
Click on the Animate menu of the text layer, choose Side > Color > RGB, and set the color to a dark grey. This will help the edges stand out later in the wireframe effect.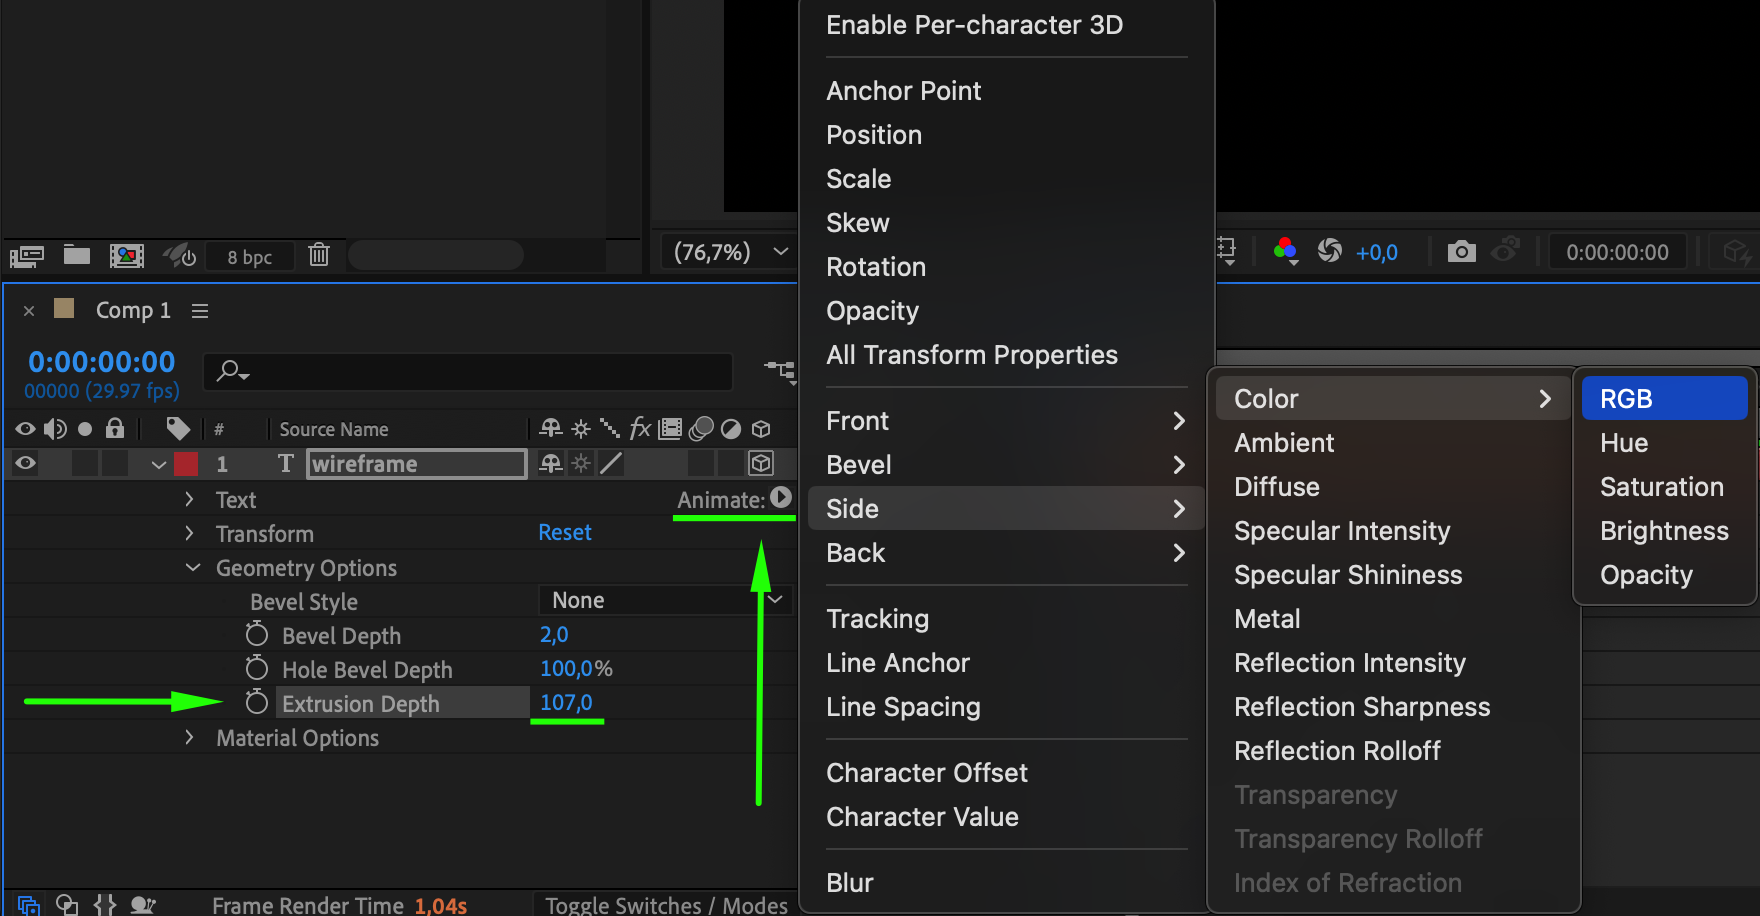
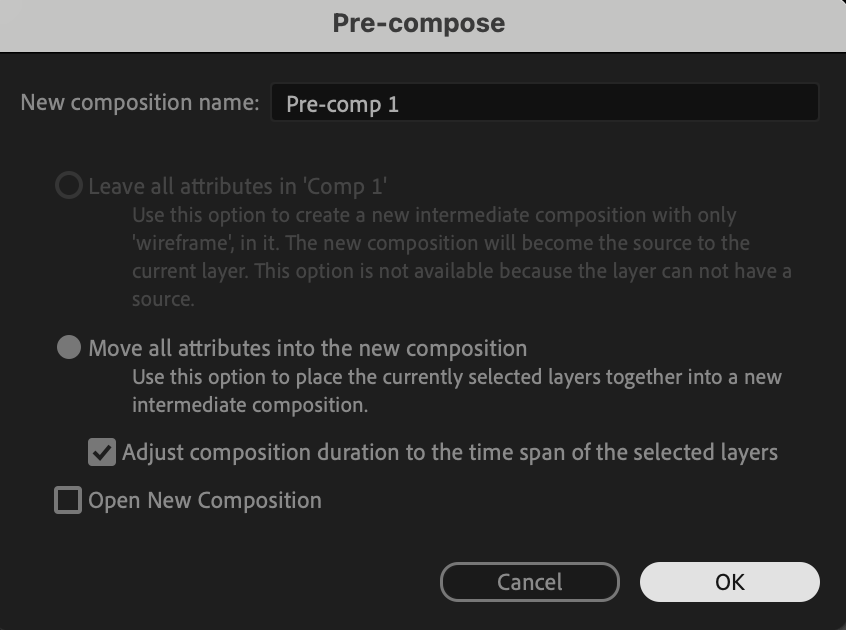
 Step 4: Pre-compose the Text Layer
Select the text layer, then go to Layer > Pre-compose. Move all attributes into the new composition. This helps isolate the wireframe processing.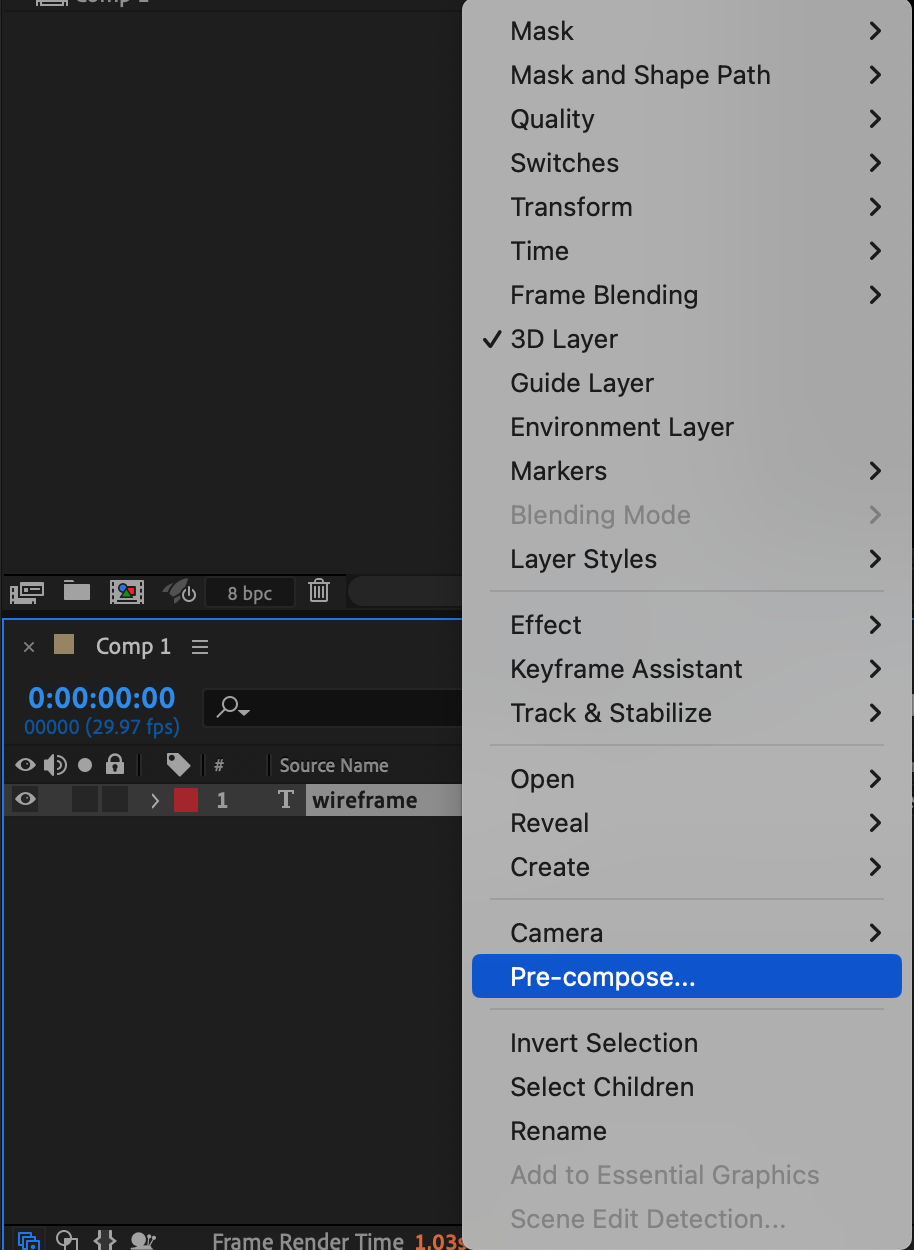
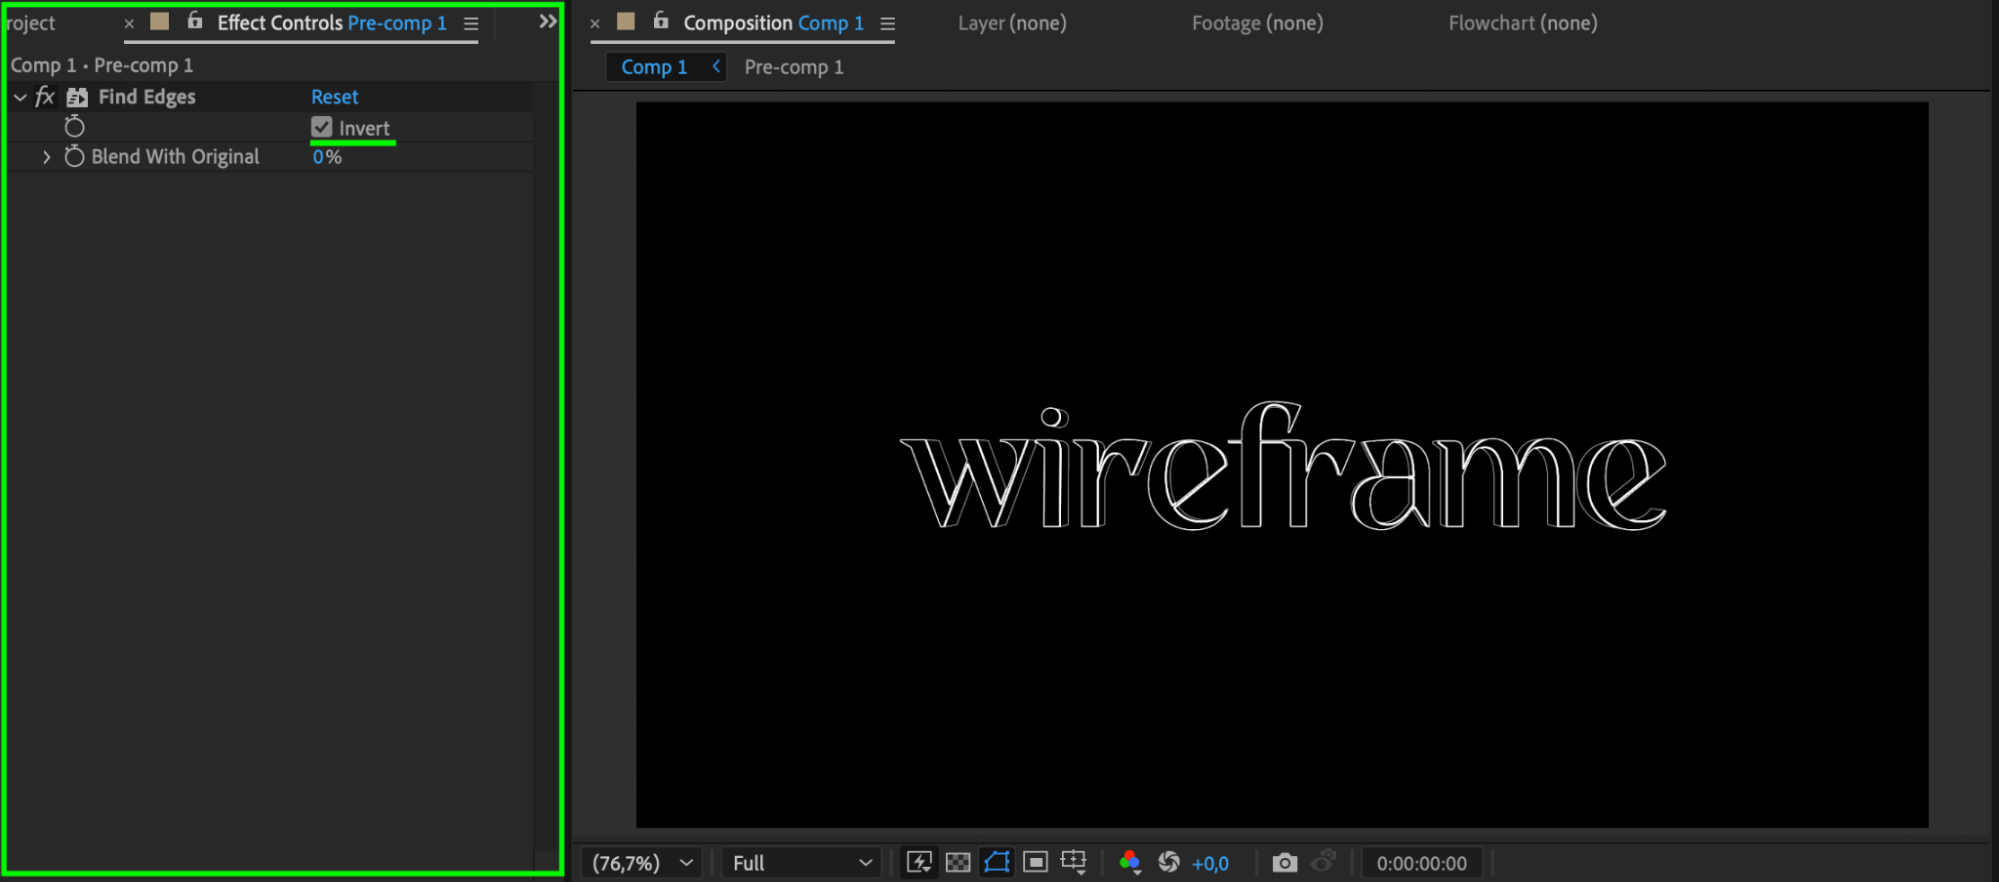
 Step 5: Apply Find Edges Effect
With the pre-comp selected, go to Effect > Stylize > Find Edges. In the Effect Controls panel, click on the Invert checkbox to turn the filled text into a white-on-black edge outline.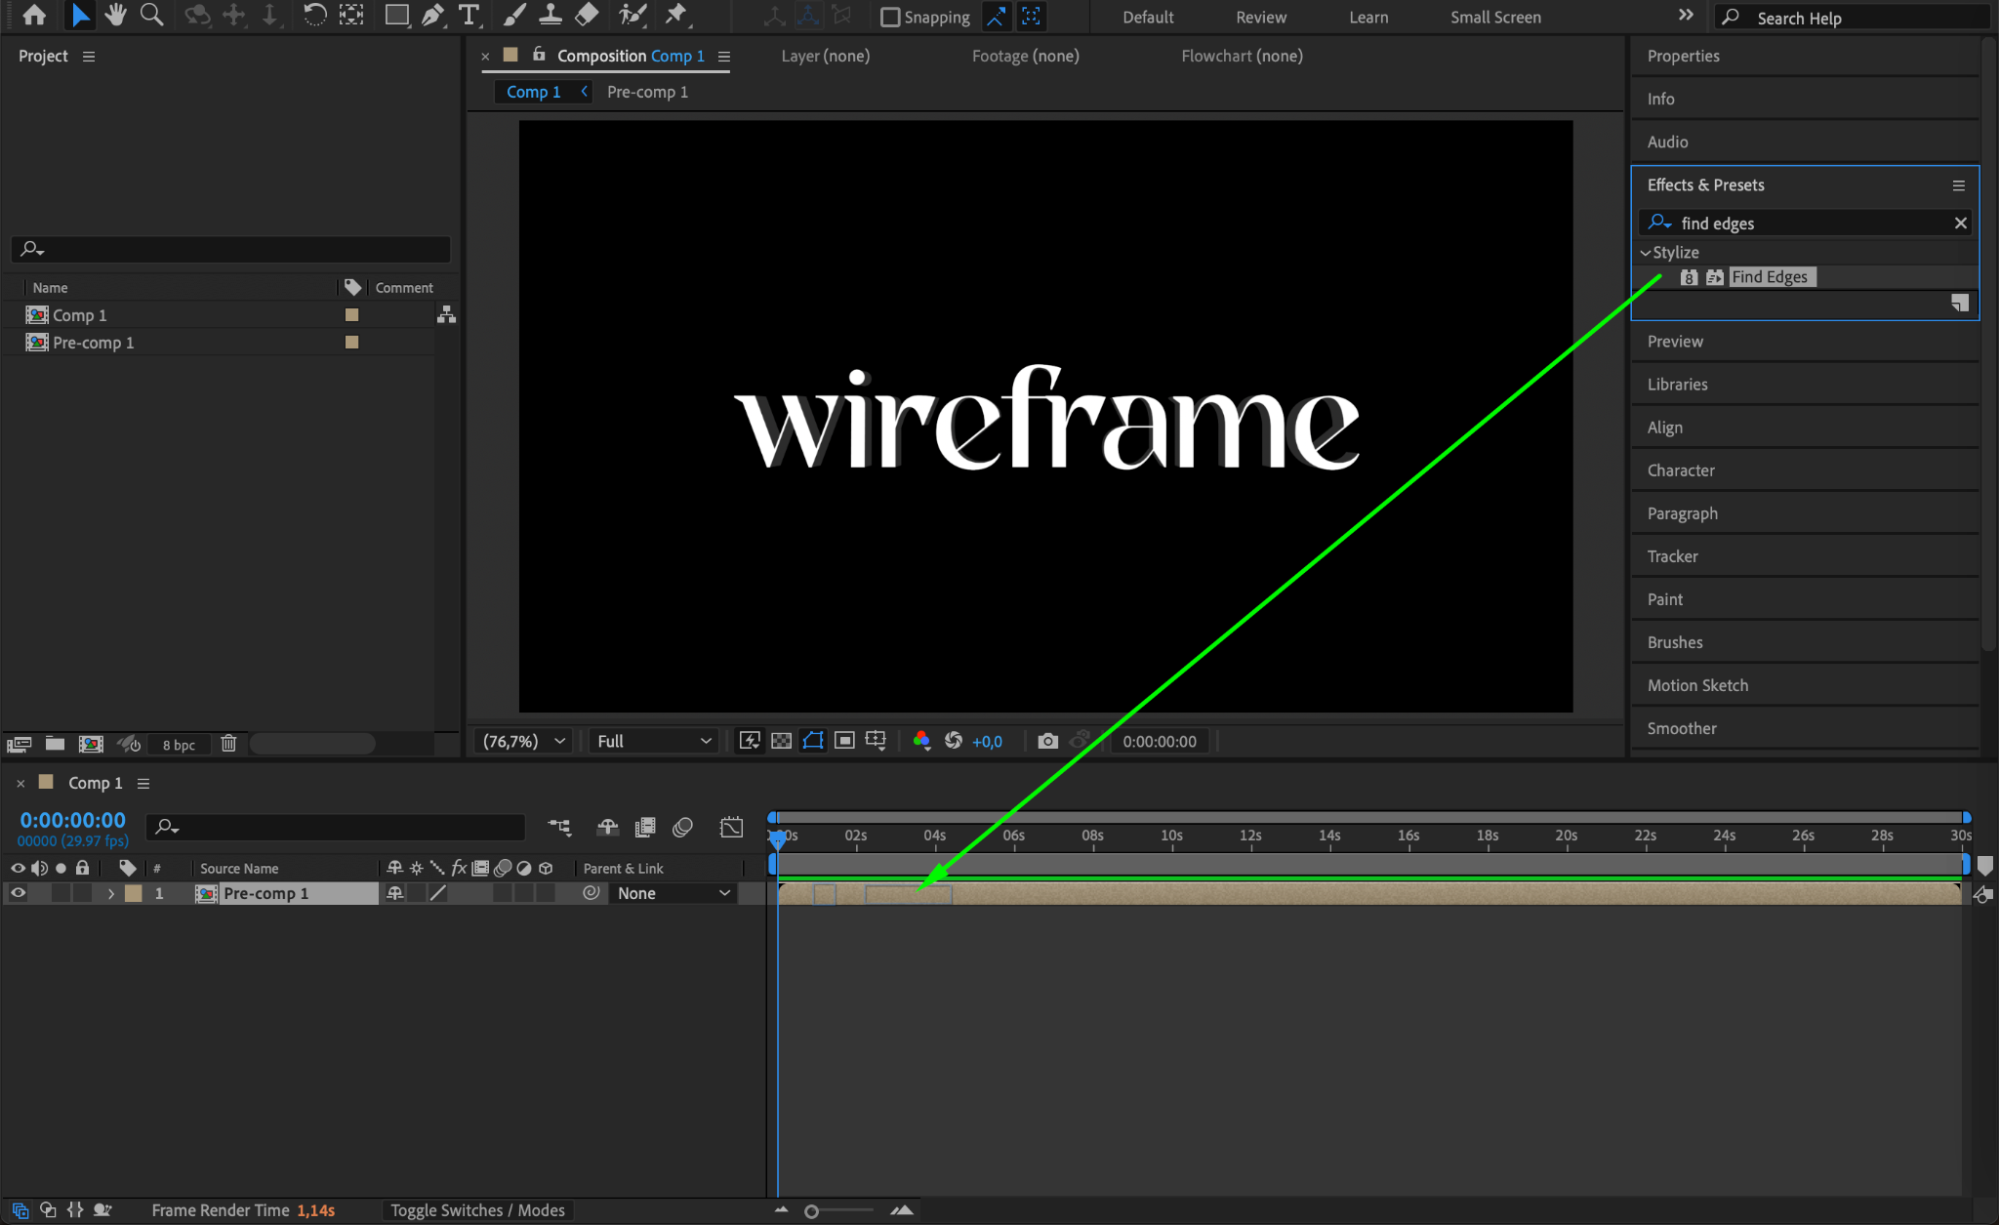
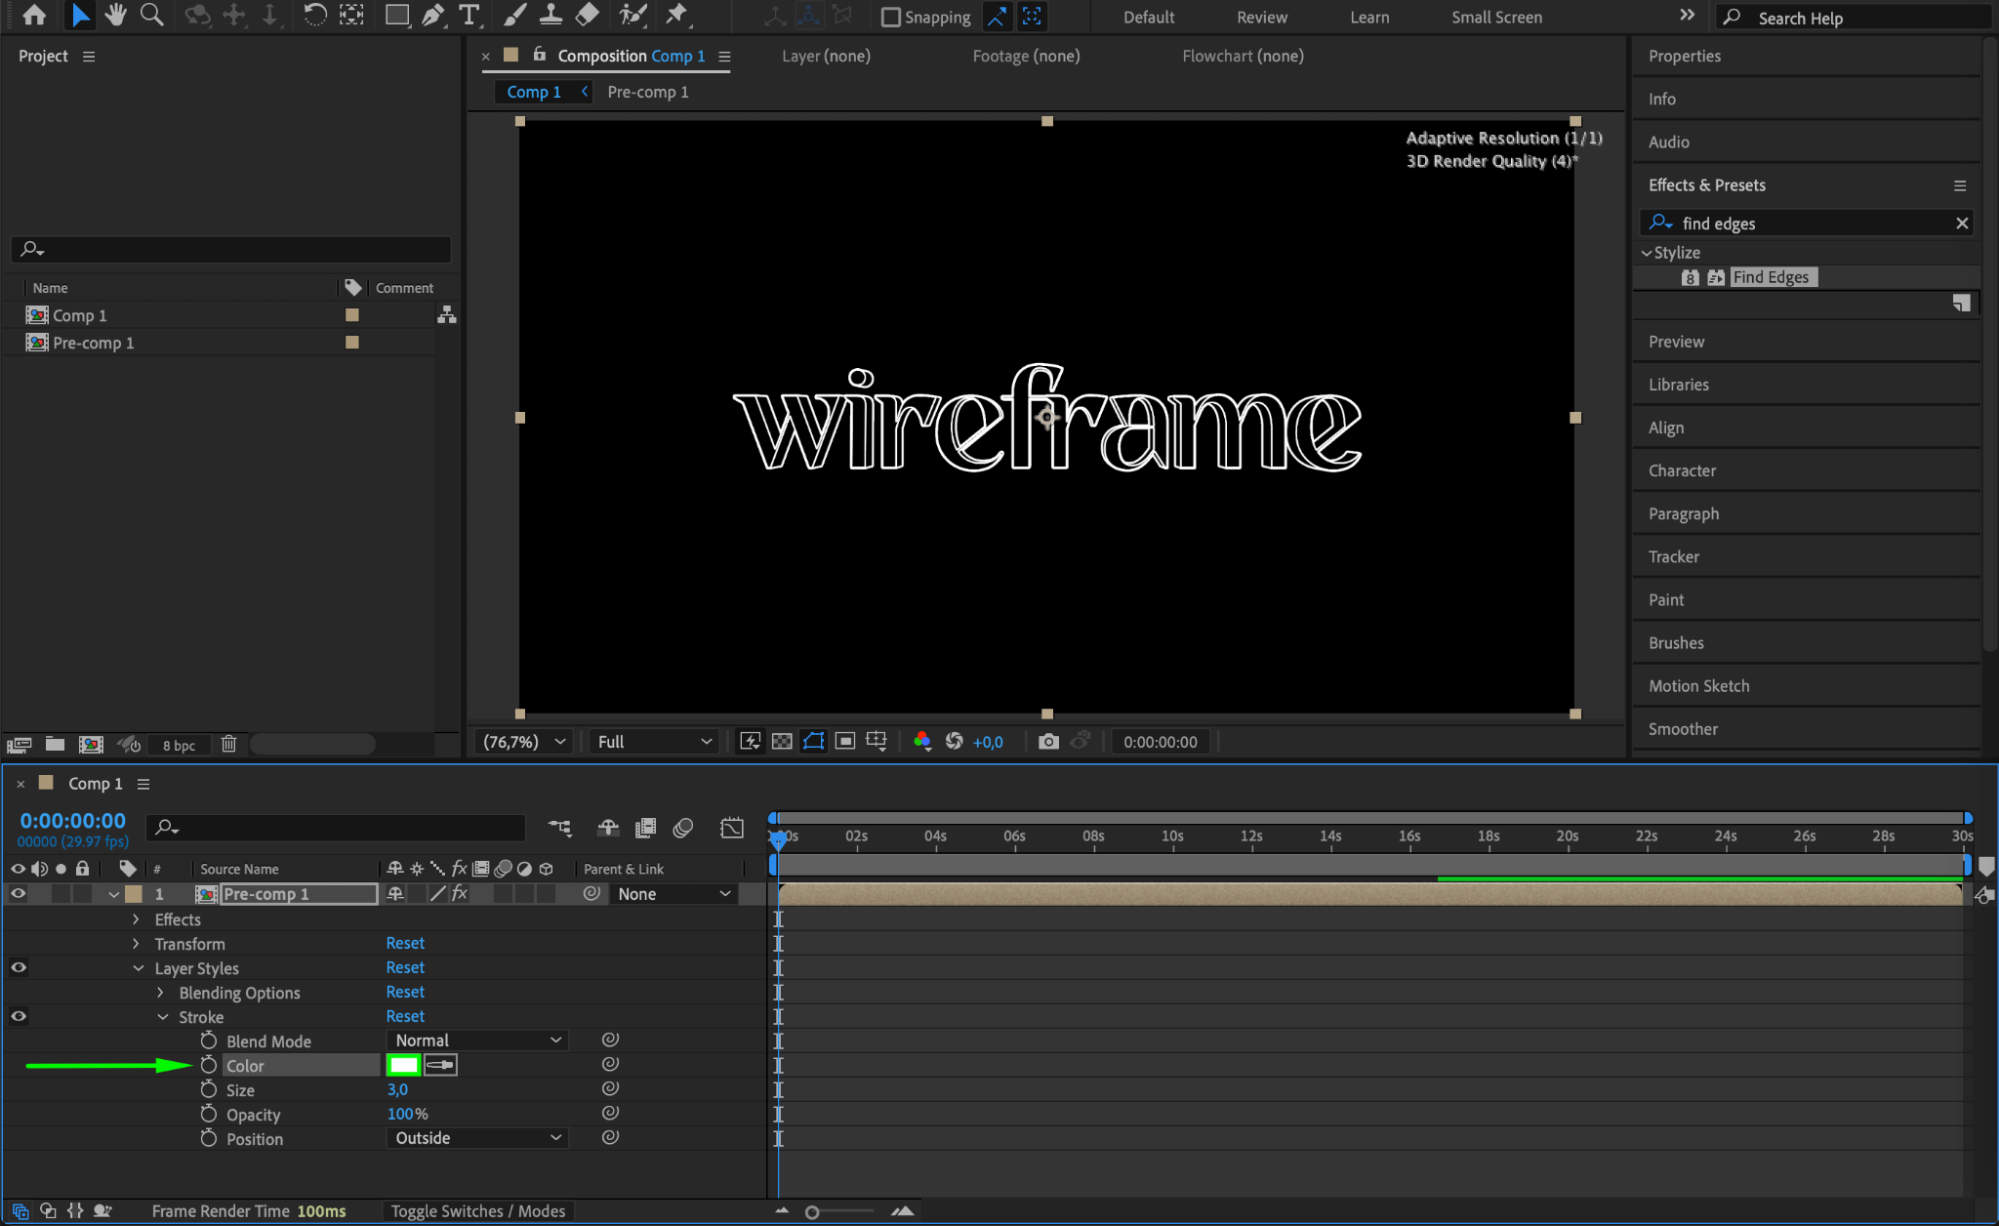
Step 6: Add Stroke with Layer Styles
Right-click the pre-comp layer, go to Layer Styles > Stroke. In the Timeline choose white as the stroke color. Adjust the stroke size until the edges are clearly defined.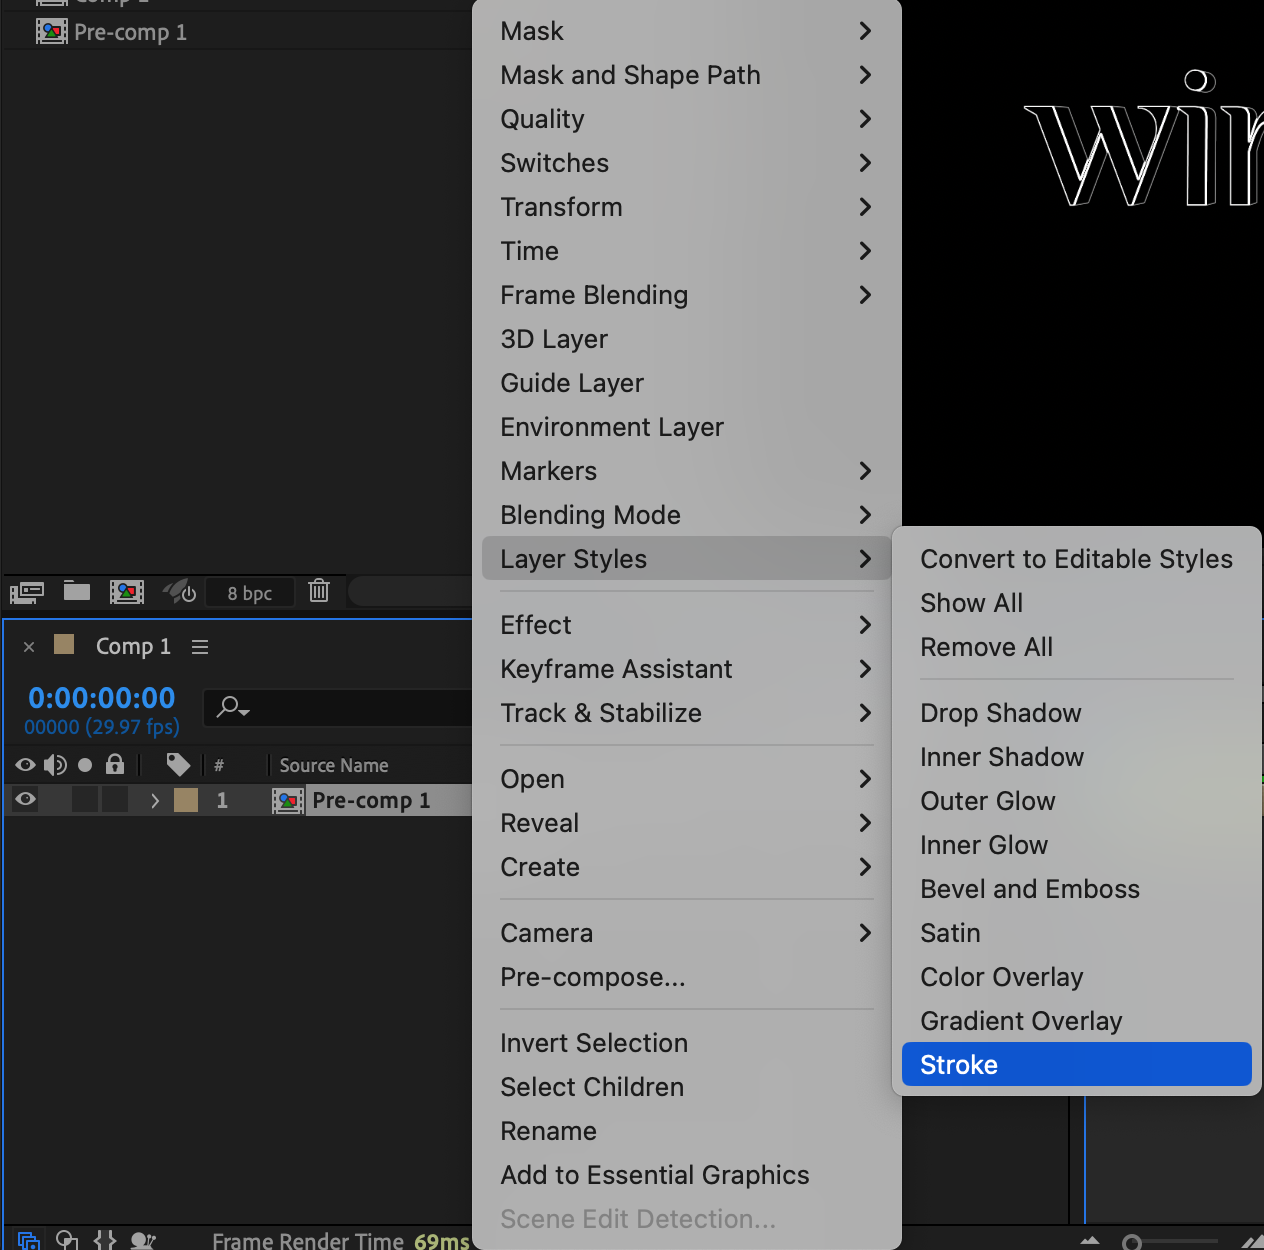
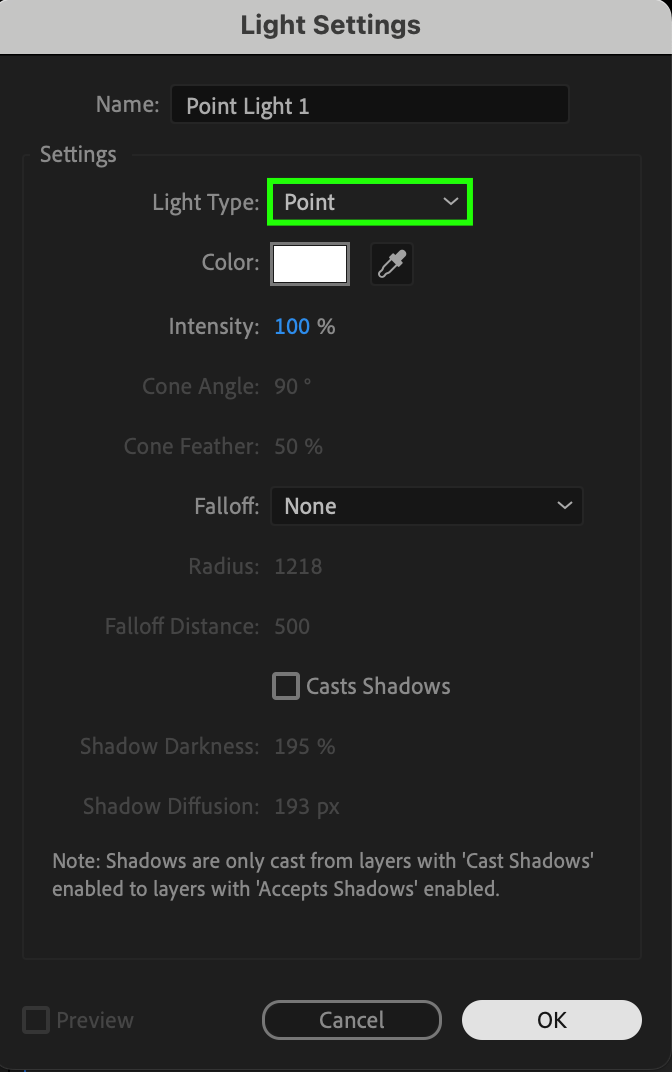
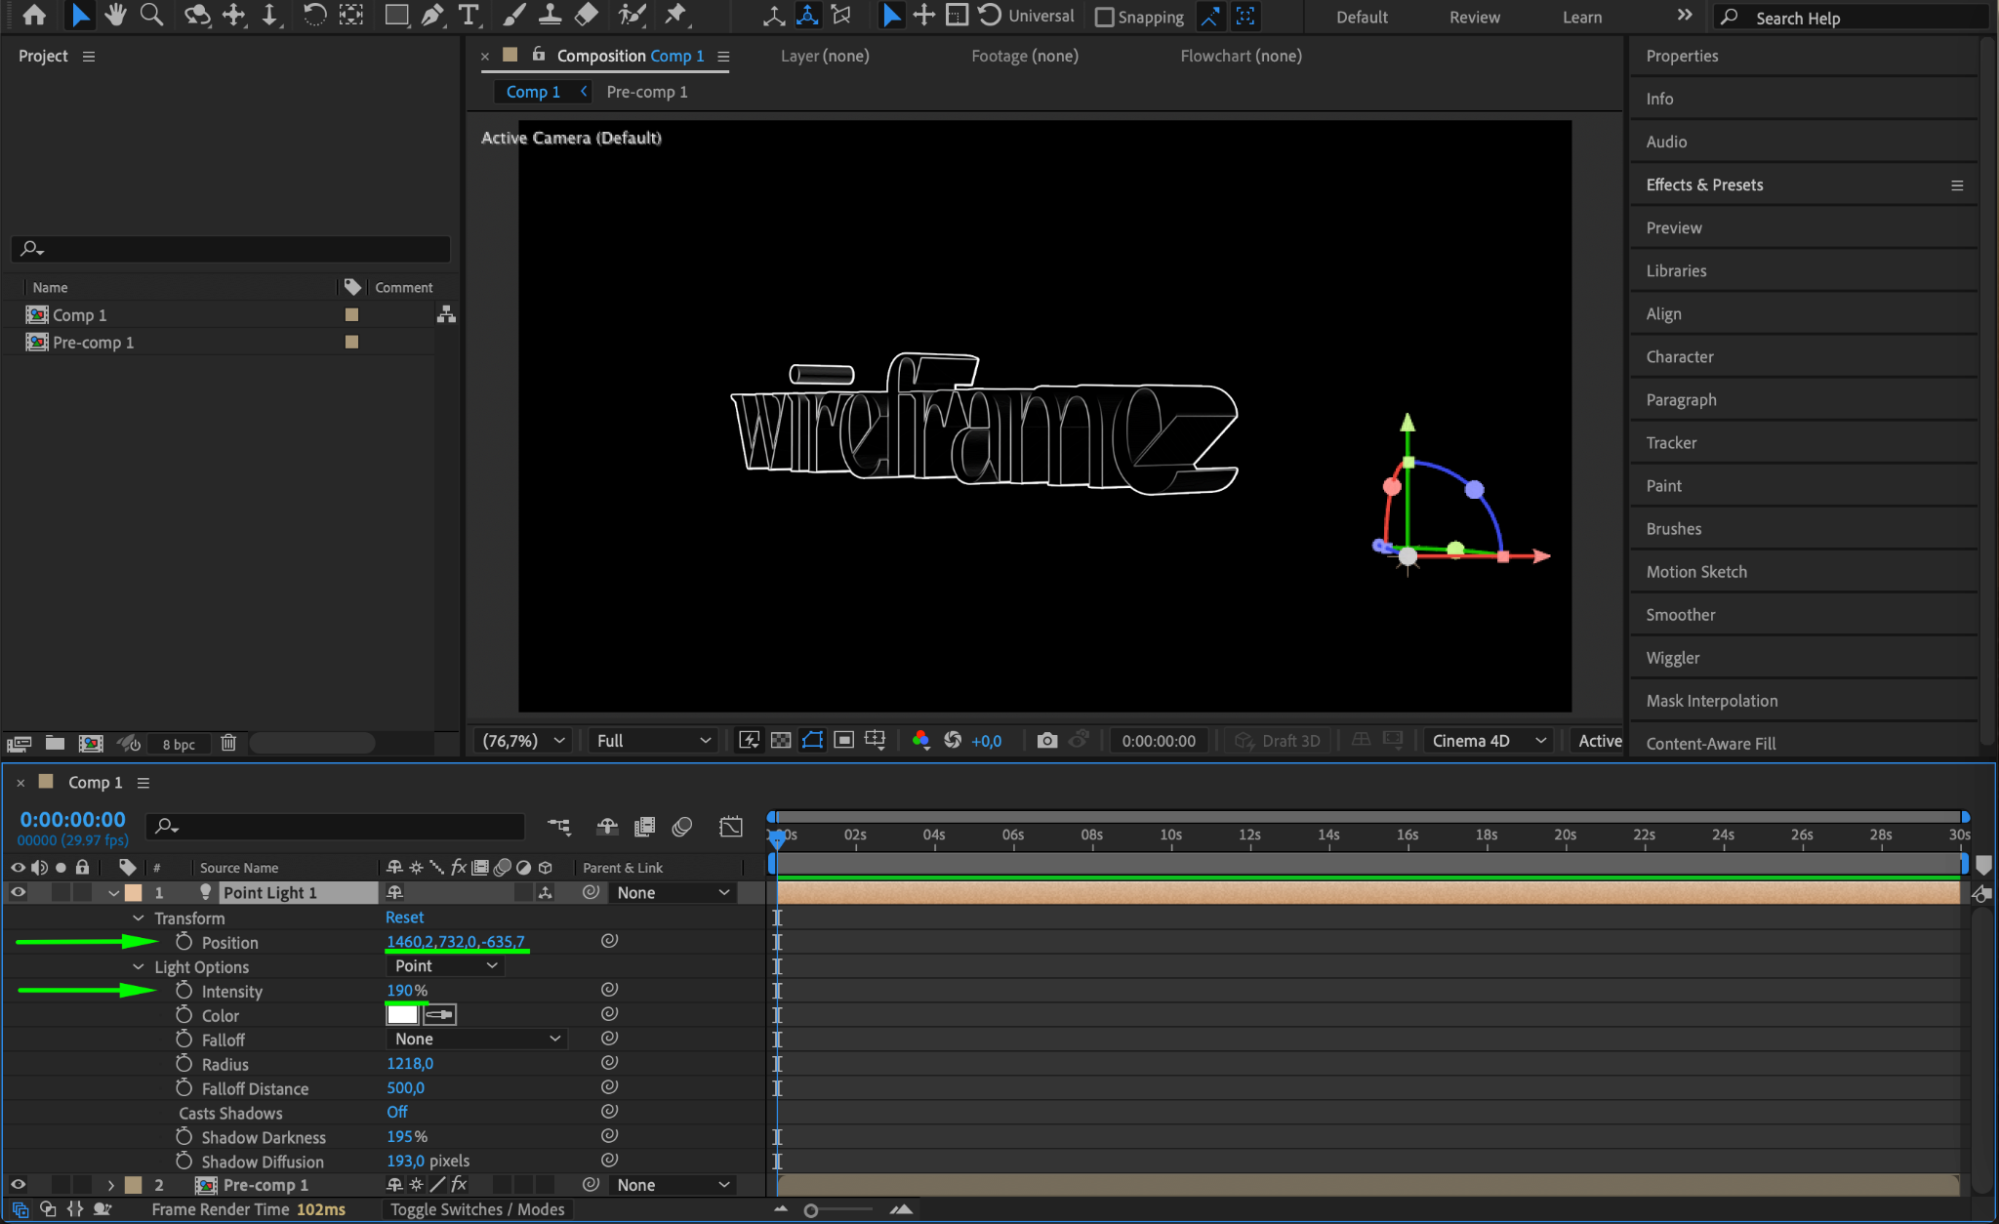
 Step 7: Enable Continuously Rasterize and Add Lighting
Click on the Continuously Rasterize switch (sun icon) to keep the wireframe sharp when scaled. Then go to Layer > New > Light and select Point Light. Adjust its intensity and position to enhance the 3D look of the wireframe.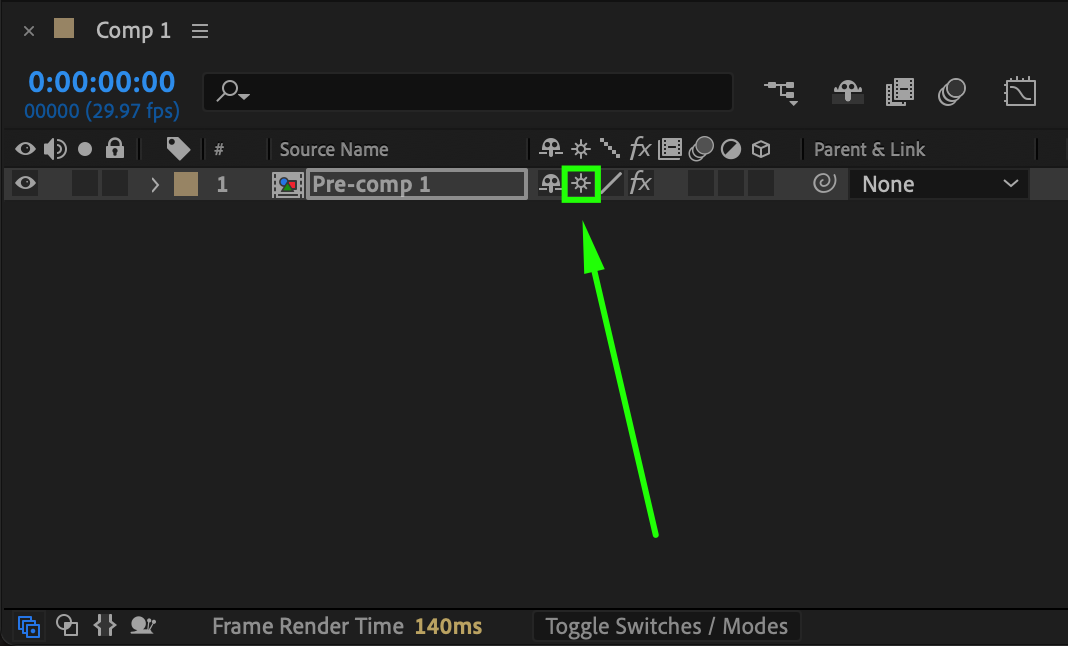

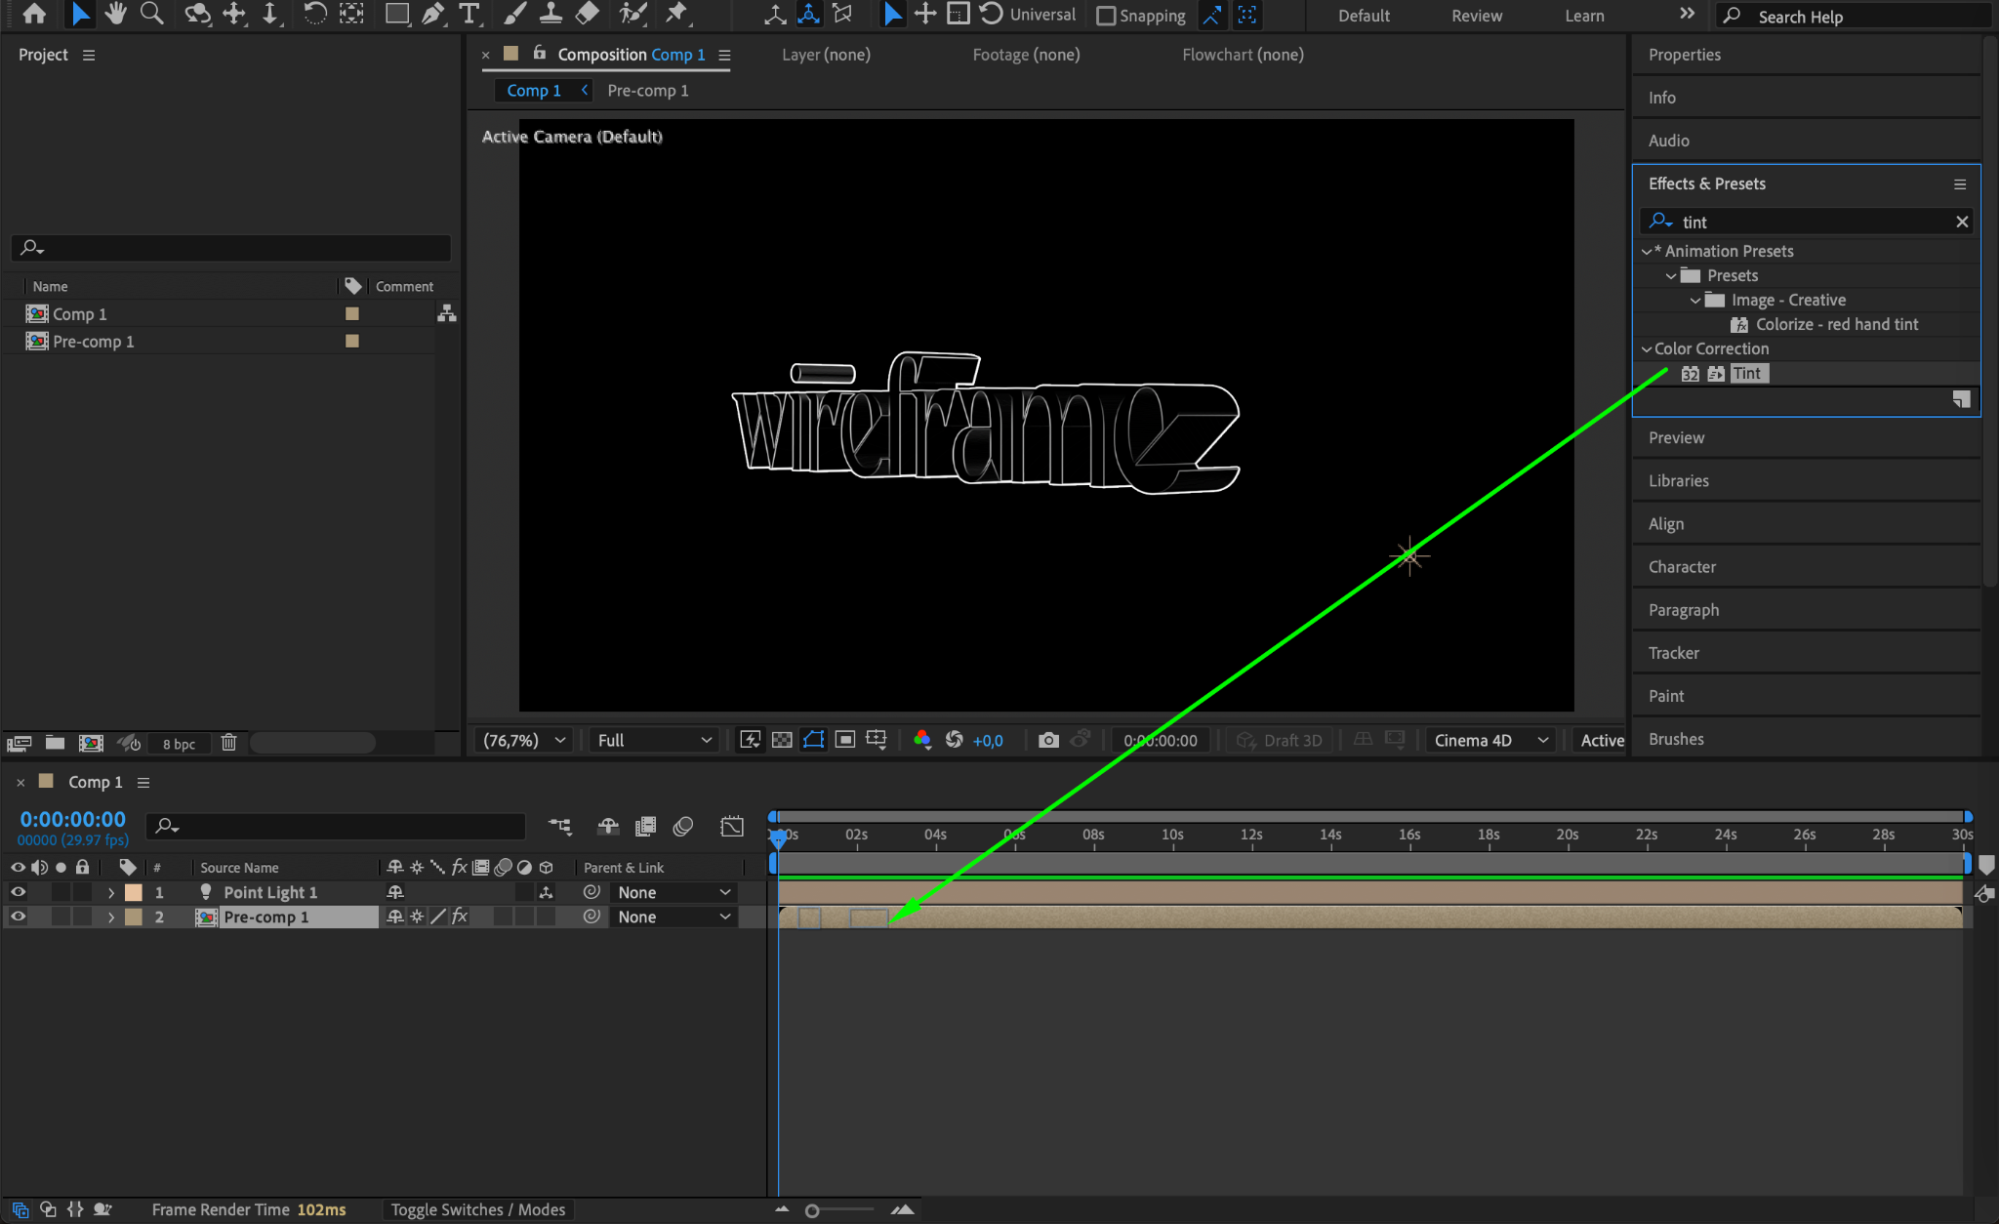
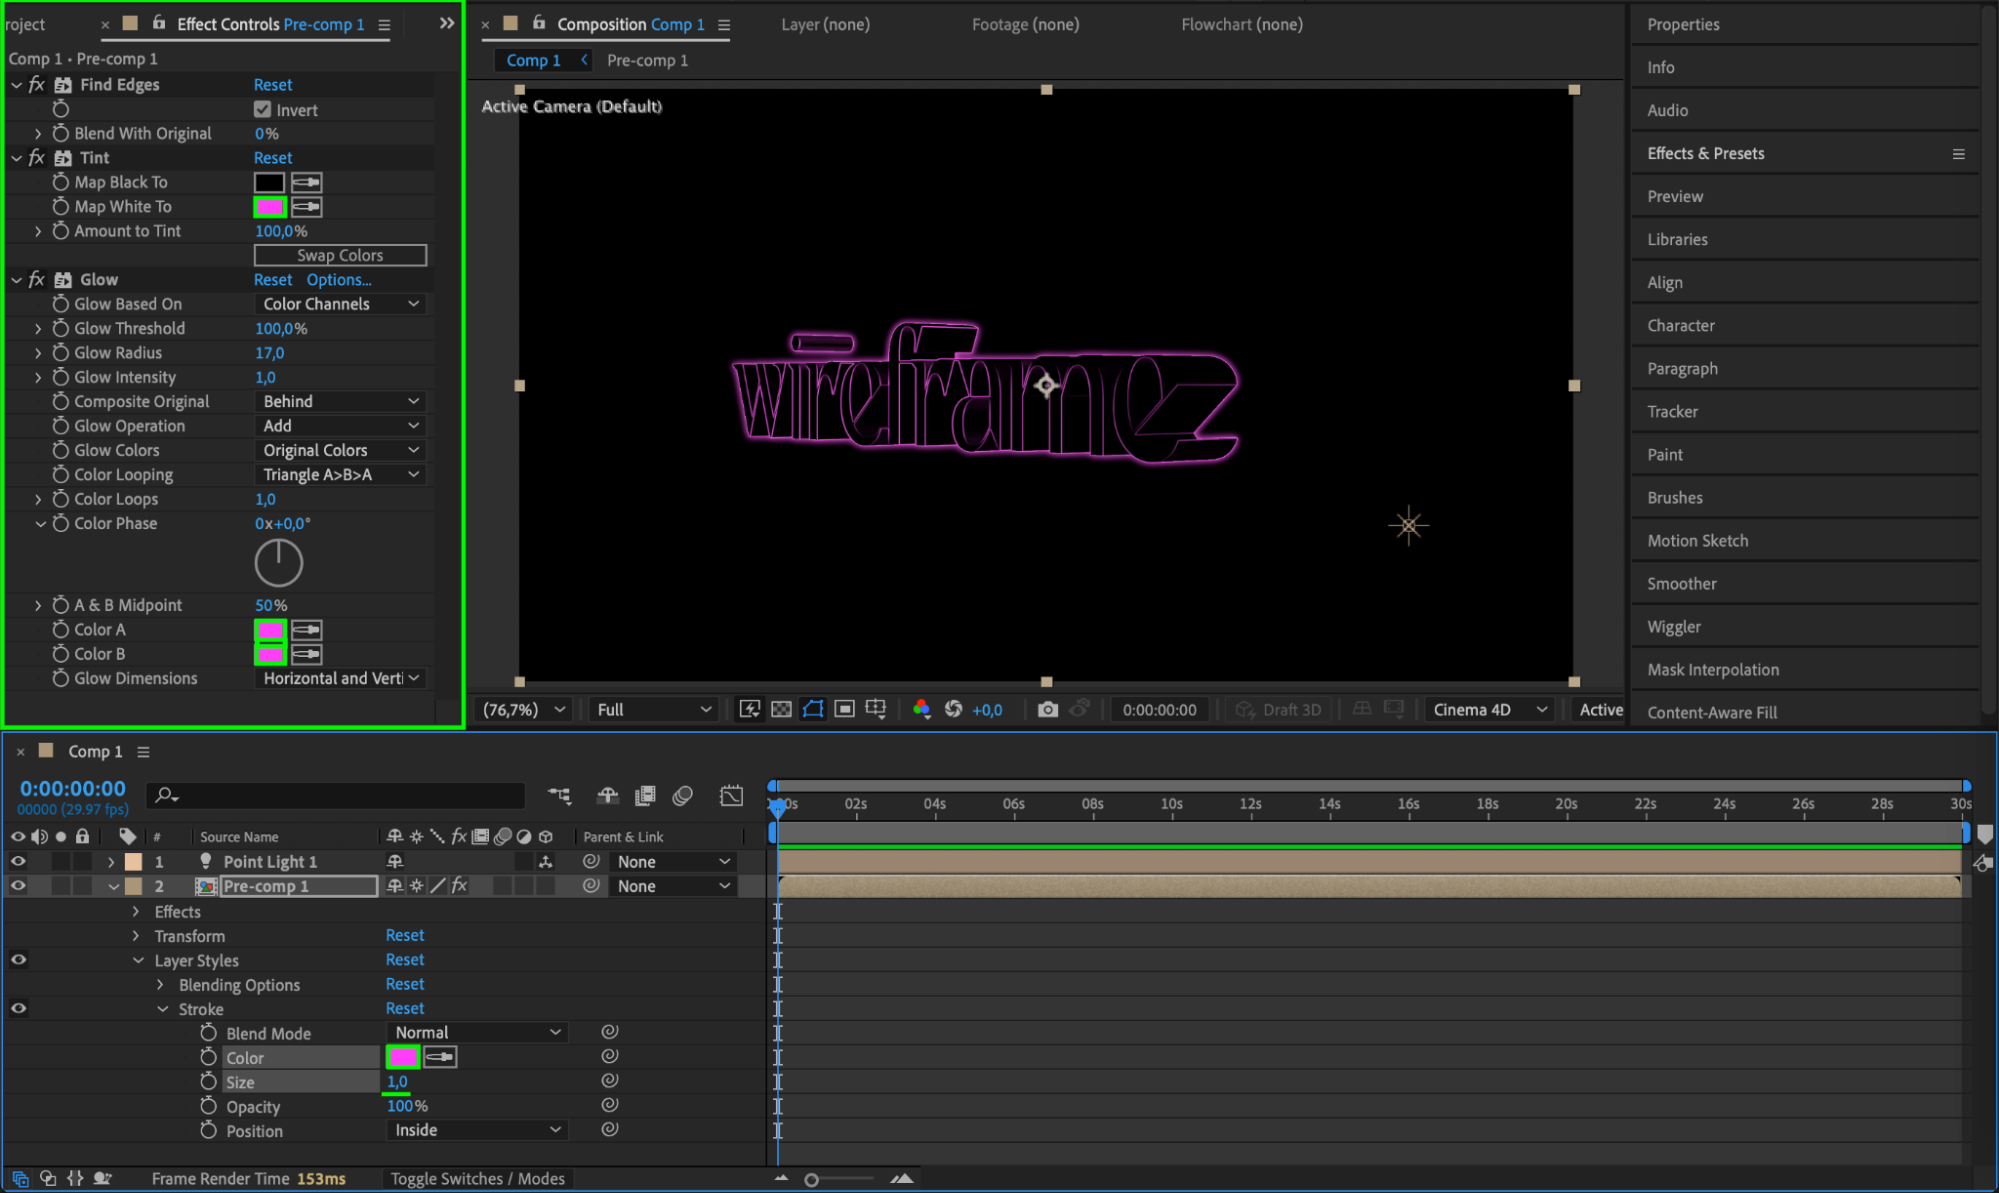
 Step 8: Add Tint and Glow for Final Look
Apply the Tint effect to colorize the wireframe. Map white to your desired stroke color (e.g., neon green or blue). Then apply the Glow effect to enhance the brightness and create a glowing outline. Adjust the stroke size as needed.
 Step 9: Preview and Refine
Press Spacebar to preview your animation. Fine-tune the timing, glow intensity, and rotation speed until you’re happy with the result.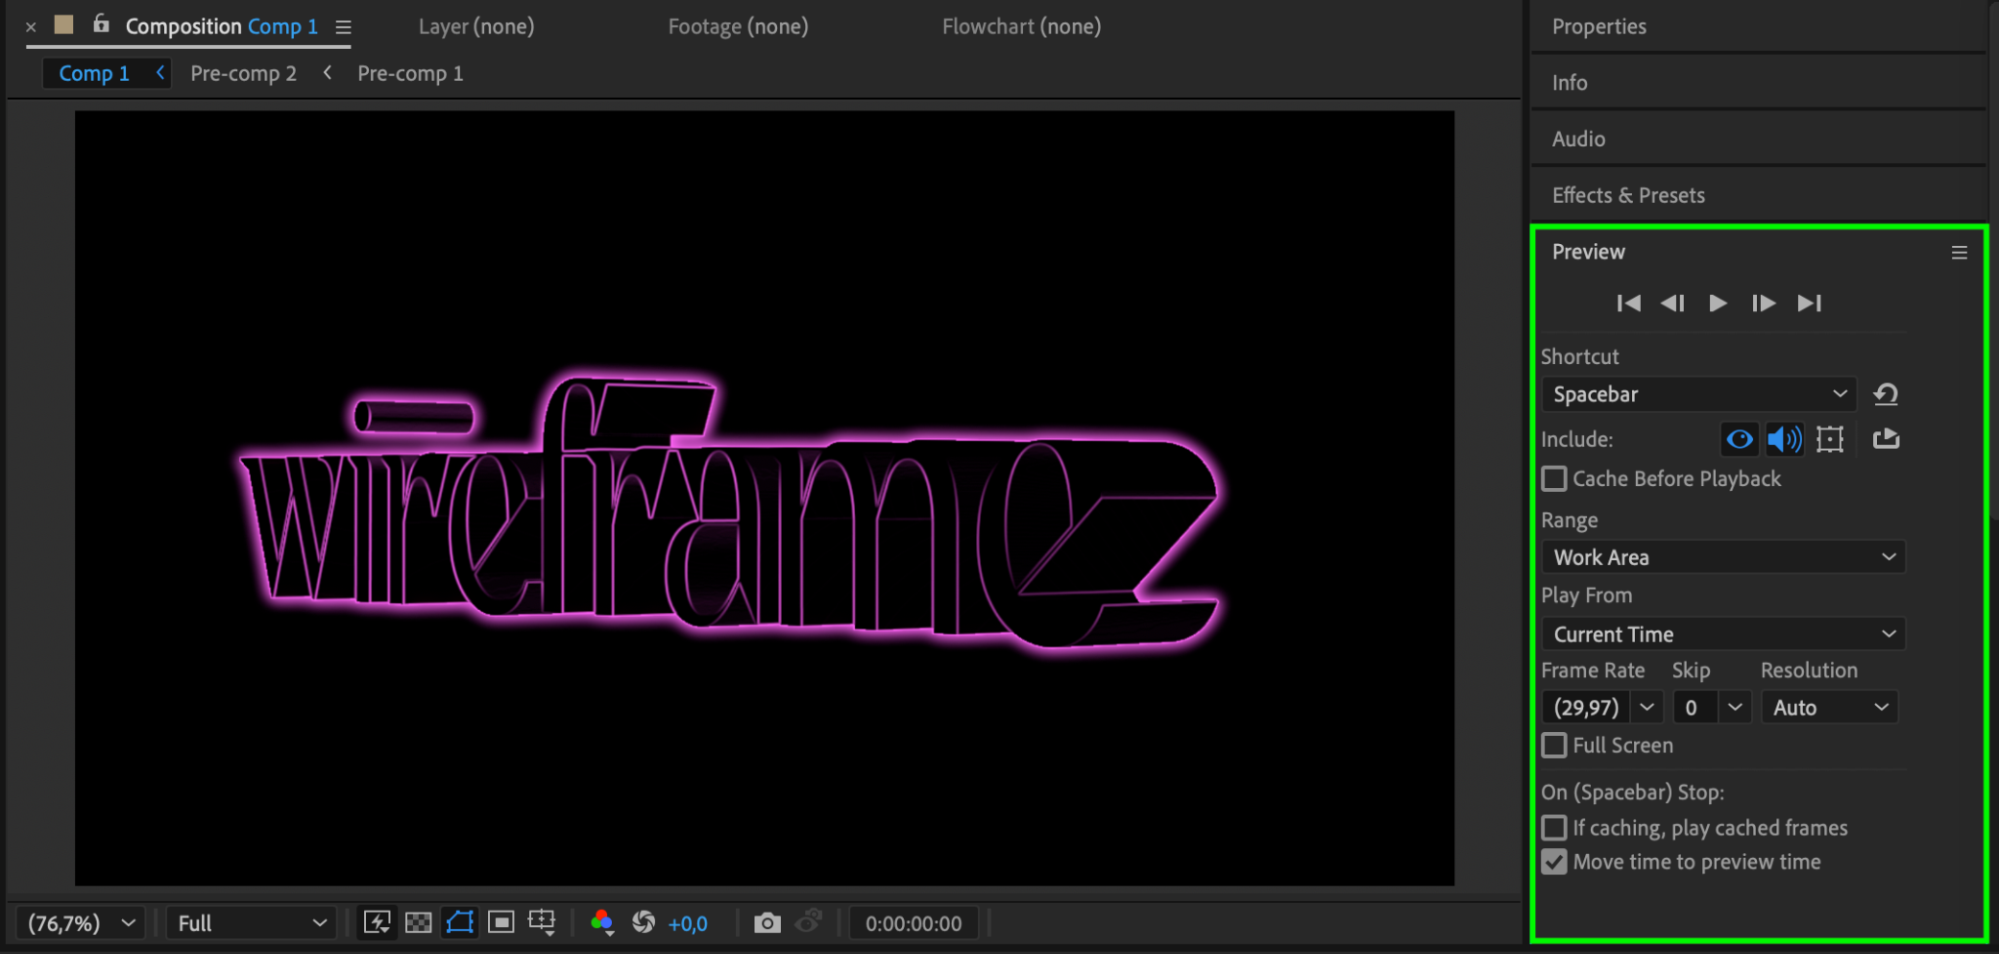 Conclusion
Using a mix of 3D text, effects, and lighting, you can create a stylish wireframe text animation in After Effects. This technique works great for titles, tech-themed motion graphics, or background elements in a modern video.
Our Bestsellers


