Creating a Circular Path Animation in After Effects
Introduction
Animating text along a circular path is a great way to add movement and energy to your designs. This technique is often used for logos, title sequences, and motion graphics. In this tutorial, you will learn how to create a circular text animation in After Effects using masks, expressions, and 3D transformations.
Step 1: Create a New Text Layer
Open your After Effects project and select the Type Tool (Ctrl/Cmd + T). Click anywhere on
the composition and type your text. Adjust the font, size, and color as needed in the Properties Panel.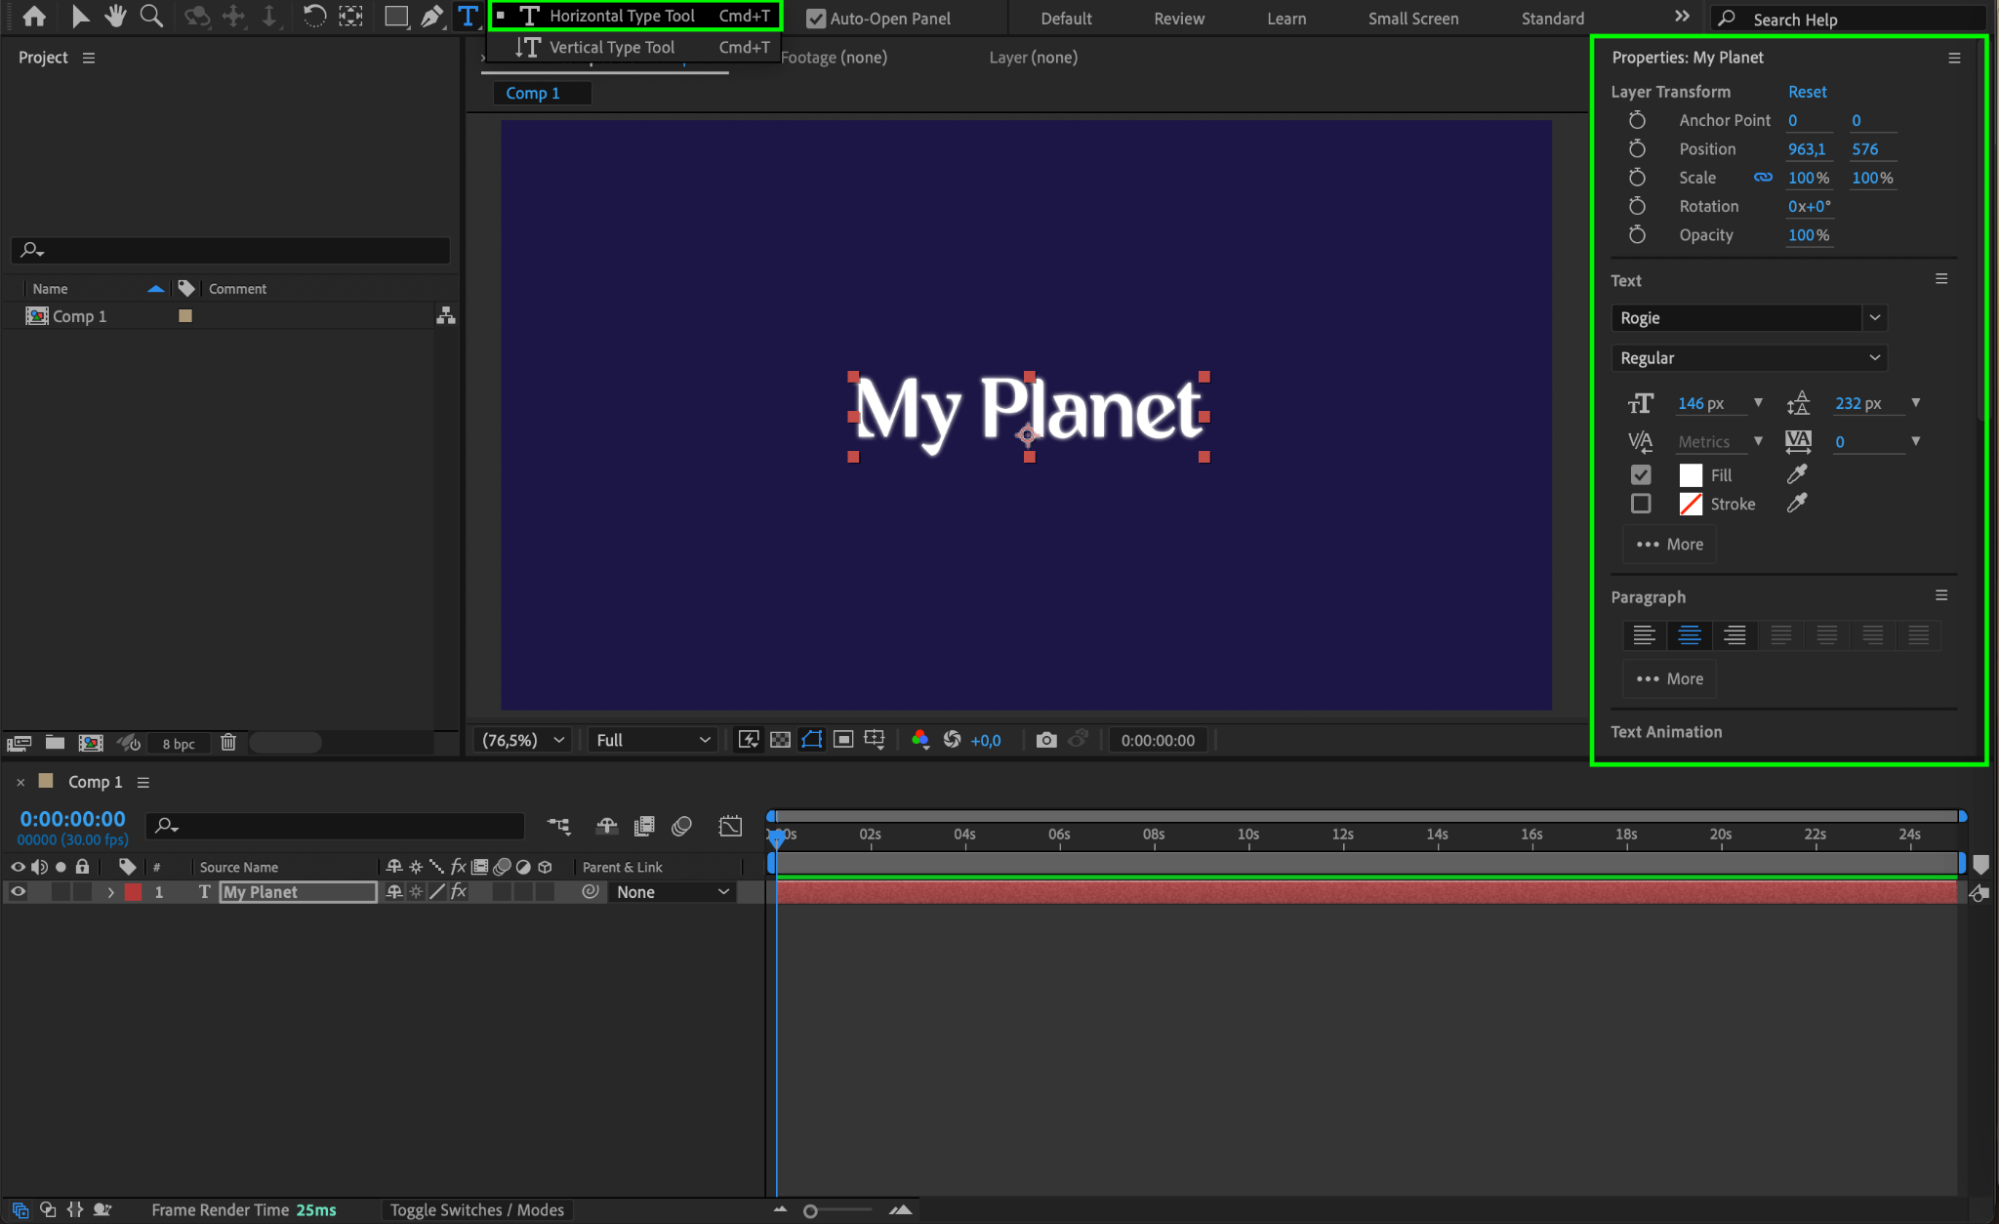 Step 2: Create a Circular Path
Select the text layer and choose the Ellipse Tool (Q) from the toolbar. Double-click the tool to create a perfect circular mask. This mask will act as a path for the text animation.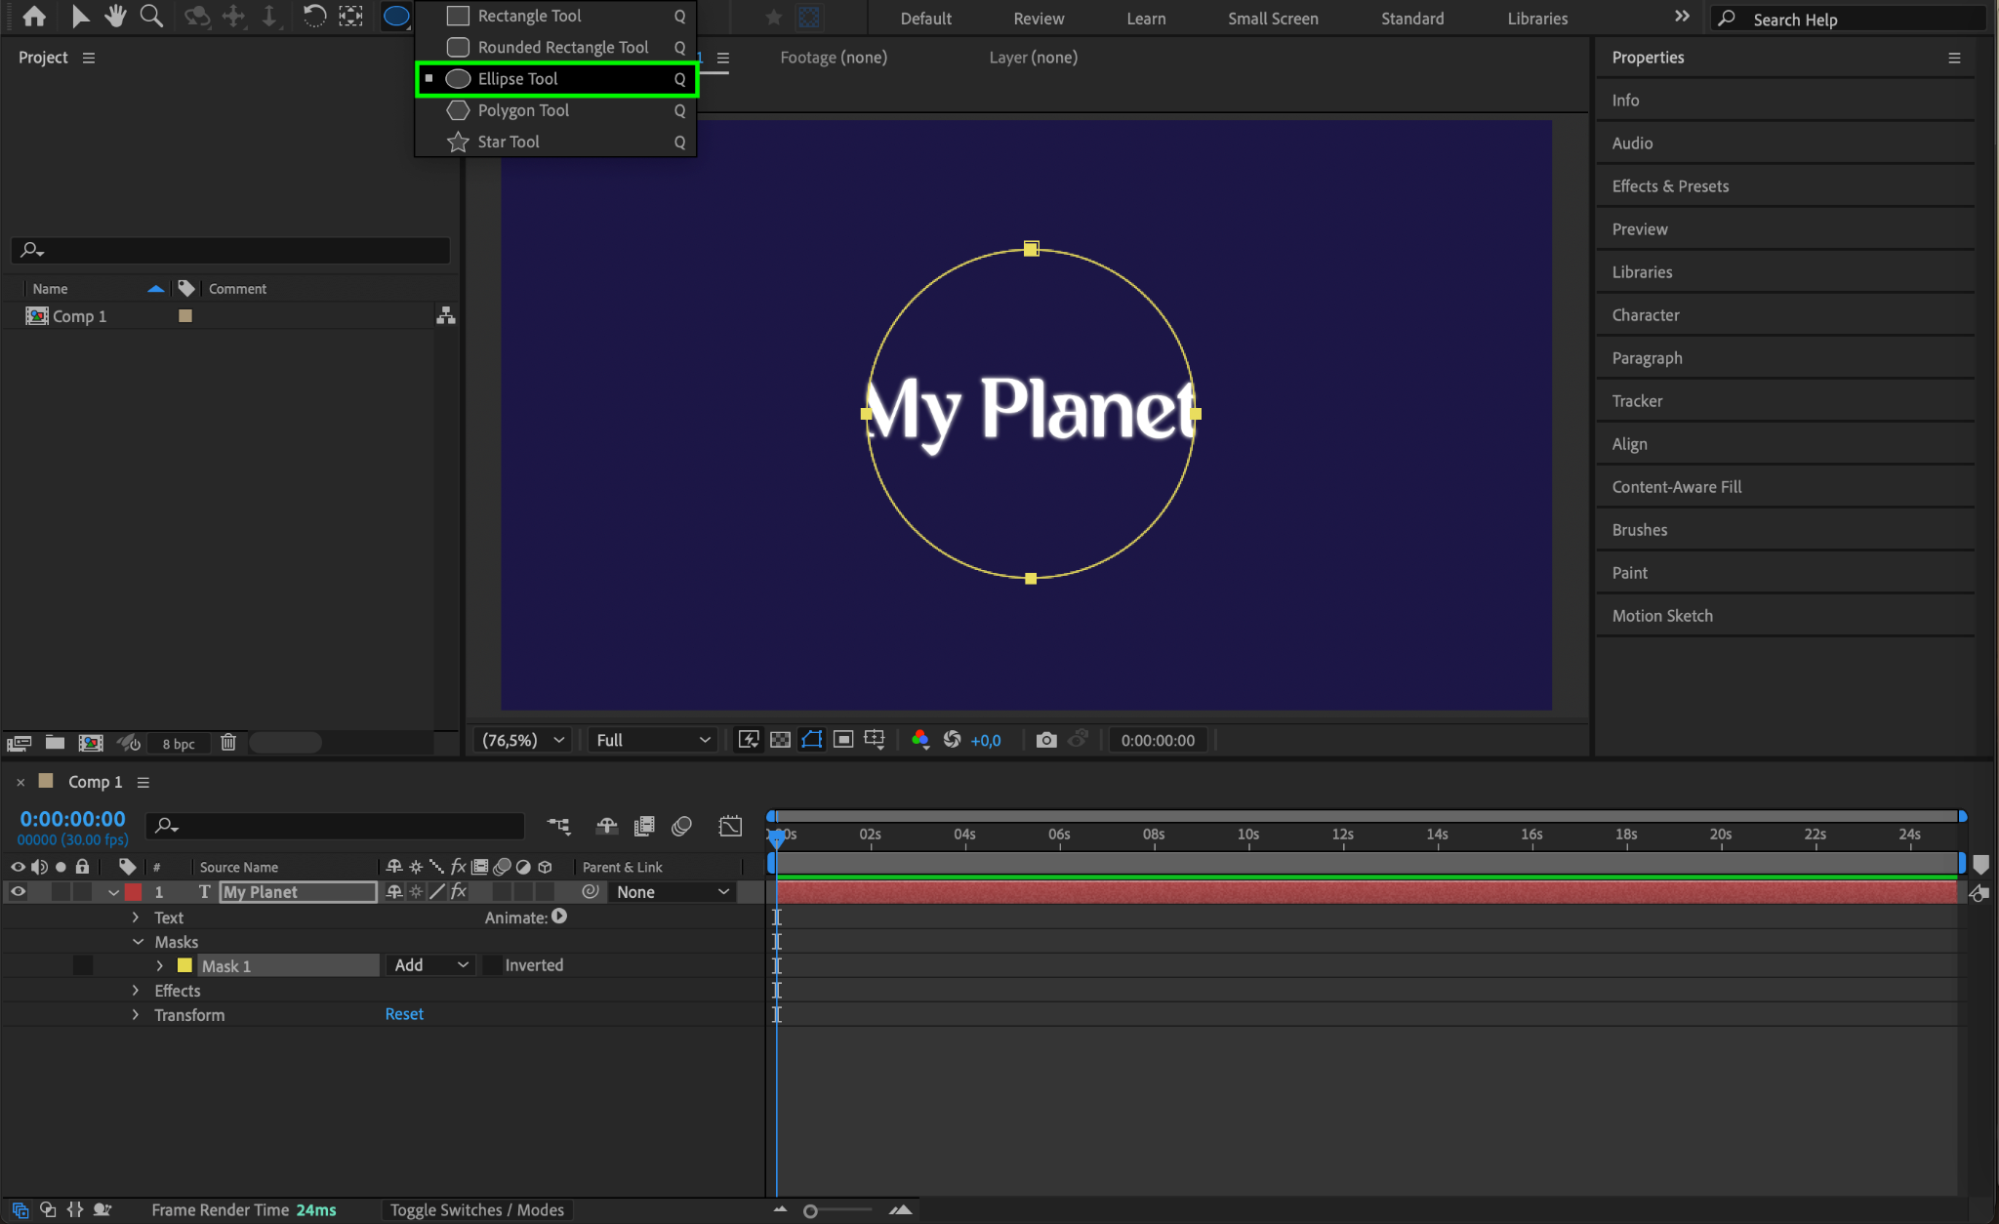 Step 3: Link Text to the Path
Expand the Text Layer Properties and go to Path Options. Set Path to Mask 1 so that the text follows the circular shape. To make the text animate around the path, hold Alt/Option and click the stopwatch next to First Margin, then enter the expression:
time * -200
This expression will automatically rotate the text along the path.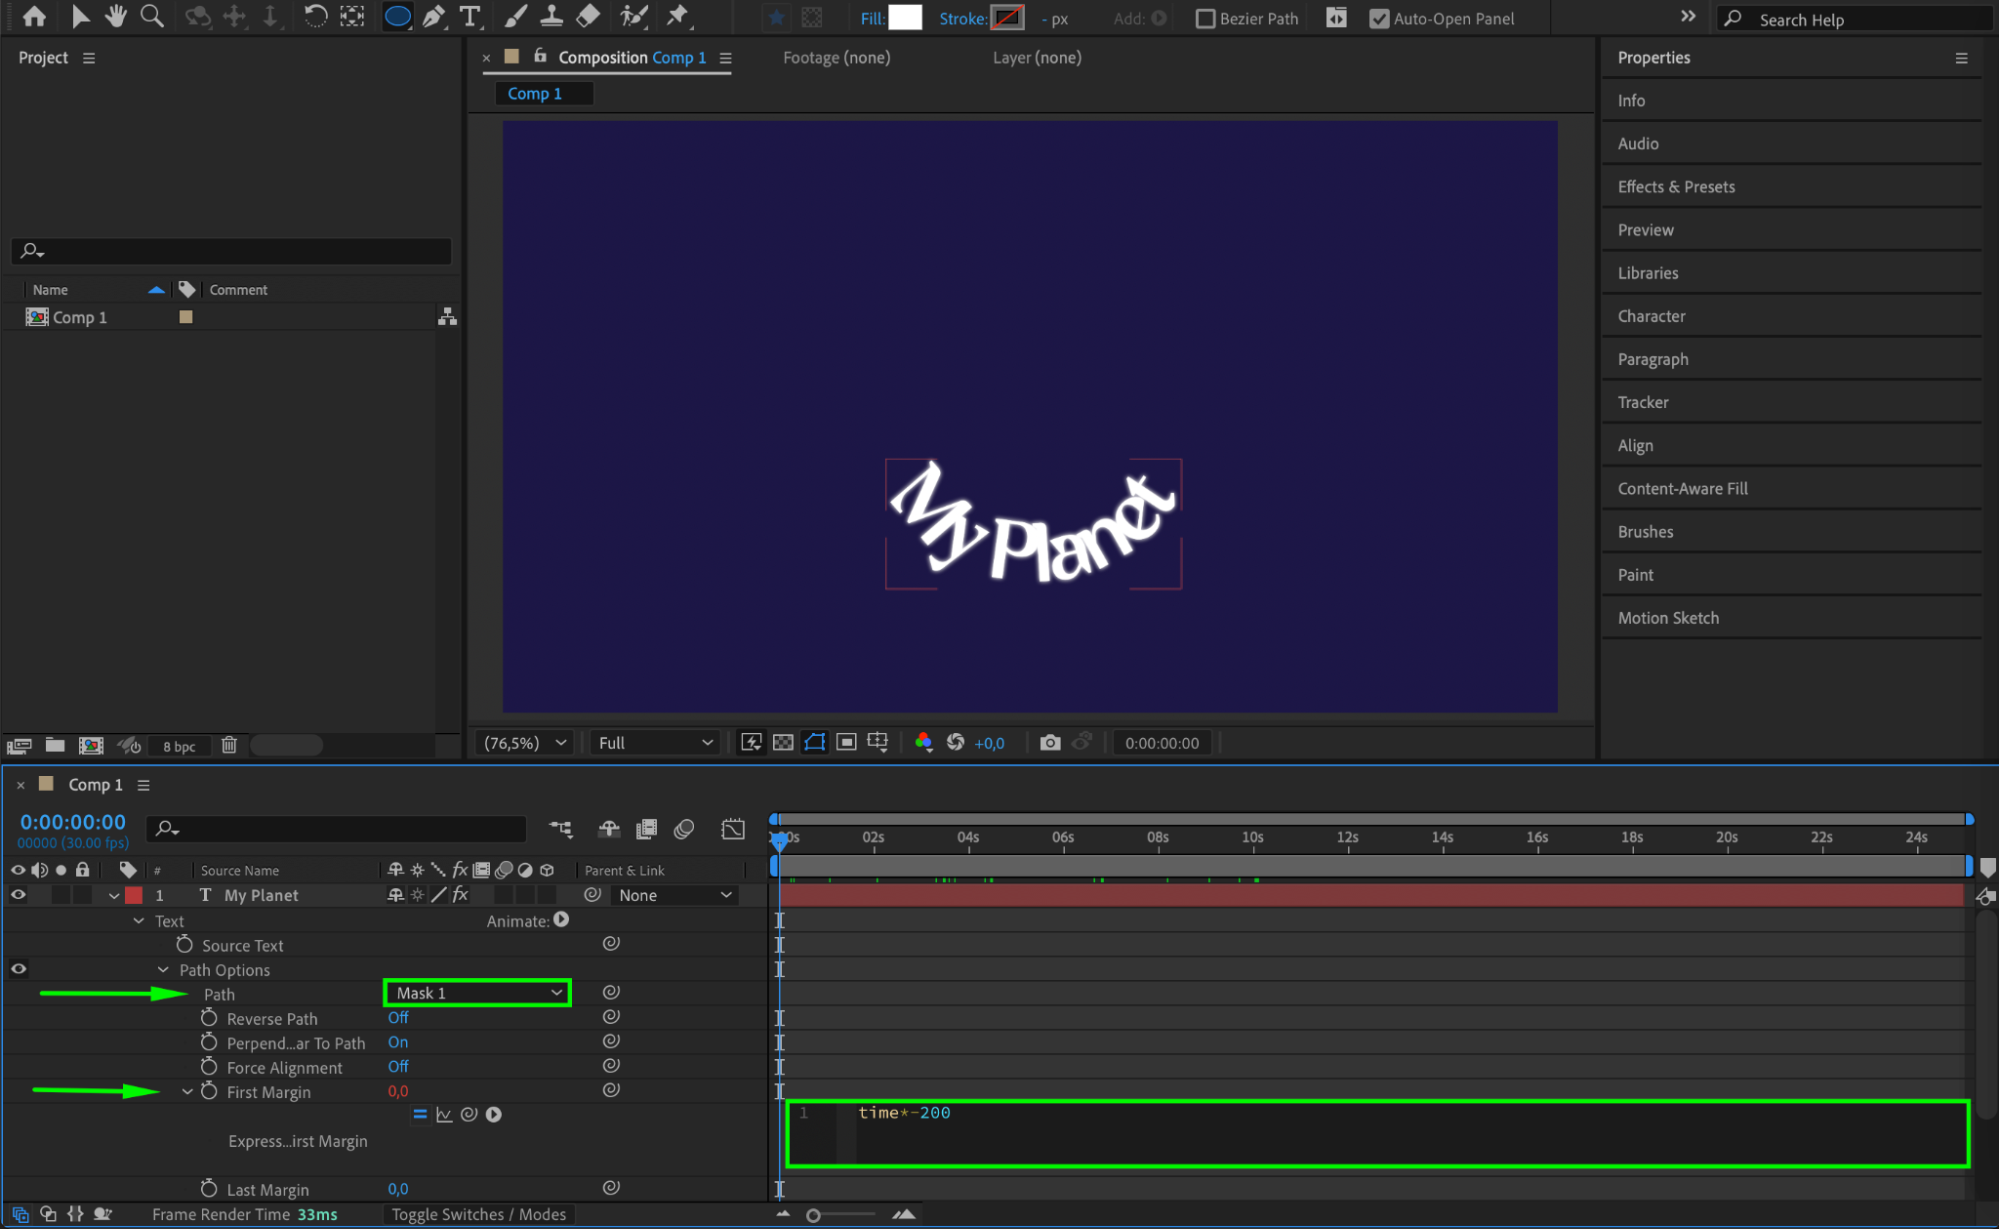 Step 4: Enable 3D for the Layer
Check the 3D Layer Checkbox for the text layer in the Timeline Panel. This allows you to add depth and rotation to the animation.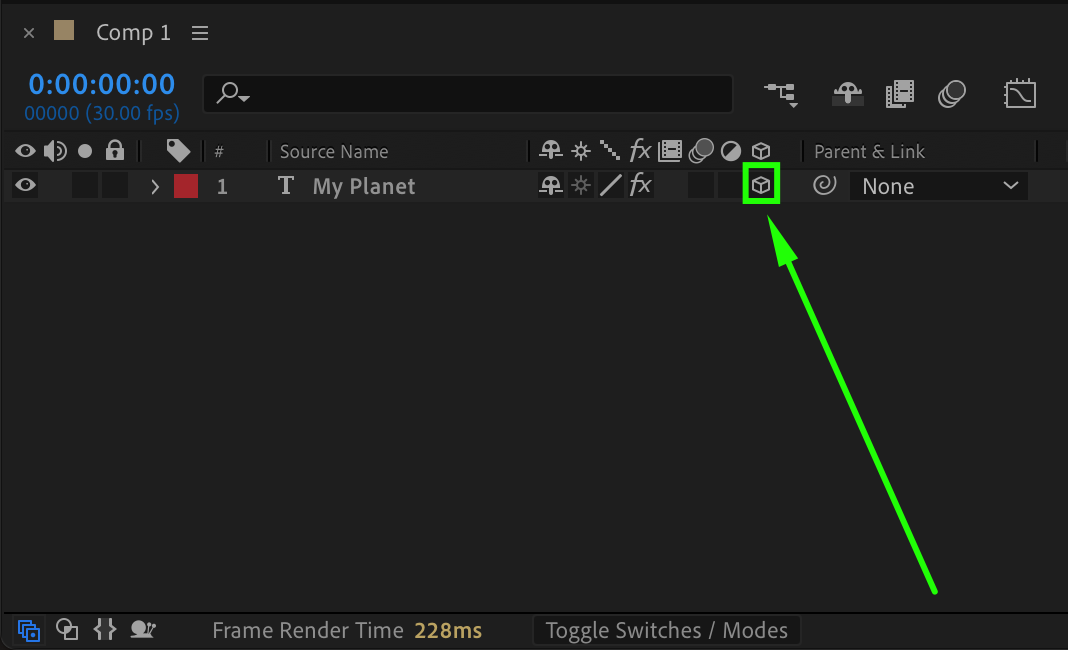 Step 5: Enable Per-Character 3D
Next to the Contents section of the text layer, press the Add button and select Enable Per-Character 3D. This will allow individual letters to move independently.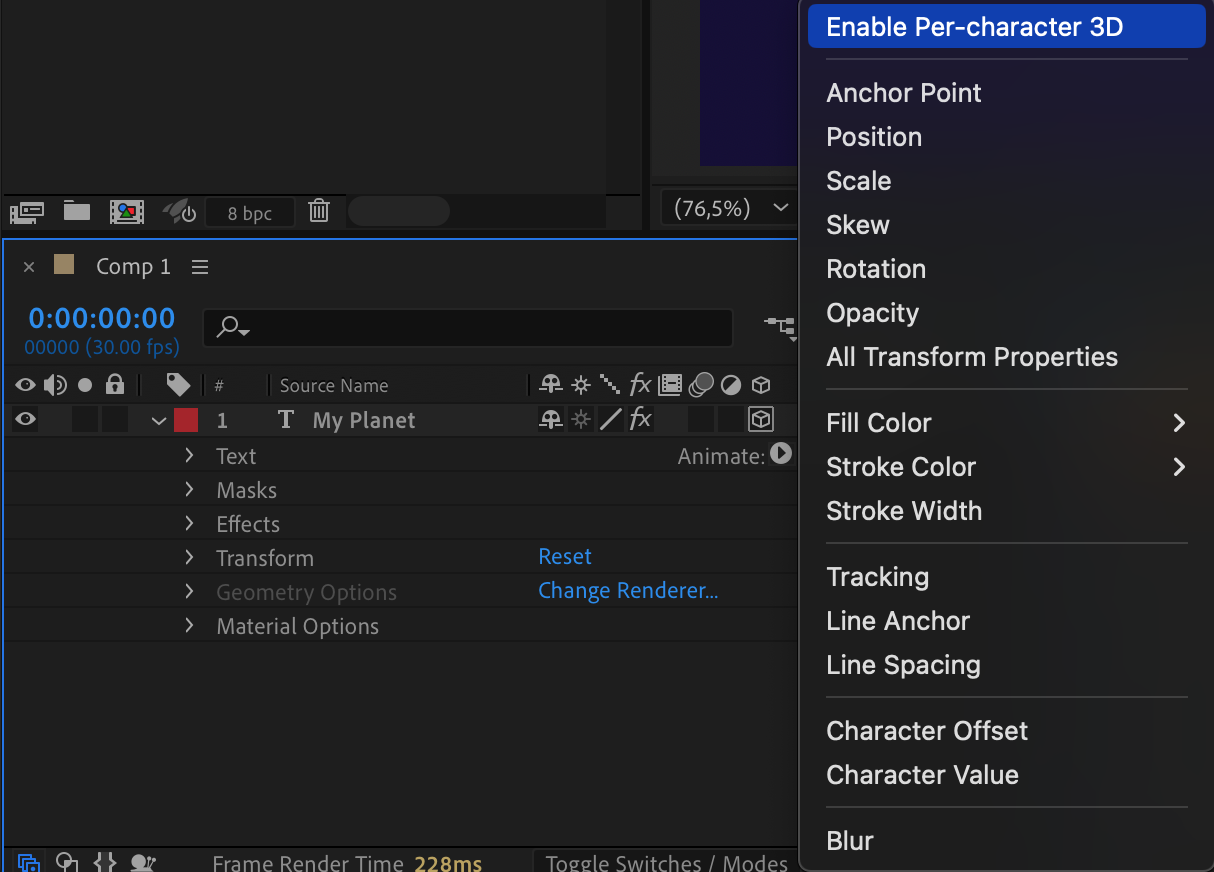 Step 6: Add Rotation to the Animation
Press the Add button again and choose Rotation. This will allow you to animate the text’s movement in 3D space.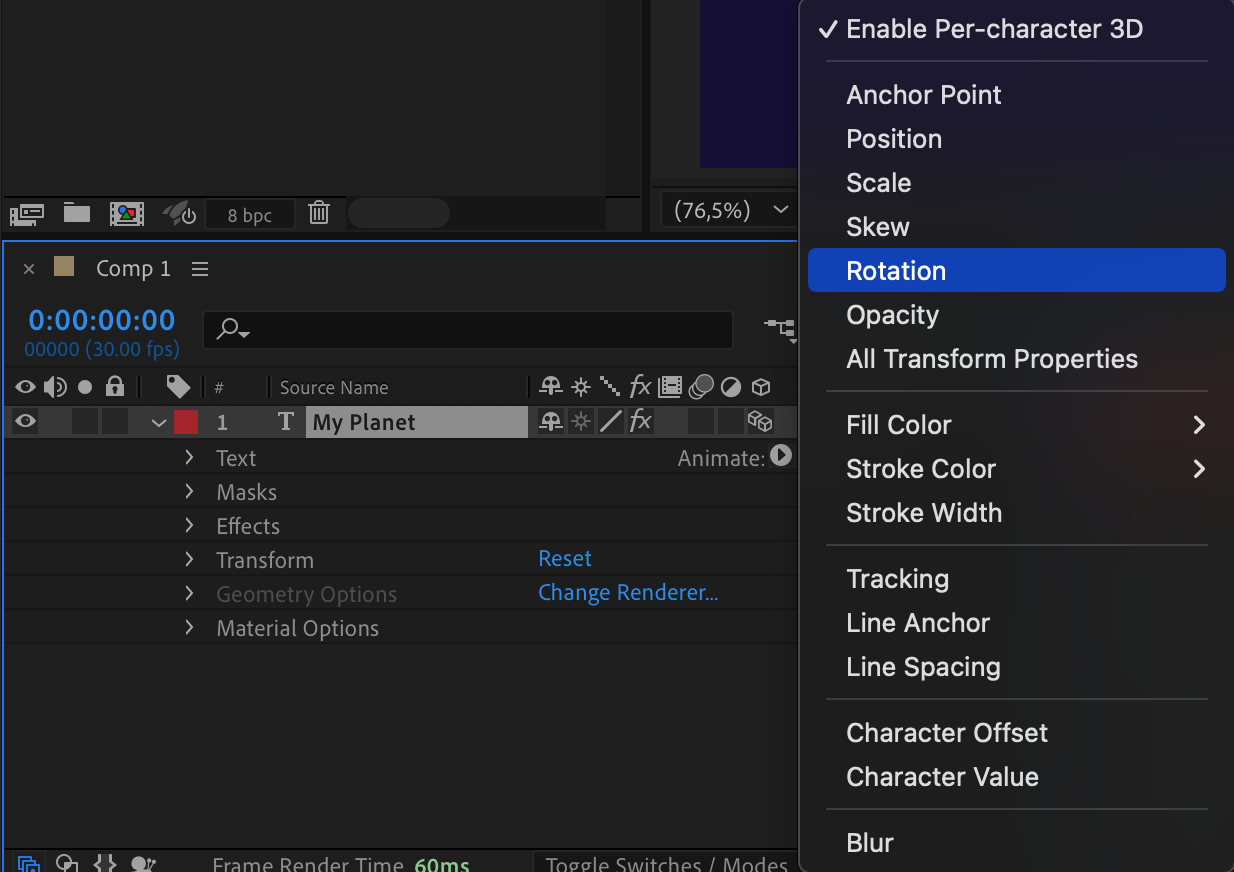 Step 7: Adjust Rotation Values
Under Animator 1, set the X Rotation to 90° to tilt the text. Then, adjust the X Rotation of the entire text layer to -75° for a more dynamic perspective.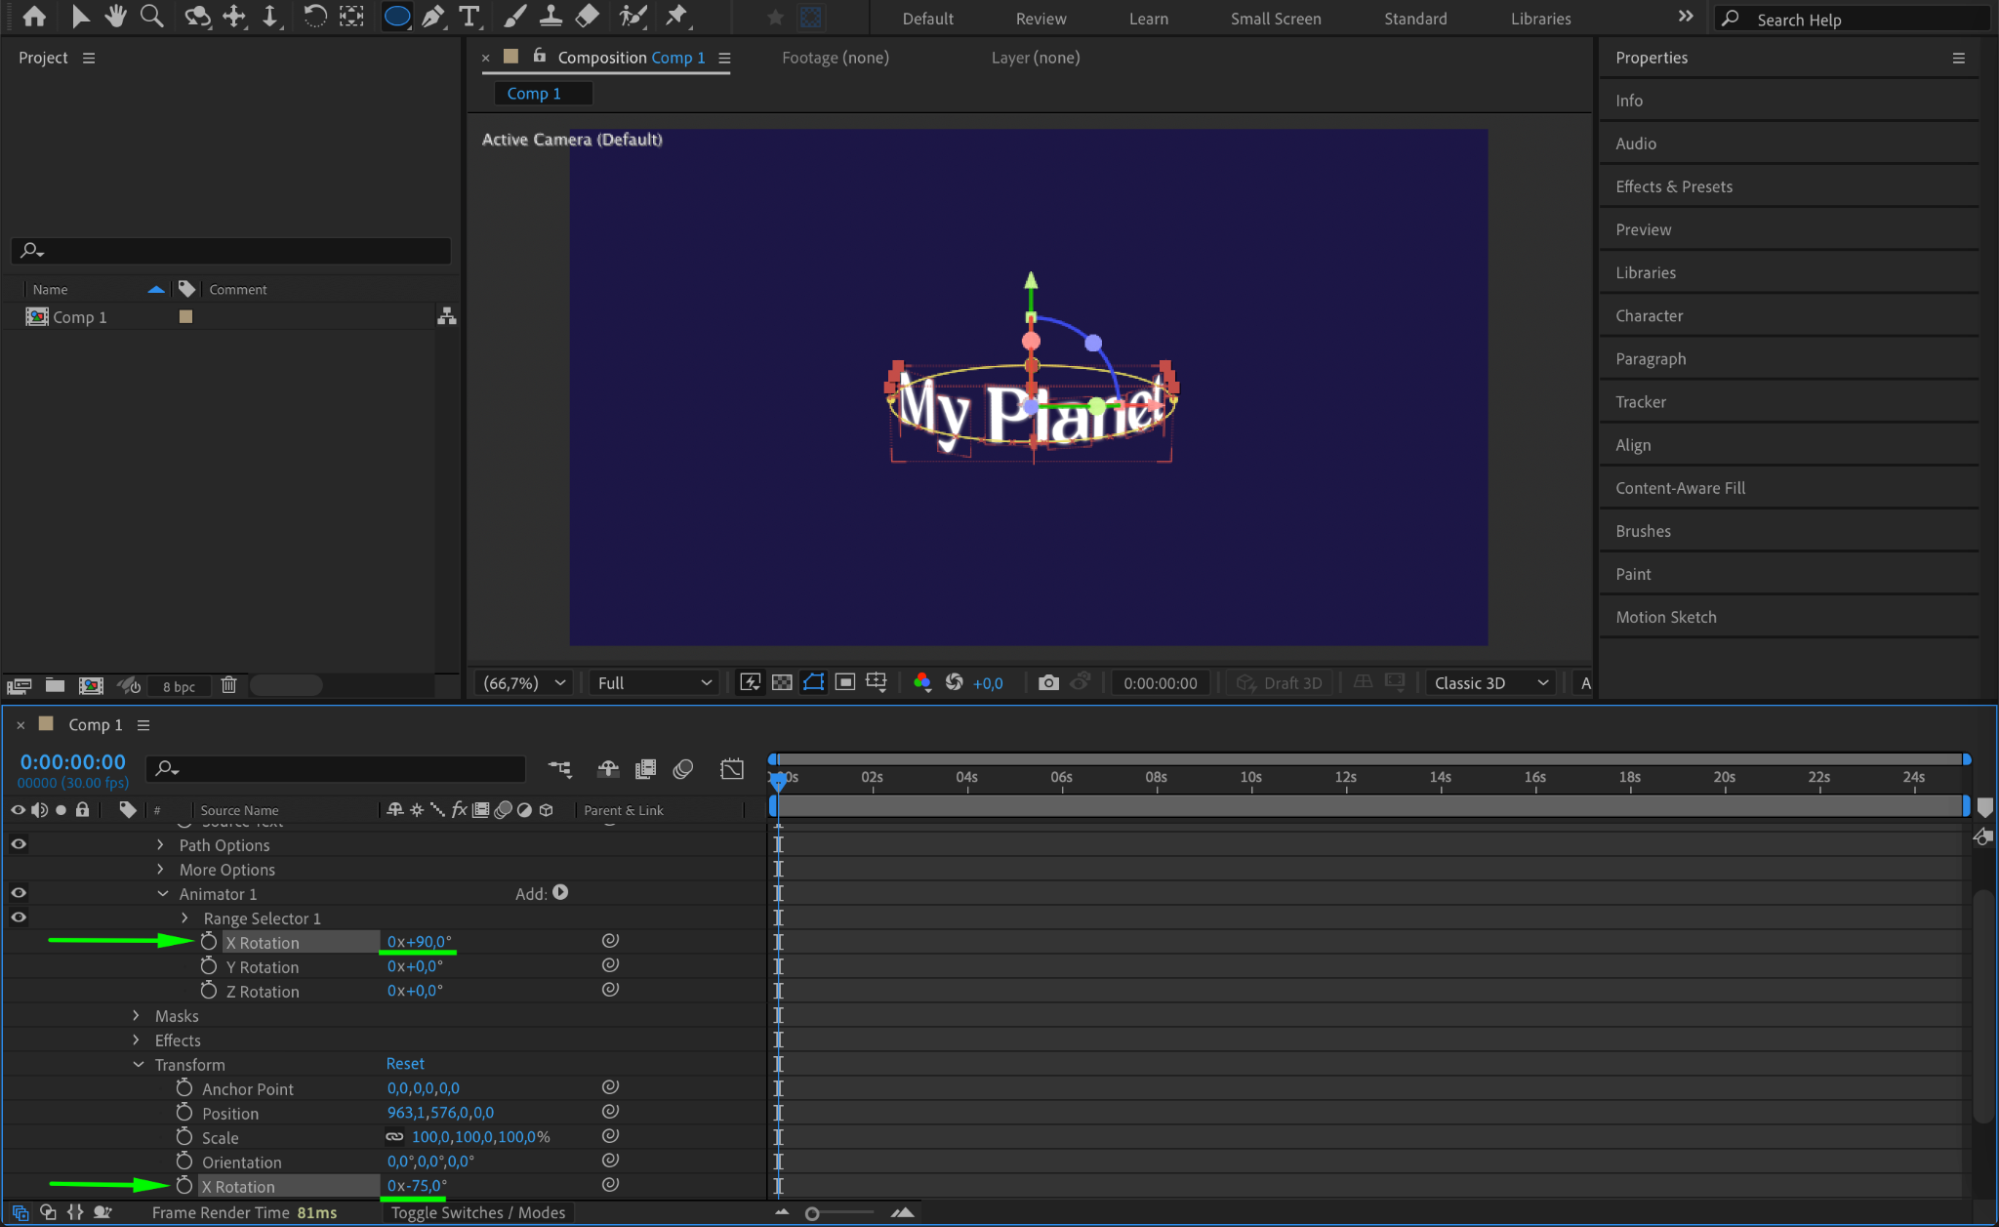 Step 8: Preview the Animation
Press the Spacebar to preview the animation. The text should now be smoothly rotating along the circular path. Adjust the rotation or expression speed as needed.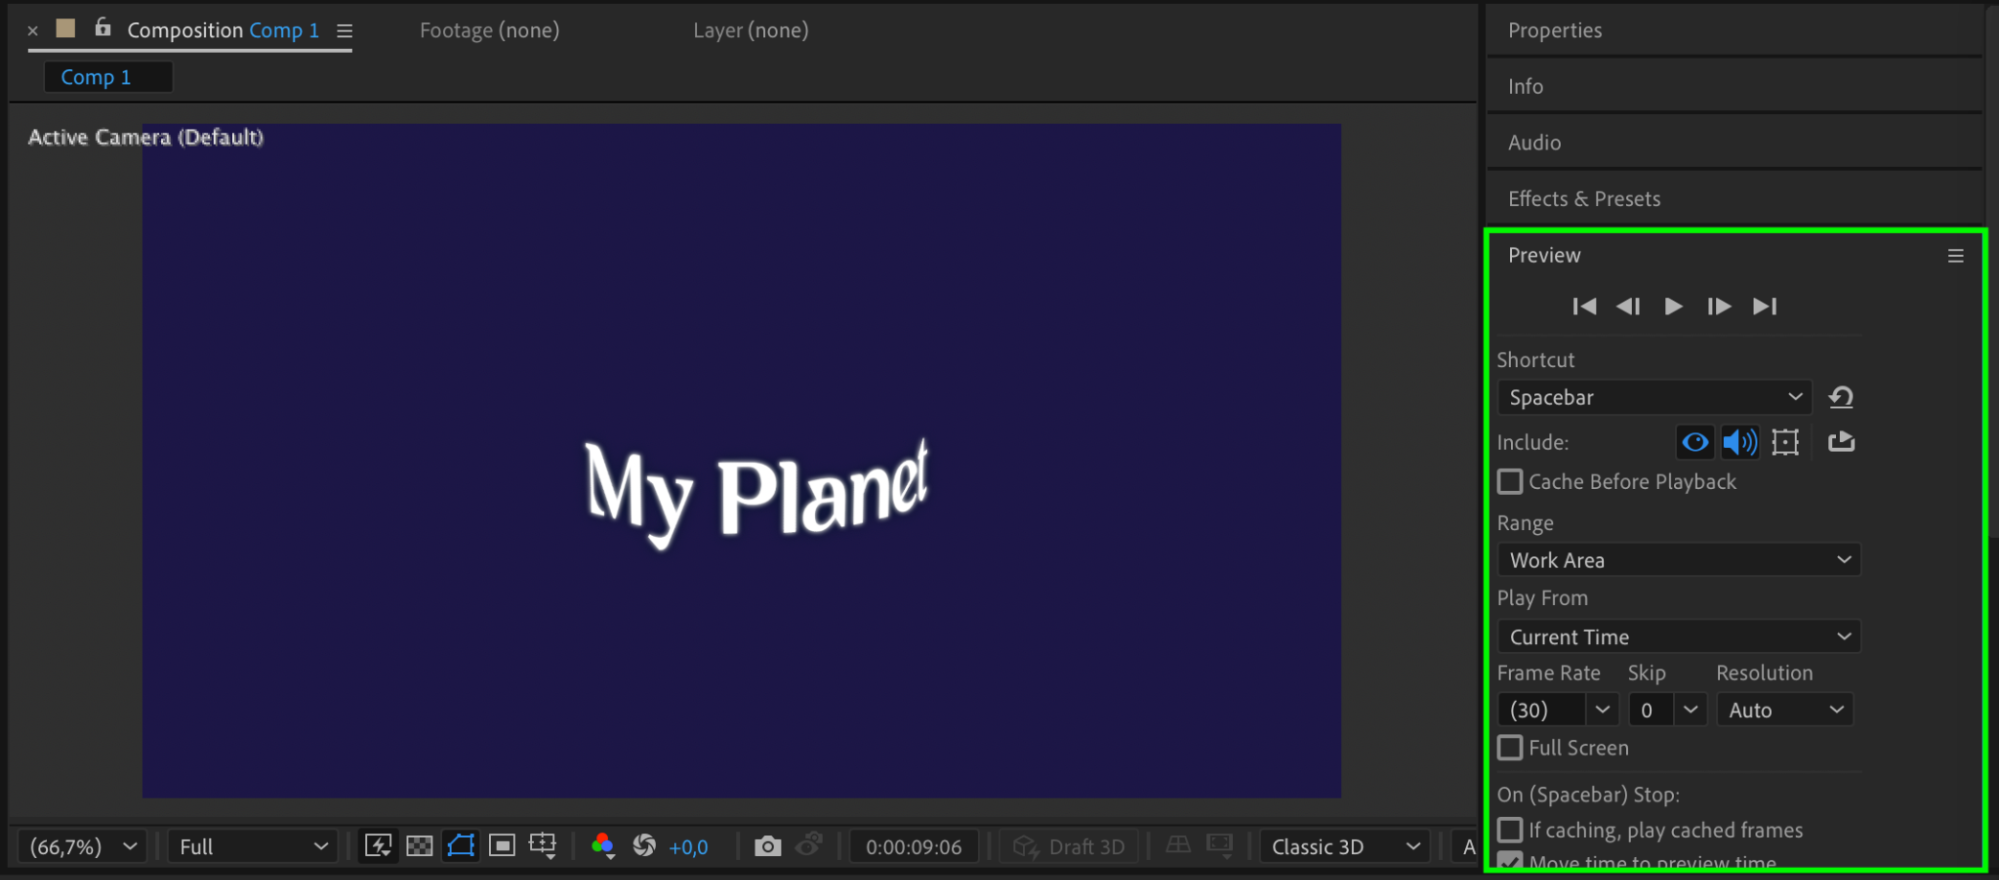 Step 9: Render the Final Animation
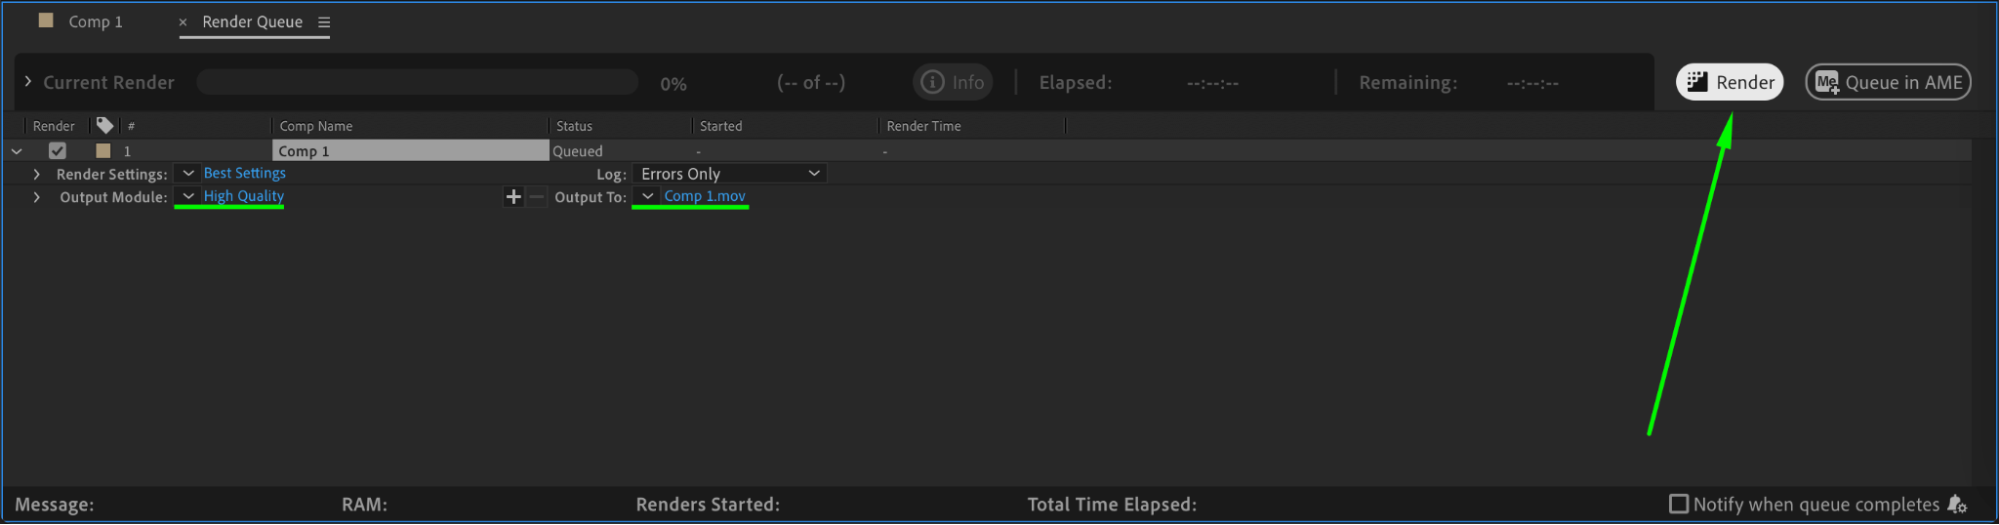
Once satisfied with the result, go to Composition > Add to Render Queue, set your output format, and render your animation.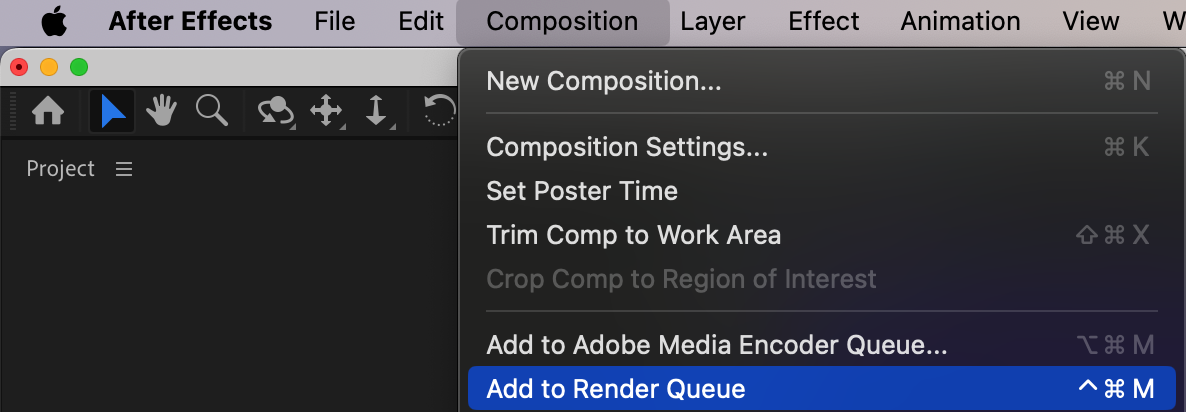
 Conclusion
Animating text along a circular path in After Effects is an effective way to create dynamic motion graphics. By using masks, expressions, and 3D transformations, you can achieve professional-looking animations suitable for titles, logos, and other creative projects. Experiment with different speeds and rotations to customize the effect.
Get 10% off when you subscribe to our newsletter

Our Bestsellers


