Creating a Gaming Montage in After Effects
Introduction
A gaming montage is a great way to showcase your best gameplay moments, highlight epic wins, or create engaging content for YouTube and social media. In this guide, you will learn how to edit, enhance, and animate your gaming footage in After Effects to create a polished and exciting montage.
Step 1: Create a New Composition
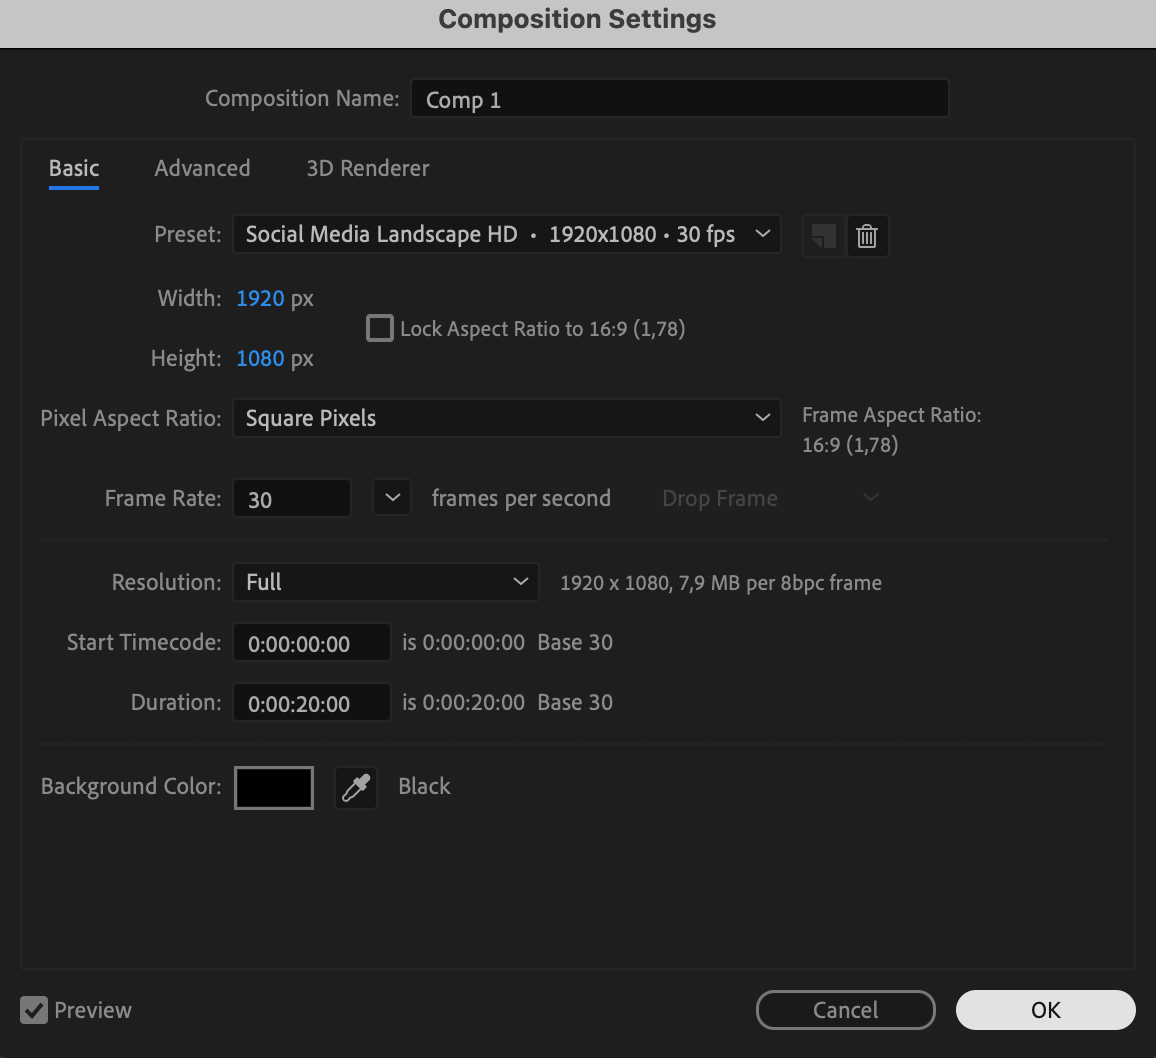
Open After Effects and create a new composition by going to Composition > New Composition. Set the resolution to 1920×1080 (or your preferred size), frame rate to 30fps or 60fps, and duration based on the length of your montage.
 Step 2: Import and Add Your Footage
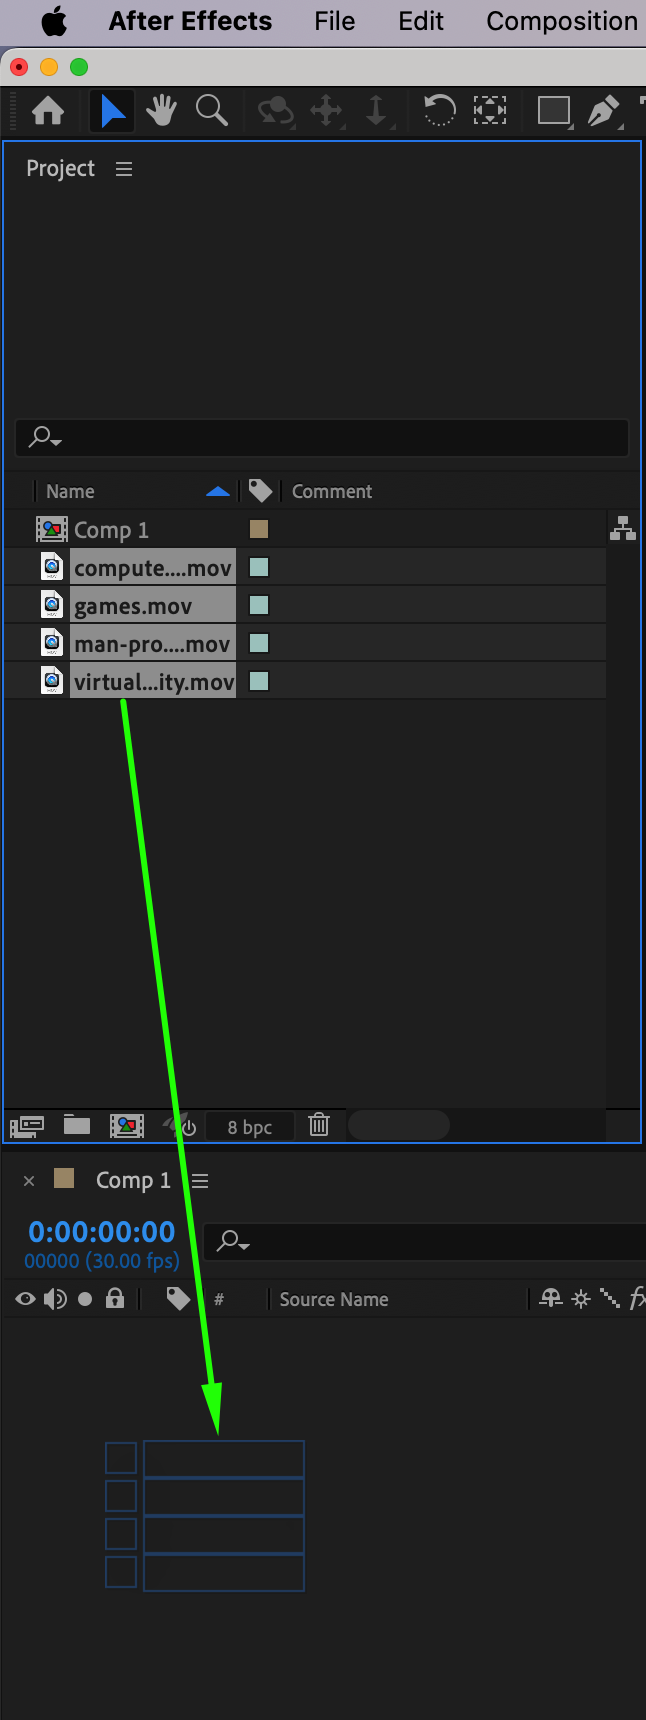
Go to File > Import > File and select your gameplay footage. Drag it onto the timeline to begin working with it. You can also import multiple clips if you plan to create a montage with different moments from your gameplay.
 Step 3: Trim and Arrange Clips
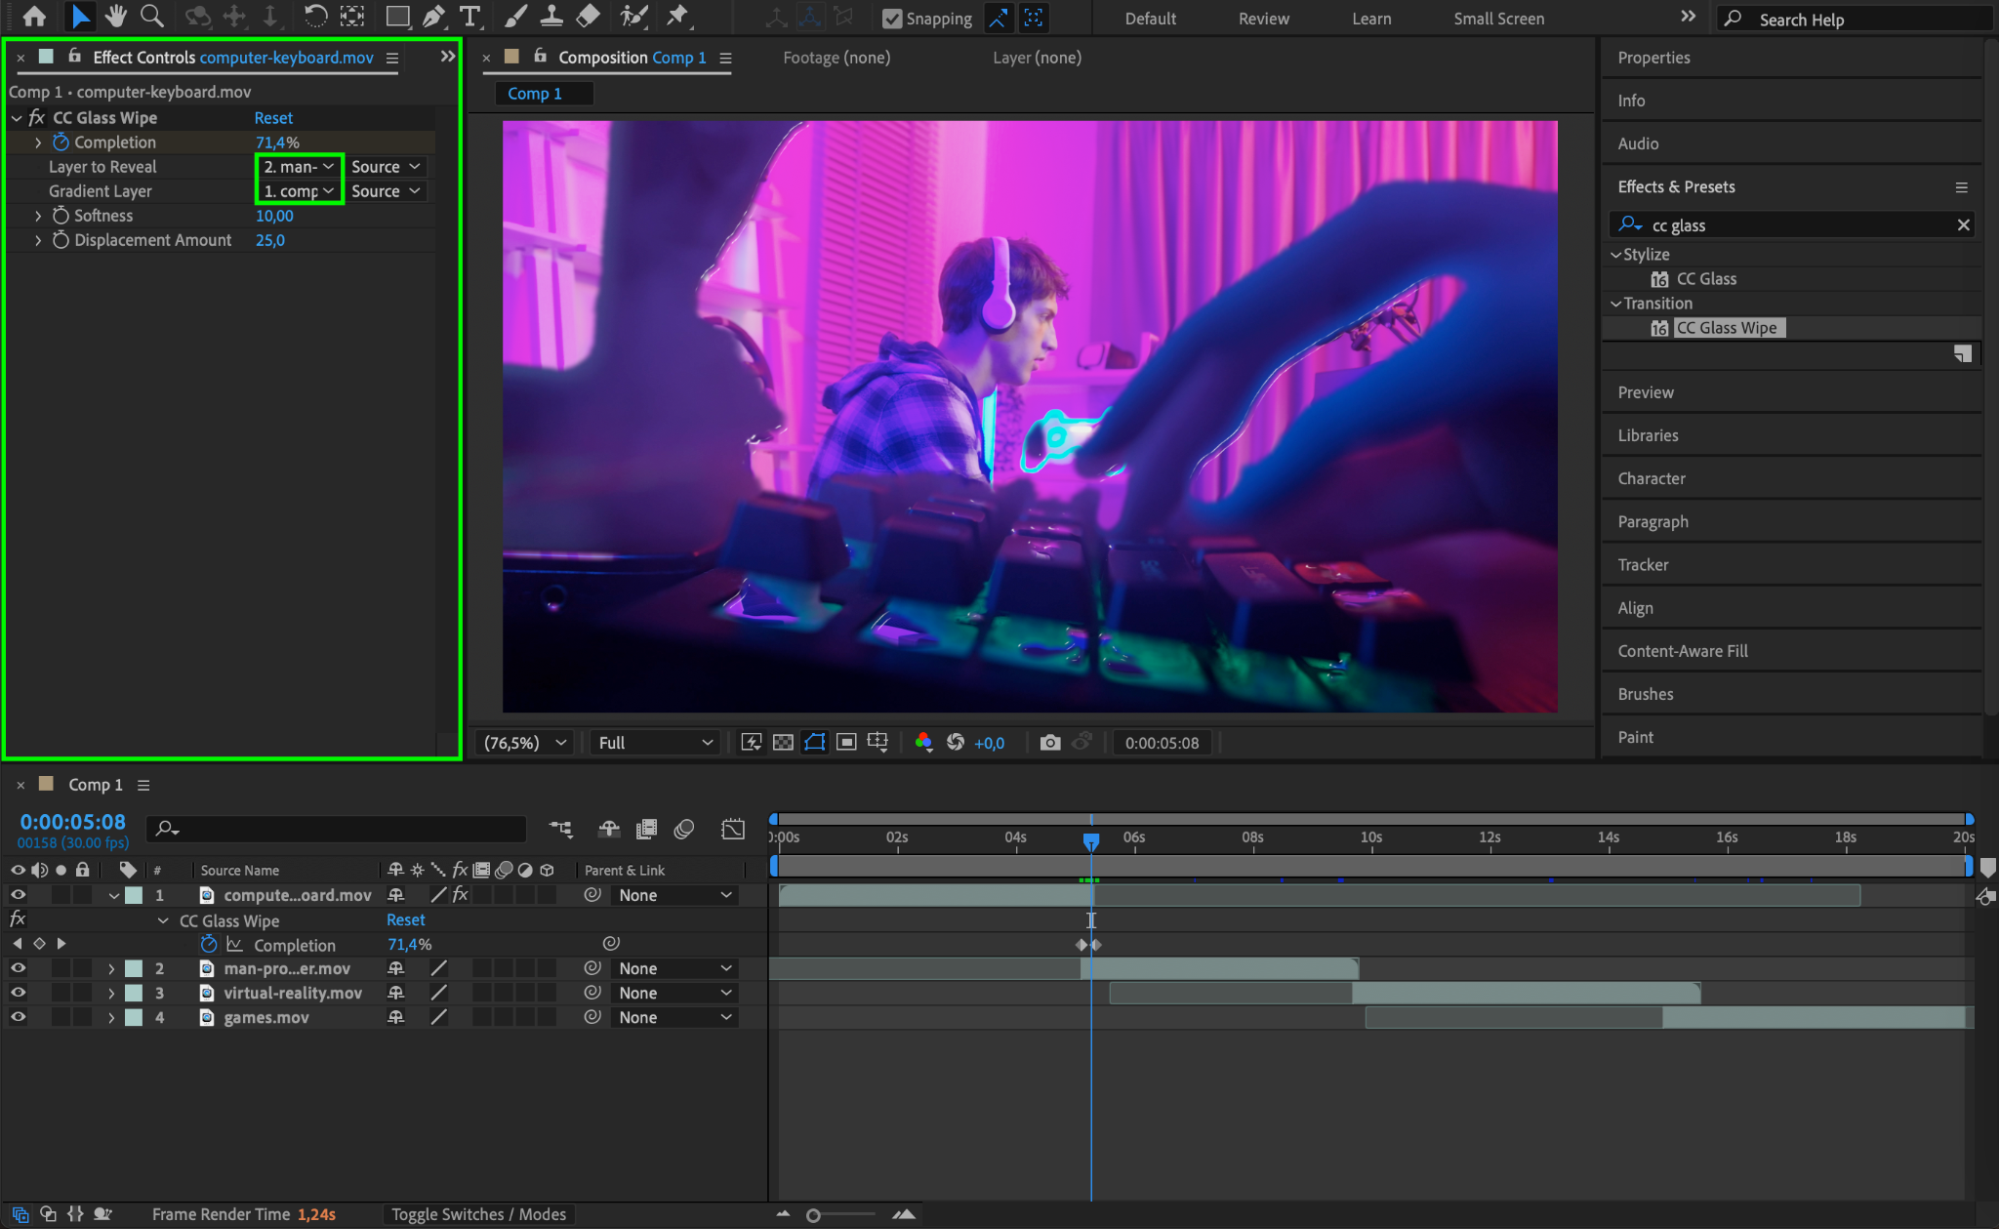
Use the Alt/Option + [ or ] shortcuts to trim your clips, keeping only the most exciting or essential moments. Arrange them in the timeline to create a smooth flow, ensuring that the transitions between clips are visually appealing.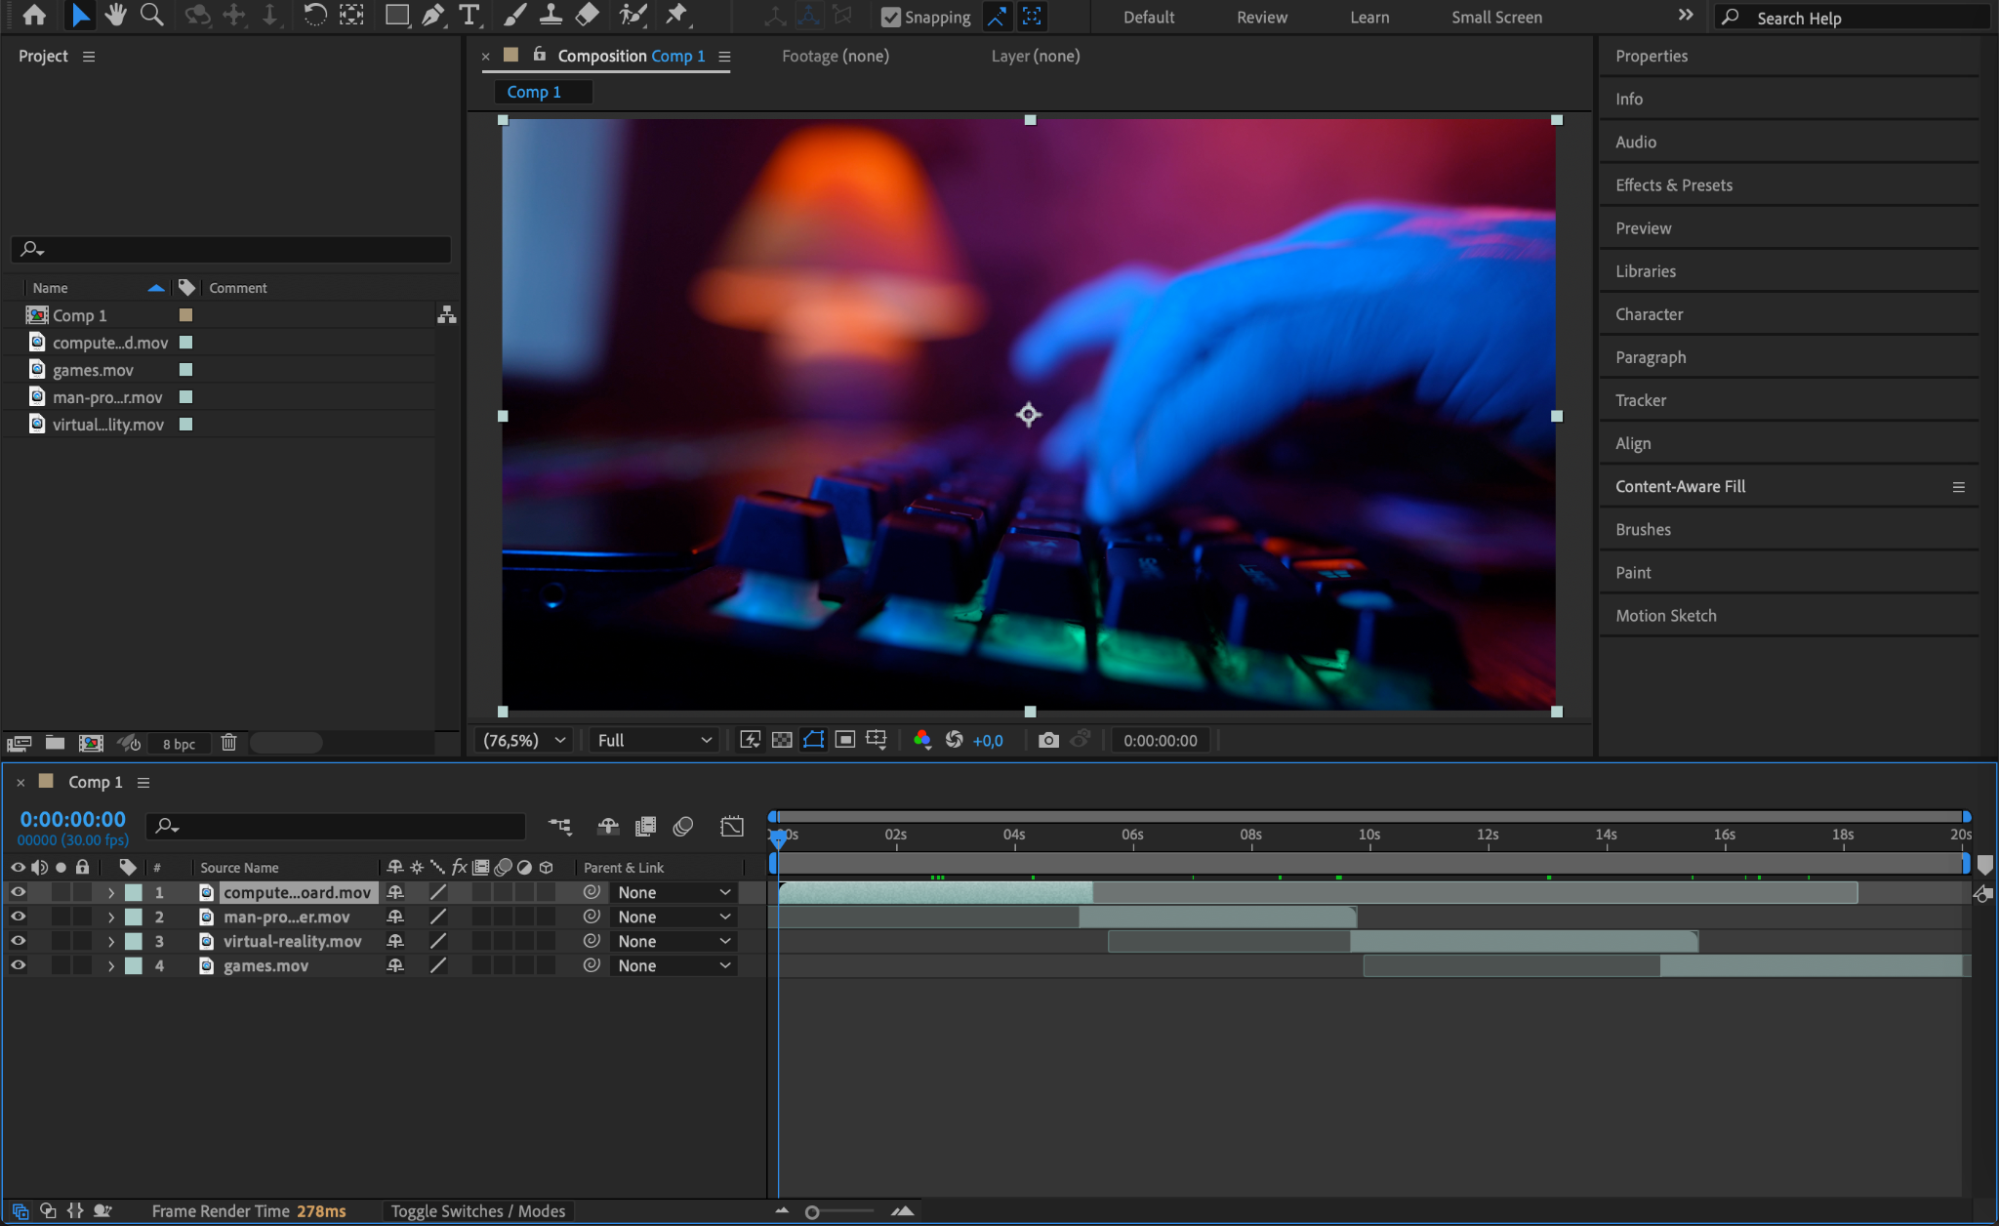
 Step 4: Add Text, Logos, or Channel Branding
Use the Type Tool (Ctrl/Cmd + T) to add text overlays, such as your channel name, player name, or match highlights. If you have a logo, import it and place it in the corner to reinforce your branding. Adjust size, position, and opacity for a clean look.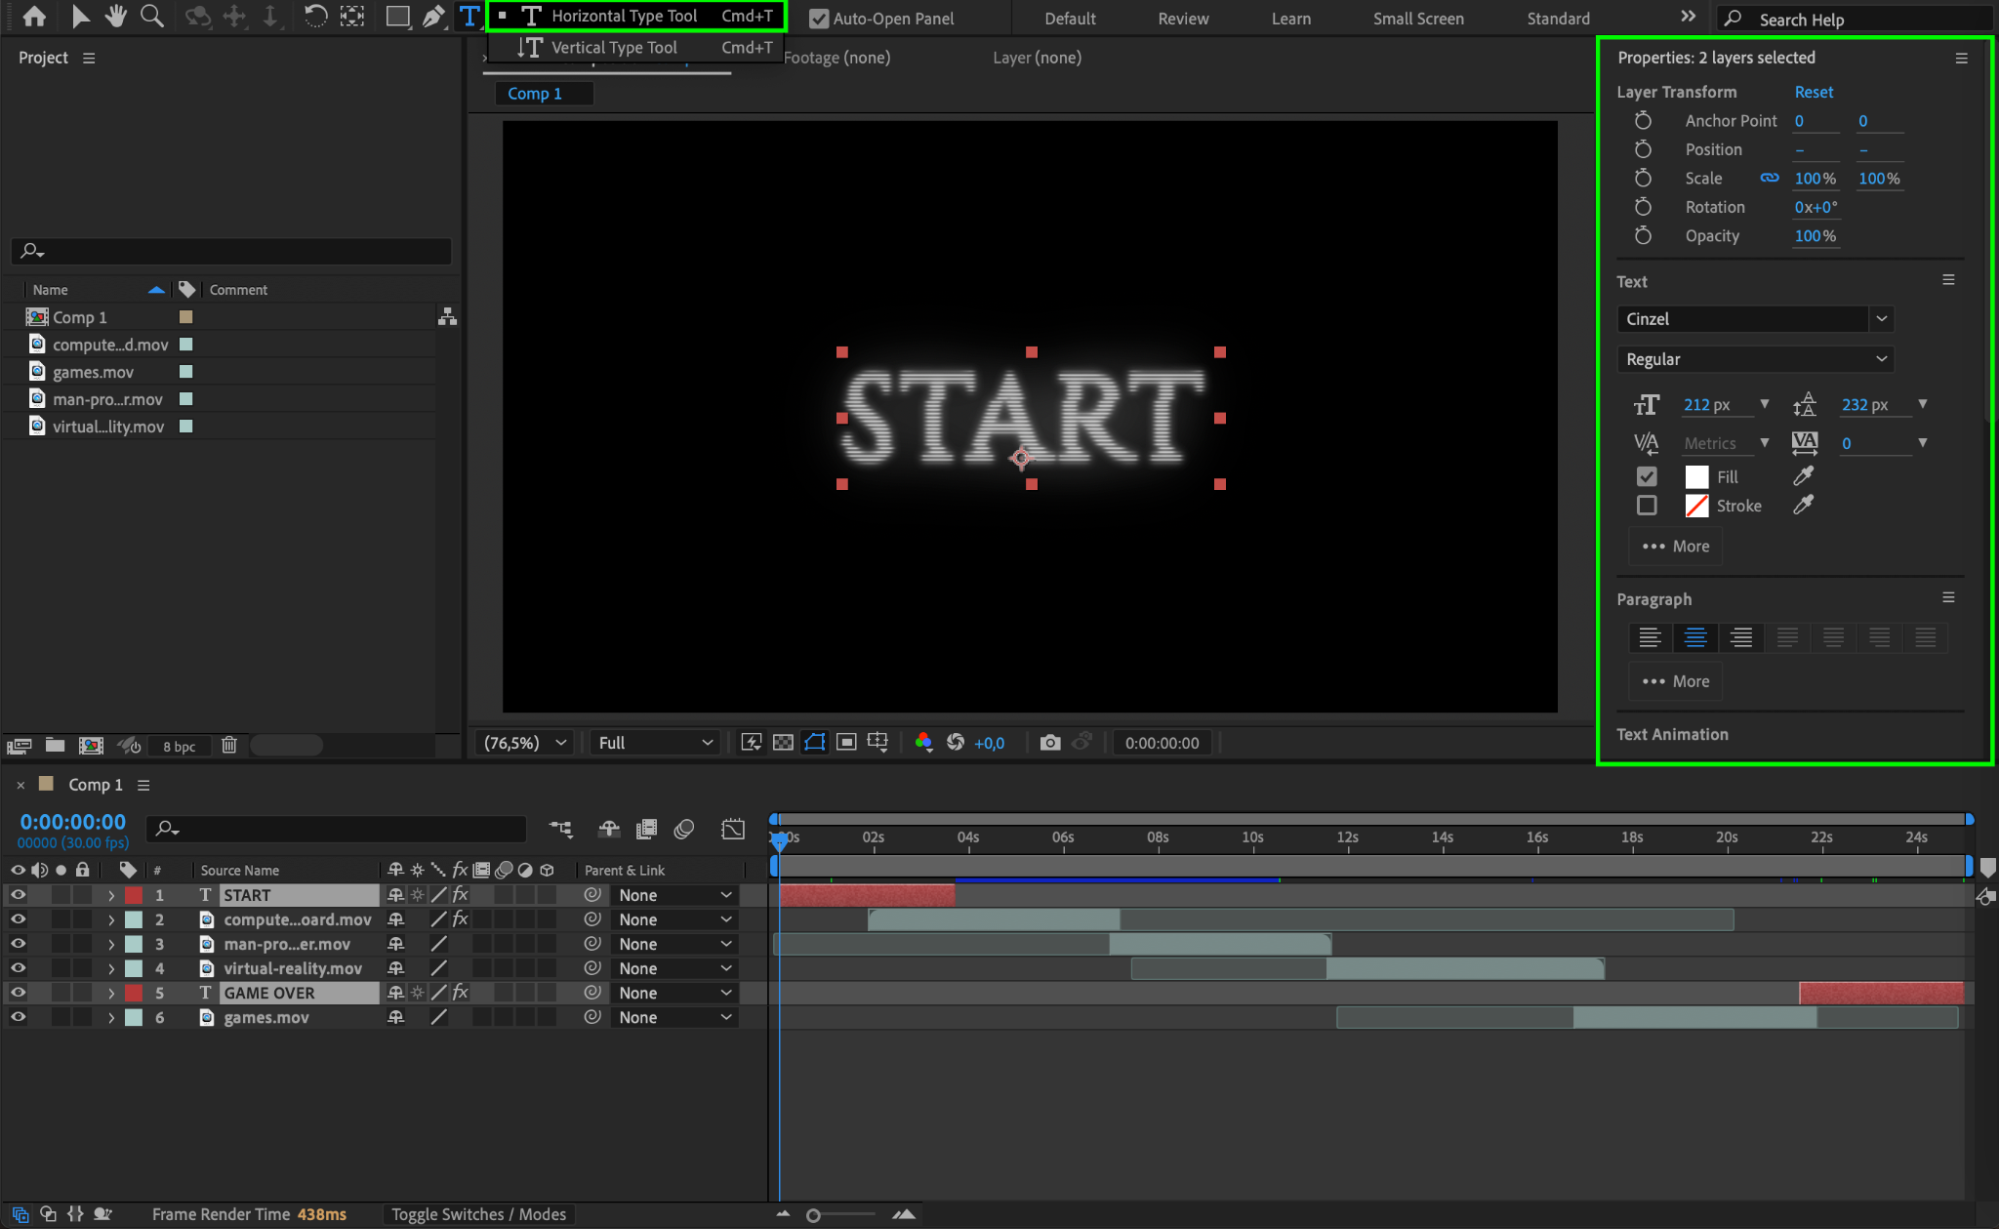 Step 5: Apply Effects and Color Grading
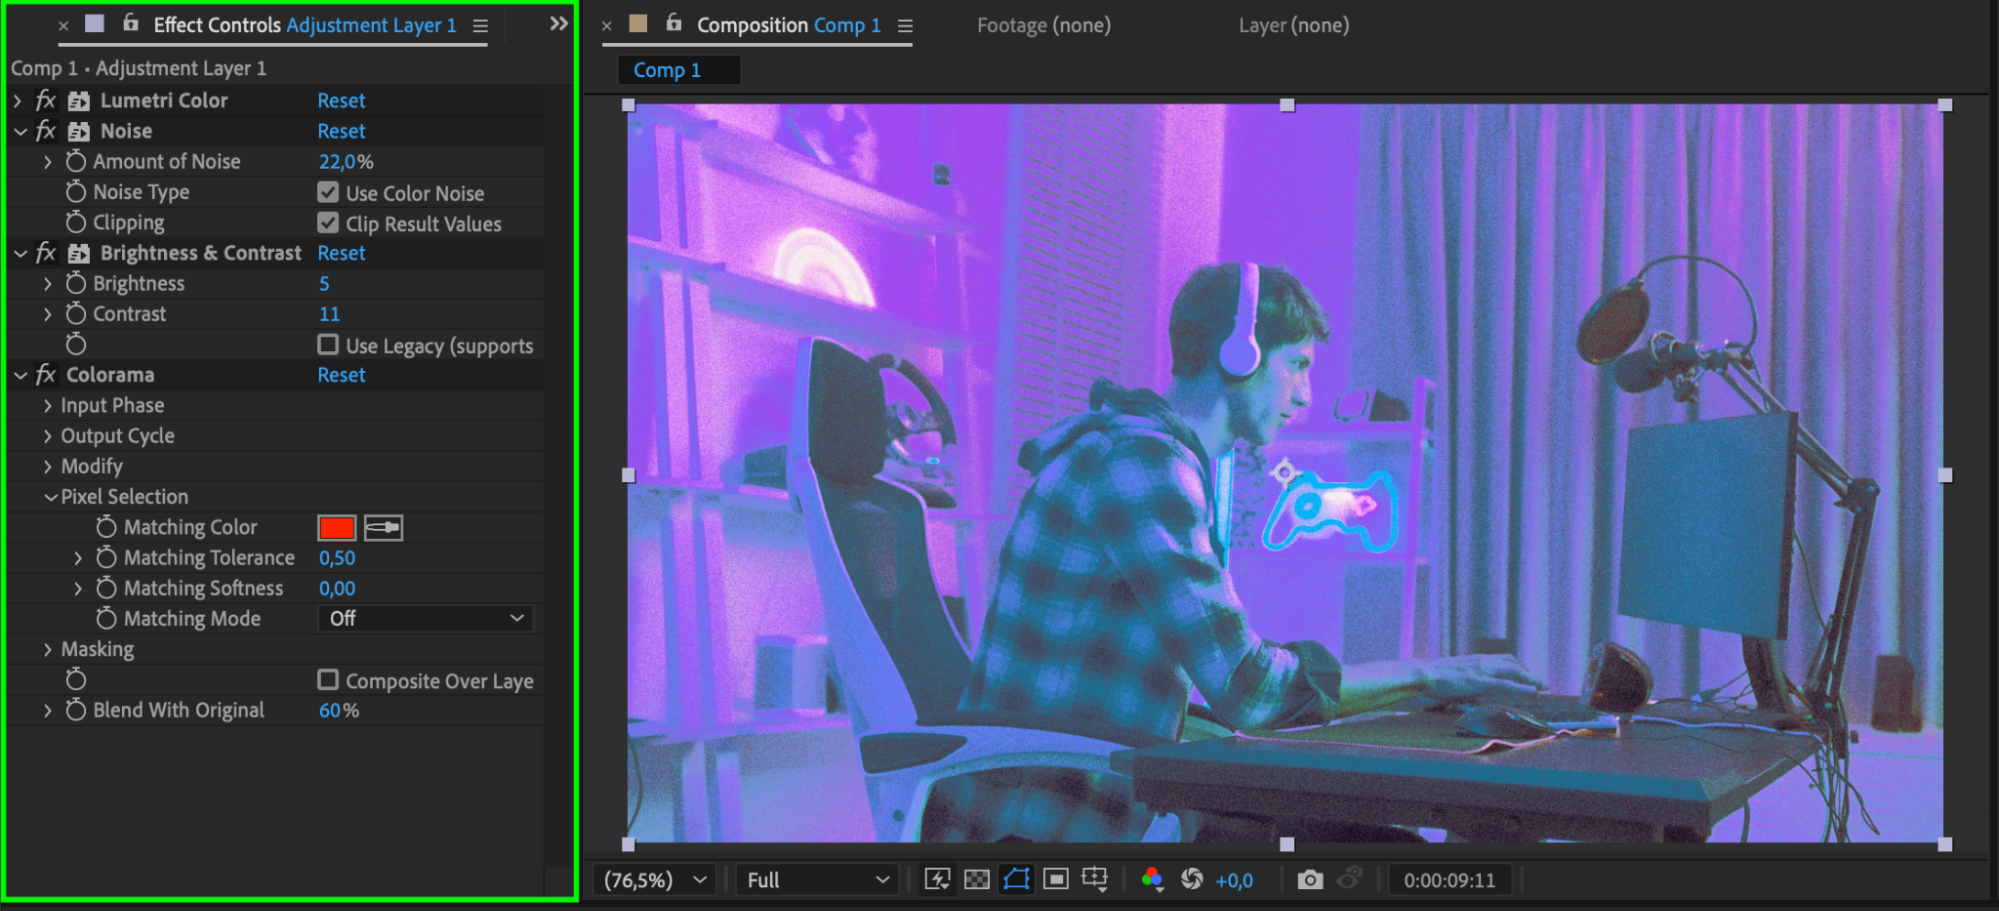
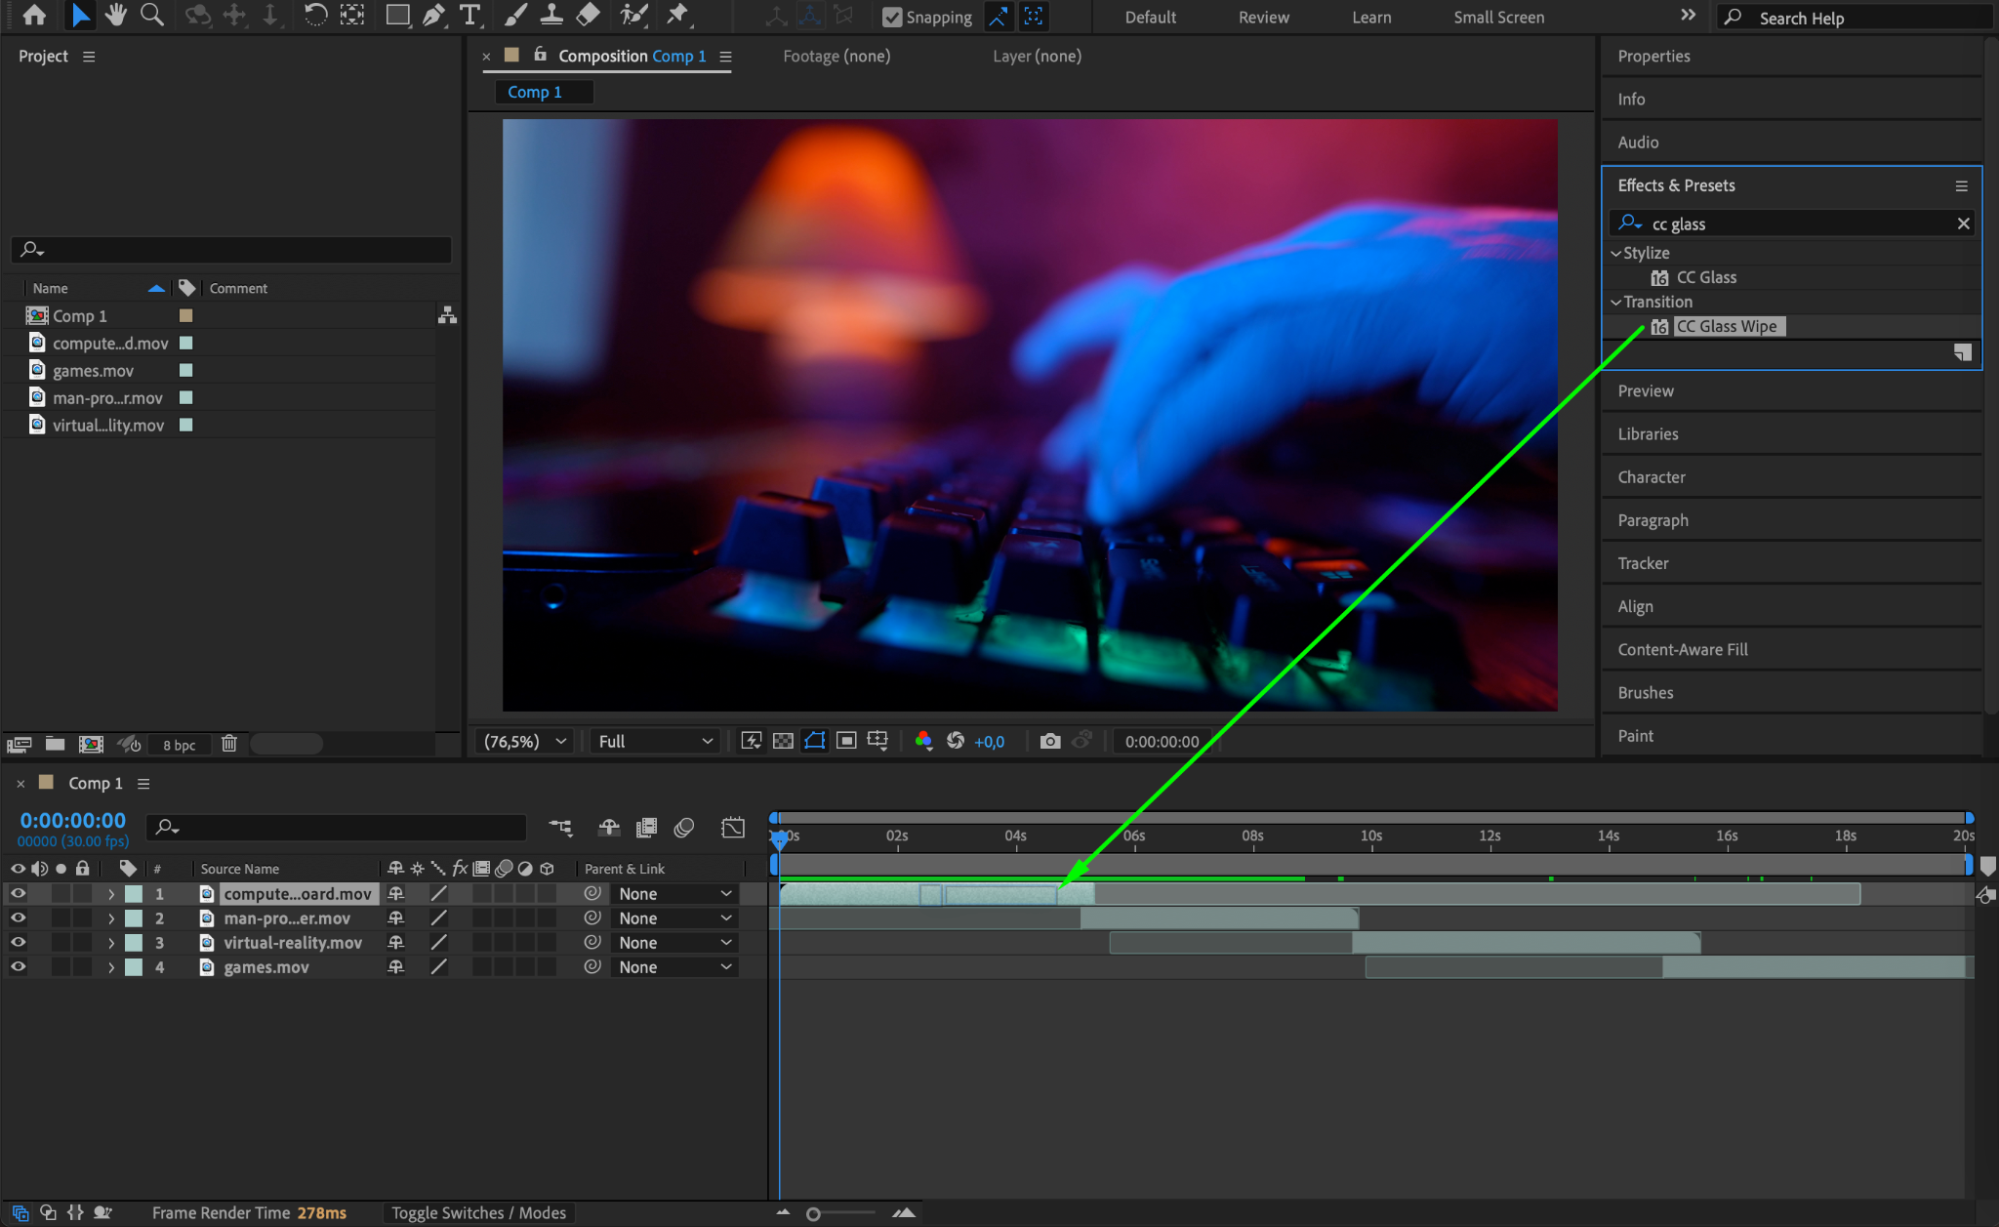
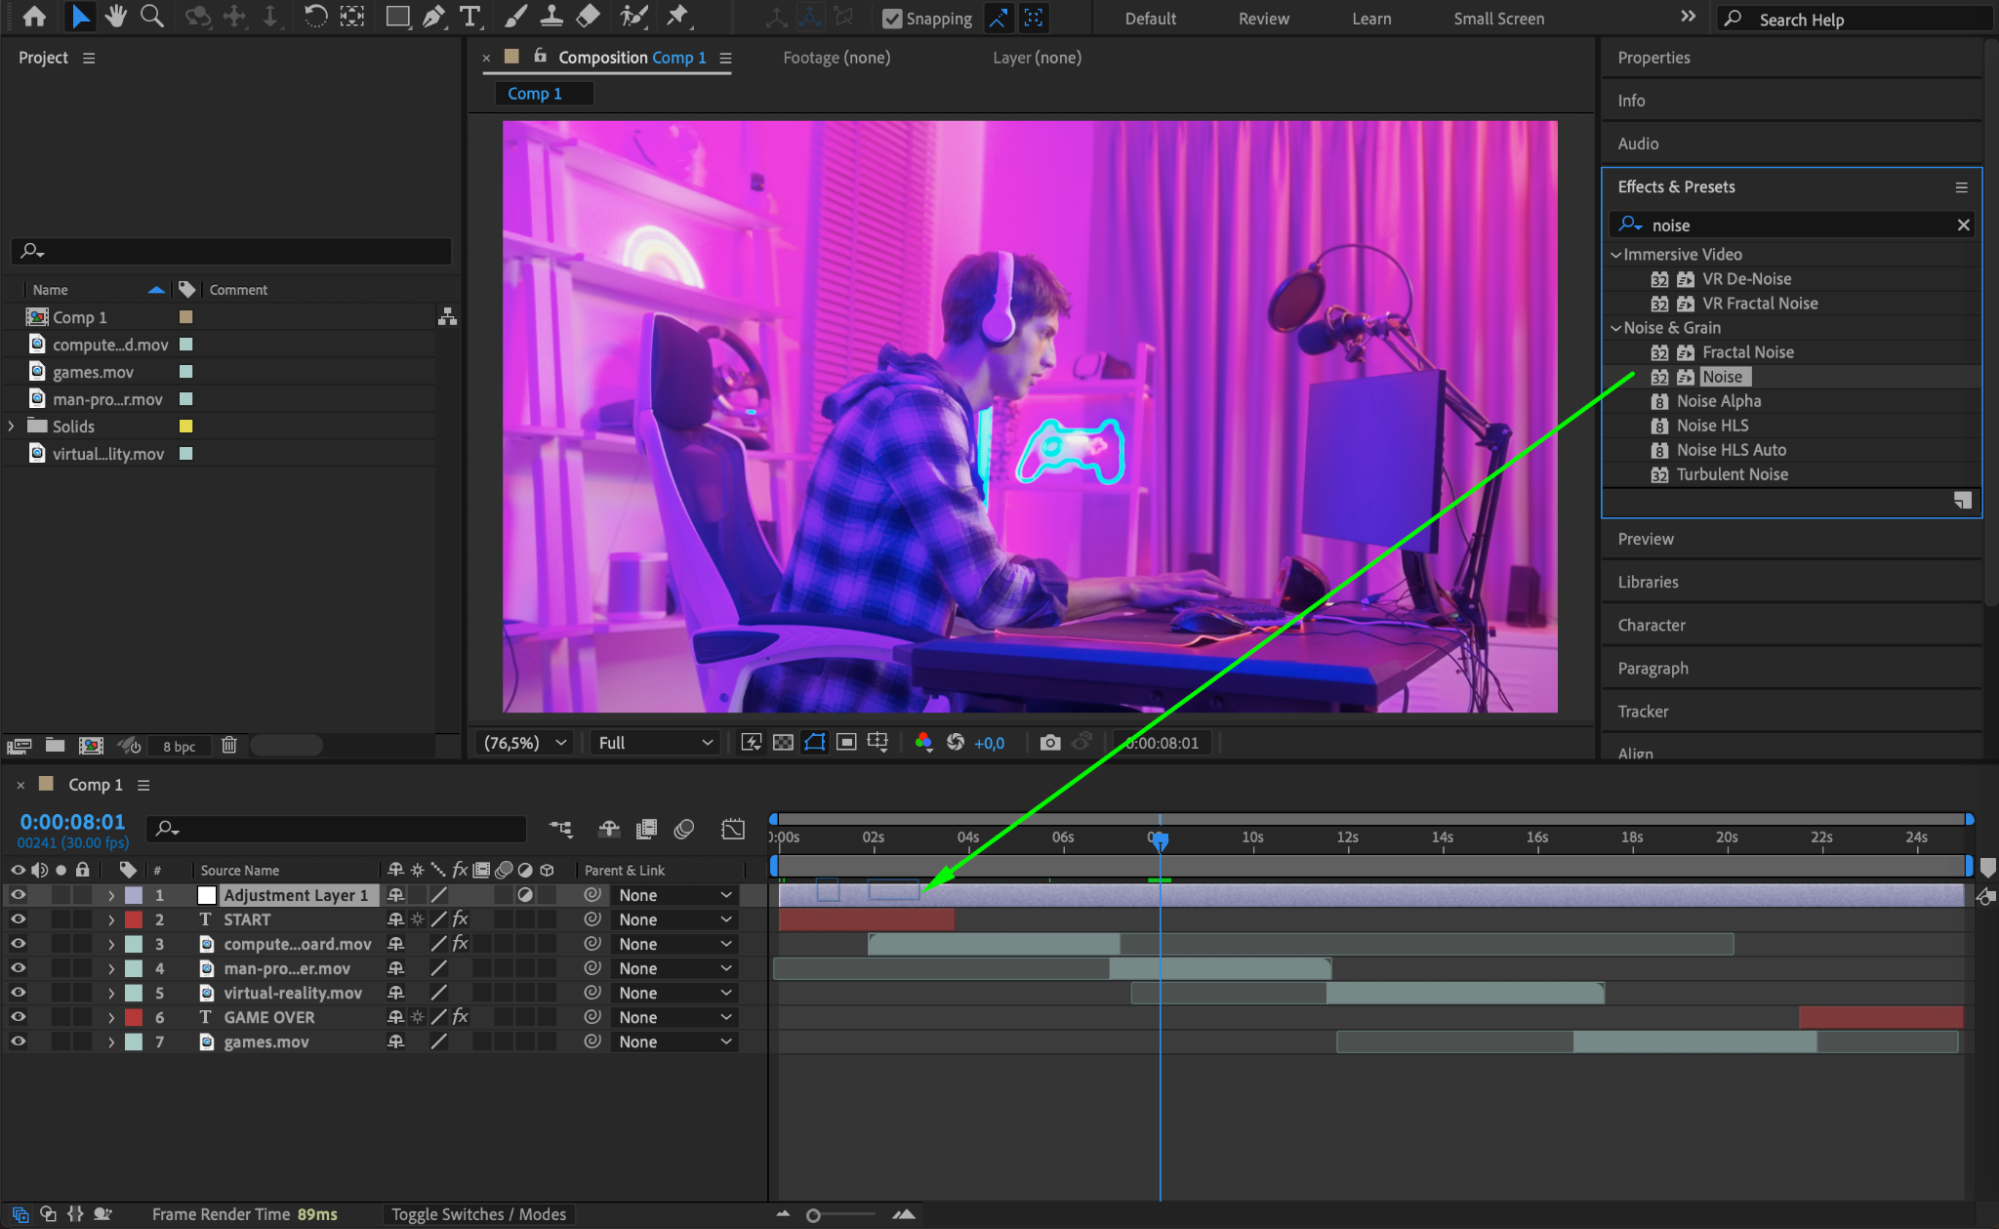
Use the Effects & Presets panel to add effects to your footage or text. You can apply color grading effects like Lumetri Color or Curves to enhance the visuals. To create a unified style, add an Adjustment Layer above all clips and apply effects to it, ensuring consistency across your montage.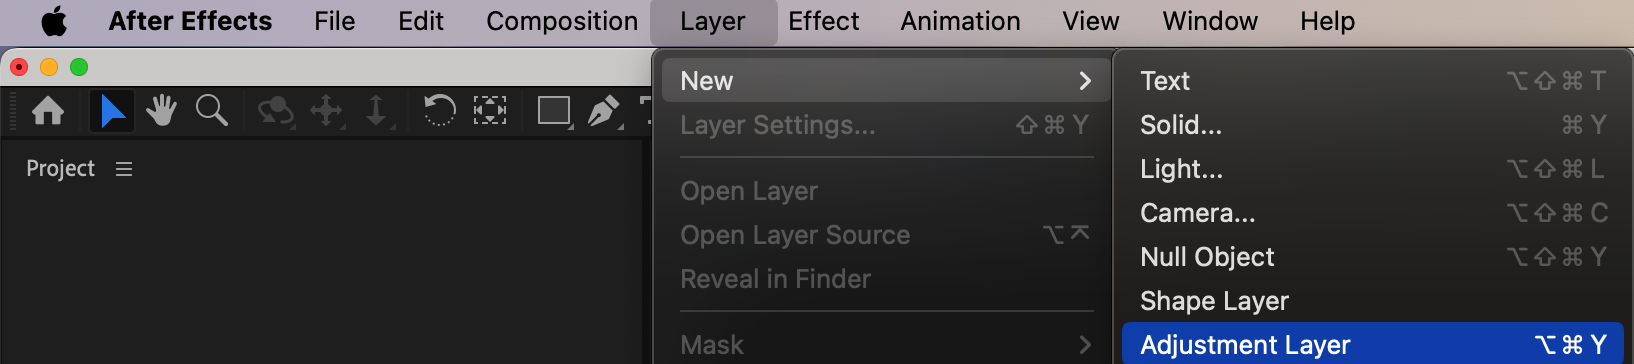
 Step 6: Animate Elements for a Dynamic Look
Use Transform properties (Position, Scale, Rotation, Opacity) to animate text, images, or clips. You can also add expressions like wiggle() for subtle movement or keyframe animations for dynamic transitions. Speed ramps and motion blur can enhance the action.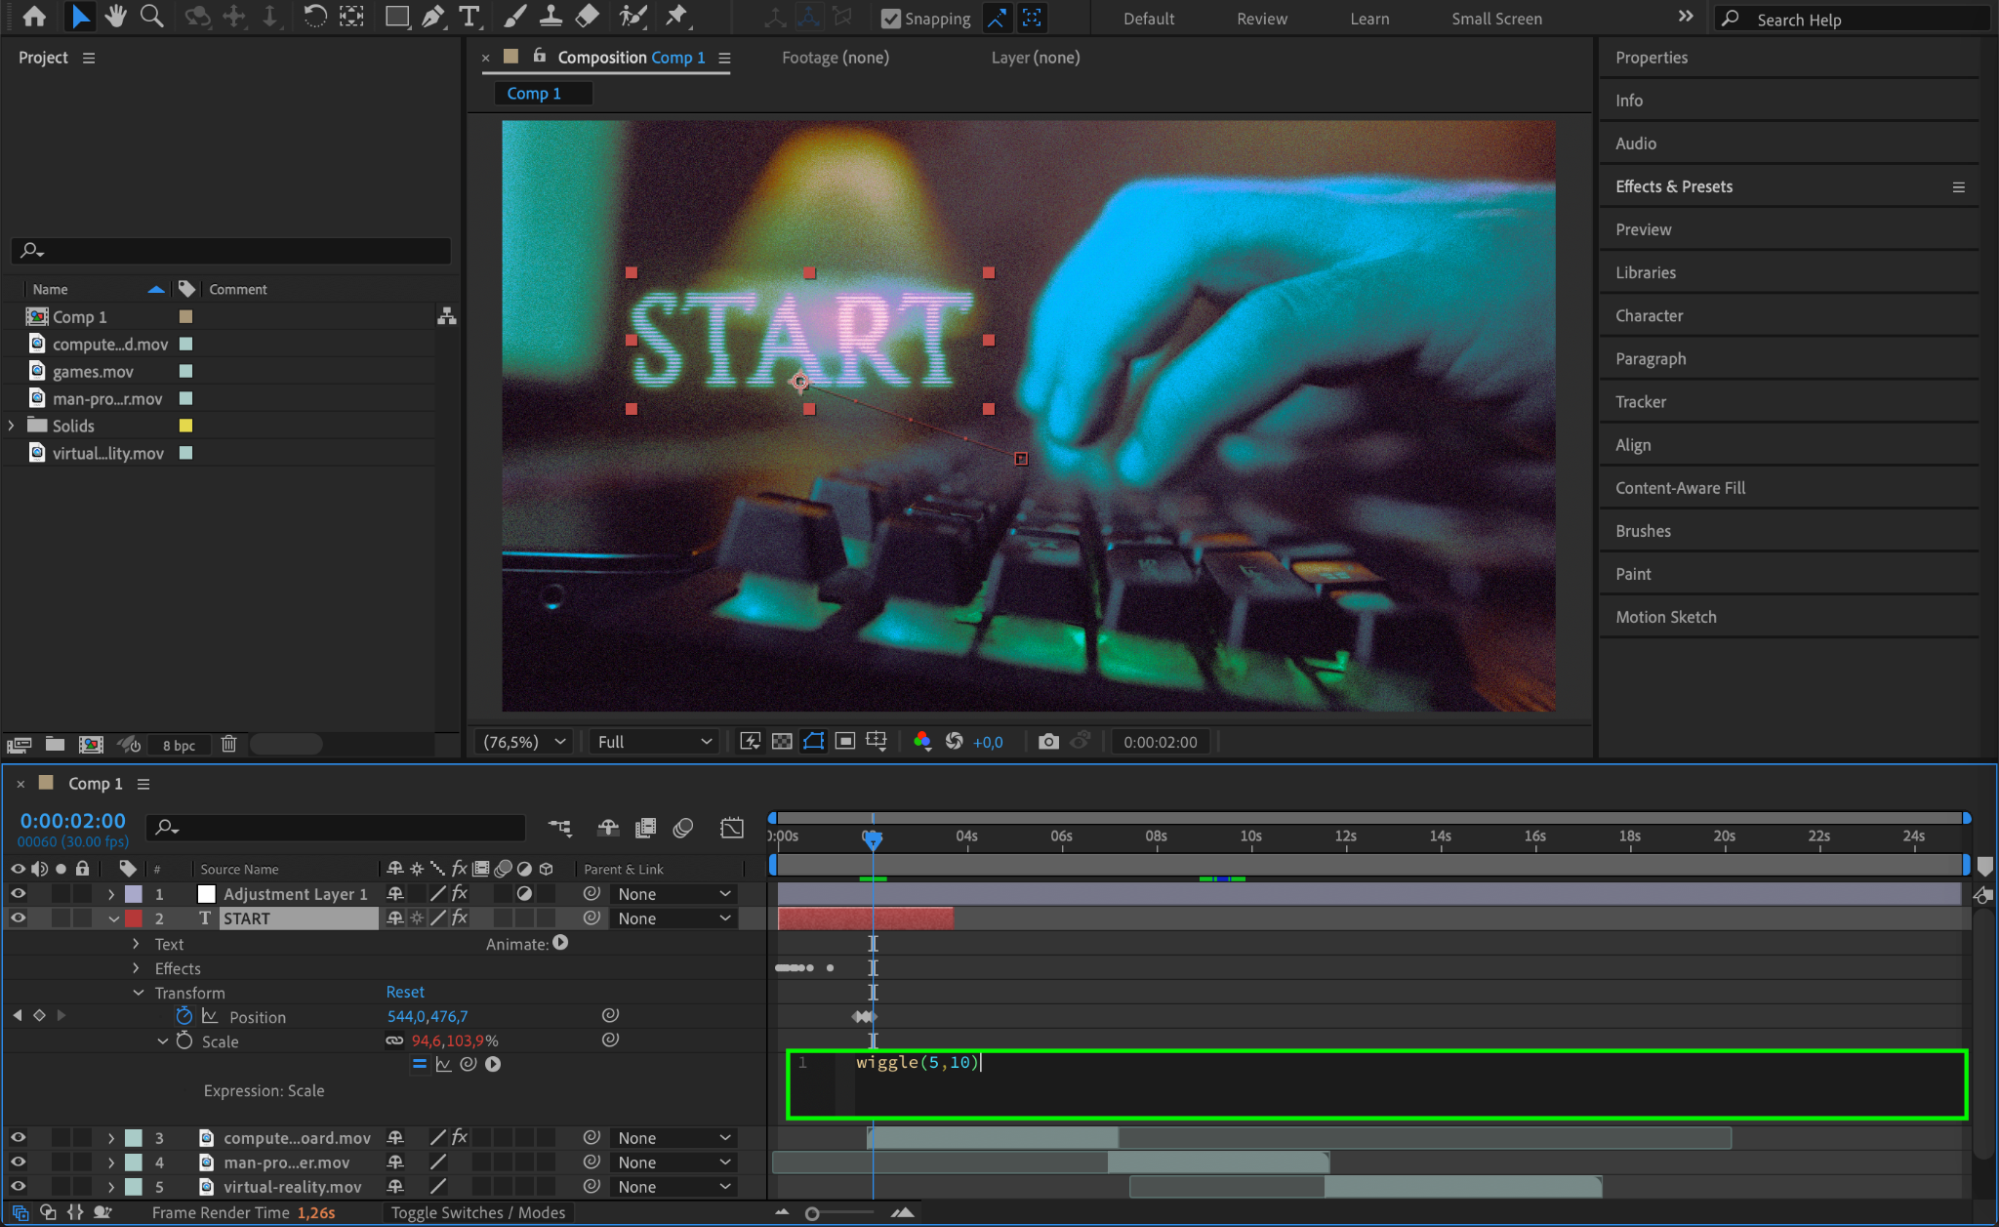 Step 7: Add Background Music and Sound Effects
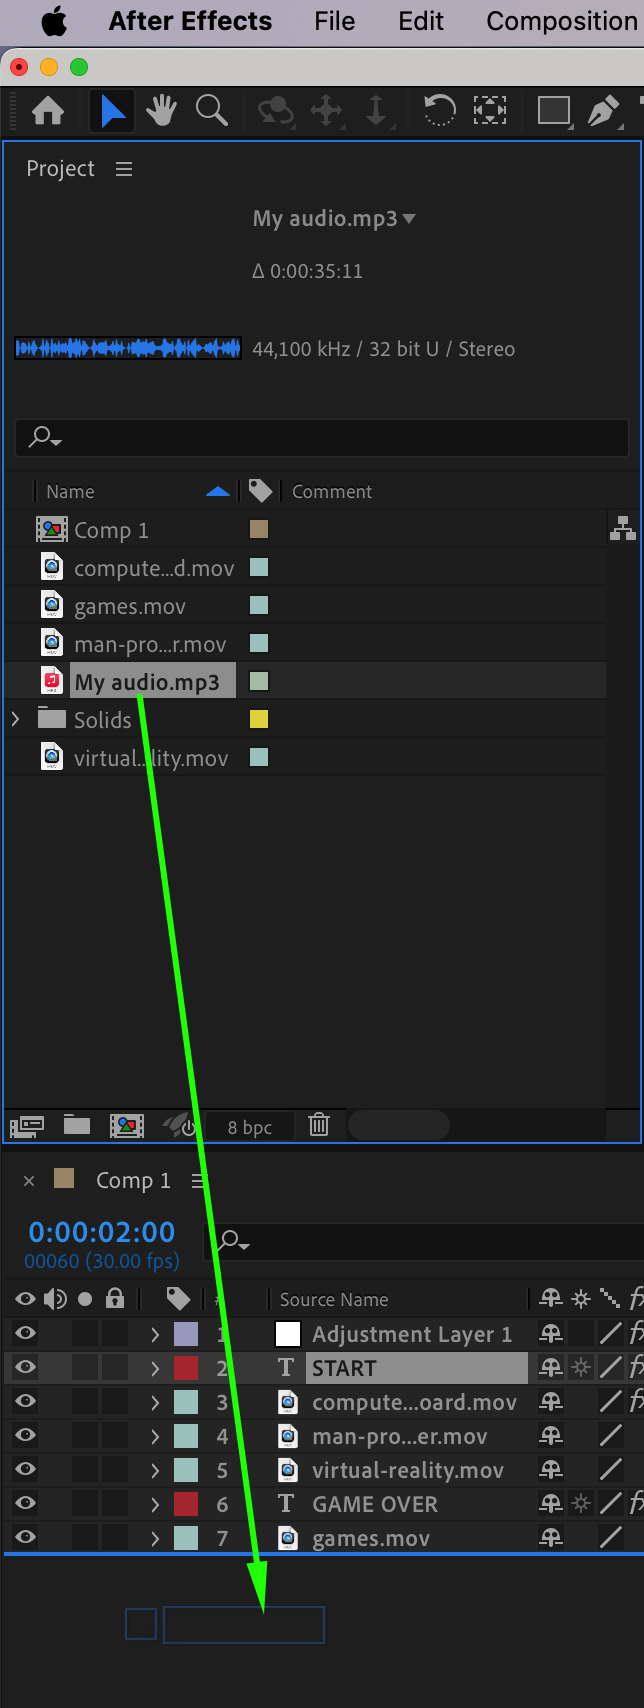
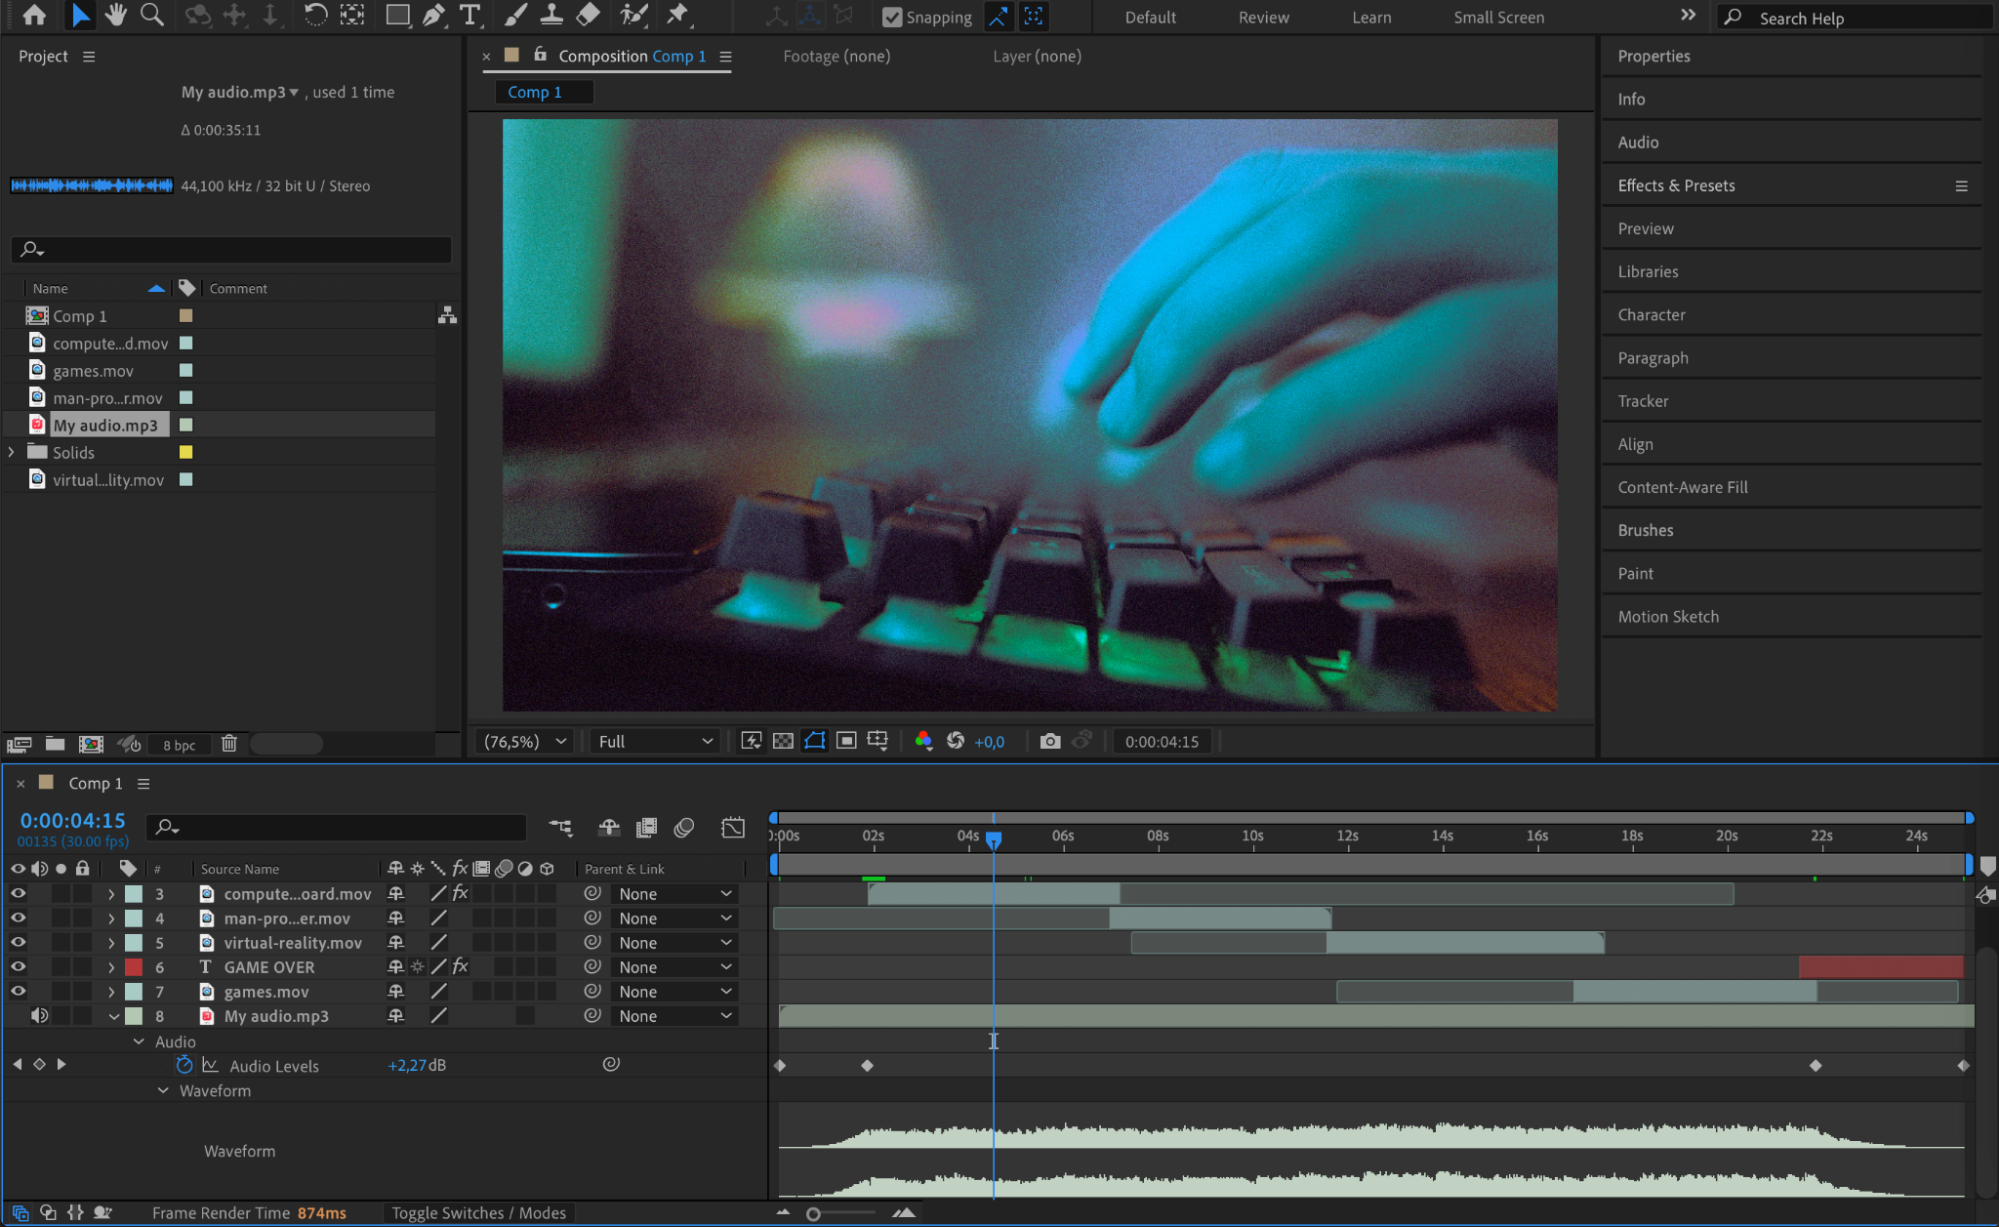
Import a soundtrack that matches the energy of your montage. Sync the cuts and transitions to the beat of the music for a more engaging experience. You can also add sound effects for gunshots, explosions, or other in-game actions to enhance immersion.
 Step 8: Preview the Montage
Press Spacebar to preview your montage and check for any adjustments needed. Ensure smooth transitions, well-timed effects, and a cohesive visual style. Adjust layers, keyframes, or effects if necessary.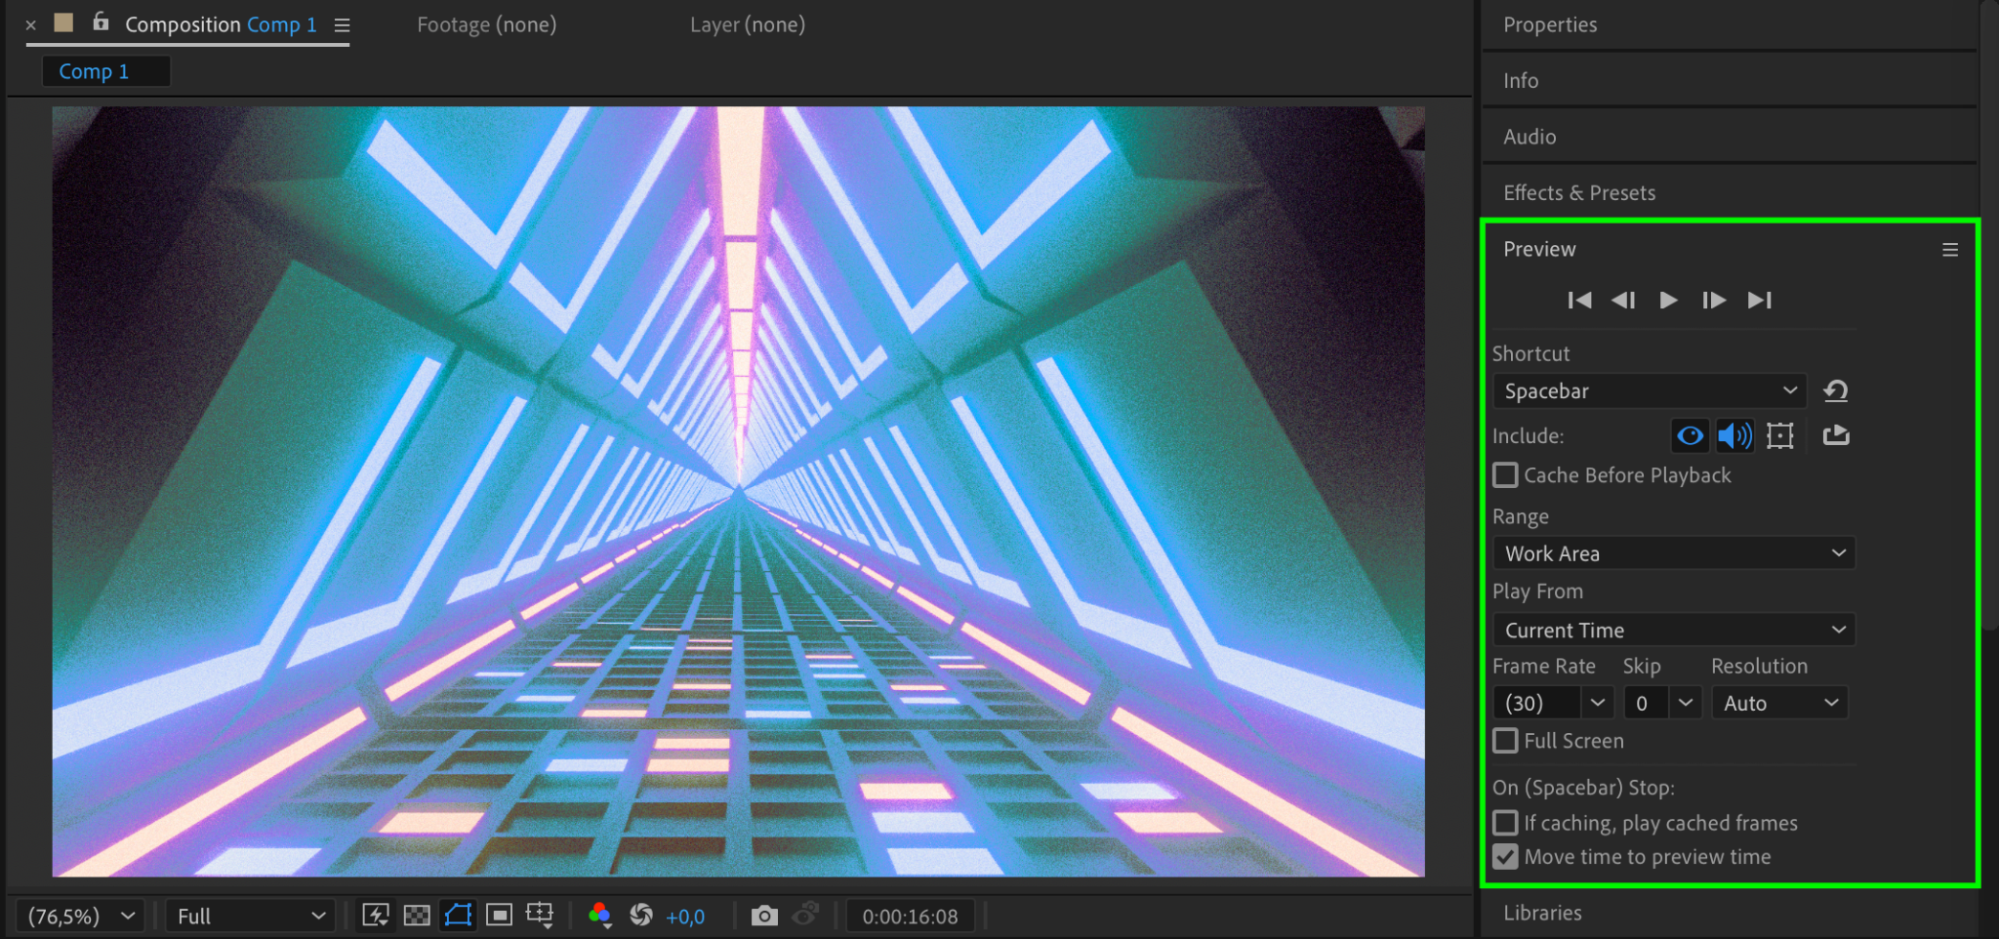 Step 9: Render the Final Video
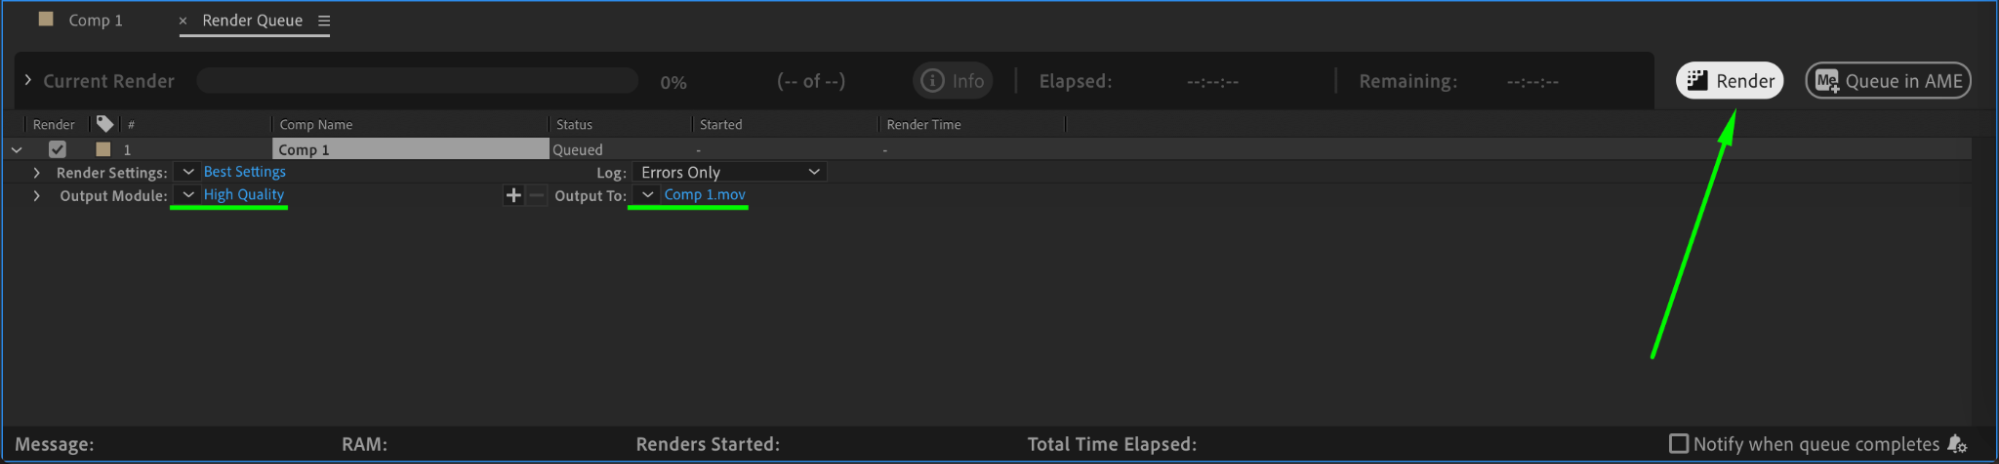
Once satisfied, go to Composition > Add to Render Queue. Choose your preferred export settings (H.264 for MP4 is recommended for YouTube and social media) and render your gaming montage in high quality.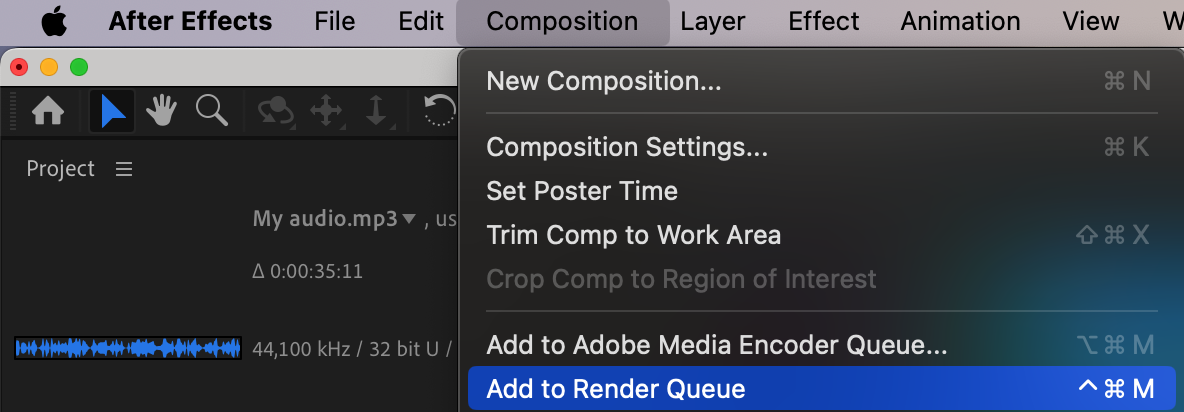
Conclusion
By following these steps, you can create an engaging gaming montage in After Effects that highlights your best moments in a visually dynamic way. With well-timed cuts, effects, animations, and music, your montage will stand out and captivate your audience.
Get 10% off when you subscribe to our newsletter

Our Bestsellers


