Master the Art of Creating Glitch Effects in After Effects
Introduction: Unleash the Power of Glitch Effects
Are you looking to give your videos a trendy and edgy look? Glitch effects can add that touch of digital distortion and excitement that captures viewers’ attention. Whether you’re creating music videos, commercials, or any other multimedia projects, glitch effects can elevate your visuals and make them stand out from the crowd.
Get 10% off when you subscribe to our newsletter

In this comprehensive guide, we will take you through the step-by-step process of creating glitch effects in Adobe After Effects. Even if you’re new to the software, don’t worry! We will break down the techniques and tools, making it easy for you to master the art of glitch animation.
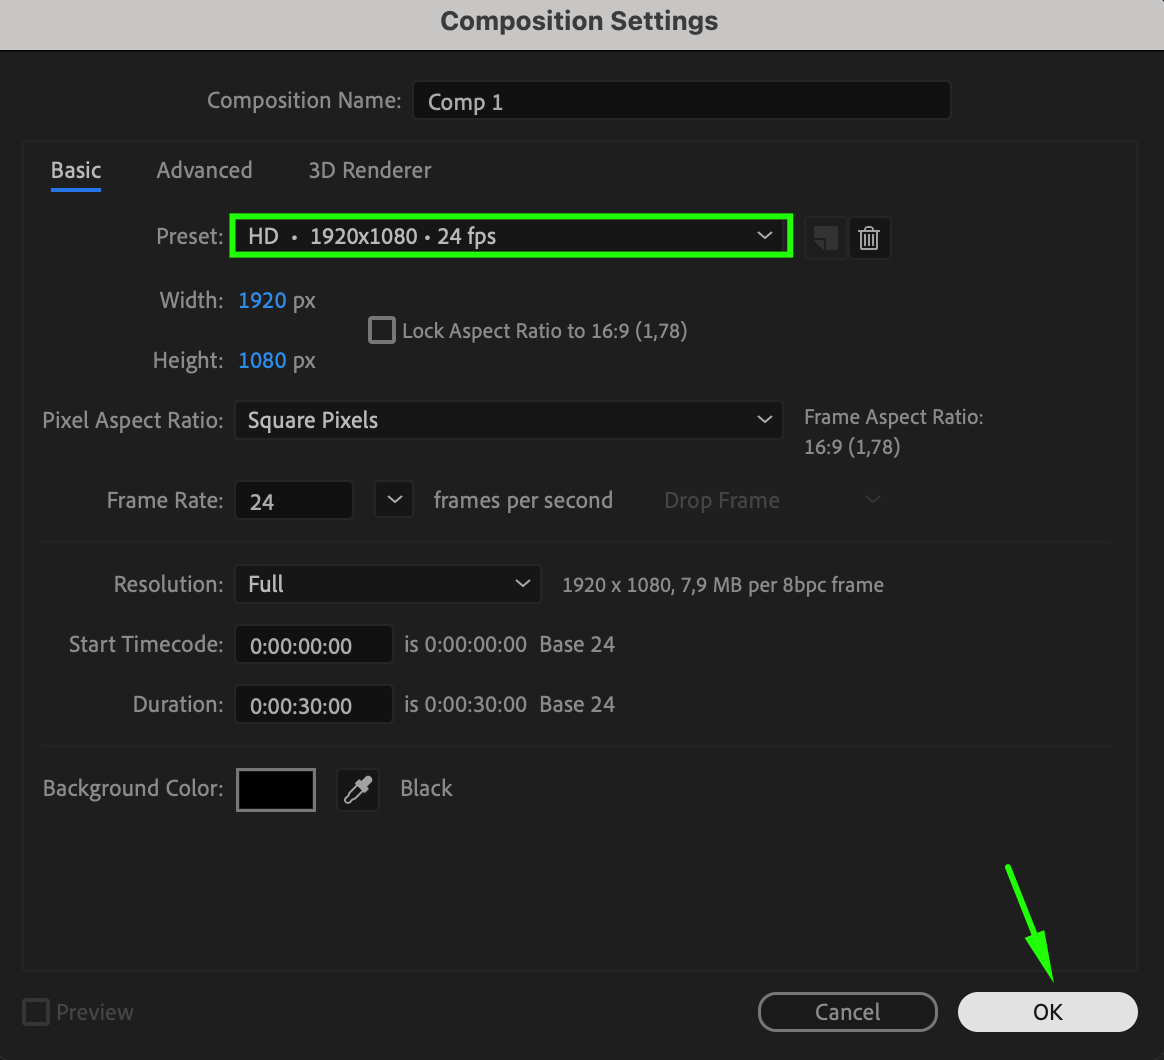
Step 1: Create a New Composition
Start by creating a new composition in After Effects. Go to Composition > New Composition and set your desired resolution, frame rate, and duration. This will be the base for your glitch effect, so make sure to choose the right settings for your project.
Step 2: Import Glitch Footage
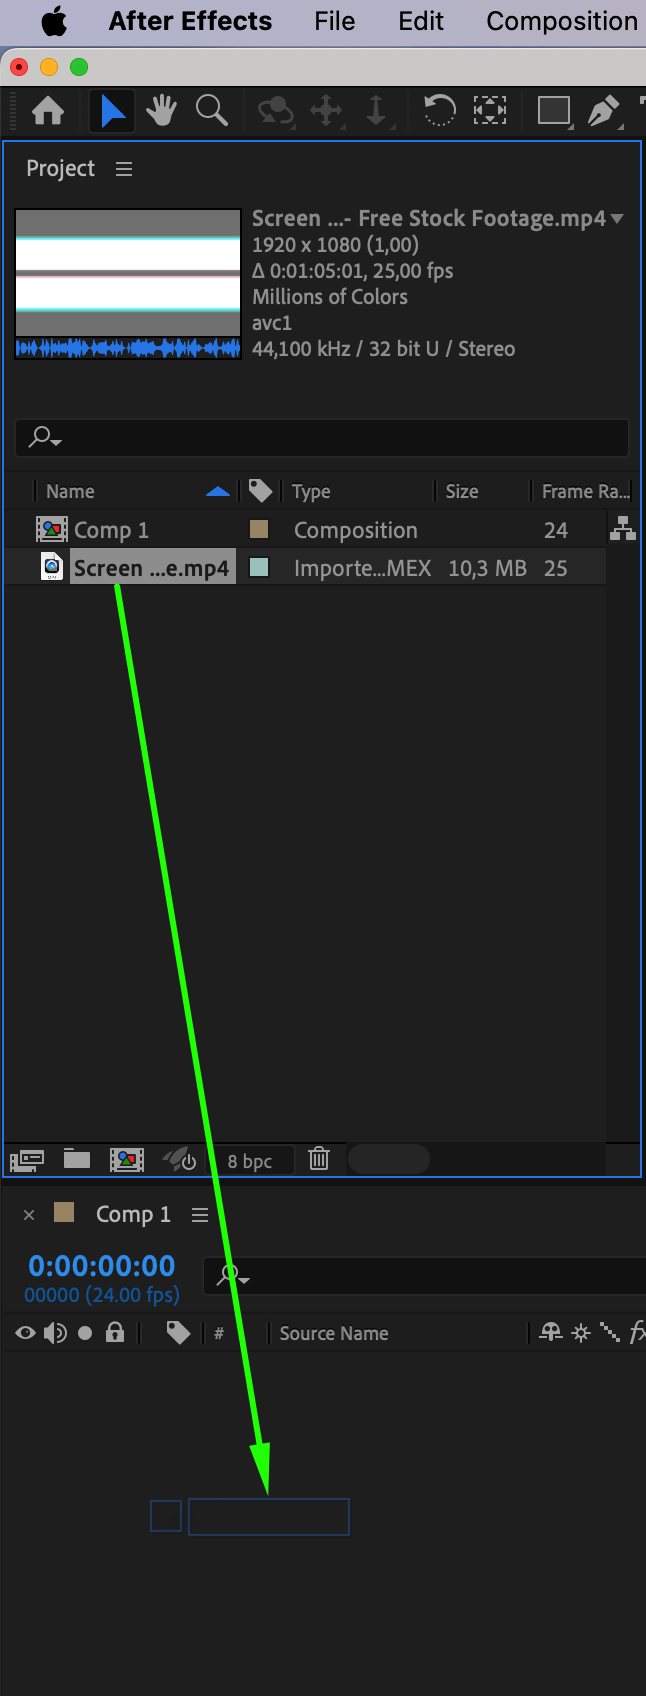
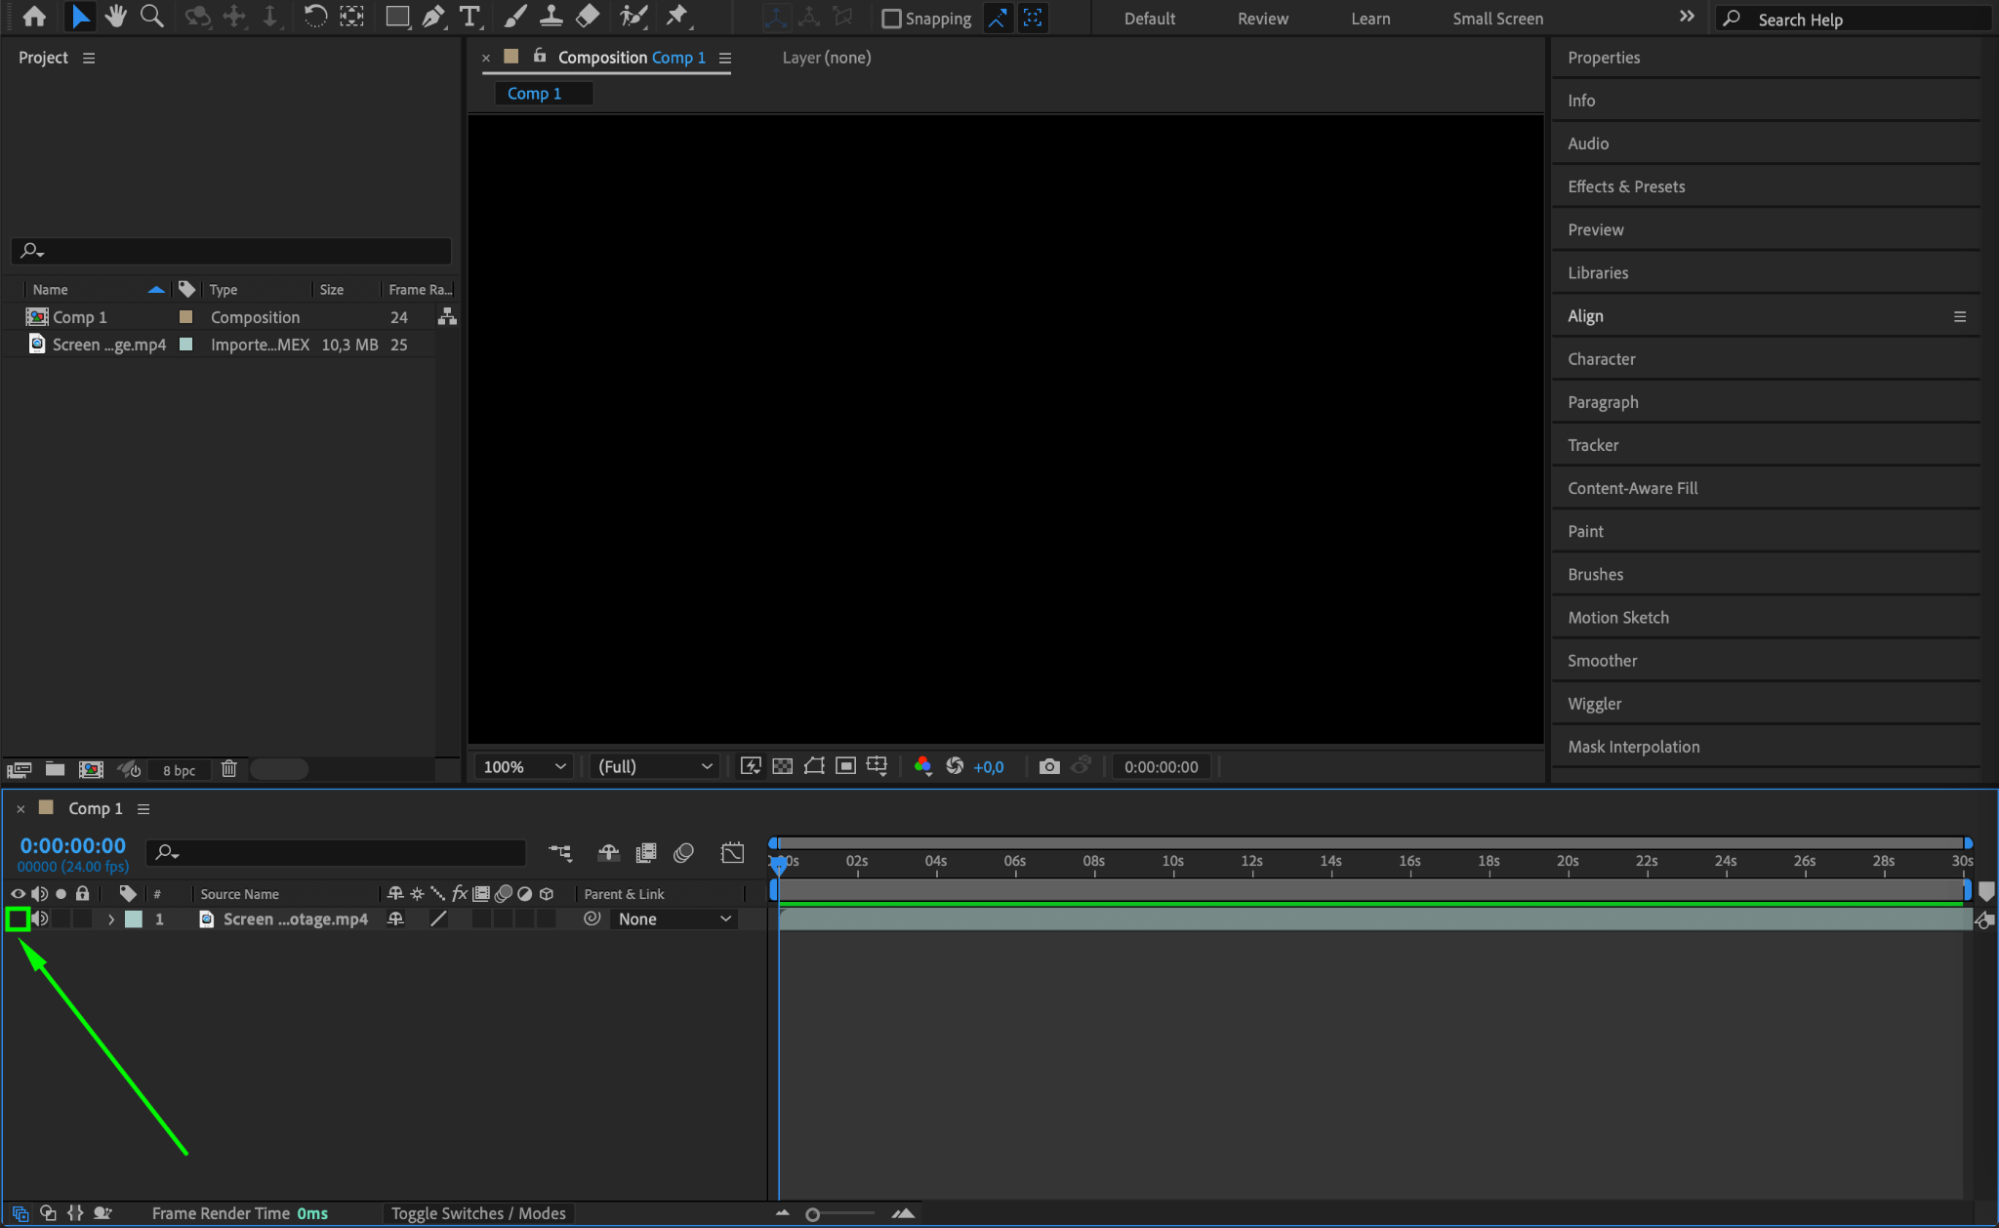
Find and download free glitch stock footage from the internet, such as “Screen Glitch – Free Stock Footage.” This footage will simulate the glitch animation that enhances your effect. Import this footage into After Effects by going to File > Import > File and then drag it onto the timeline. To make it invisible in the composition, click the eye icon next to the layer on the timeline.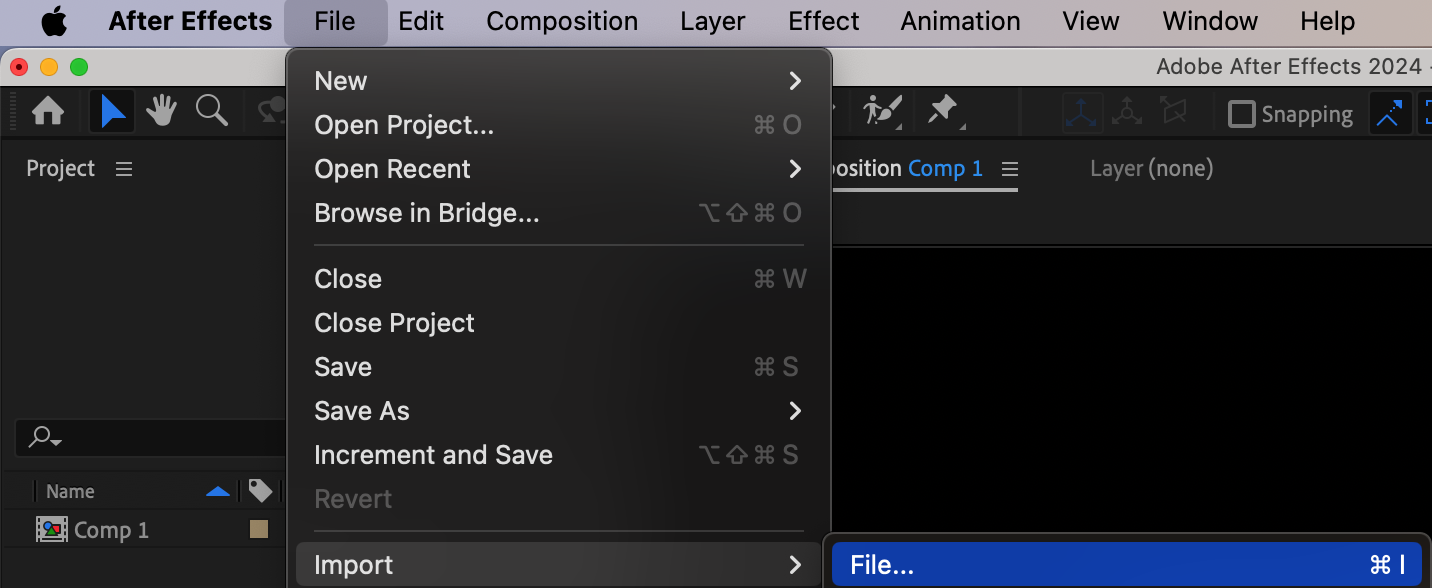
Step 3: Create and Customize Text
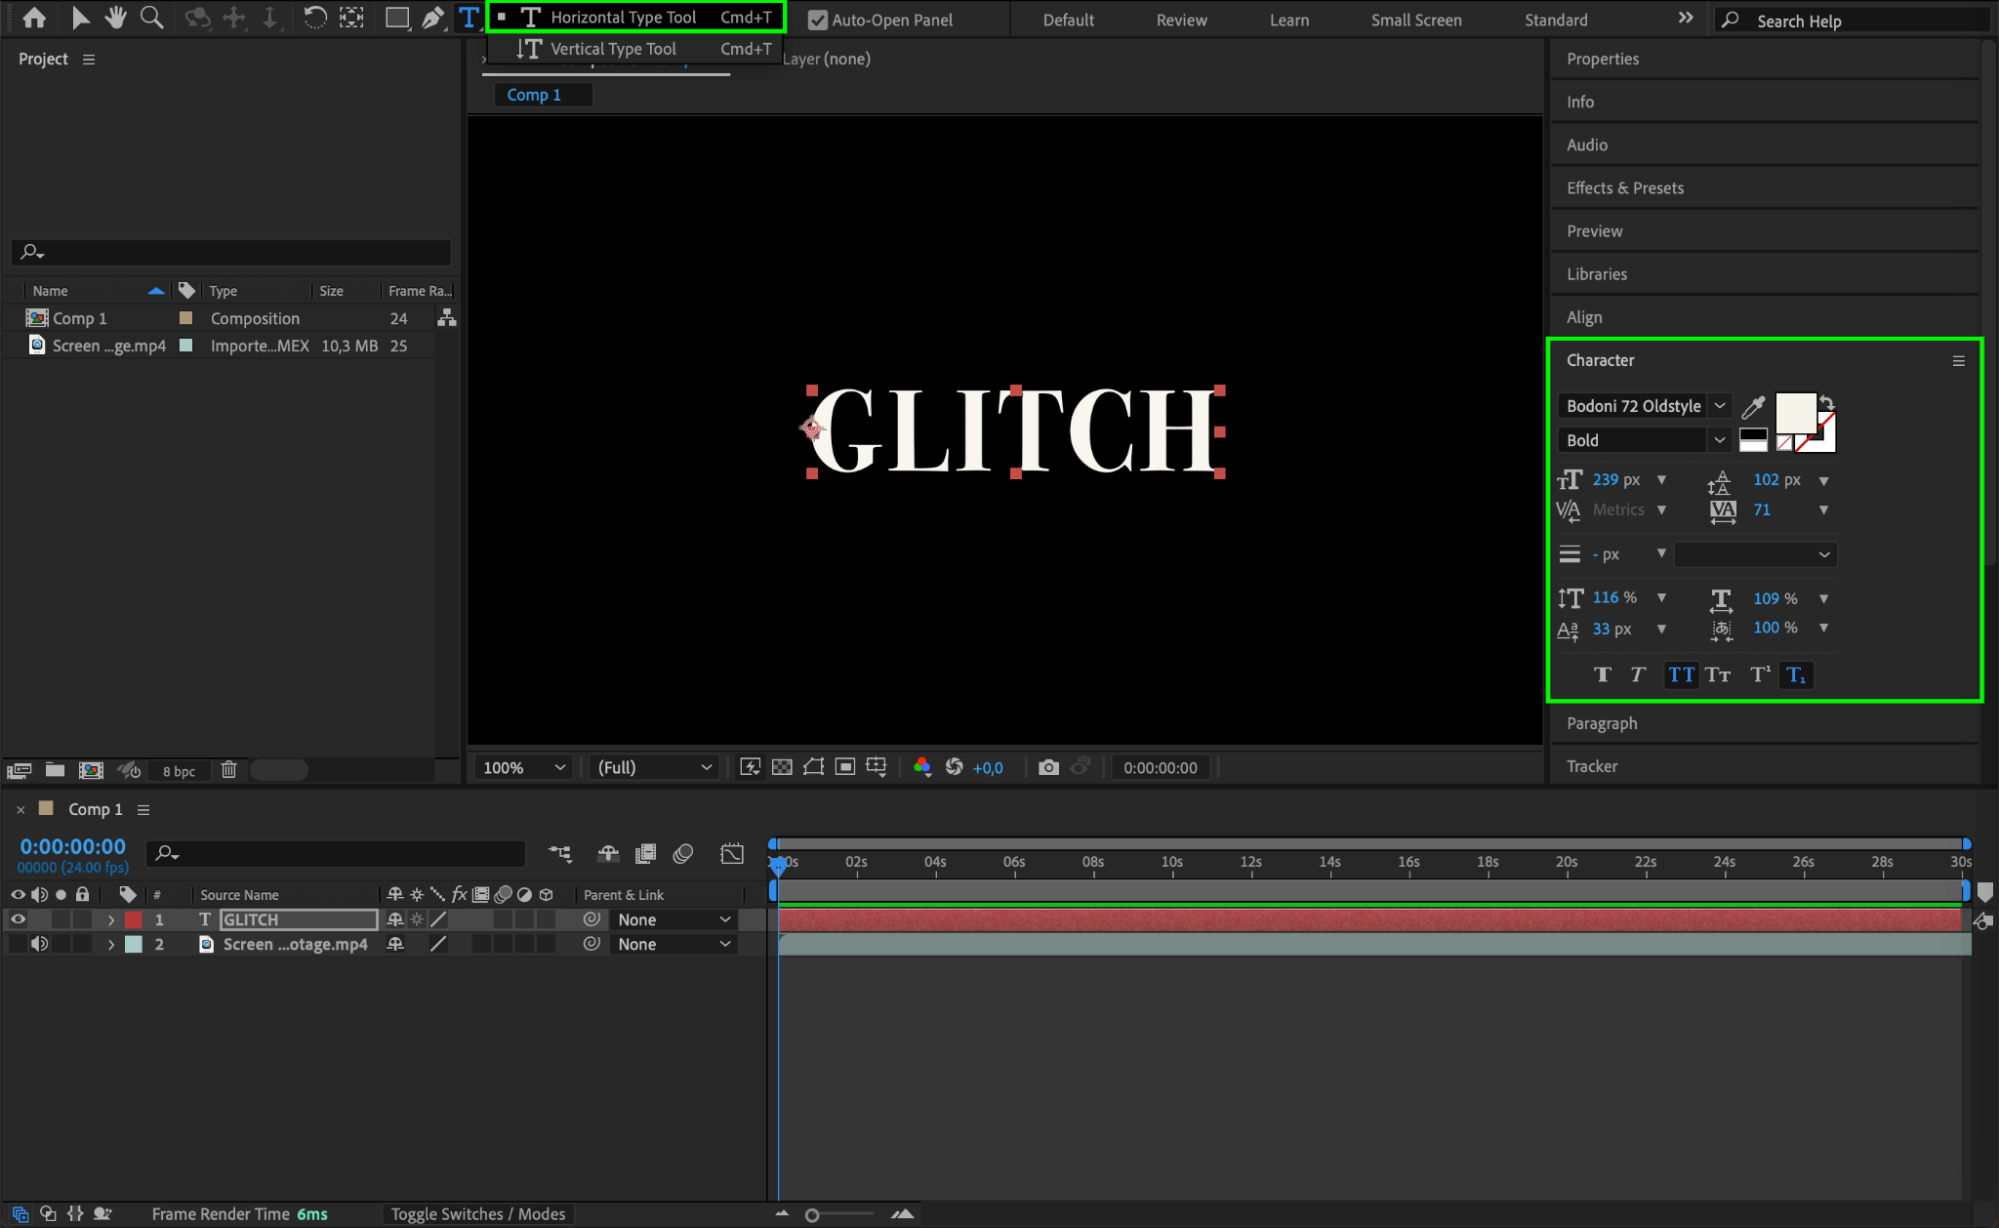
Create the text you want to apply the glitch effect to by selecting the Text Tool (Ctrl/Cmd + T). Type your desired text and customize its appearance using the Character Panel. Choose a font that complements the glitch aesthetic, such as a bold and futuristic style.
 Step 4: Add an Adjustment Layer
Next, add an adjustment layer by going to Layer > New > Adjustment Layer. This layer will allow you to apply effects that influence all layers below it, essential for creating the glitch effect.
Step 5: Apply the Displacement Map Effect
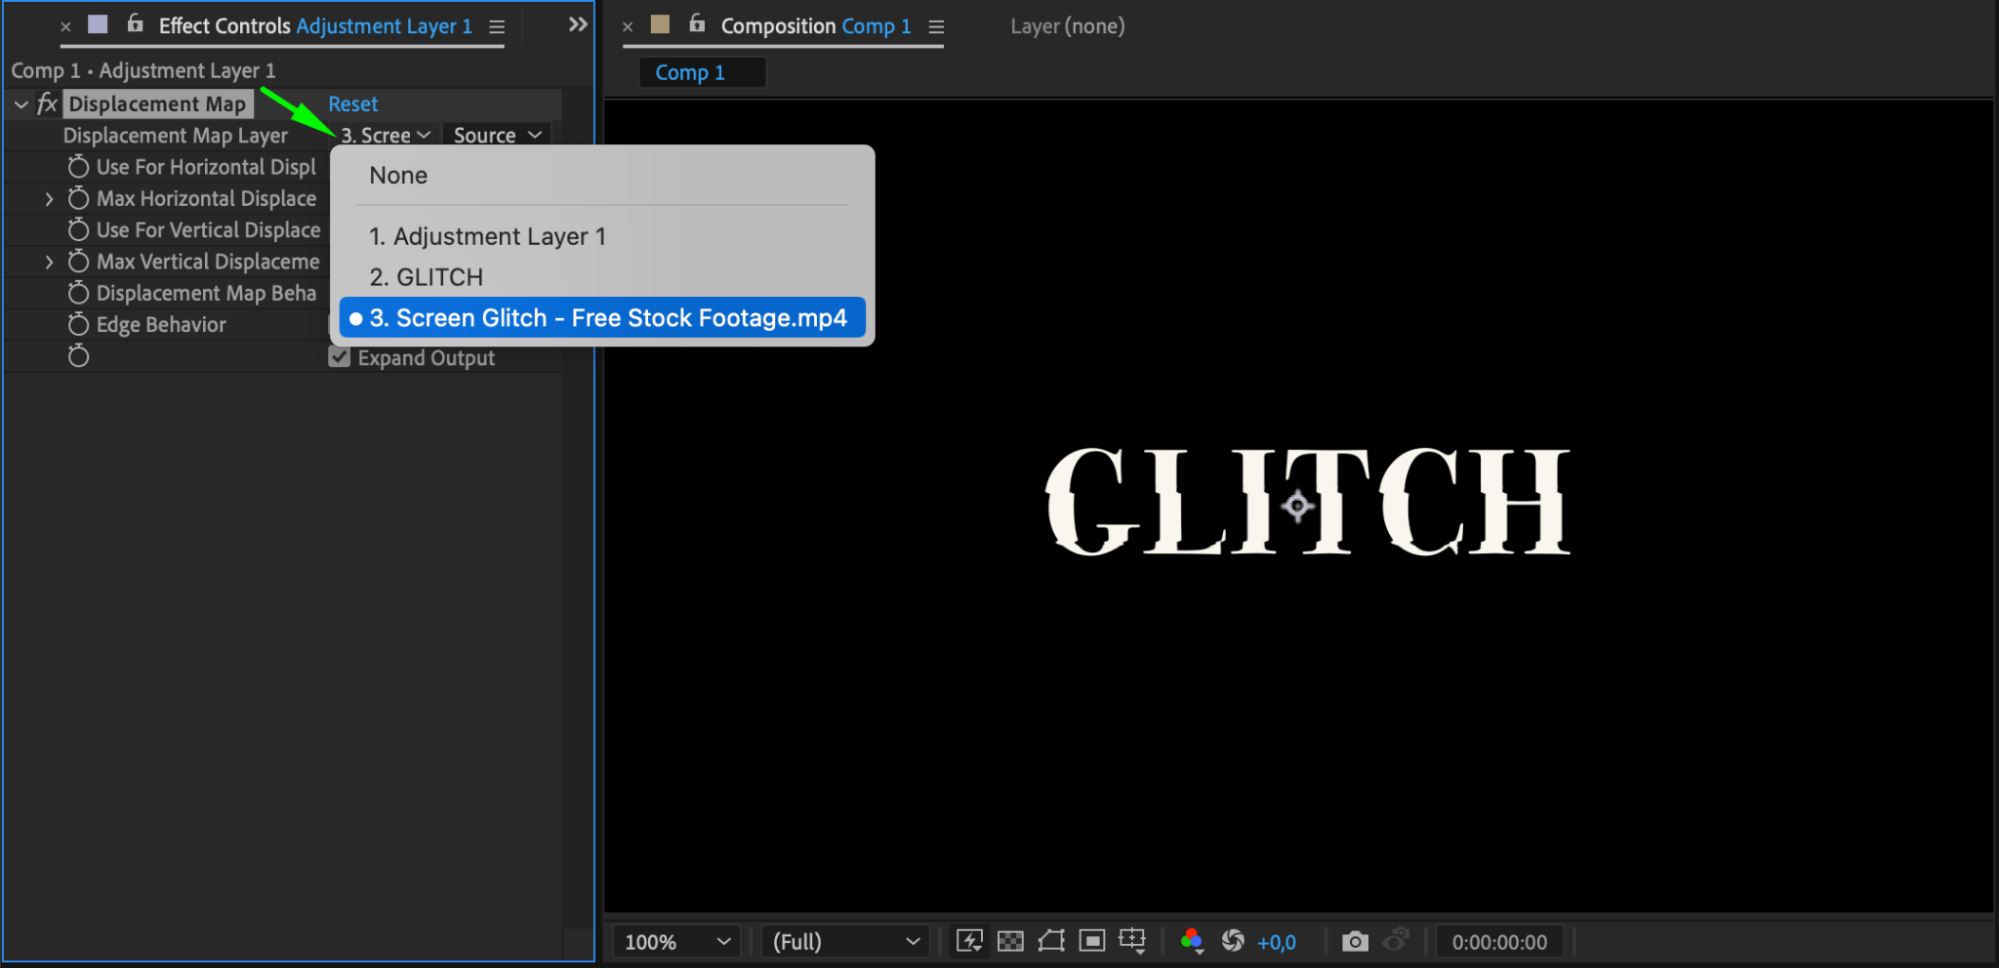
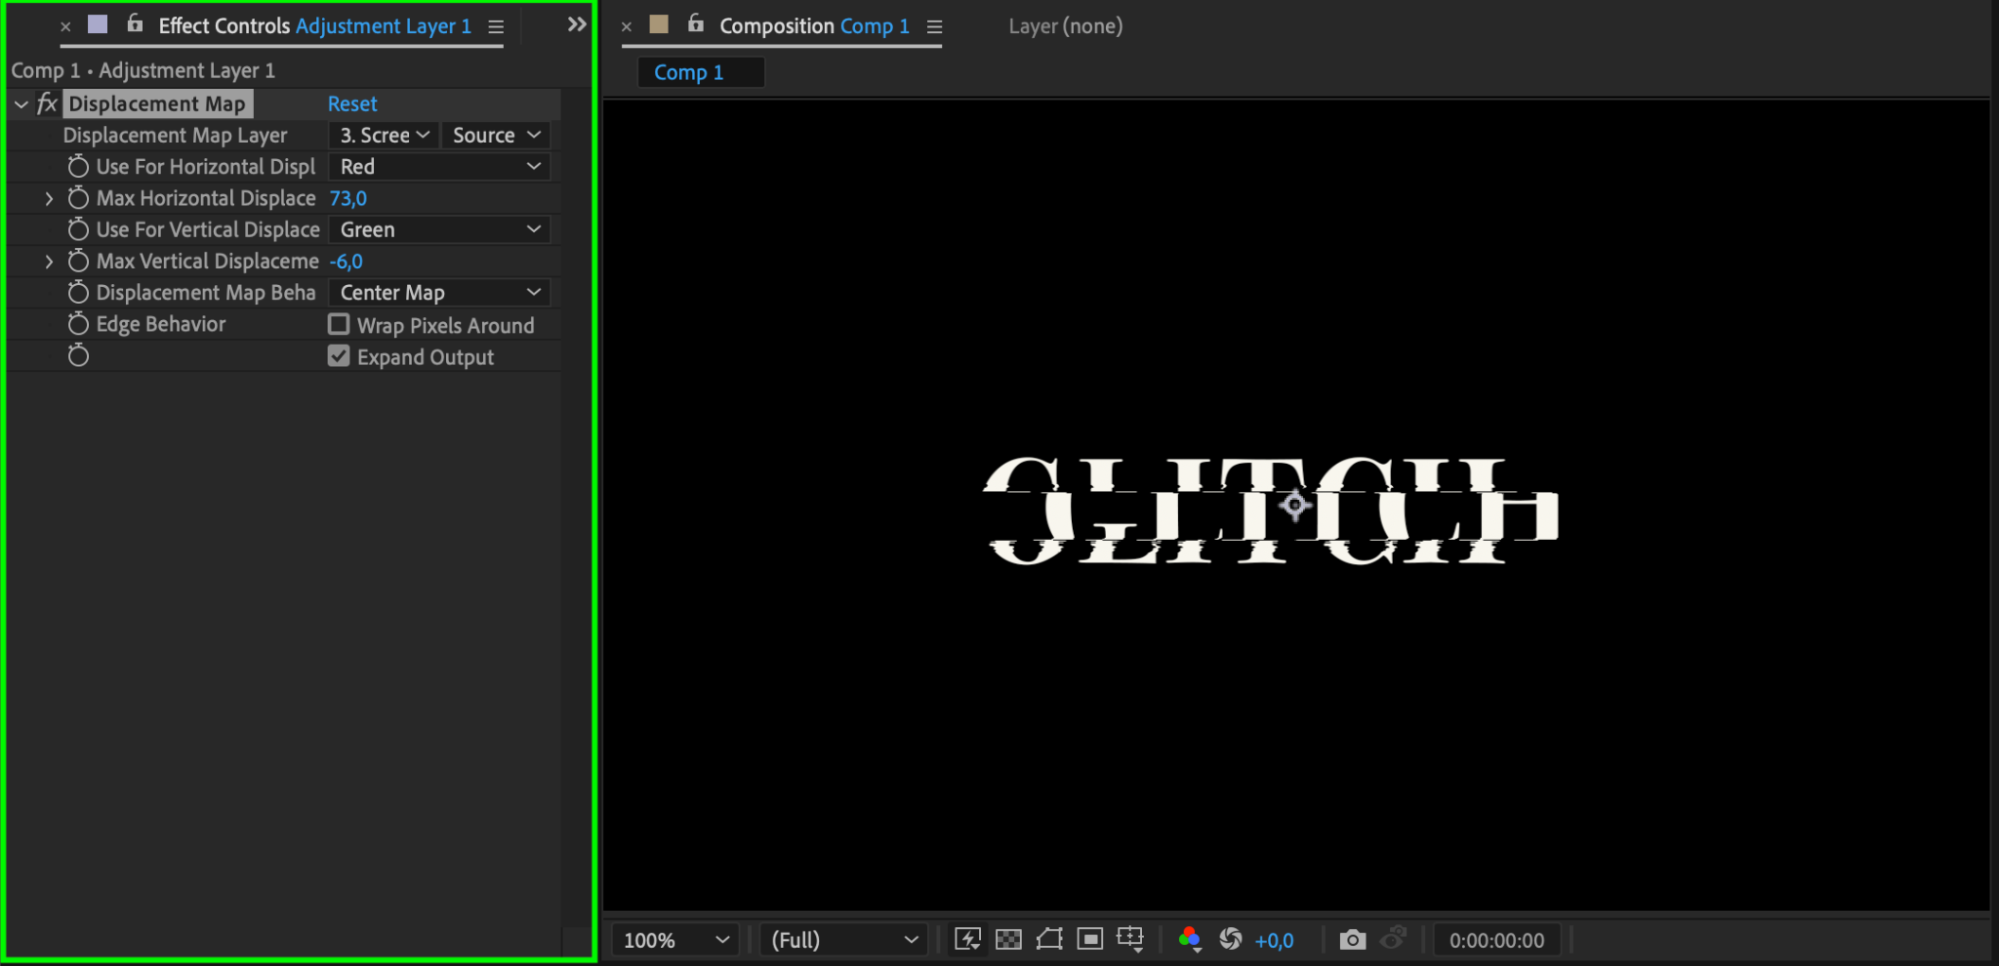
Apply the Displacement Map effect to the adjustment layer by dragging it from the Effects & Presets panel onto the layer. In the Effect Controls panel, set the Displacement Map Layer to the glitch footage you imported earlier. This will distort the text based on the glitch footage, creating the core of your effect.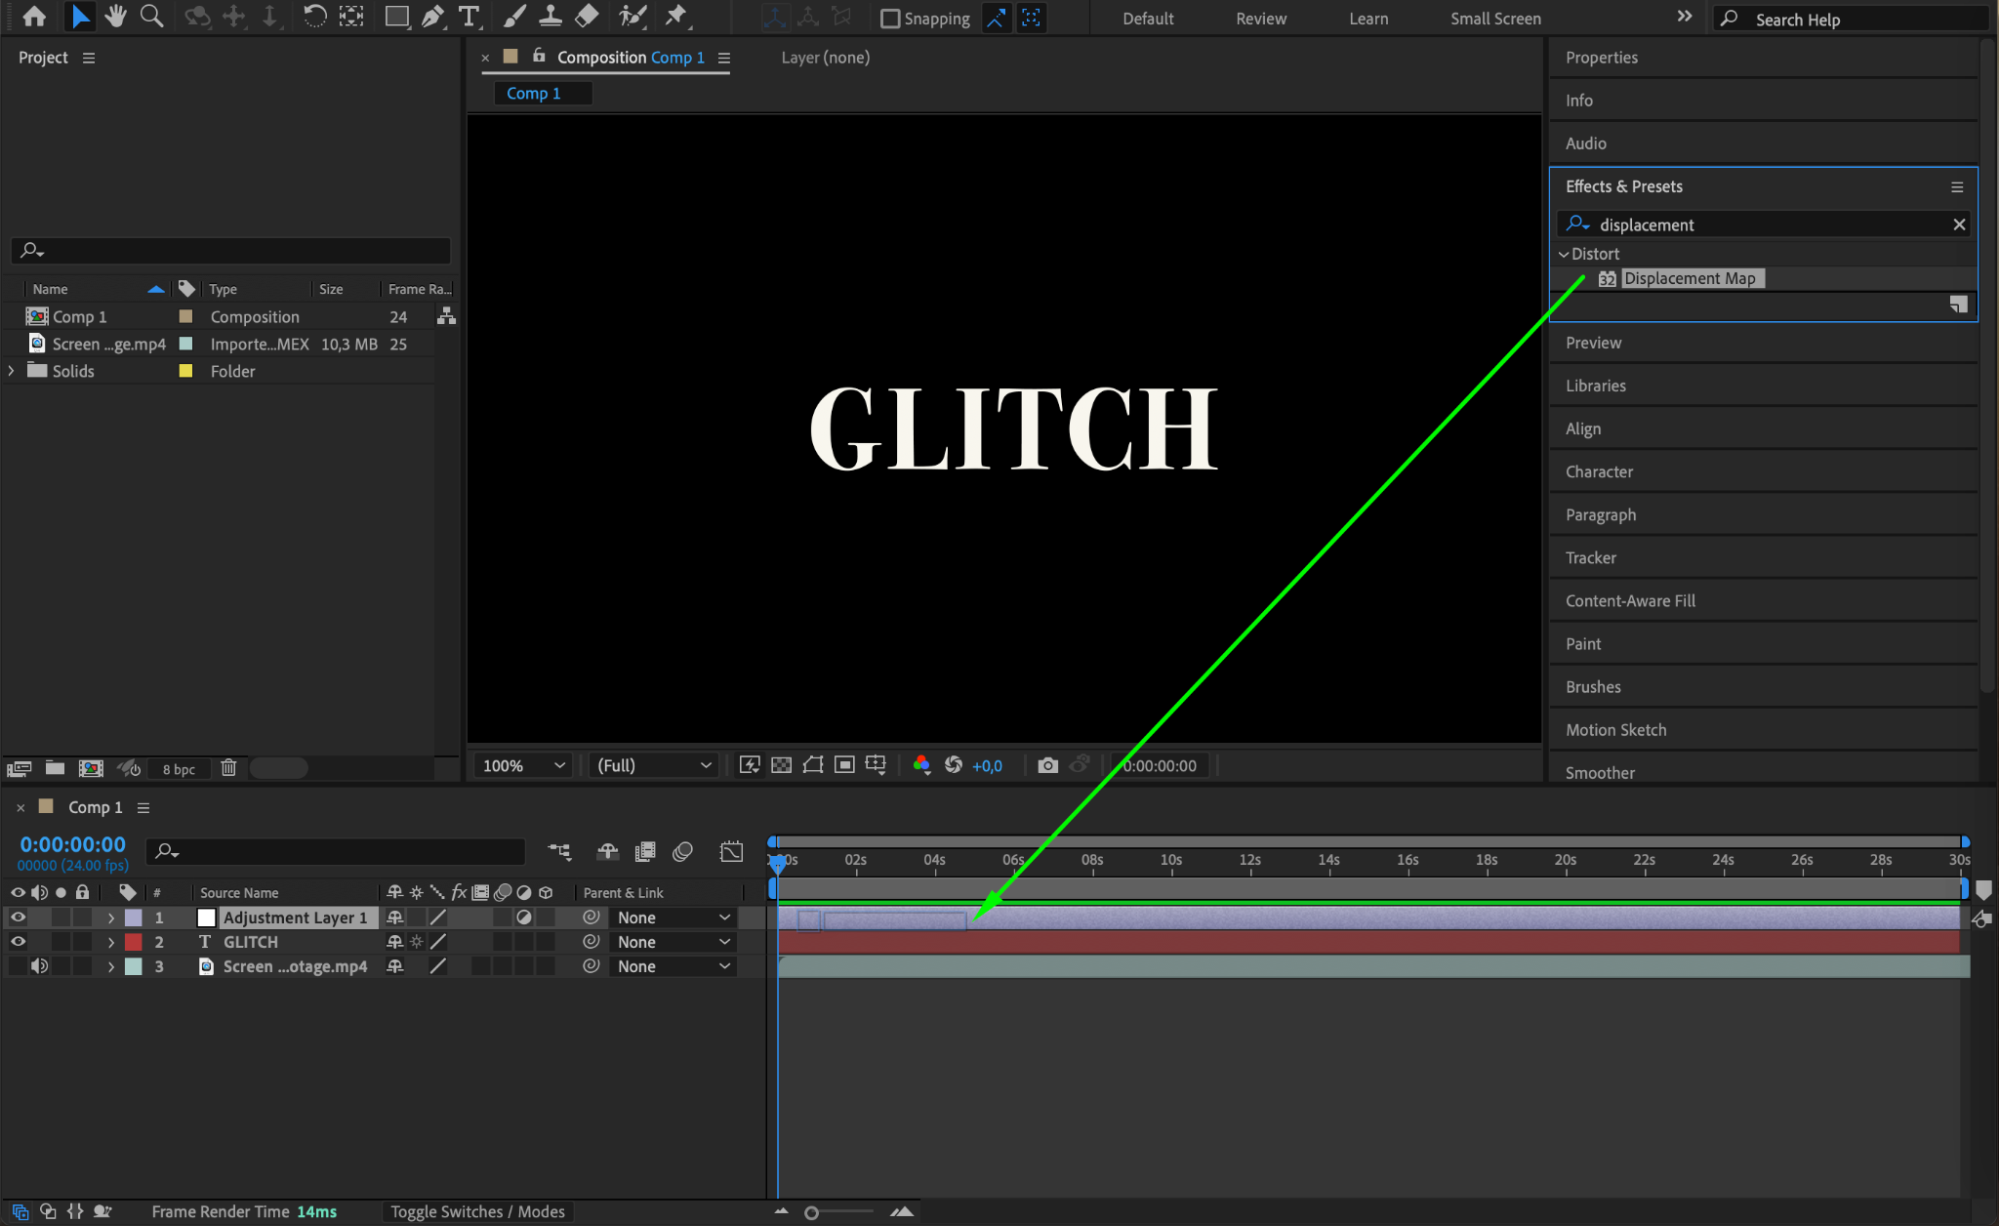
 Step 6: Apply the Set Channels Effect
Now, apply the Set Channels effect to your text layer by dragging it from the Effects & Presets panel. This effect allows you to manipulate the color channels of your text, adding to the glitch effect.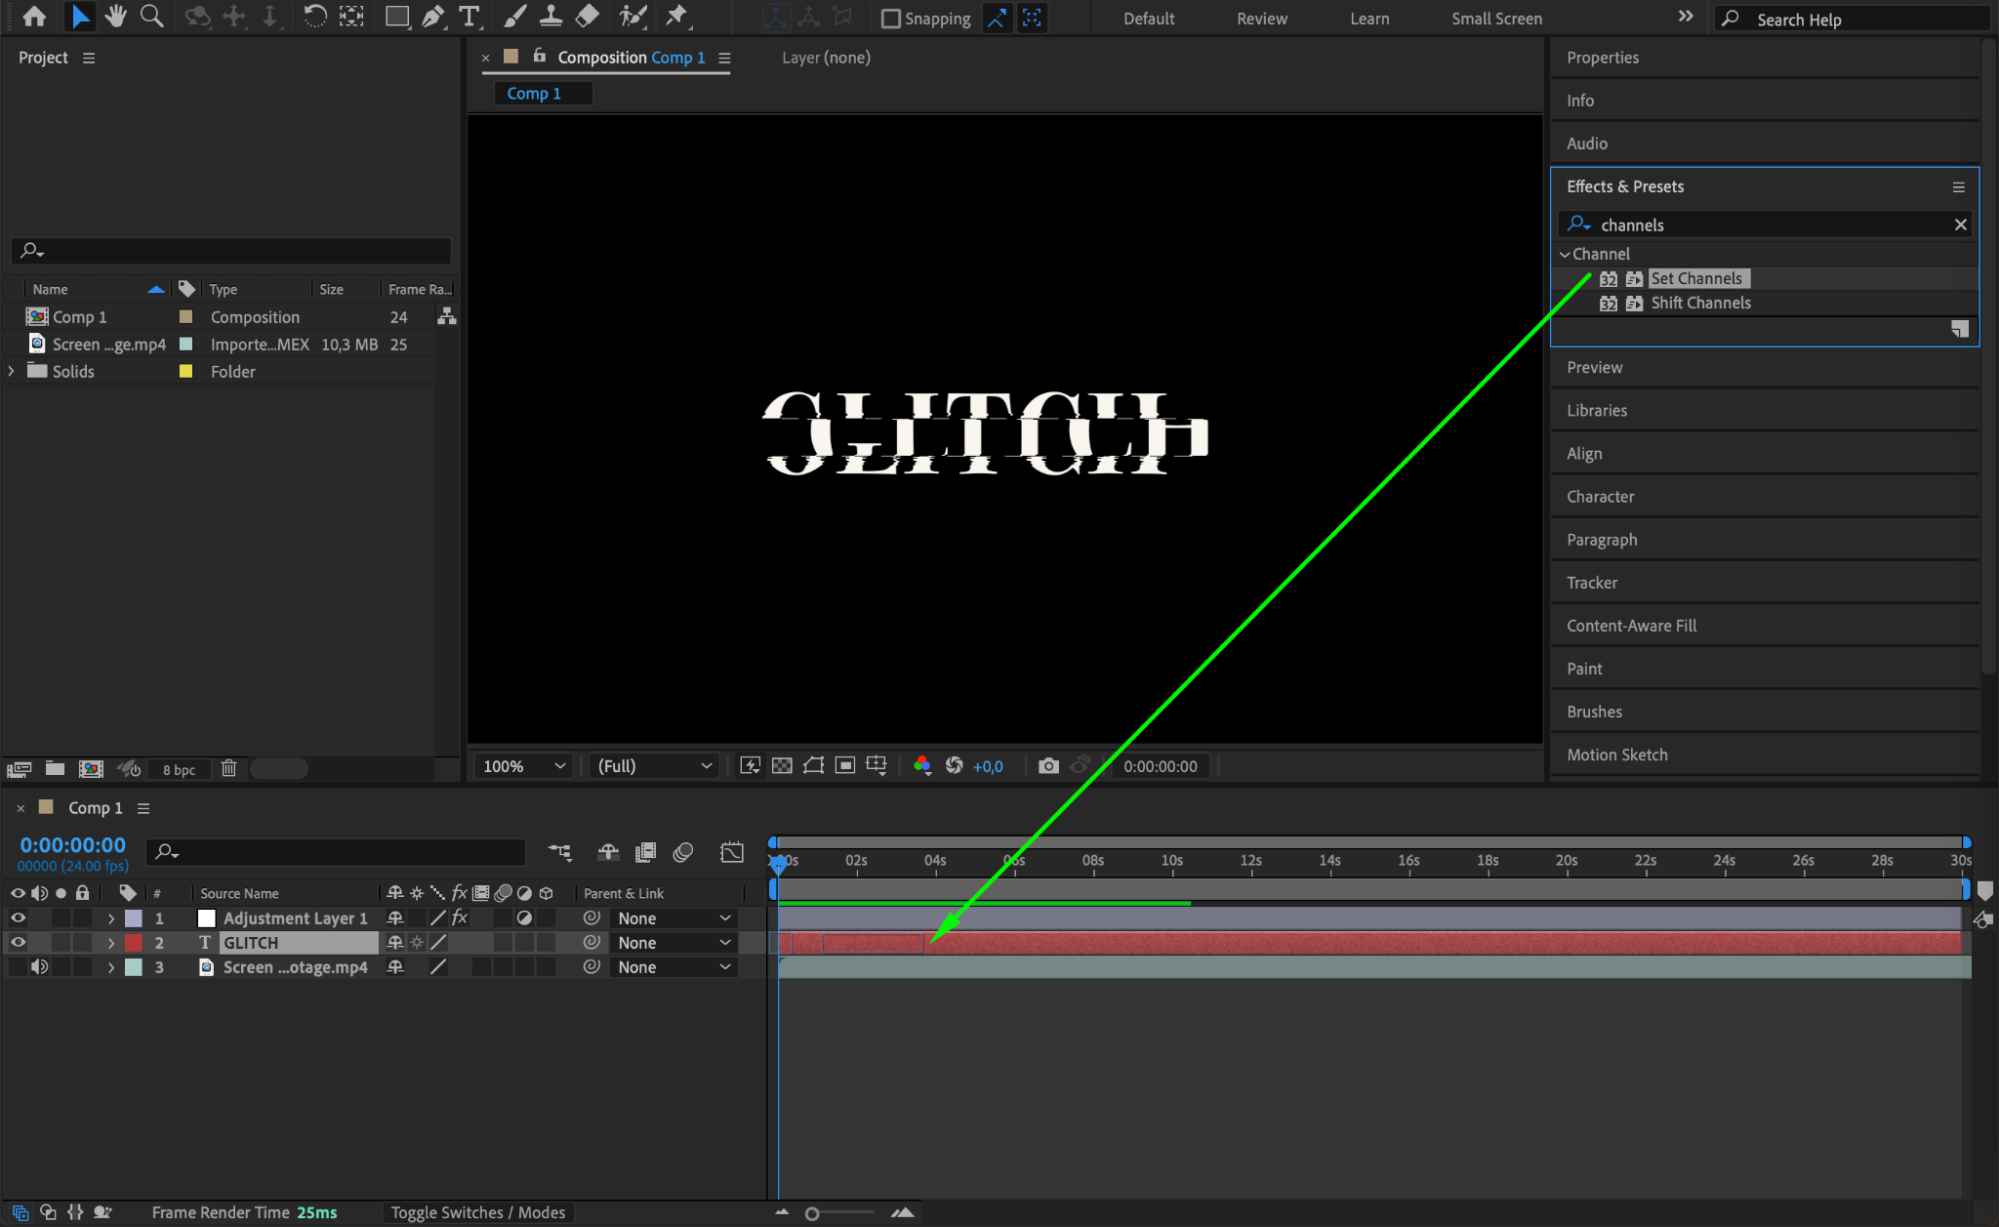 Step 7: Duplicate the Text Layer
Duplicate the text layer twice by selecting it and pressing “Ctrl/Cmd + D” or by going to Edit > Duplicate. Name the original and duplicated layers Red, Green, and Blue. This will allow you to manipulate each color channel separately.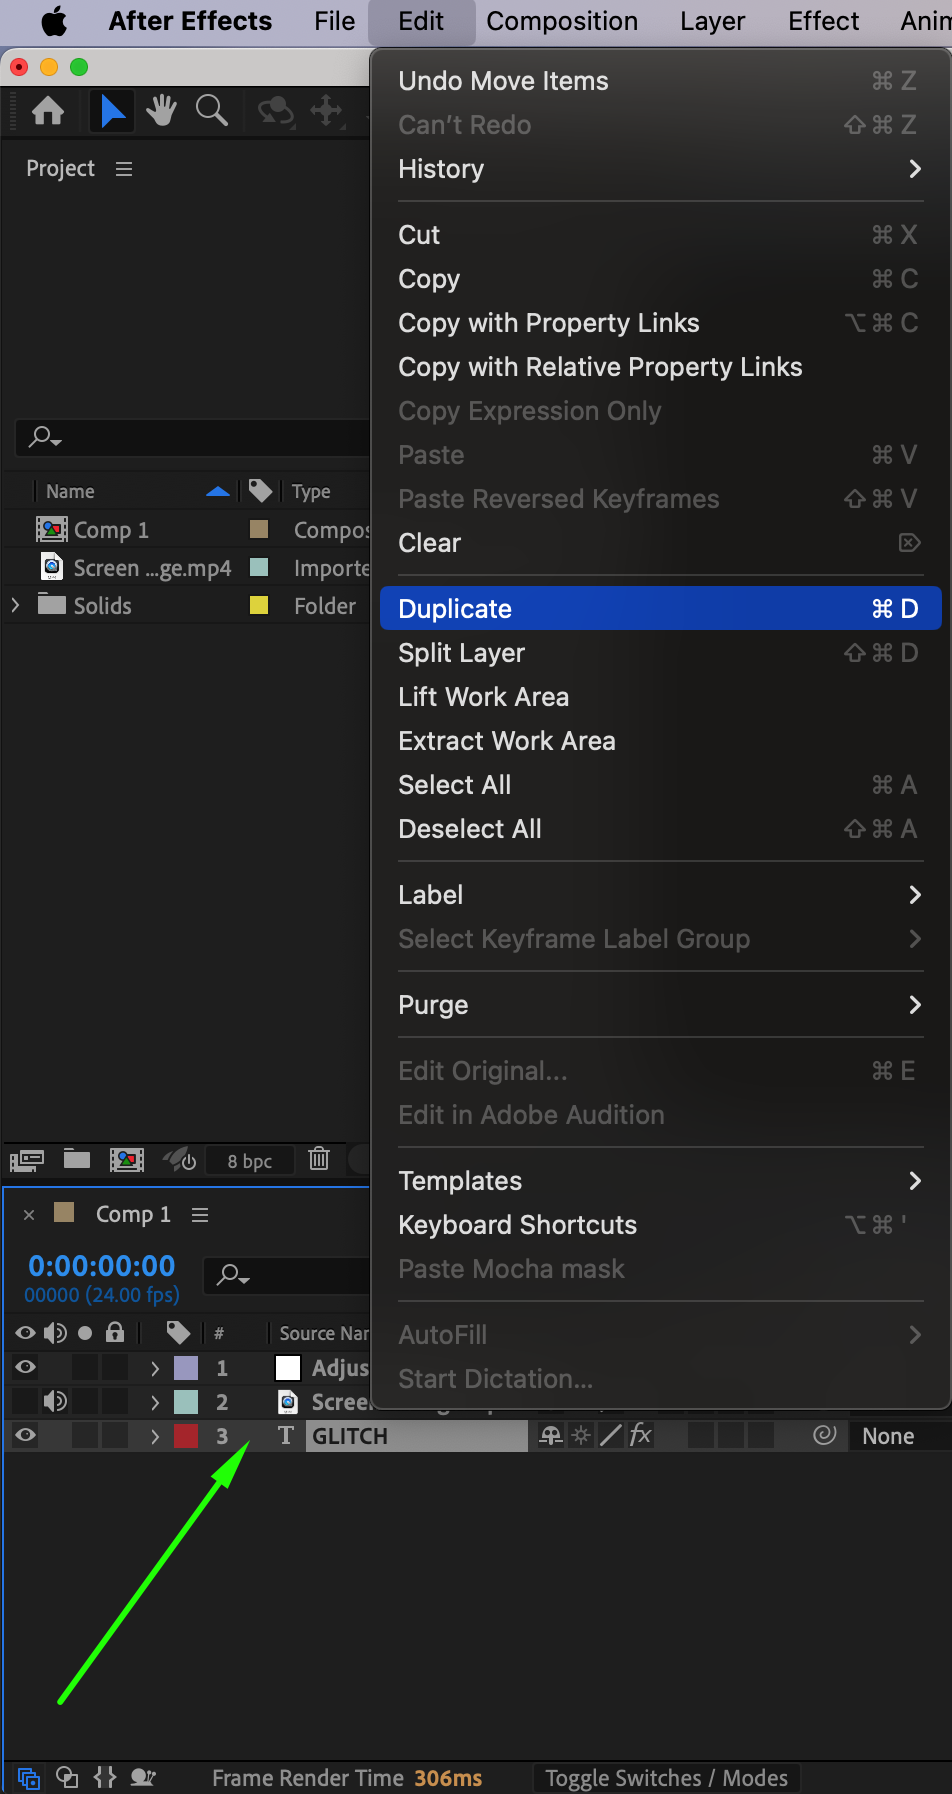
 Step 8: Set the Blending Modes
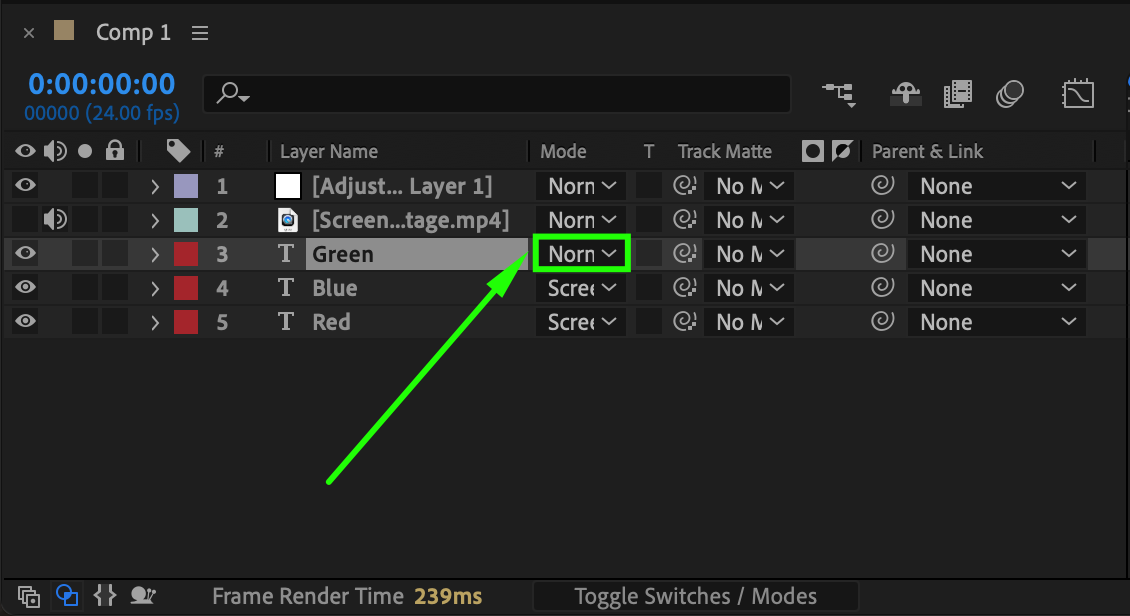
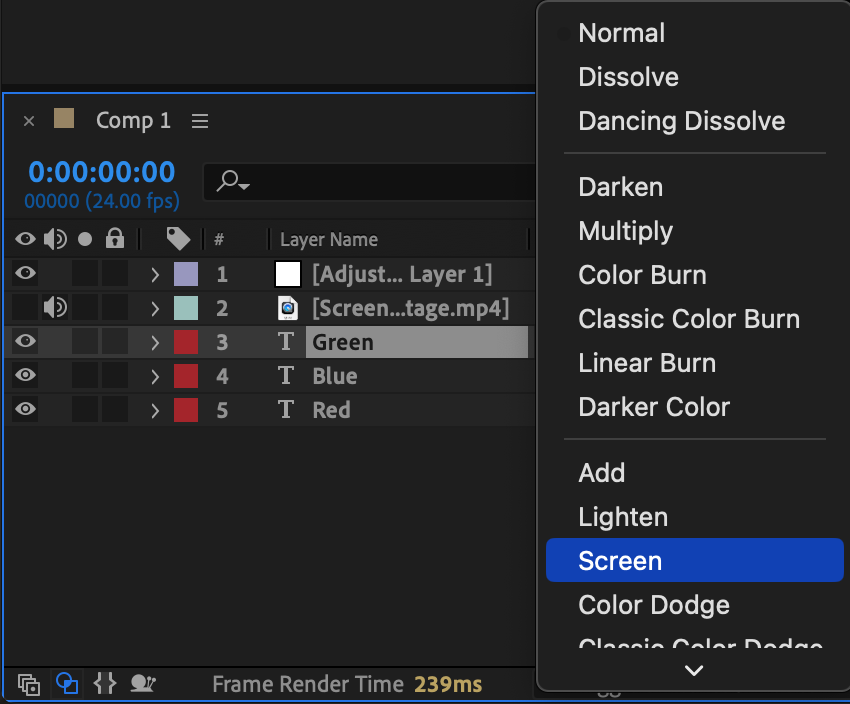
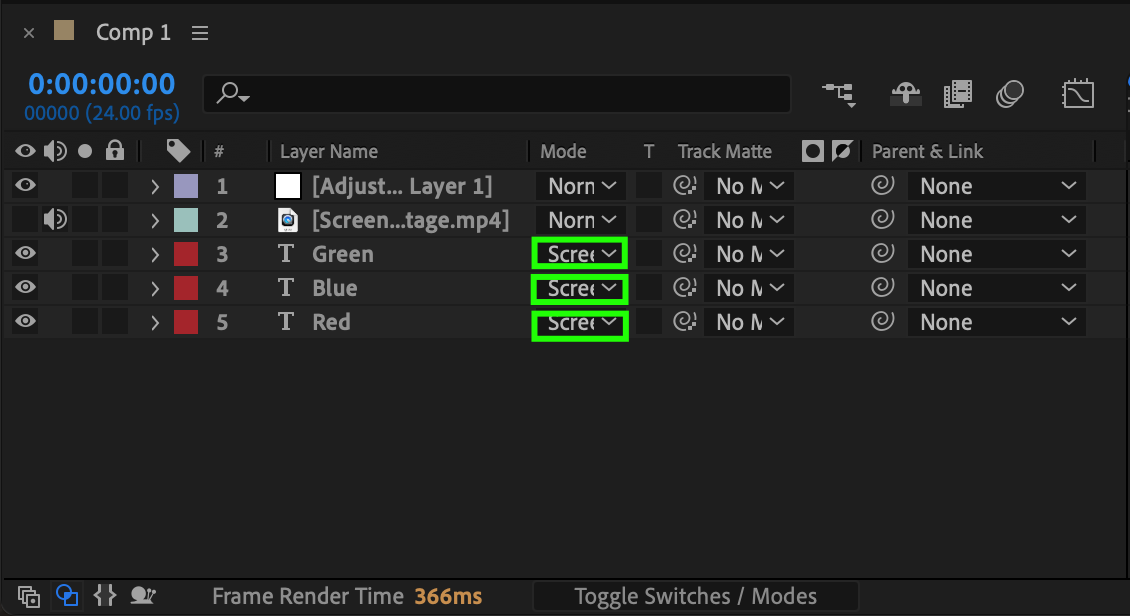
At the bottom of the timeline panel, click the Toggle Switches/Modes button. Set the blending mode of each text layer (Red, Green, and Blue) to Screen. This will blend the layers together, creating a composite image with a glitchy color effect.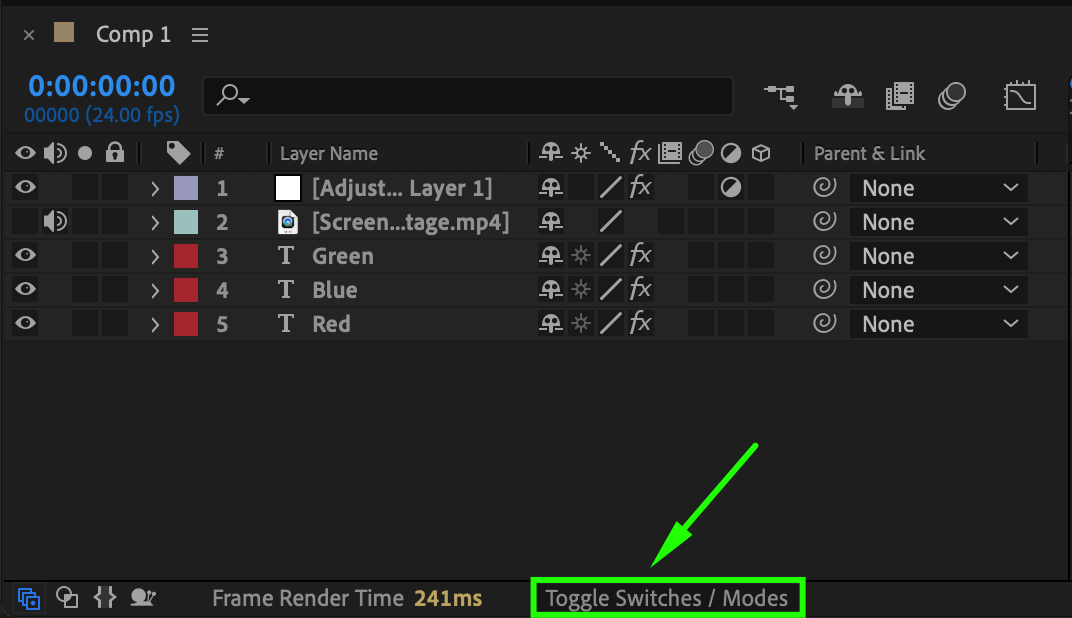
 Step 9: Adjust Color Channels
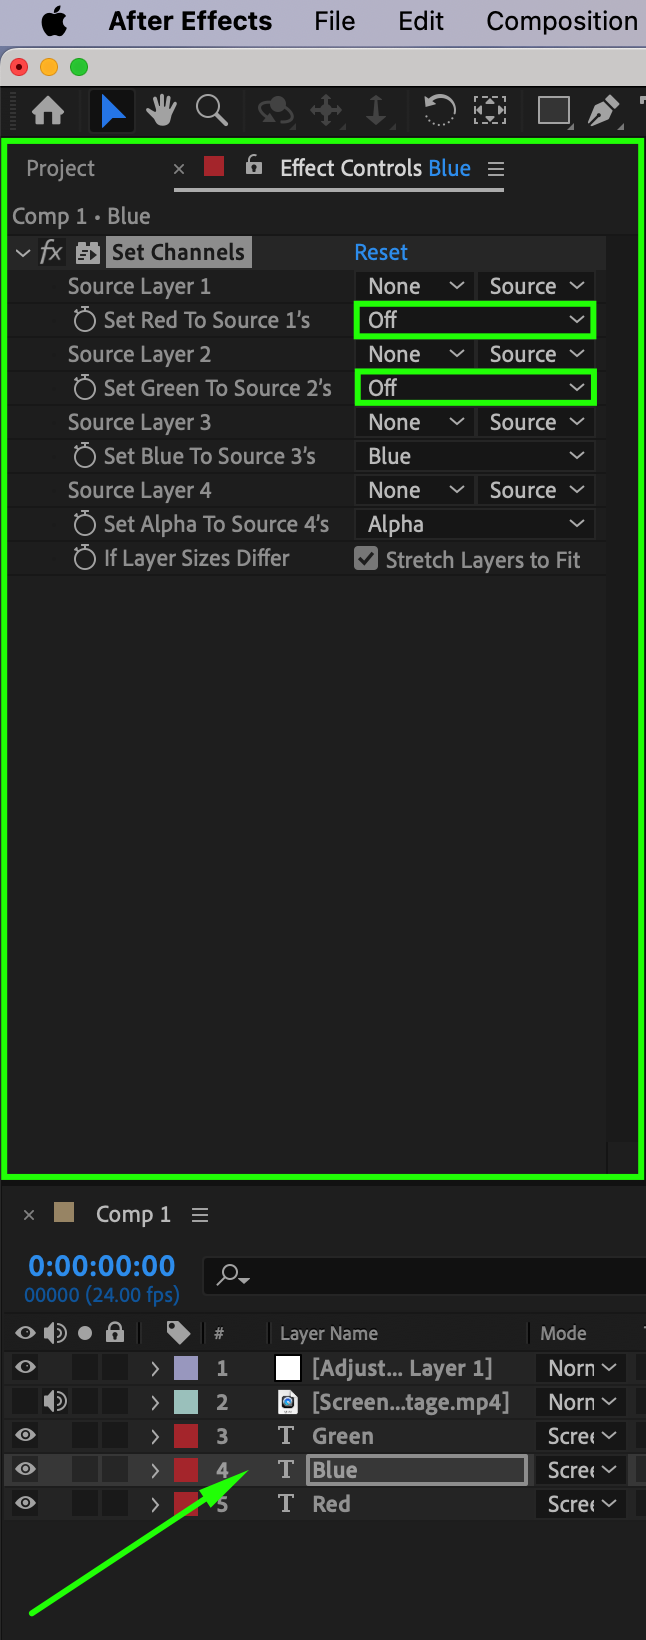
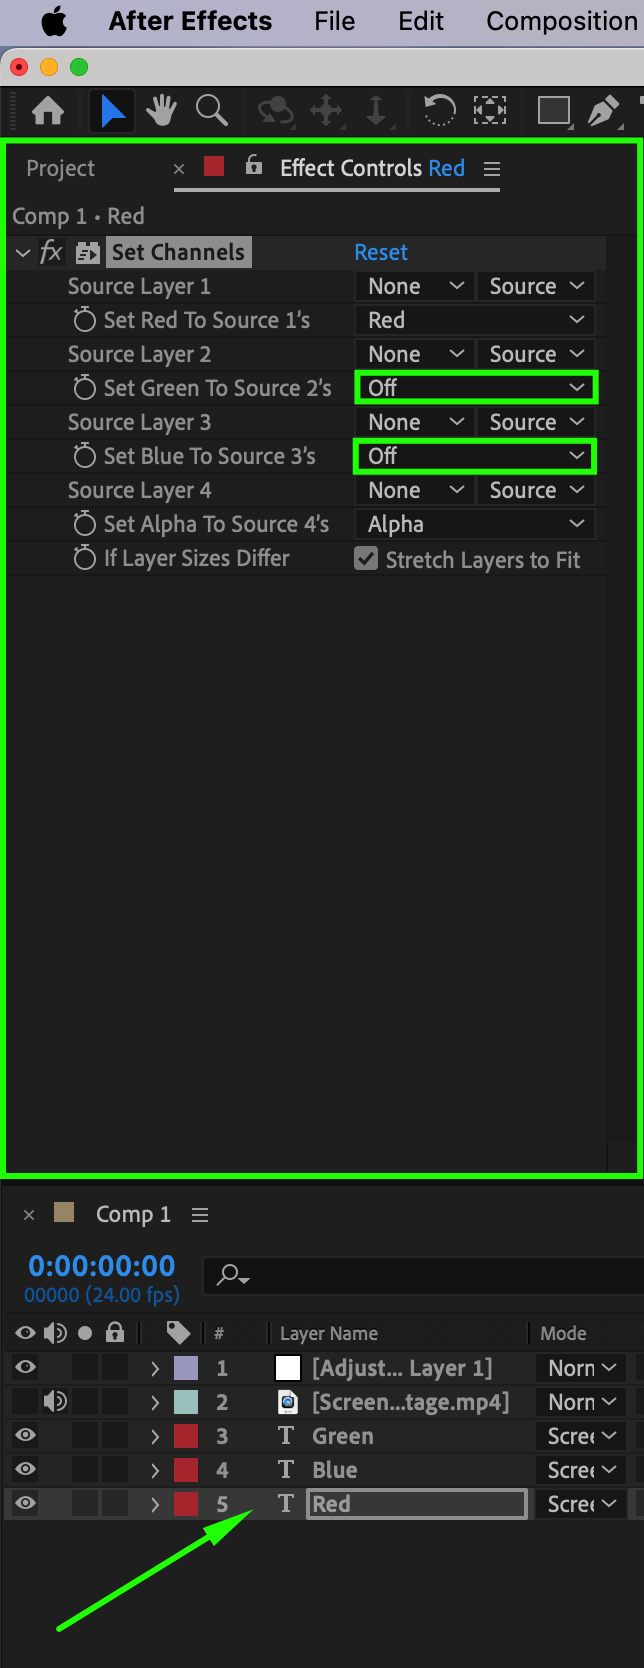
Return to the Effect Controls panel. For the Red text layer, set Set Red To to Red, and turn off Green and Blue channels. For the Green layer, set Set Green To to Green and turn off the other channels. For the Blue layer, set Set Blue To to Blue and turn off the other channels. This step separates the color channels, adding a chromatic aberration effect to your glitch.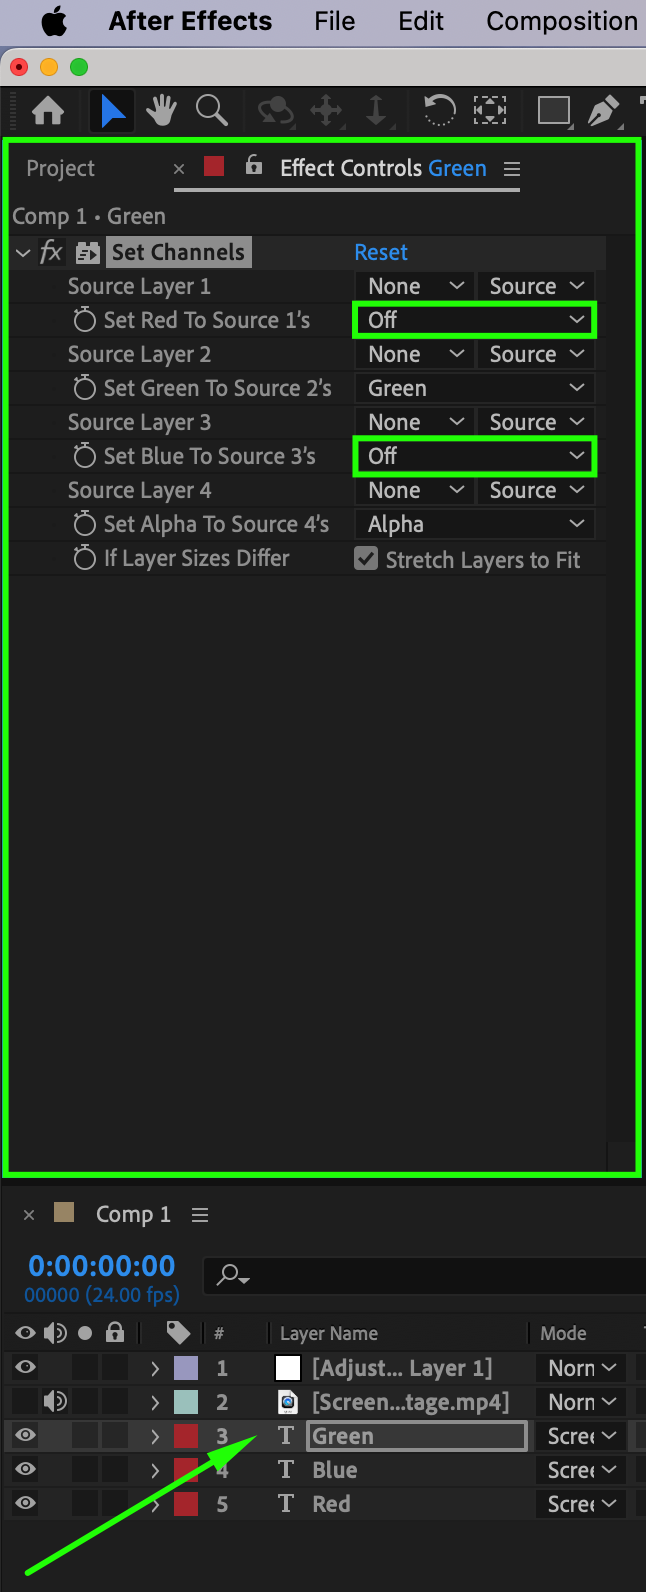
 Step 10: Offset the Position
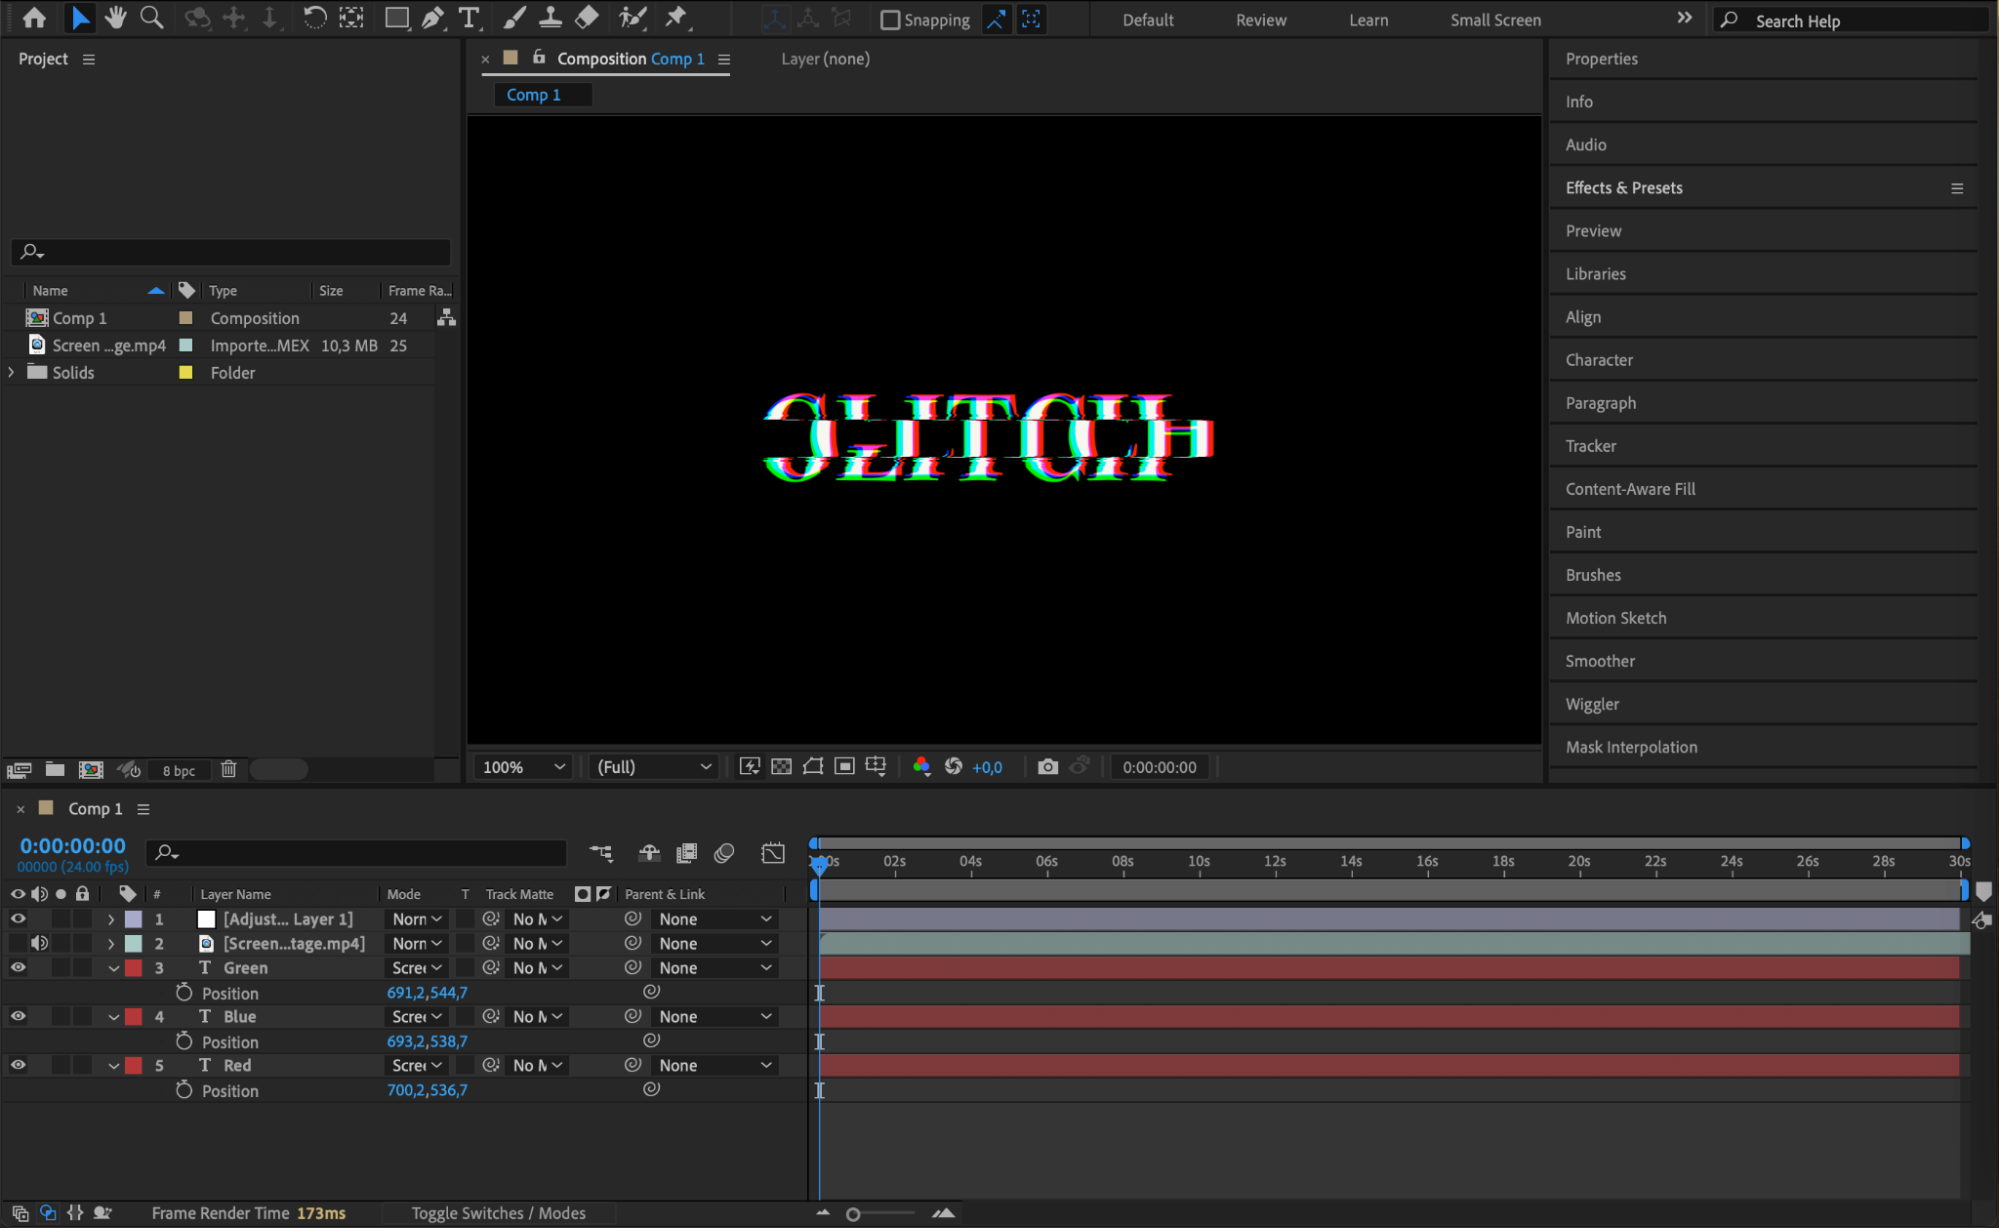
Select all the text layers and press P to reveal the Position property. Slightly offset the position values of each layer to create a misalignment between the colors, enhancing the glitch effect. Experiment with the values until you achieve the desired result.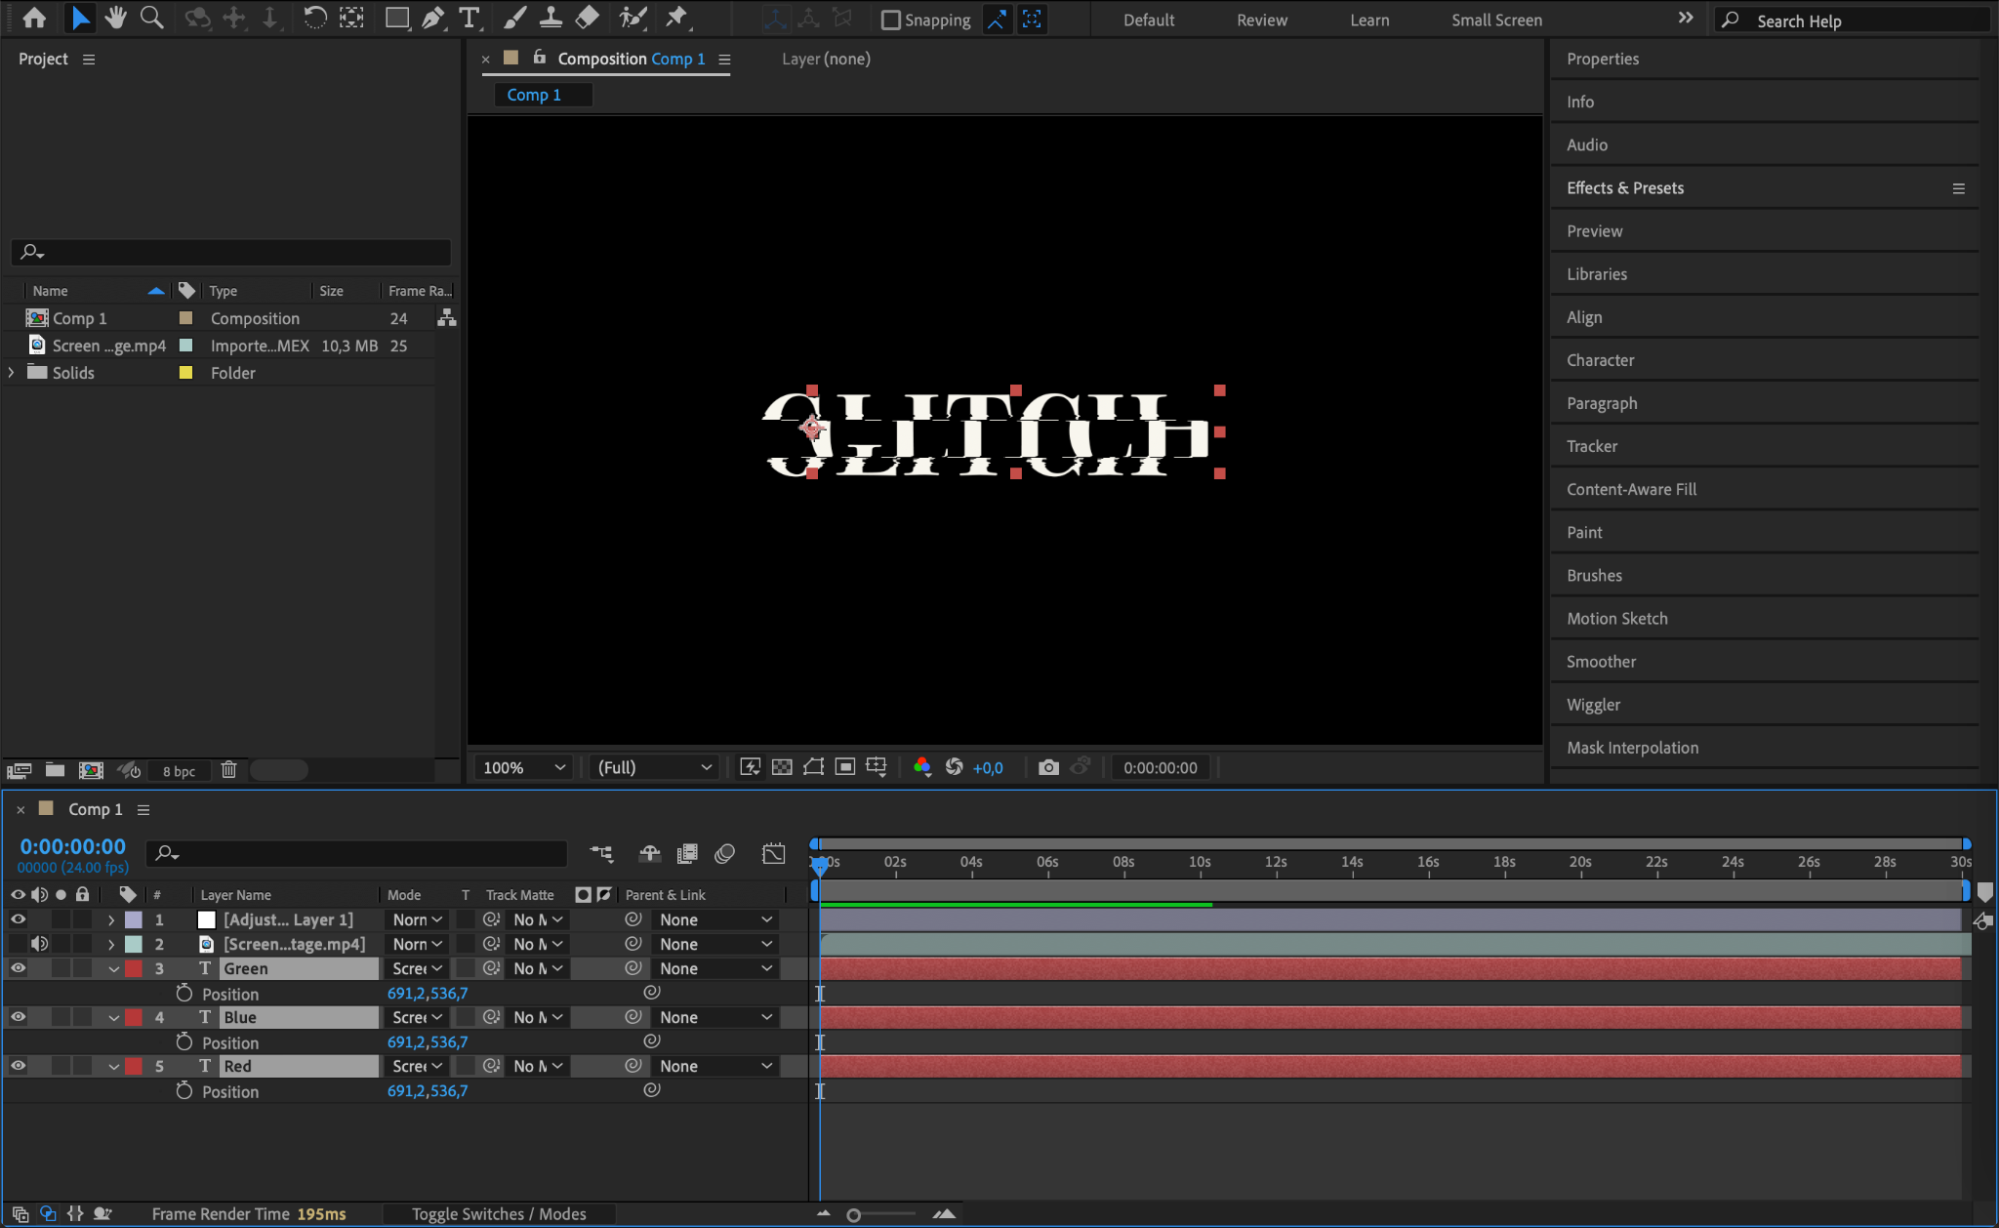
Step 11: Preview and Refine
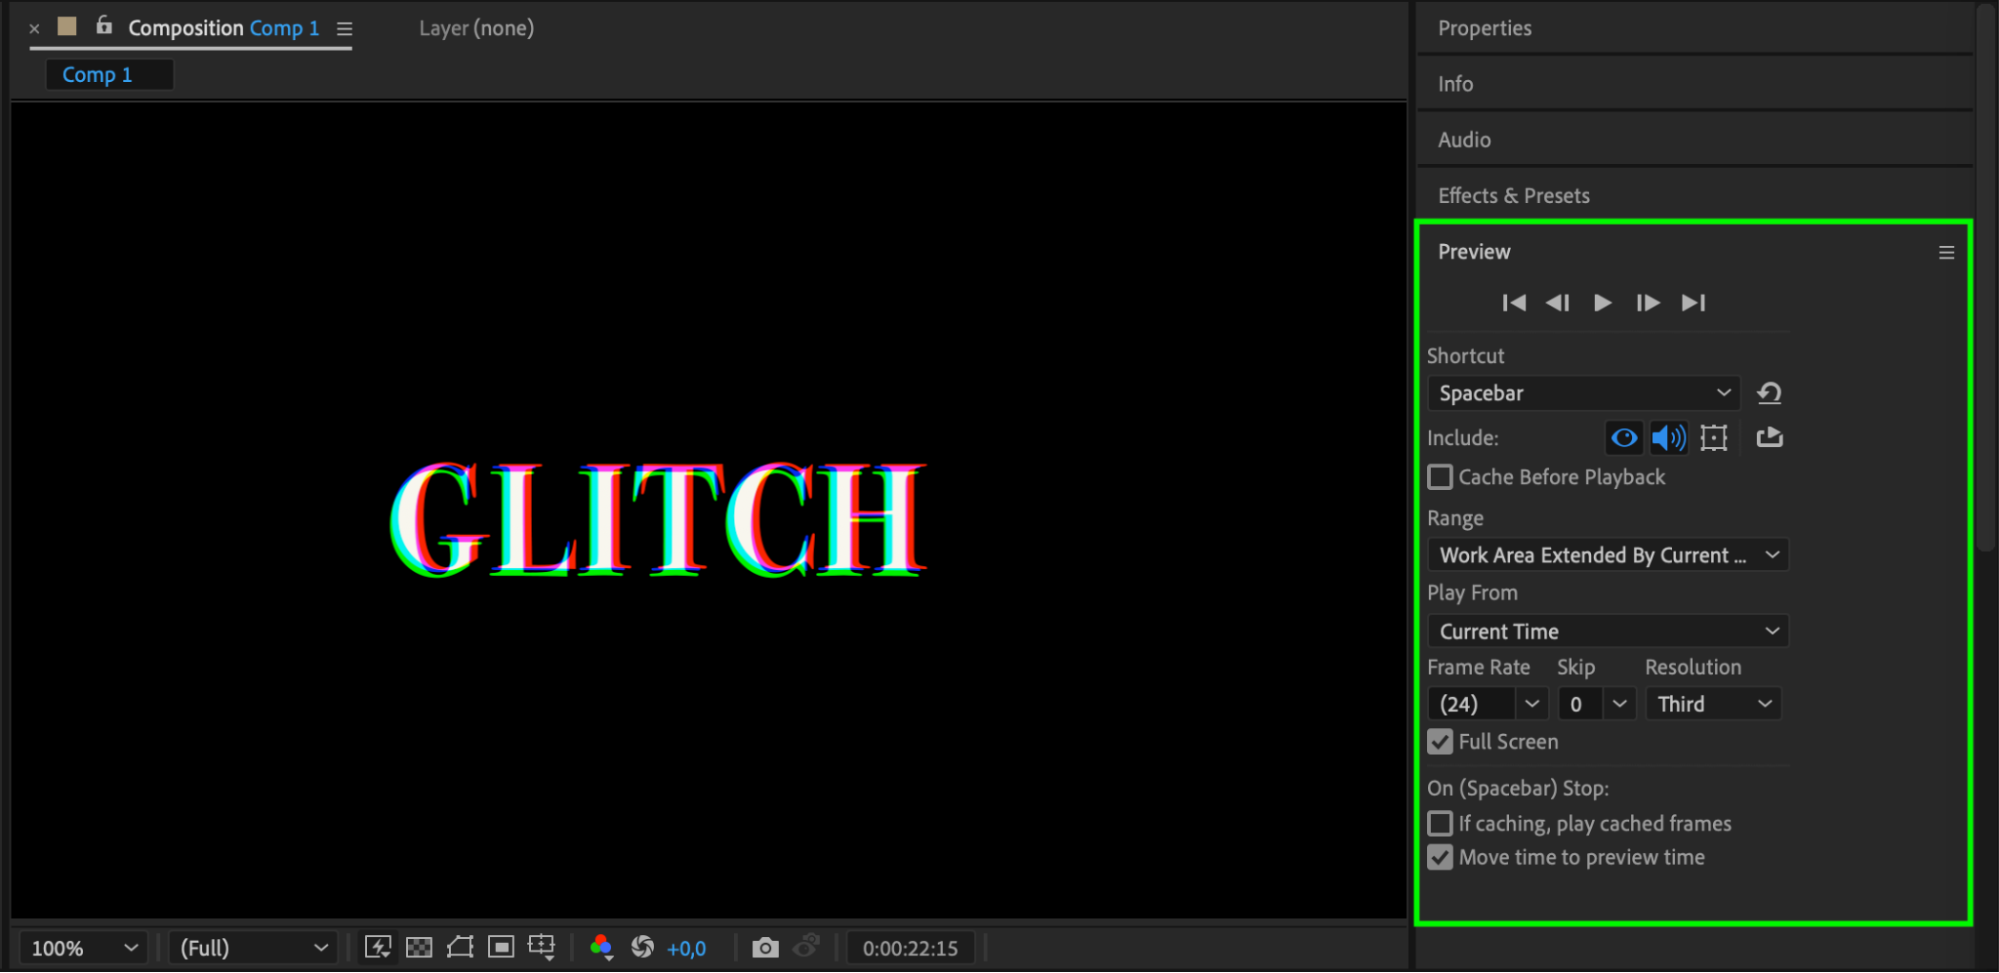
Preview your composition by pressing the Spacebar to play it. Make any necessary adjustments to the effects or positions to ensure the glitch effect looks just right. Tweak the parameters and try different settings to perfect your design.
Conclusion
By following these steps, you’ll be able to create eye-catching glitch effects in Adobe After Effects. Remember, glitch animation is all about embracing imperfections and introducing chaos into your visuals. Let your creativity flow and experiment with different techniques to make your glitch effects truly unique. So, go ahead and add a touch of glitch to your videos and watch them come to life with excitement and intrigue.


