How to Create a HUD Animation in After Effects
Introduction
A HUD (Heads-Up Display) is a futuristic interface often seen in sci-fi movies and video games. In this guide, you will learn how to create a clean and modern HUD animation in After Effects using shape layers, stroke animations, opacity effects, and glowing elements.
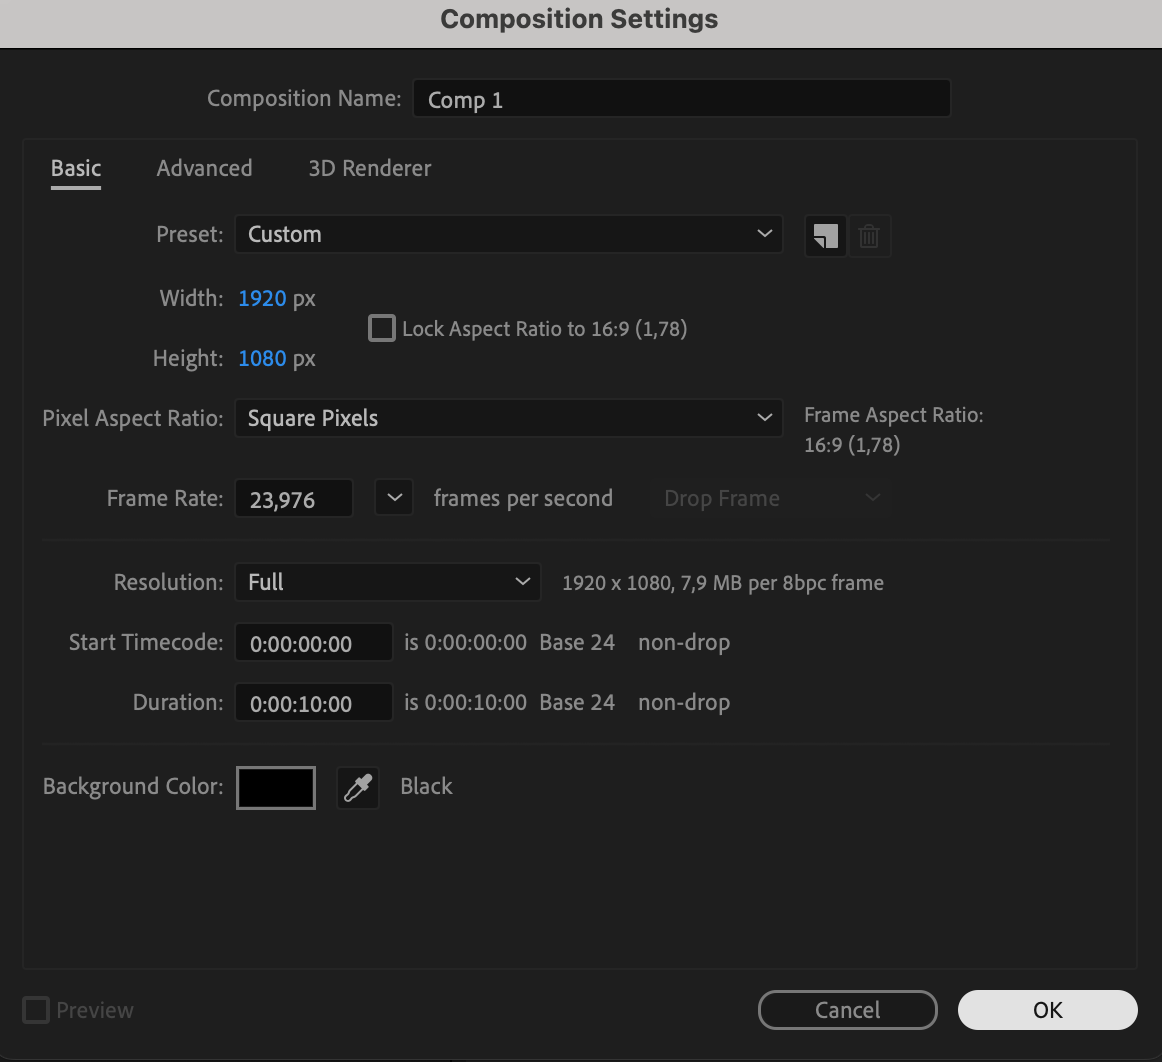
Step 1: Create a New Composition
Open After Effects and create a New Composition with your desired resolution and frame rate. This will be the base for your HUD animation.
 Step 2: Create the HUD Base Shape
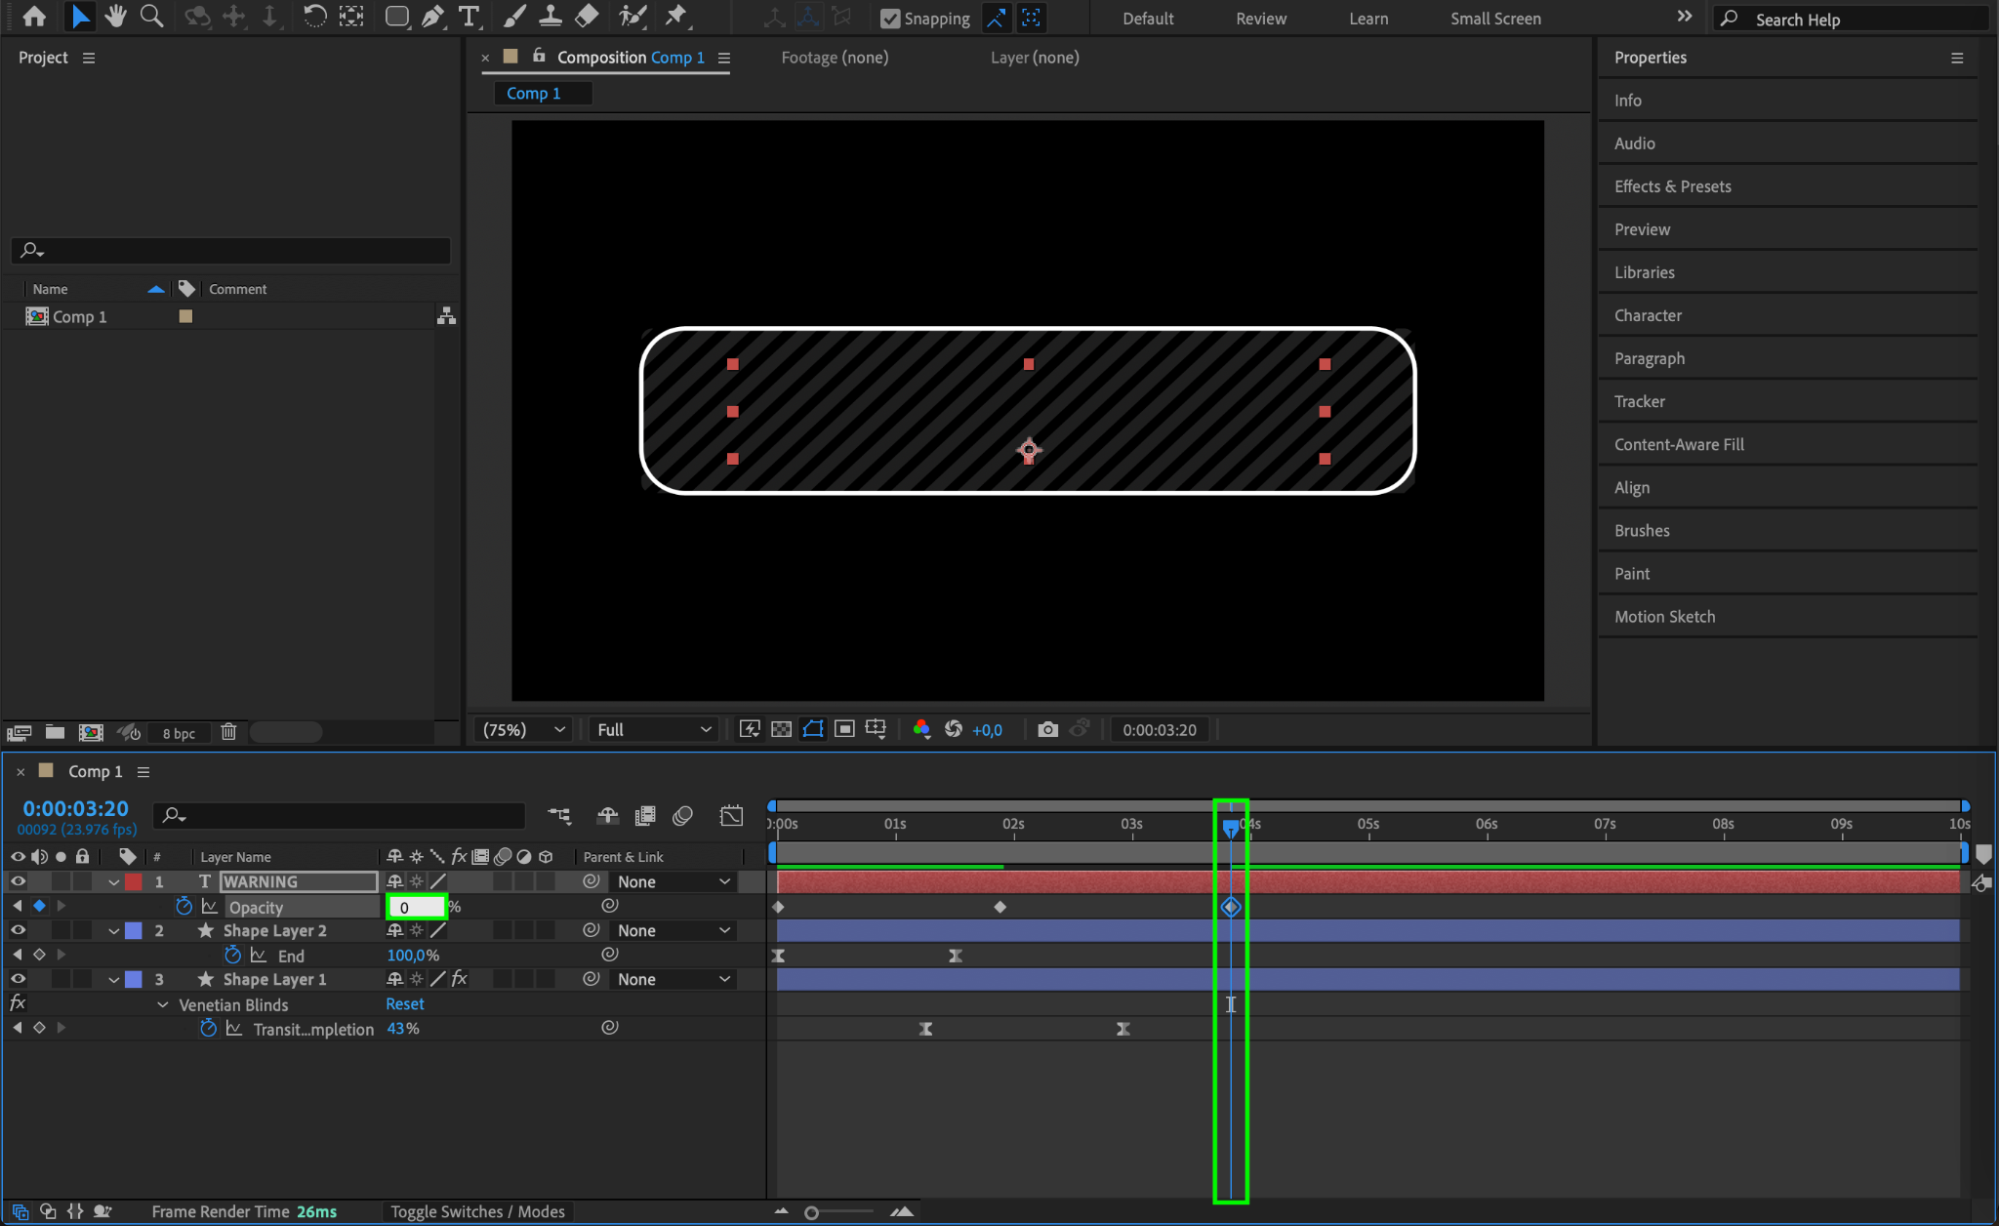
Select the Rounded Rectangle Tool (Q) and draw a shape. This will be the main element of the HUD. Duplicate the shape layer to create a second version.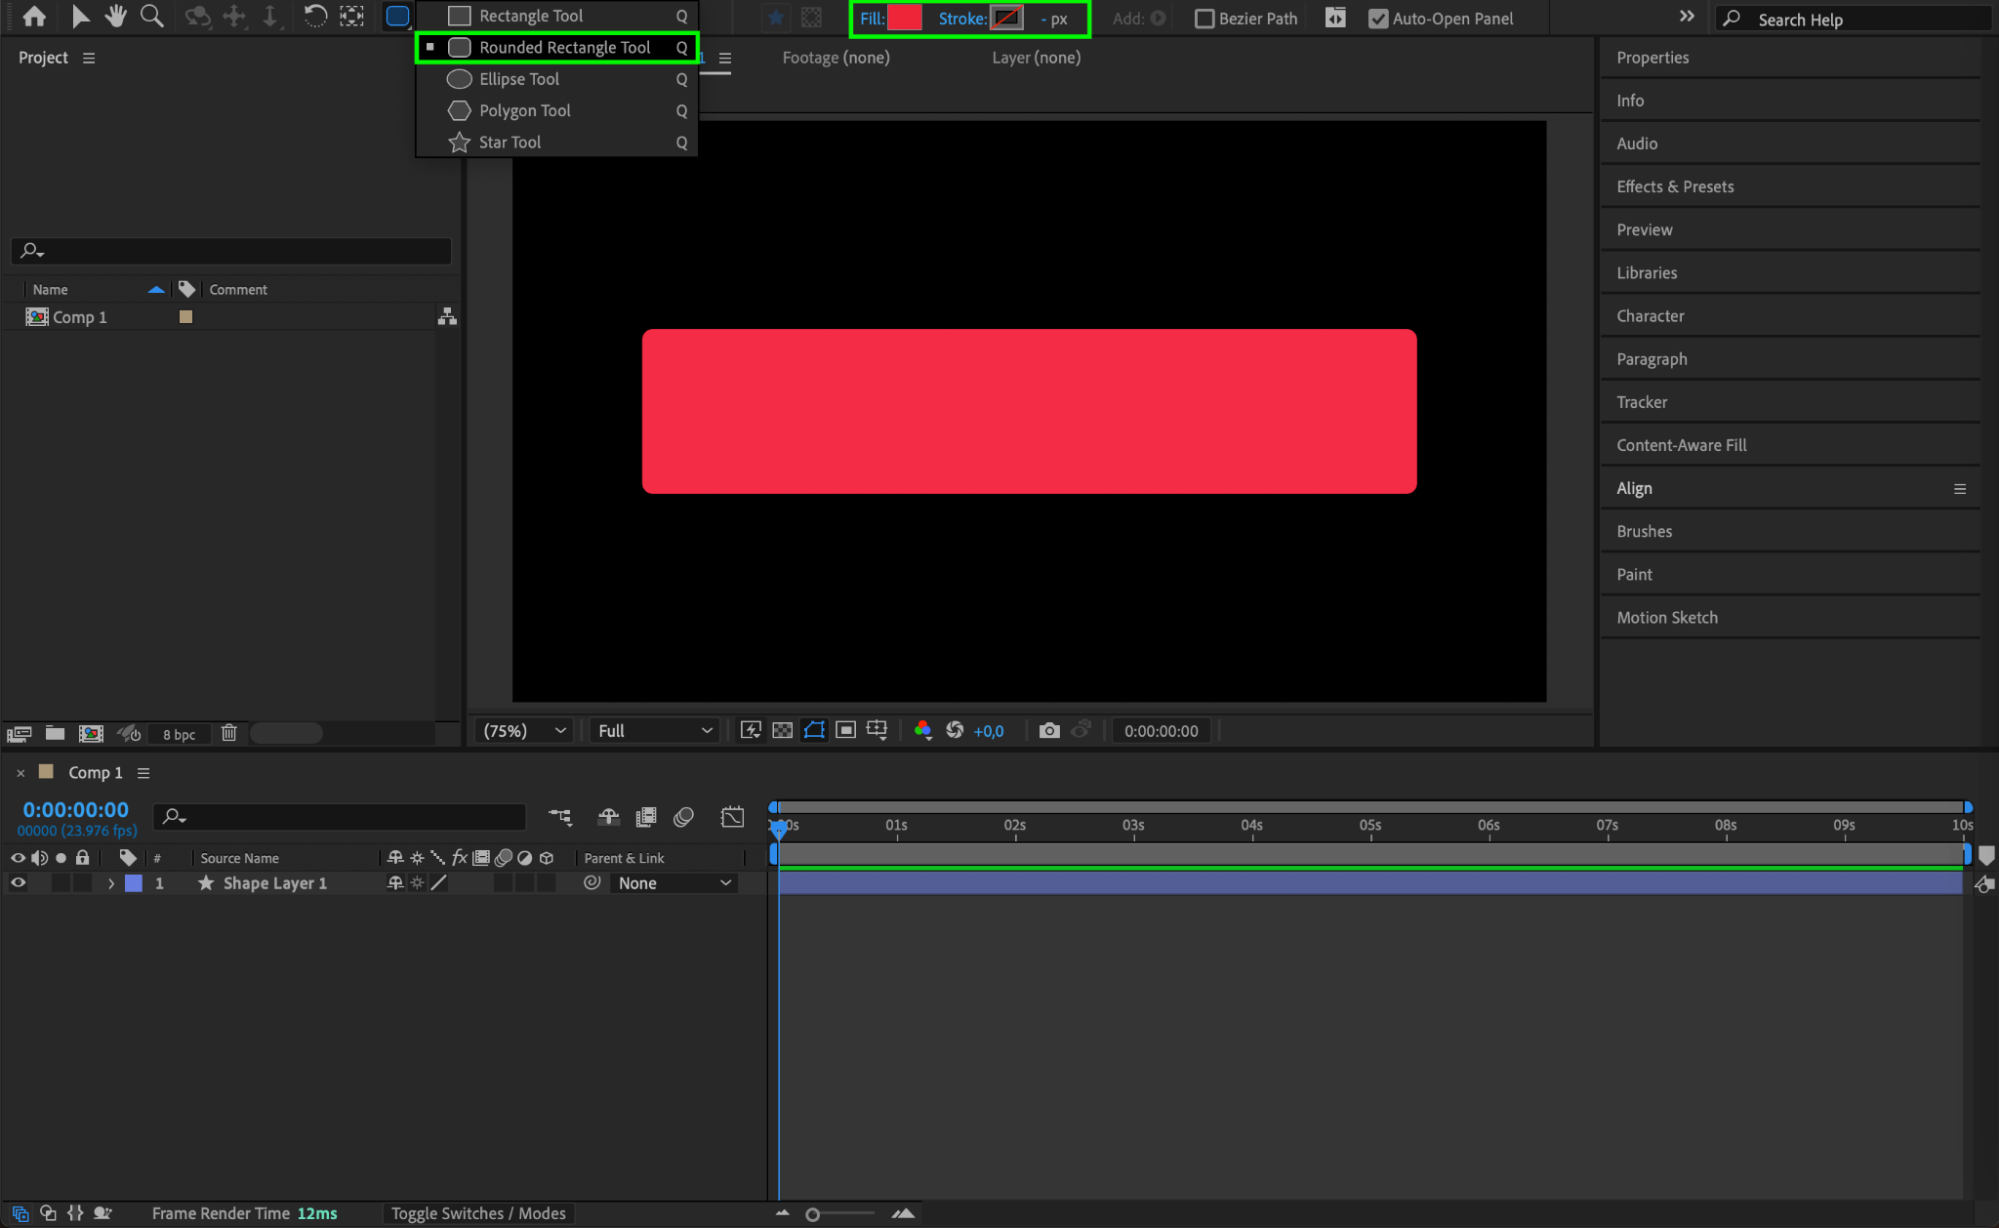
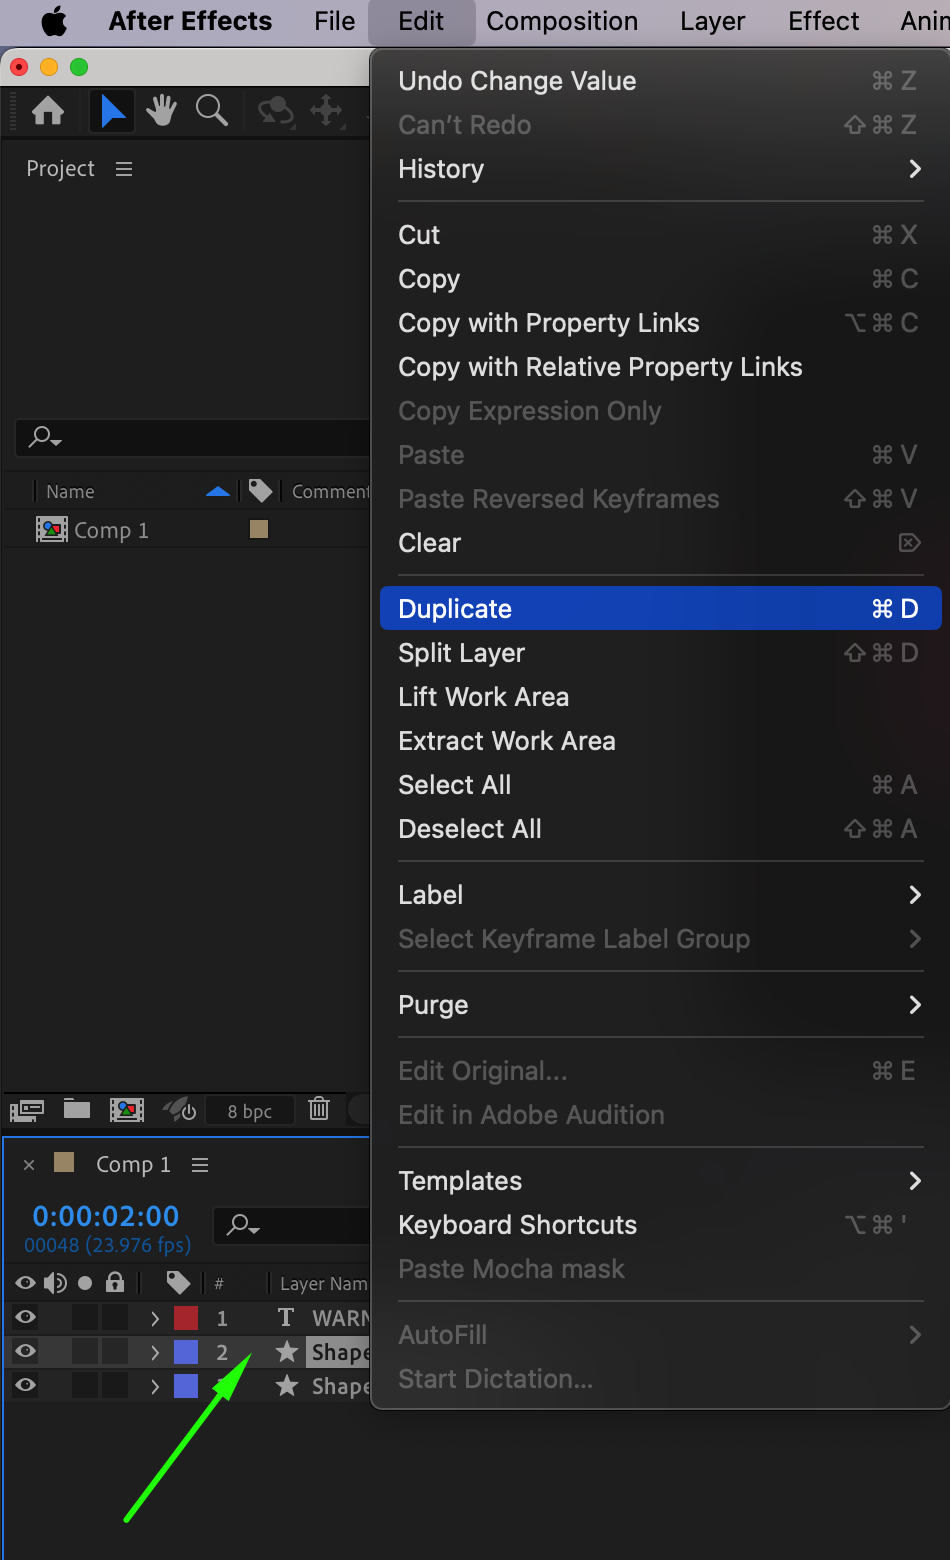 Step 3: Modify the Duplicate Shape
For the duplicated shape, change Fill to None and set the Stroke to White (8px). Then, hide the original shape layer by clicking the eye icon.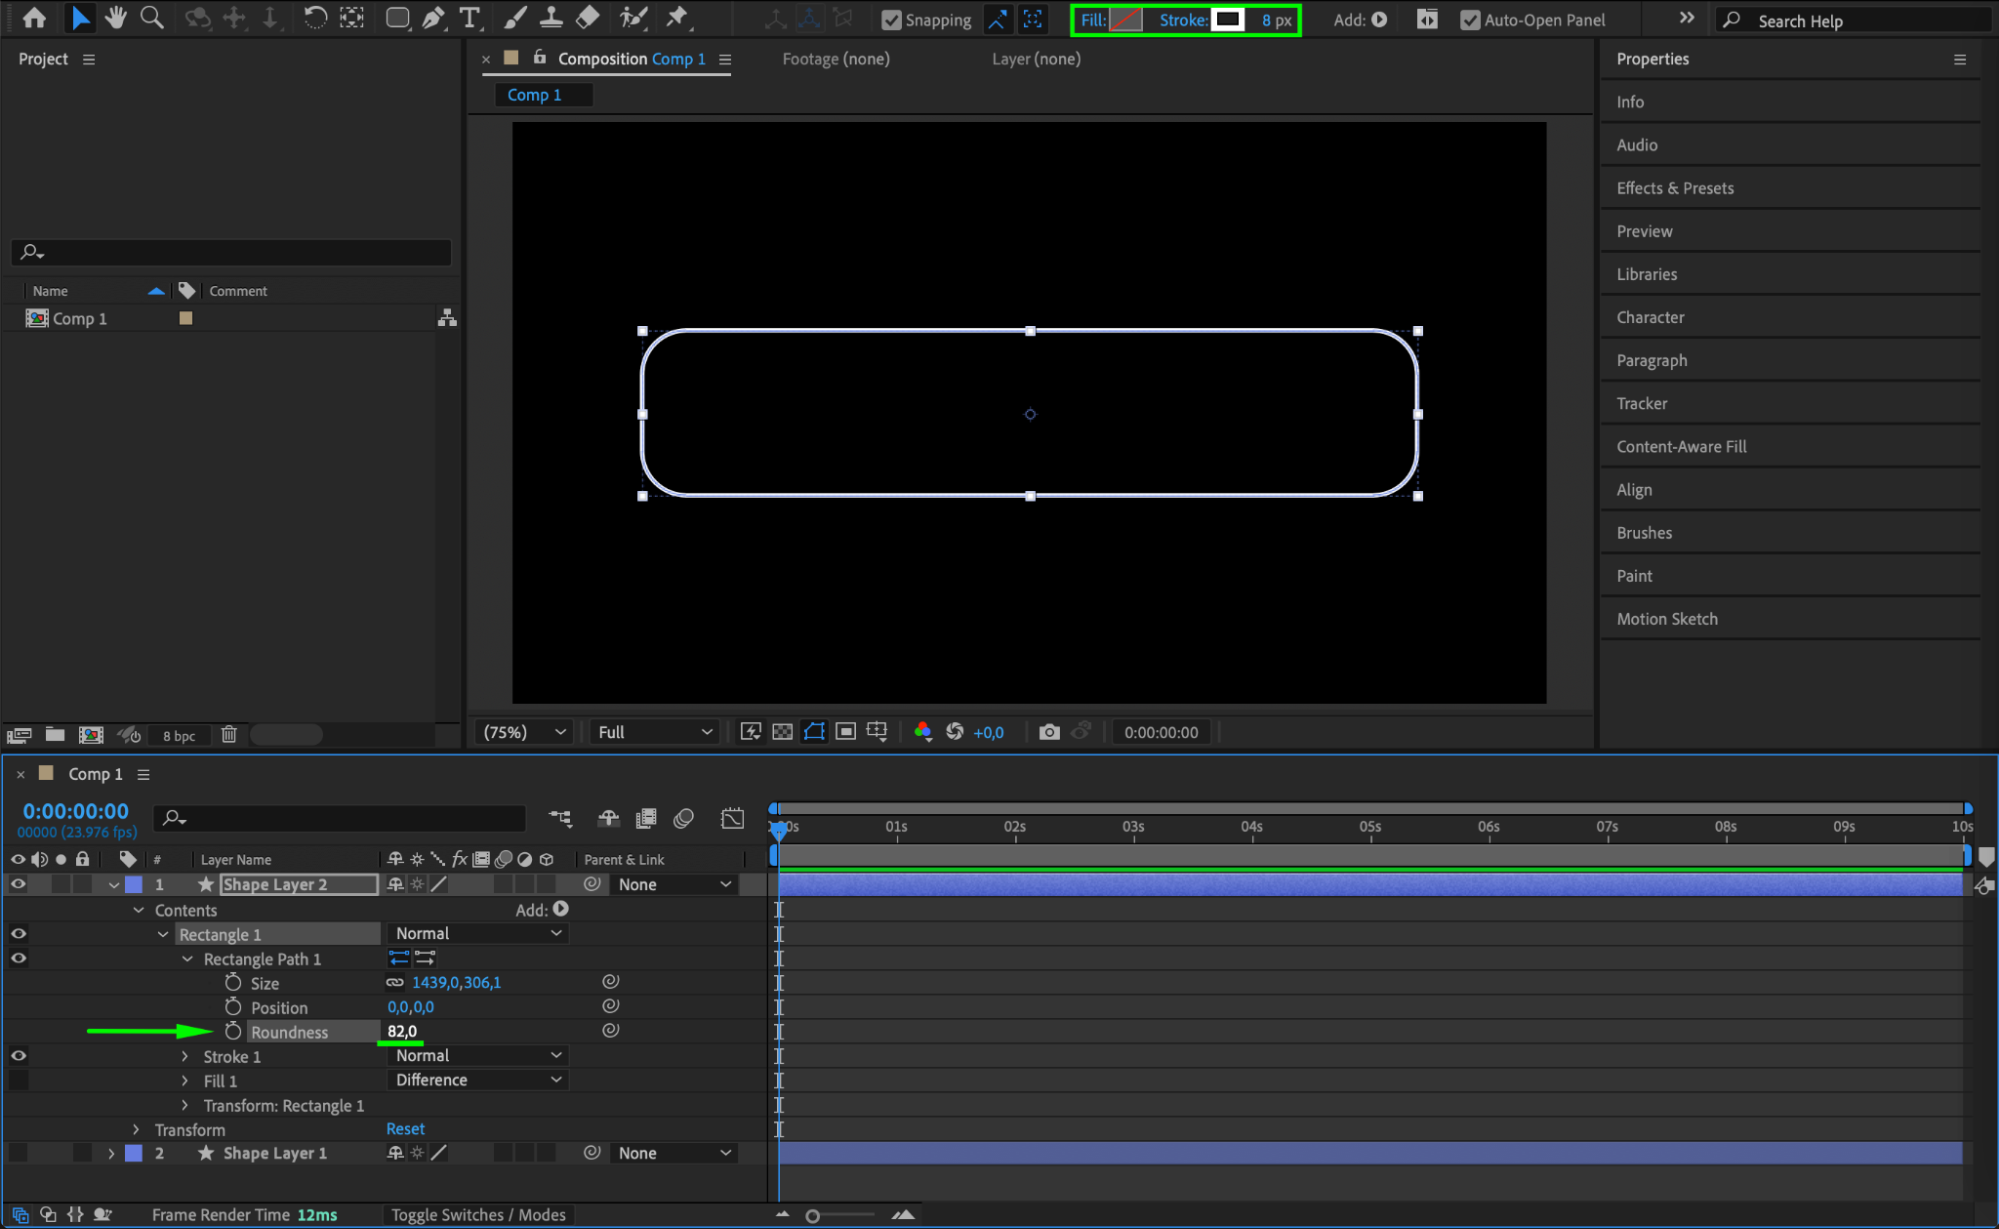 Step 4: Add Trim Paths Animation
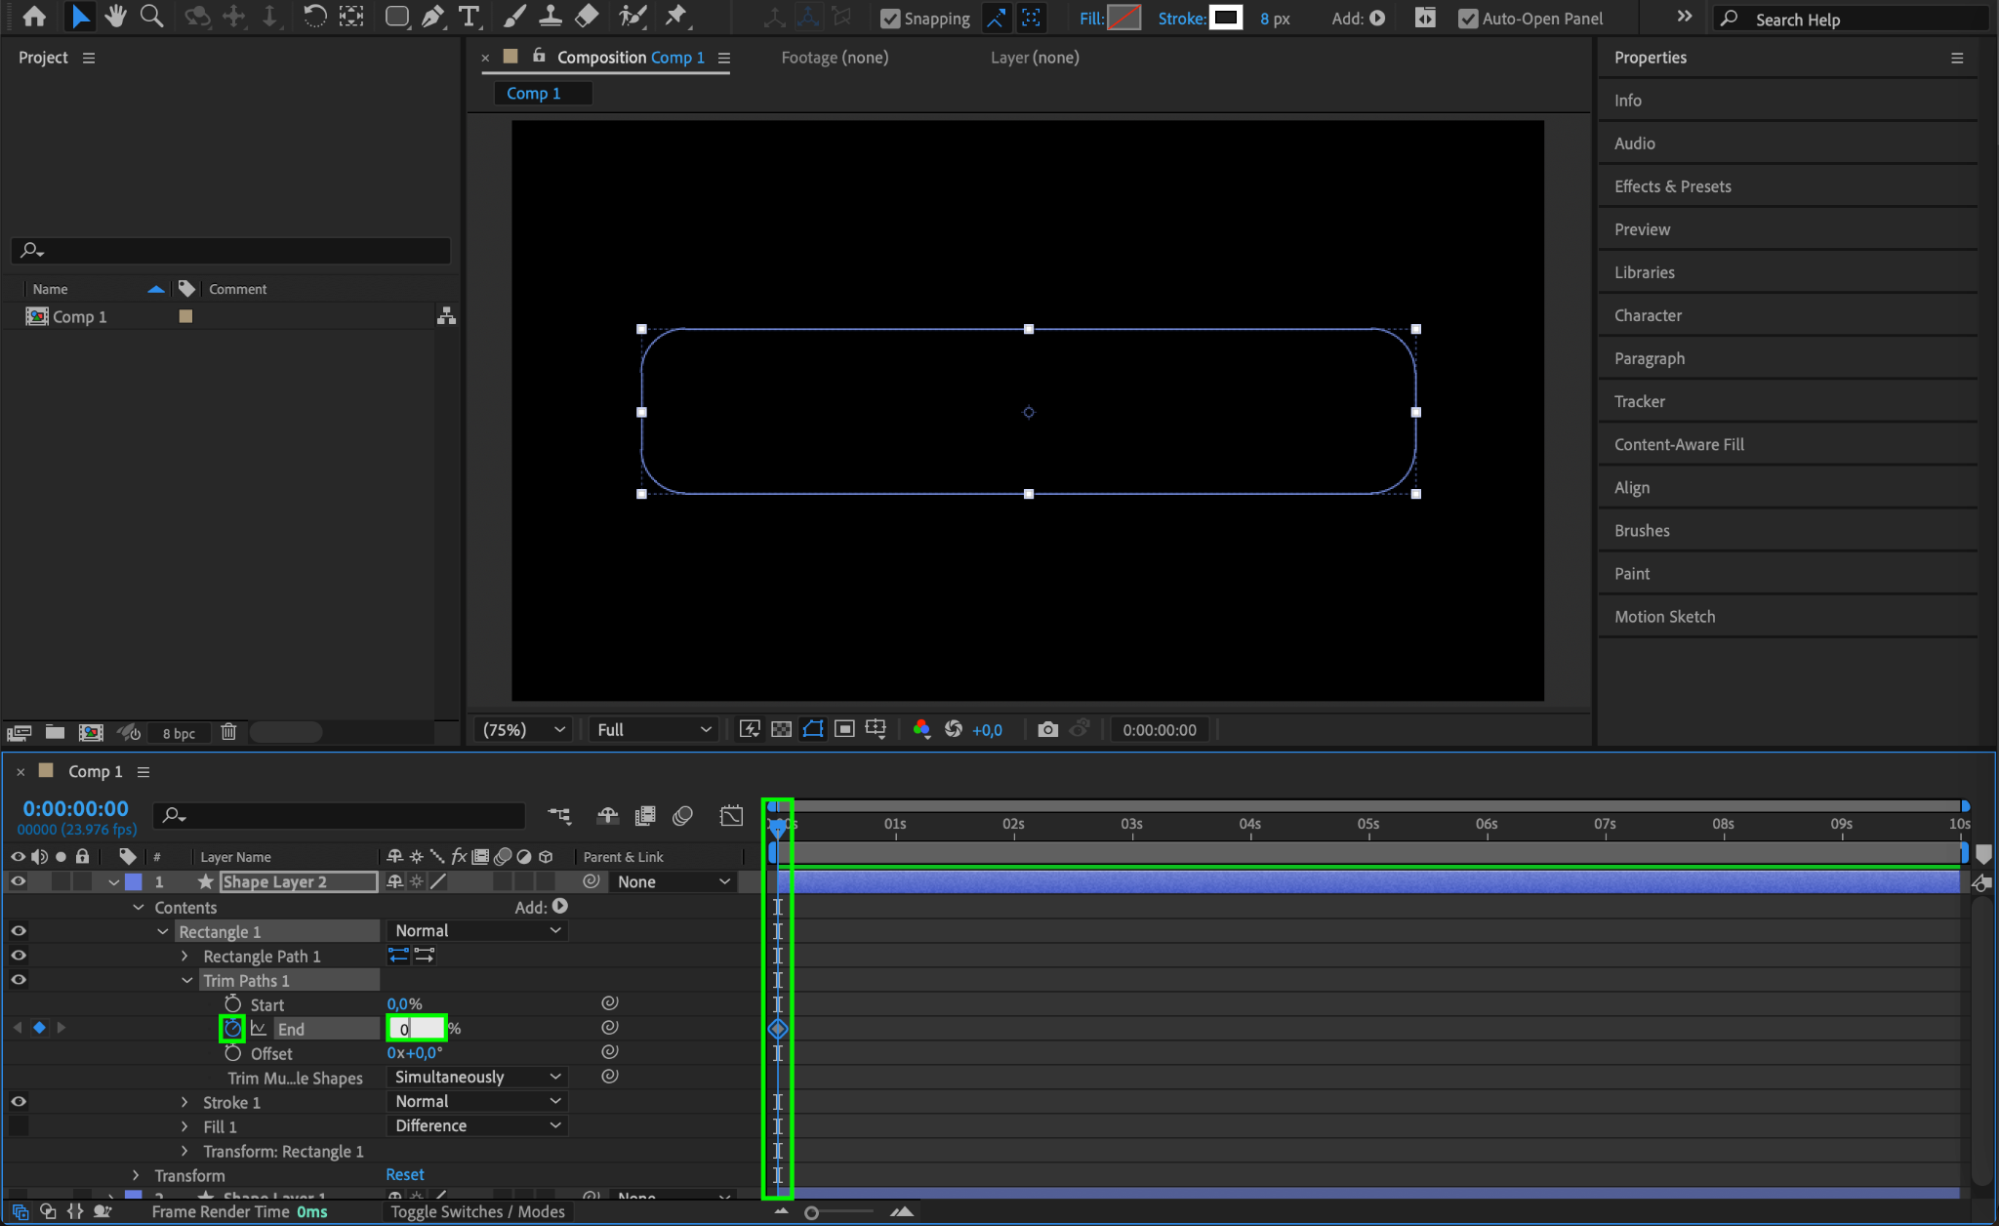
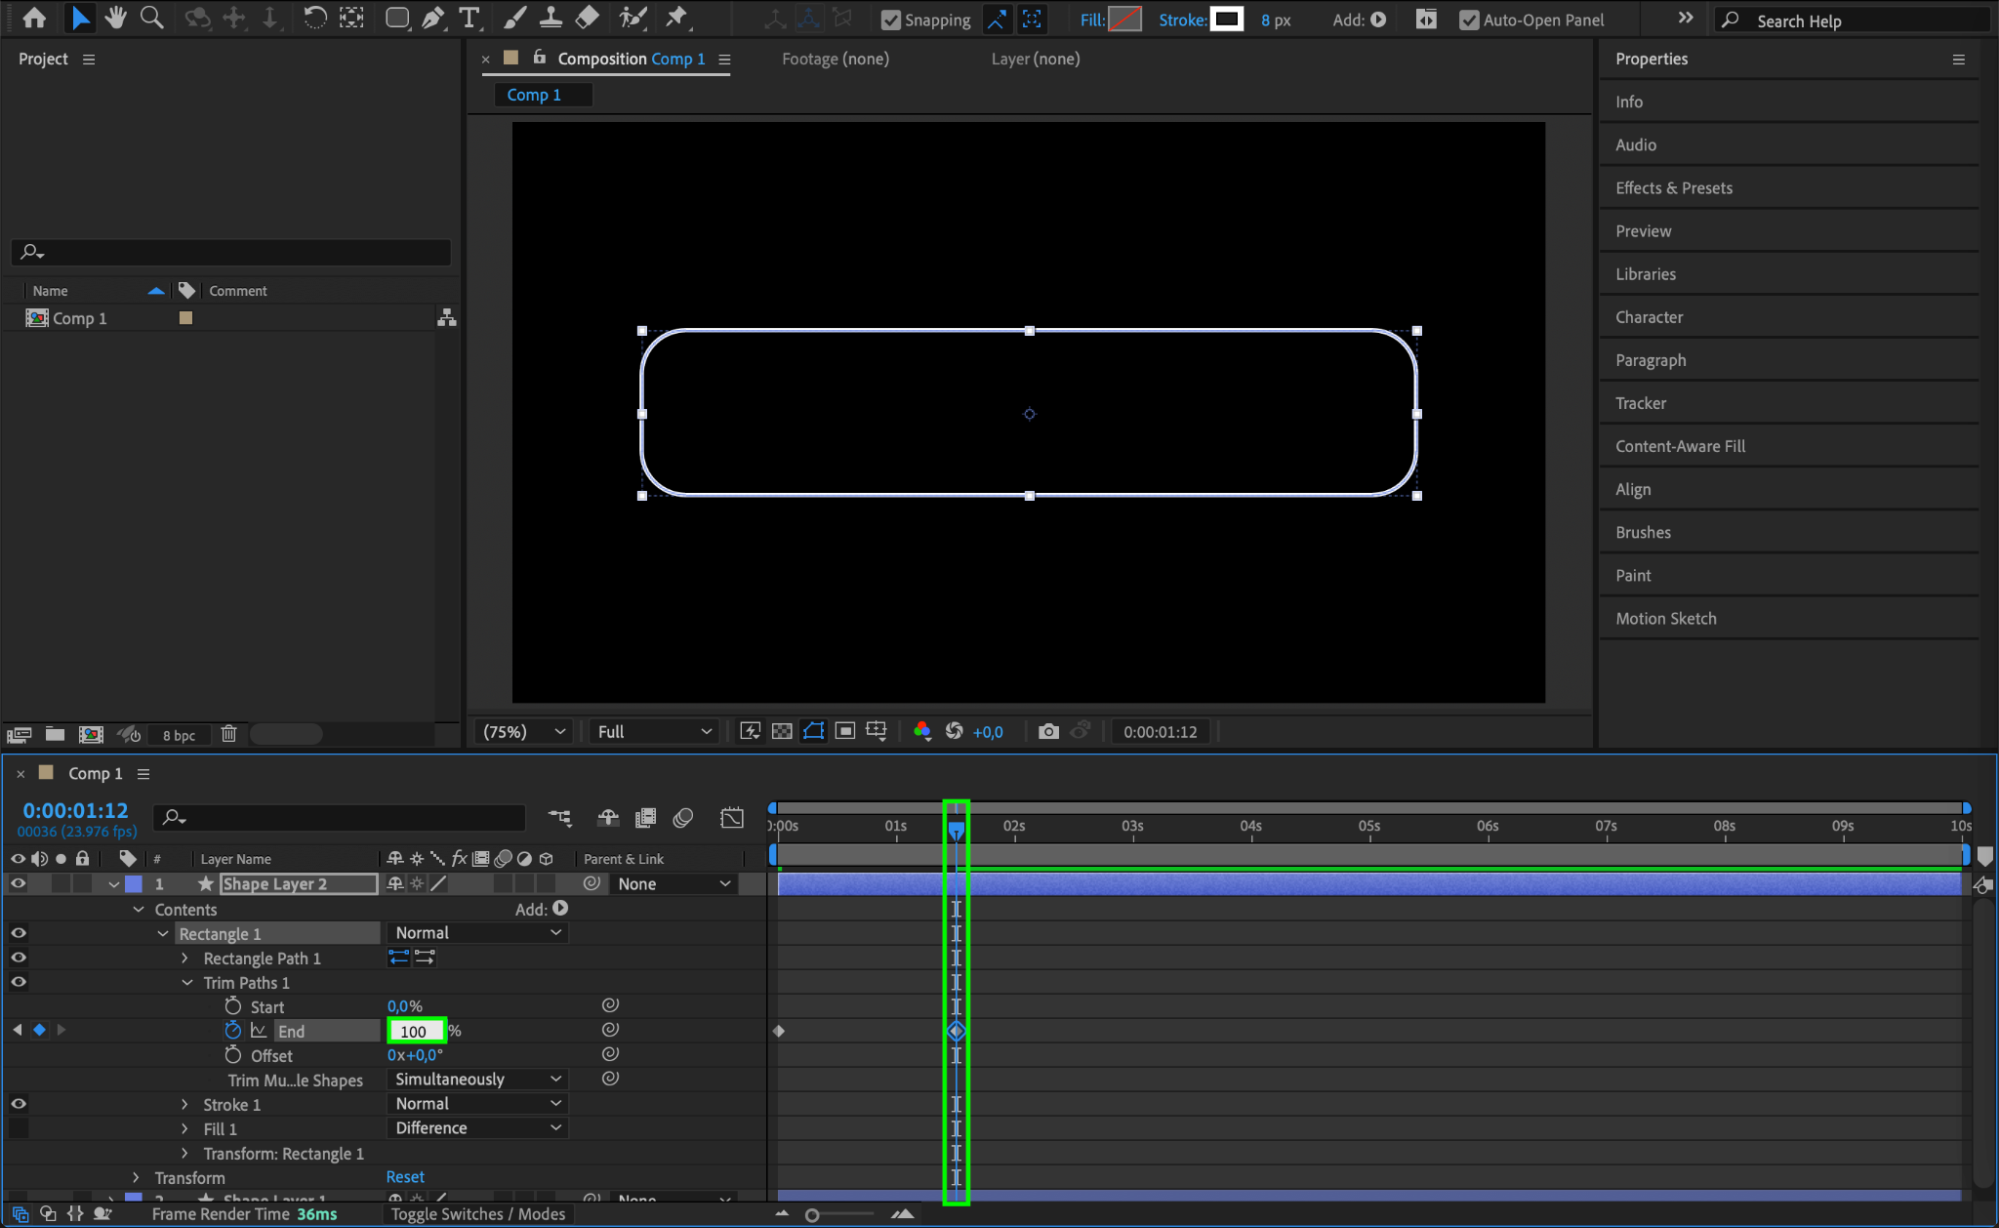
Expand the properties of the duplicated shape, click Add, and choose Trim Paths. Set End to 0% at the beginning of the timeline, then animate it to 100% over a few frames. Also, set Offset to 97 to create a moving effect.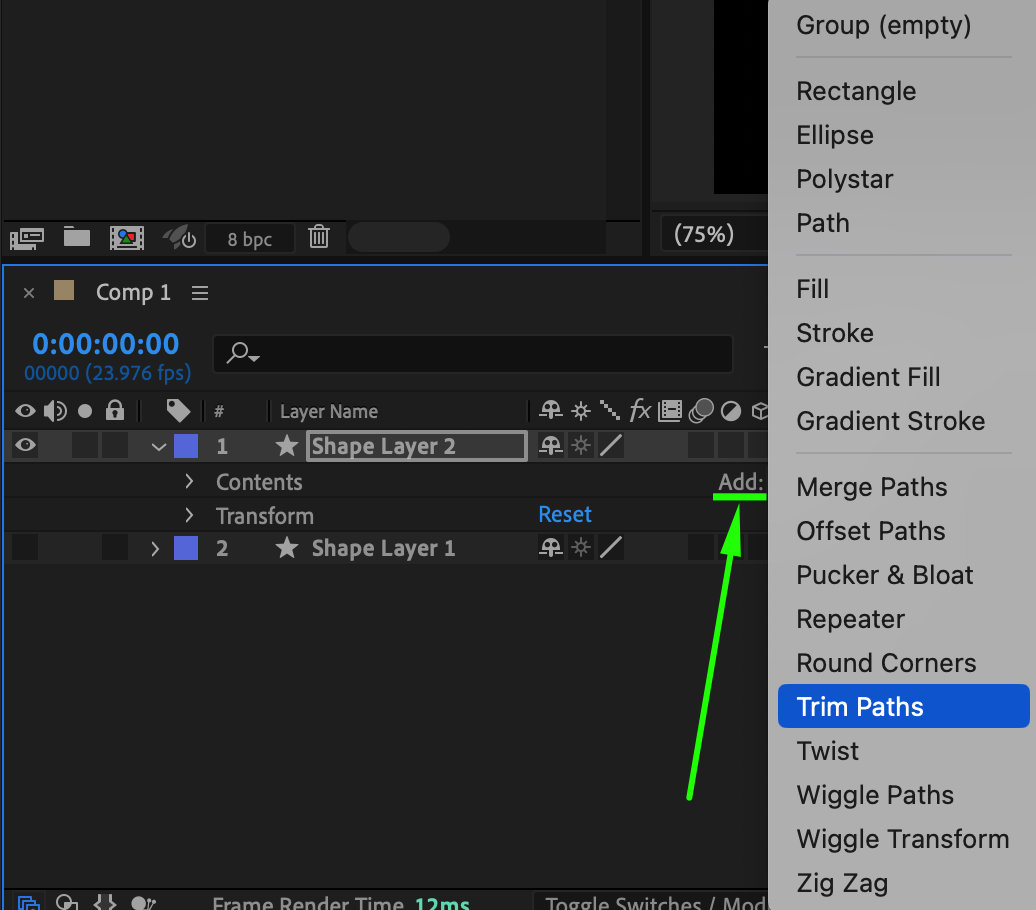
 Step 5: Adjust the Original Shape Layer
Turn the original shape layer back on. Change its Fill color to White and reduce the Opacity to 9% to give it a subtle appearance.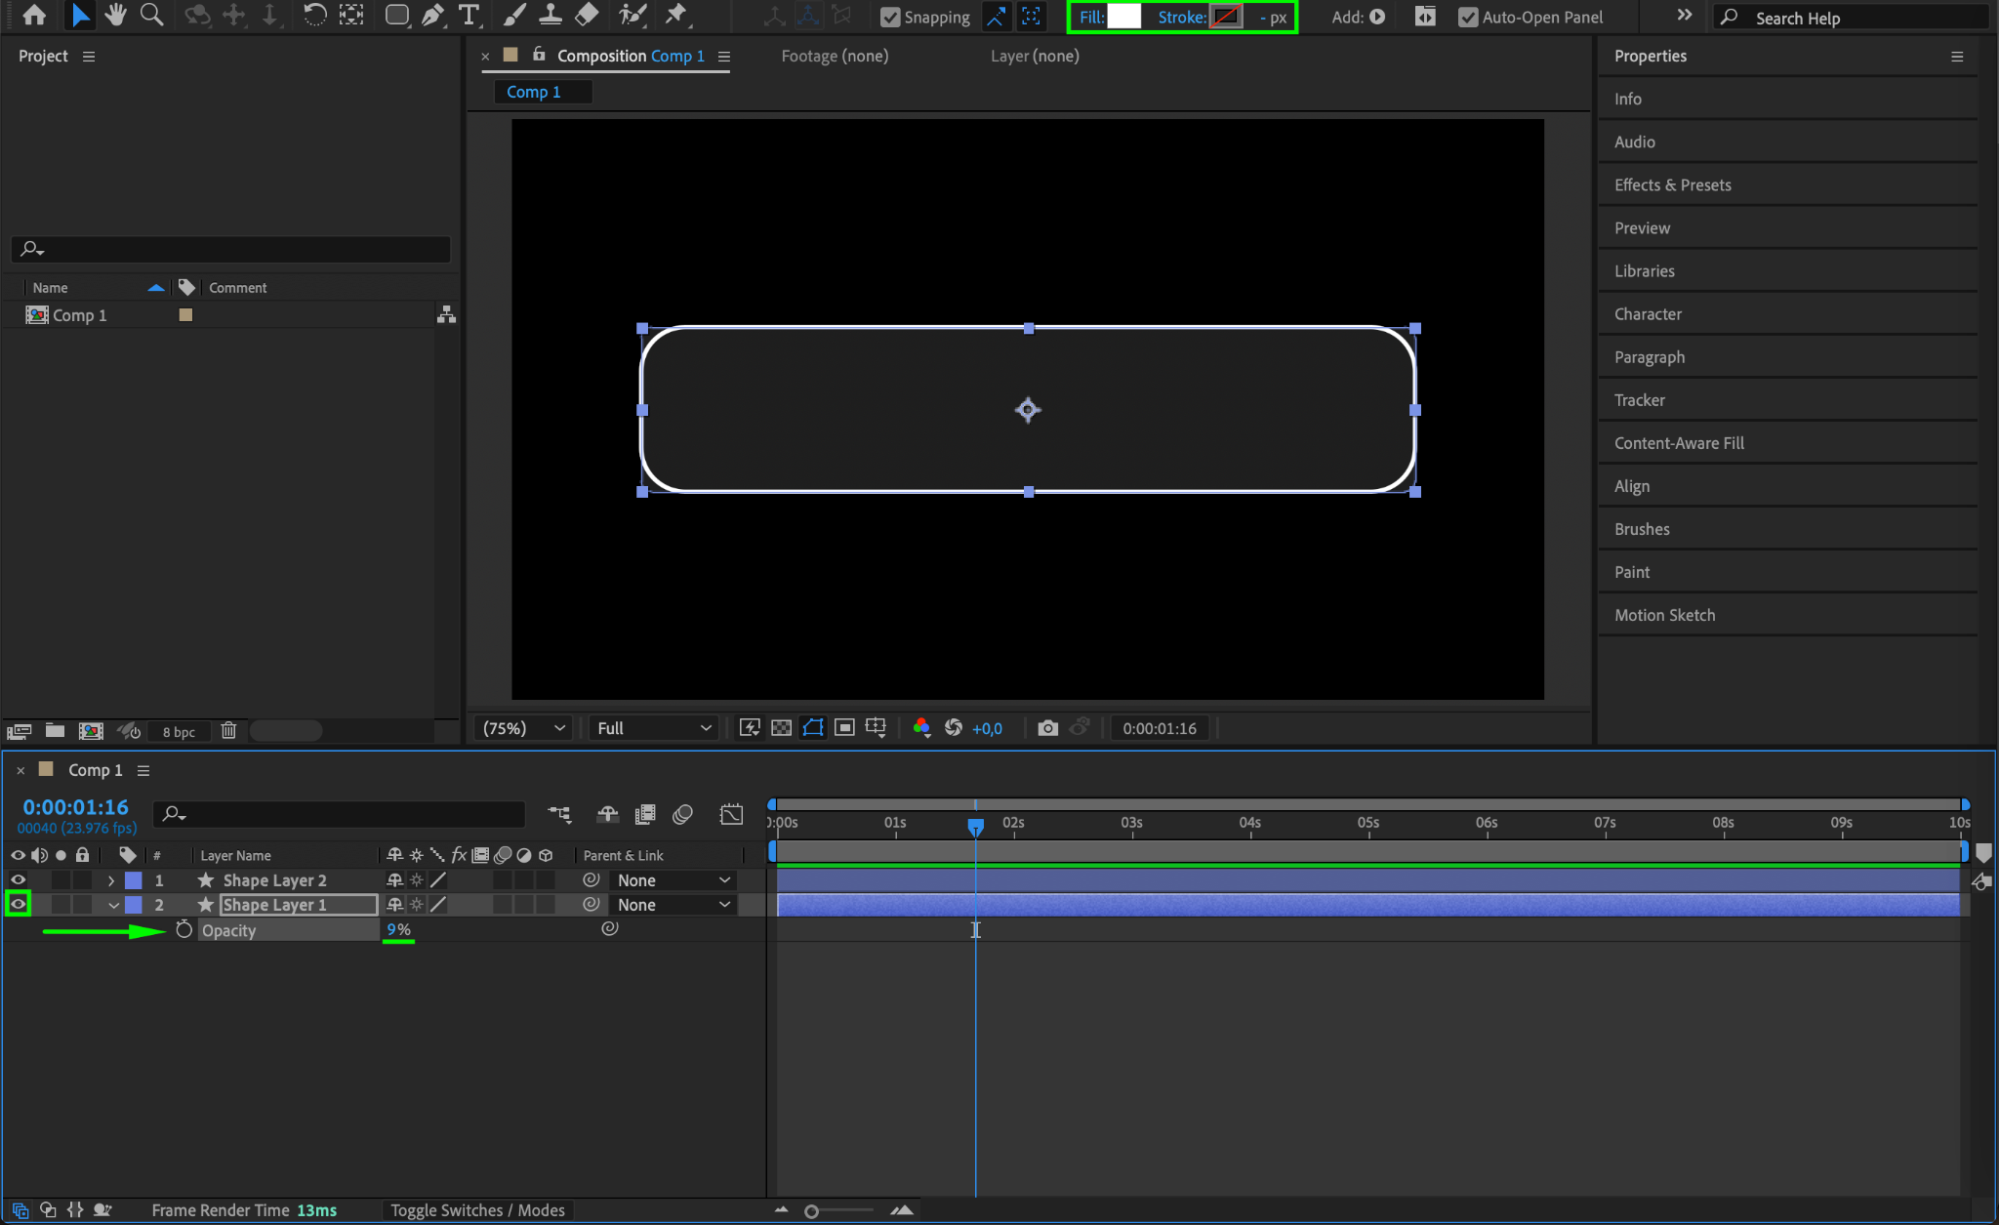 Step 6: Apply Venetian Blinds Effect
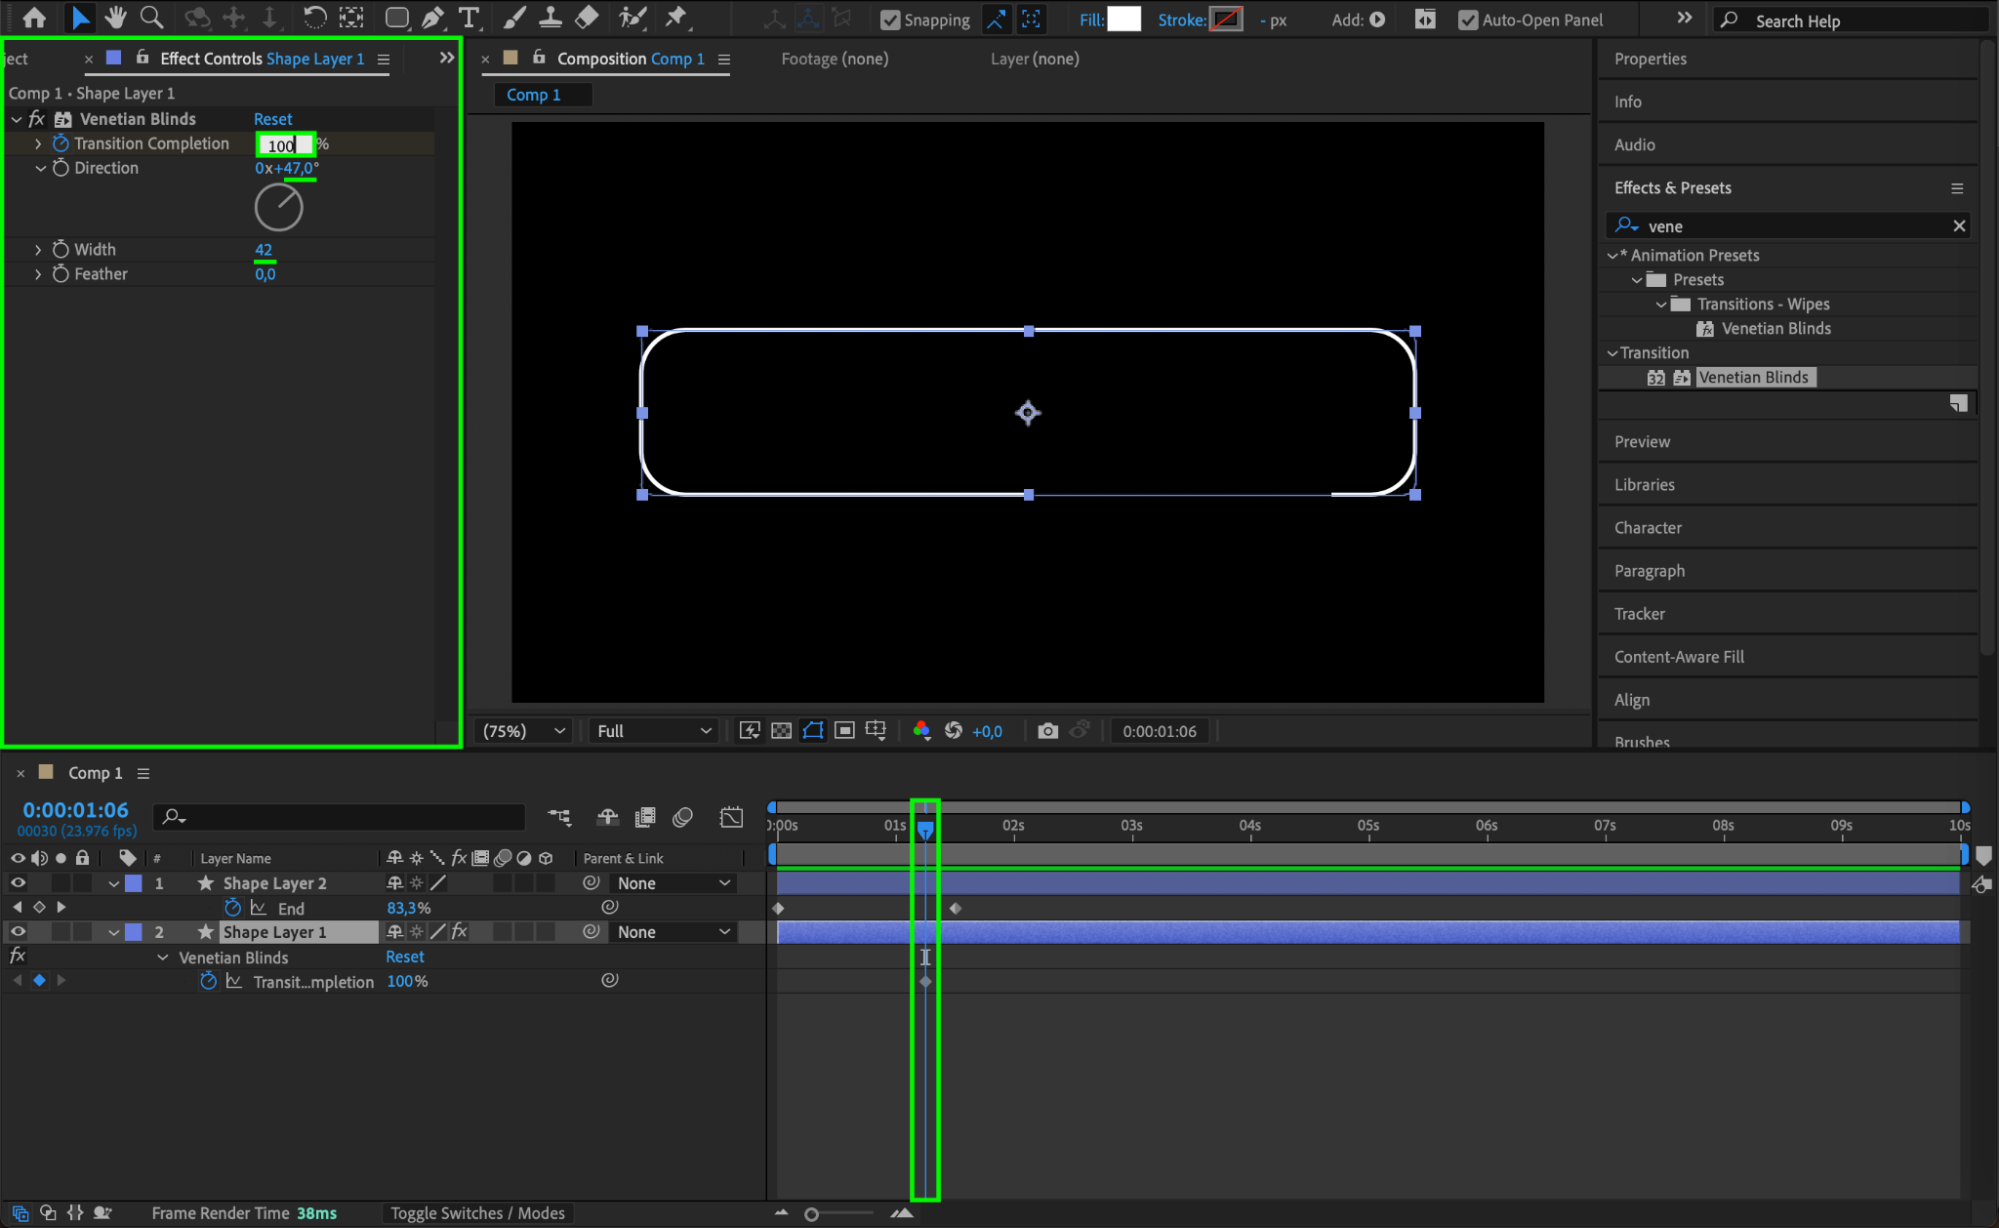
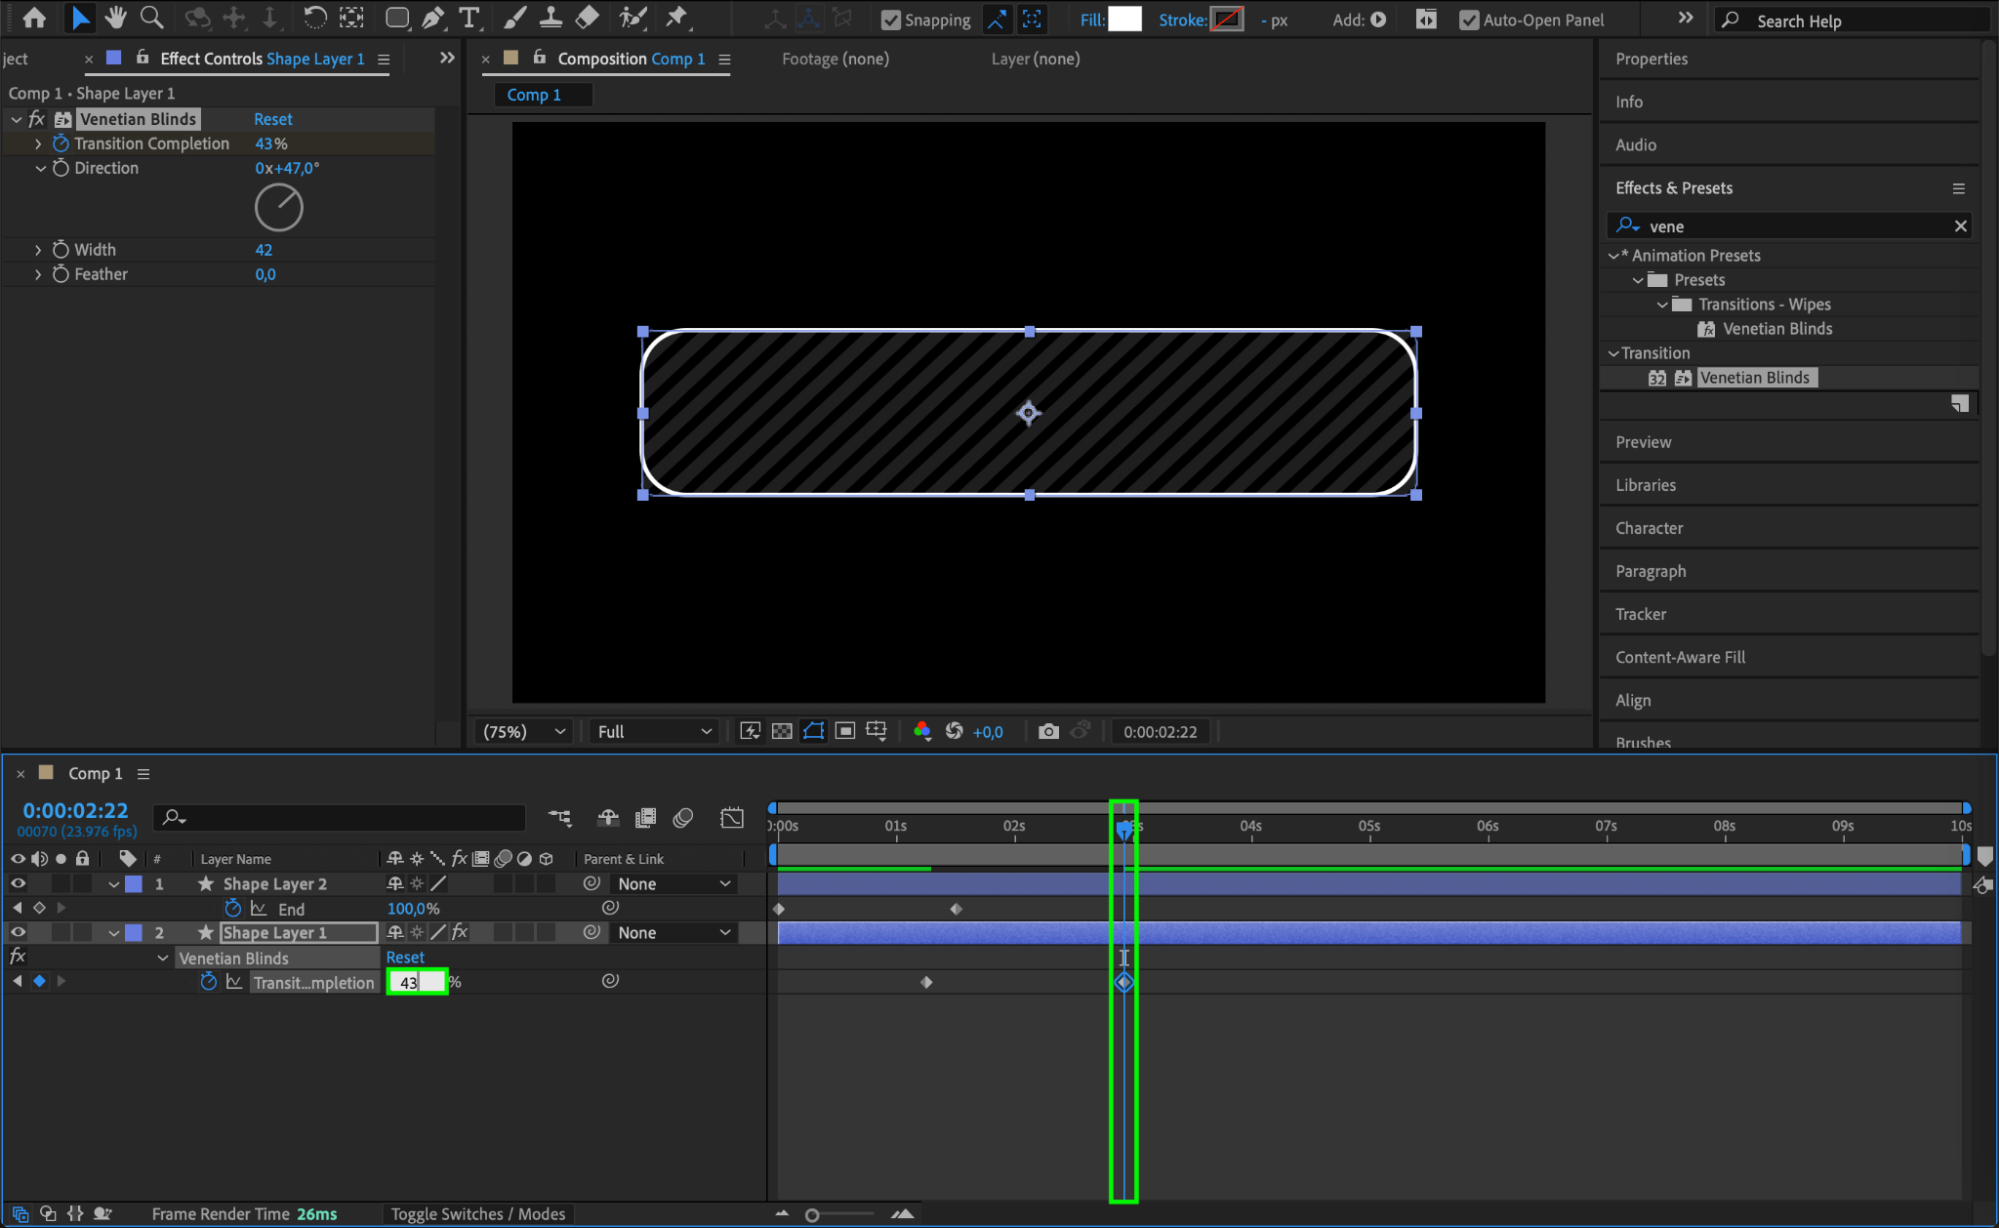
Go to Effects & Presets and apply the Venetian Blinds effect to the original shape layer. Set Direction to 47°, Width to 42, and animate Transition Completion from 100% at the start to 43% after a few frames to create a scanning effect.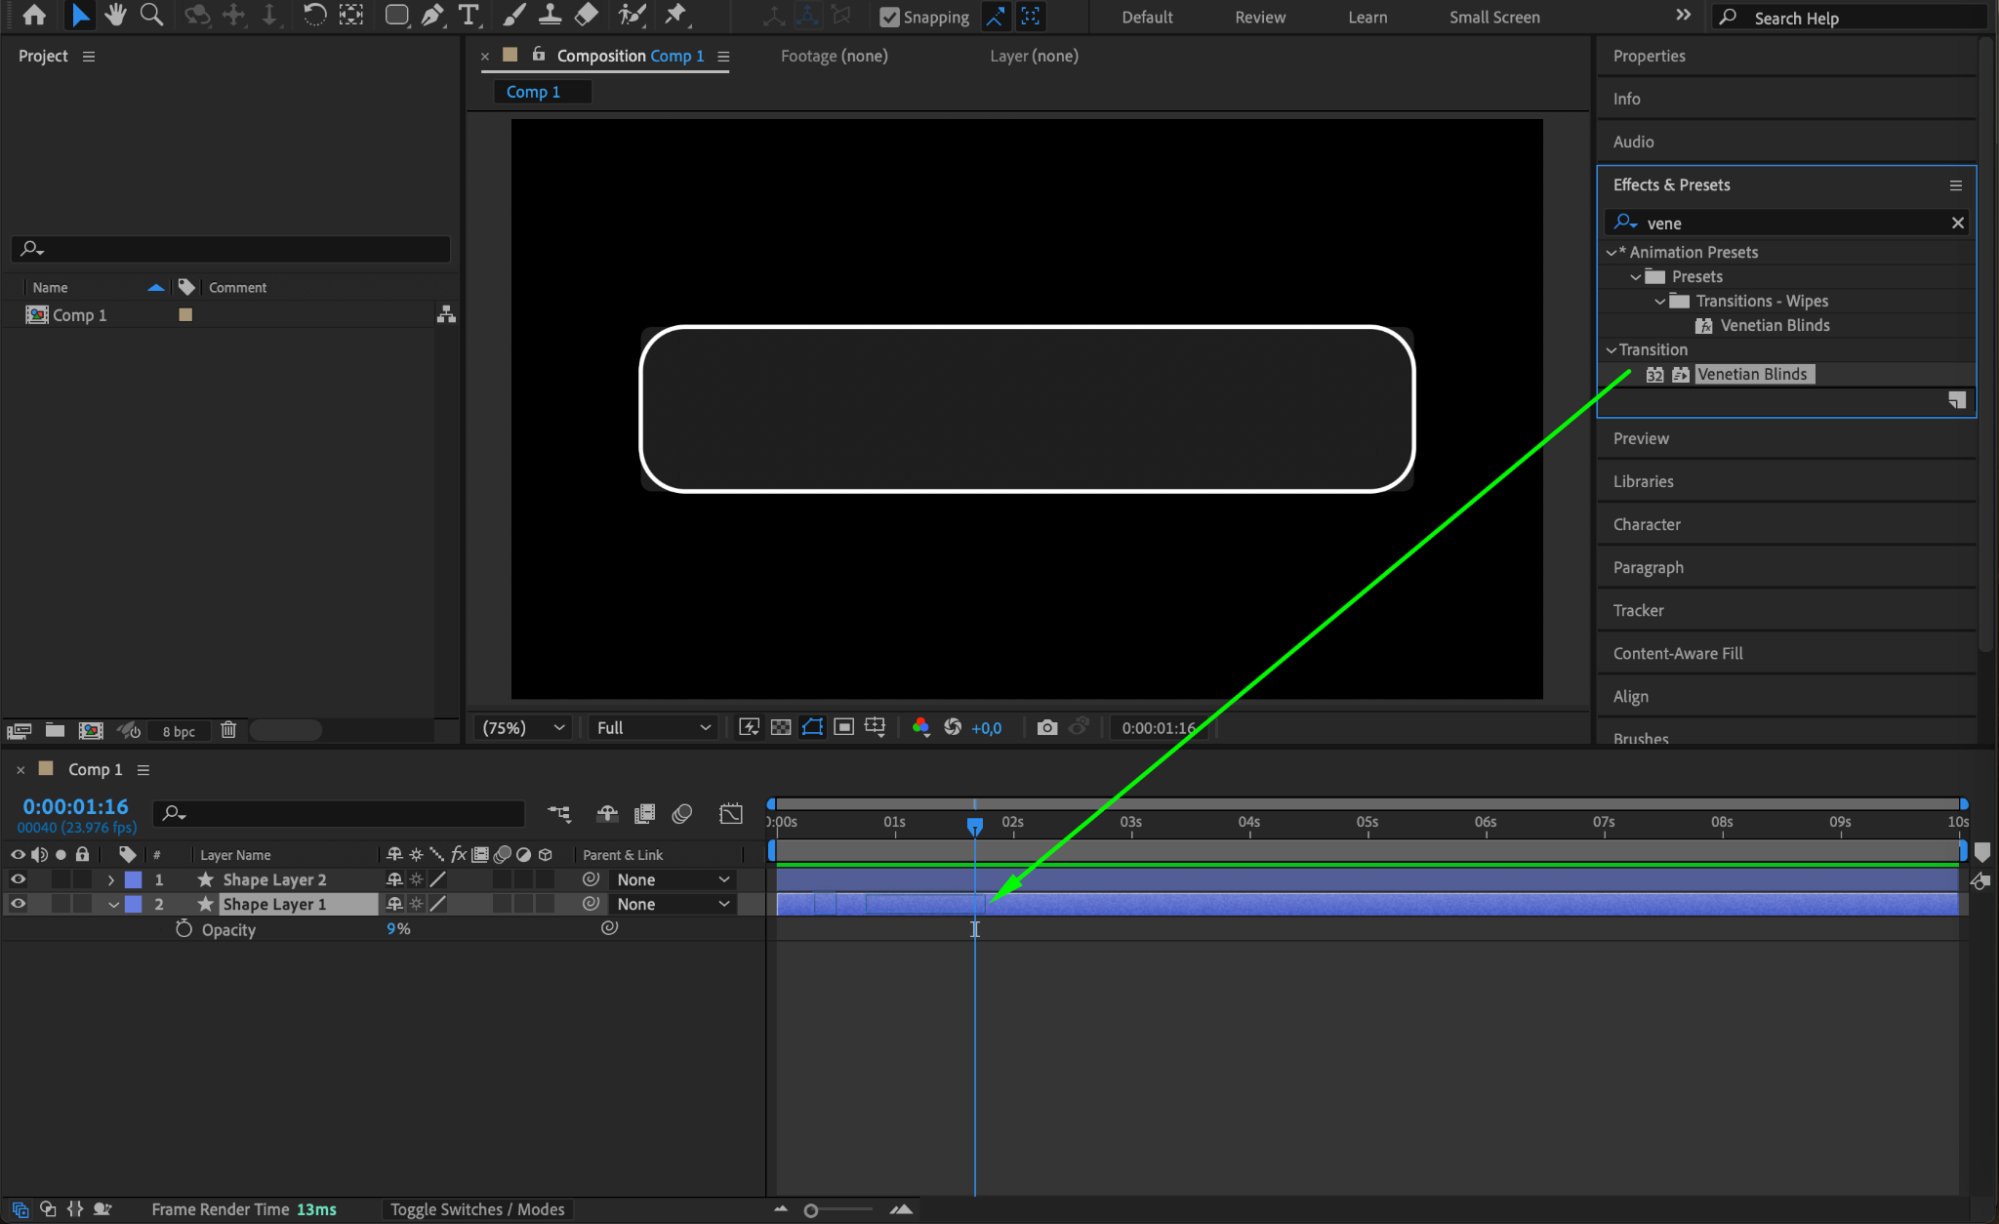
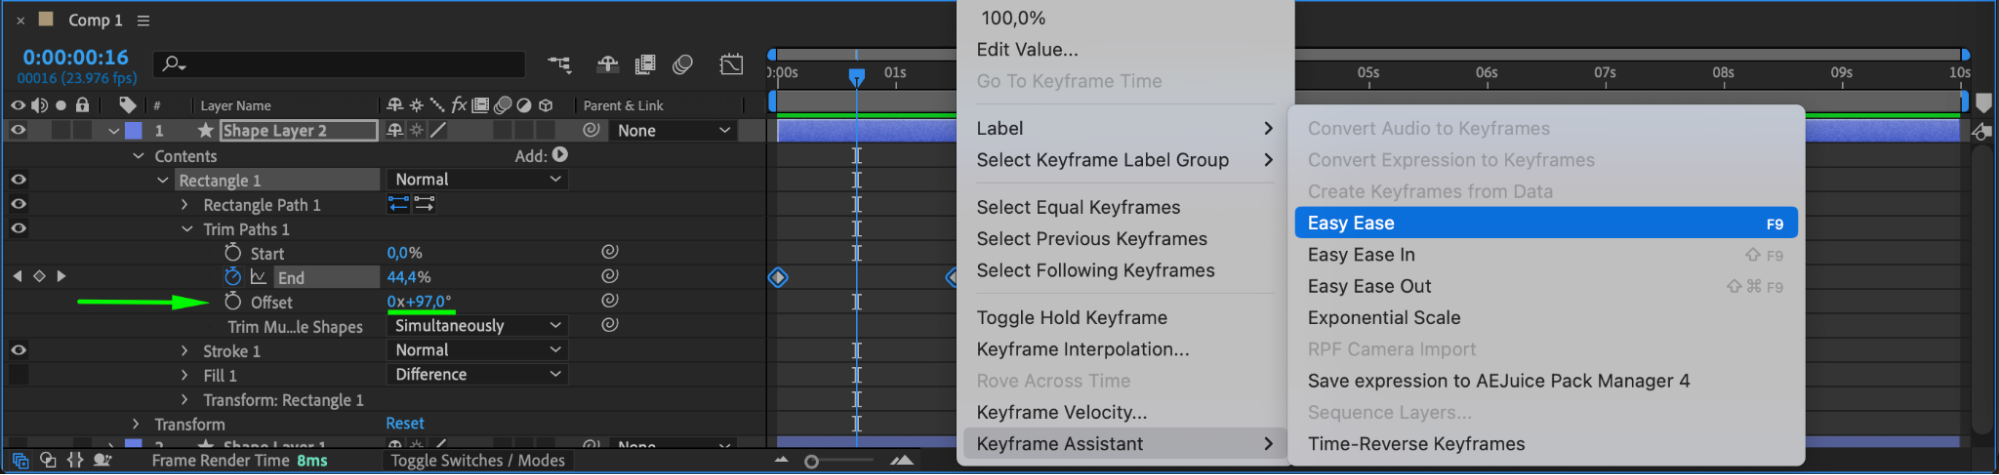
 Step 7: Smooth Keyframe Animation
Select all keyframes, then go to Keyframe Assistant > Easy Ease to make the animations smoother and more natural.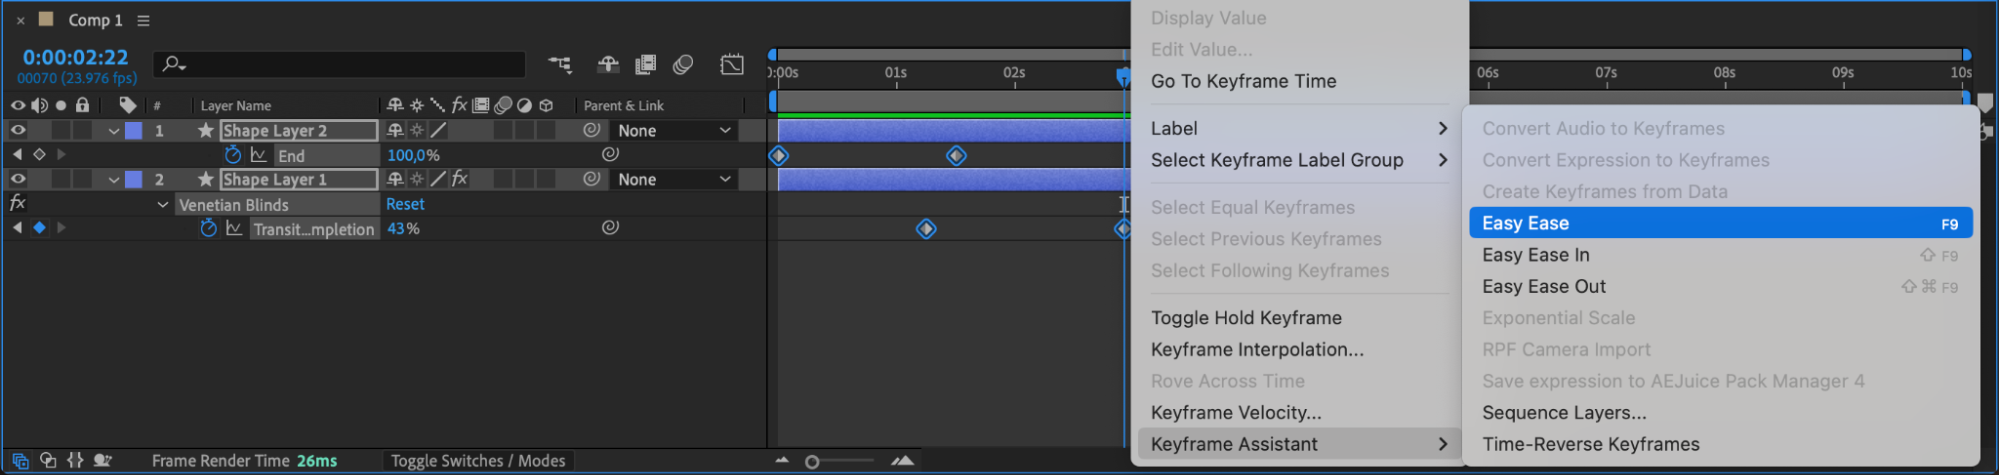 Step 8: Add a Warning Text
Select the Type Tool (Ctrl/Cmd + T) and type “WARNING” or any HUD-related text. Position it within the HUD interface.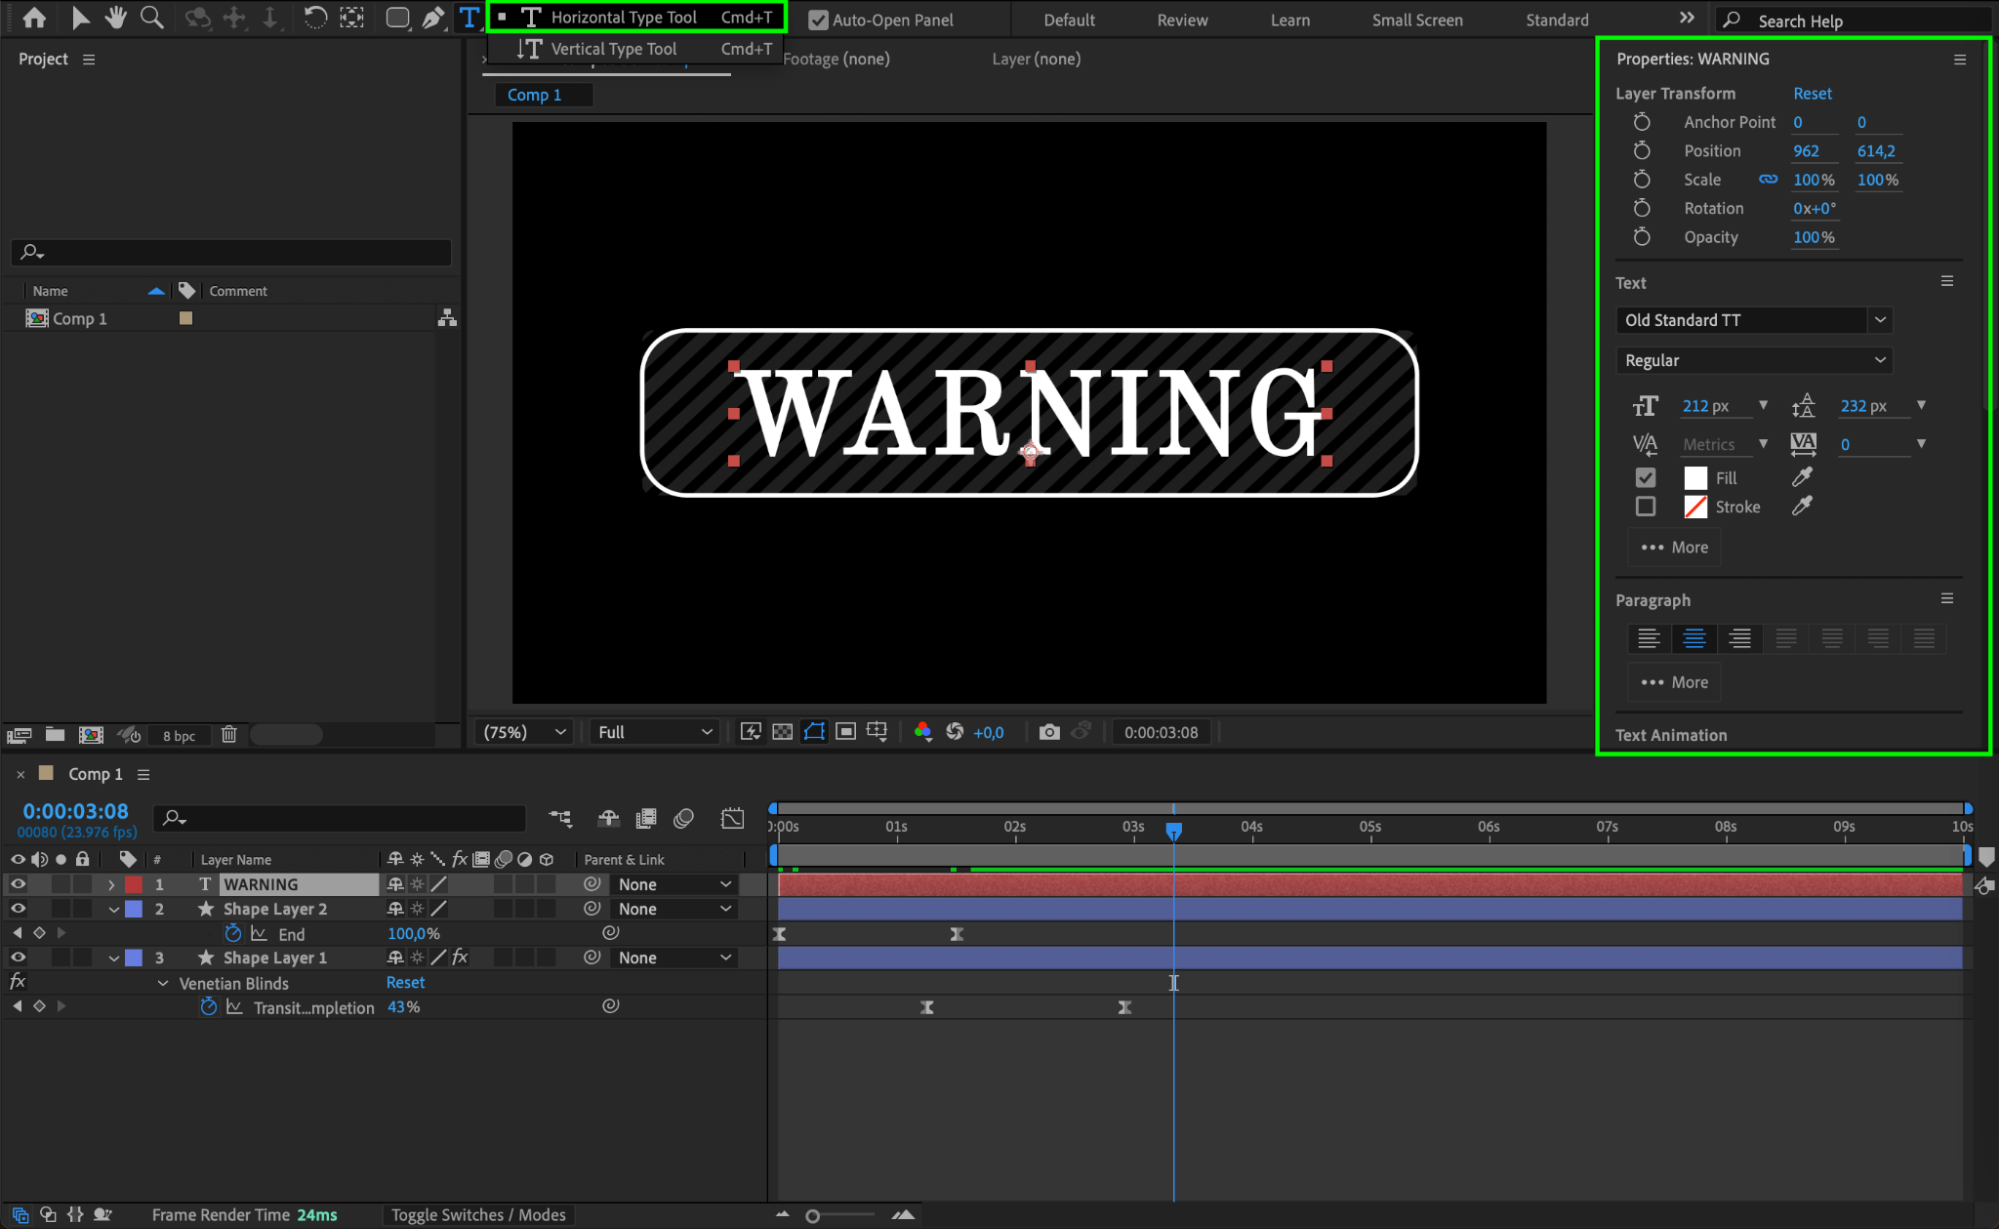 Step 9: Animate Text Opacit
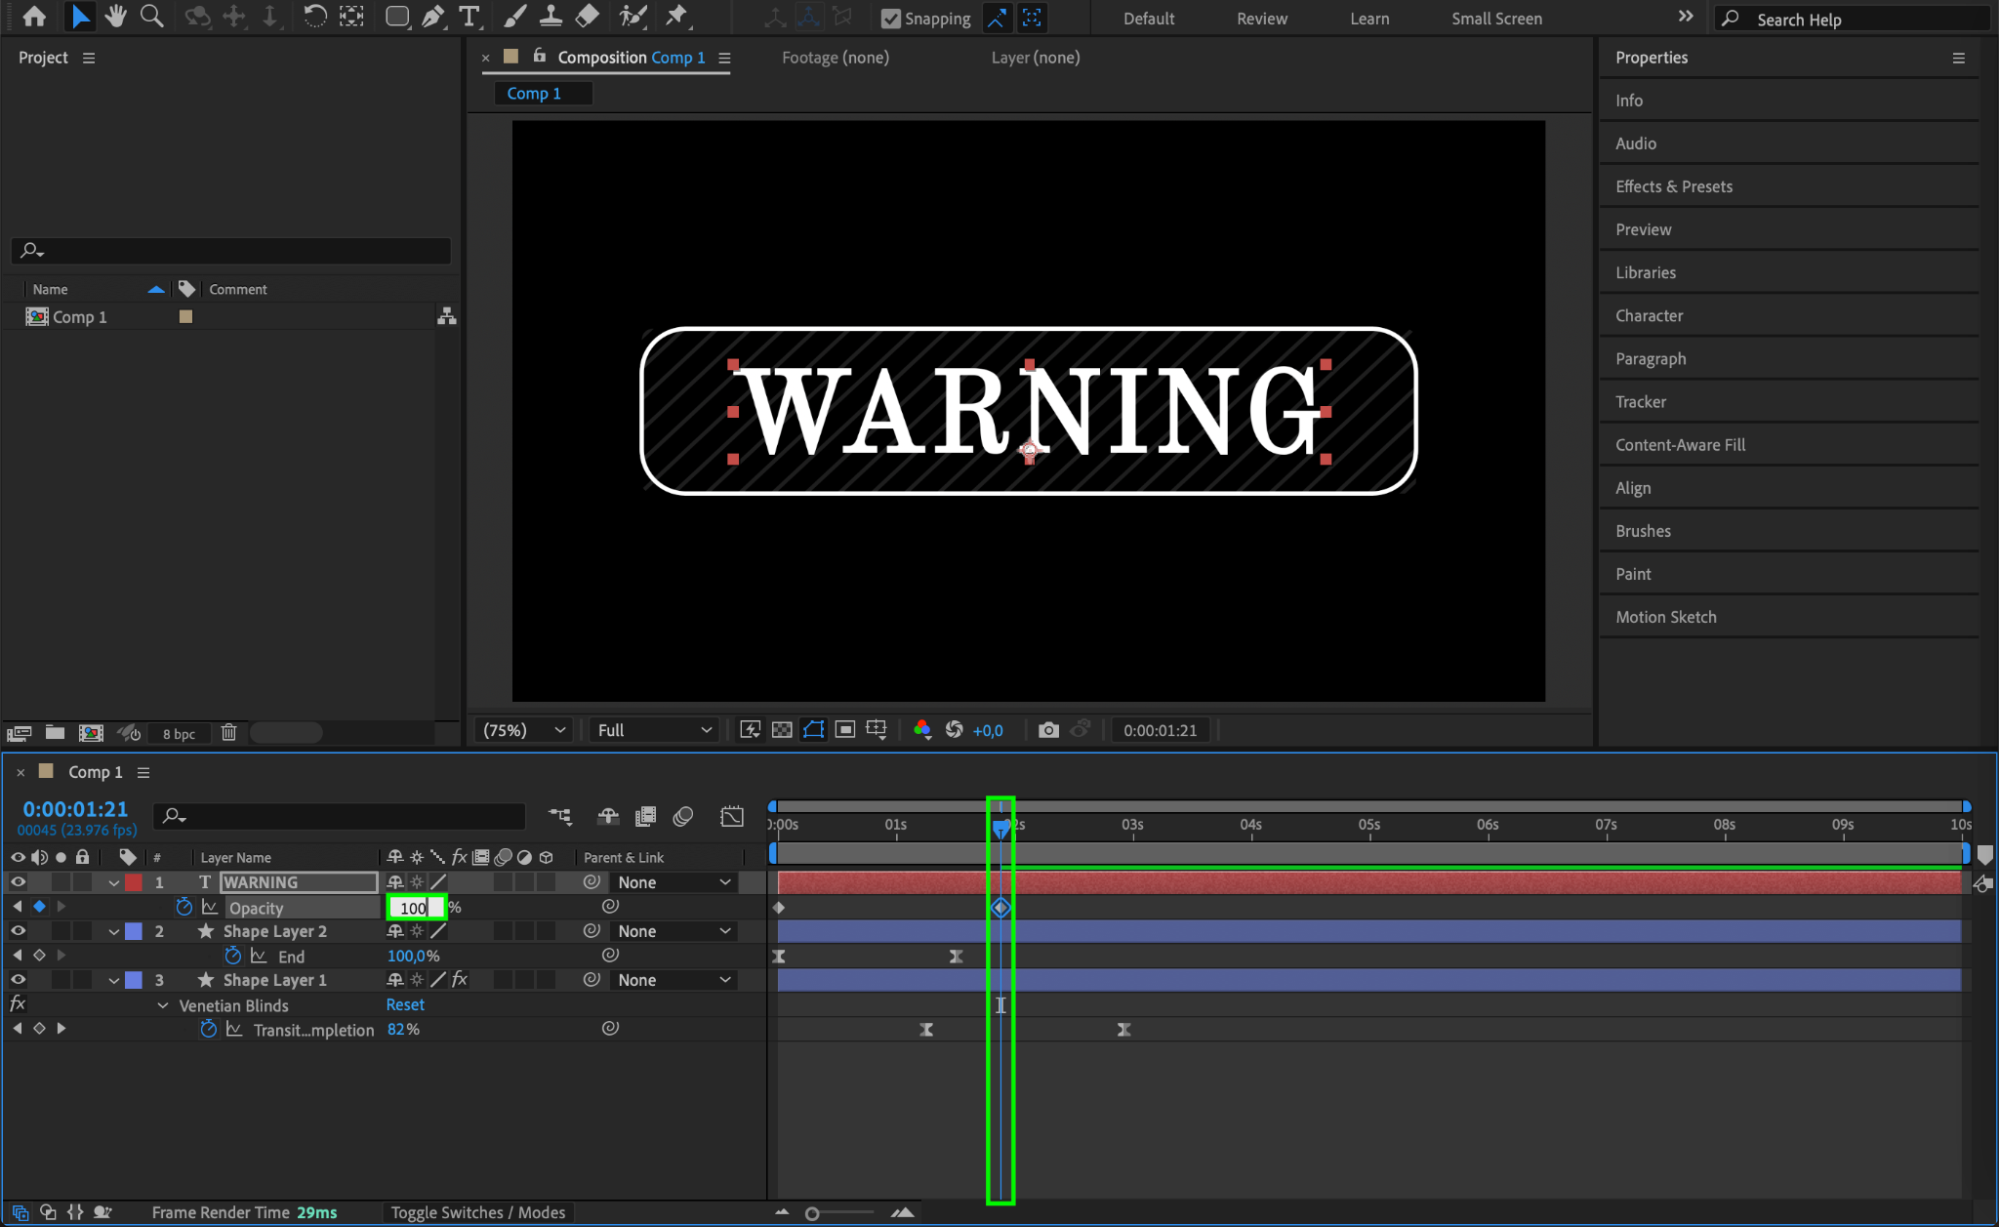
For the text layer, animate Opacity from 0% at the start to 100% after a few frames, then back to 0% again to create a blinking effect.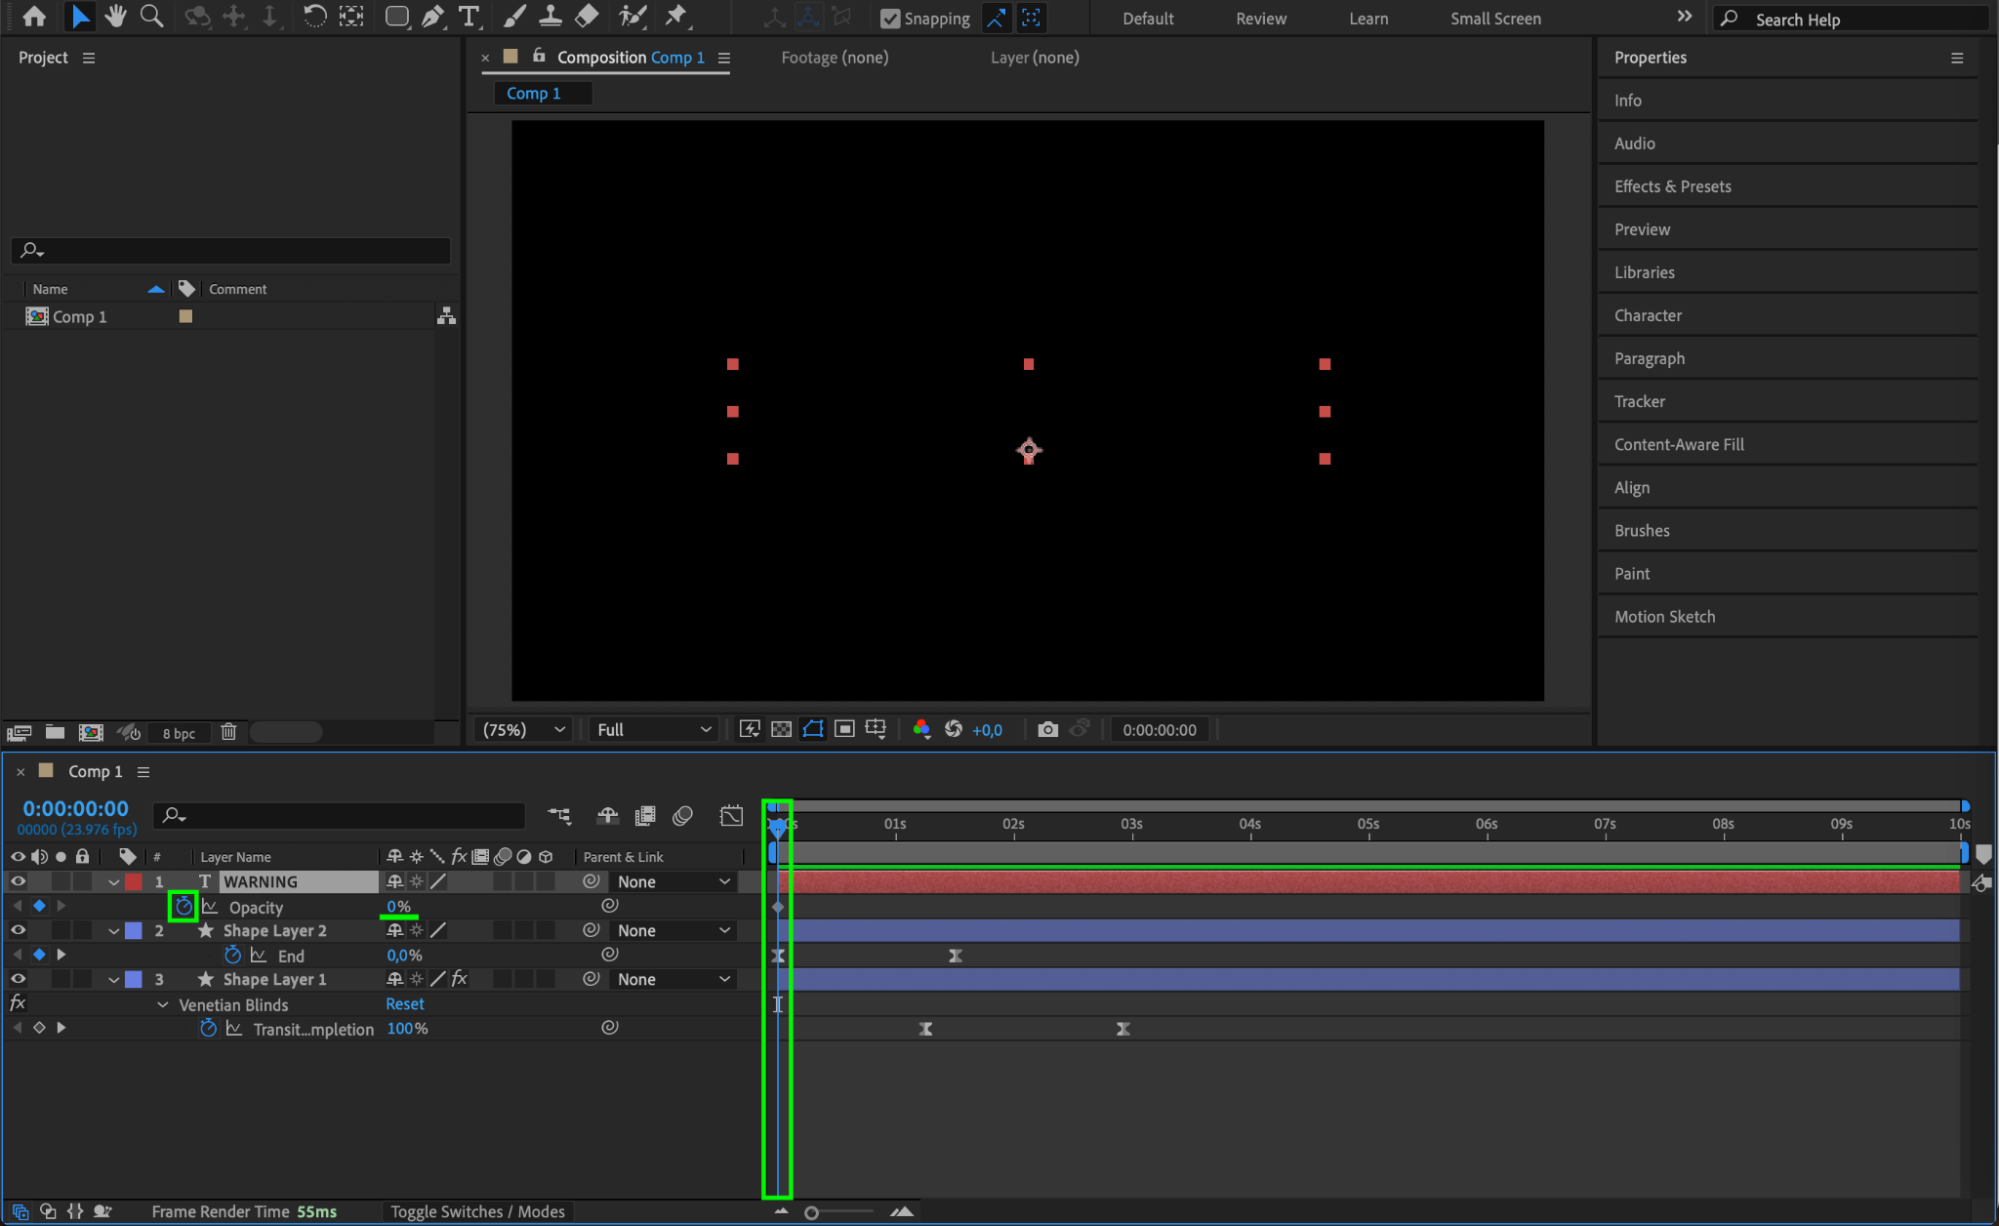
 Step 10: Add a Looping Expression
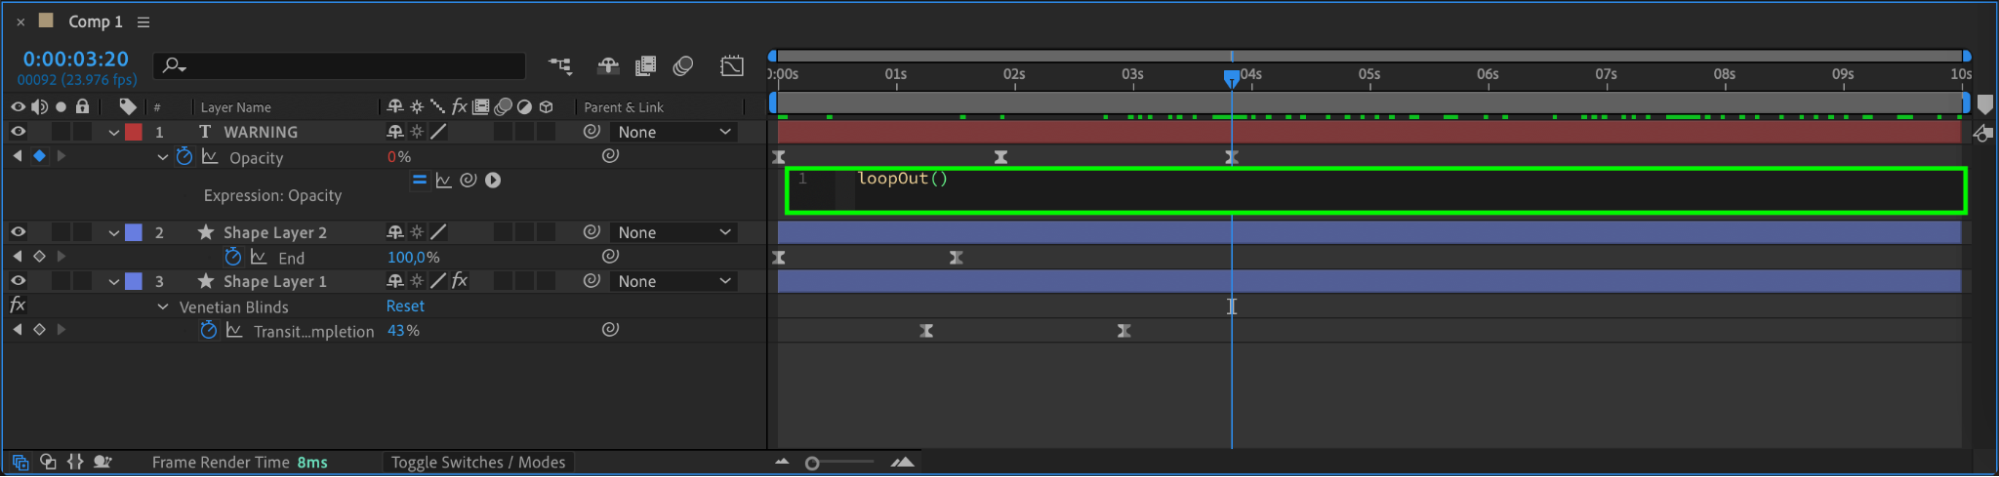
Select the text layer’s Opacity keyframes, go to Keyframe Assistant > Easy Ease, and add the expression:
loopOut()
This makes the blinking effect repeat continuously.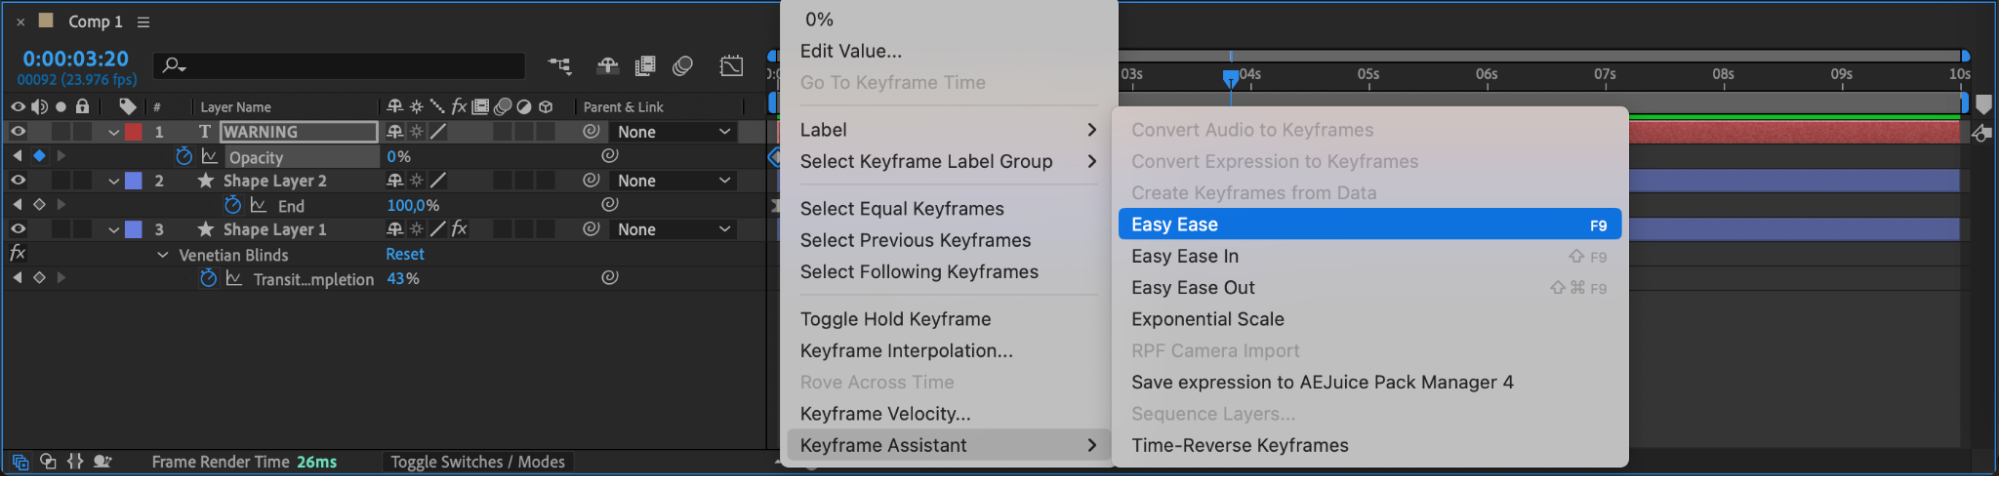
 Step 11: Add a Wiggle Effect to the Shape Layer
For the original shape layer, apply an expression to Opacity:
wiggle(7,10)
This creates a flickering effect, making the HUD look more dynamic.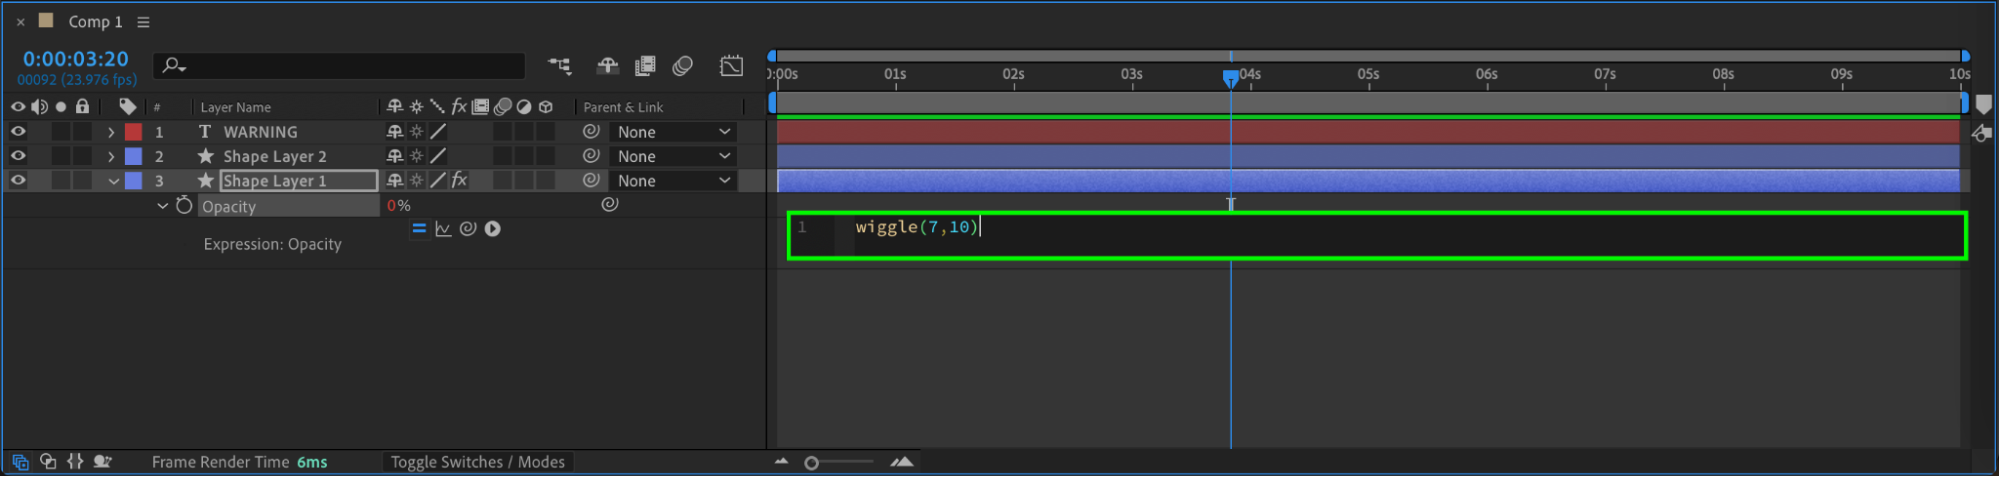 Step 12: Apply a Fill Effect
Select both the text and second shape layer, then apply the Fill Effect from the Effects & Presets panel to control their color dynamically.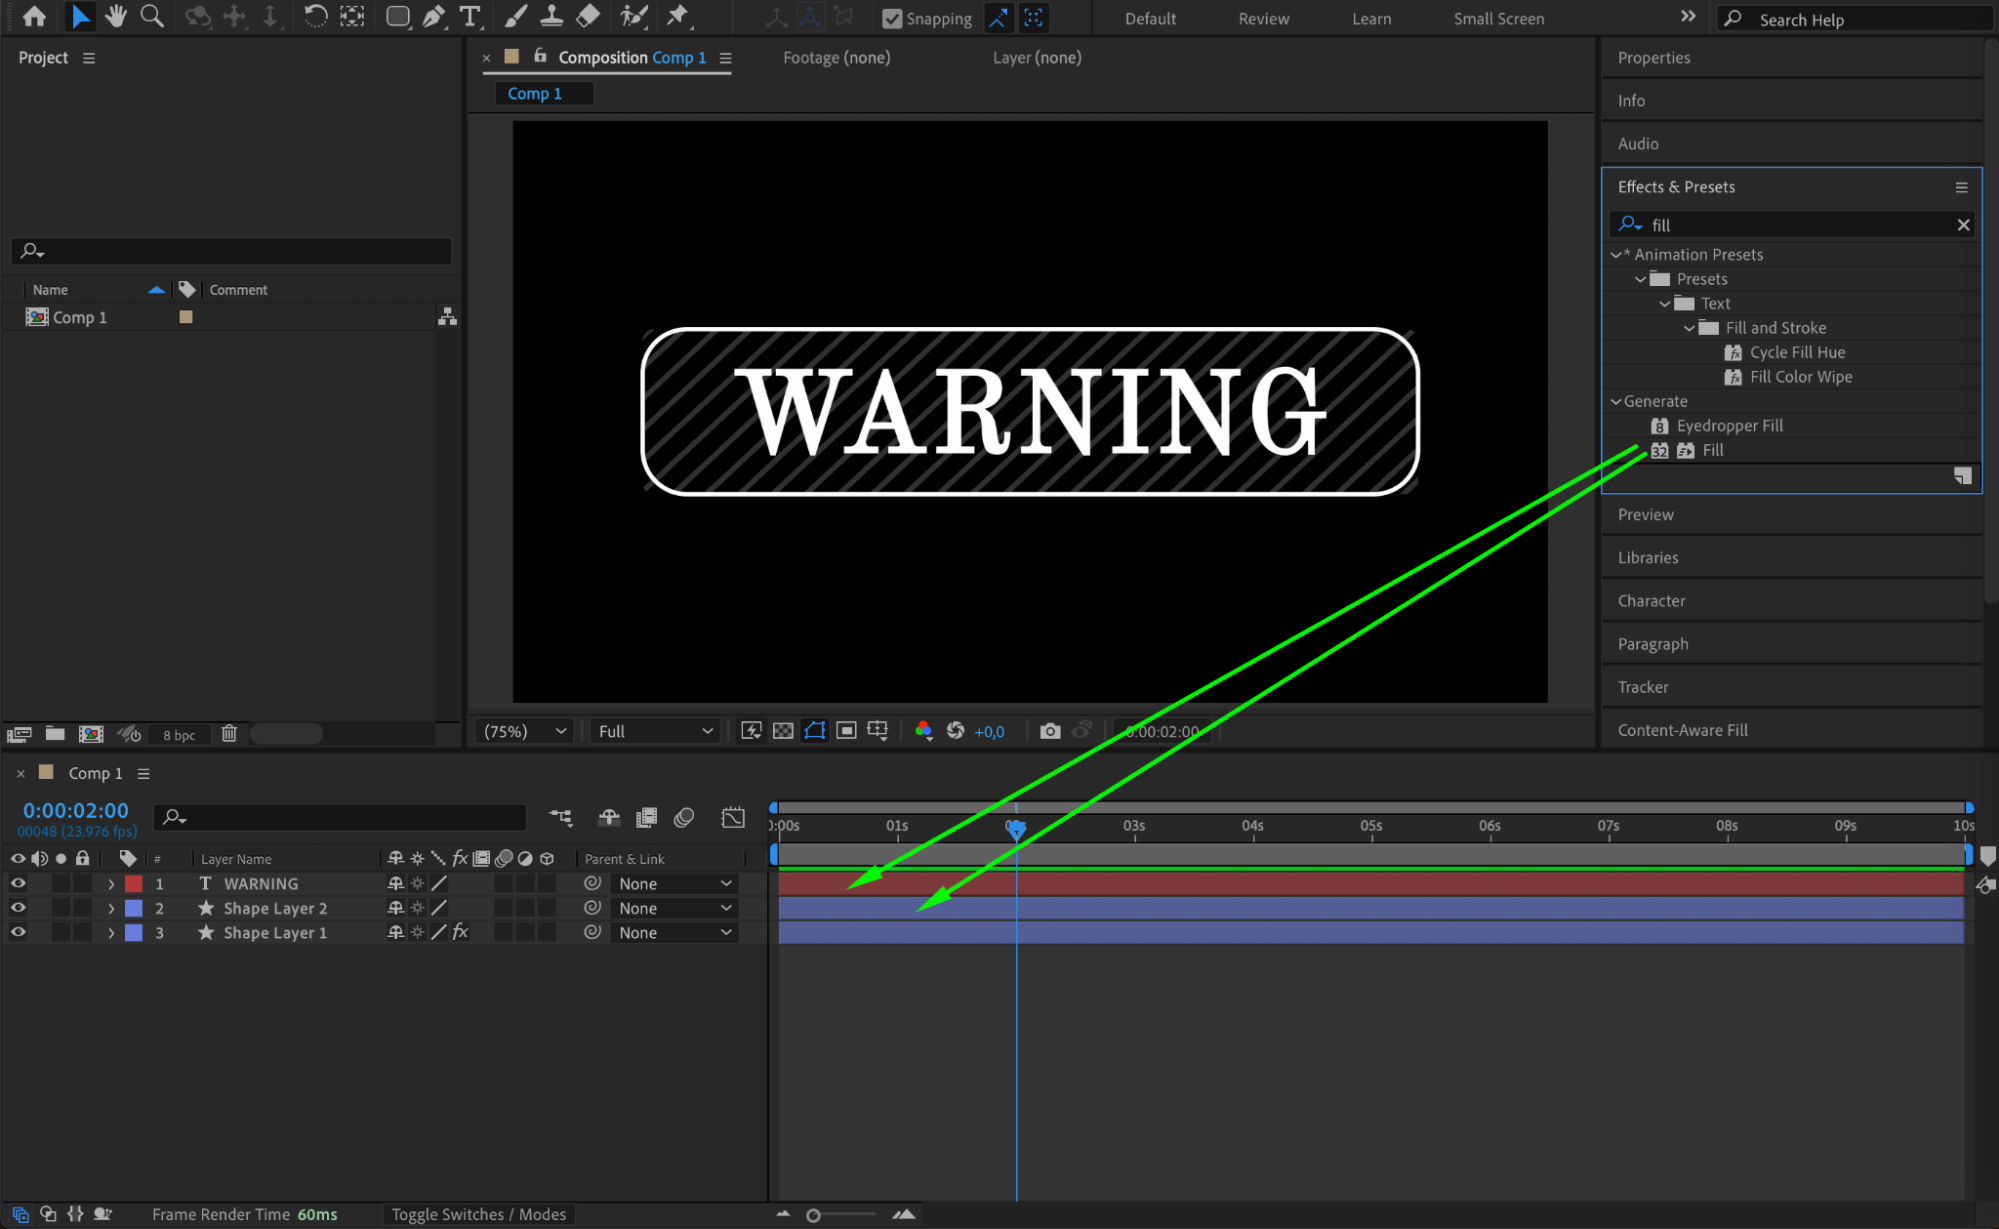 Step 13: Adjust Shape Roundness
For the original shape layer, set Roundness to 82 to smooth out the corners and give it a high-tech look.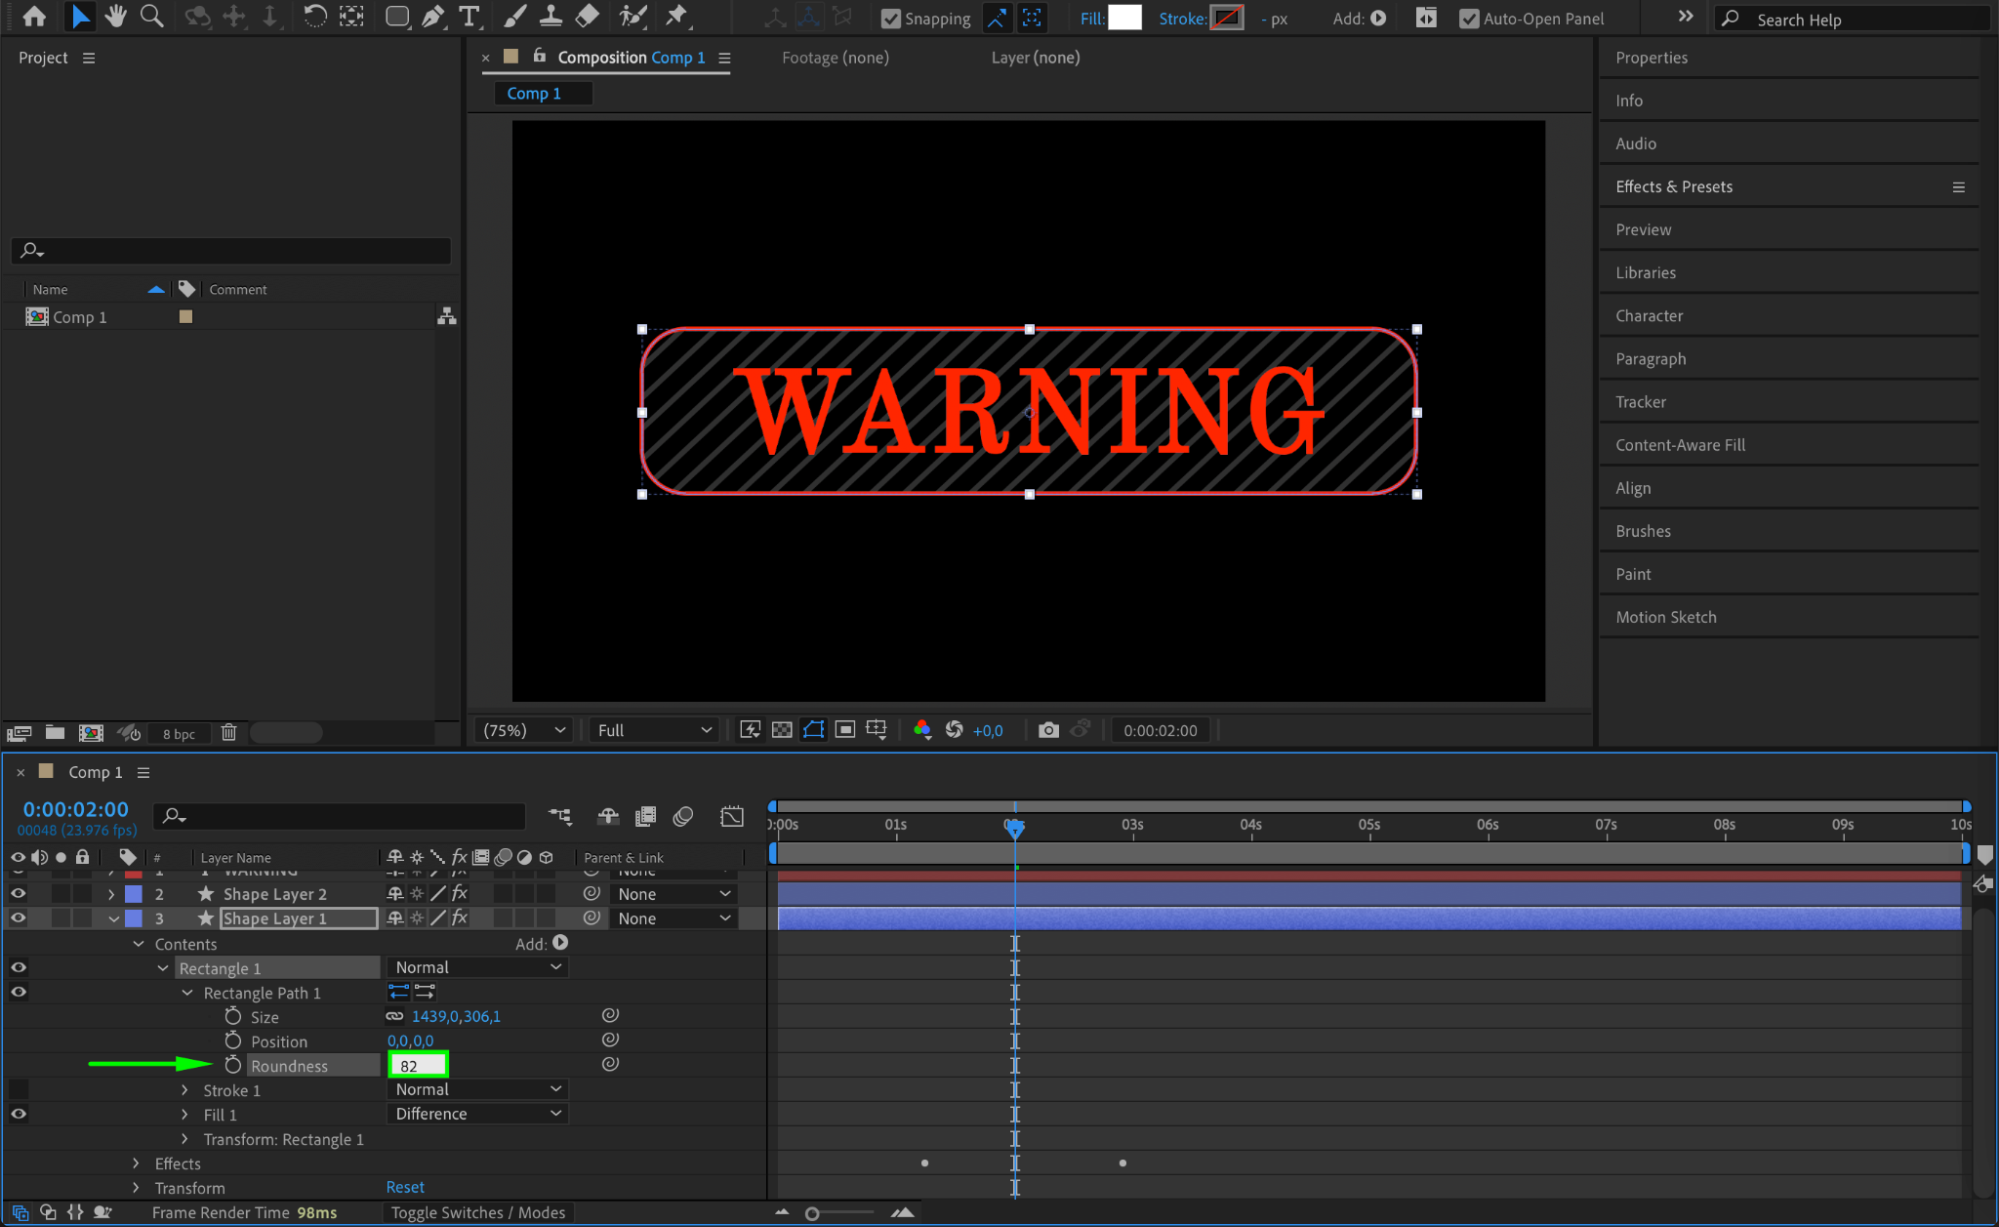 Step 14: Create an Outer Stroke
Duplicate Shape Layer 2, increase its scale, and position it as an outer border around the HUD interface to add more depth.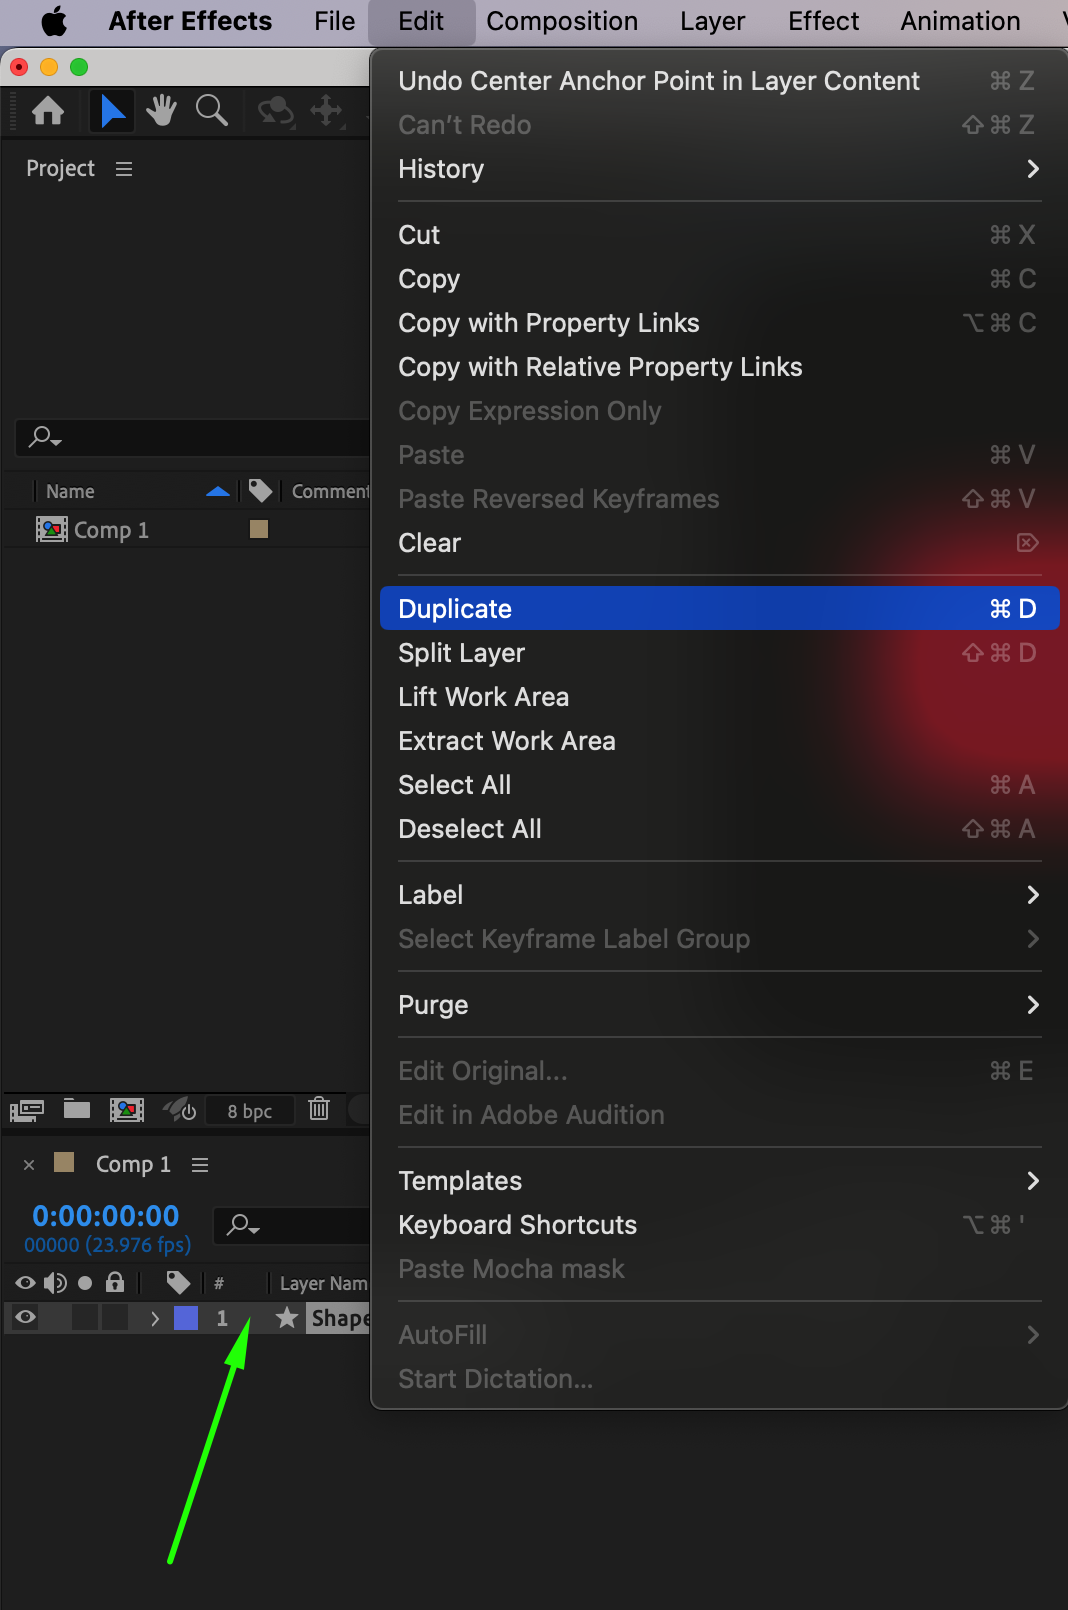
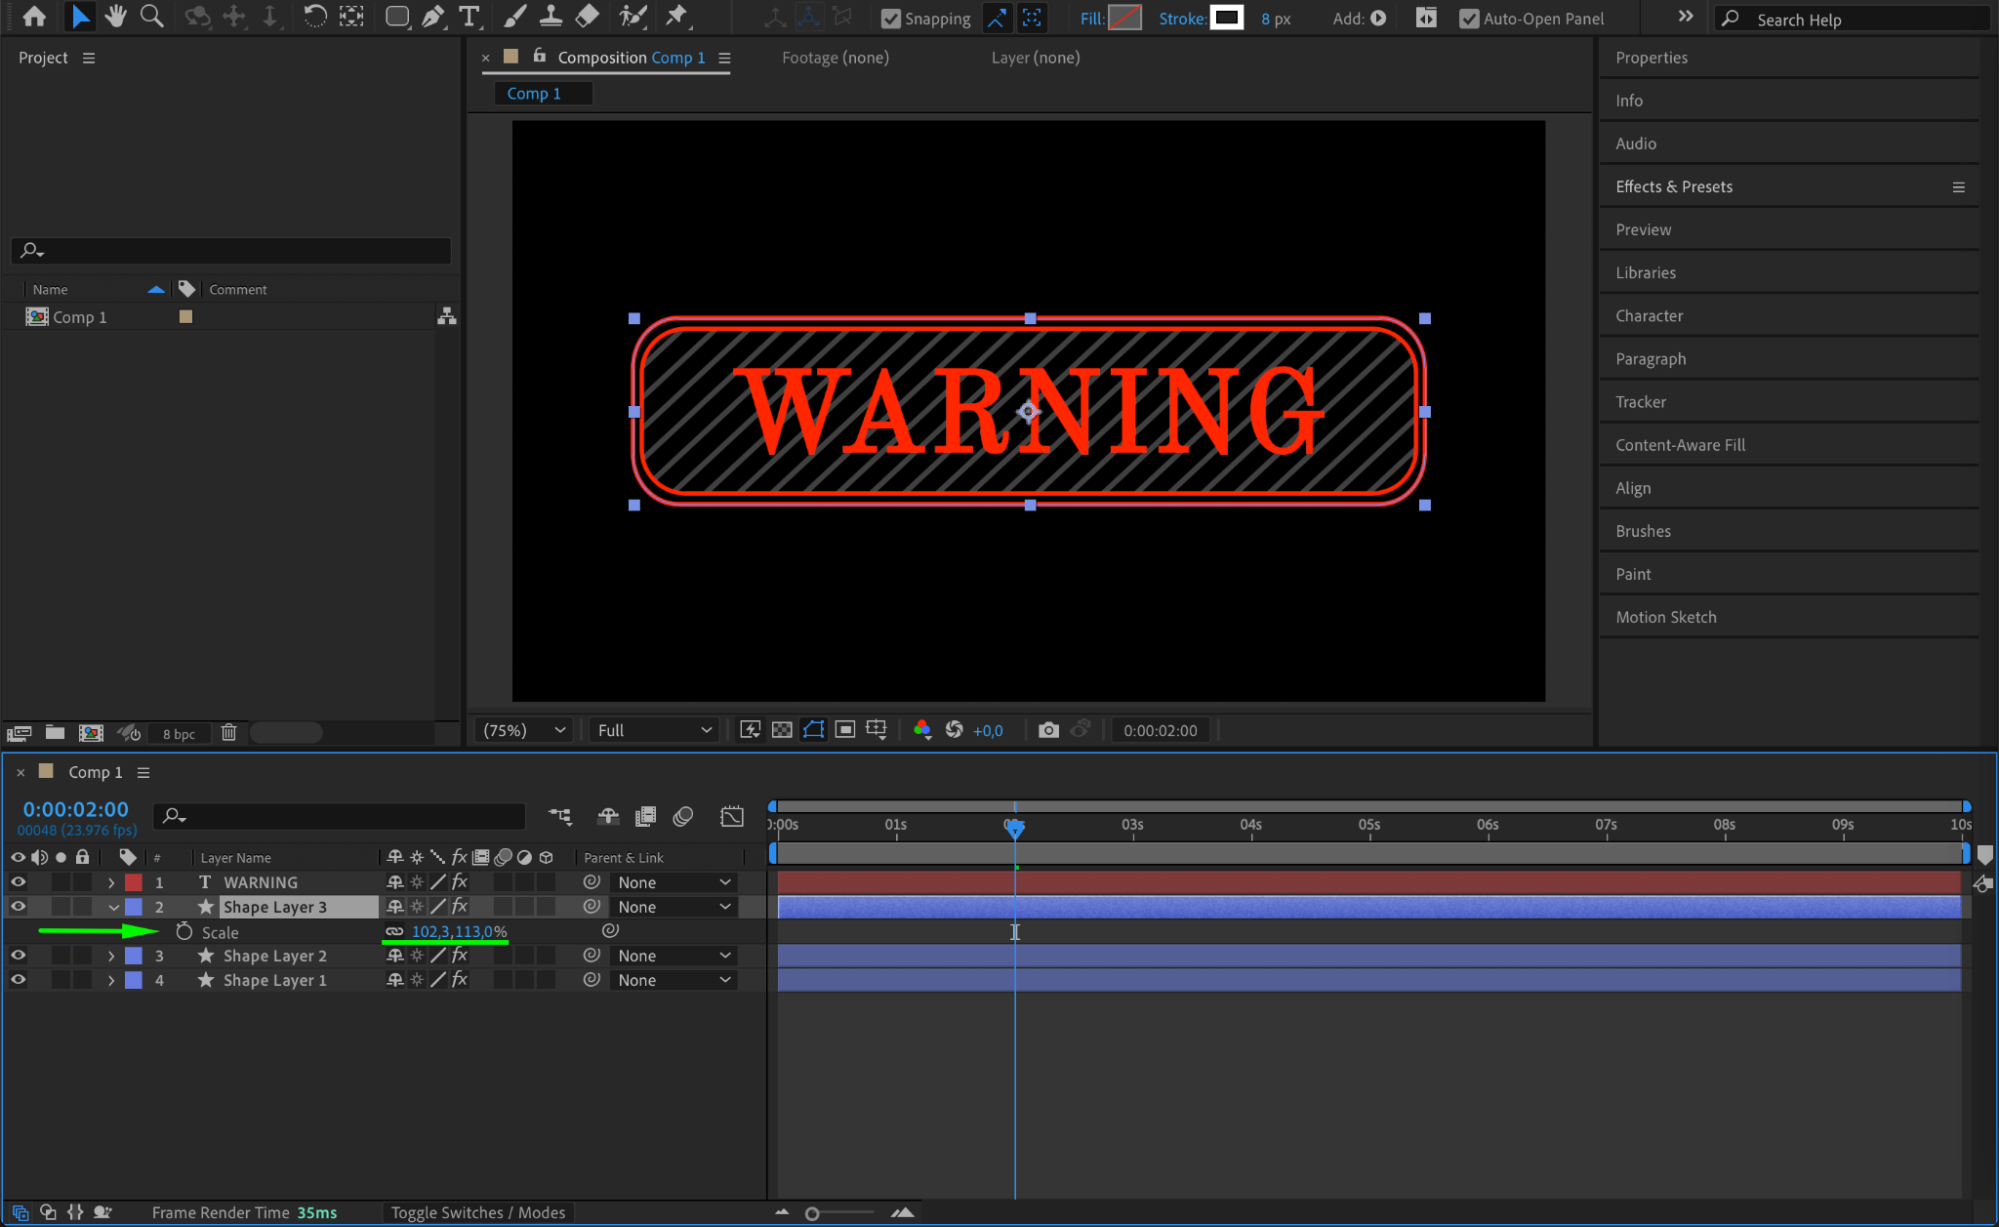 Step 15: Adjust Offset and Position
For Shape Layer 2, change Offset to 277 and slightly shift its position to the right to create movement in the HUD.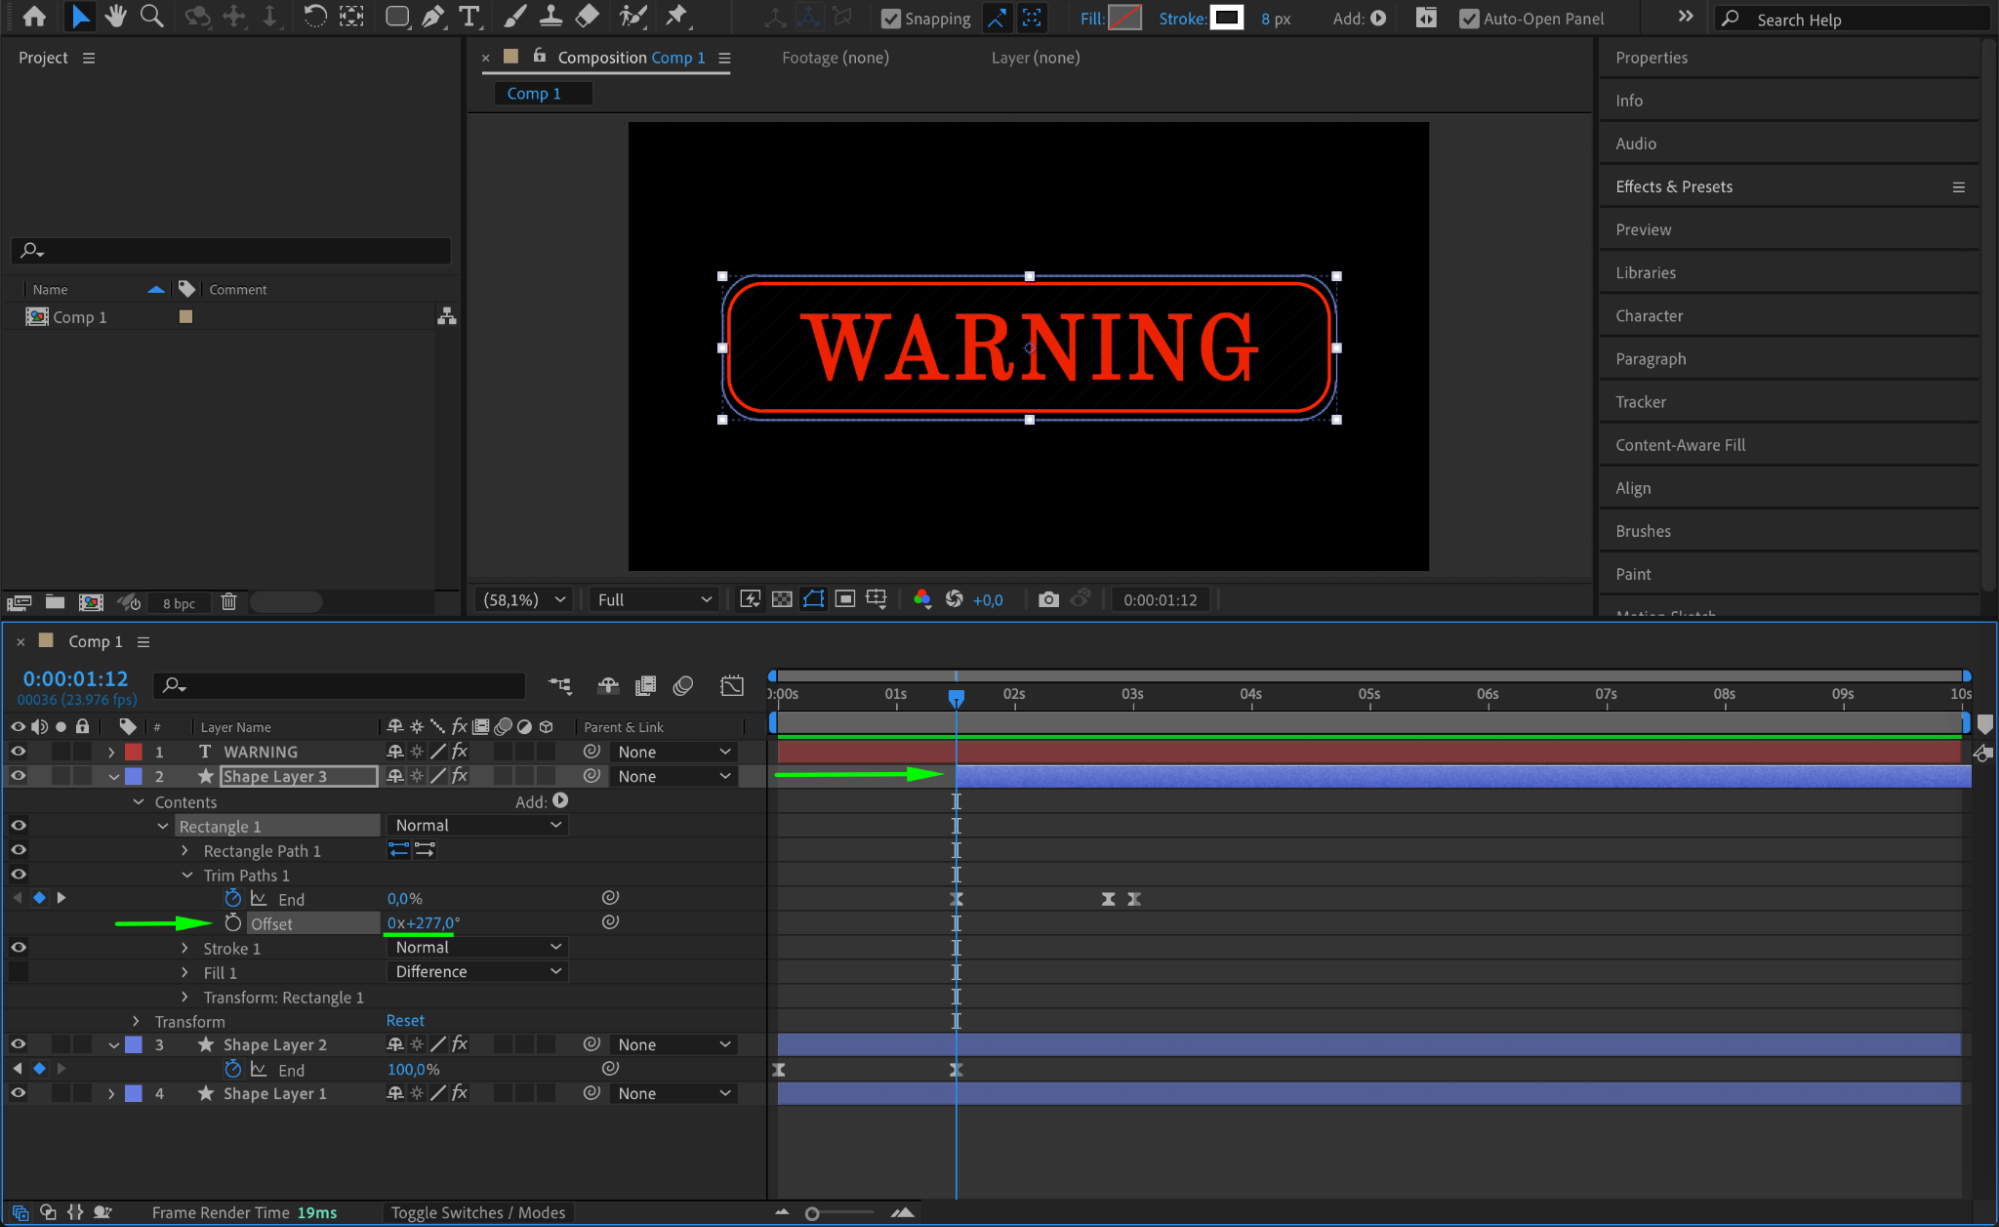 Step 16: Add a Glow Effect
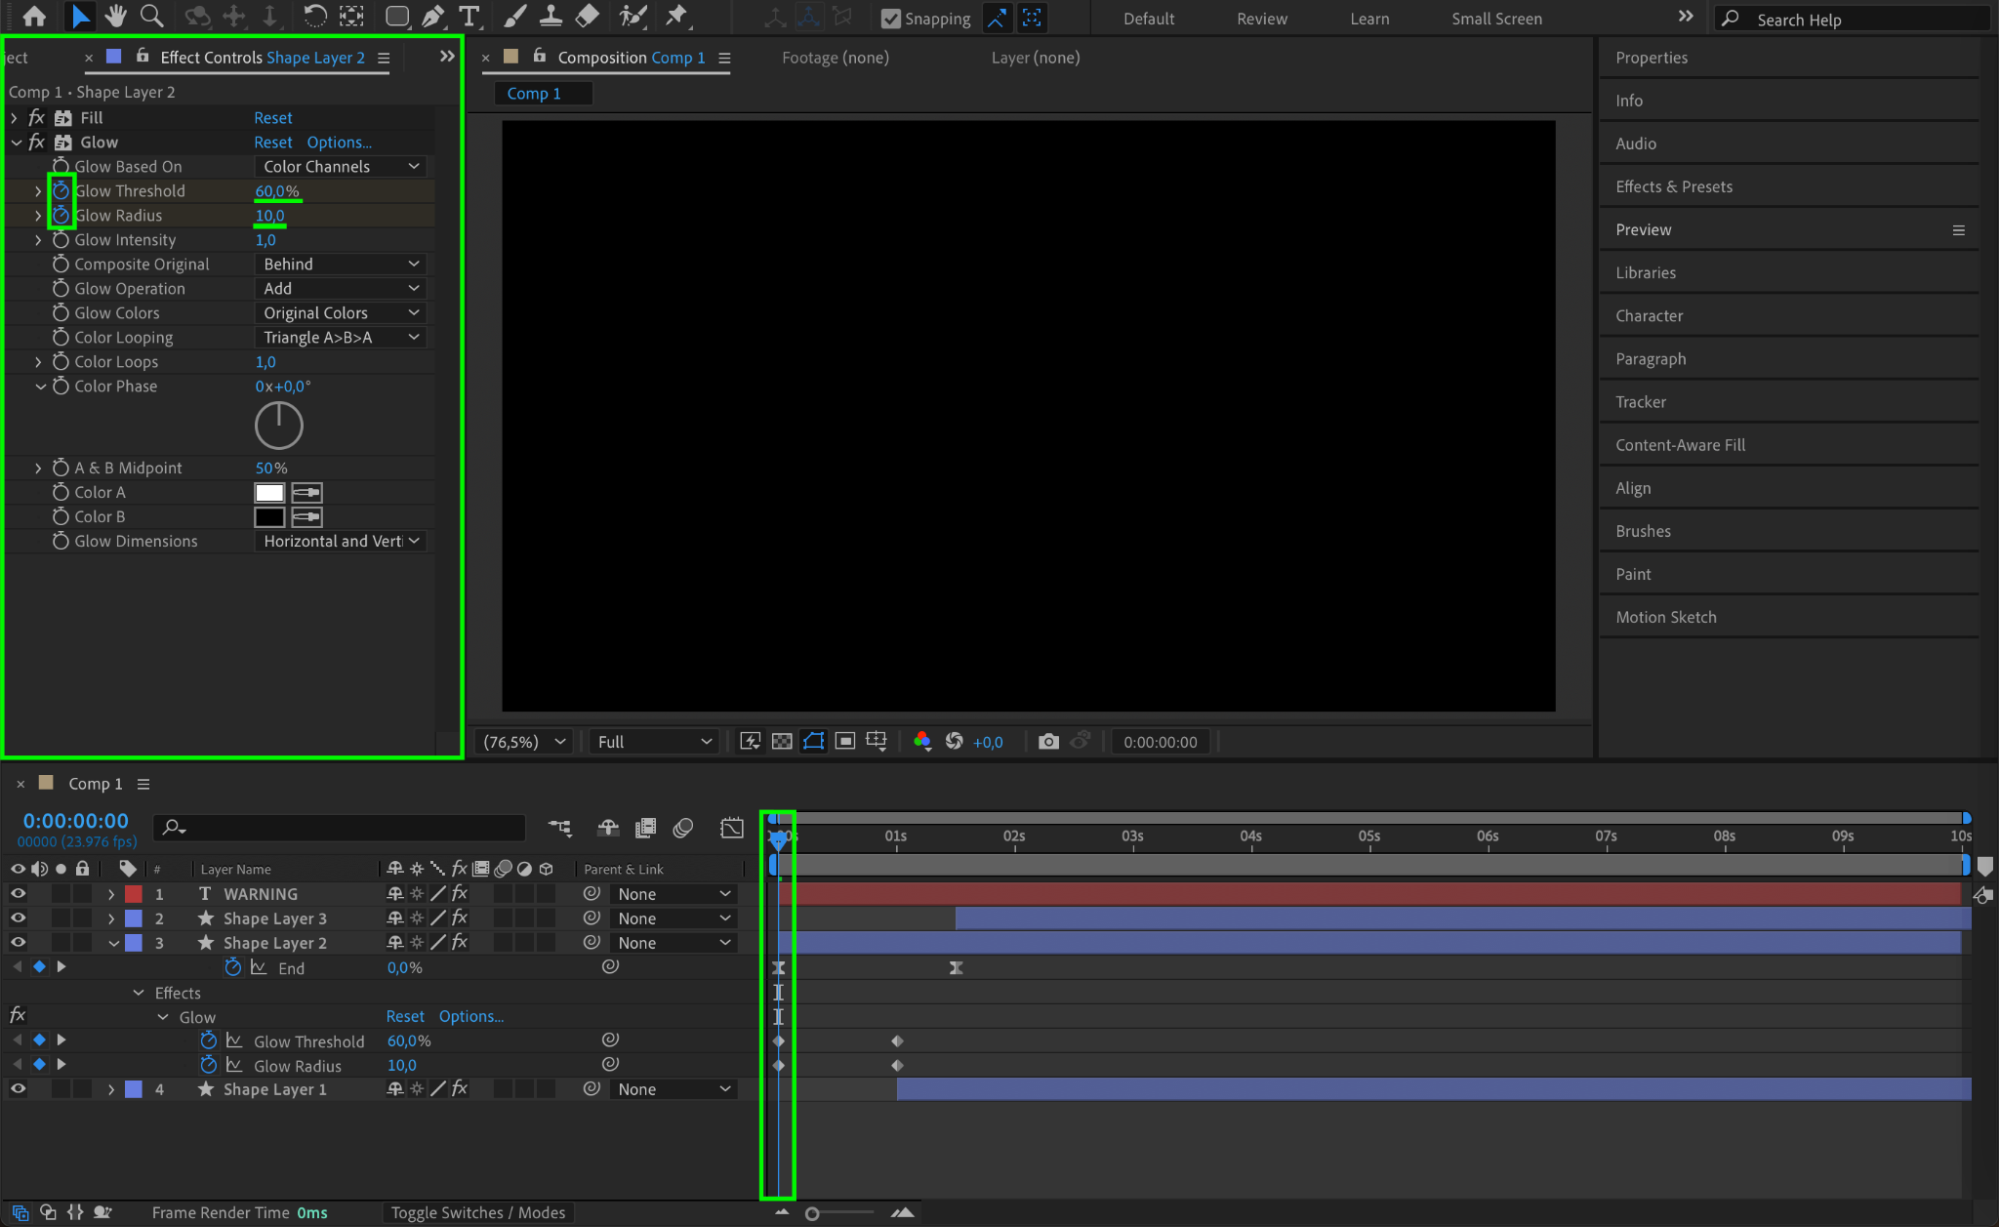
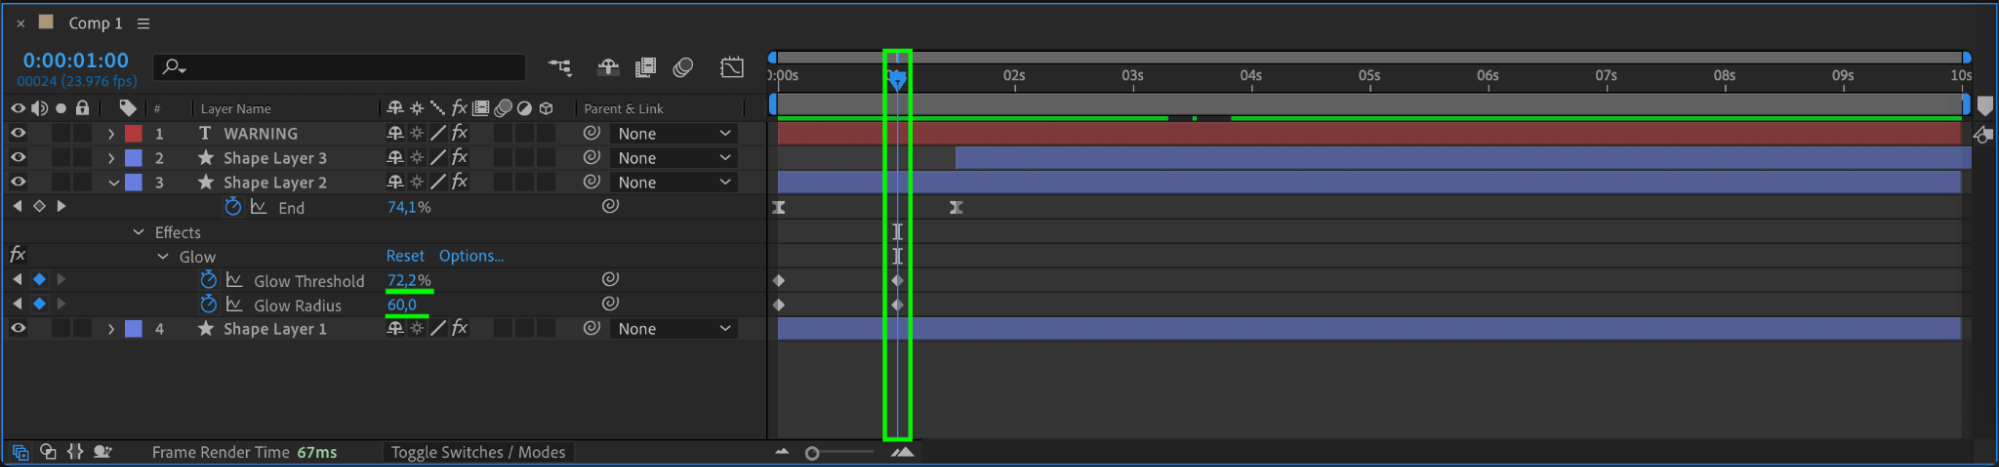
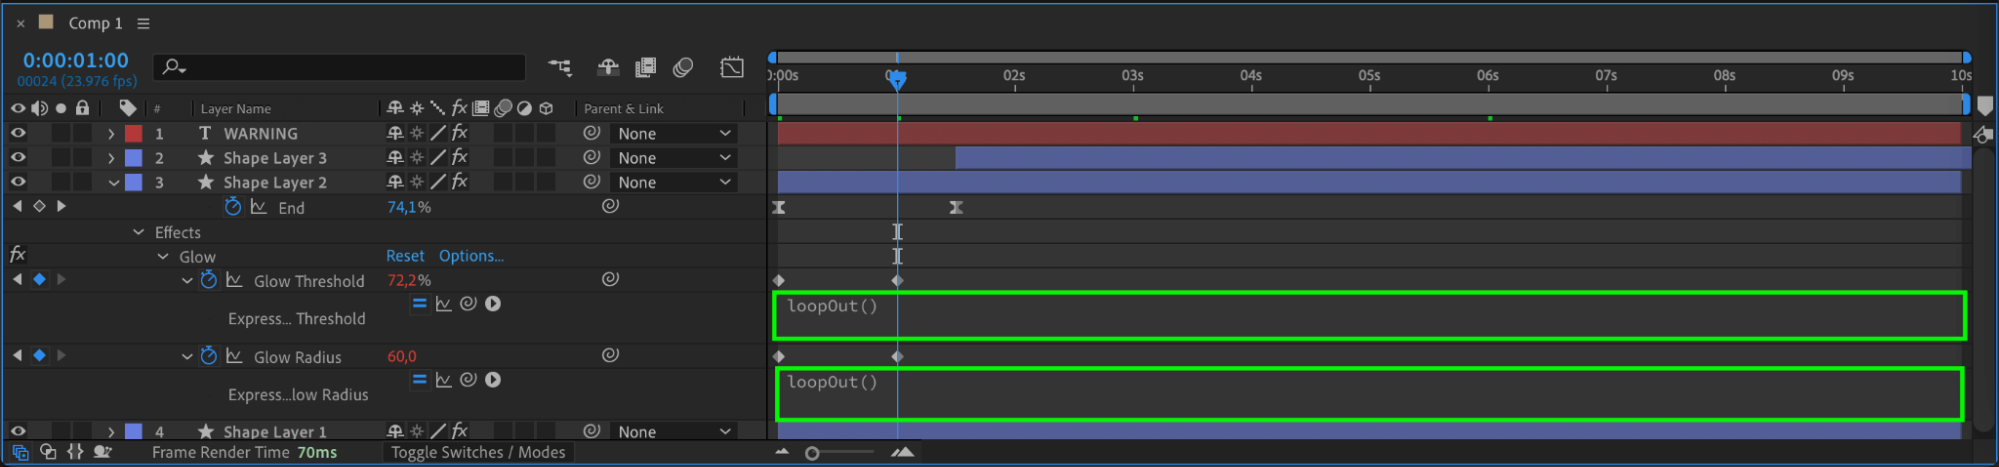
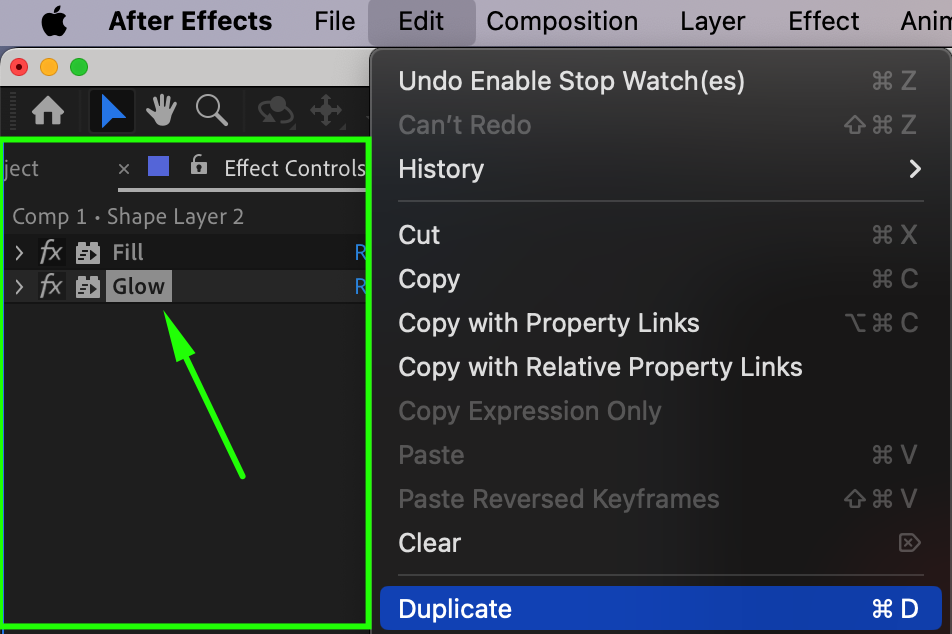
Select the Text Layer, Shape Layer 3, and Shape Layer 2, then apply the Glow Effect from the Effects & Presets panel. Set the Glow Threshold to 60 and the Glow Radius to 10 at the start. Over time, animate the Glow Threshold to 72 and the Glow Radius to 60 to create a dynamic glowing effect. To make the glow continuous, add the expression:
loopOut()
Finally, duplicate the Glow Effect on each layer to enhance the brightness and intensity.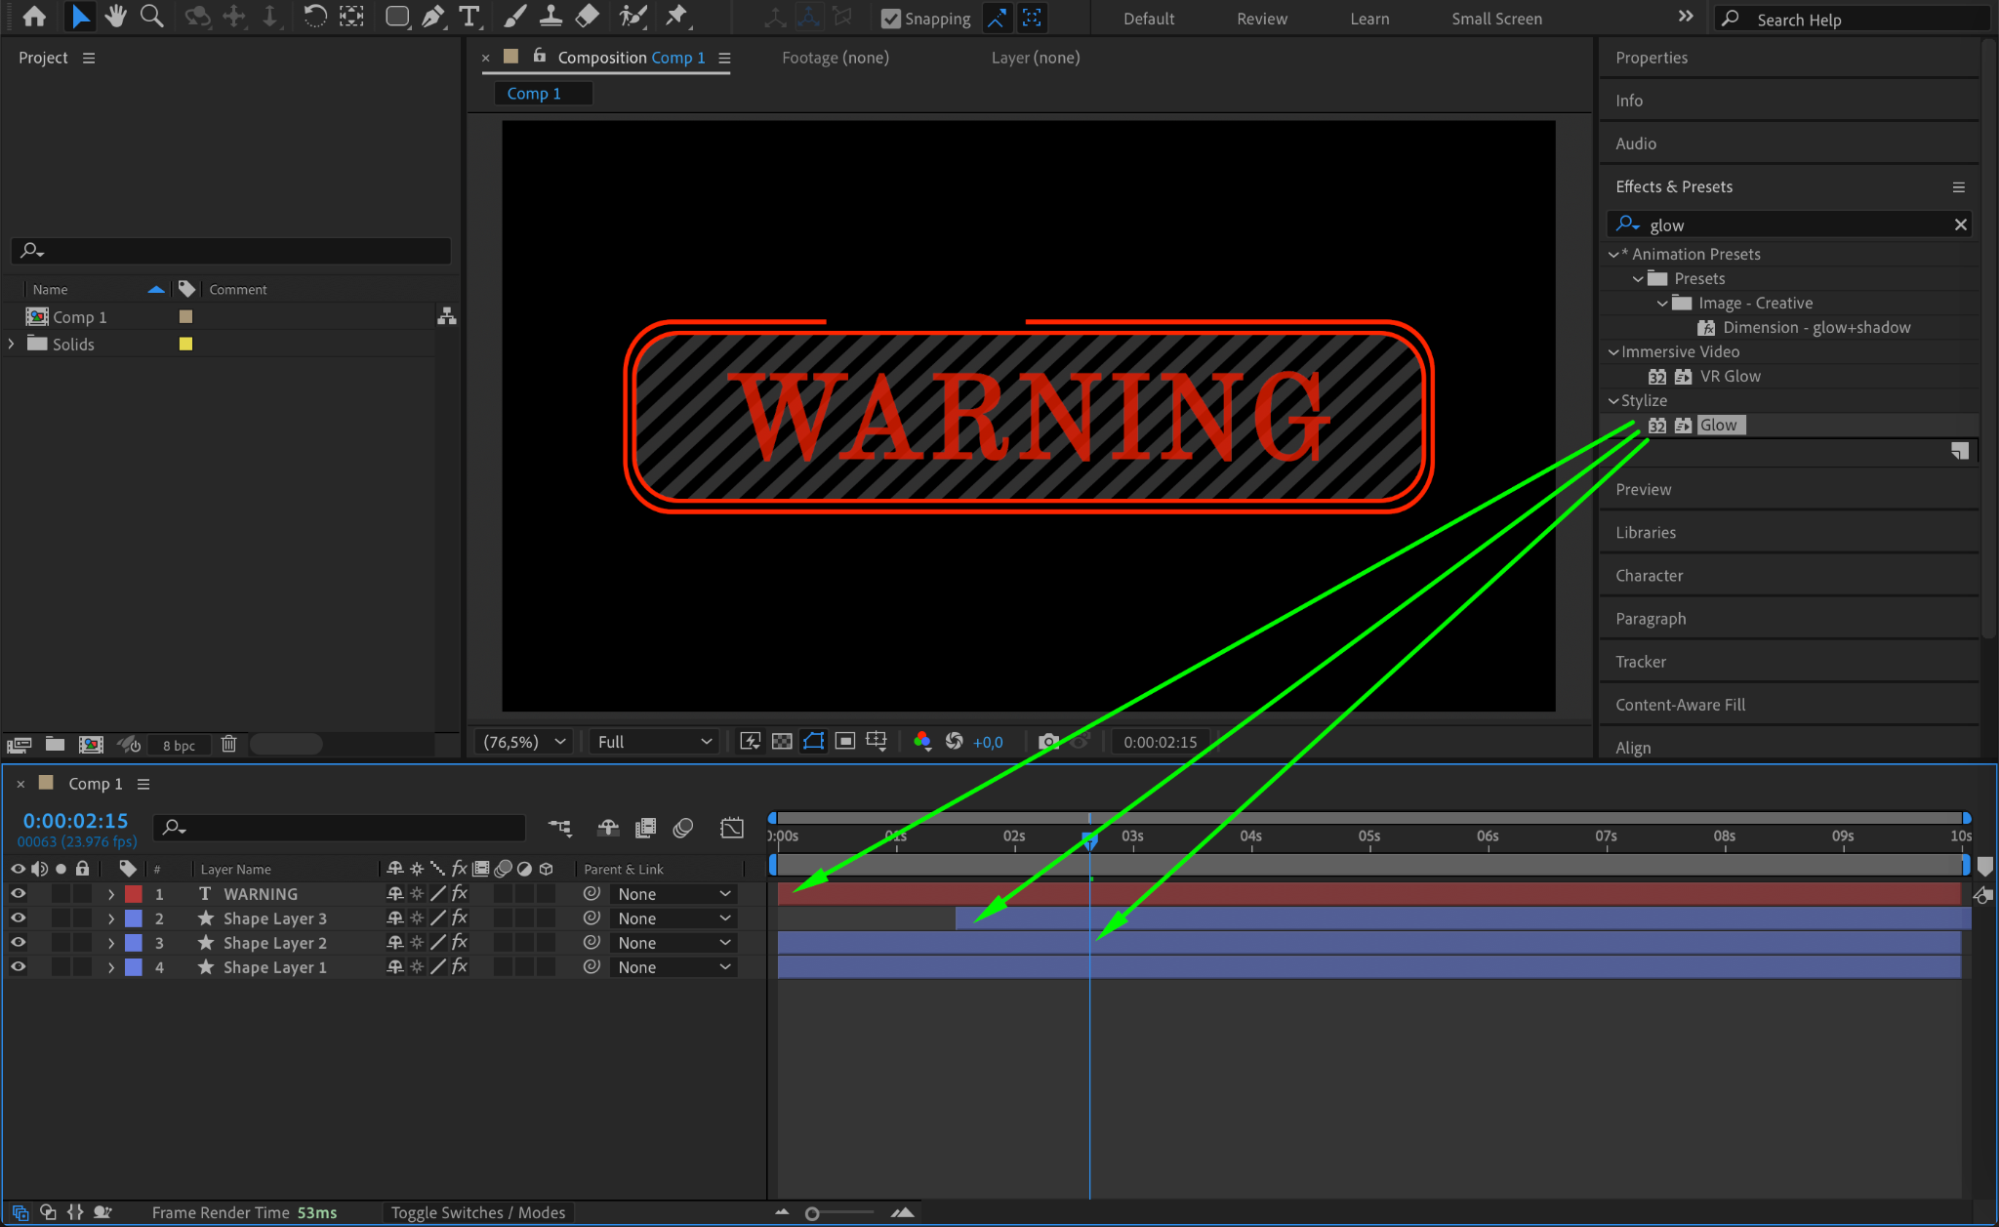
 Step 17: Preview the Animation
Press Spacebar to preview your animation. Adjust keyframes, opacity, and effects if needed to refine the look.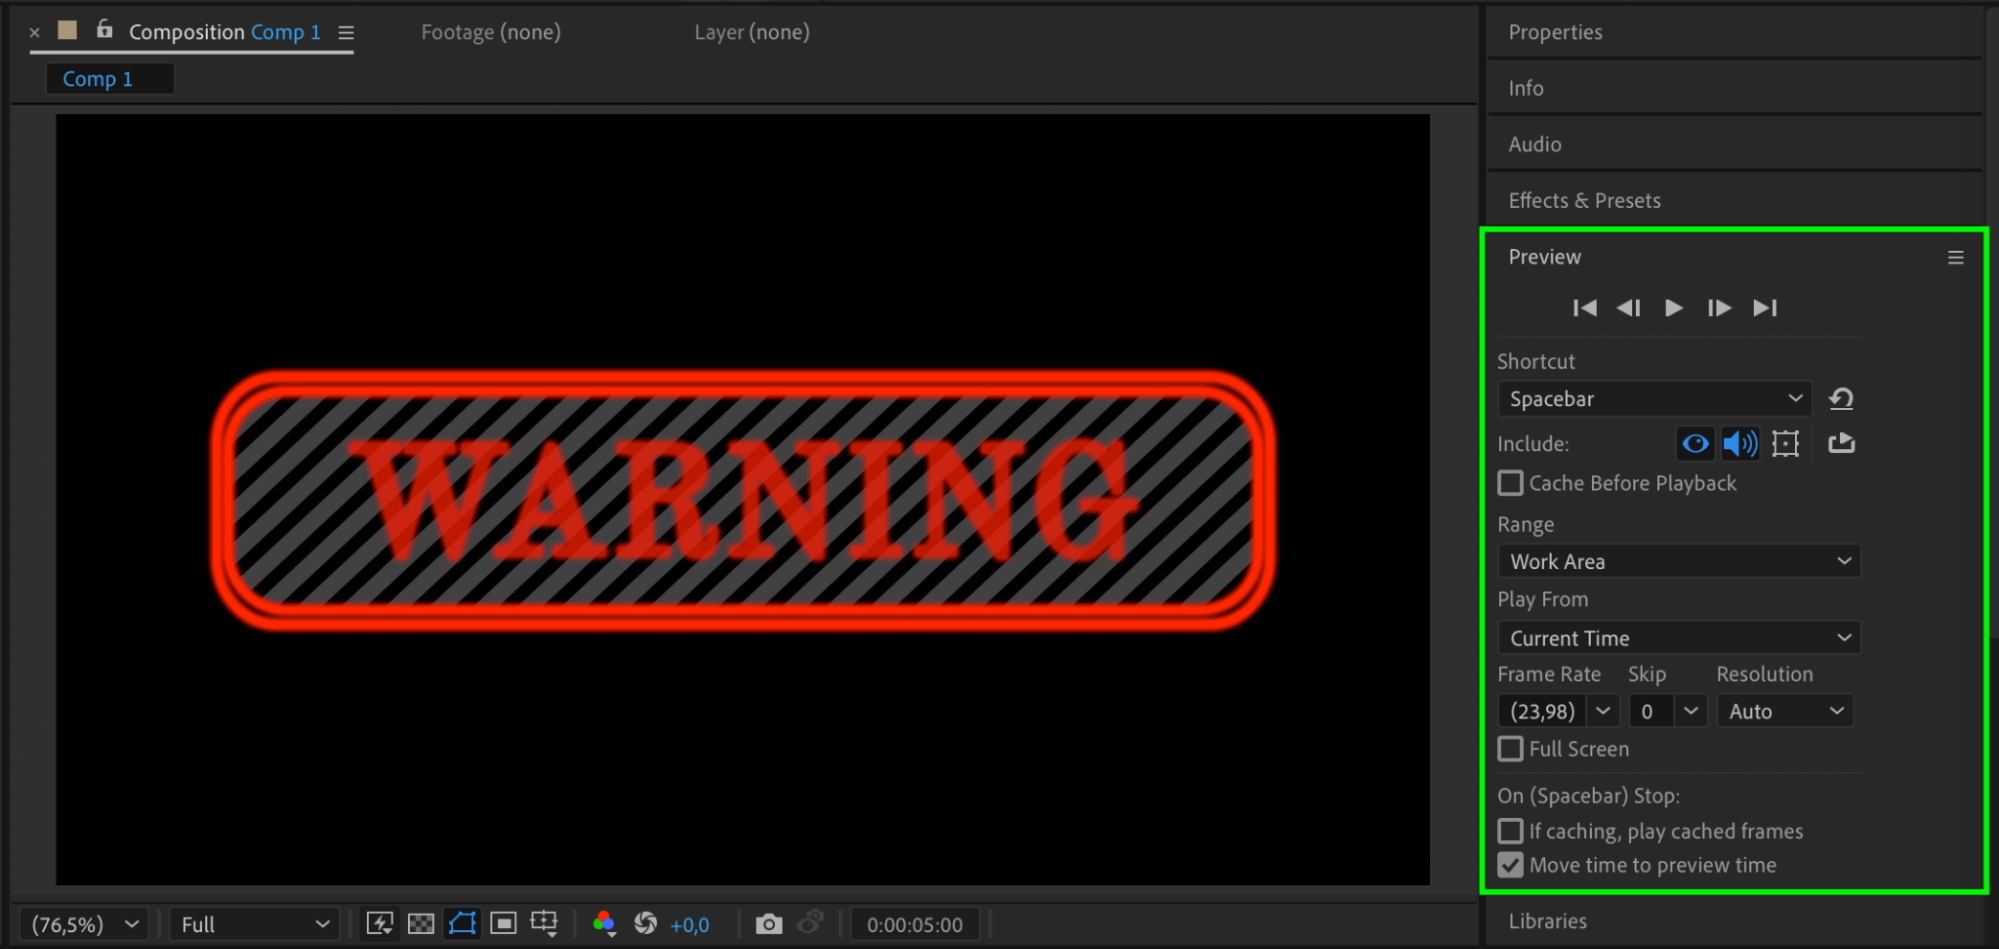 Conclusion
By following these steps, you can create a professional-looking HUD animation in After Effects. Using shape layers, trim paths, opacity effects, and glow, you can design a futuristic interface for sci-fi scenes, gaming overlays, or motion graphics projects.
Get 10% off when you subscribe to our newsletter

Our Bestsellers


