Creating a Smoke Effect in After Effects: A Step-by-Step Tutorial
Introduction: Unleash Creativity with Smoke Effects in After Effects
In the world of video editing and motion graphics, incorporating stunning visual effects can take your projects to a whole new level. Among the many effects that can bring life and depth to your videos, the smoke effect stands out as a powerful tool to mesmerize viewers. With its ethereal movement and atmospheric touch, smoke can add drama, mystery, and a touch of magic to any scene.
Fortunately, creating smoke effects in After Effects doesn’t require magic or advanced technical skills. In this quick tutorial, we will walk you through the basic techniques that anyone with basic knowledge of After Effects can use. Regardless of the level you’re currently at, get ready to learn how to master the art of smoke effects When creating a quick and easy smoke animation in your presets.
Through this quick tutorial, we’ll assume you already have the right footage, and know your way around the After Effects interface.
So, let’s dive into the world of smoke effects, after getting some coffee!
Whether you want to add a touch of mystique to a title sequence, create a smoldering explosion, or generate a stream of magical smoke, this tutorial has got you covered. So let’s kickstart your journey to becoming a smoke effects master in After Effects!
Tips and Tricks for Creating Spectacular Smoke Effects
Creating realistic and visually striking smoke effects in After Effects requires attention to detail and some clever techniques. Here are some valuable tips and tricks to help you level up your smoke effect game:
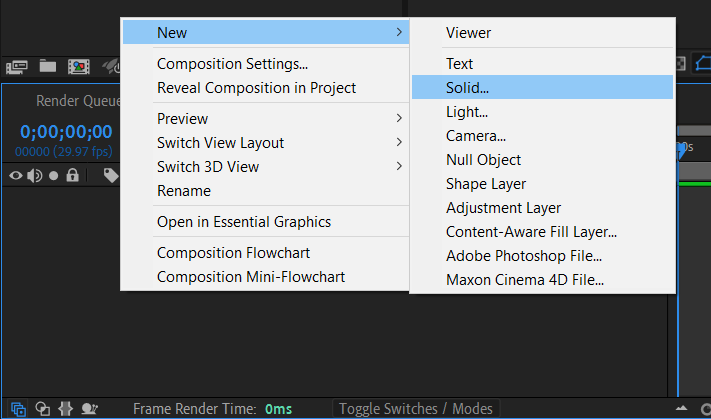
1. Create a solid layer
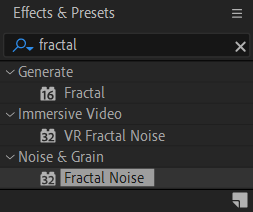
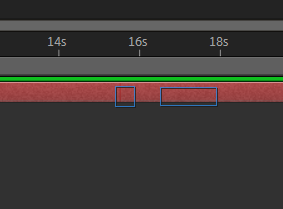
To begin, establish a pristine white solid layer as the foundation for your design. Following this, implement the Fractal Noise effect, a versatile tool renowned for crafting intricate organic textures, notably suitable for simulating smoke.
Get 10% off when you subscribe to our newsletter

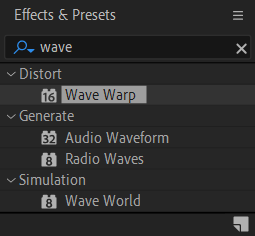
Introduce the Wave Warp effect to instill dynamic motion, lending an animated quality to the ethereal smoke.
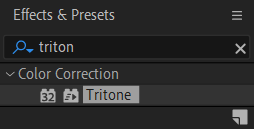
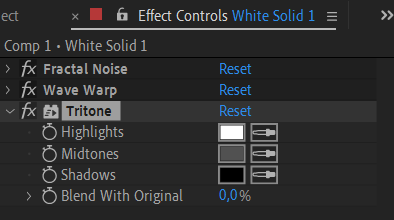
Enhance the visual richness by applying the Tritone effect, allowing for the nuanced infusion of color gradients that will elevate the overall aesthetic.
To heighten realism, judiciously employ the “Turbulent Displace” effect, introducing subtle distortions that mimic the turbulence inherent in authentic smoke formations.



2. Configure Fractal Noise Effect
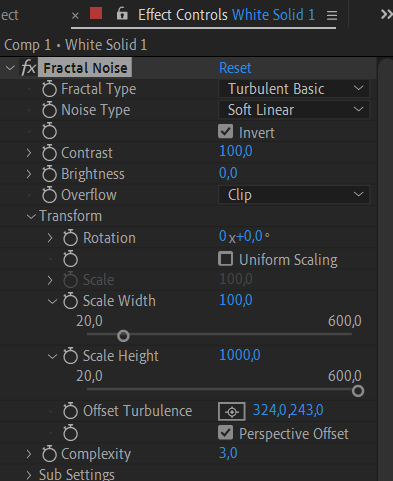
Begin by transforming the Fractal Noise effect with precision: opt for the Turbulent Basic Fractal type, introduce a Soft Linear Noise Type, and enhance the composition by activating the Invert option.
Infuse dynamic depth by animating the contrast option, smoothly transitioning from 100 to 125, while maintaining a constant Brightness at 0.0; engage the Stopwatch Button for seamless animation.
Cap off this phase by selecting ‘clip’ from the overflow menu. Navigate to the Transform menu for nuanced adjustments – disable Uniform Scaling, setting the Scale width to 100.0 and the Scale height to 1000.0.
Elevate the visual complexity by tweaking the Offset turbulence to 324,243, embrace the Perspective offset option, and refine the intricacy with a Complexity setting of 3.0.
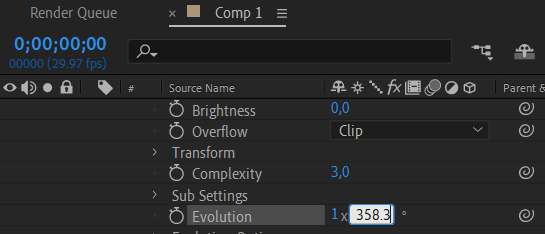
The animated journey unfolds gracefully, covering an interval from (0x+0.0 degrees to 1x+358.3 degrees), adding a layer of sophistication to your creative endeavor.
3. Configure Wave Warp Effect
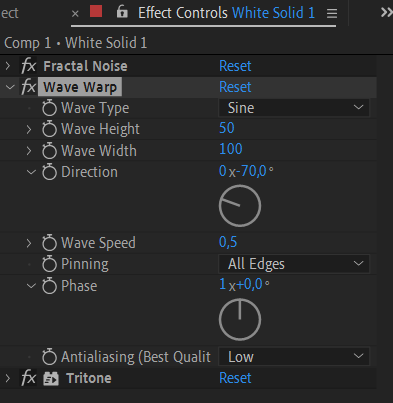
Transitioning to the Wave Warp effect, refine the visual dynamics with deliberate adjustments. Set the Wave Height to 50 and the Wave Width to 100, sculpting the undulating contours.
Alter the Direction to 0x minus 70.0 degrees for a directional shift, and infuse subtle motion by configuring the Wave Speed to 0.5.
Enhance the spatial integration by selecting Pinning for All Edges.
For animated finesse, meticulously animate the Phase parameter, gracefully transitioning from 0x+0.0 degrees to 1x+0.0 degrees, maintaining a consistent gap between the keyframes.
This meticulous approach ensures a seamless and captivating evolution in the Wave Warp effect, contributing to the overall aesthetic cohesion of your composition.
4. Configure the Tritone Effect
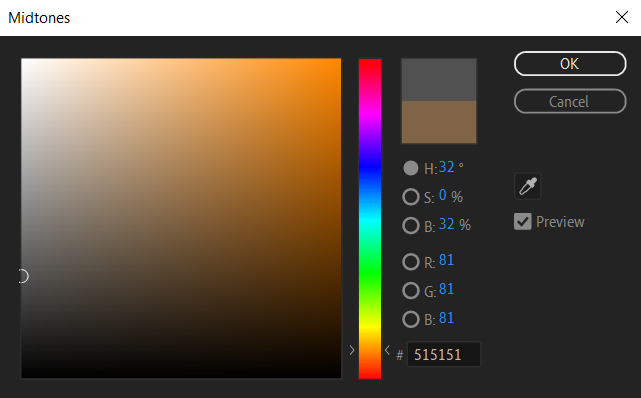
Transitioning to the Tritone Effect, refine the color composition with a discerning touch. Adjust the Midtone to Gray, maintaining the other settings in their current configurations. This subtle modification introduces a nuanced grayscale tone to the composition, contributing to the visual depth and sophistication of your design.
5. Change Fractal type
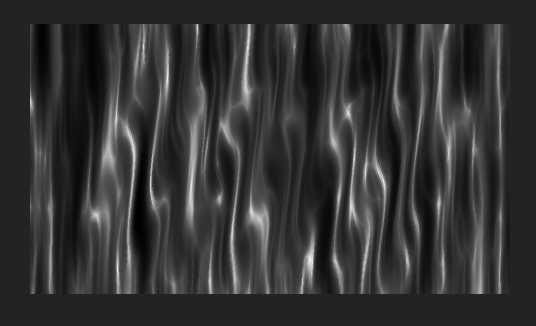
In this After Effects tutorial, we will transition the Fractal type to Turbulence Sharp. Subsequently, move the seek bar to preview the output, allowing for a real-time assessment of the visual transformation achieved through the applied changes.

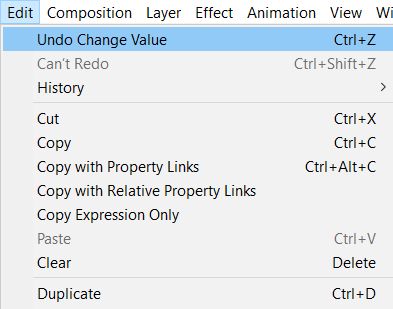
Bonus Tip: To speed up your workflow, learn and utilize hotkeys such as “Ctrl/Cmd + D” to duplicate layers and “Ctrl/Cmd + Z” to undo any accidental changes.
By mastering these tips and tricks, you’ll be well on your way to creating breathtaking smoke effects in After Effects. So go ahead, unleash your creativity, and bring your videos to life with mesmerizing smoke animations!
Conclusion: Smoke Effects to Elevate Your Videos
Congratulations on completing this comprehensive tutorial on creating smoke effects in After Effects! By applying the techniques and tips discussed, you now can add captivating smoke animations to your videos, elevating them to a whole new level of visual appeal.
Remember, practice makes perfect. Don’t be afraid to experiment and tweak settings to achieve the desired effect for your specific project. The possibilities with smoke effects are endless – from creating mystical atmospheres to simulating intense explosions, you have the power to unleash your creativity and make your videos truly unforgettable.
Additionally, as you continue to expand your After Effects skills, consider exploring other visual effects that can complement your smoke animations. Combining elements like fire, particles, and light can create even more impactful and immersive scenes.
So, whether you’re a filmmaker, a motion graphics artist, or simply someone with a passion for creative storytelling, incorporating smoke effects in After Effects can take your videos to new heights. Keep practicing, experimenting, and exploring new techniques, and soon you’ll be bringing your visions to life with stunning, realistic smoke.
We hope this tutorial has provided you with valuable insights and techniques to create mesmerizing smoke effects. Now it’s time to unleash your creativity, let your imagination soar, and create awe-inspiring smoke animations that will leave viewers spellbound. So fire up After Effects, grab your footage, and dive into the magical world of smoke effects!
Happy creating!


