Creating a Stunning Bokeh Effect in After Effects
Introduction
Bokeh is a photography effect that makes the background of your image or video appear blurred with circular light spots. It’s often used to add a dreamy or artistic quality to footage. In this tutorial, we’ll explore how to create a bokeh effect in After Effects using built-in tools and a few creative techniques.
Step 1: Create a New Composition
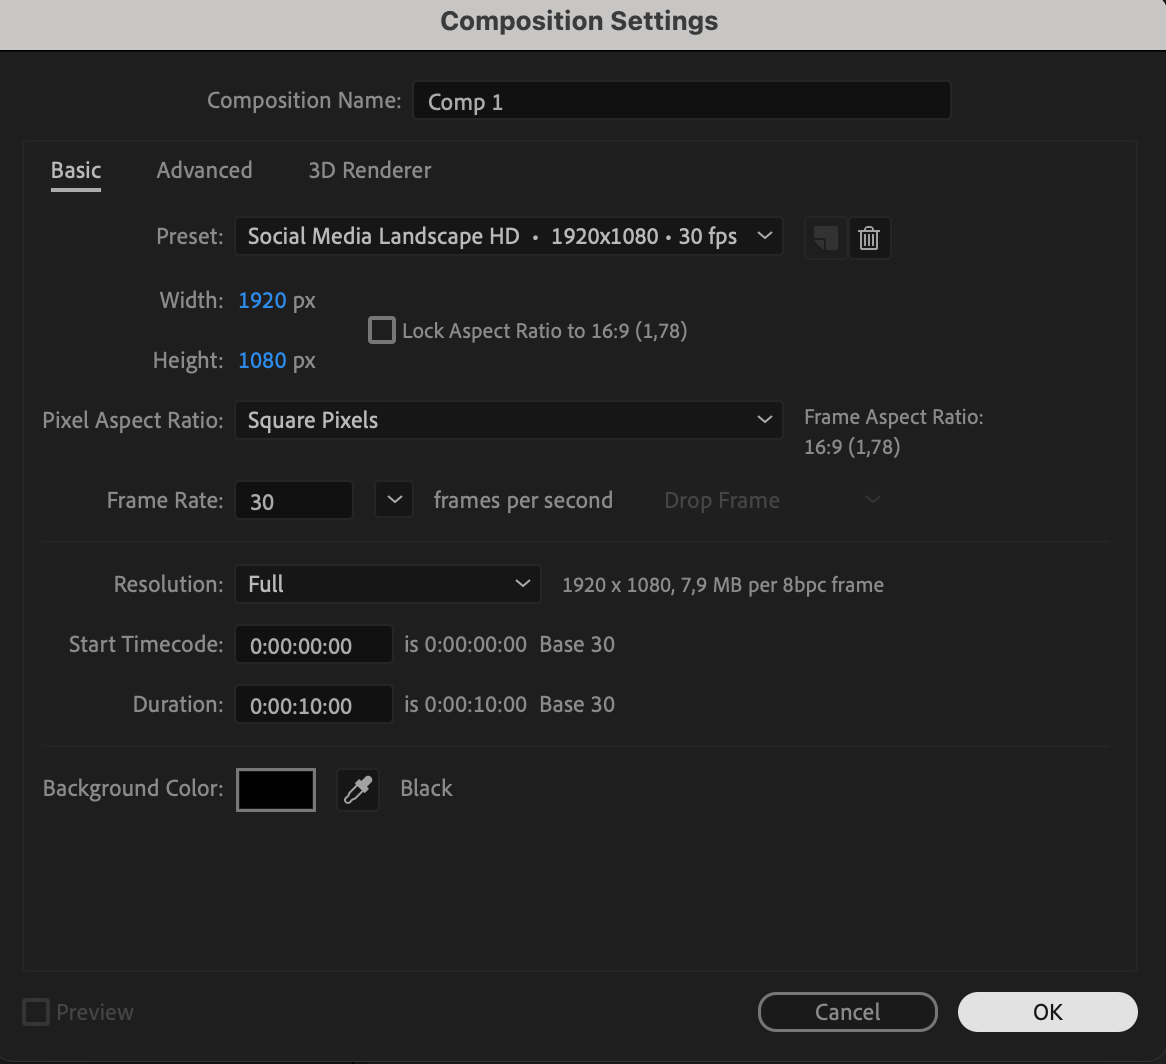
First, create a new composition in After Effects. Set the resolution to 1920×1080 (or your desired resolution), choose a frame rate of 30 fps, and adjust the duration based on how long you want the bokeh effect to last.
 Step 2: Create a Solid Layer
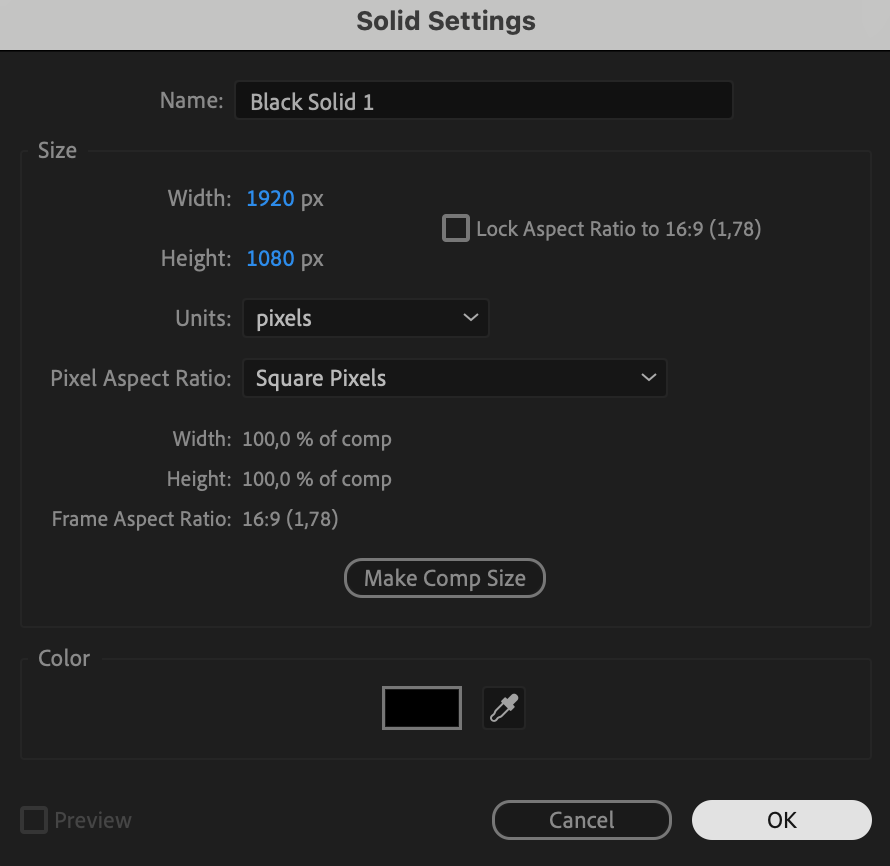
Go to Layer > New > Solid and choose a black color for the solid layer. 
 Step 3: Apply CC Particle World Effect
Select the solid layer and go to Effects & Presets. Search for CC Particle World and apply it to the solid. This will create the base particle system for the bokeh effect.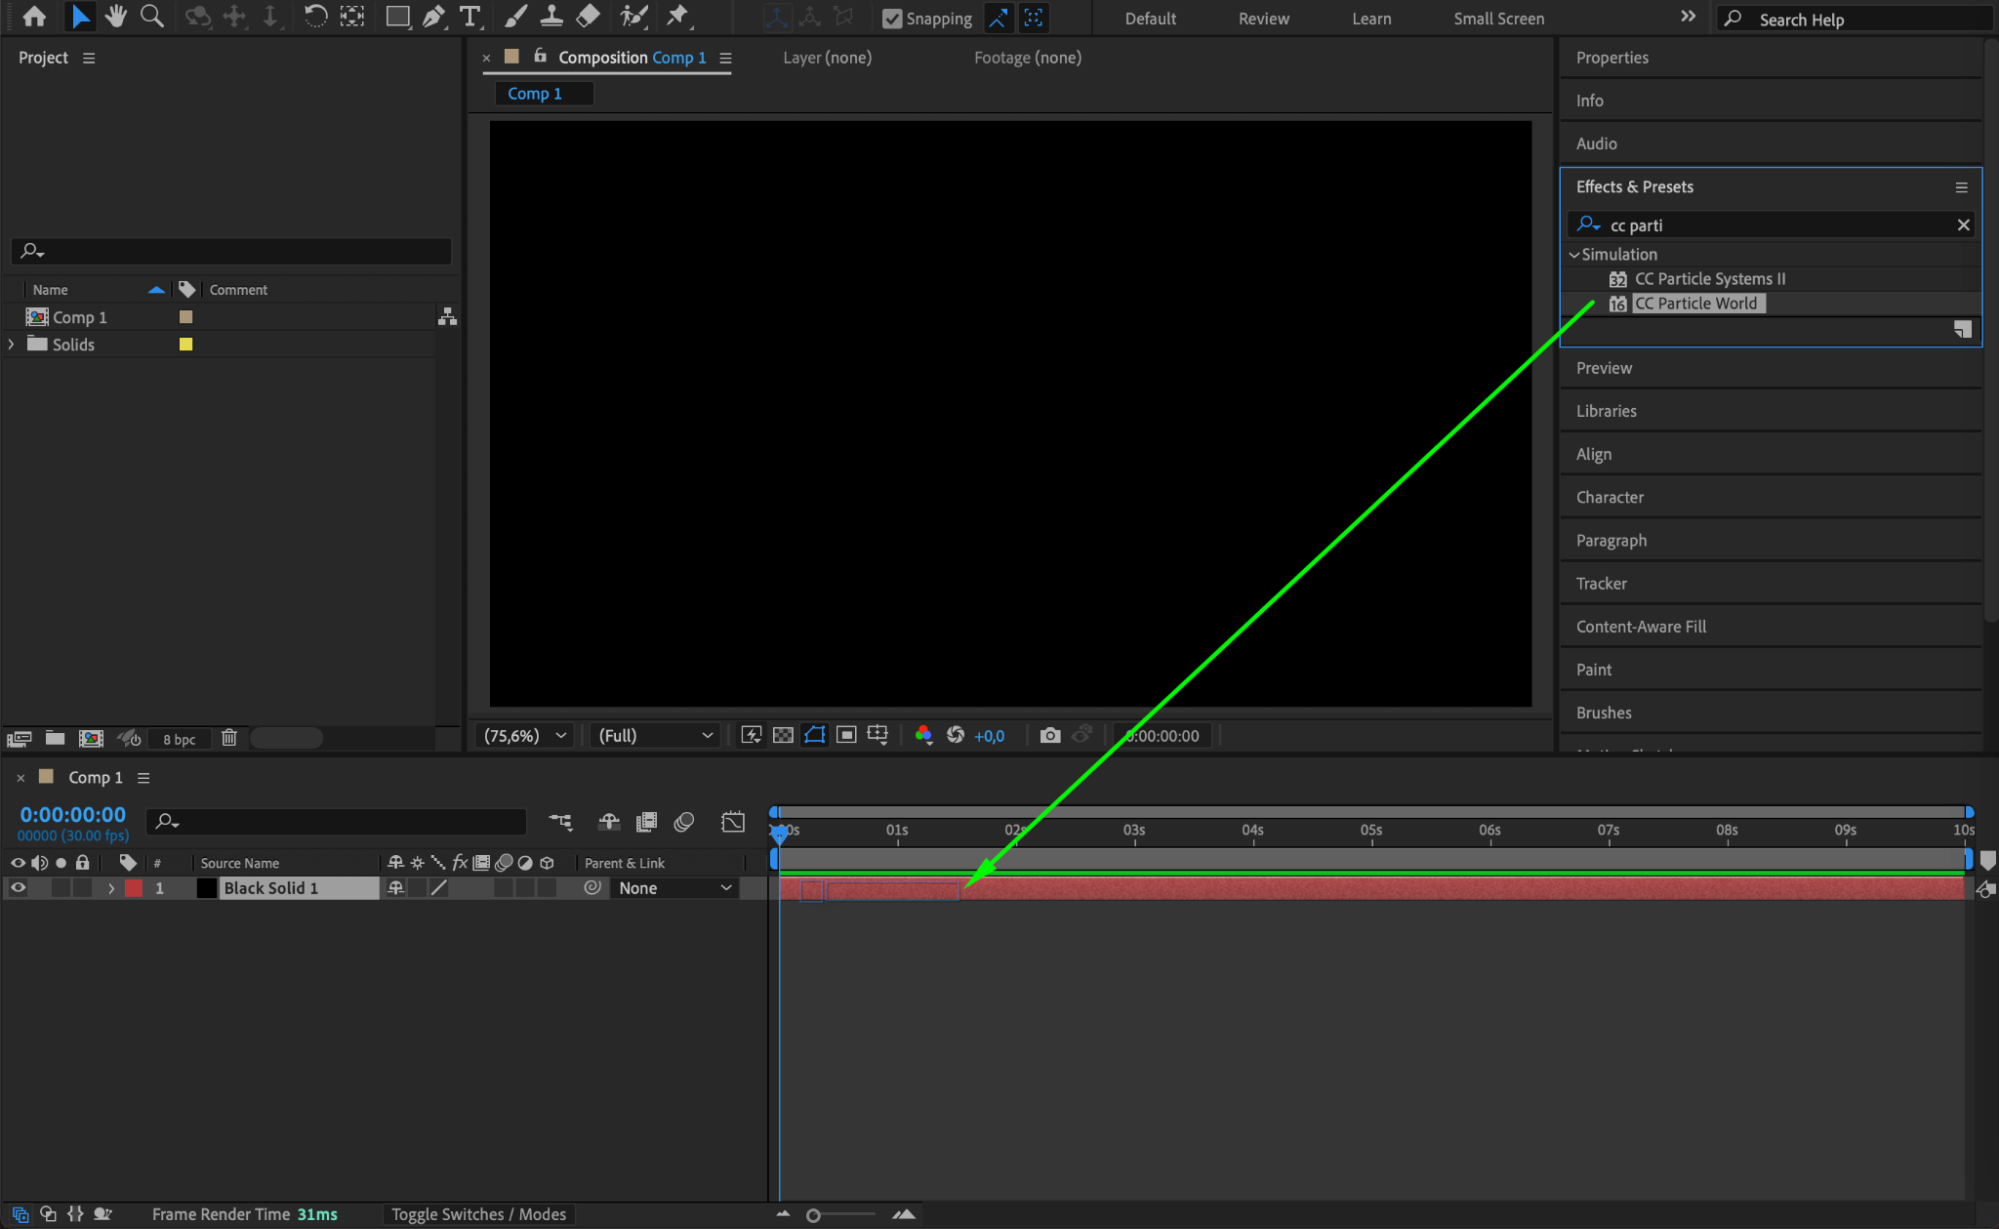
Step 4: Position the Solid Layer
Move the solid layer slightly to the left in the timeline so that the composition starts when the effect is already in full motion. This ensures that the bokeh effect is visible right from the beginning.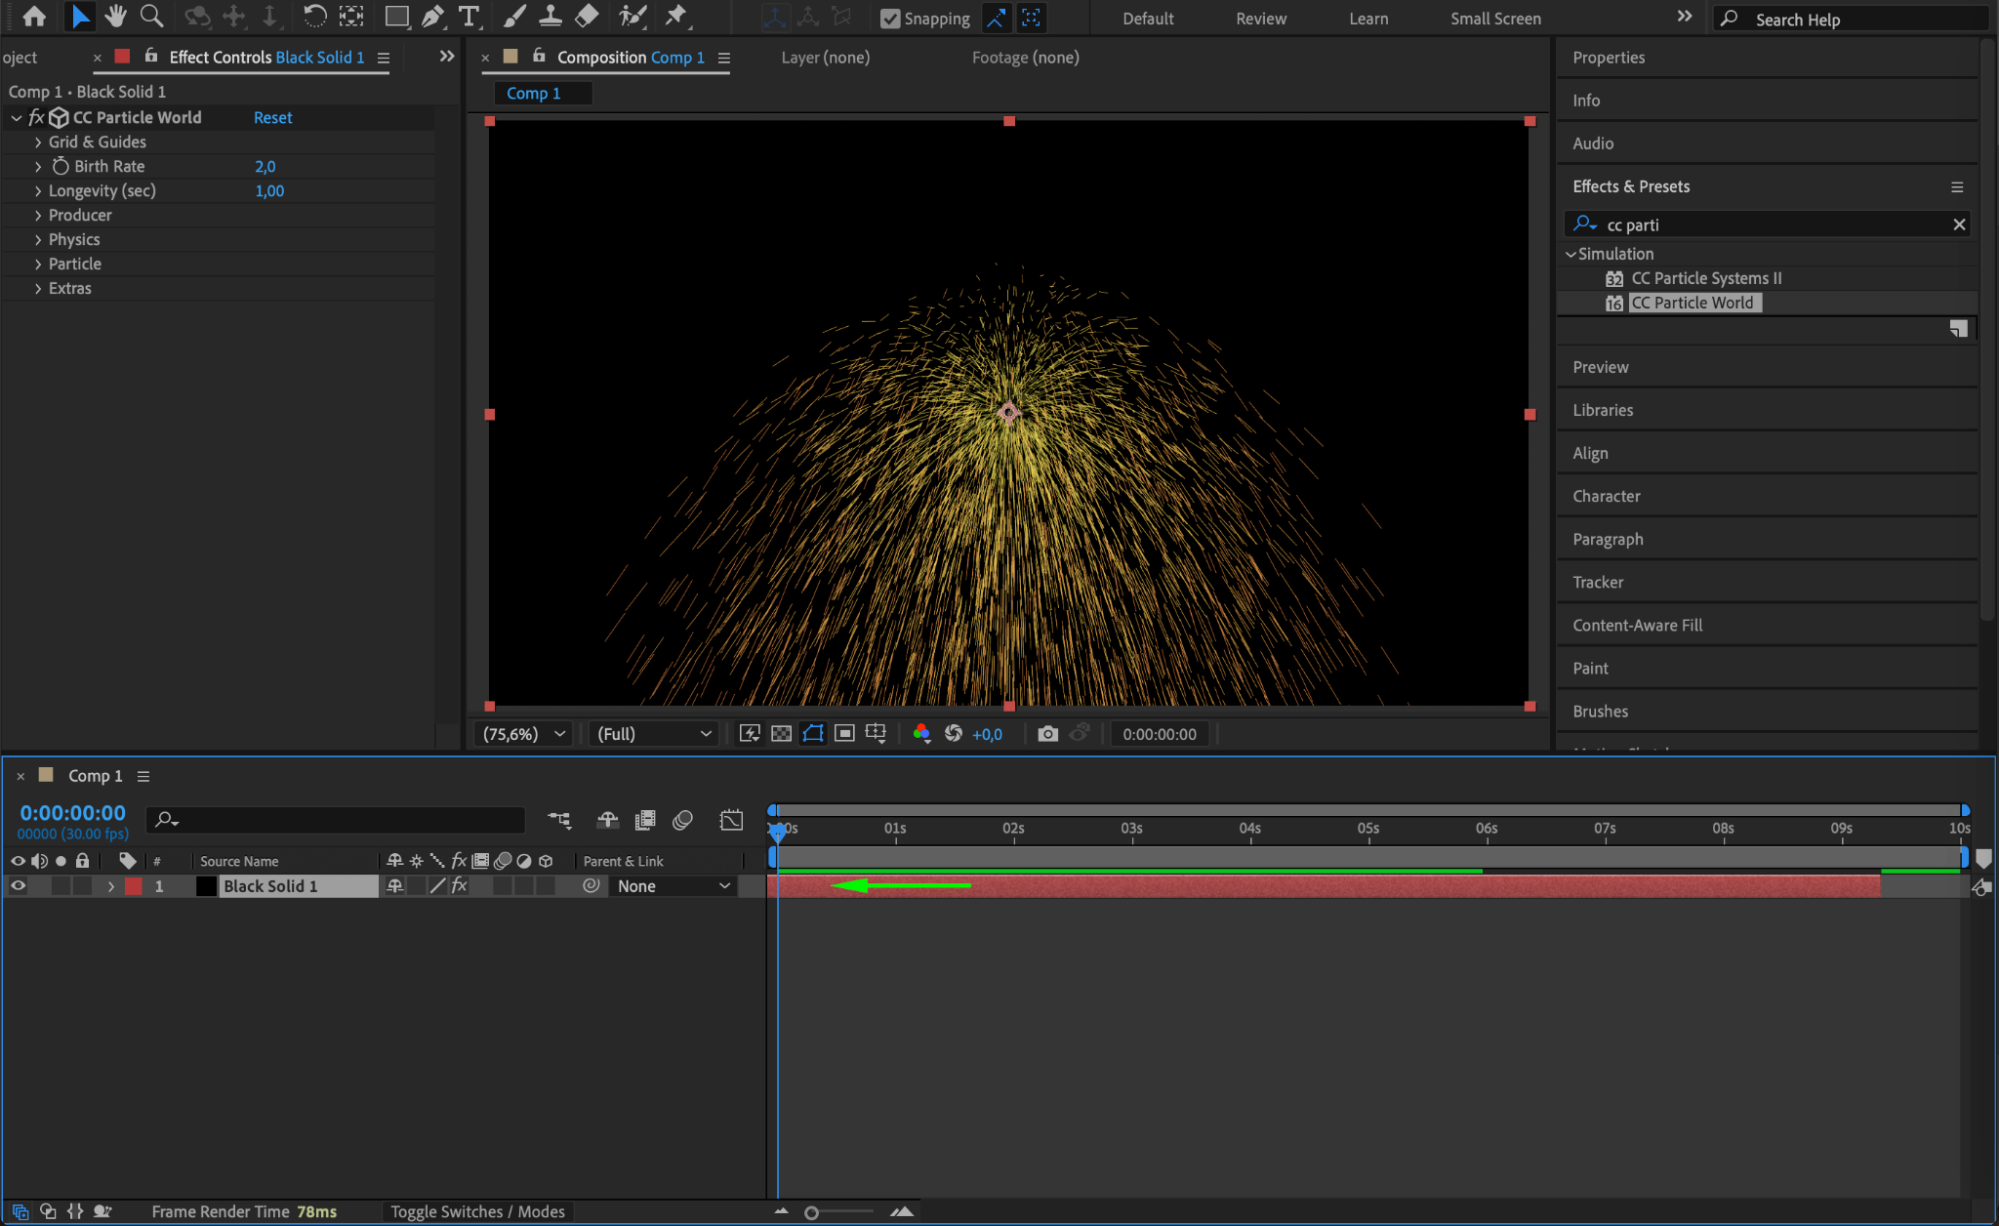 Step 5: Adjust the Particle Settings
Get 10% off when you subscribe to our newsletter

In the Effect Controls Panel, adjust the settings for CC Particle World:
Set Longevity to 3
Set Position Z to -0.94
Adjust Radius X, Radius Y, and Radius Z to 0.65, 0.65, and 0.19 respectively
Set Animation to Jet Sideways
Set Velocity to 0.1
Set Gravity to 0.01
Set Particle Type to Textured Disc
These adjustments will help create the soft, circular light spots typical of bokeh.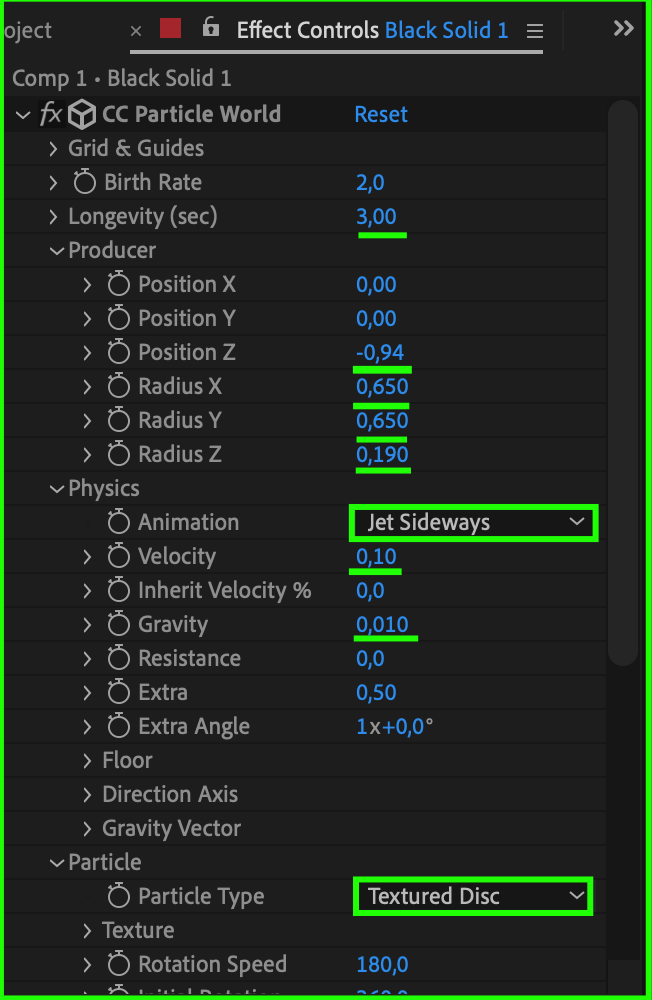 Step 6: Add the Texture Image for the Bokeh
Import a texture image for the bokeh effect. Place this image on the timeline, underneath the solid layer. Toggle the eye icon off for this texture layer so it remains hidden during the animation process.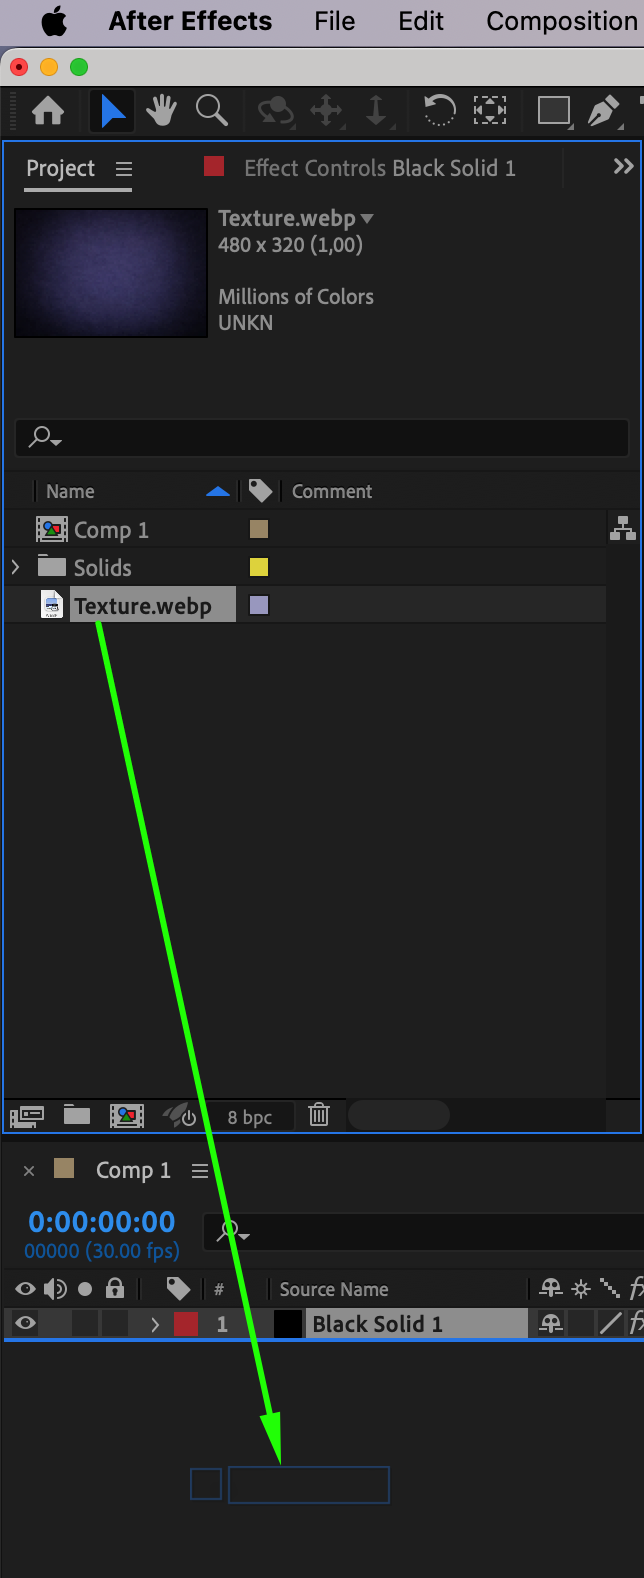 Step 7: Configure the Textured Layer Settings
In the Effect Controls Panel for the solid layer, set the Textured Layer parameter to the texture image you just added. Then adjust the following settings:
Scatter to 43
Death Size to 0.7
Birth Size to 0.54
Death Size to 0.7
Set the Birth and Death Color to match your desired bokeh color palette
These settings will define the size and appearance of the bokeh particles.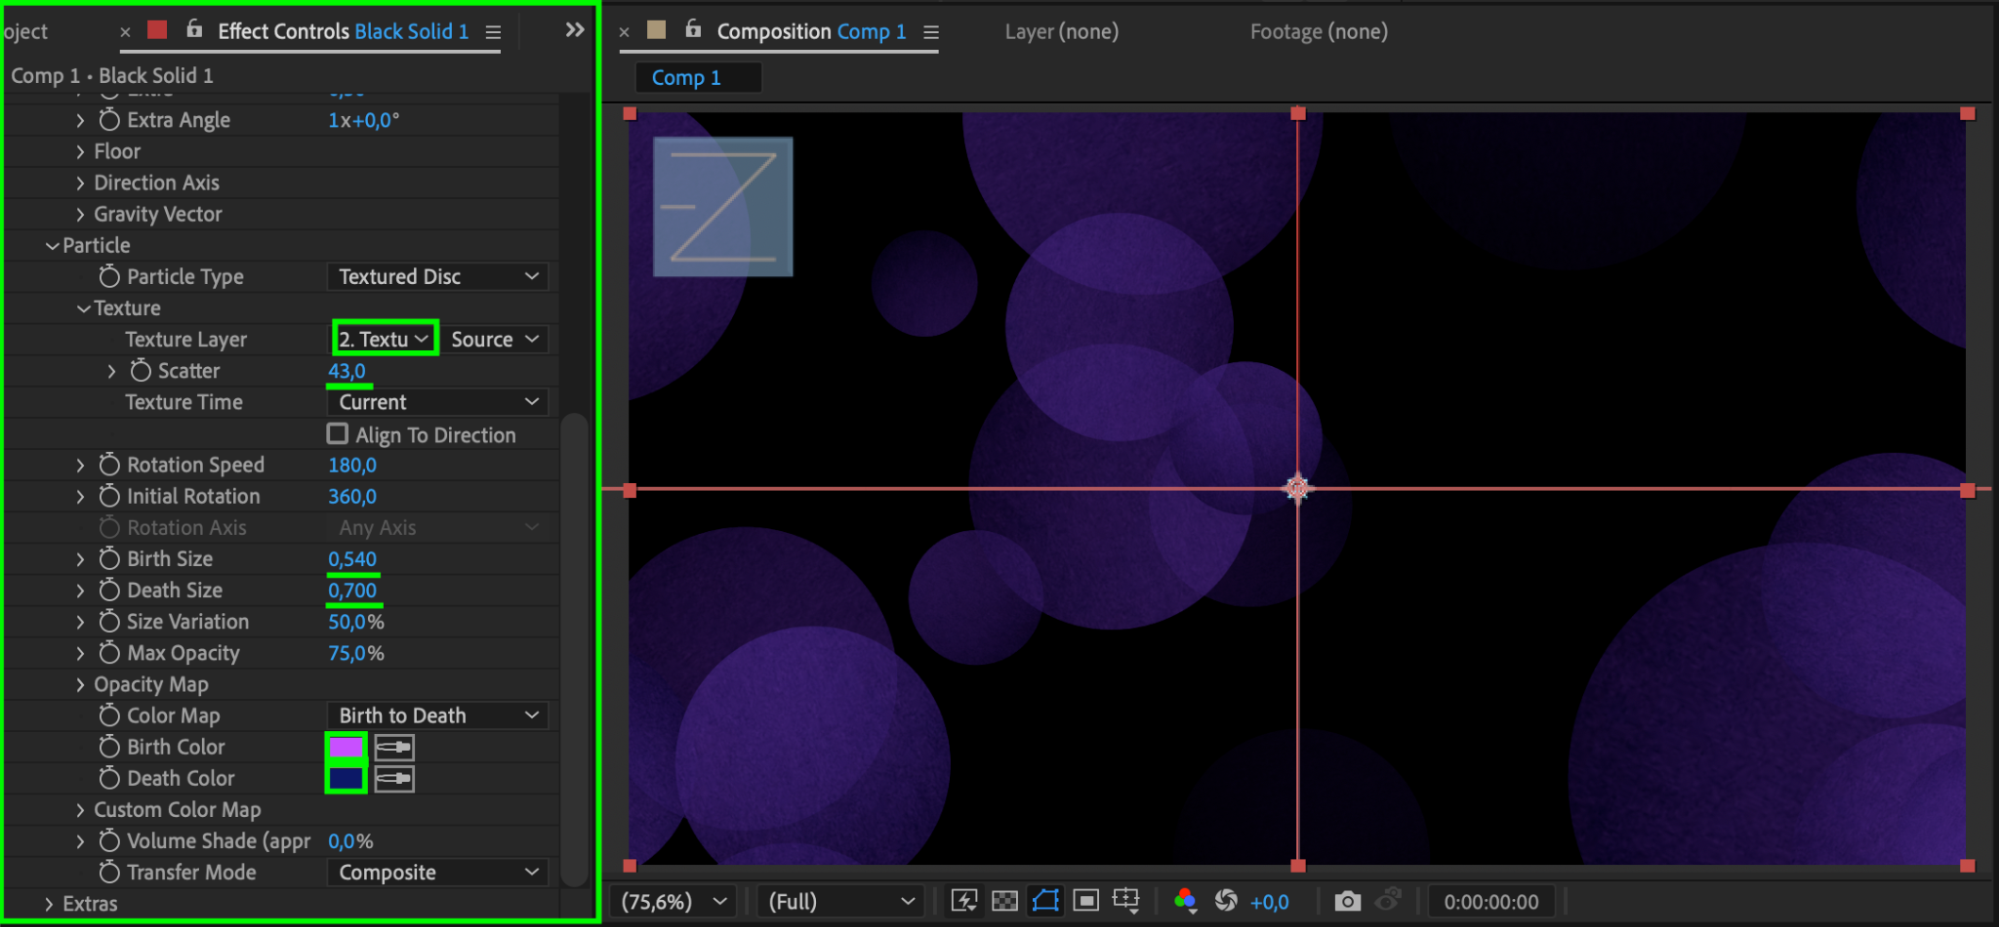 Step 8: Apply the Glow Effect
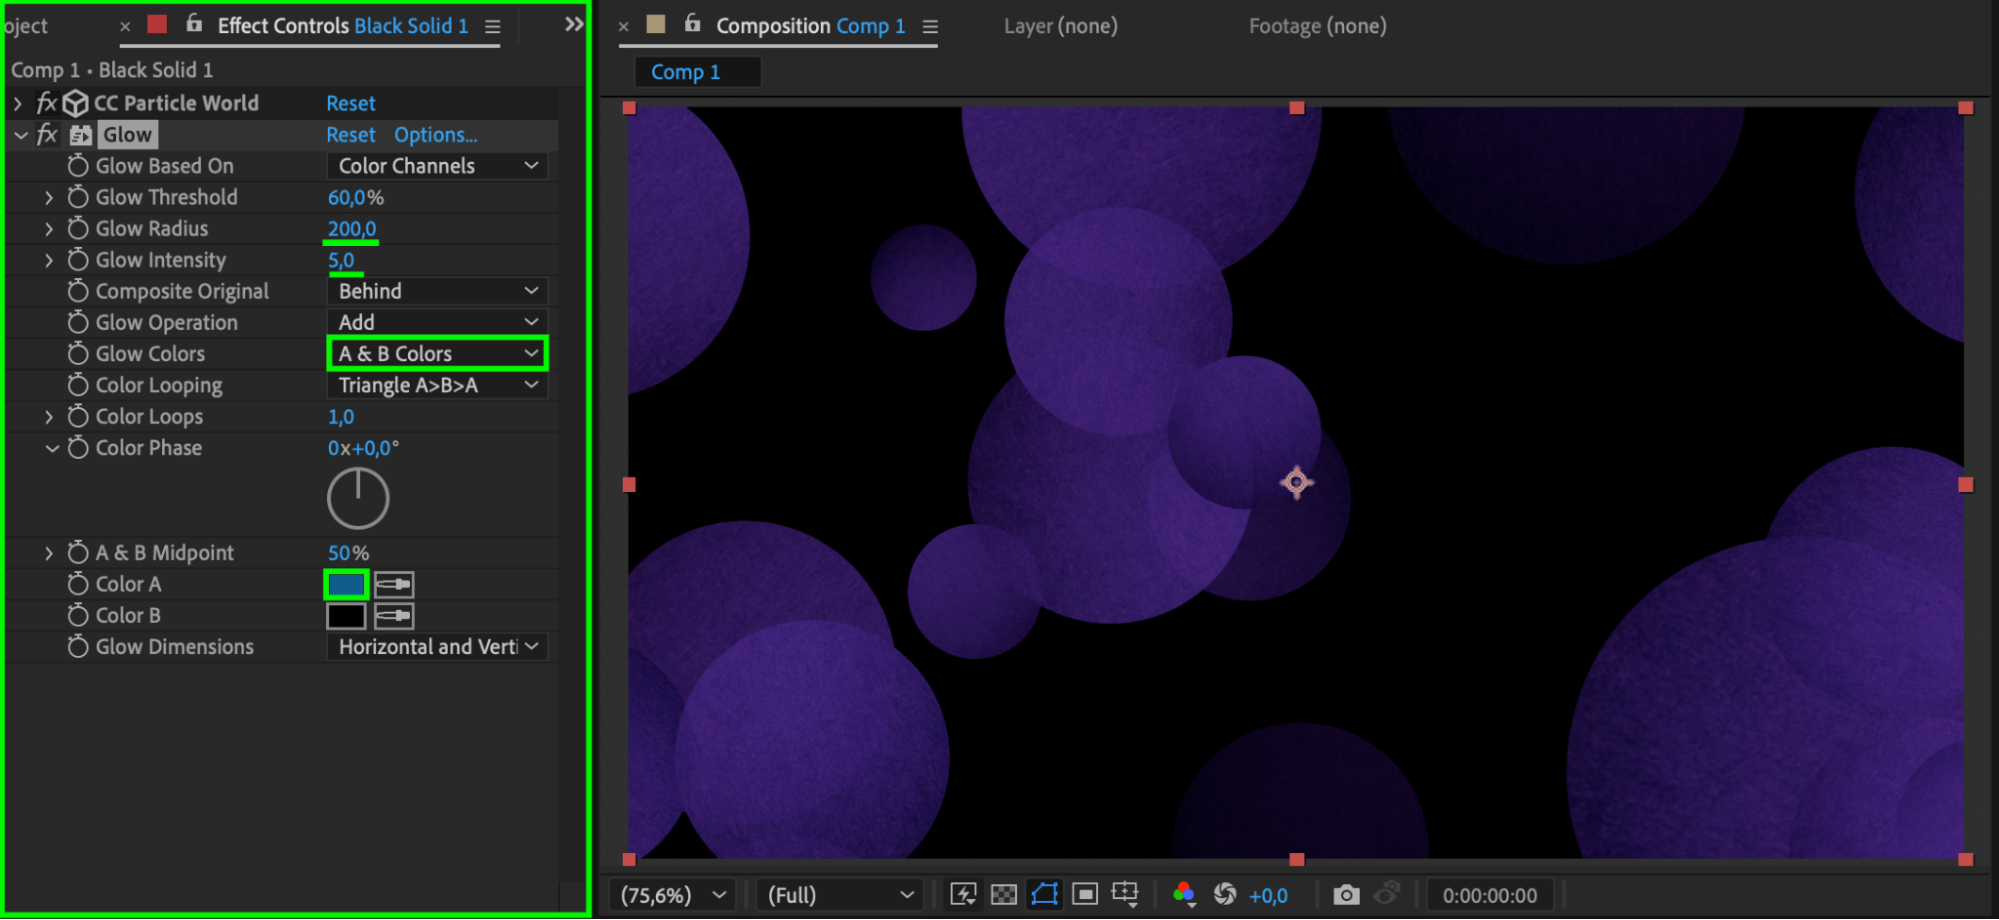
To enhance the look of the bokeh, apply the Glow Effect:
Set Glow Radius to 200
Set Glow Intensity to 5
Set Glow Colors to A & B Colors, and choose Color A as the main glow color
The glow effect will give the bokeh particles a soft, illuminated look, making them stand out against the background.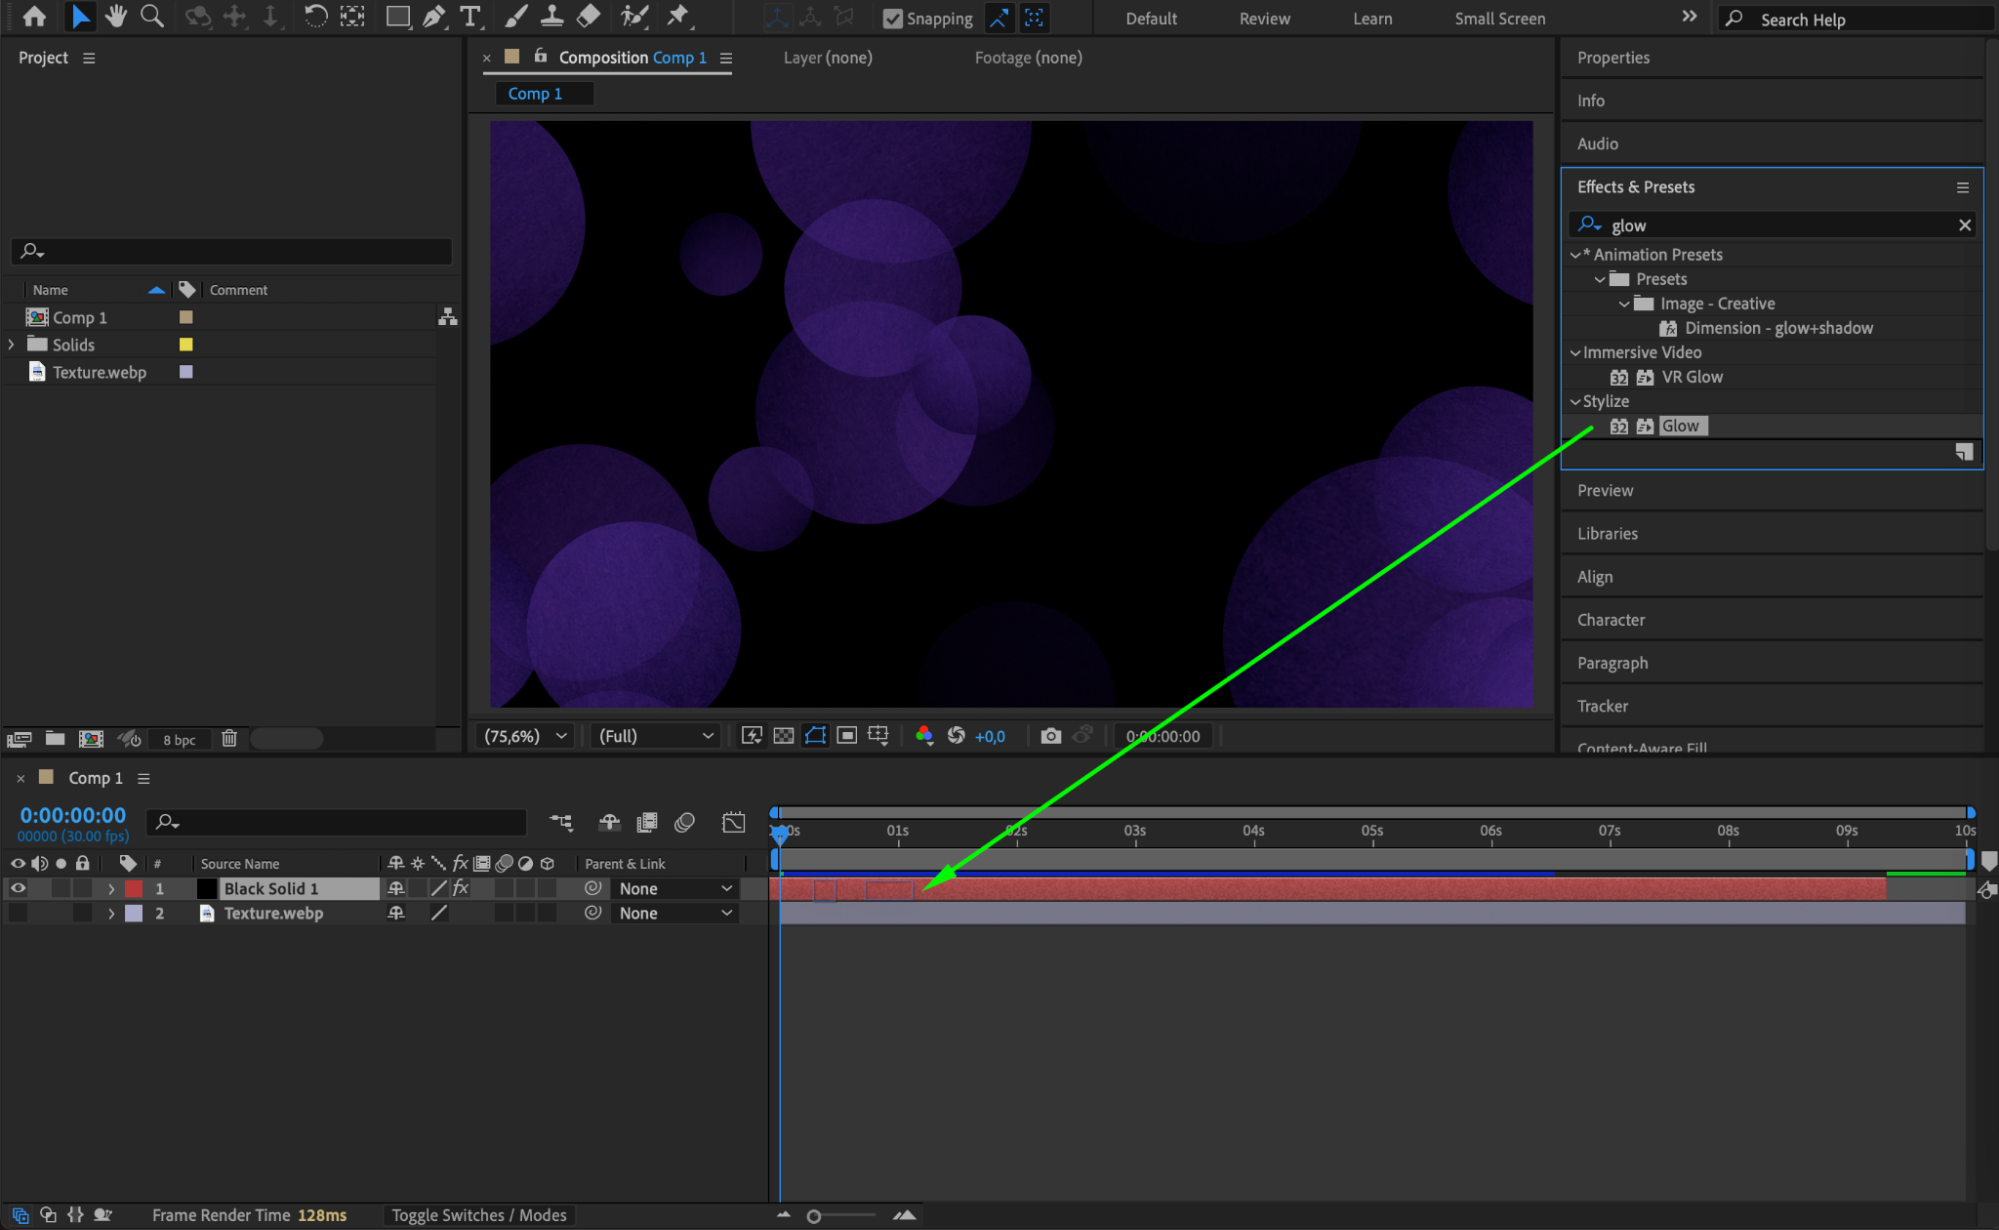
 Step 9: Add an Adjustment Layer
Go to Layer > New > Adjustment Layer. This layer will be used to apply additional effects that influence the whole composition without affecting individual layers.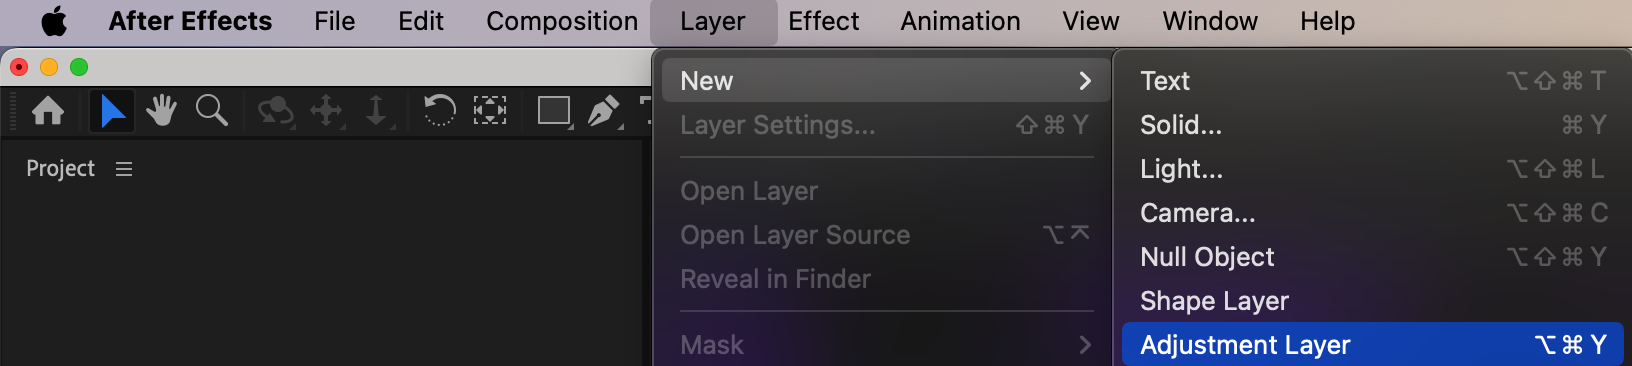
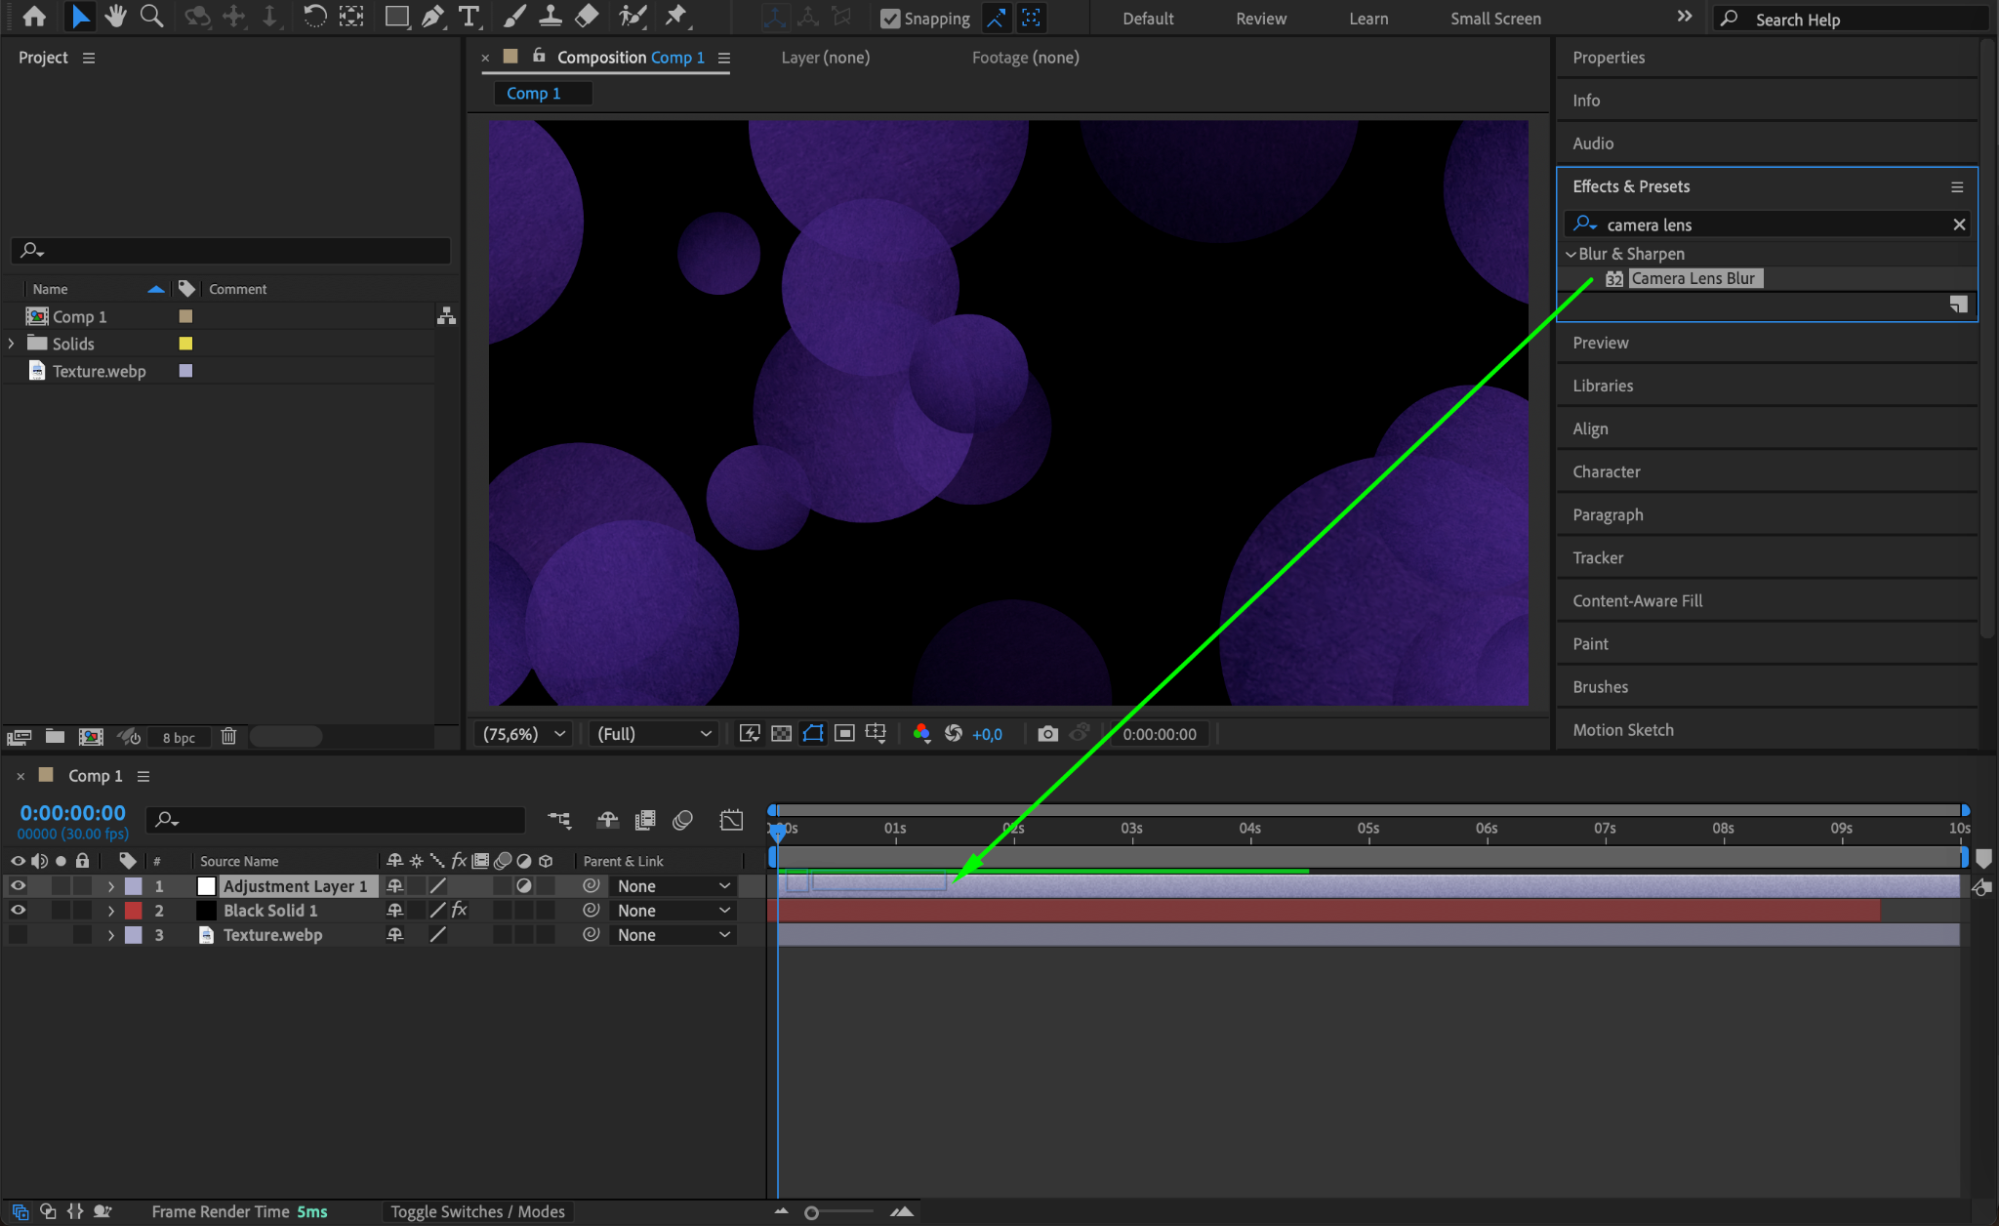
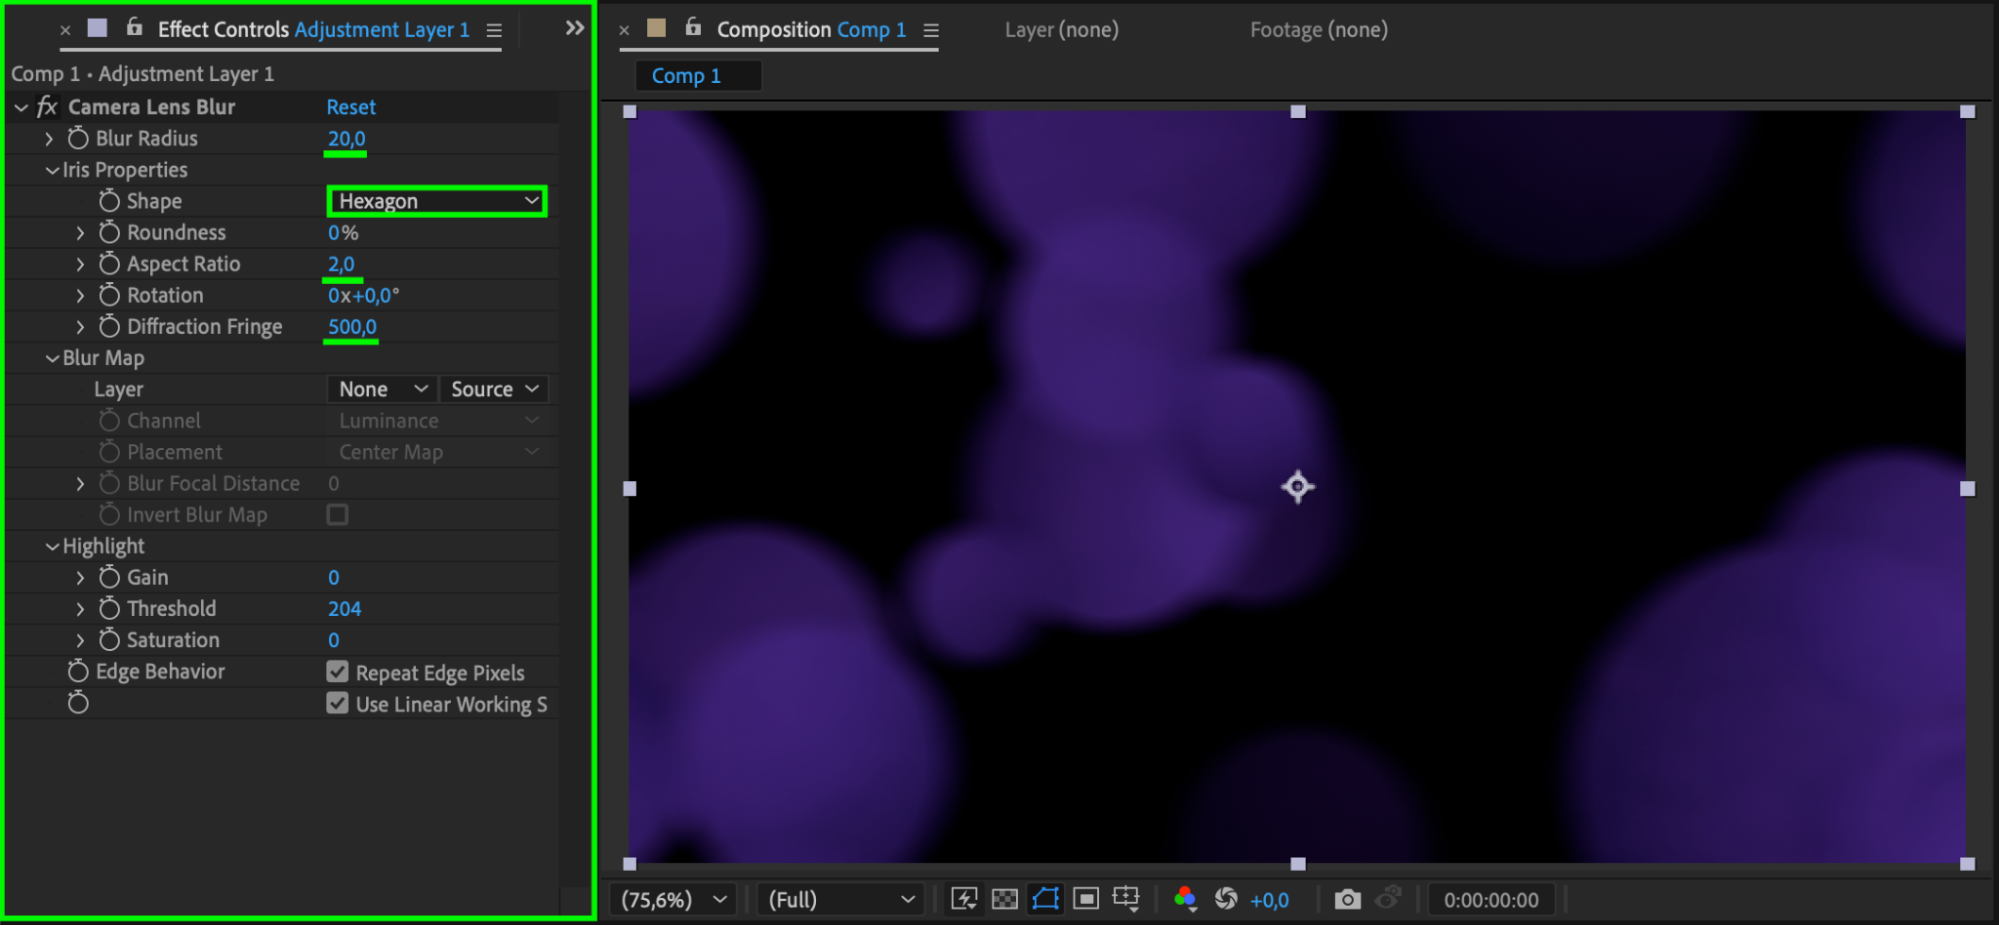
Step 10: Apply Camera Lens Blur Effect
Apply the Camera Lens Blur effect to the adjustment layer:
Set Blur Radius to 20
Set Shape to Hexagon
Set Aspect Ratio to 2
Set Diffraction Fringe to 500
This effect simulates the optical properties of a camera lens, adding to the realistic look of the bokeh.
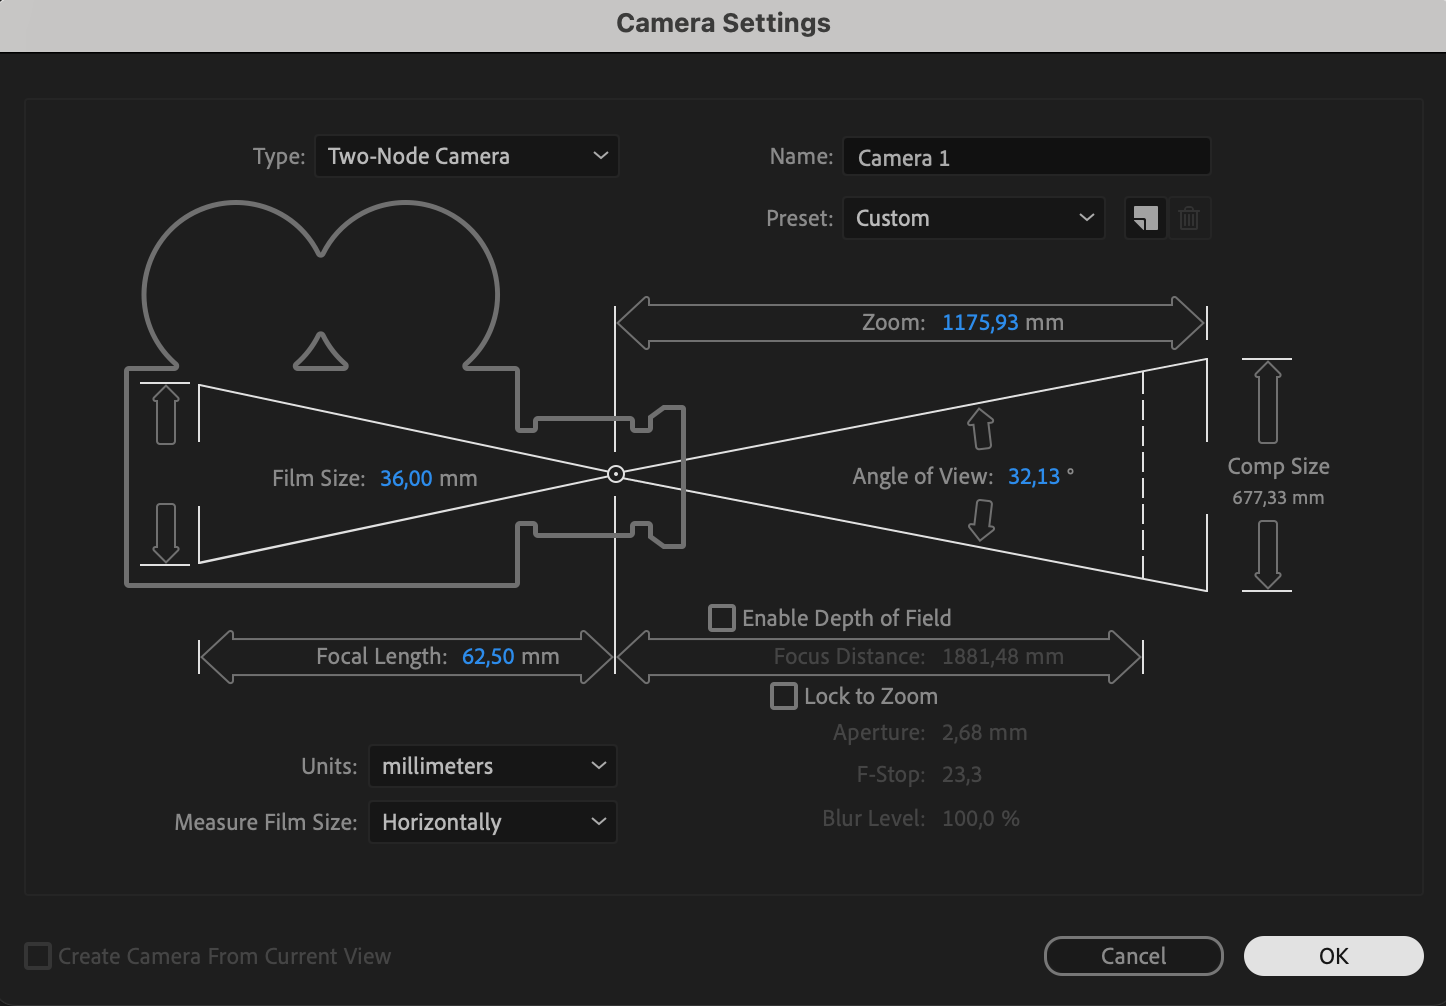
 Step 11: Add a Camera Layer
Now, go to Layer > New > Camera. This will allow you to animate the scene’s perspective and add depth to the bokeh effect.
 Step 12: Animate the Camera
Animate the X, Y, and Z Rotation parameters of the camera to change the angle and perspective of the bokeh effect. You can add subtle rotations to give the effect more dynamic movement.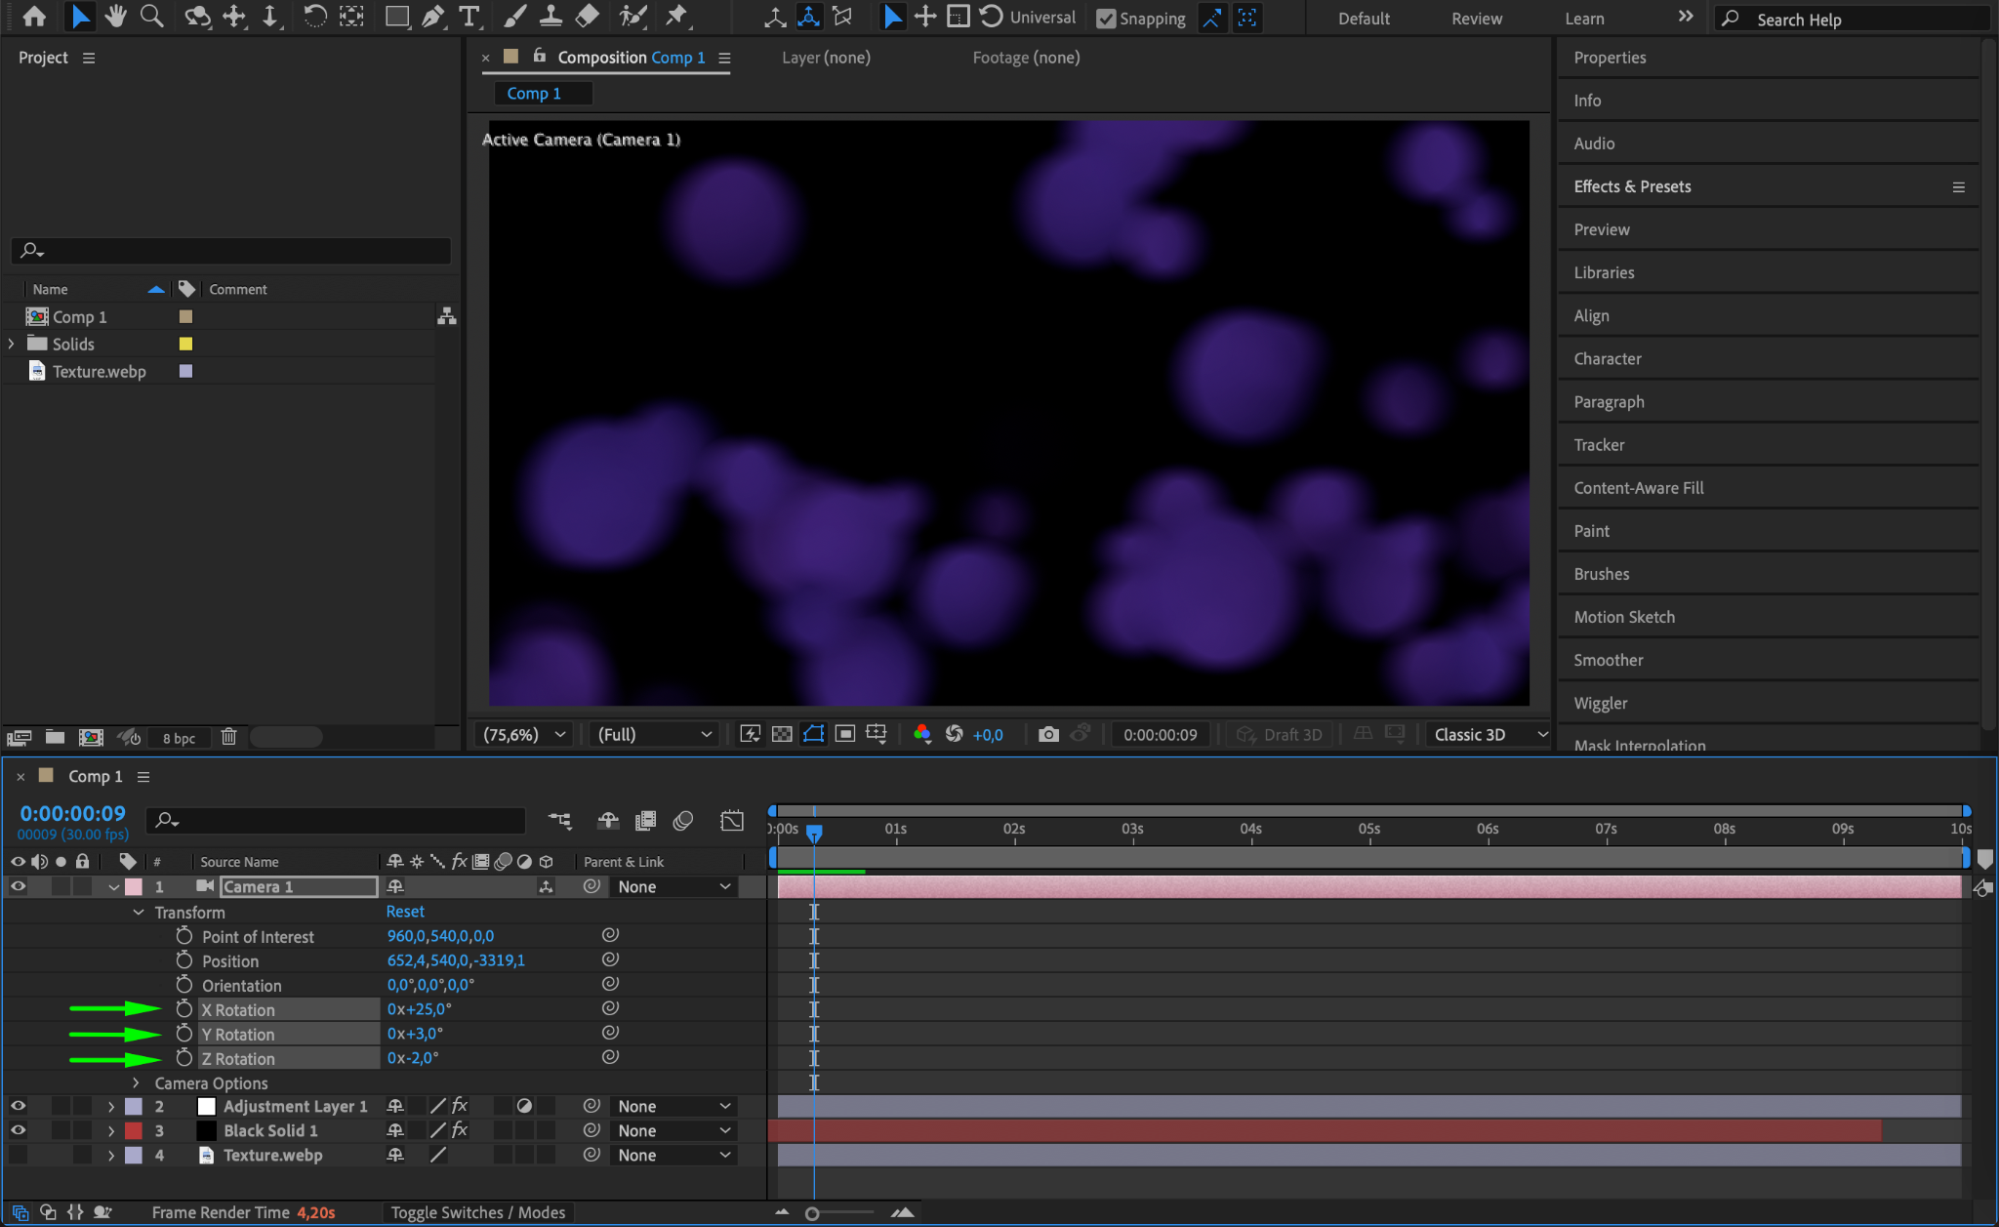
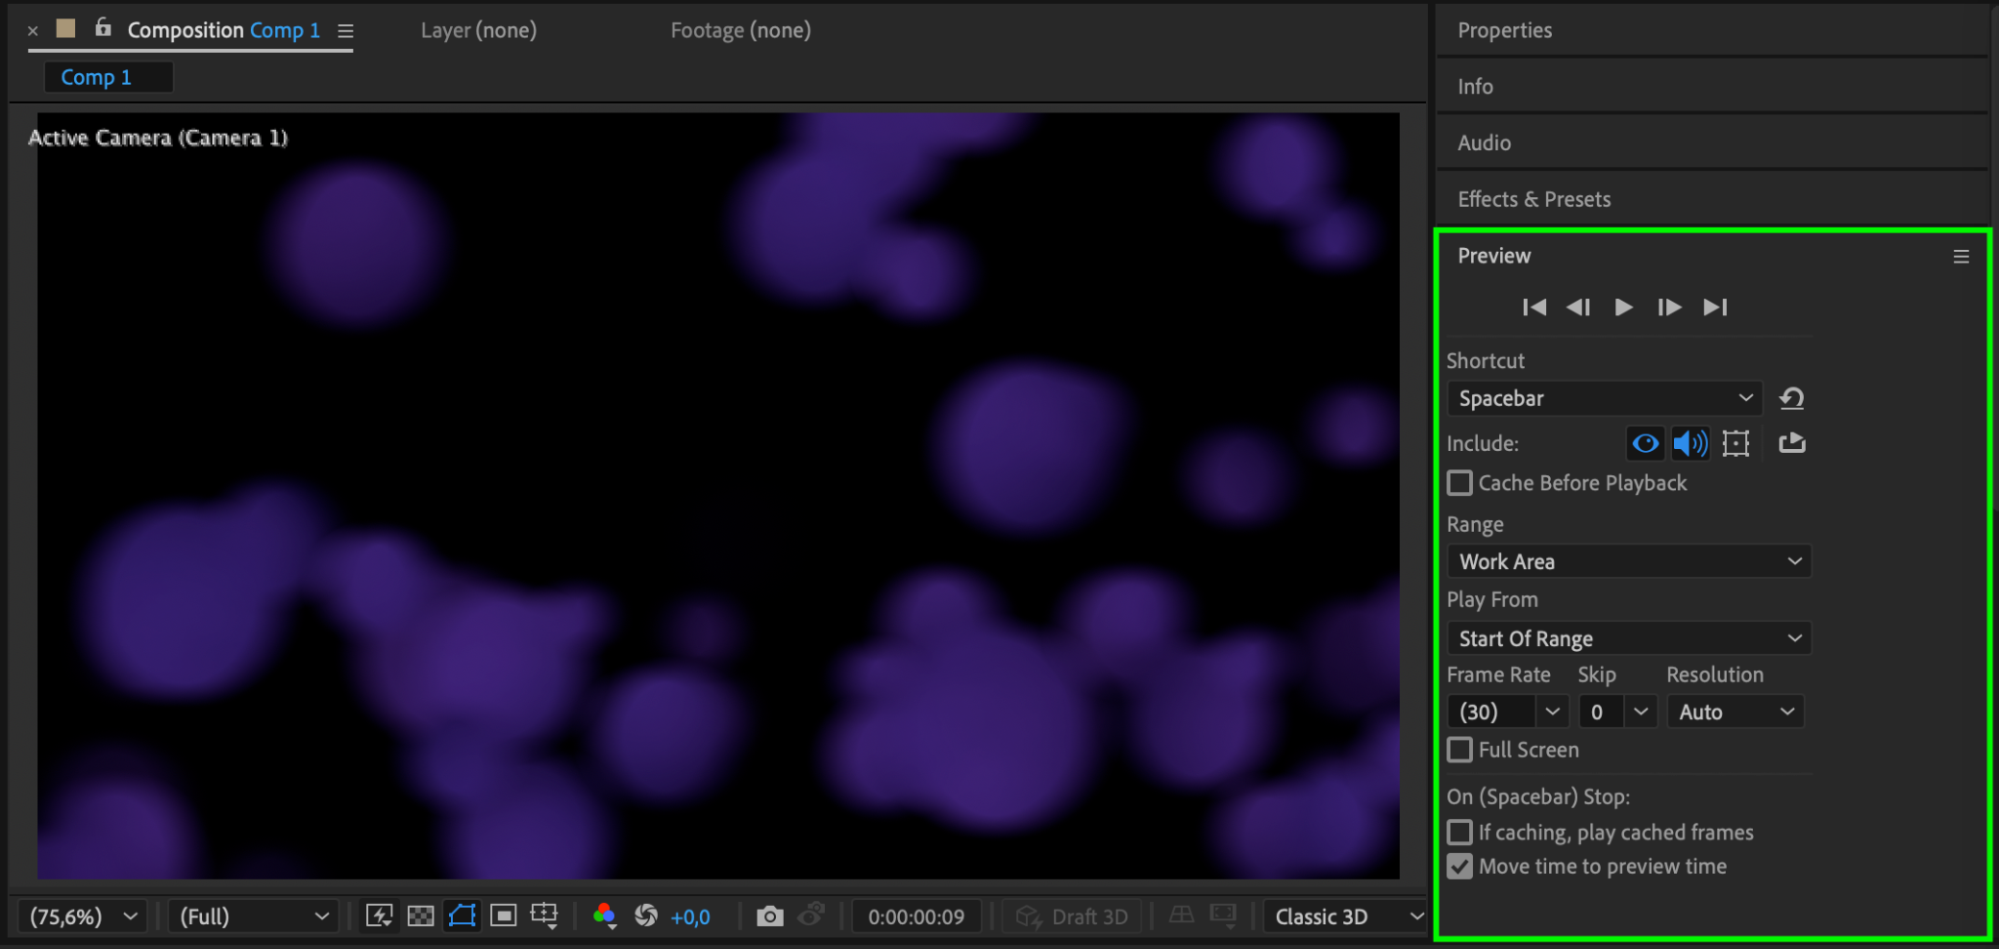
Step 13: Preview the Animation
After completing all the adjustments, press the spacebar to preview your animation. Make sure everything looks as expected and adjust the settings as necessary.
 Step 14: Render the Composition
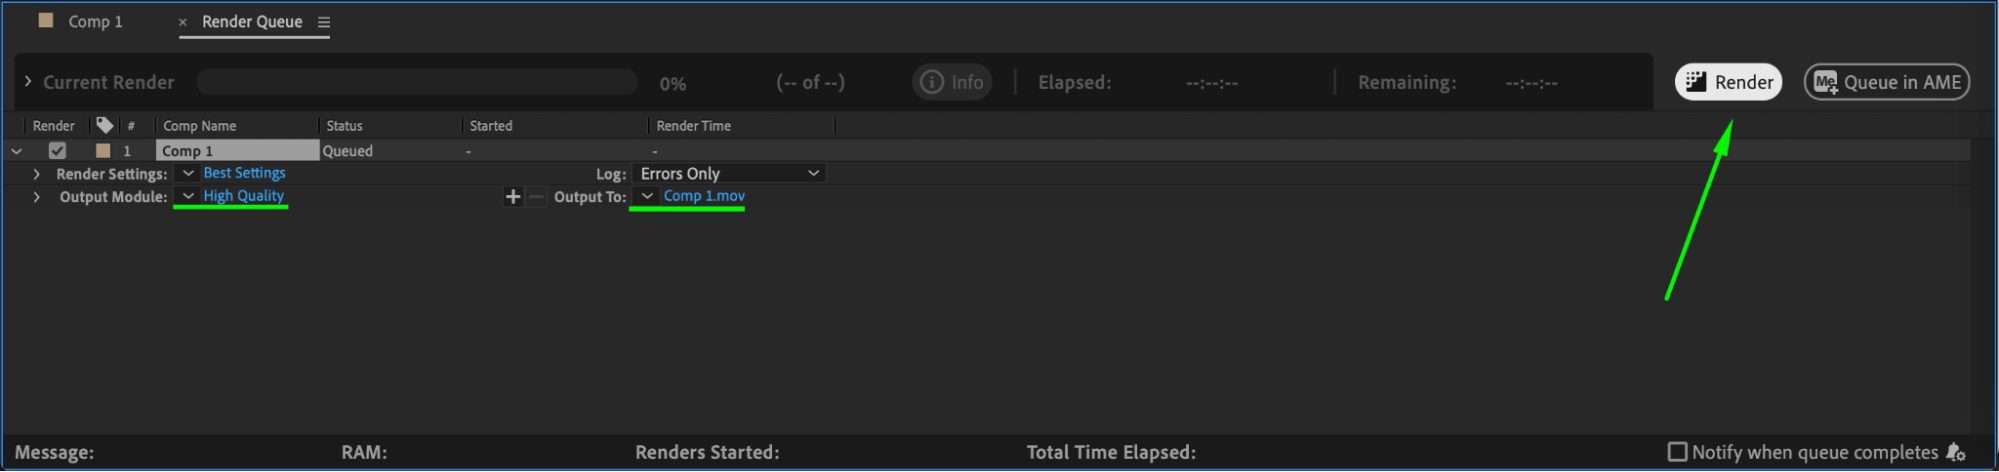
Once you’re satisfied with the animation, go to Composition > Add to Render Queue. Choose the format and settings for your output file, then click Render to export your bokeh effect.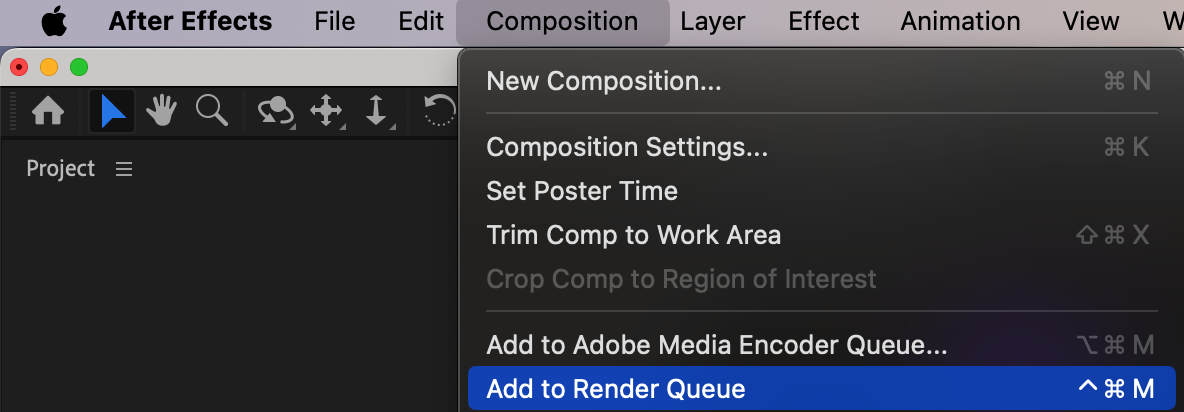
 Conclusion
Creating a bokeh effect in After Effects can significantly enhance the aesthetic of your video, adding a dreamy, out-of-focus background with beautiful light spots. By following the steps in this tutorial, you can create an eye-catching and professional-looking bokeh effect for your projects. Experiment with different textures and settings to create unique looks. Happy editing!
Our Bestsellers


