How to Create a Block Dissolve Effect in After Effects
Mastering the Block Dissolve Effect in After Effects: Create Seamless Transitions in Your Videos
When it comes to video editing, transitions play a crucial role in defining the flow and aesthetic of your project. Among the various transition effects available, the block dissolve effect in Adobe After Effects stands out as a versatile and powerful tool. It allows you to seamlessly merge one clip into another, creating a smooth and visually appealing transition that captivates your audience.
In this article, we will walk you through the process of using After Effects’ block dissolve effect to elevate your editing skills and add a professional touch to your videos. Whether you are a beginner looking to expand your knowledge or an experienced user aiming to sharpen your techniques, this comprehensive guide will cover everything you need to know about creating captivating transitions.
You will learn how to utilize keyframe animation, adjust timing and duration, and explore additional settings for customizing the block dissolve effect to suit the specific needs of your project. So, let’s dive in and unlock the secrets to mastering the block dissolve effect in After Effects!
Step-by-Step Guide to Creating a Block Dissolve Effect in After Effects
Before we jump into the process, it’s essential to ensure you have Adobe After Effects up and running on your computer. Once you’re ready, follow these simple steps to master the block dissolve effect:
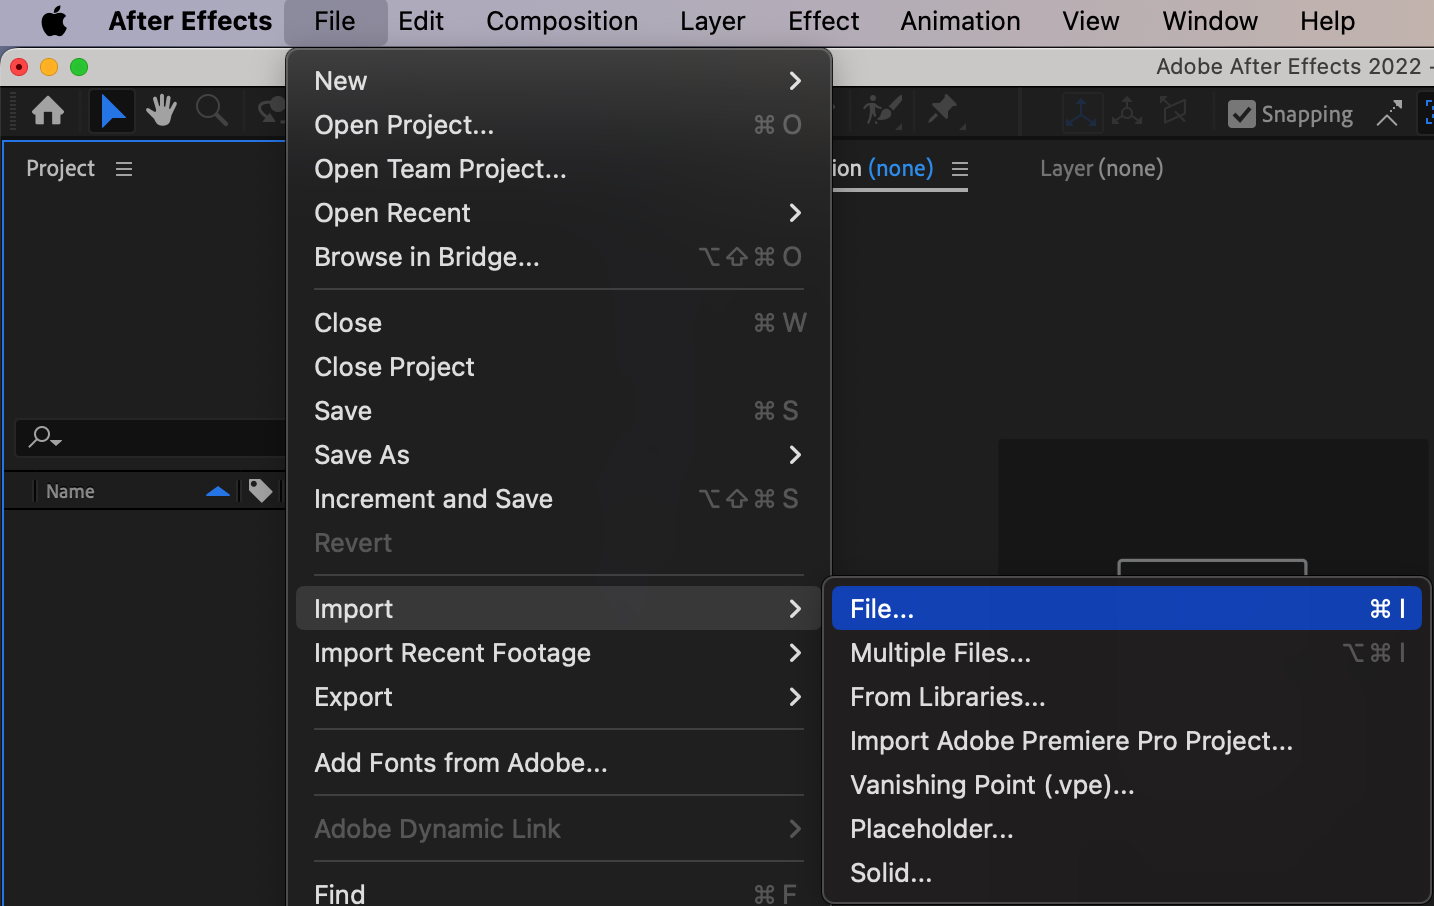
1. Import your footage: Start by importing the clips you want to work with into your After Effects project. Simply drag and drop the files into the project panel to add them to your composition.
Get 10% off when you subscribe to our newsletter

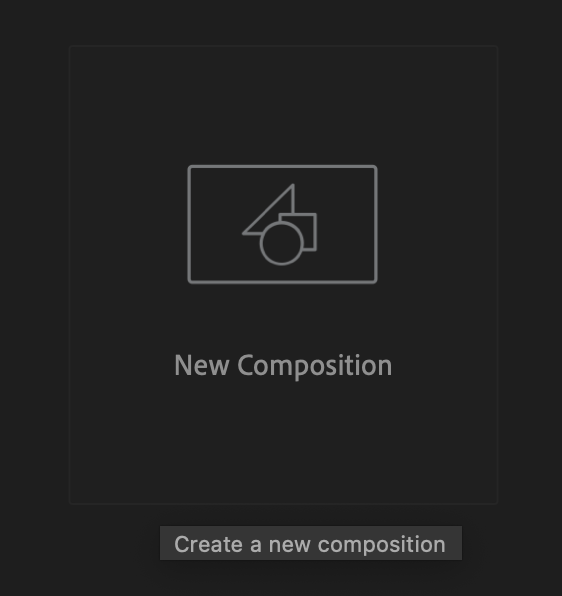
2. Create a new composition: Right-click on your footage in the project panel and select “New Composition.” Set the desired composition settings, such as resolution and frame rate, and click “OK.”

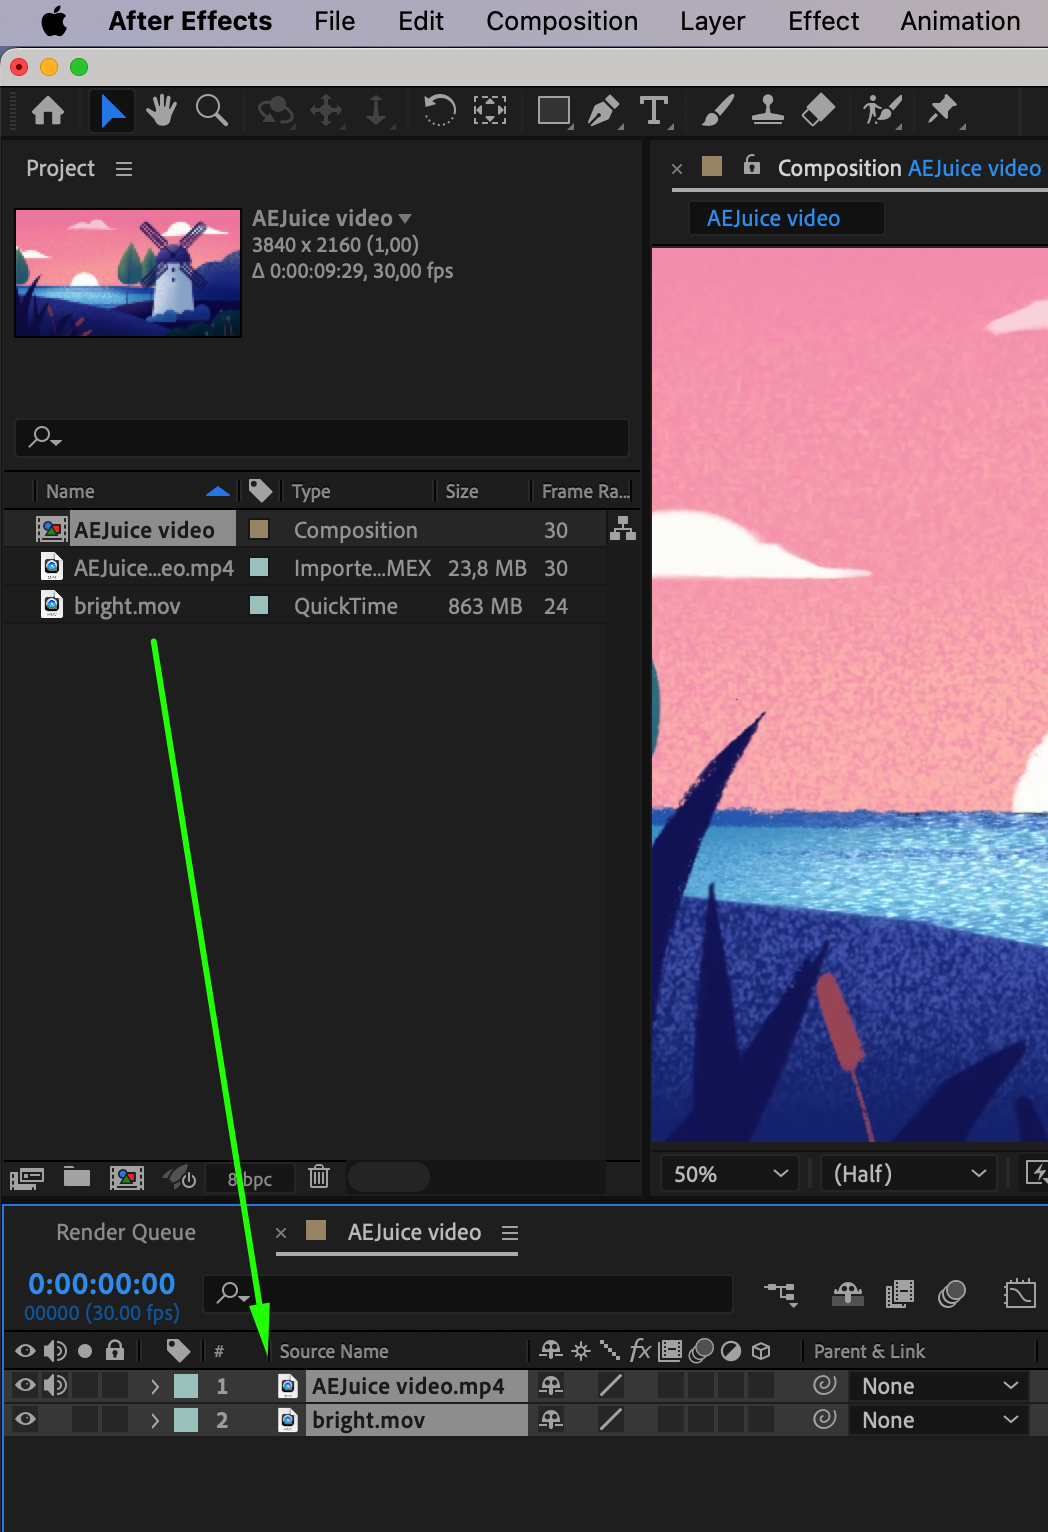
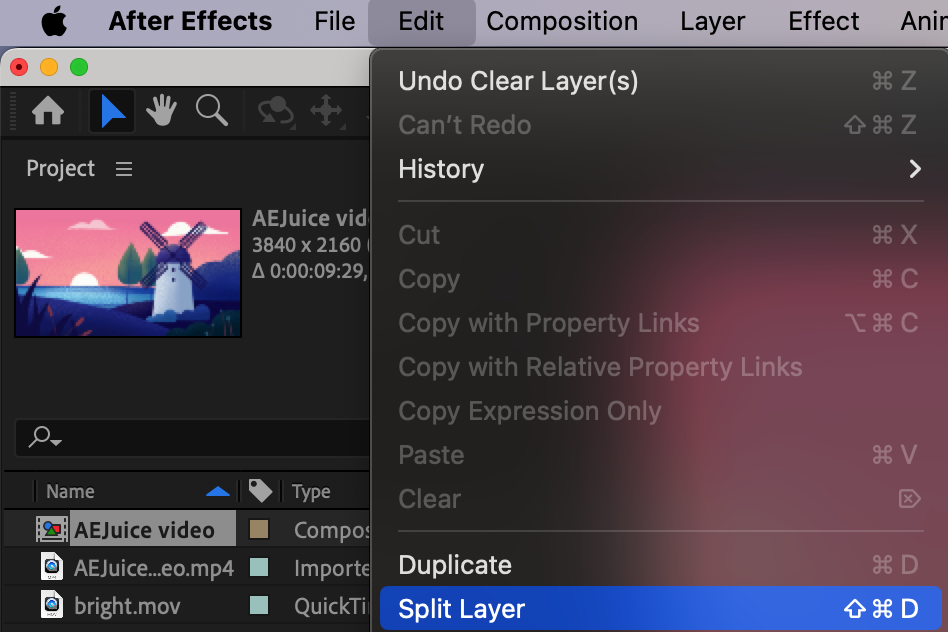
3. Arrange your clips: Drag the clips from the project panel into the composition timeline, placing them in the order you’d like them to appear. Ensure that there is a slight overlap between each clip to allow for a seamless transition. Use the Ctrl/Cmd + Shift + D hotkey to split the layer and create the necessary length for clips in the composition.
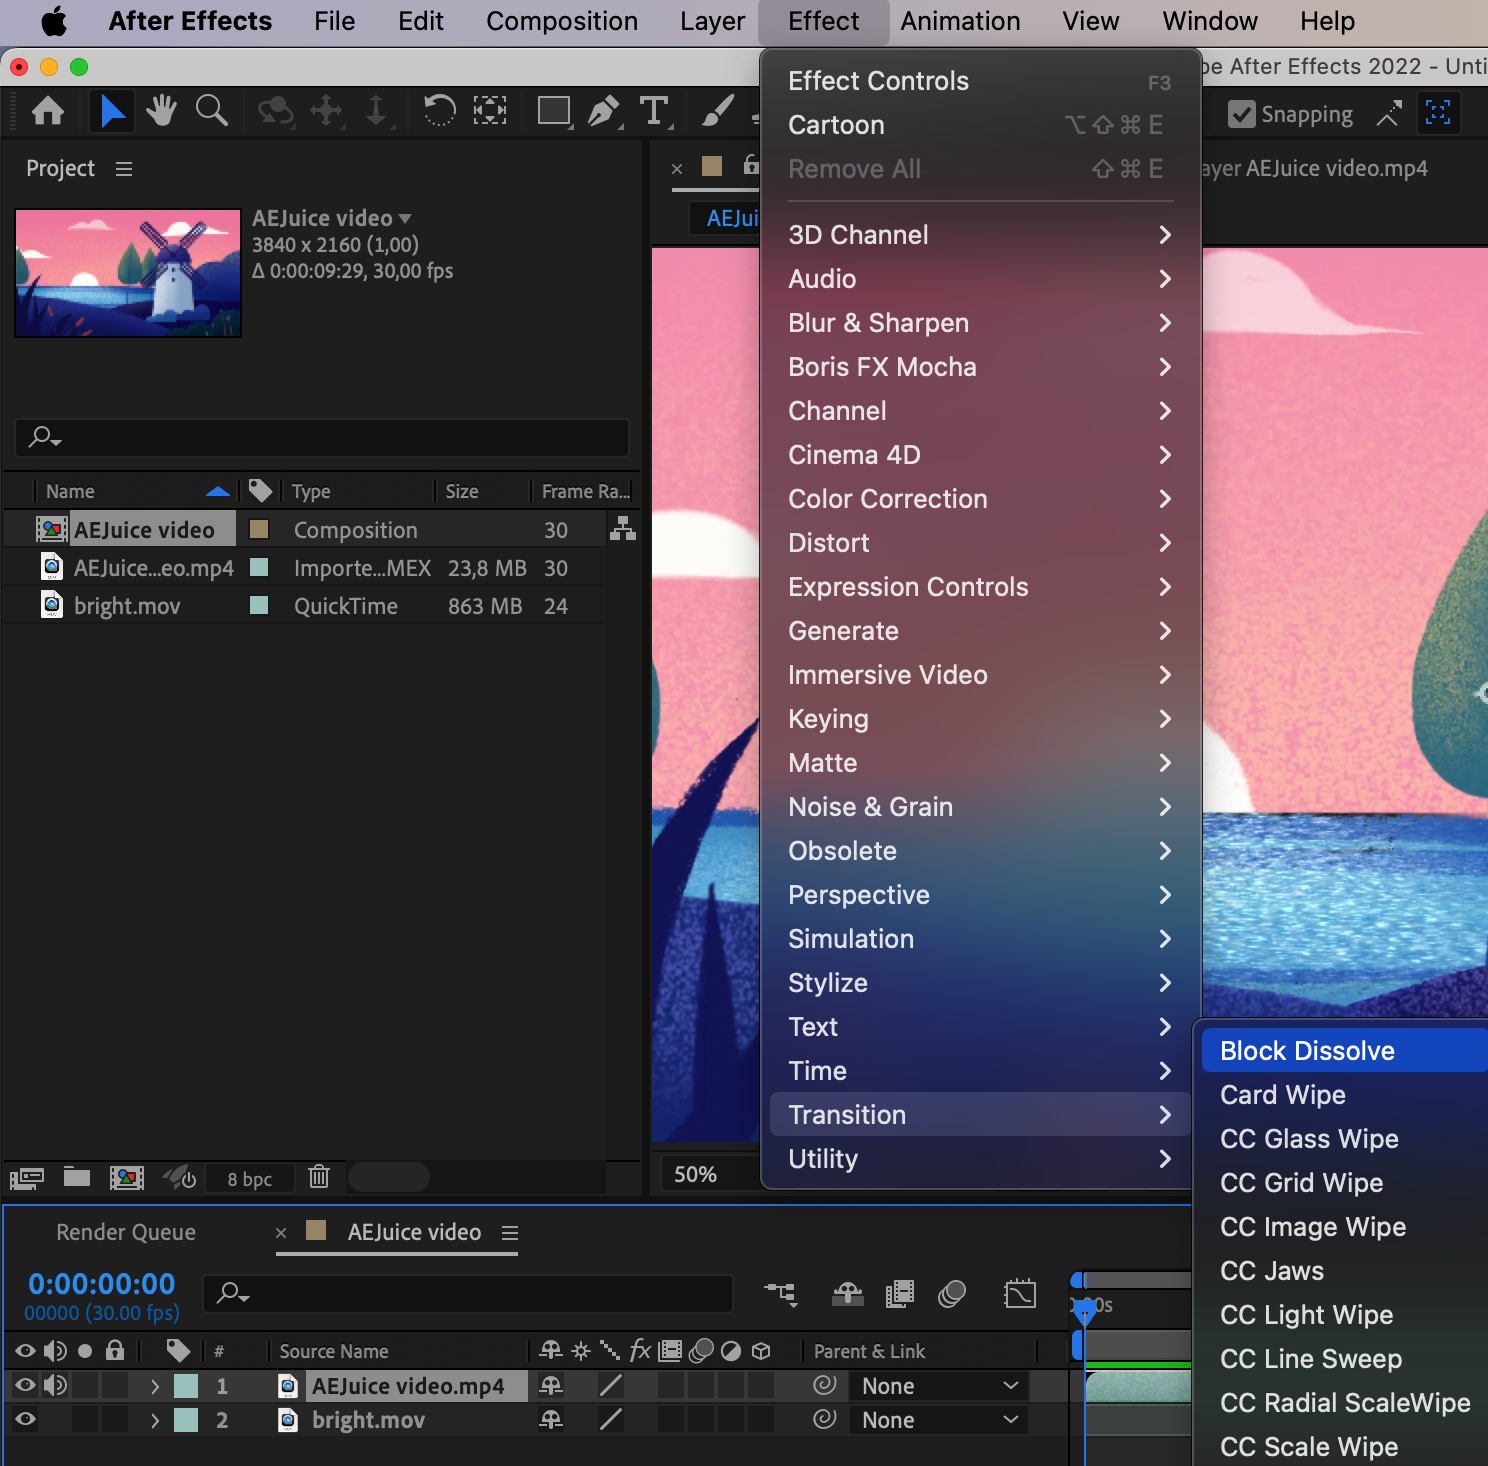
4. Set the block dissolve effect: With the first clip selected, navigate to the Effects & Presets panel and search for “Block Dissolve” to apply the default cross dissolve effect directly onto the selected clip.
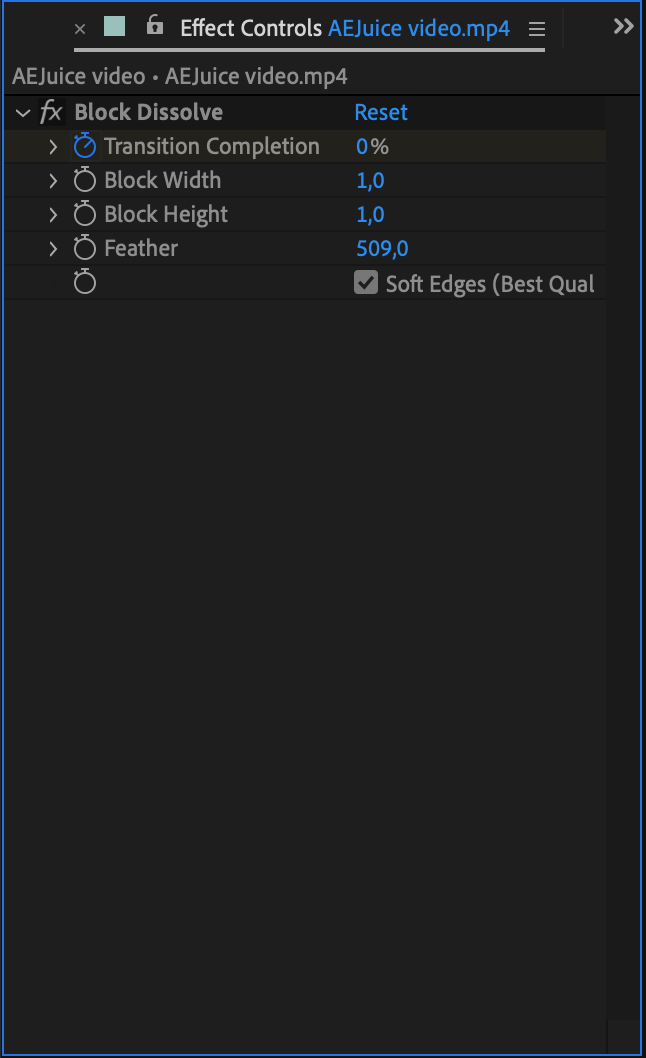
5. Customize the effect: To adjust the timing and duration of the block dissolve, select the transition layer in the timeline and go to the Effect Controls panel. Here, you can modify parameters such as the duration, start time, and end time of the transition to achieve the desired effect.
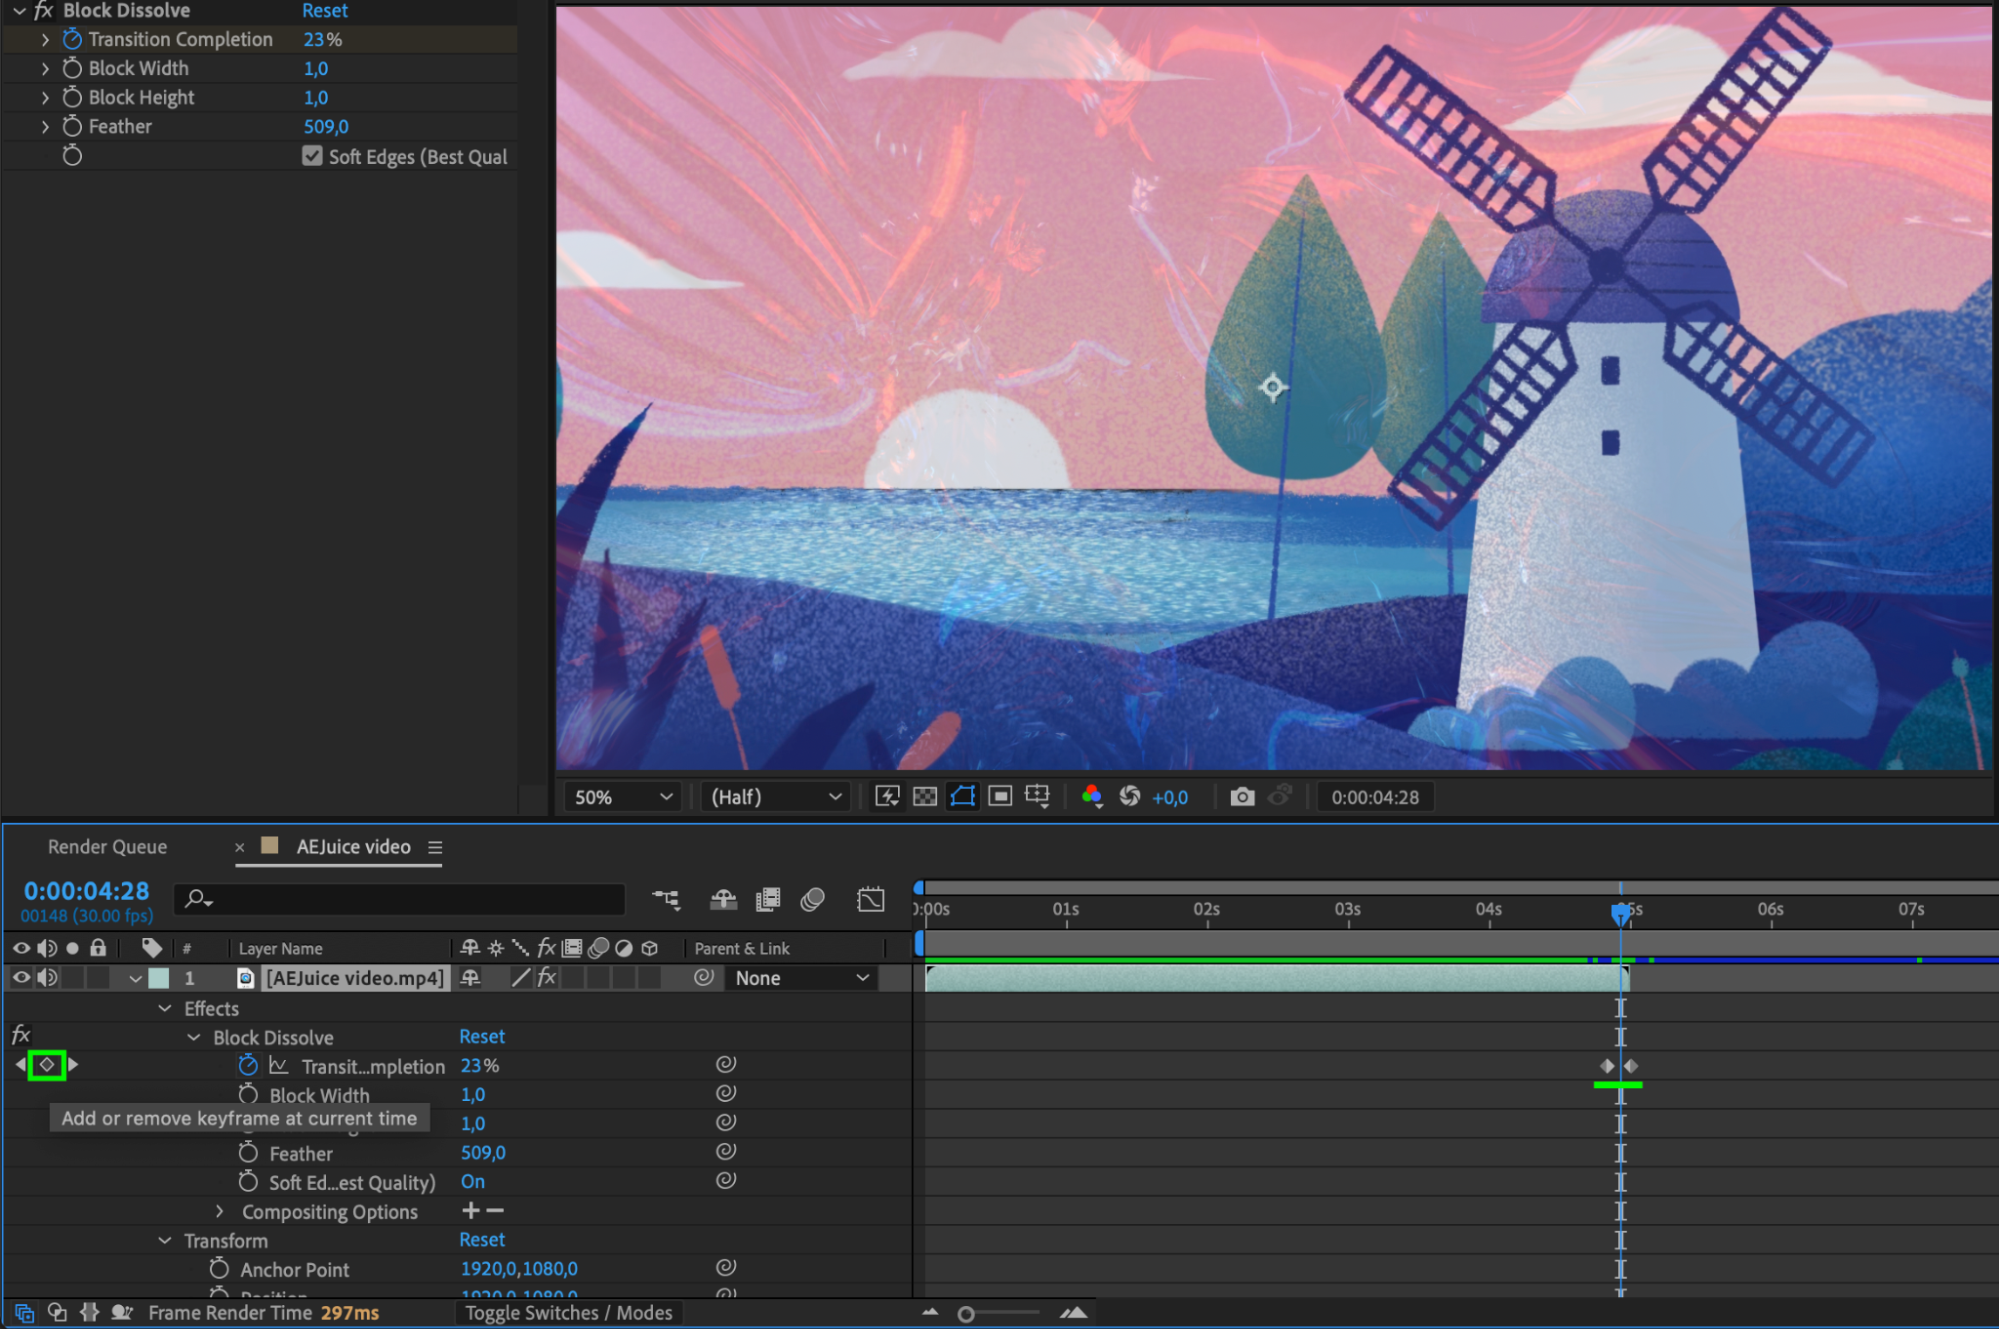
6. Fine-tune the transition: If you want to further refine the block dissolve, you can add keyframes to control the opacity of the clips involved in the transition. This allows for more creative control over the blend between the two clips. Use the hotkey “T” to reveal the opacity property, and create keyframes at the points where you want the transition to begin and end.
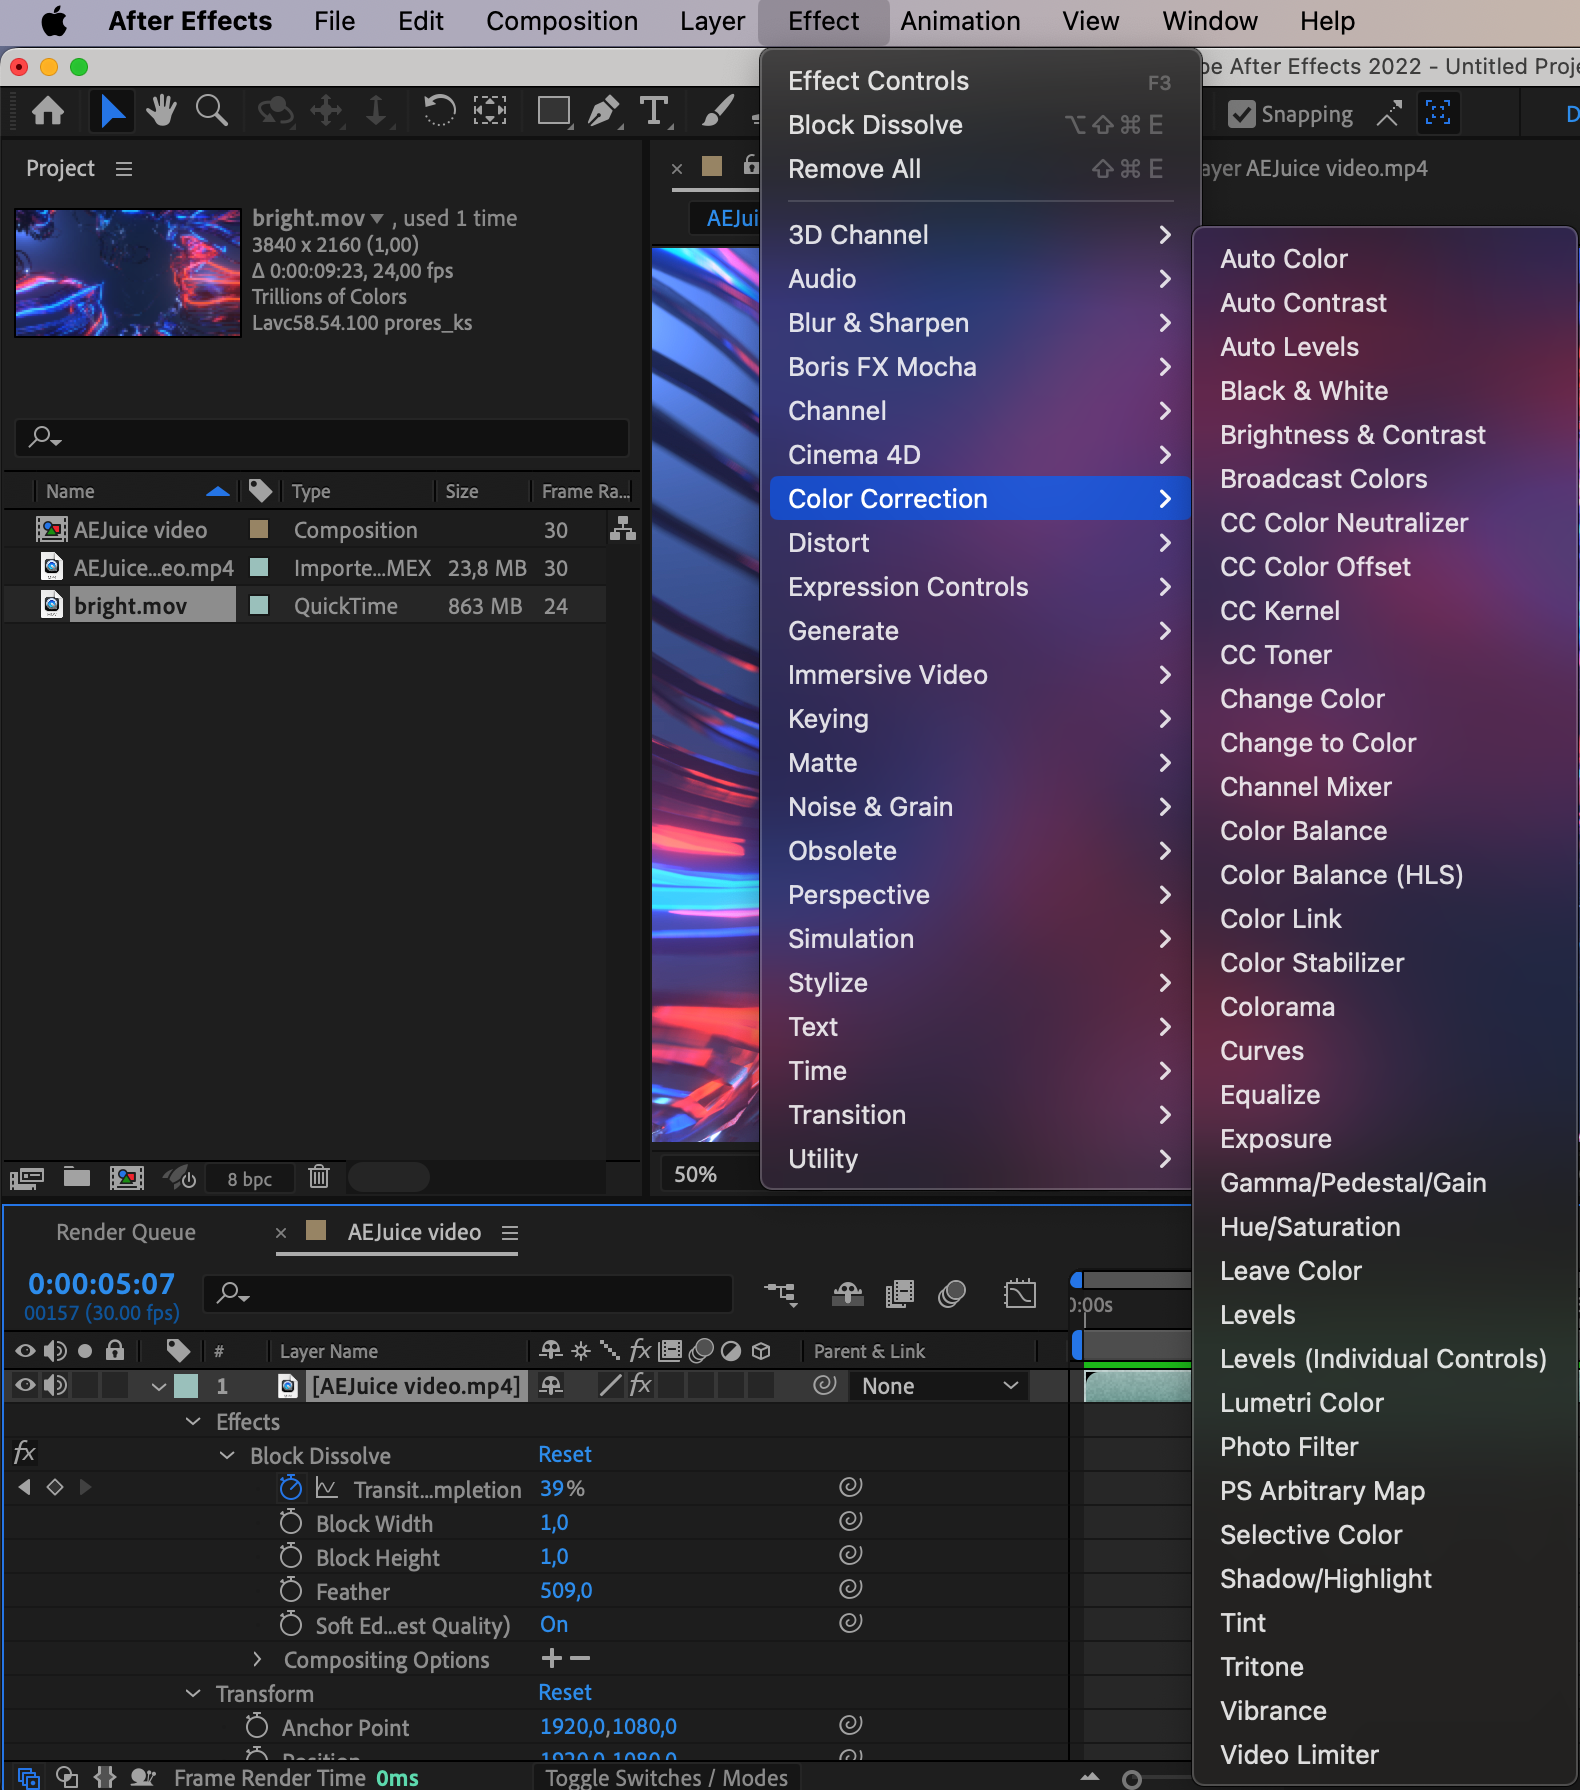
7. Experiment with additional settings: After Effects offers various options to enhance the block dissolve effect further. In the Effect Controls panel, explore settings such as feathering, blend modes, and color correction to add depth and style to your transitions.
8. Preview and refine: Once you’ve configured the block dissolve to your satisfaction, click the spacebar to preview your composition. If any adjustments are needed, go back and fine-tune until the transition appears seamless and visually appealing.
Remember, practice makes perfect. Experiment with different footage, durations, and settings to gain confidence in using the block dissolve effect effectively. With this powerful tool at your fingertips, you’ll be able to create captivating and professional transitions that will elevate your video editing to new heights.
In conclusion, the block dissolve effect is a valuable asset in After Effects that allows you to seamlessly merge clips, creating smooth and visually pleasing transitions. By following this step-by-step guide, you’ve learned the fundamentals of applying and customizing the block dissolve effect to enhance your projects. So, start implementing this technique in your edits and watch as your videos come to life with seamless transitions that captivate your audience.
Conclusion: Mastering the Block Dissolve Effect in After Effects
In this comprehensive guide, we have explored the power of the block dissolve effect in Adobe After Effects and how it can enhance your video editing skills. We’ve covered the step-by-step process of creating seamless transitions using the block dissolve effect, from importing footage to customizing settings and fine-tuning the transition.
By mastering this technique, you can add a professional touch to your videos, creating visually appealing and captivating transitions that keep your audience engaged. The ability to smoothly merge clips is essential in creating a cohesive storyline, and the block dissolve effect is a versatile tool that empowers you to achieve precisely that.
Remember, practice is key. Experiment with different durations, adjustments, and additional settings to truly harness the potential of the block dissolve effect. The more you explore and play with the possibilities, the more you’ll refine your skills and develop your unique style in utilizing this effect.
So, don’t be afraid to dive into After Effects, apply the block dissolve effect, and let your creativity flourish. Whether you’re working on a cinematic masterpiece, a corporate video, or a simple vlog, seamless transitions will elevate the overall quality of your content.
Now, armed with the knowledge and techniques outlined in this guide, you have the tools to create captivating transitions that will take your video editing skills to new heights. So, start implementing the block dissolve effect in your projects and impress your audience with seamless and professional transitions. Happy editing!
Our Bestsellers


