How to Clear Cache in After Effects for Improved Performance
Introduction: Why Clearing Cache in After Effects is Important
Clearing the After Effects cache can significantly improve your editing experience by freeing up space and resolving performance issues. Over time, the cache can accumulate large amounts of data, which may slow down your workflow. In this guide, we’ll walk you through the steps to clear your After Effects cache, ensuring a smoother and more efficient editing process.
Step 1: Open After Effects and Access Cache Settings
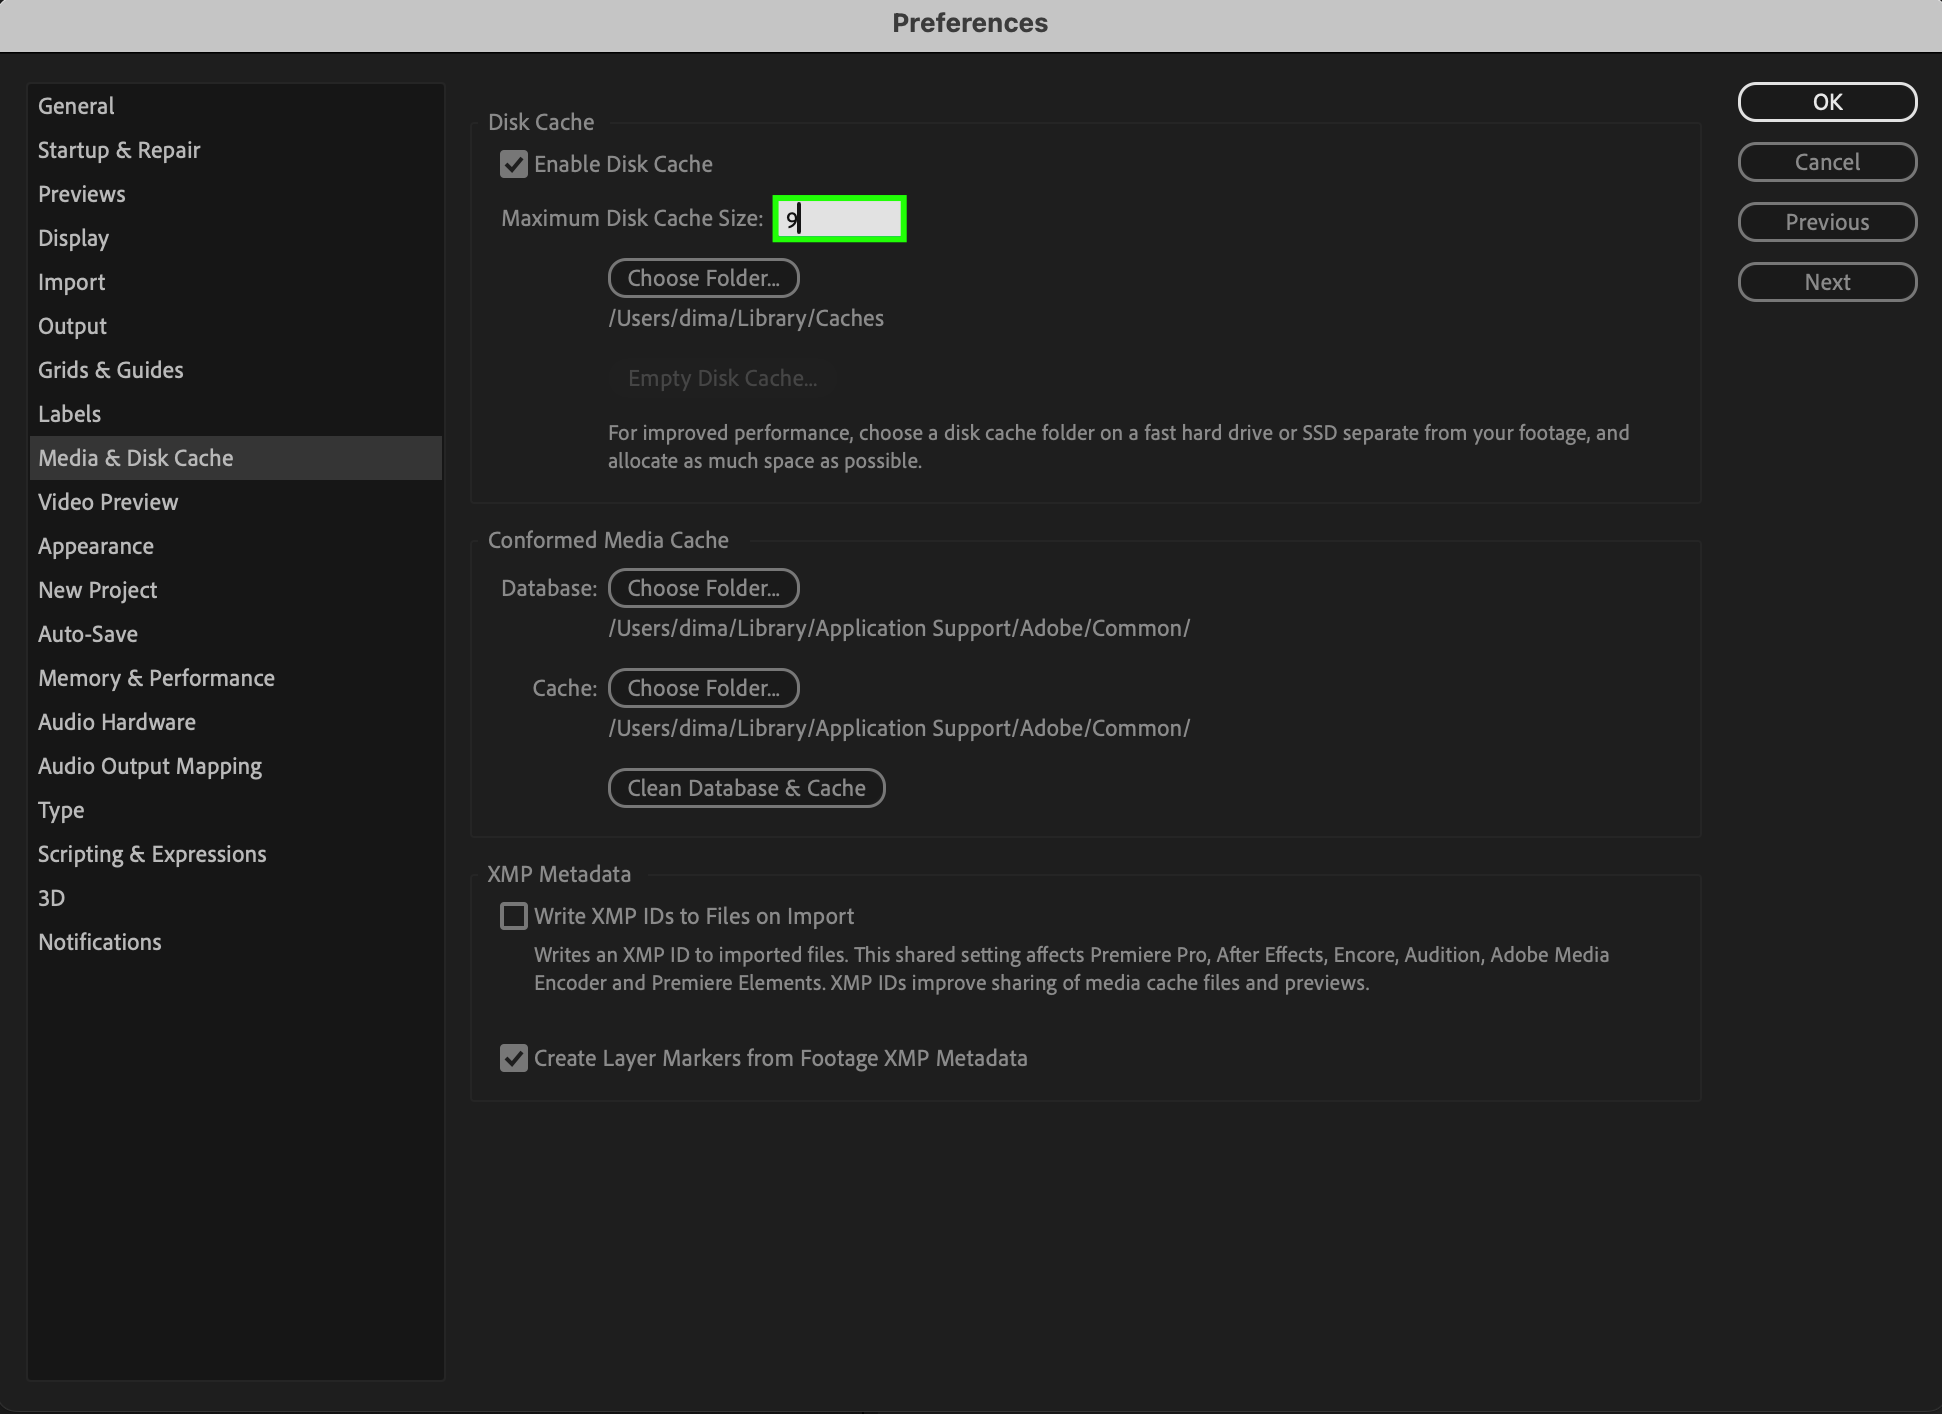
First, launch After Effects on your computer. Once the program is open, navigate to the cache settings. For Mac users, go to After Effects > Settings > Media & Disk Cache. For Windows users, go to Edit > Preferences > Media & Disk Cache. This is where you can view and manage the cache settings for your projects.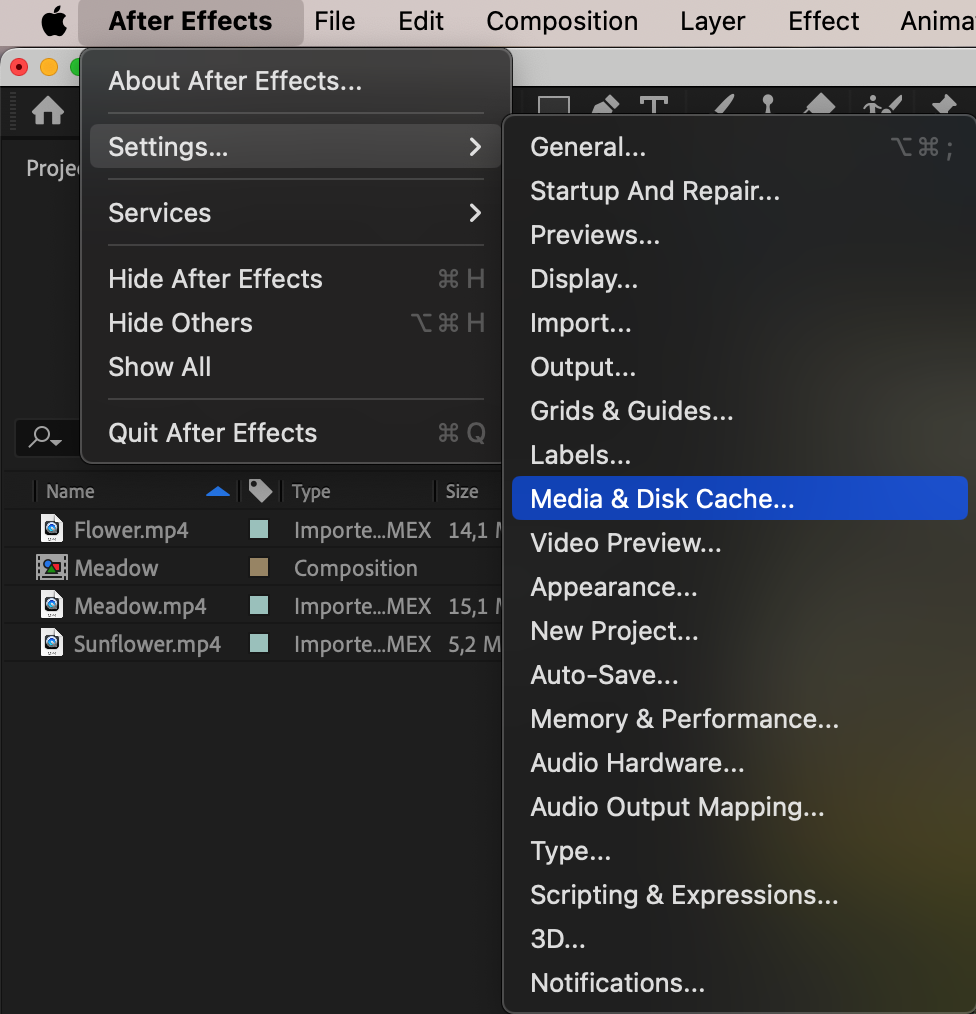 Step 2: Close After Effects and Backup Files (Optional)
Get 10% off when you subscribe to our newsletter

Before proceeding with deleting the cache, it’s advisable to close After Effects and back up any important projects or files. You can do this by saving your work with the shortcut “Ctrl/Cmd + S”. Backing up ensures that you don’t lose any crucial data, especially if you plan on making significant changes to your cache settings or workspace.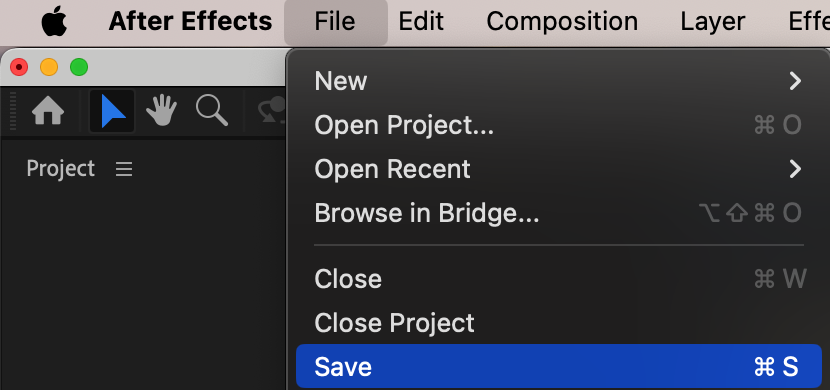 Step 3: Empty Disk Cache
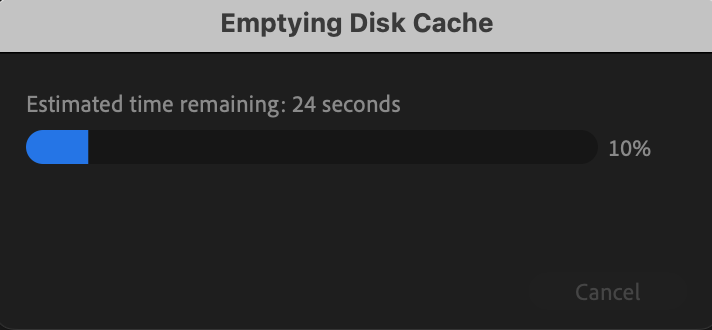
After accessing the Media & Disk Cache preferences, you’ll see an option labeled Empty Disk Cache…. Click this button to initiate the cache clearing process. This action will remove all cached files stored on your disk, freeing up space and potentially speeding up your After Effects performance.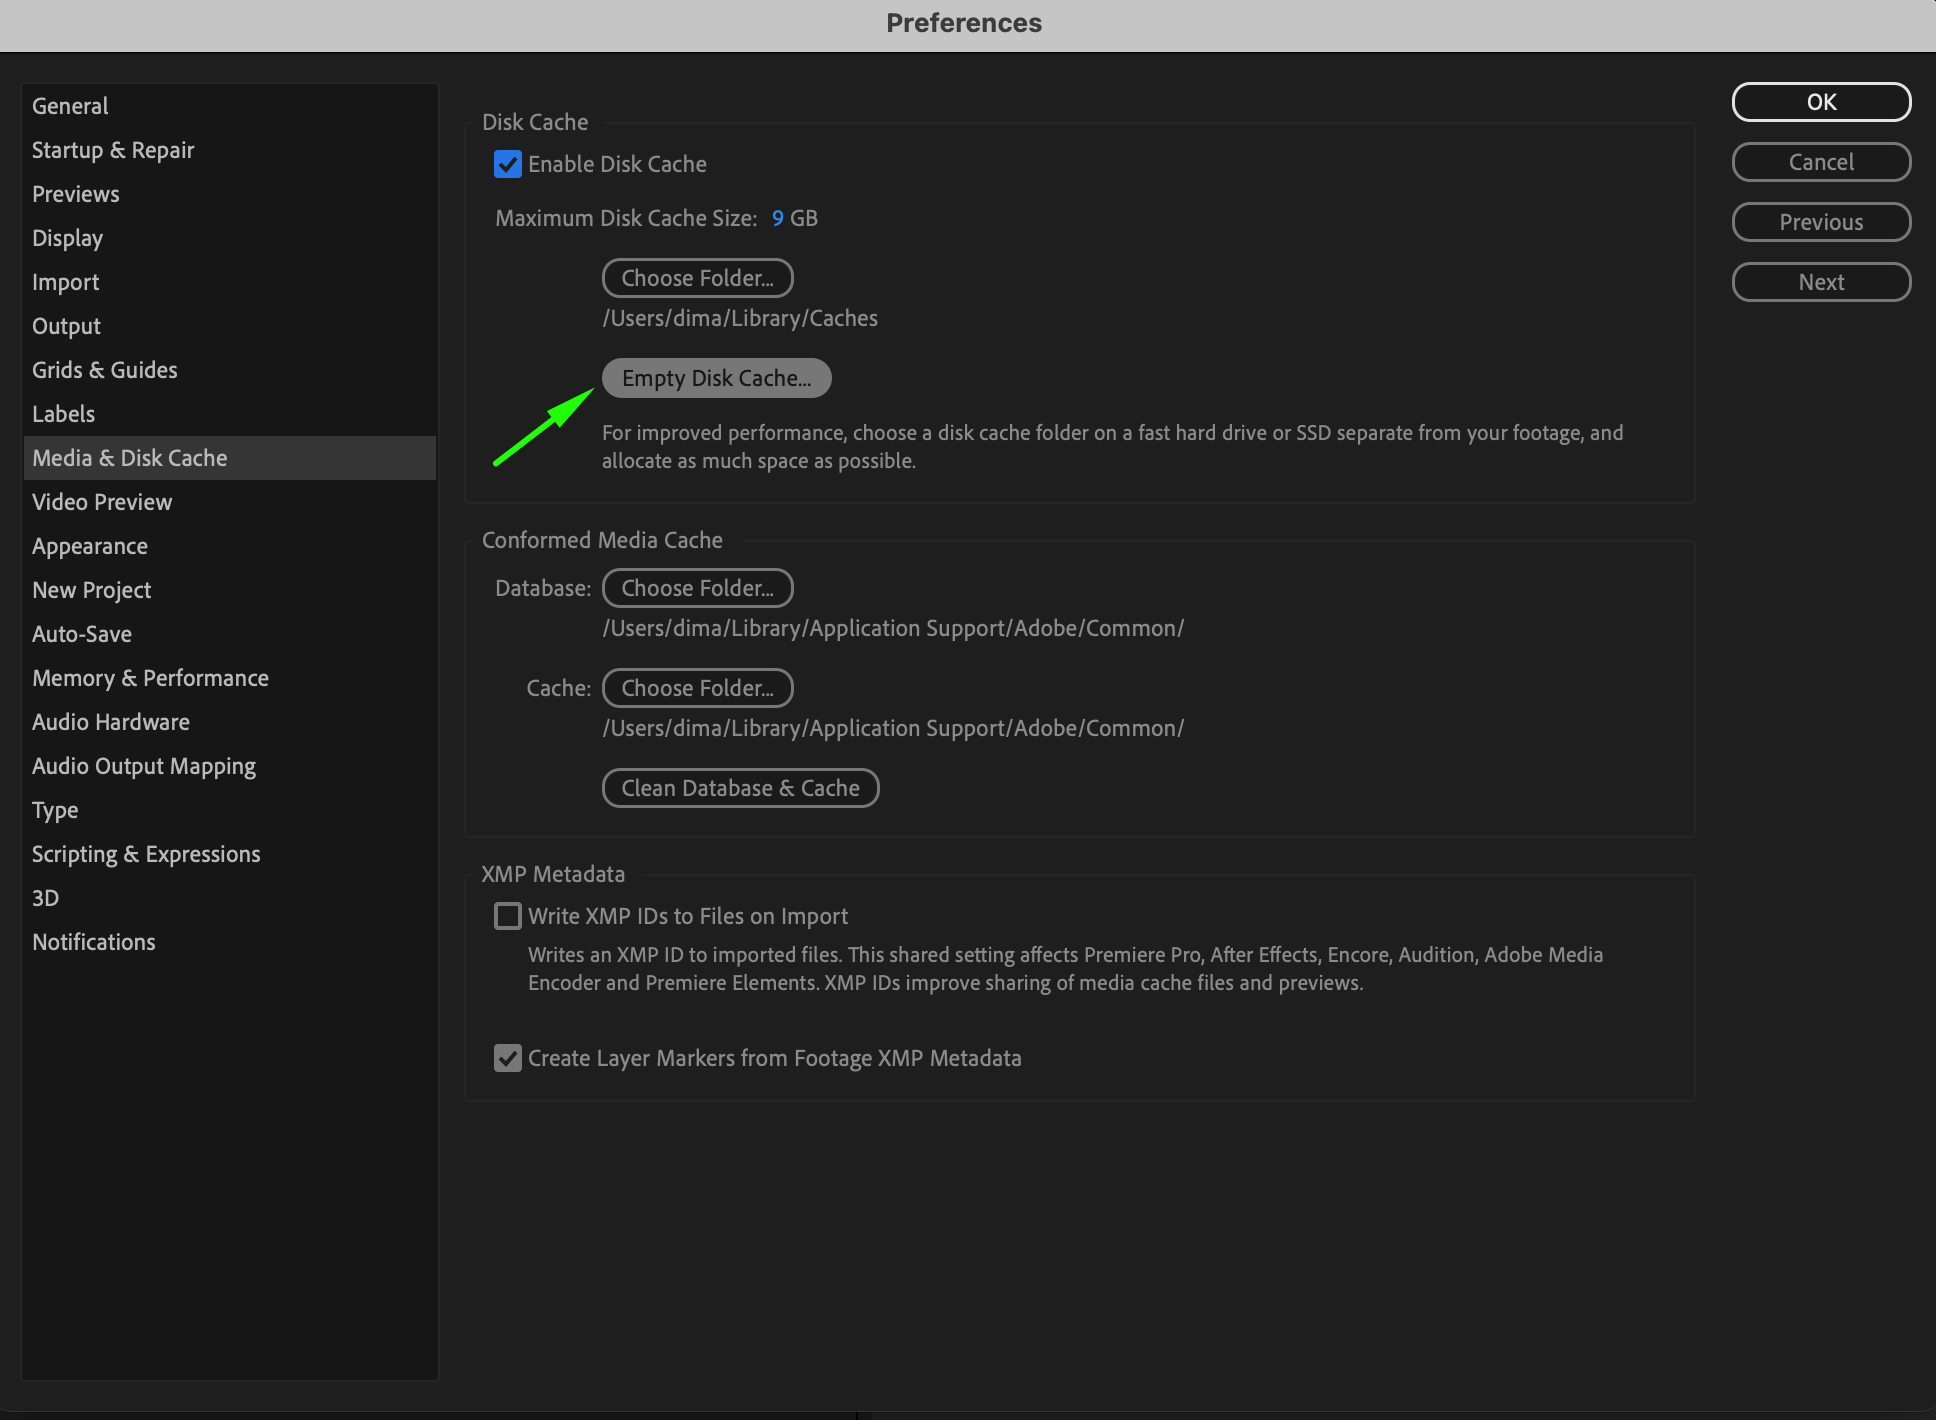 Step 4: Confirm Cache Deletion
A confirmation window titled Clear Disk Cache will appear, showing you how much space the cache currently occupies. It will ask if you are sure you want to delete the cache. If you’re certain, click OK to proceed. Deleting the cache won’t affect your project files; it will simply clear temporary files that After Effects generates during the editing process.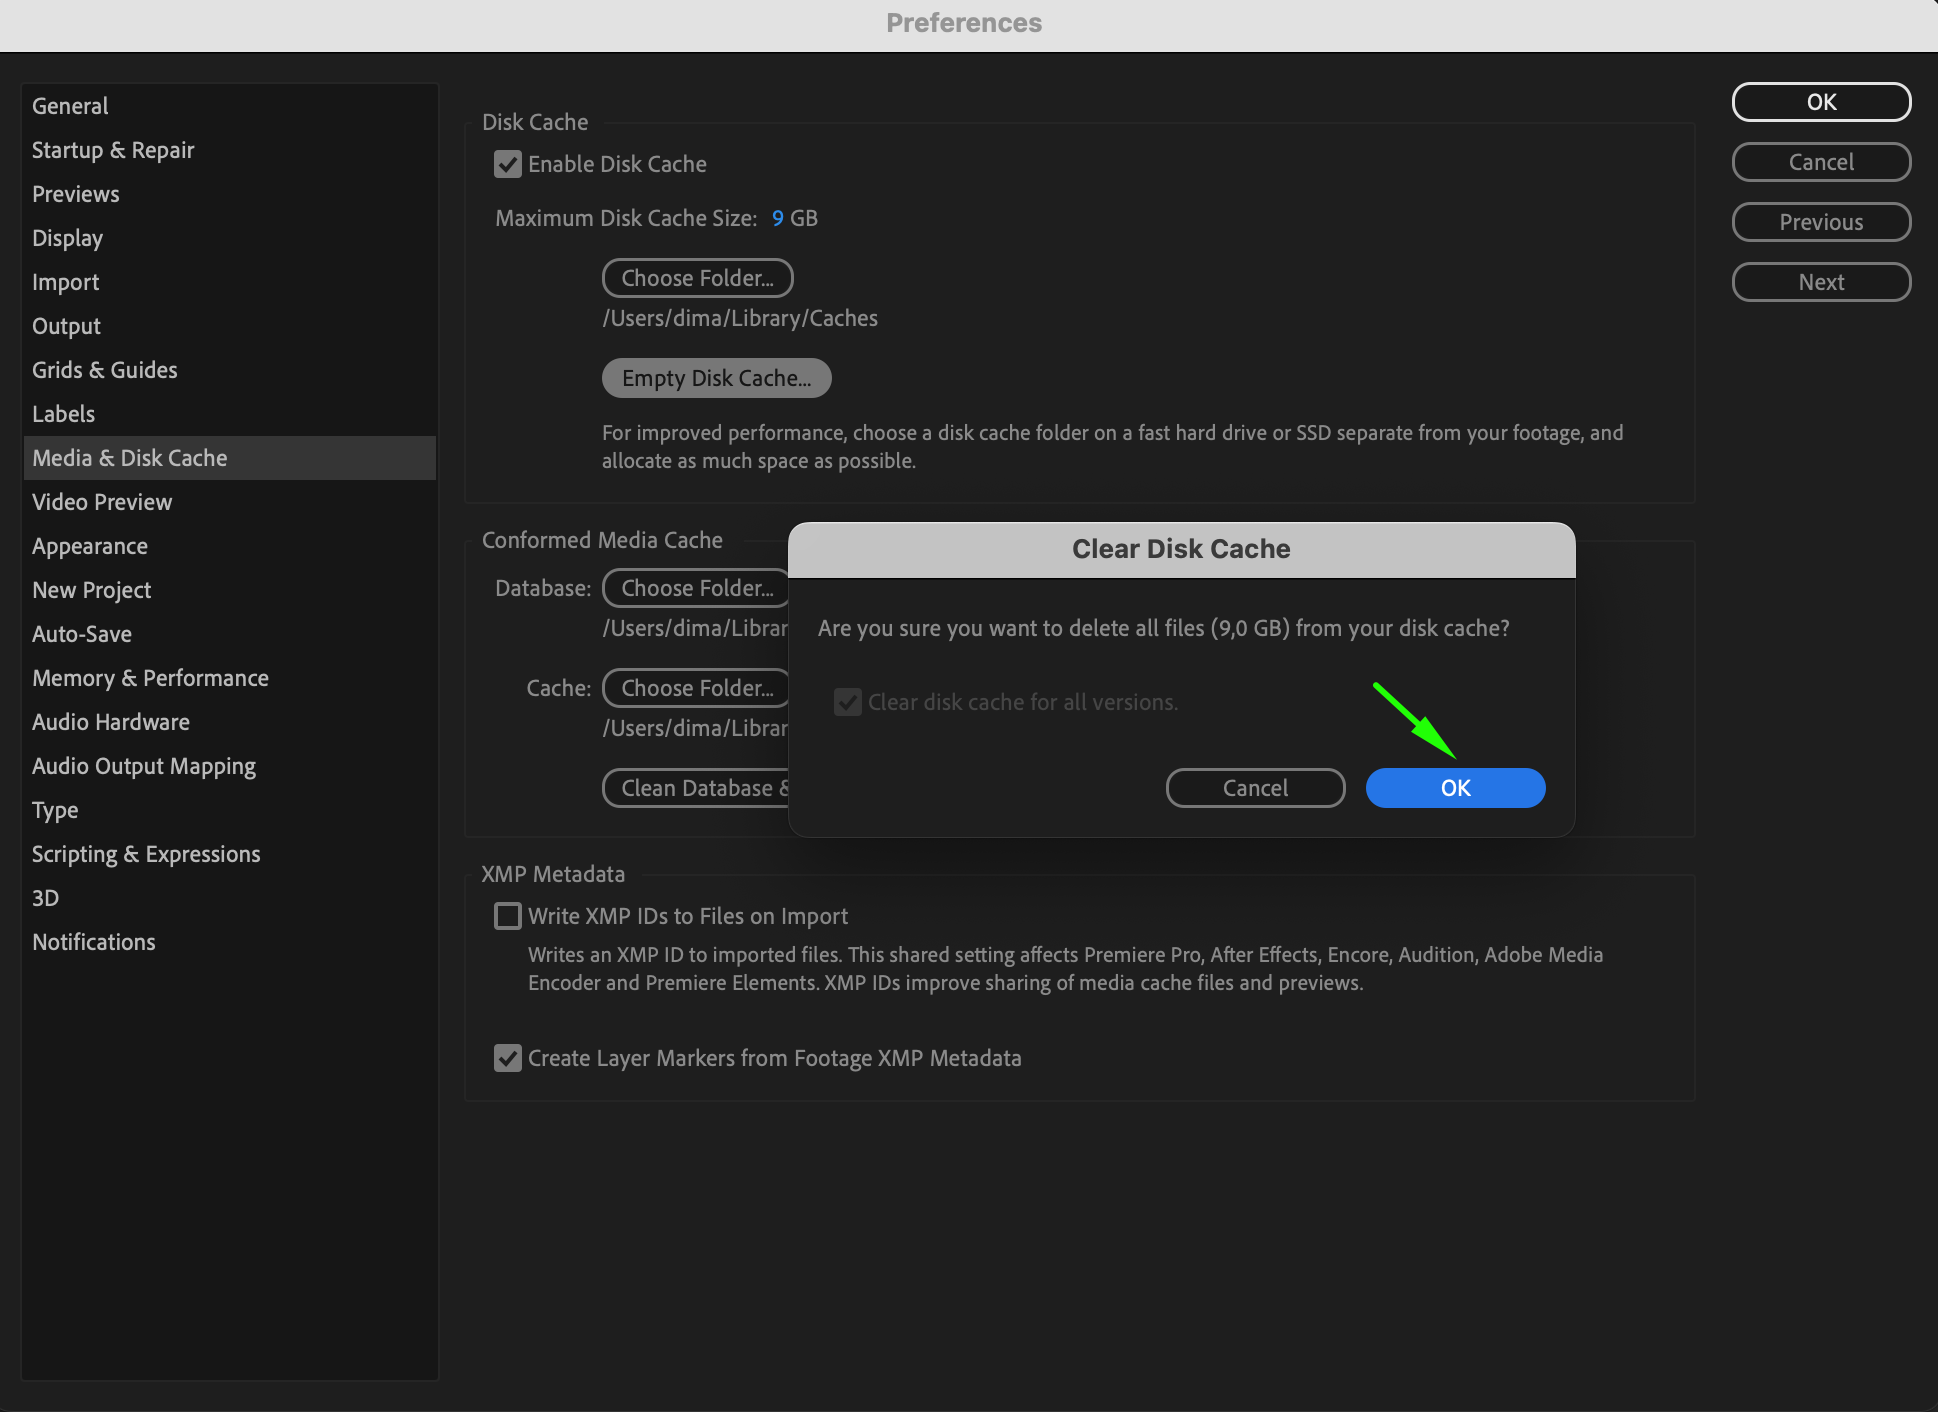
 Step 5: Restart After Effects
Once the cache has been cleared, restart After Effects. This will allow the program to create a new, empty cache folder, which can help improve performance and eliminate any issues caused by corrupted or outdated cache files. Restarting ensures that the changes take full effect, giving you a fresh start with a clean cache.
Regular Cache Maintenance Tips
To maintain optimal performance, consider implementing the following cache maintenance practices:
Clear the Cache Regularly: Aim to clear the cache once a month or every few weeks, depending on the size and frequency of your projects.
Monitor Cache Size: Keep an eye on the cache size in the Media & Disk Cache preferences. If it starts to grow significantly, it’s time to clear it out.
Adjust Cache Settings: In the Preferences menu, you can adjust the maximum disk cache size to better manage space and performance. Reducing the cache size can help prevent it from taking up too much space on your drive.
 Conclusion
By following these steps and implementing regular cache maintenance, you can optimize your workflow and enjoy a smoother editing experience with After Effects. A cluttered cache can slow down your system and cause unnecessary frustrations, so take control of your cache management and keep your editing environment running smoothly.
In conclusion, deleting the After Effects cache is a straightforward yet powerful way to enhance performance and avoid disruptions in your workflow. Regularly clearing your cache ensures that After Effects operates at its best, allowing you to focus on your creative projects without technical hindrances. Take the time to clear your cache today and unlock the full potential of your software.


