Mastering Drawing Techniques in After Effects
Introduction to Drawing in After Effects
Drawing in After Effects opens up a world of creative possibilities, allowing you to add a personal touch to your animations. Whether you’re new to the software or a seasoned designer, this guide will walk you through the essentials of drawing within After Effects, from basic shapes to intricate illustrations. With tools like shape layers and the brush tool, you can create professional-quality visuals directly in the software, seamlessly integrating your drawings with other animation features.
Get 10% off when you subscribe to our newsletter

Step 1: Set Up Your Composition
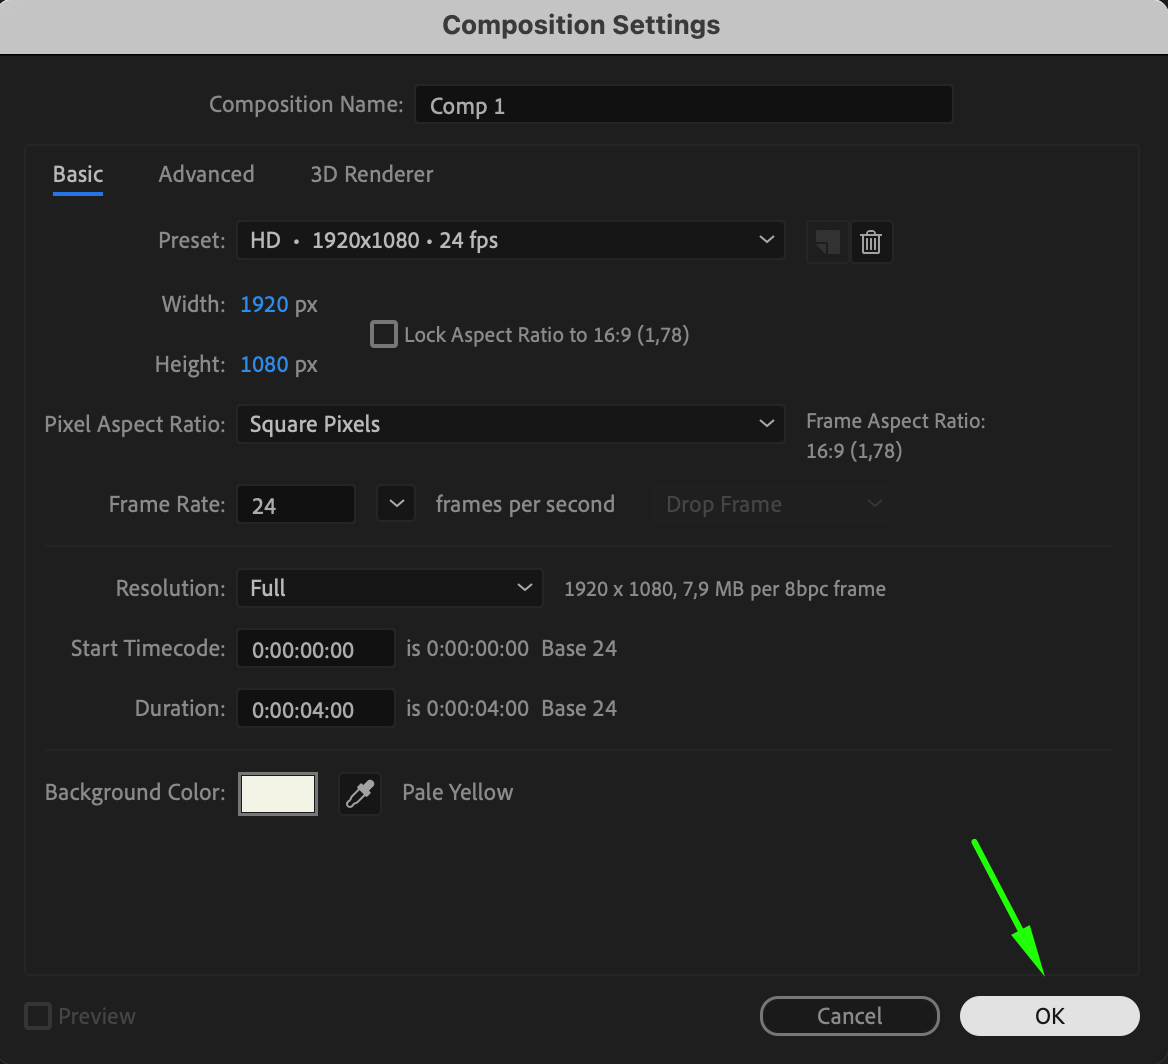
Begin by creating a new composition. Go to Composition > New Composition and set the dimensions and duration according to your project’s needs. This step establishes the workspace where you’ll create and animate your drawings, setting the stage for your creative process.
 Step 2: Use Shape Layers for Basic Shapes
To create geometric shapes, select the shape tools (Rectangle, Ellipse, Polygon, etc.) using the Q shortcut. Customize the shapes by adjusting properties such as stroke color, stroke width, and fill color. 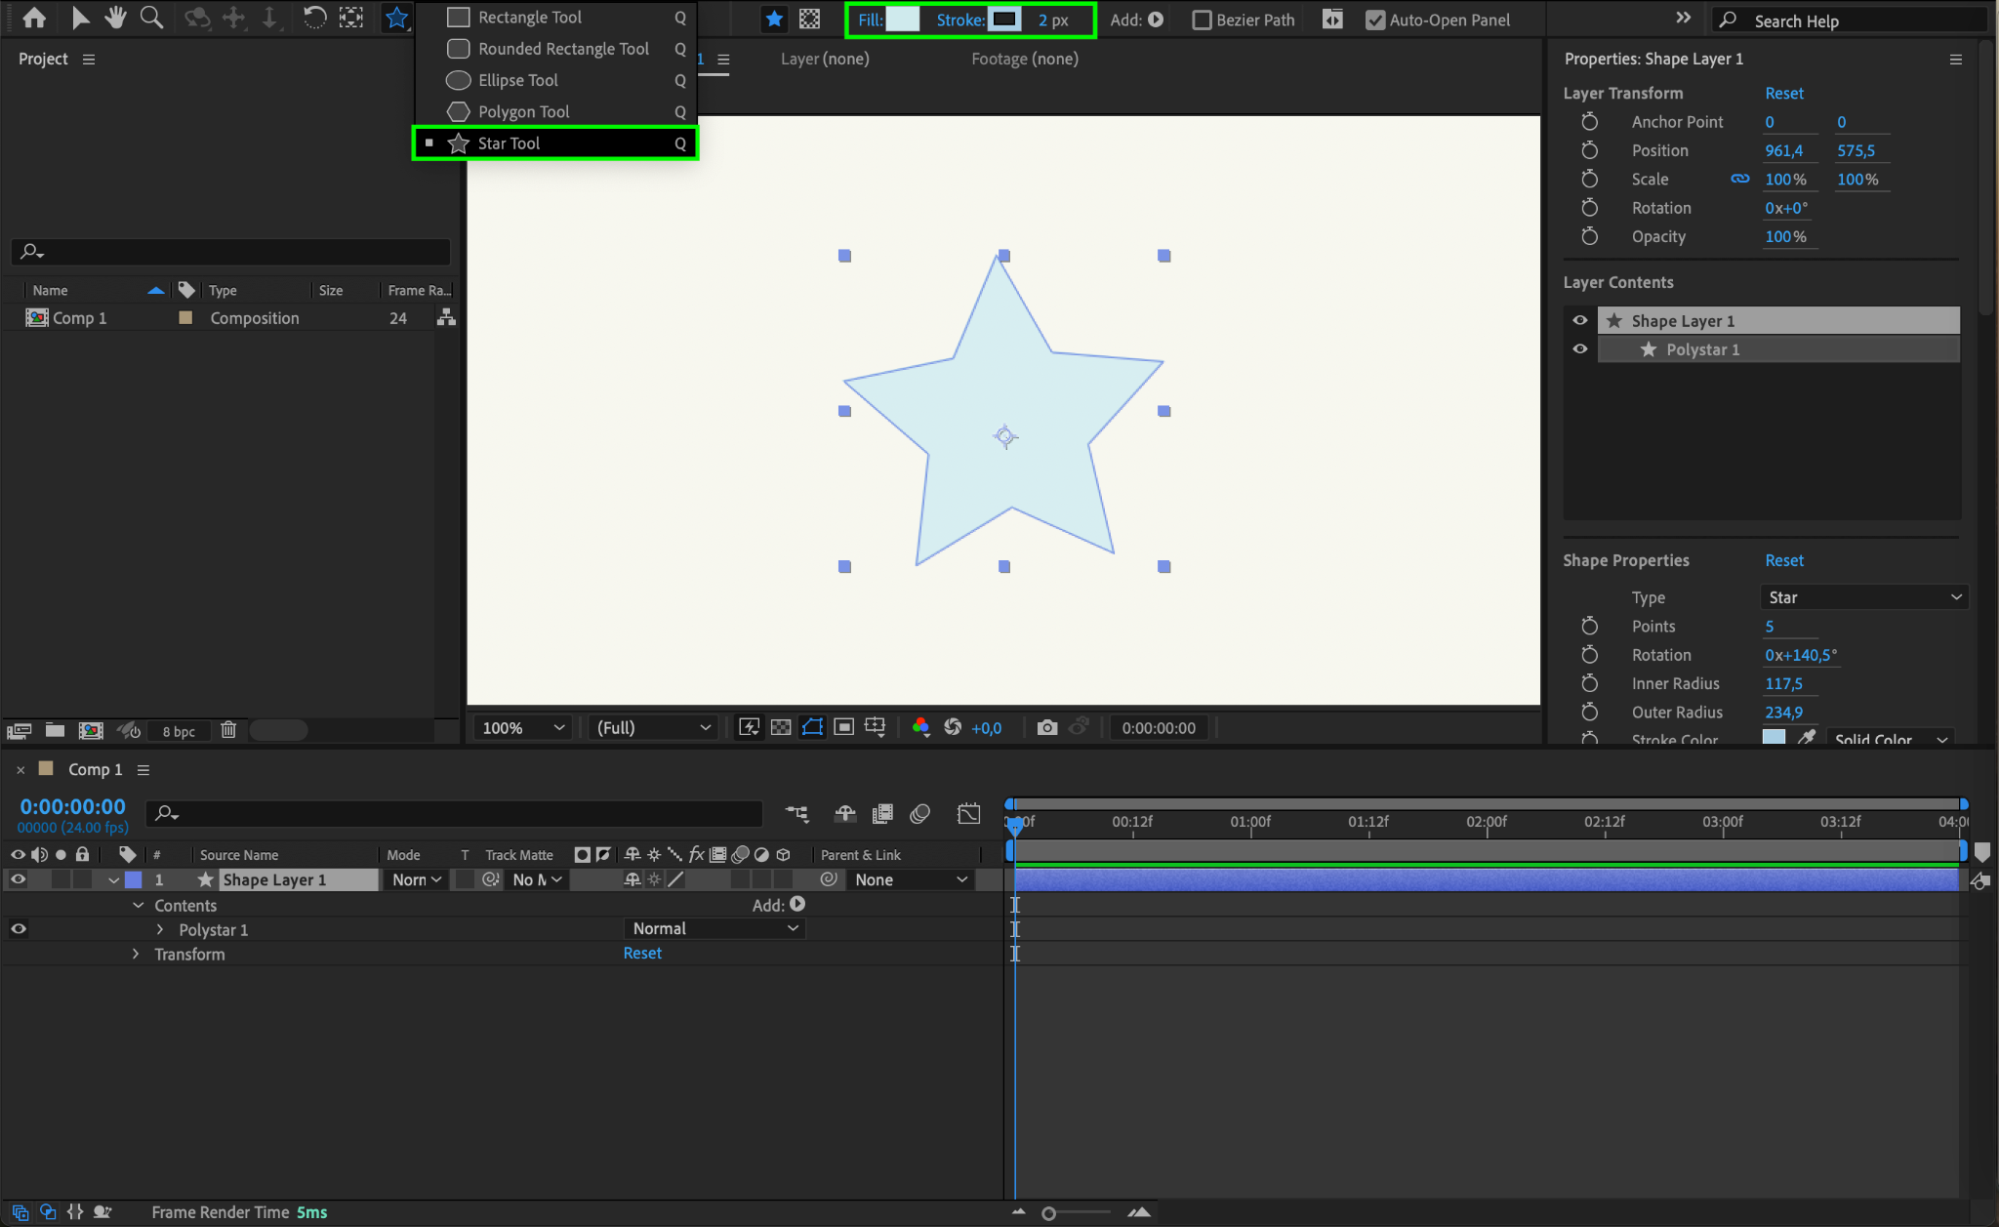 Step 3: Create Custom Paths with the Pen Tool
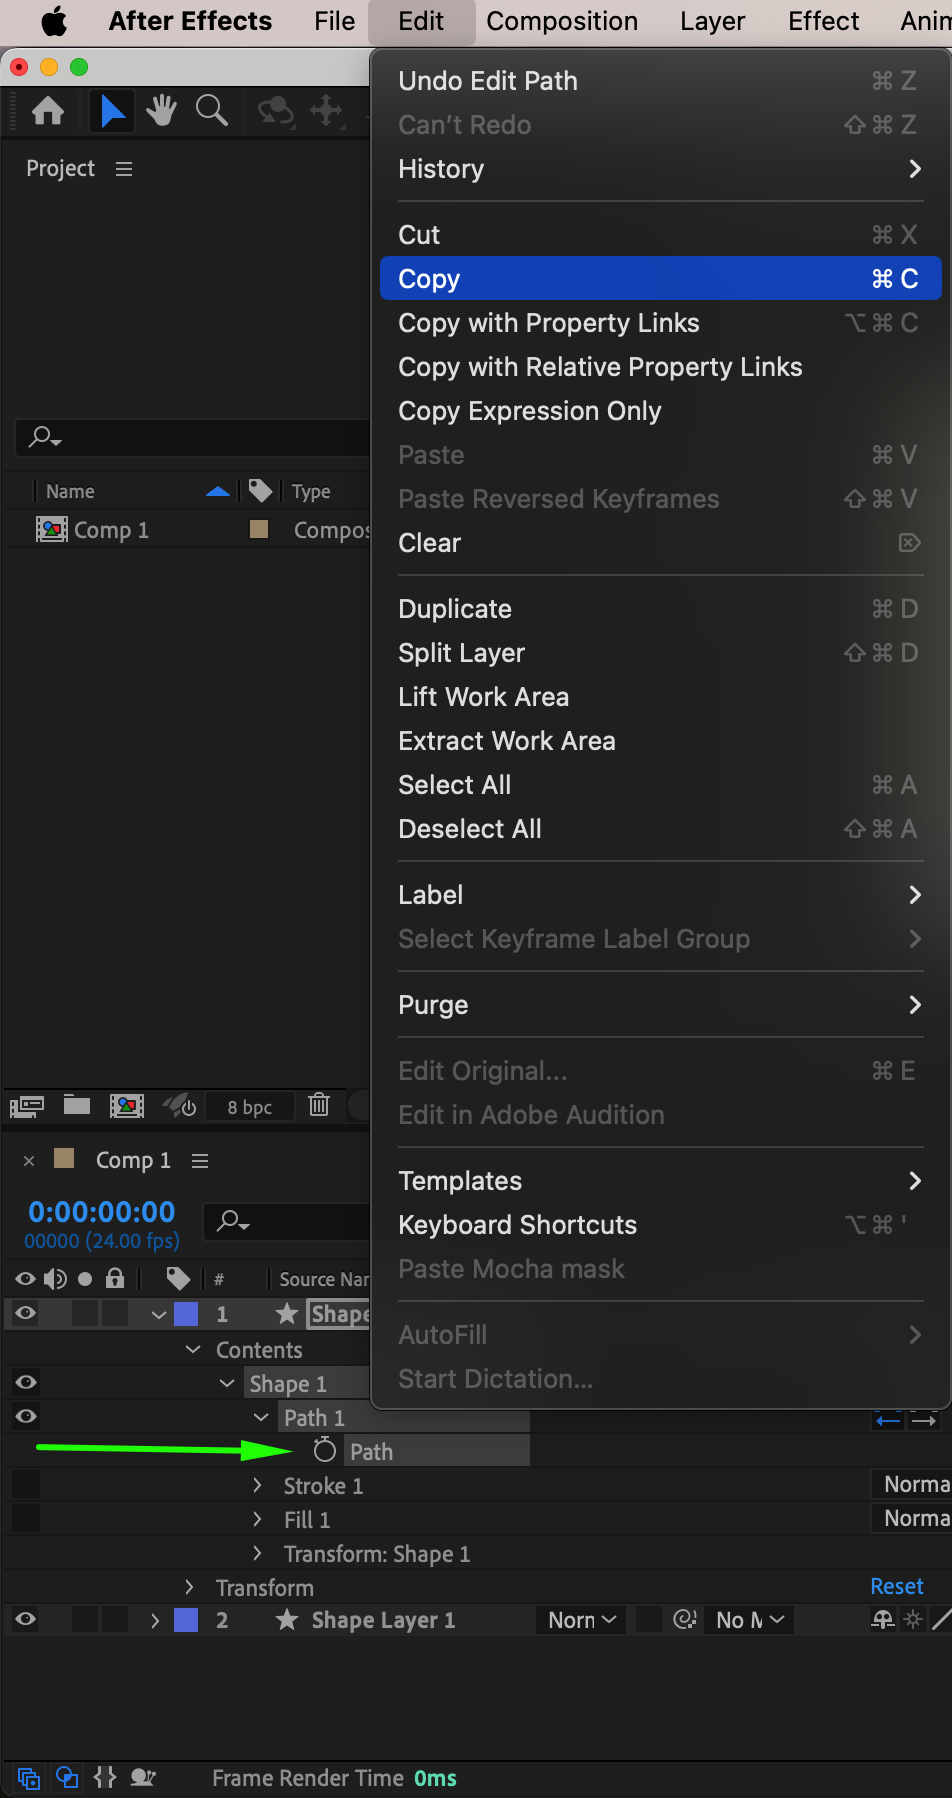
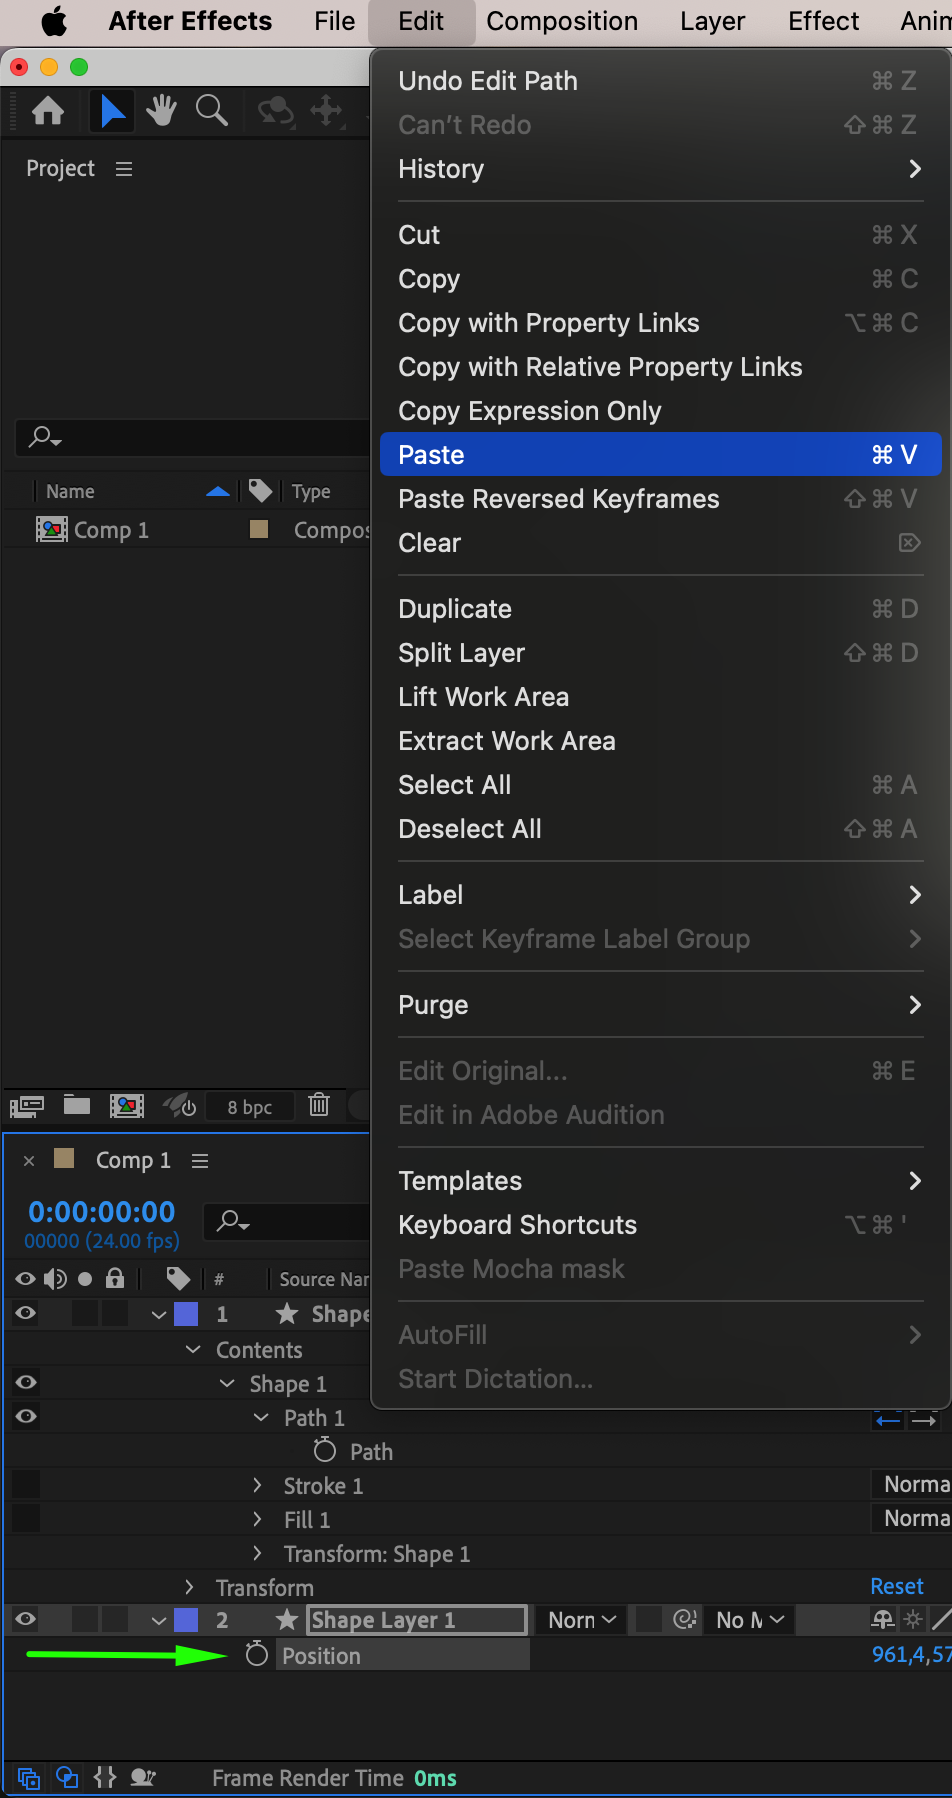
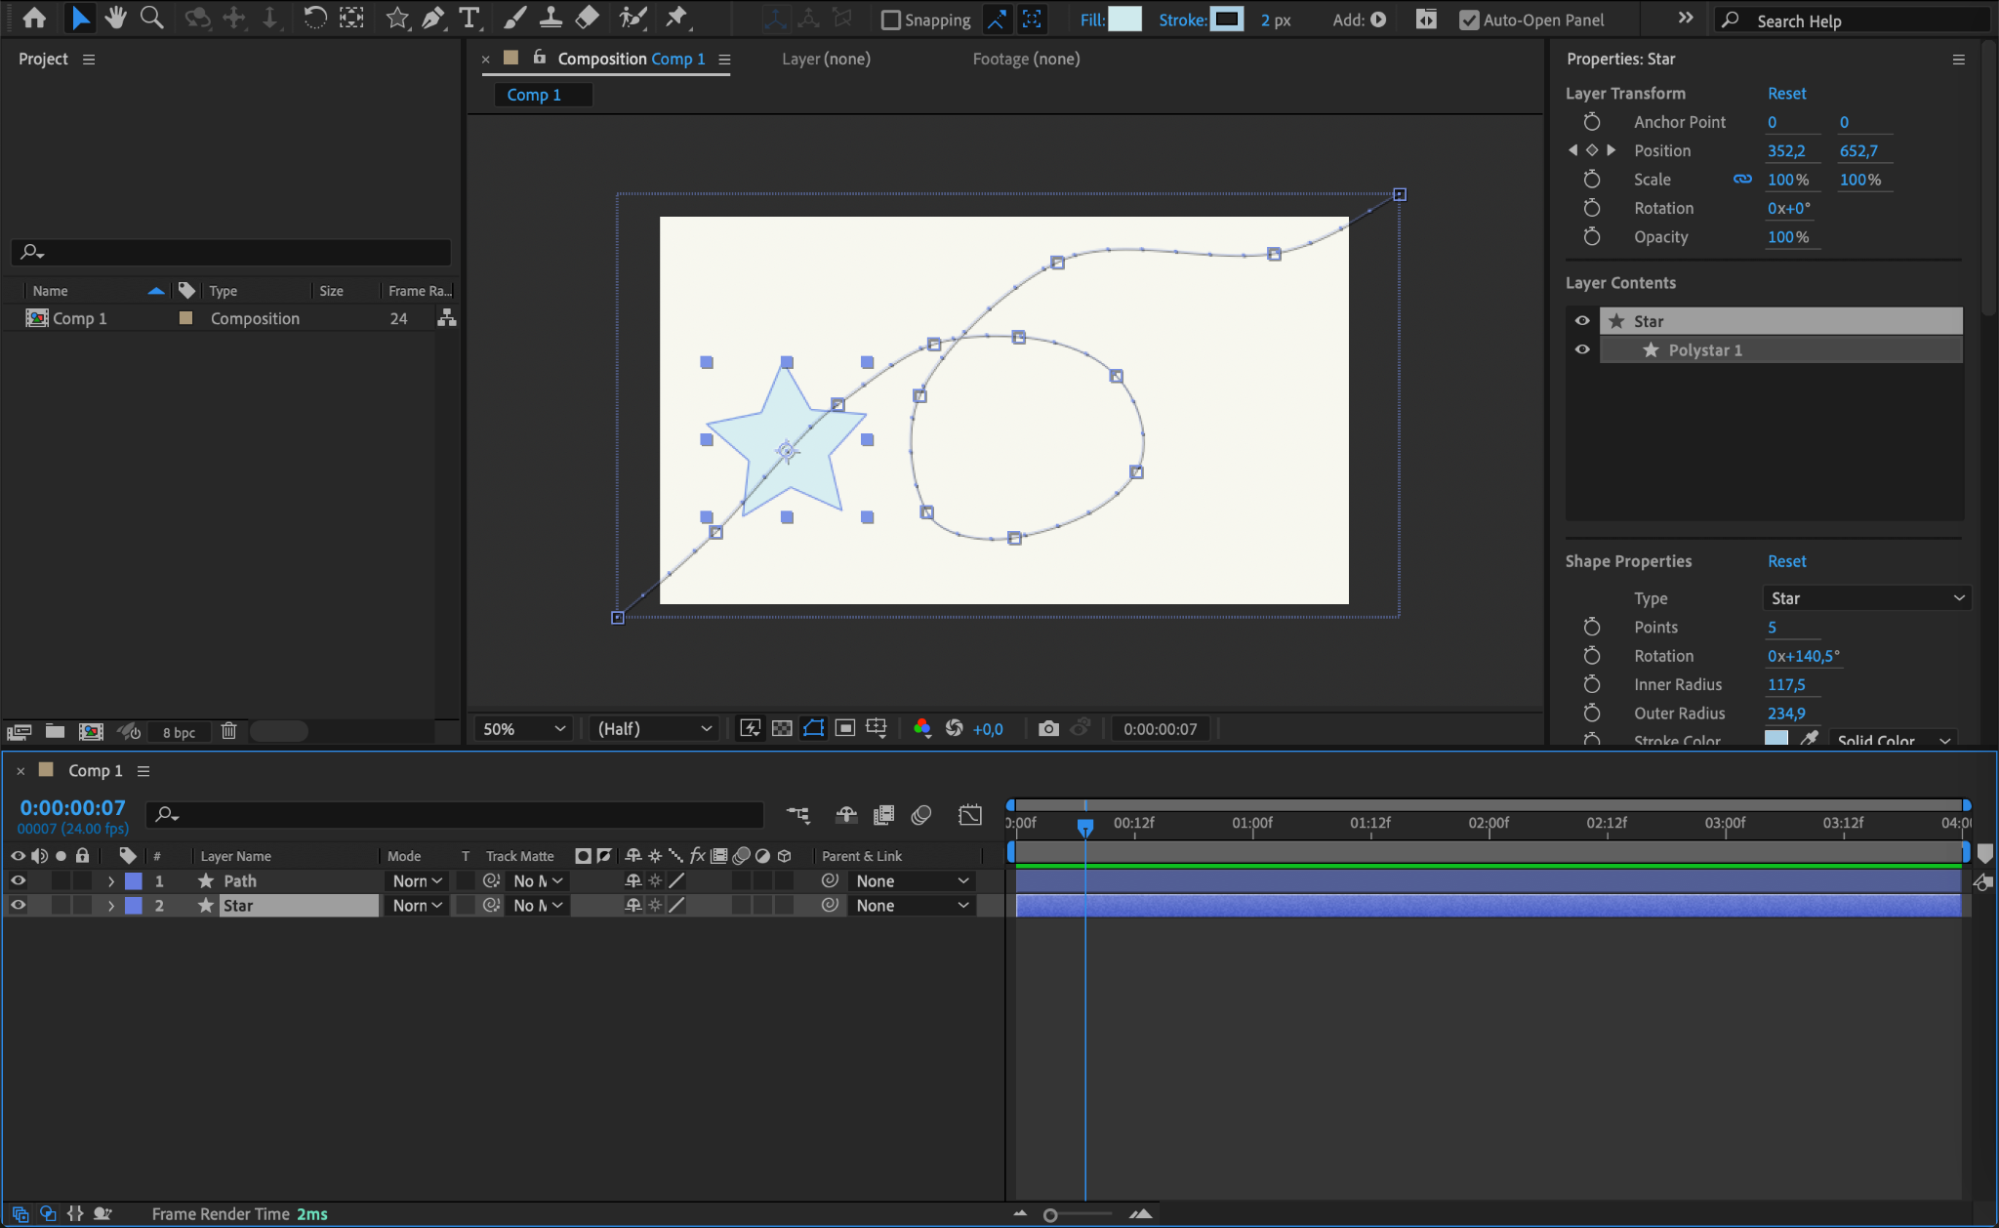
For more complex designs, use the Pen Tool (G) to draw custom paths with smooth curves and sharp angles. To apply this path to a shape layer, first copy the path value from your drawn line. Then, select the shape layer and press “P” to open the Position property. Paste the copied path value into the Position property to apply it to the shape layer. This technique allows you to seamlessly integrate custom paths into your designs.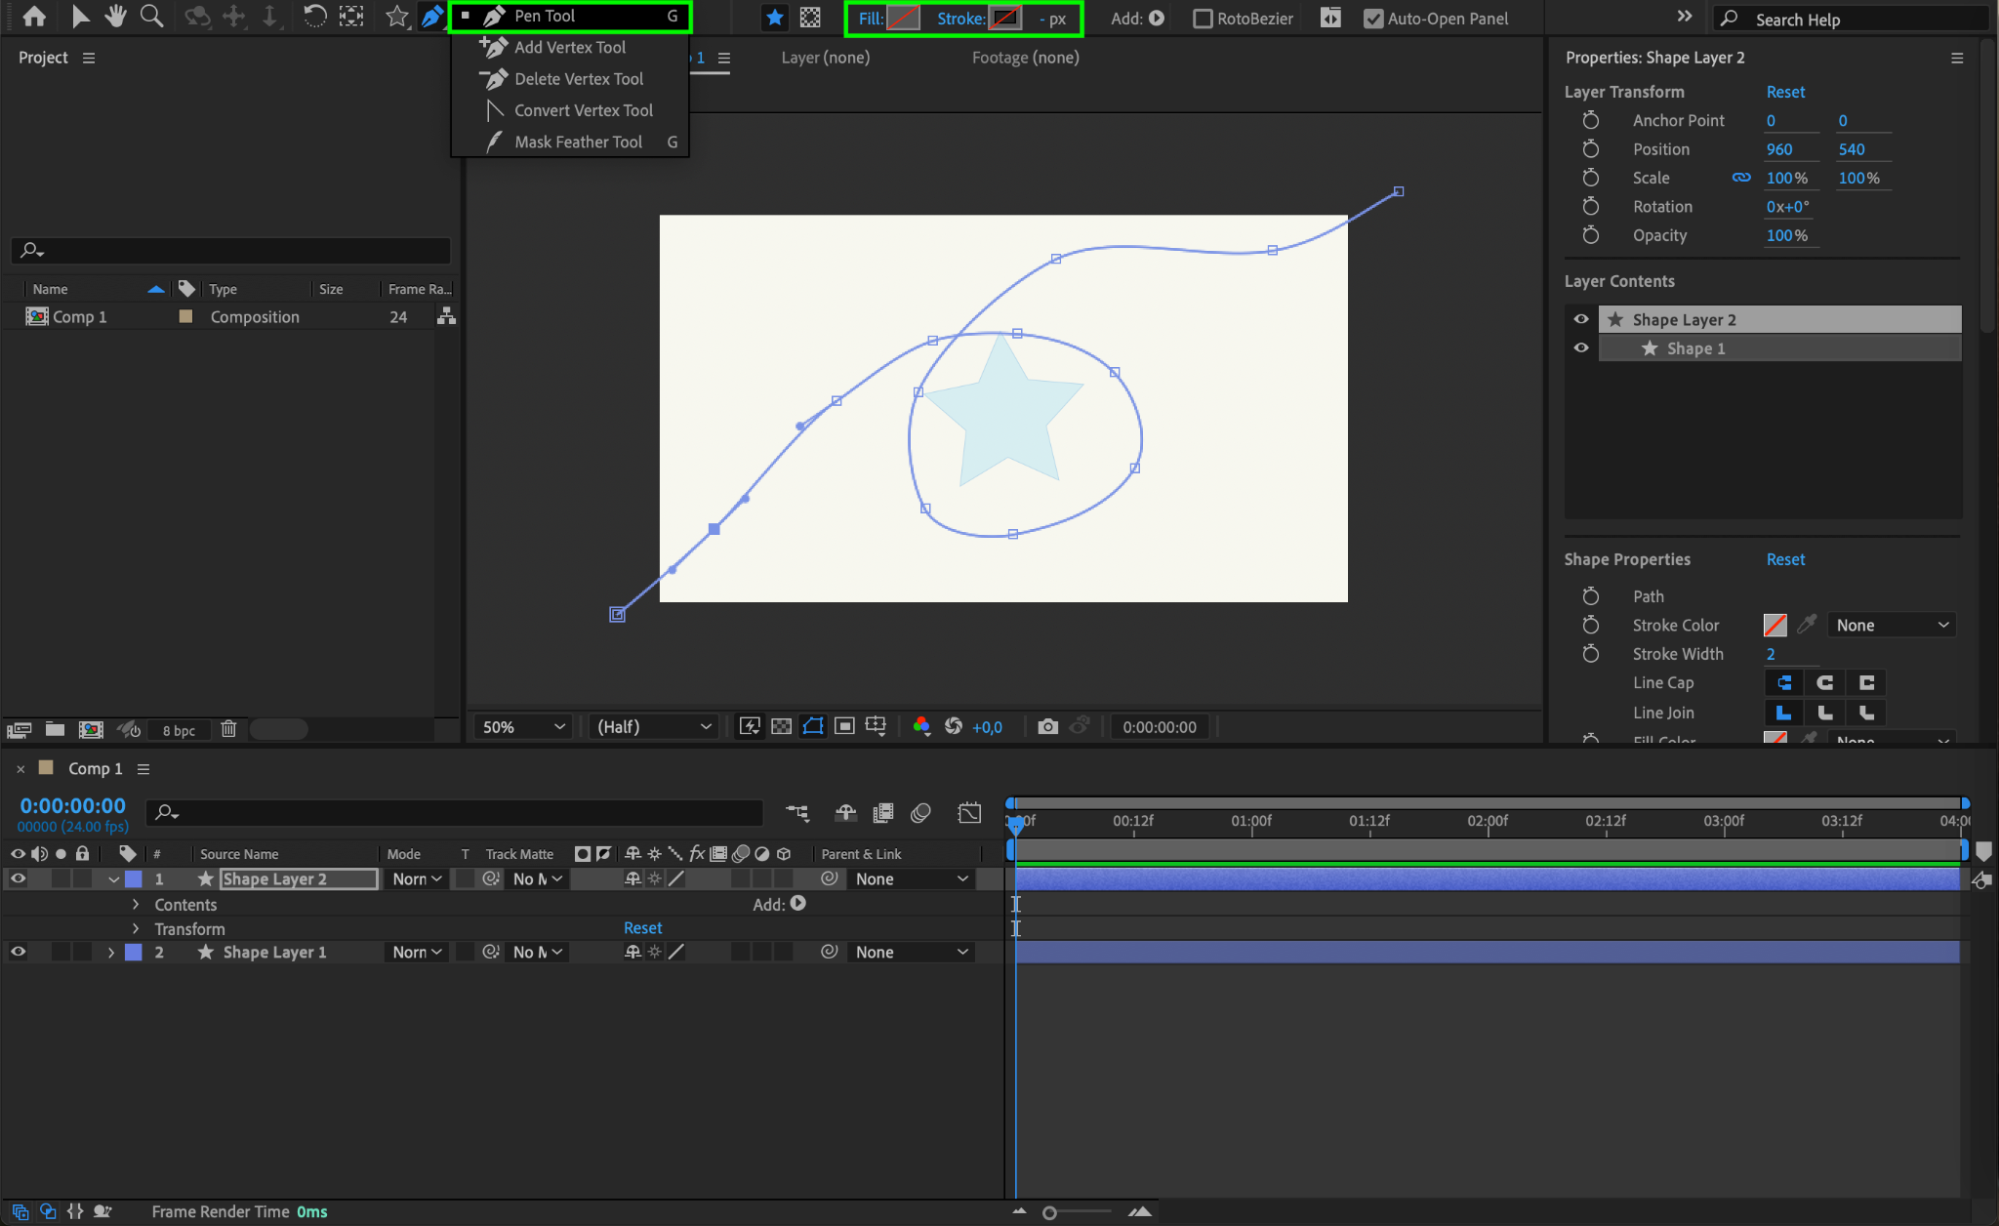
 Step 4: Enhance Your Drawings with Effects
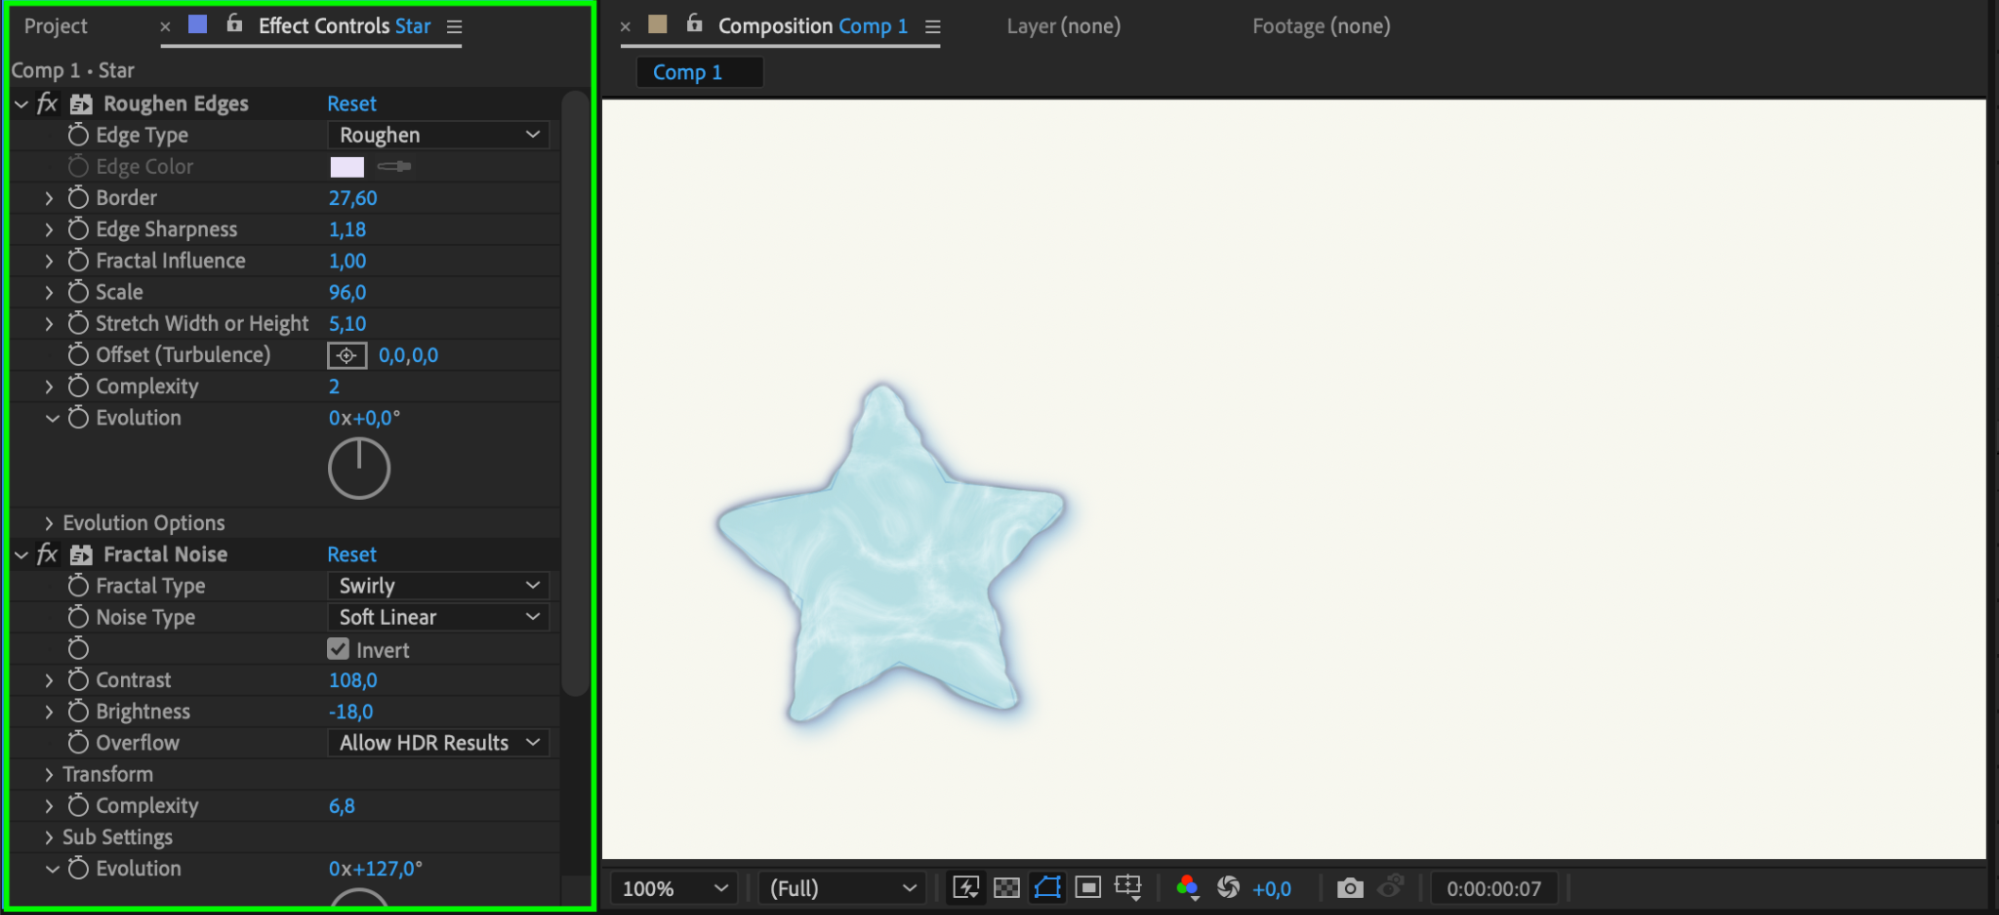
Add visual flair to your shapes by applying effects. Access the Effects & Presets Panel to experiment with gradients, textures, and other visual enhancements. Adjust the settings to achieve the desired look and feel for your drawings.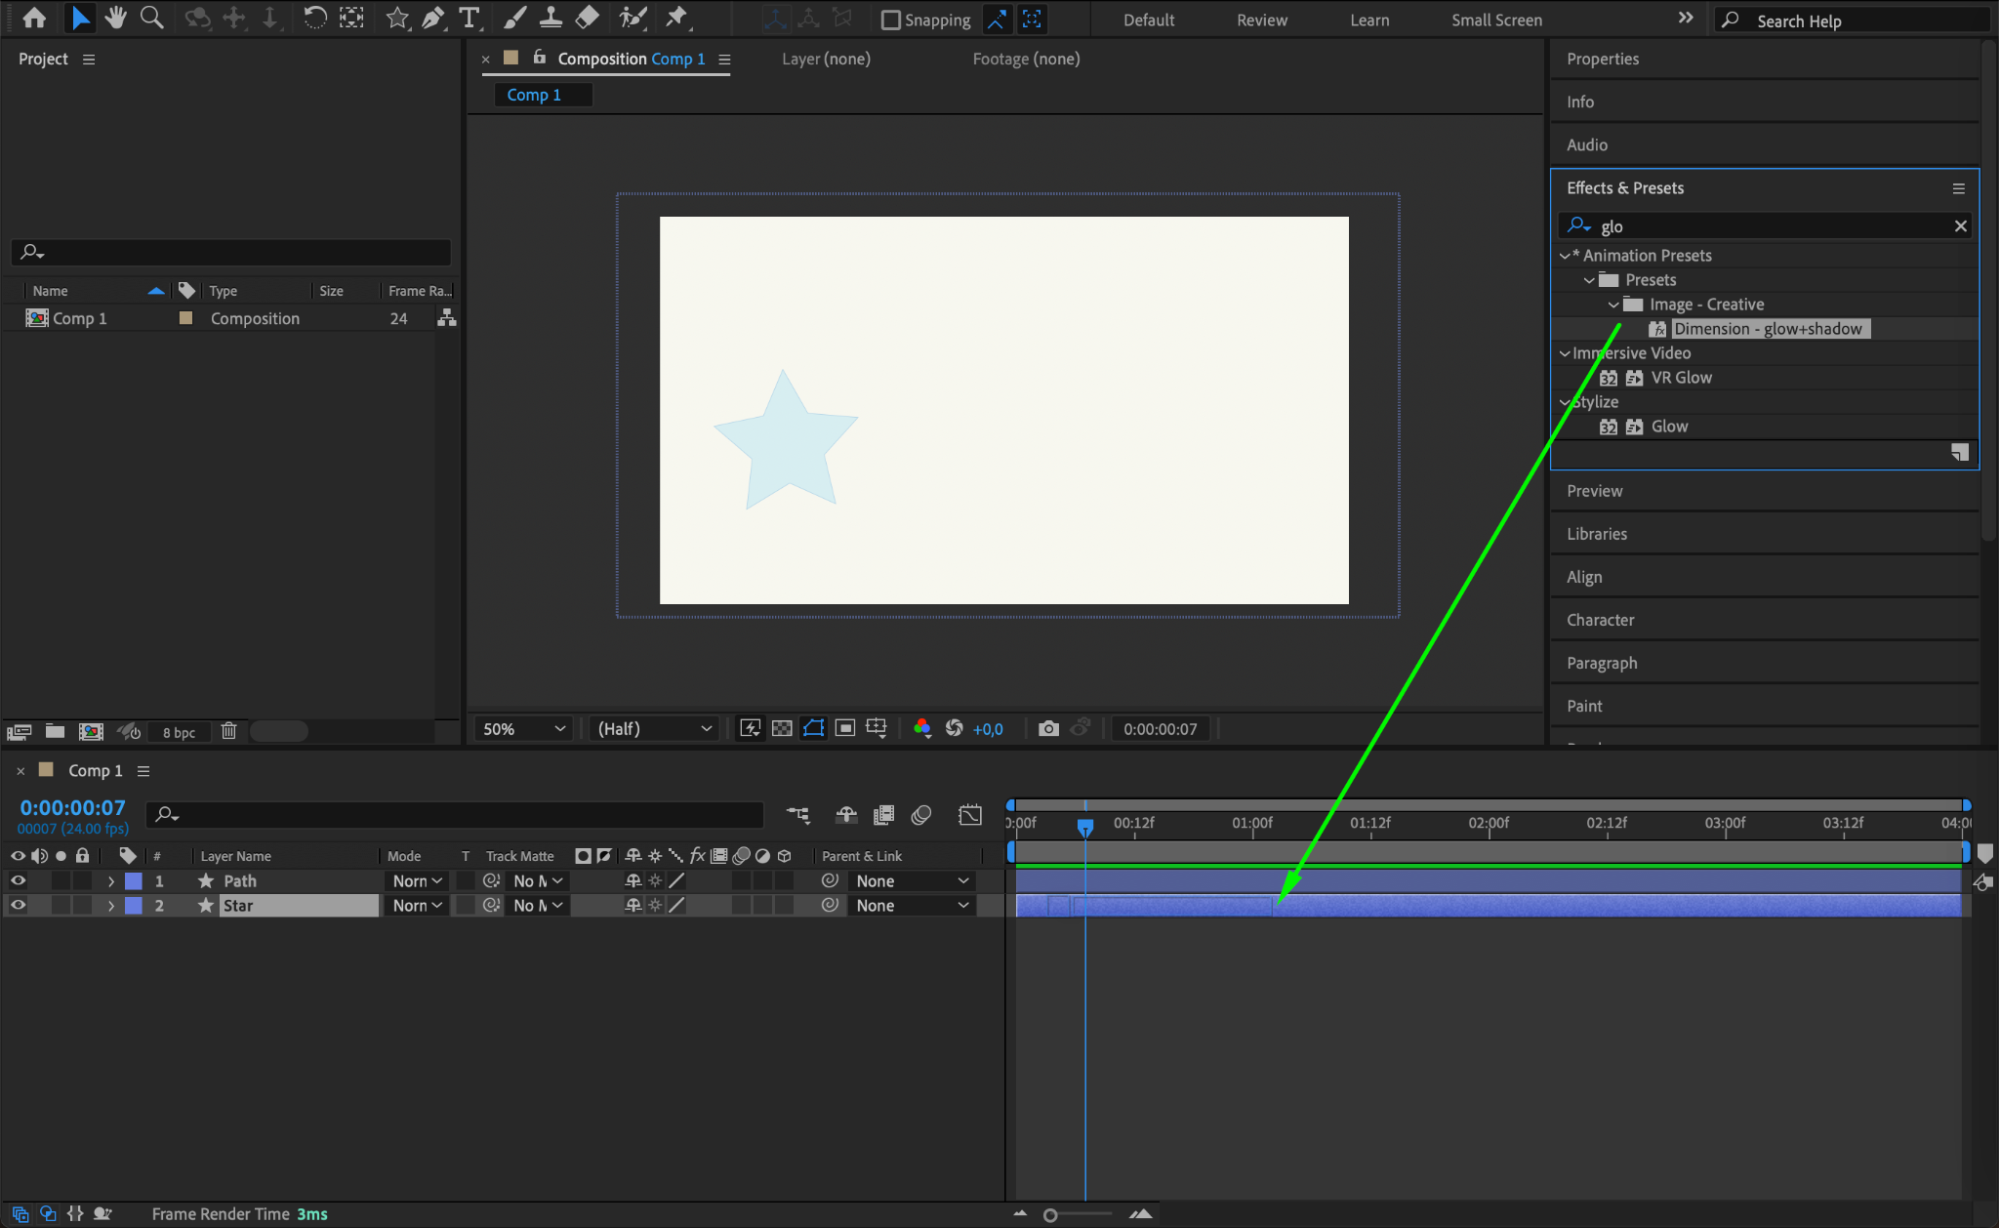
 Step 5: Use the Brush Tool for Freehand Drawing
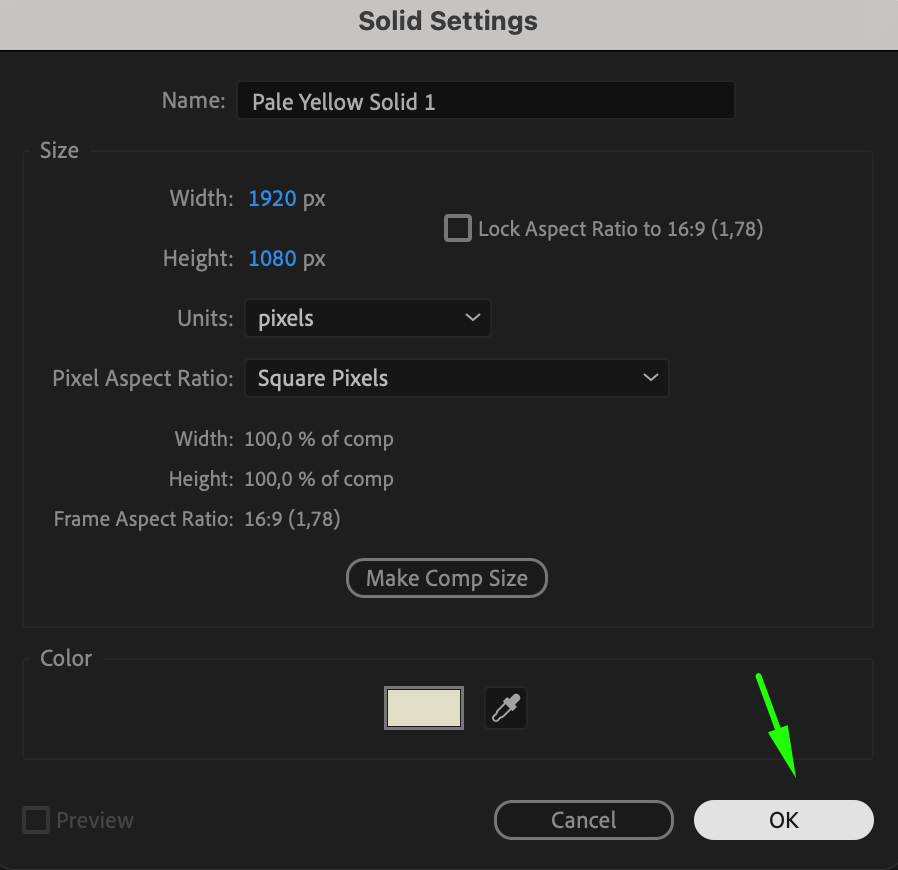
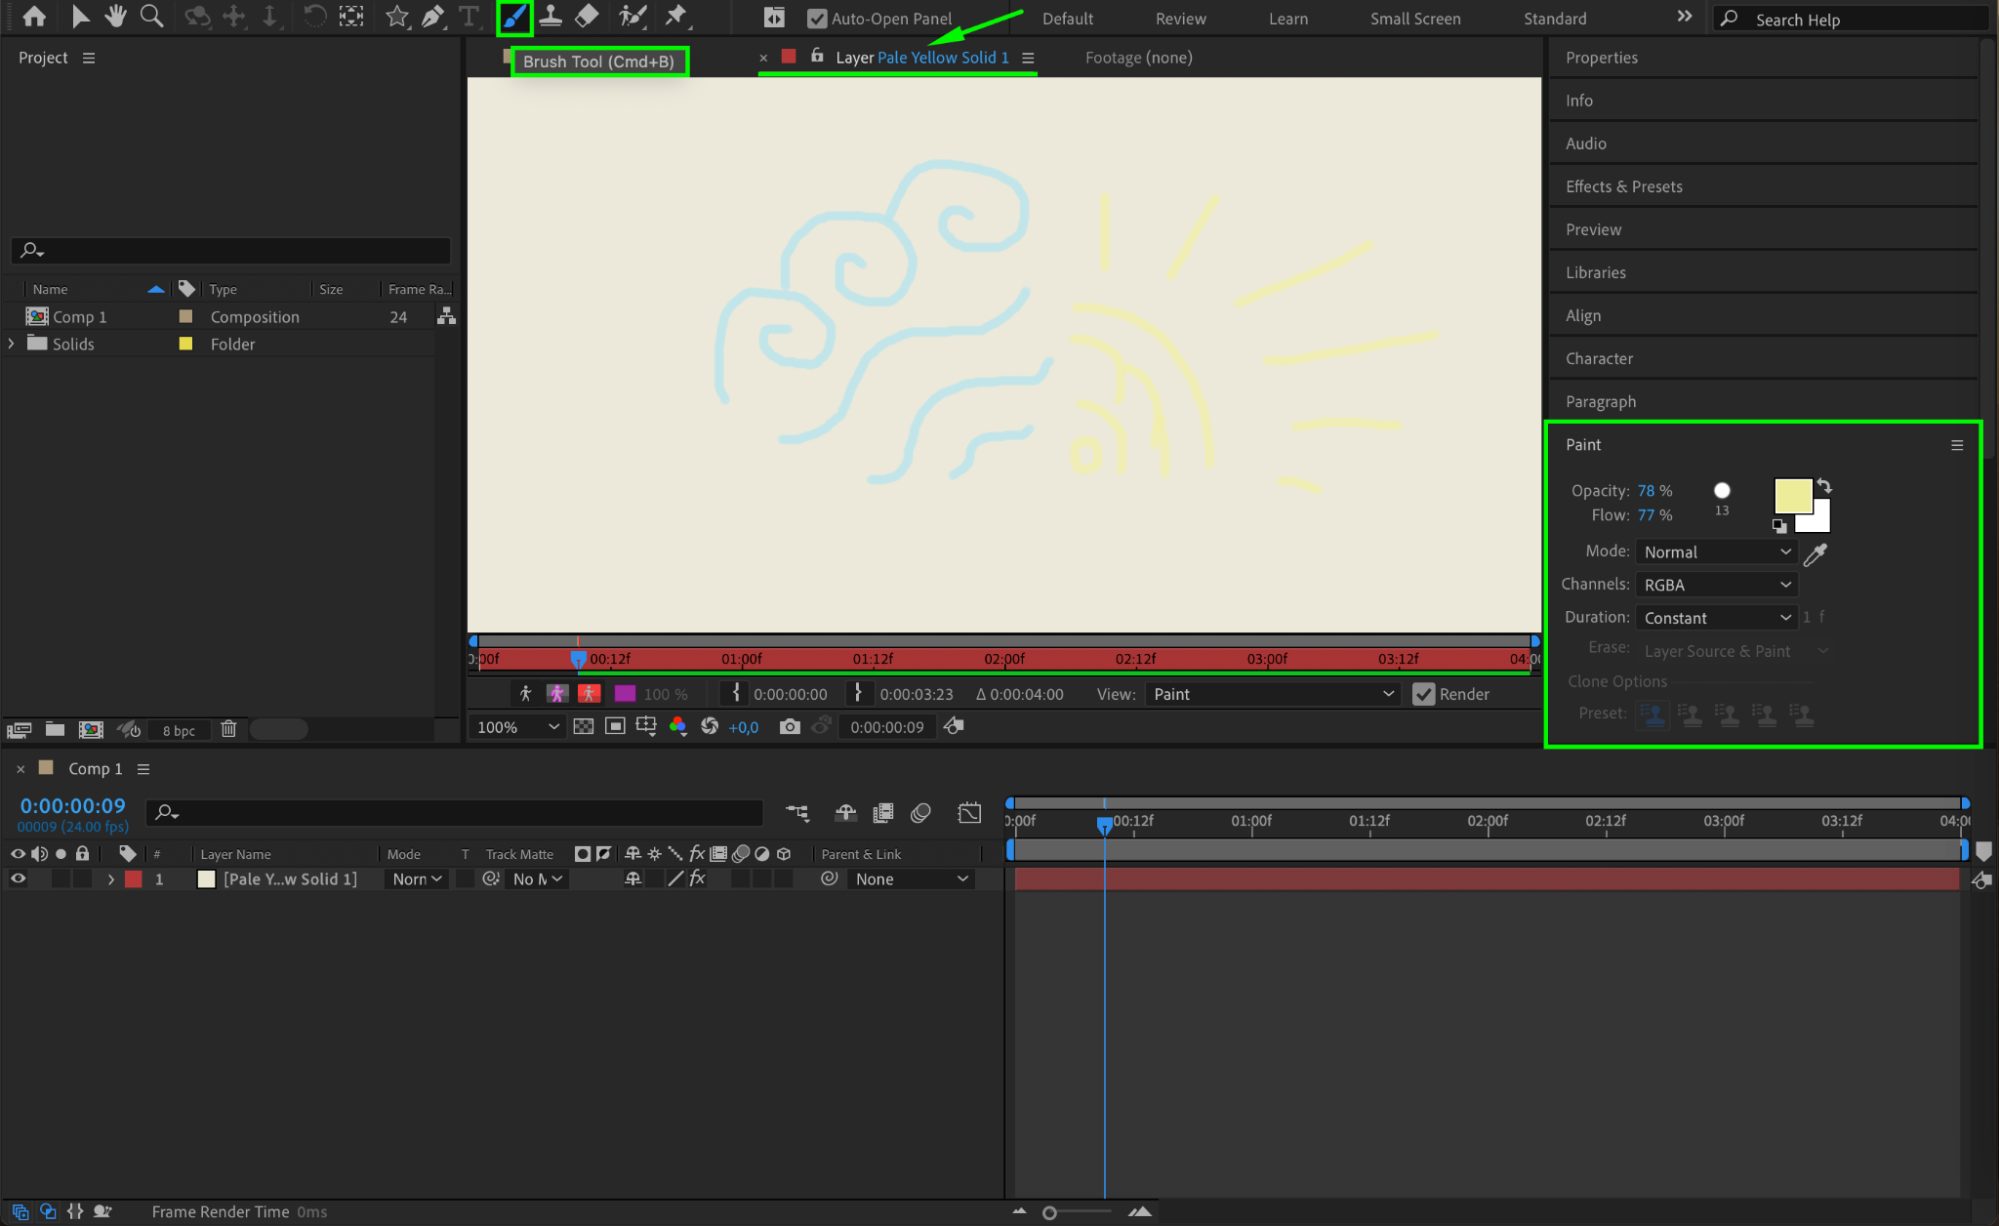
For a more organic, hand-drawn appearance, use the Brush Tool (Ctrl/Cmd + B). Create a solid layer to act as your canvas, then choose the Brush Tool from the menu. Customize brush settings like color, size, opacity, and flow to achieve the desired effect. The Brush Tool is perfect for adding freehand strokes and detailed artwork.
 Step 6: Animate Your Drawings
Get 10% off when you subscribe to our newsletter

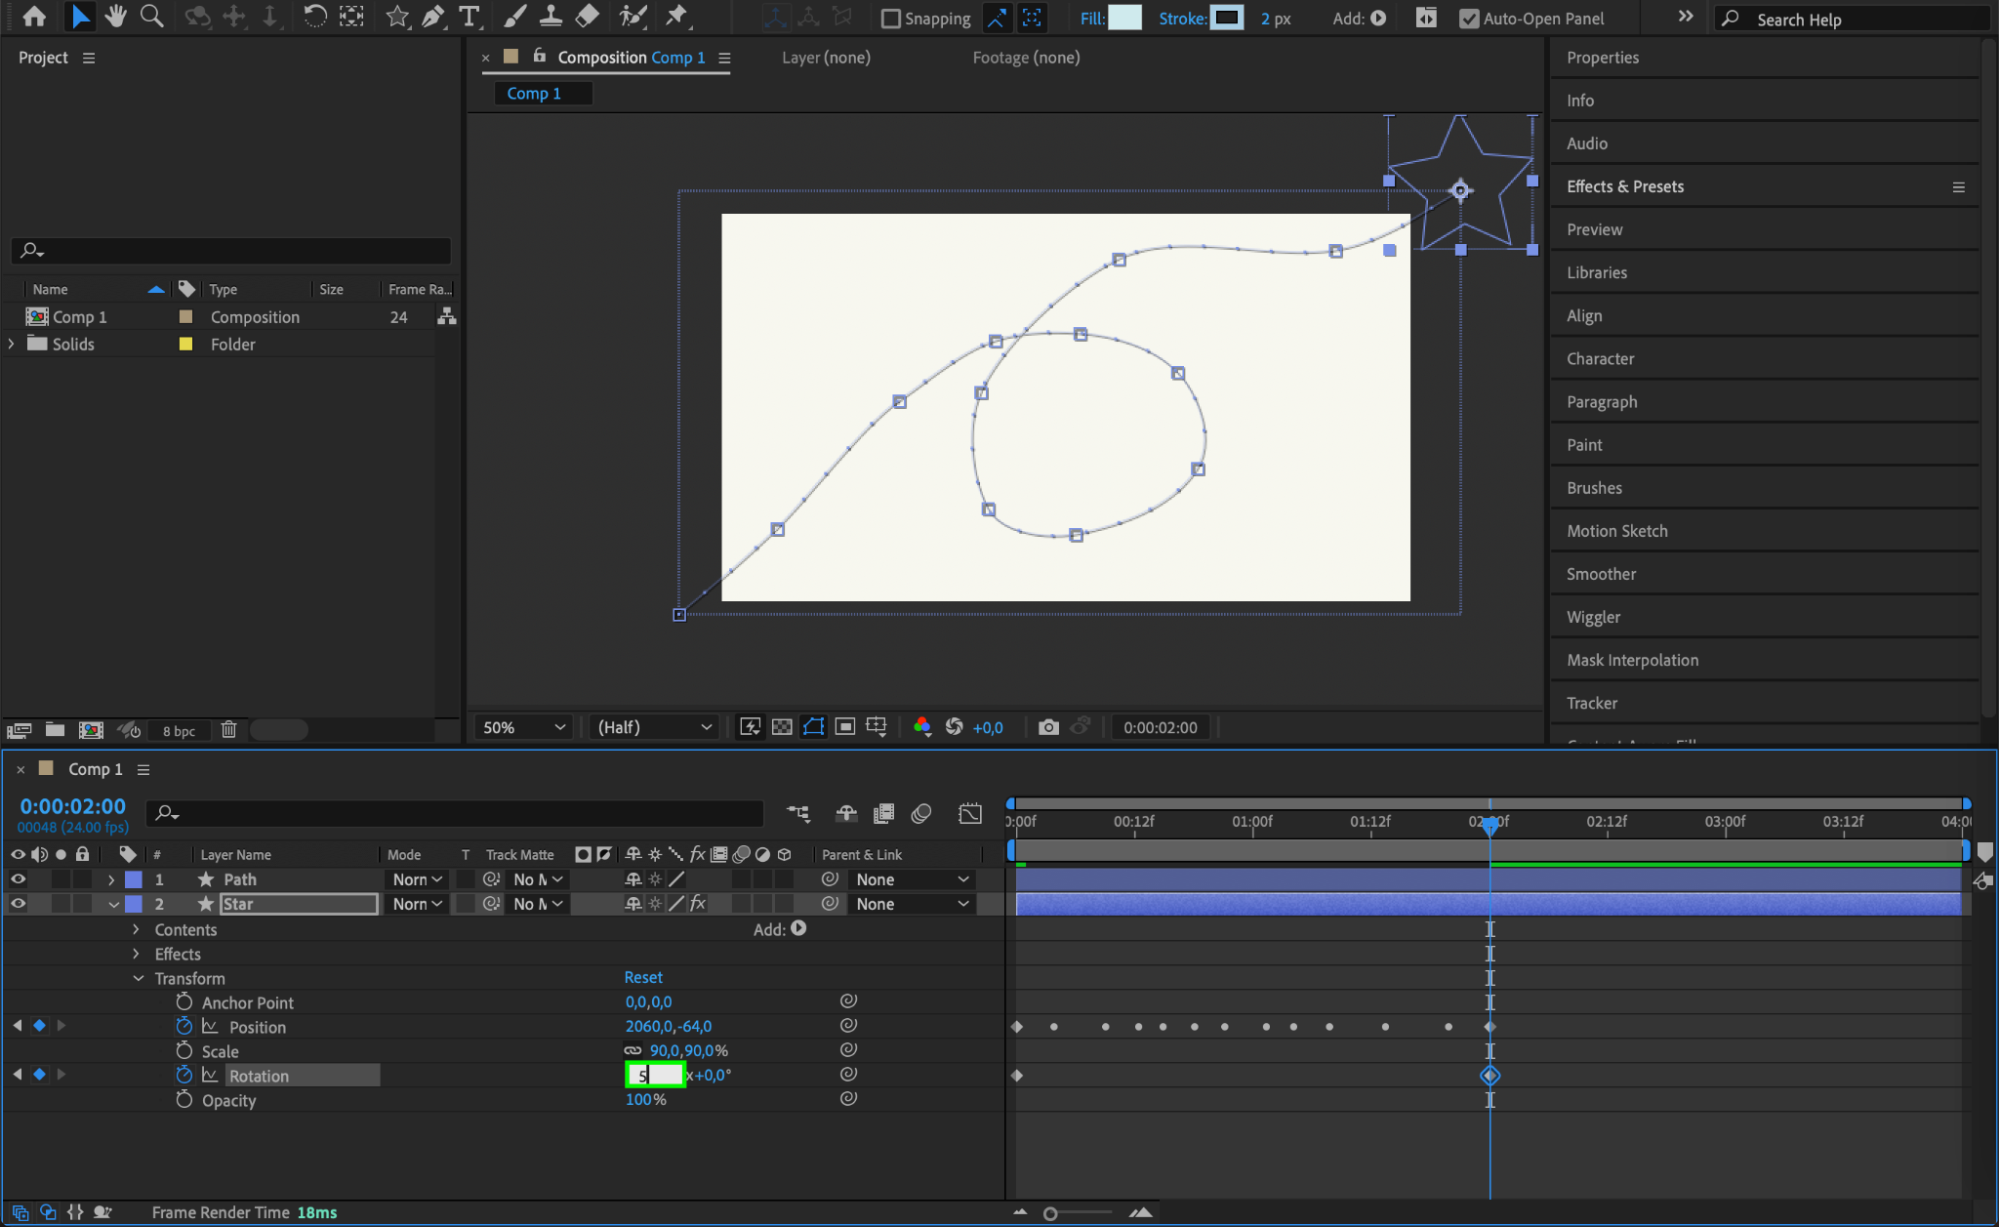
To bring your drawings to life, animate them using keyframes. Adjust properties such as position, scale, rotation, and opacity over time. Use the Timeline Panel to set keyframes and create dynamic animations. Experiment with techniques like shape morphing and stroke reveals to add movement and interest.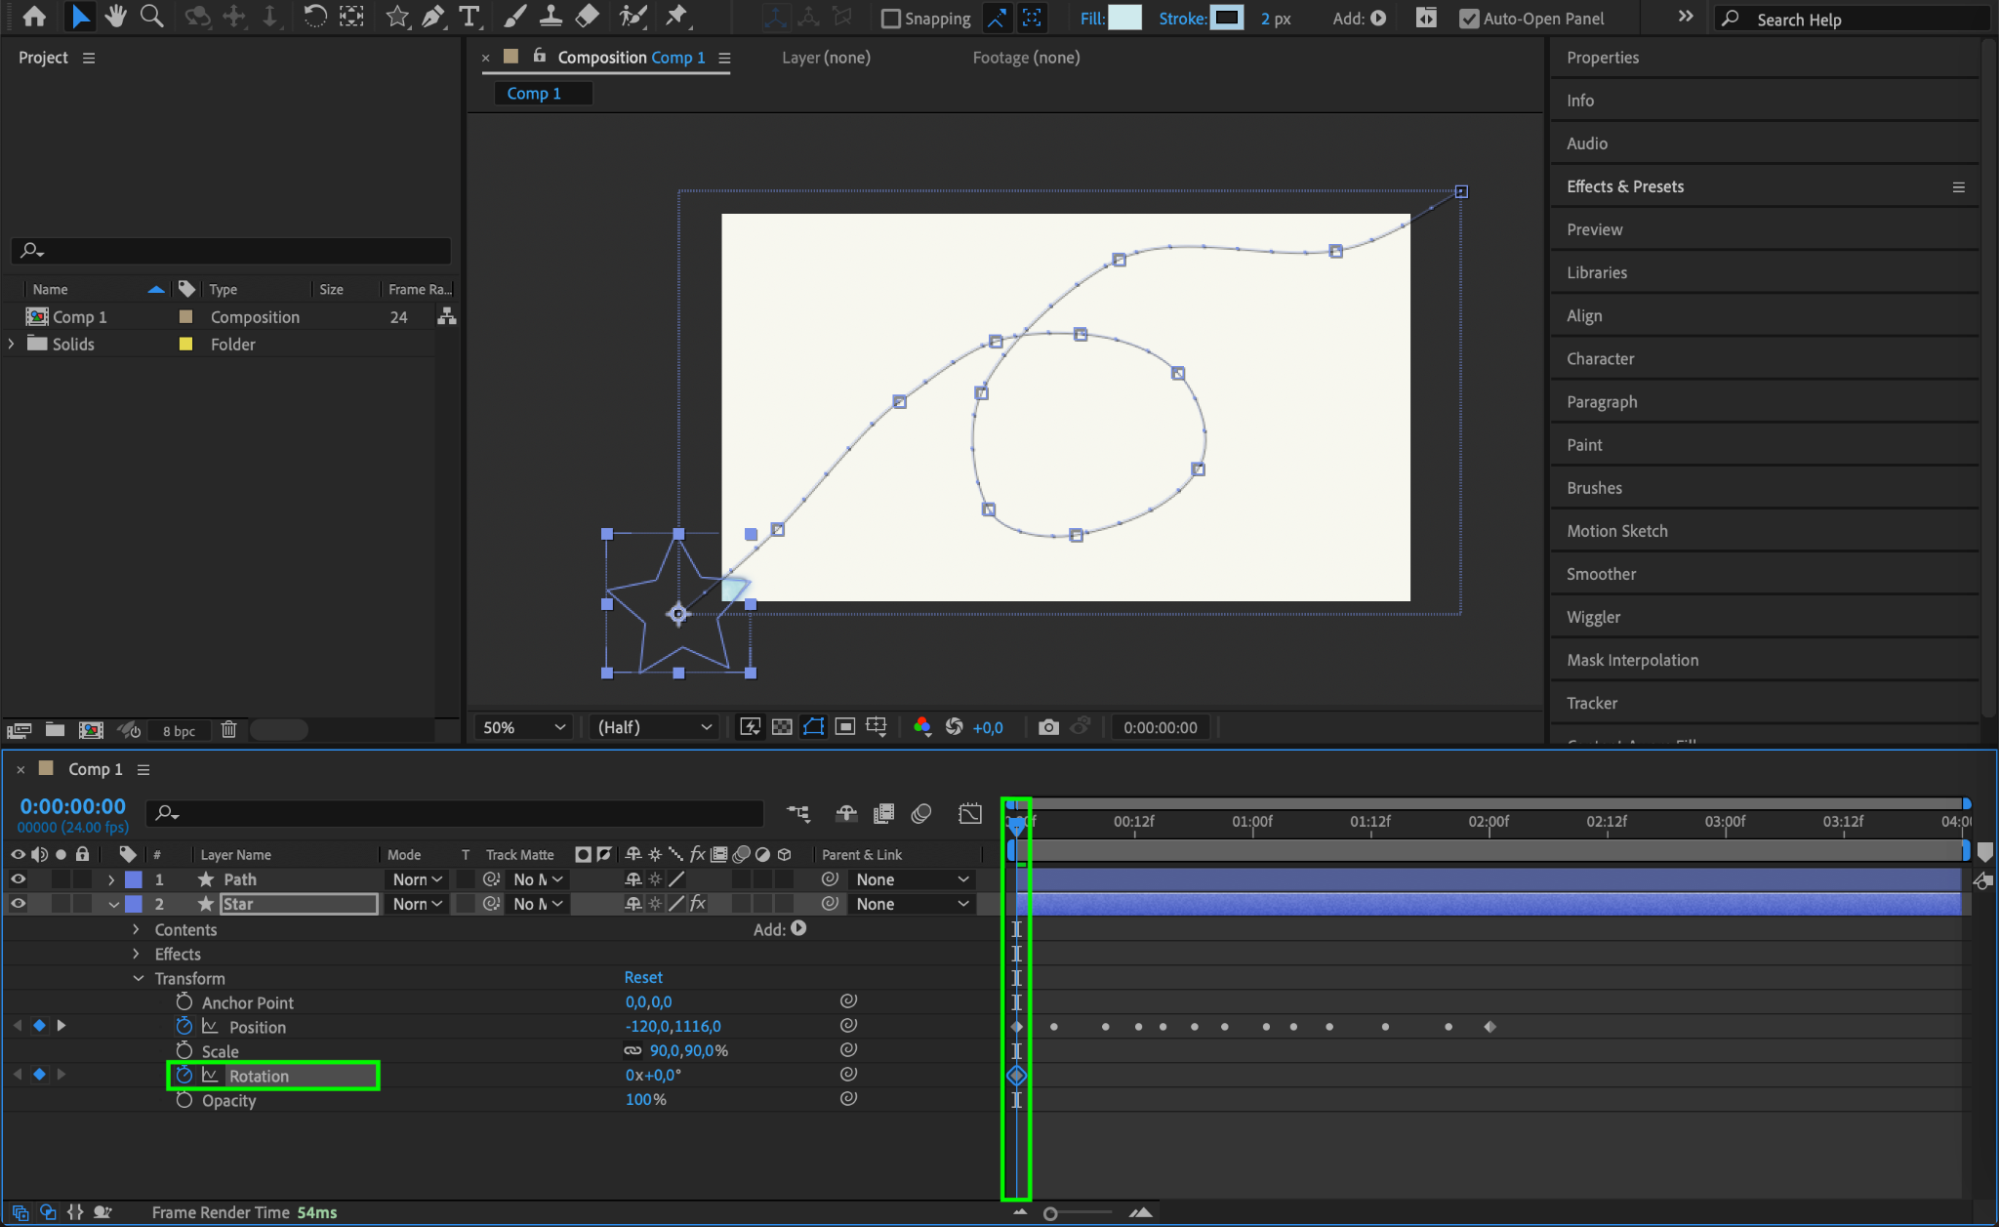
 Step 7: Apply Expressions for Advanced Animation
Enhance your animations with expressions. For example, select a parameter like scale, go to the Animation Menu, and choose Add Expression. Enter your desired expression in the text field that appears in the Timeline Panel. Expressions can automate and add complexity to your animations.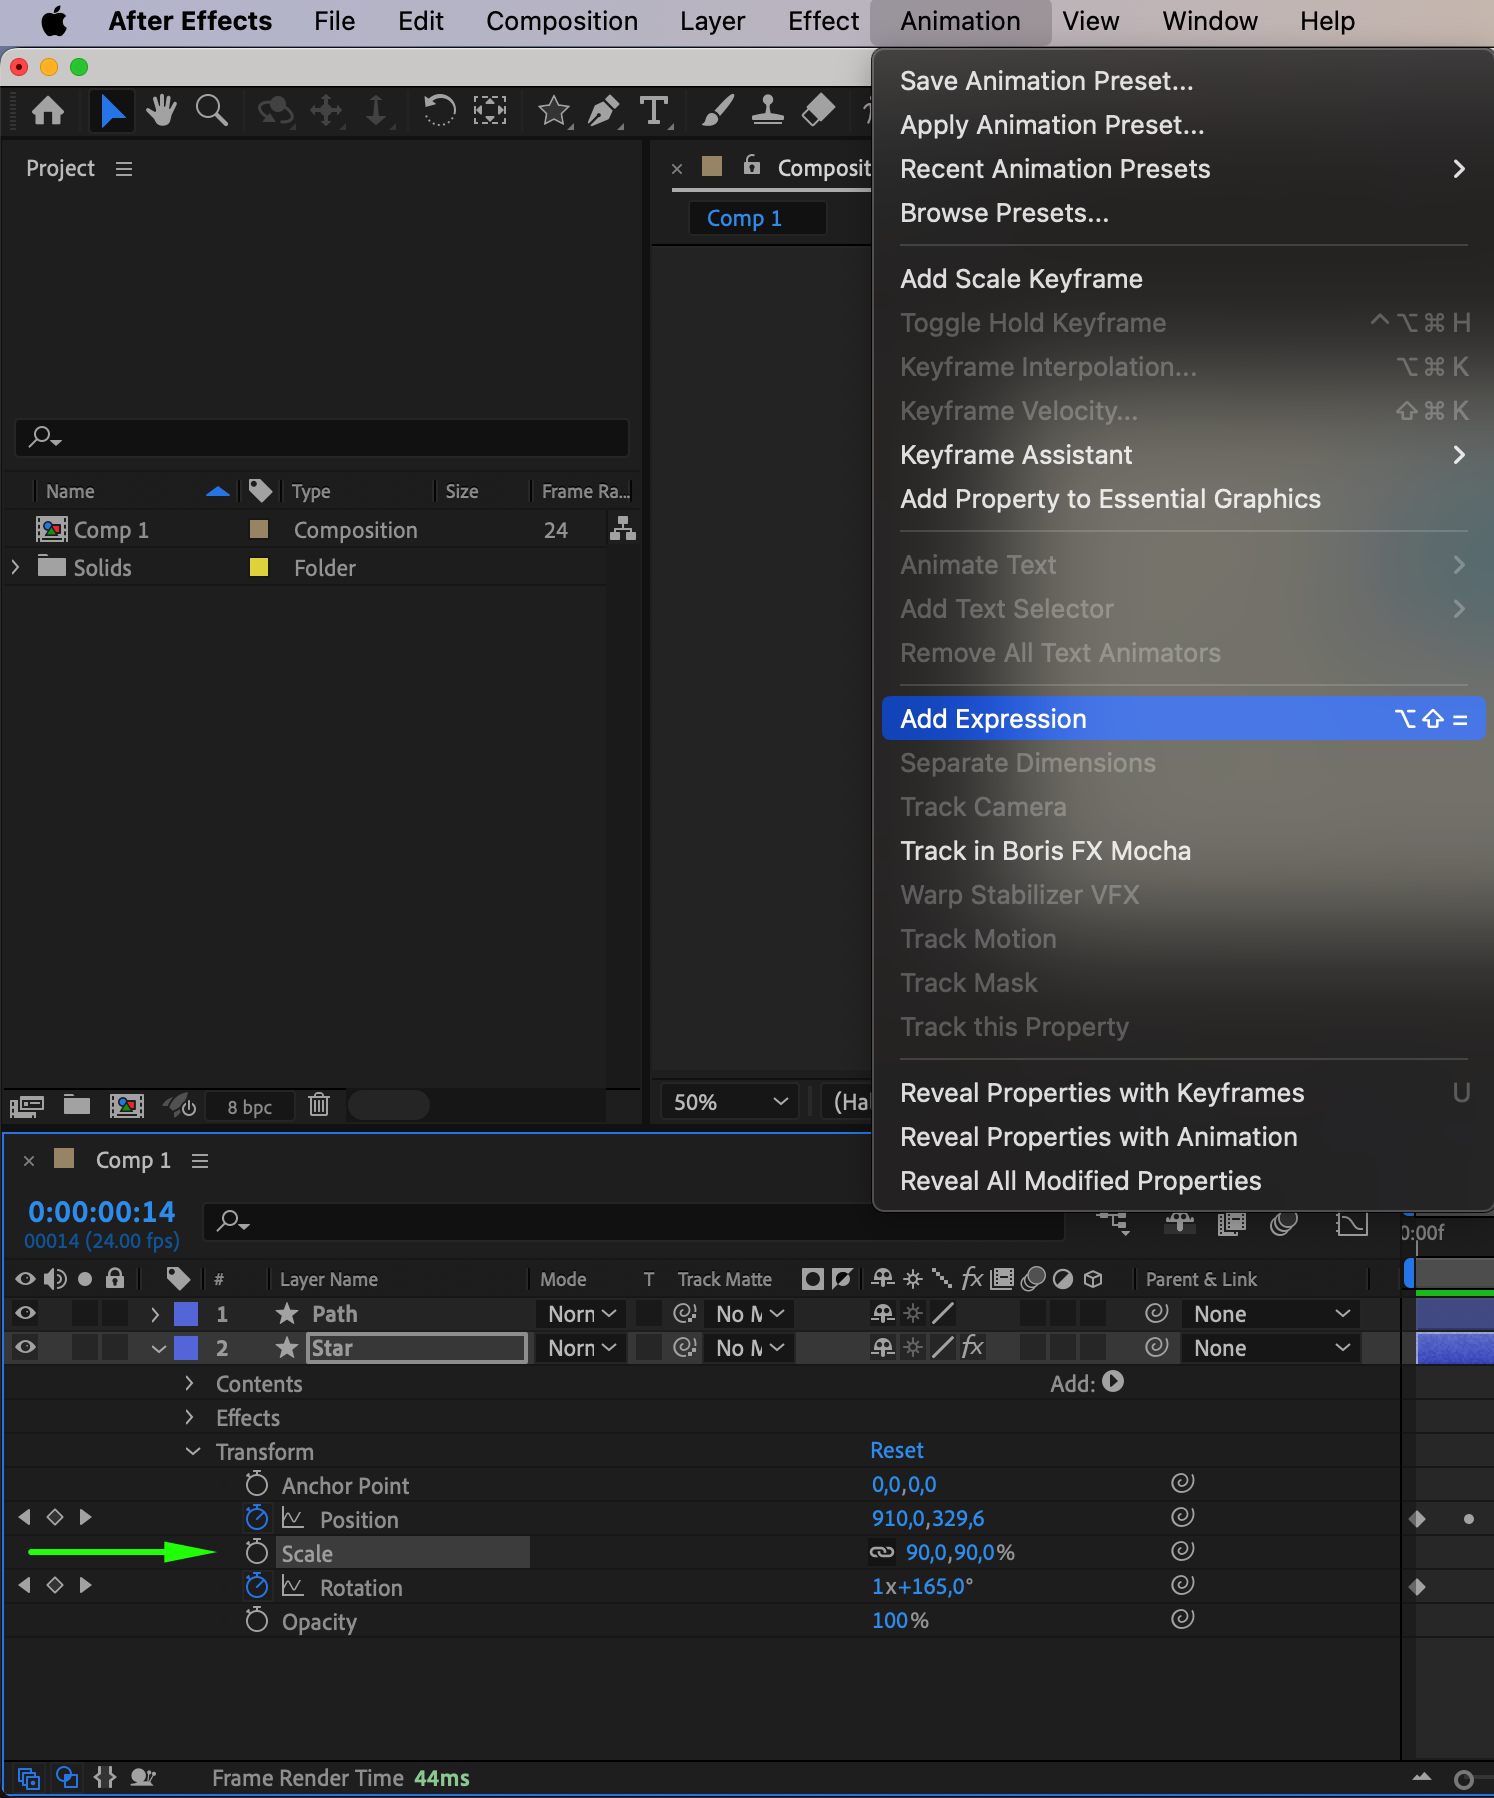
 Step 8: Preview Your Work
Use the Spacebar to preview your animation in the Composition Panel. This helps you see how your drawings look in motion and identify any adjustments needed before finalizing your project.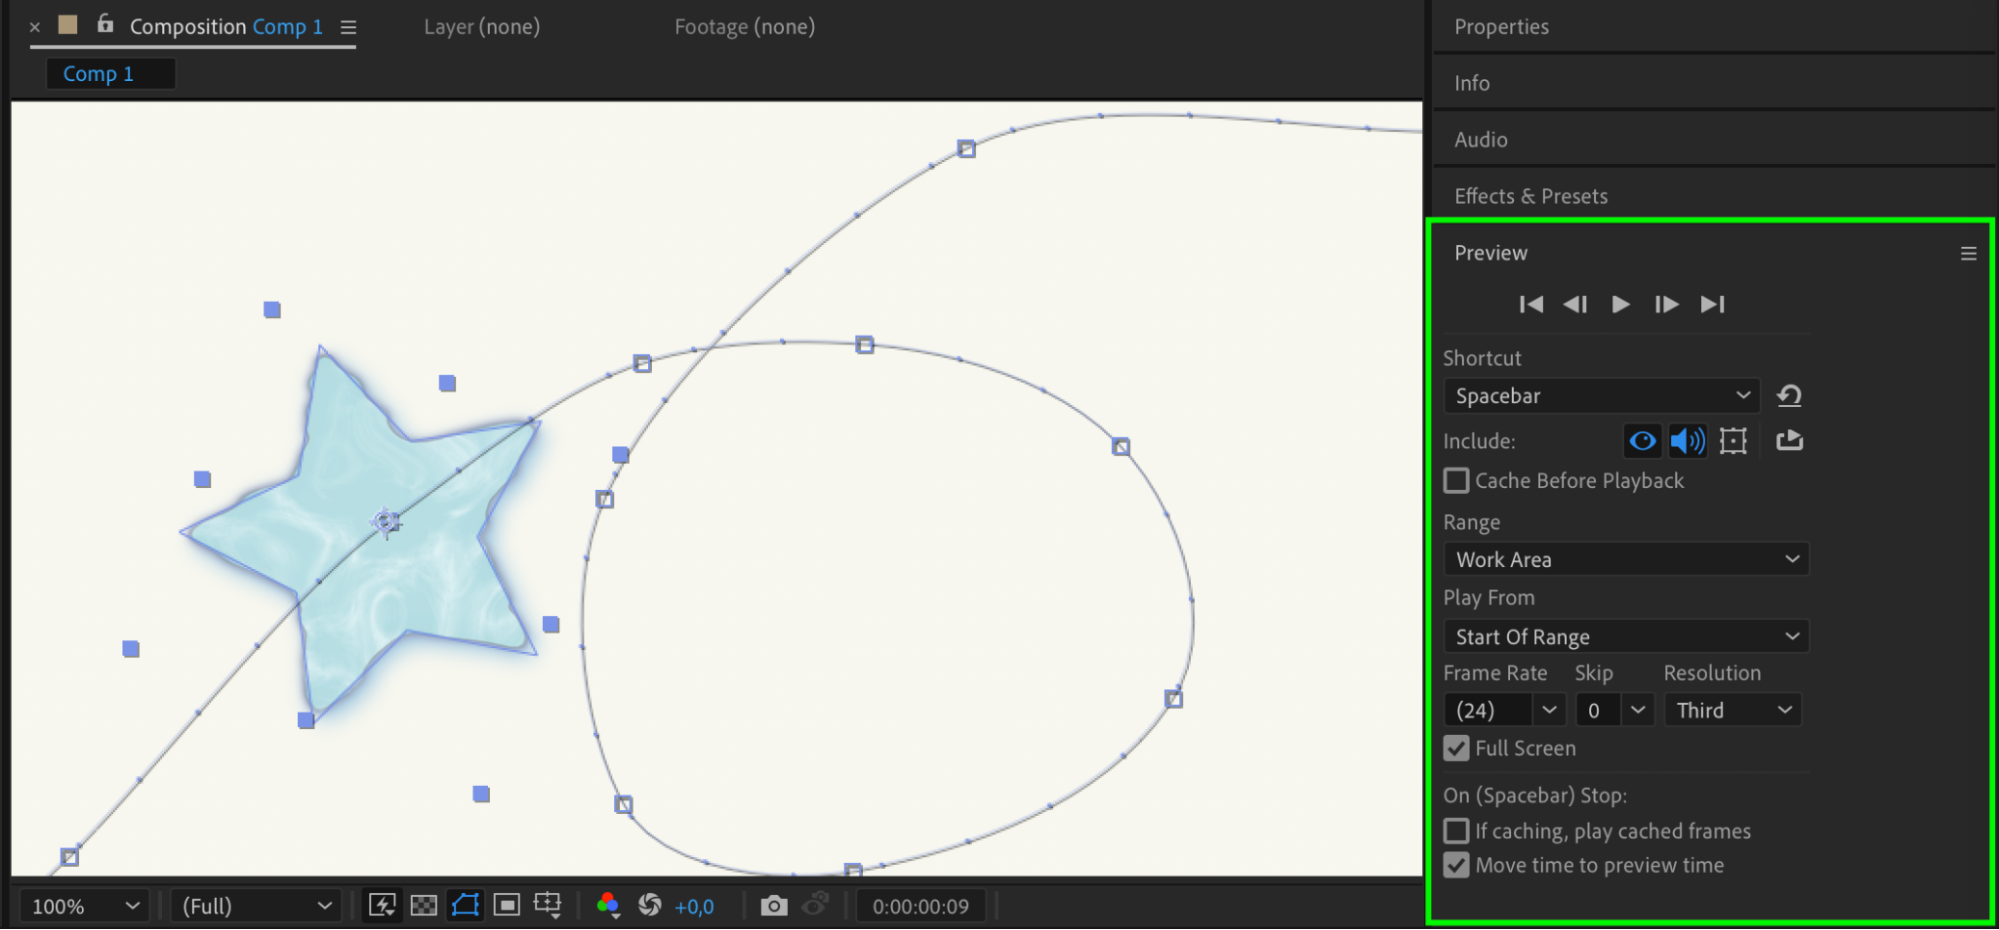 Step 9: Render Your Composition
When satisfied with your animation, go to Composition > Add to Render Queue. Adjust render settings as needed and click Render to export your composition as a video file. This step completes your project and makes it ready for distribution or further editing.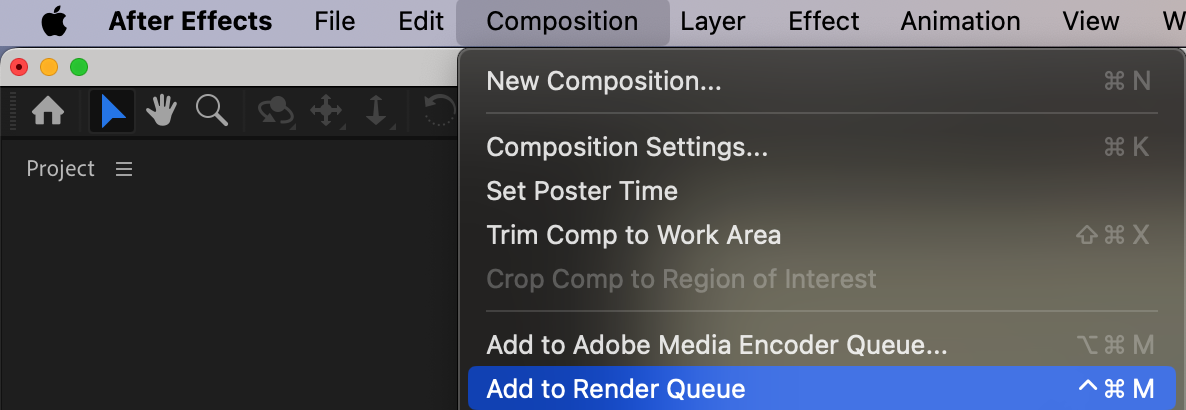
 Conclusion
Drawing in After Effects offers a unique way to integrate custom graphics into your animations. By practicing with the shape layers and brush tool, and exploring various effects and animation techniques, you can elevate your motion graphics to new levels. Embrace your creativity and start drawing in After Effects to create stunning and personalized visuals.

