Easy Steps to Create Glitch Text in After Effects”
Introduction – Achieving a Digital Glitch Effect in Text”
Text glitches are a trendy effect, often used in sci-fi themes or digital aesthetics. This guide demonstrates a quick and simple method to create glitch text in After Effects using built-in effects and presets. Follow these steps to add a professional and unique touch to your projects effortlessly.
Step 1: Create a New Composition
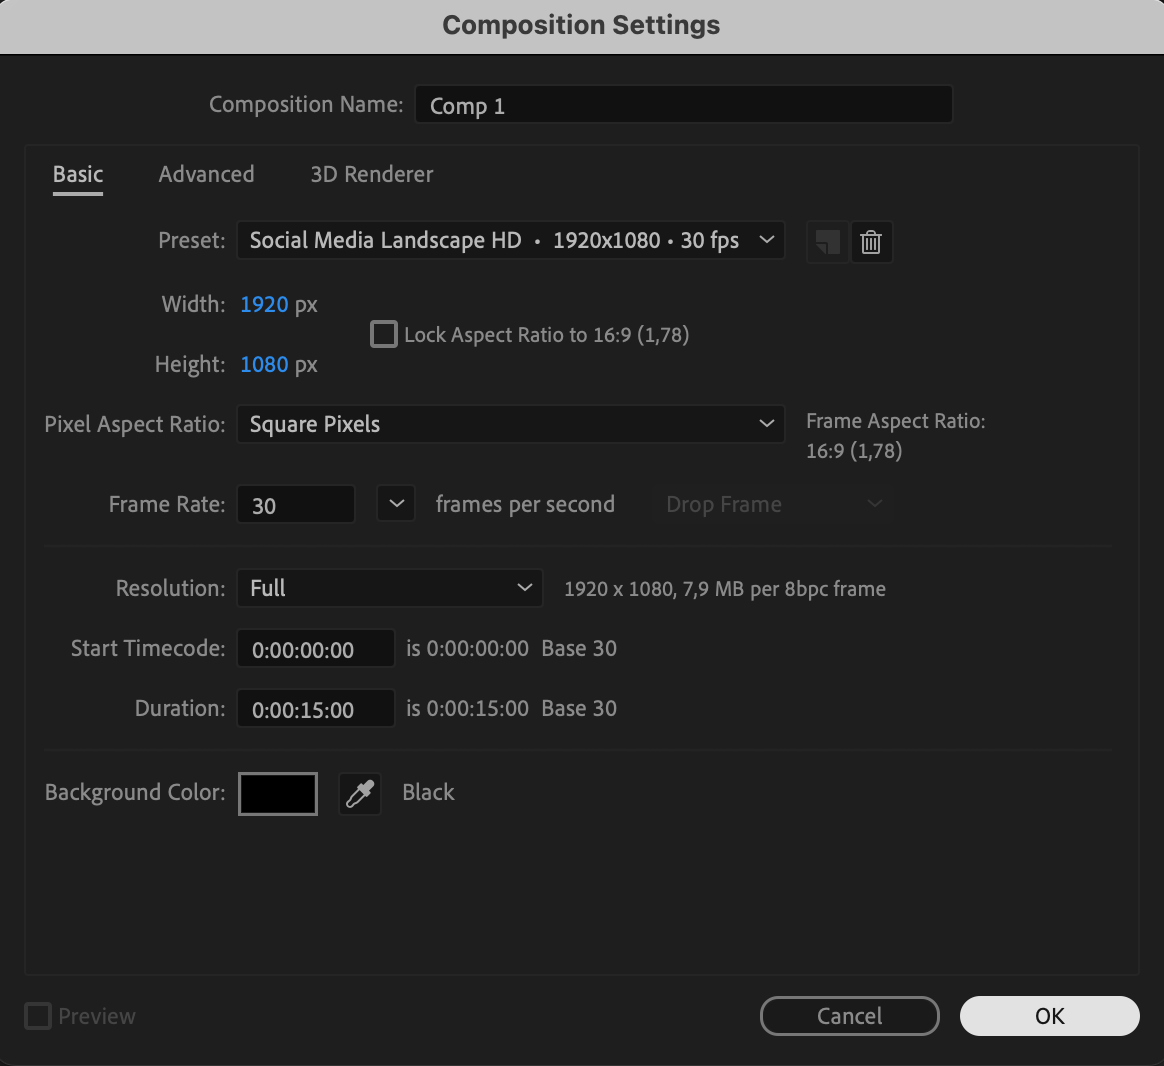
Open After Effects and create a new composition by going to Composition > New Composition. Set the resolution, frame rate, and duration according to your project requirements. Click OK to finalize the settings.
 Step 2: Add a Text Layer
Select the Type Tool from the toolbar or press “Ctrl/Cmd + T”. Click anywhere in the composition and type your desired text. Adjust the font, size, and color in the Character Panel or Properties Panel to suit your style. Center the text by enabling the Align Panel and aligning it horizontally and vertically.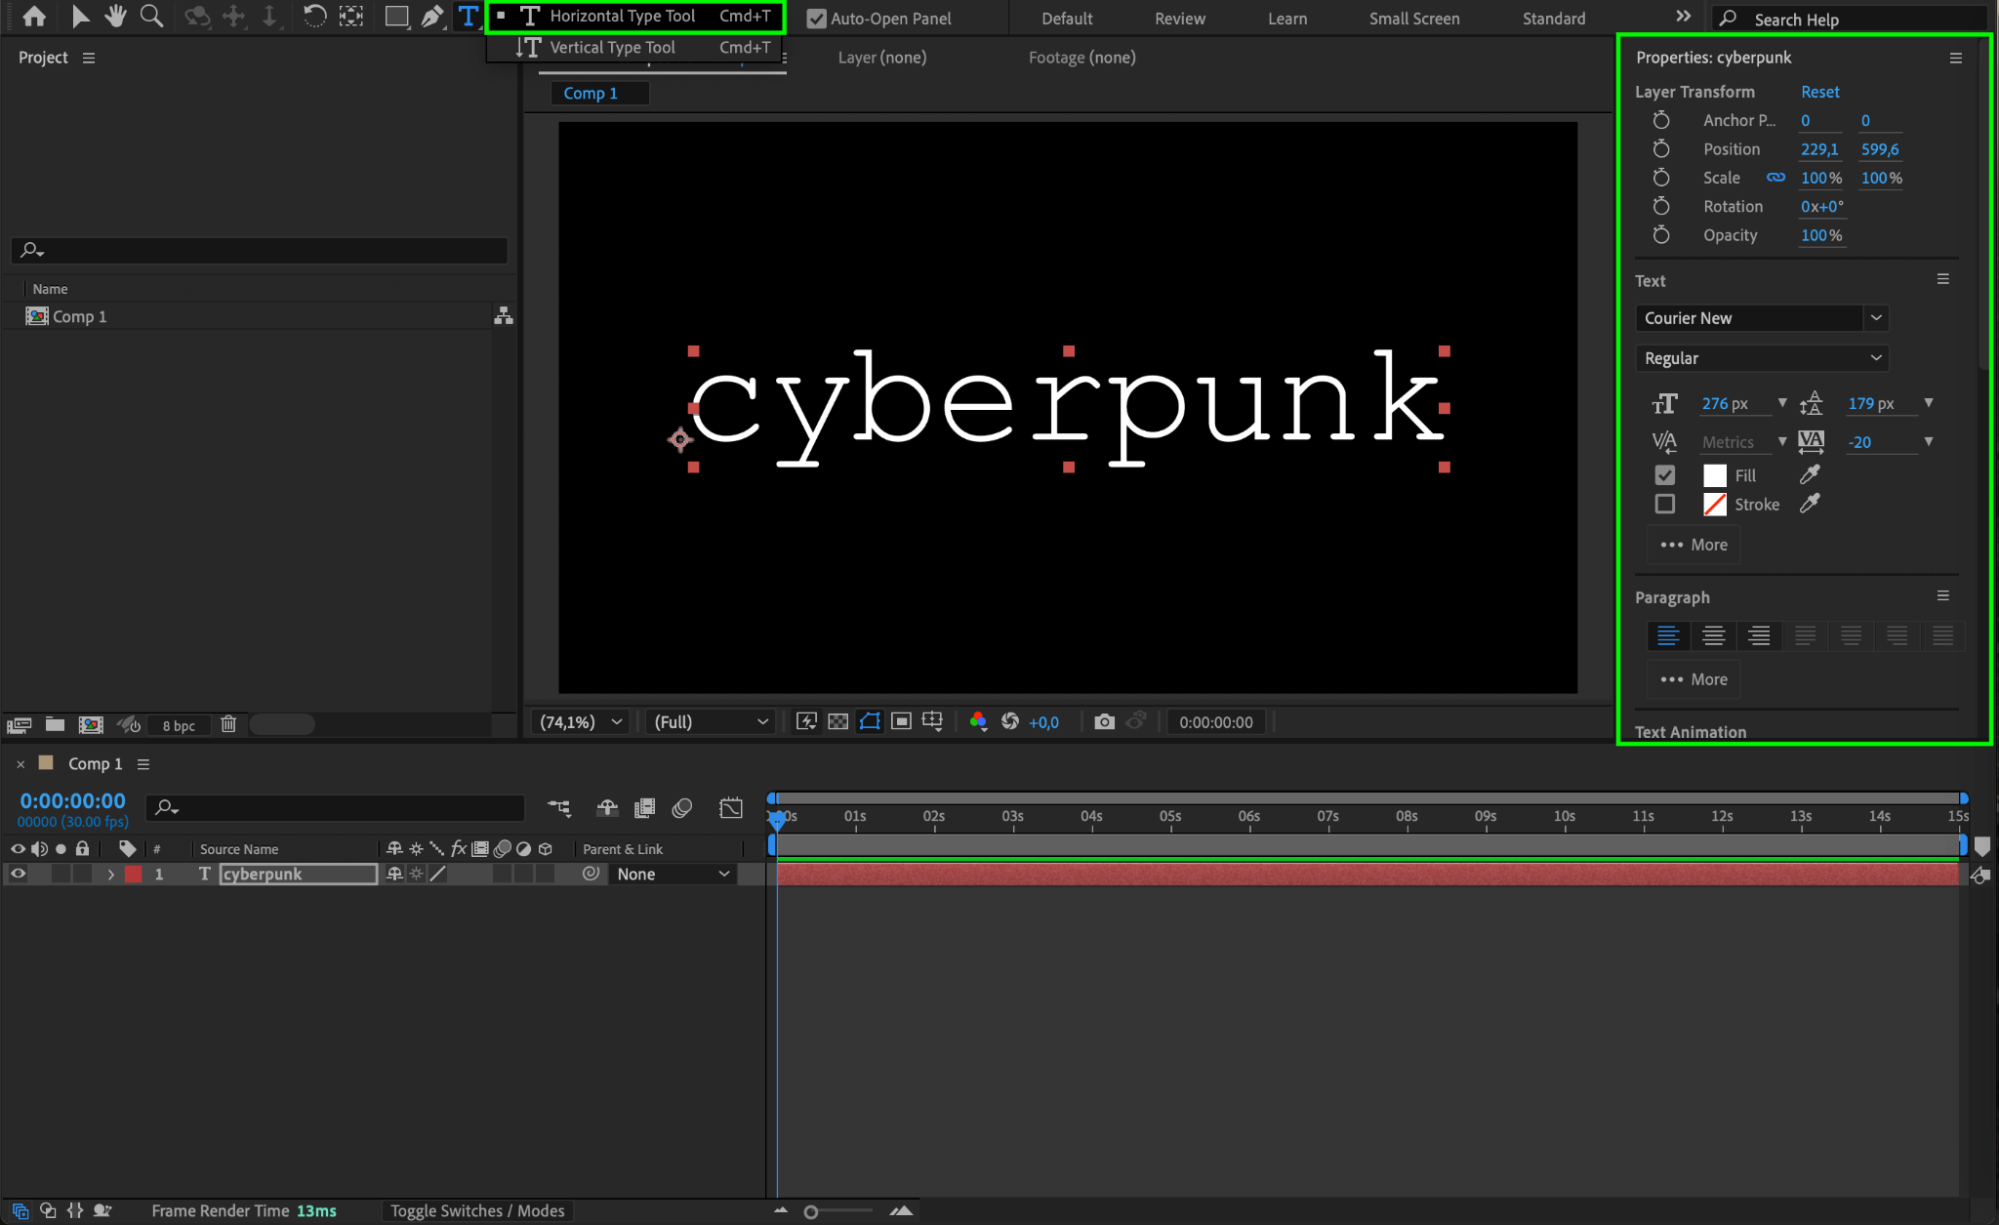 Step 3: Apply Glitch Effects
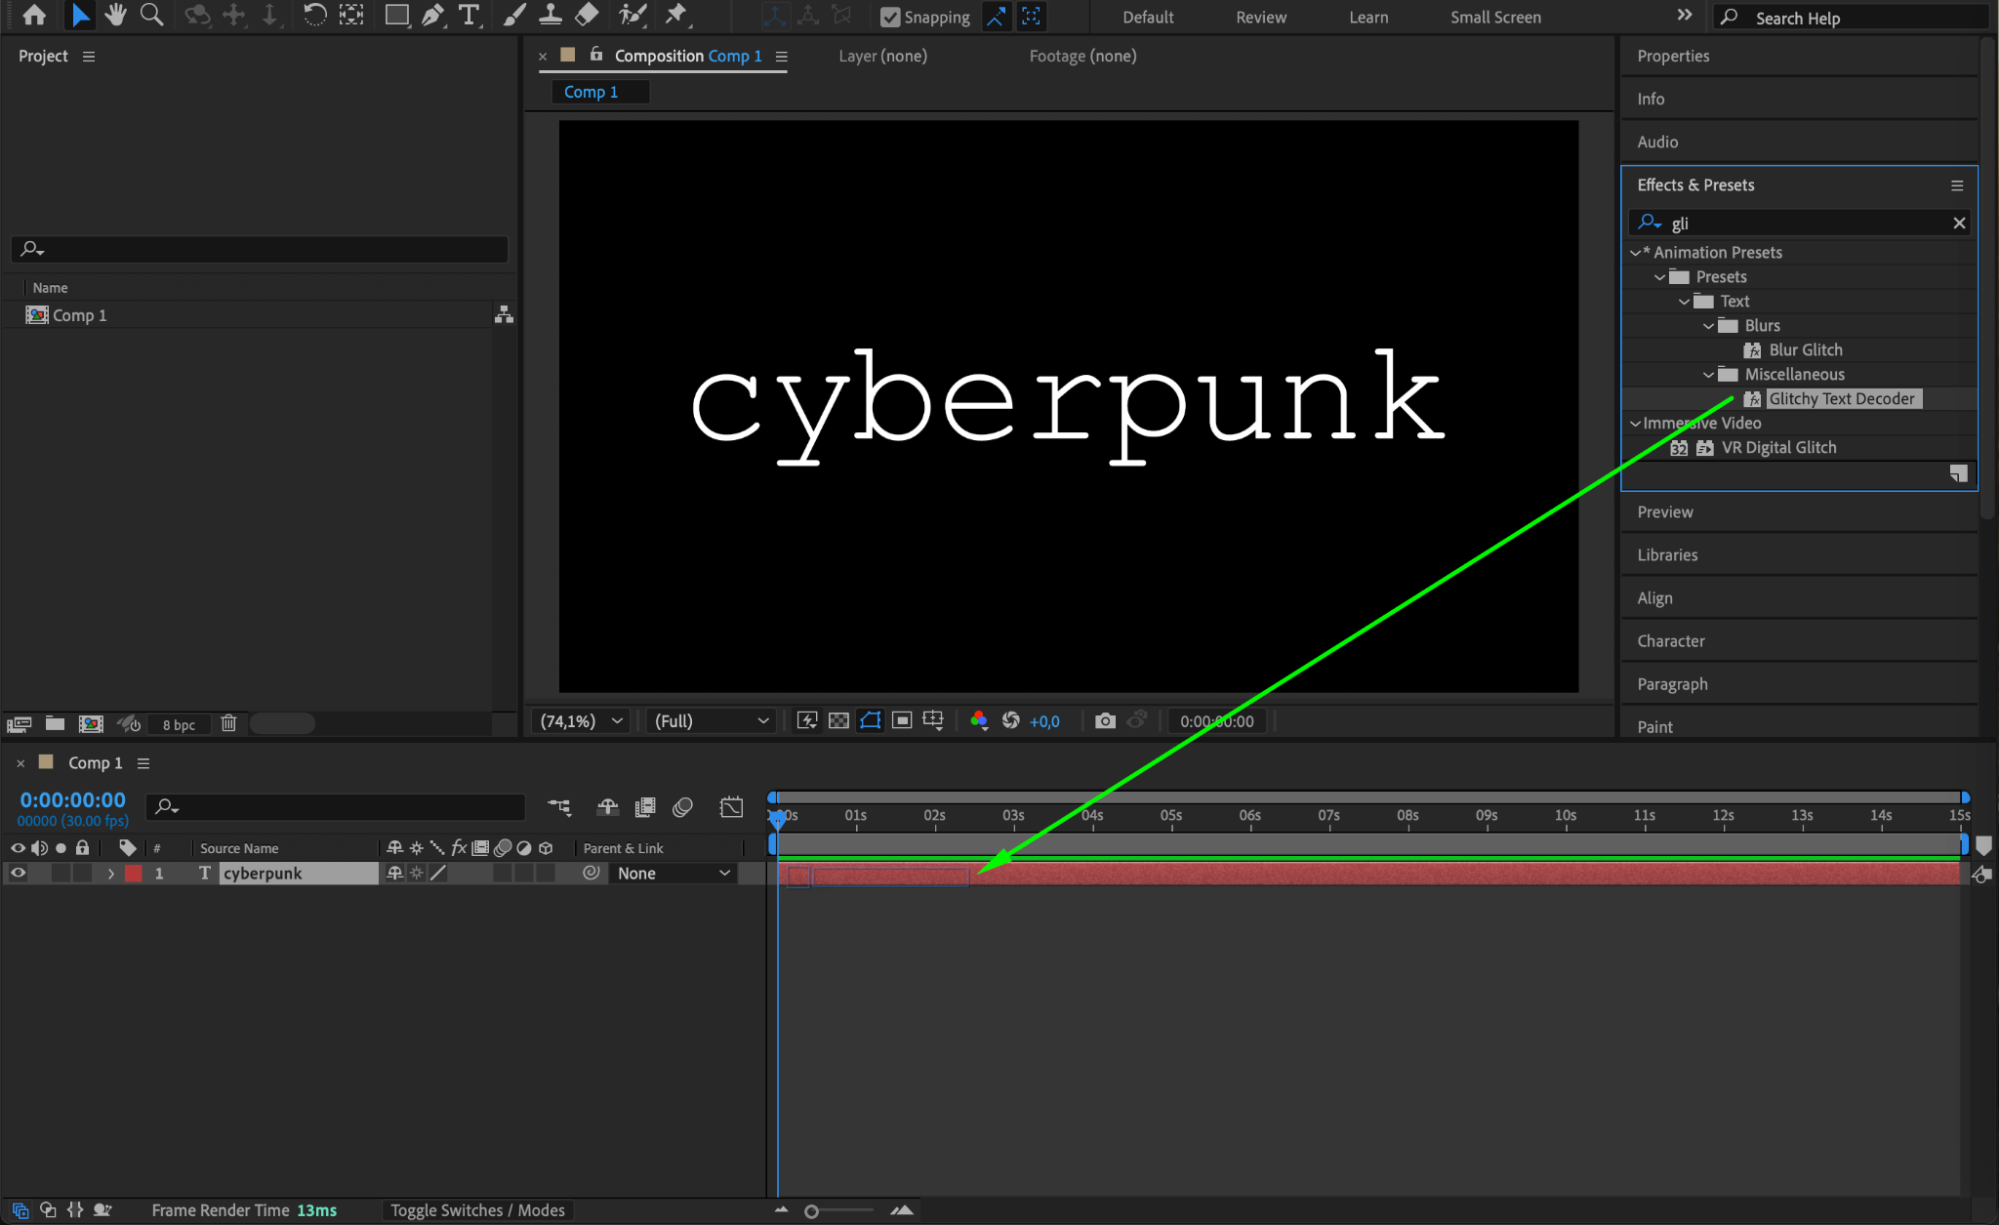
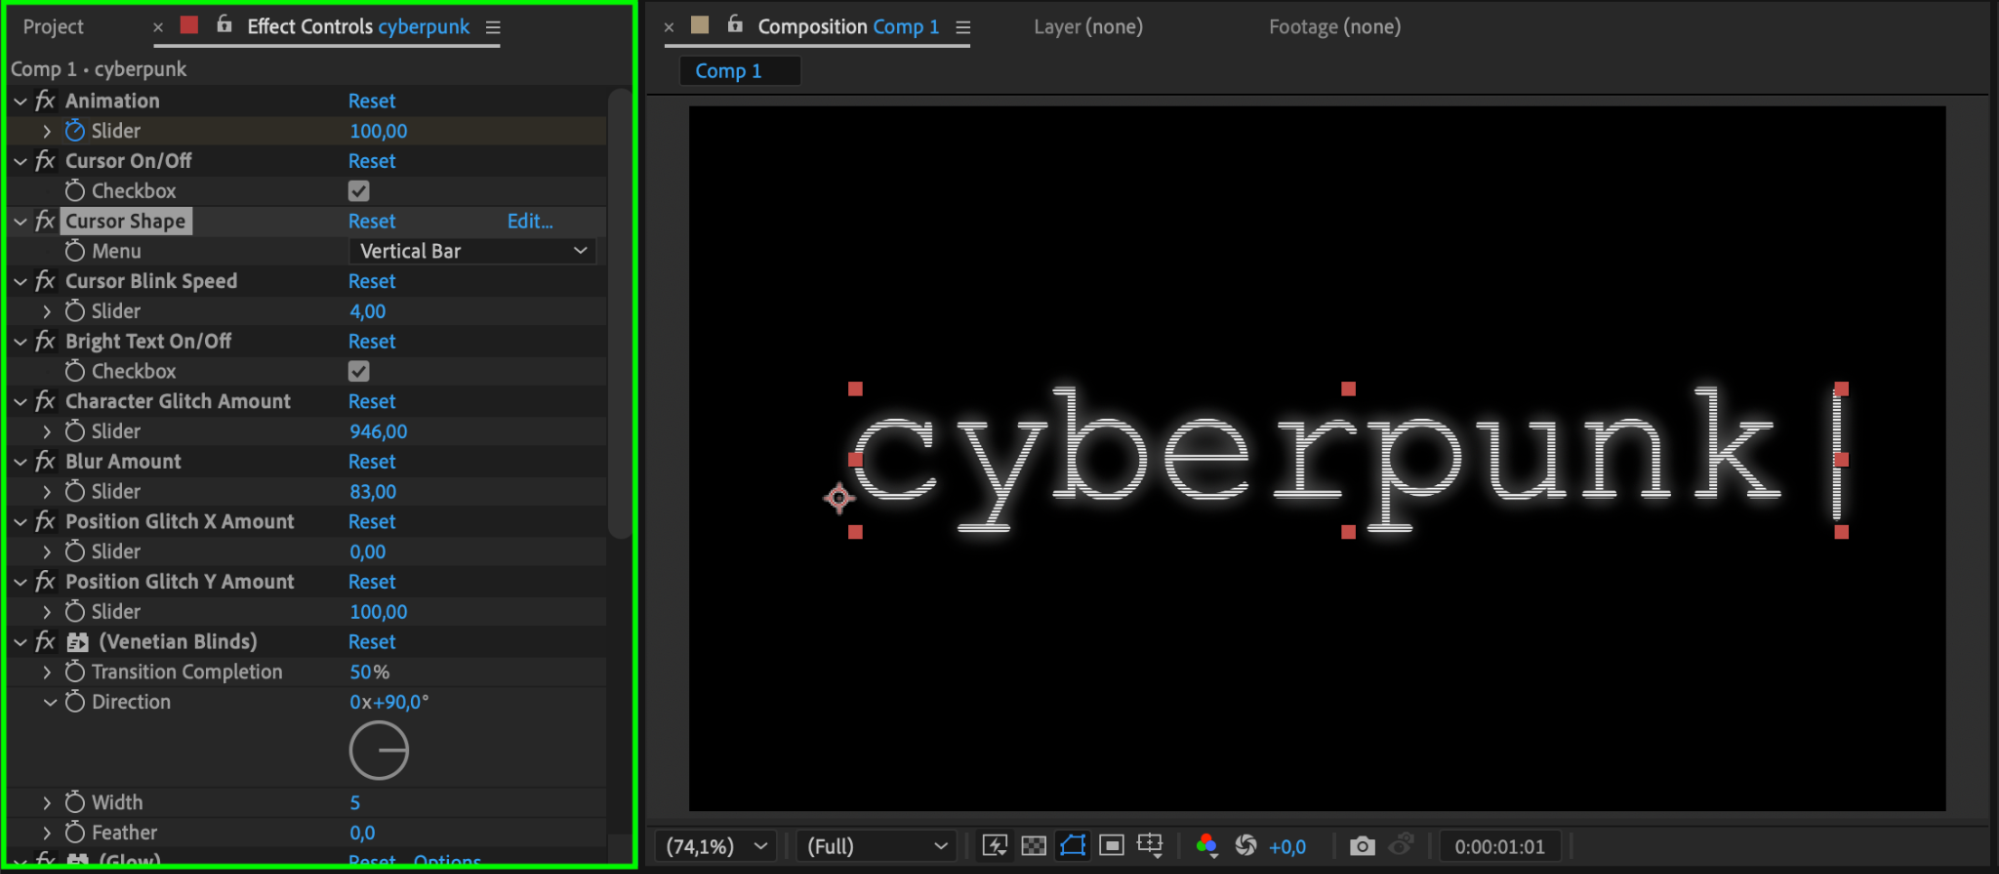
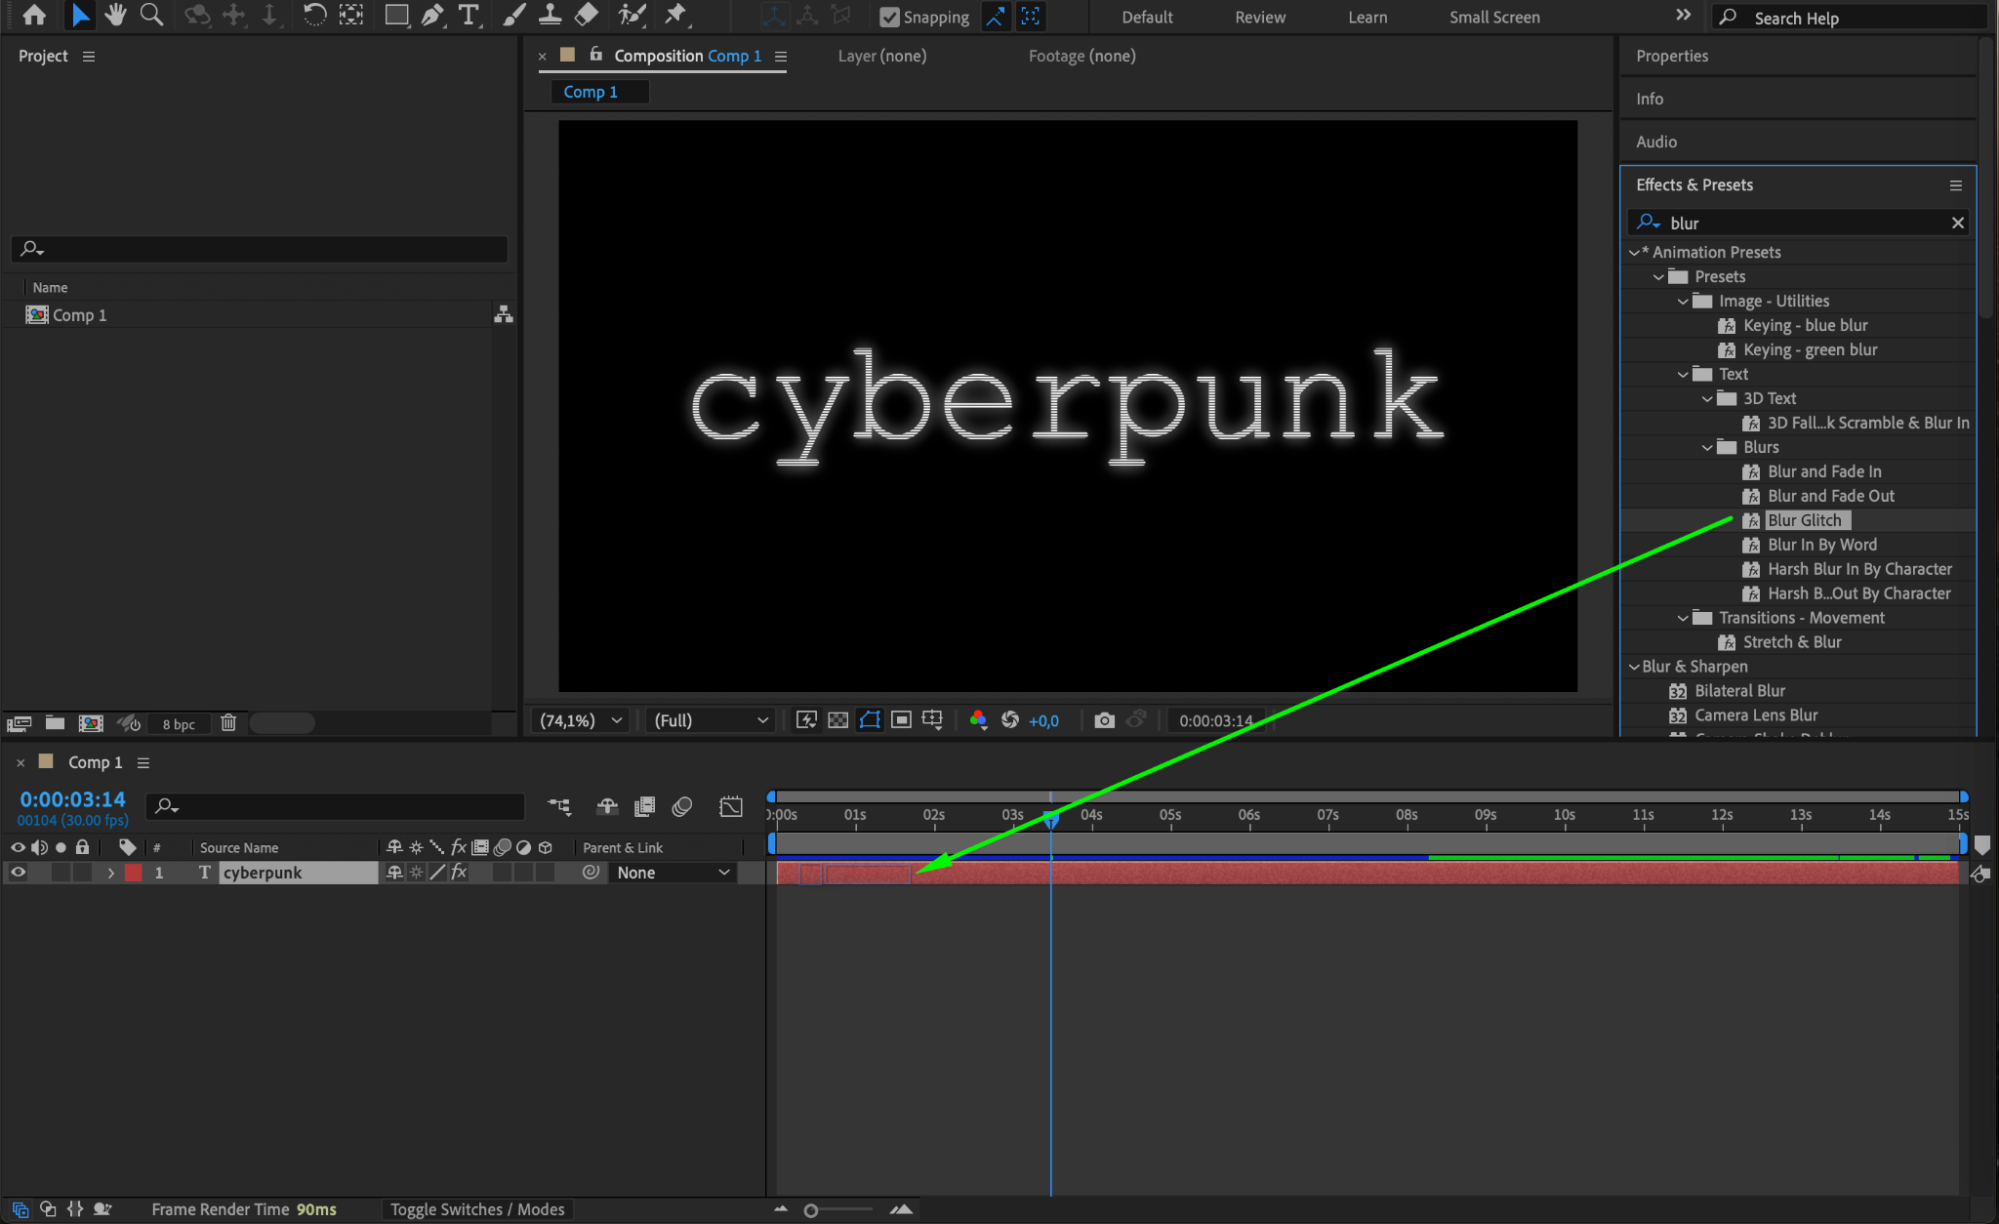
In the Effects & Presets Panel, search for the Glitchy Text Decoder effect. Drag and drop it onto the text layer. Adjust its parameters in the Effect Controls Panel to customize the glitch intensity and timing. Next, search for the Blur Glitch effect and apply it to the text. Fine-tune the settings to achieve the desired level of distortion and motion blur.
 Step 4 (Optional): Create a Background
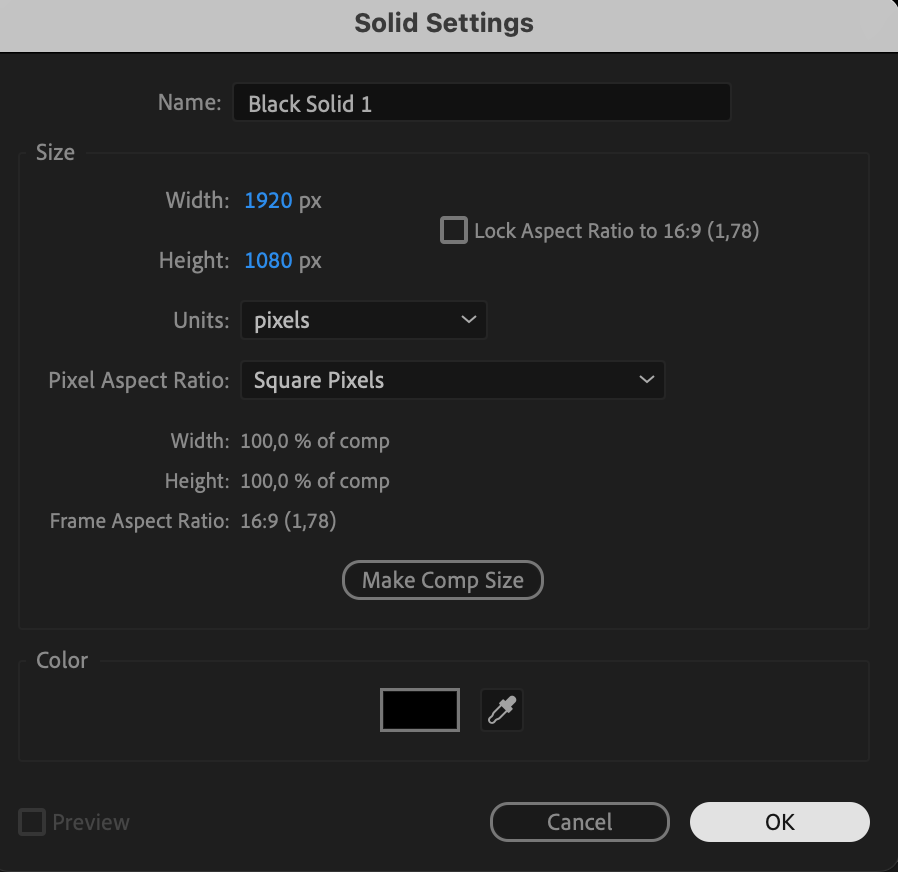
To enhance the glitch effect, create a visually appealing background. Go to Layer > New > Solid and create a black solid layer. Drag it beneath the text layer in the timeline. This ensures the glitch text stands out clearly.

 Step 5: Add Gradient and Noise to the Background
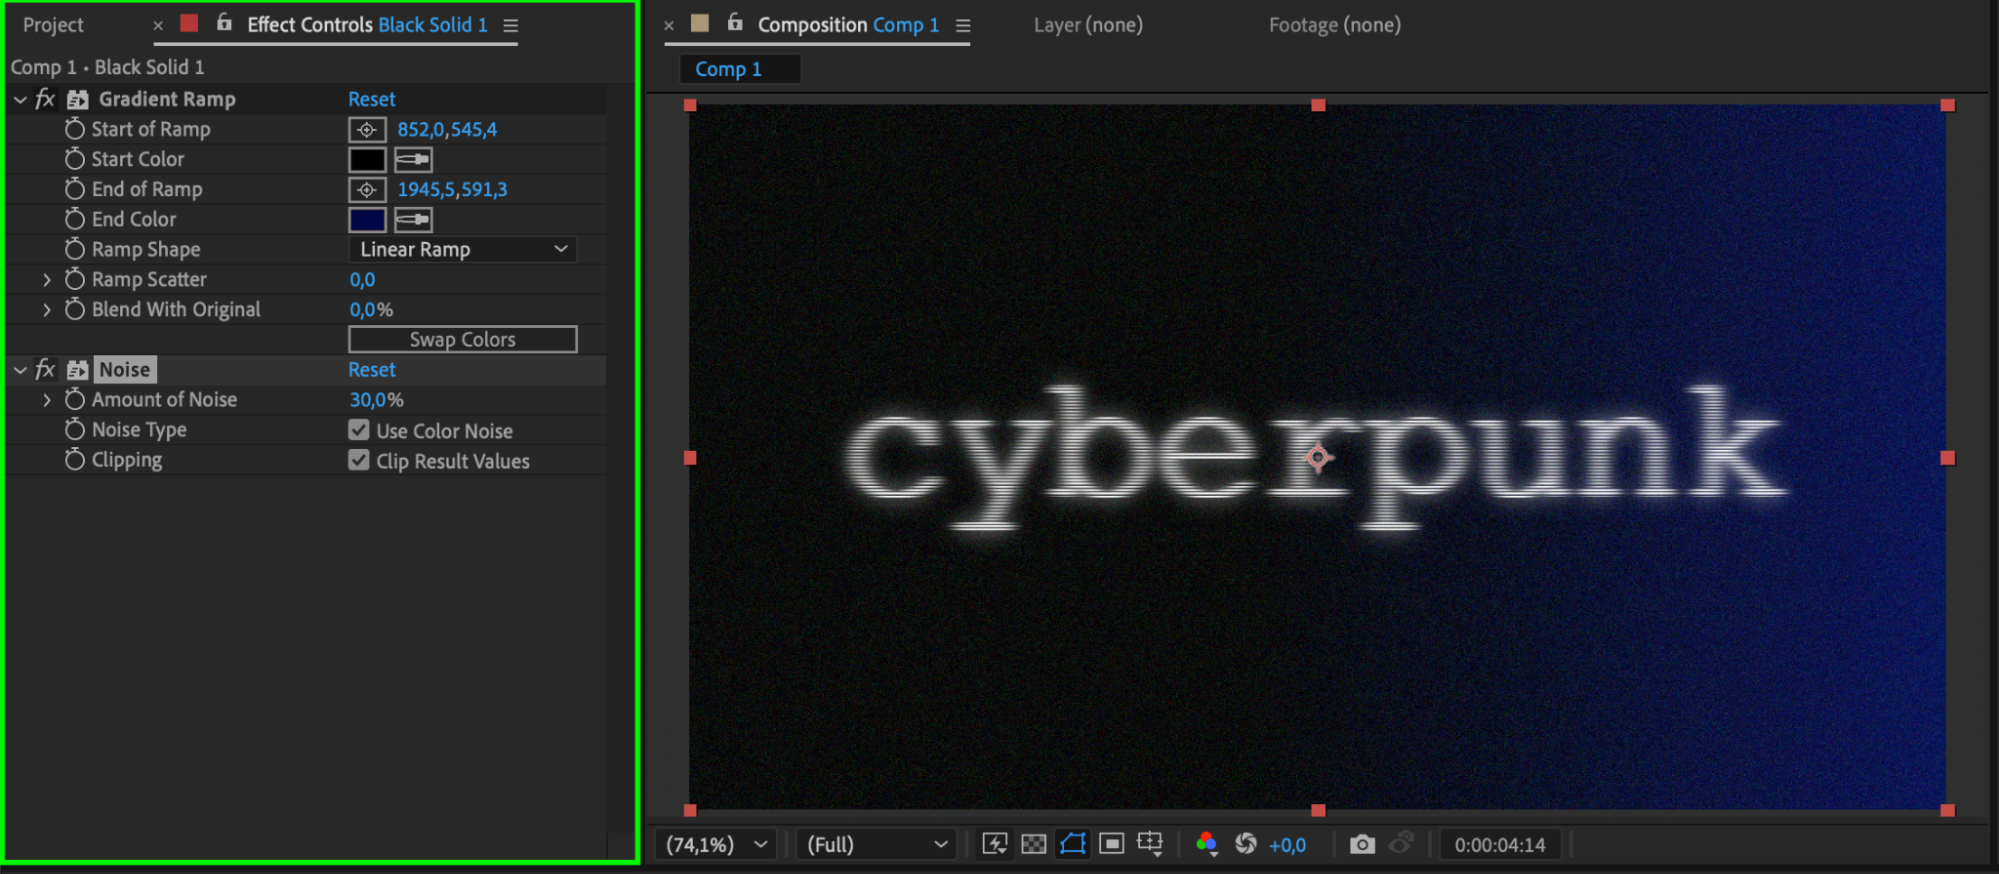
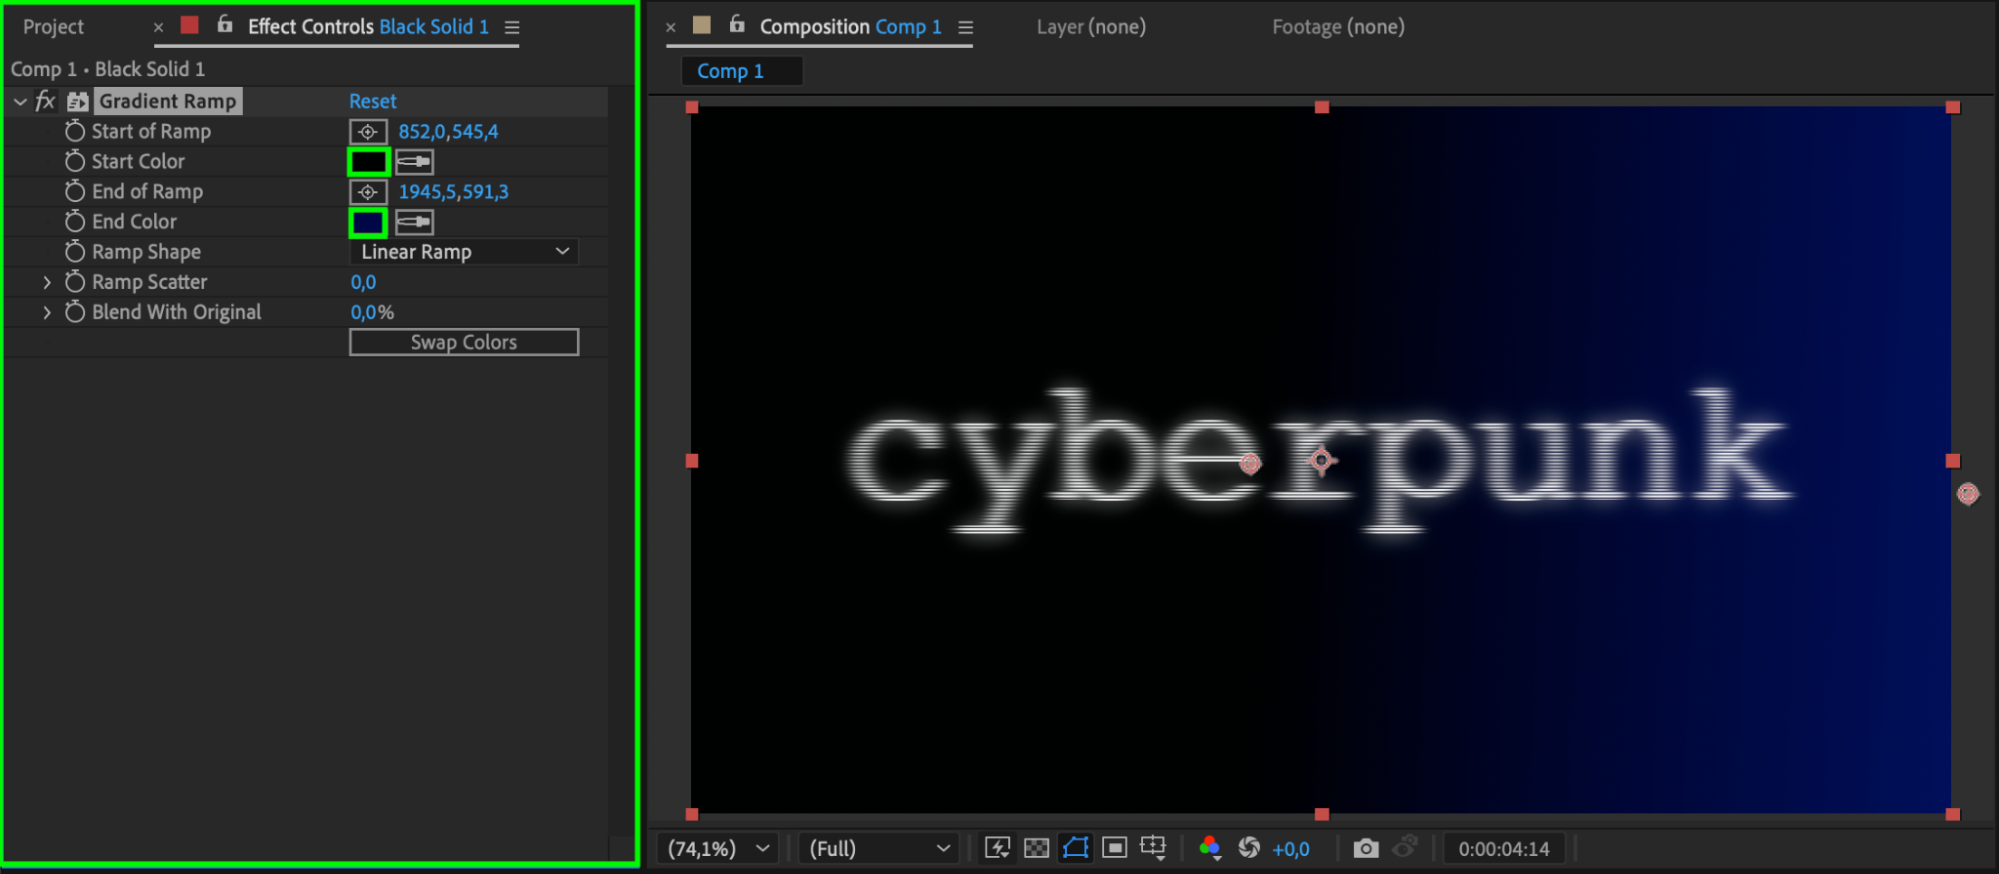
With the black solid layer selected, go to the Effects & Presets Panel and search for Gradient Ramp. Apply it to the solid layer and set the Start Color to dark green and the End Color to dark blue for a cyberpunk aesthetic. Then, search for the Noise effect and apply it to the same layer. Set the Amount of Noise to 30% to add texture and grit to the background.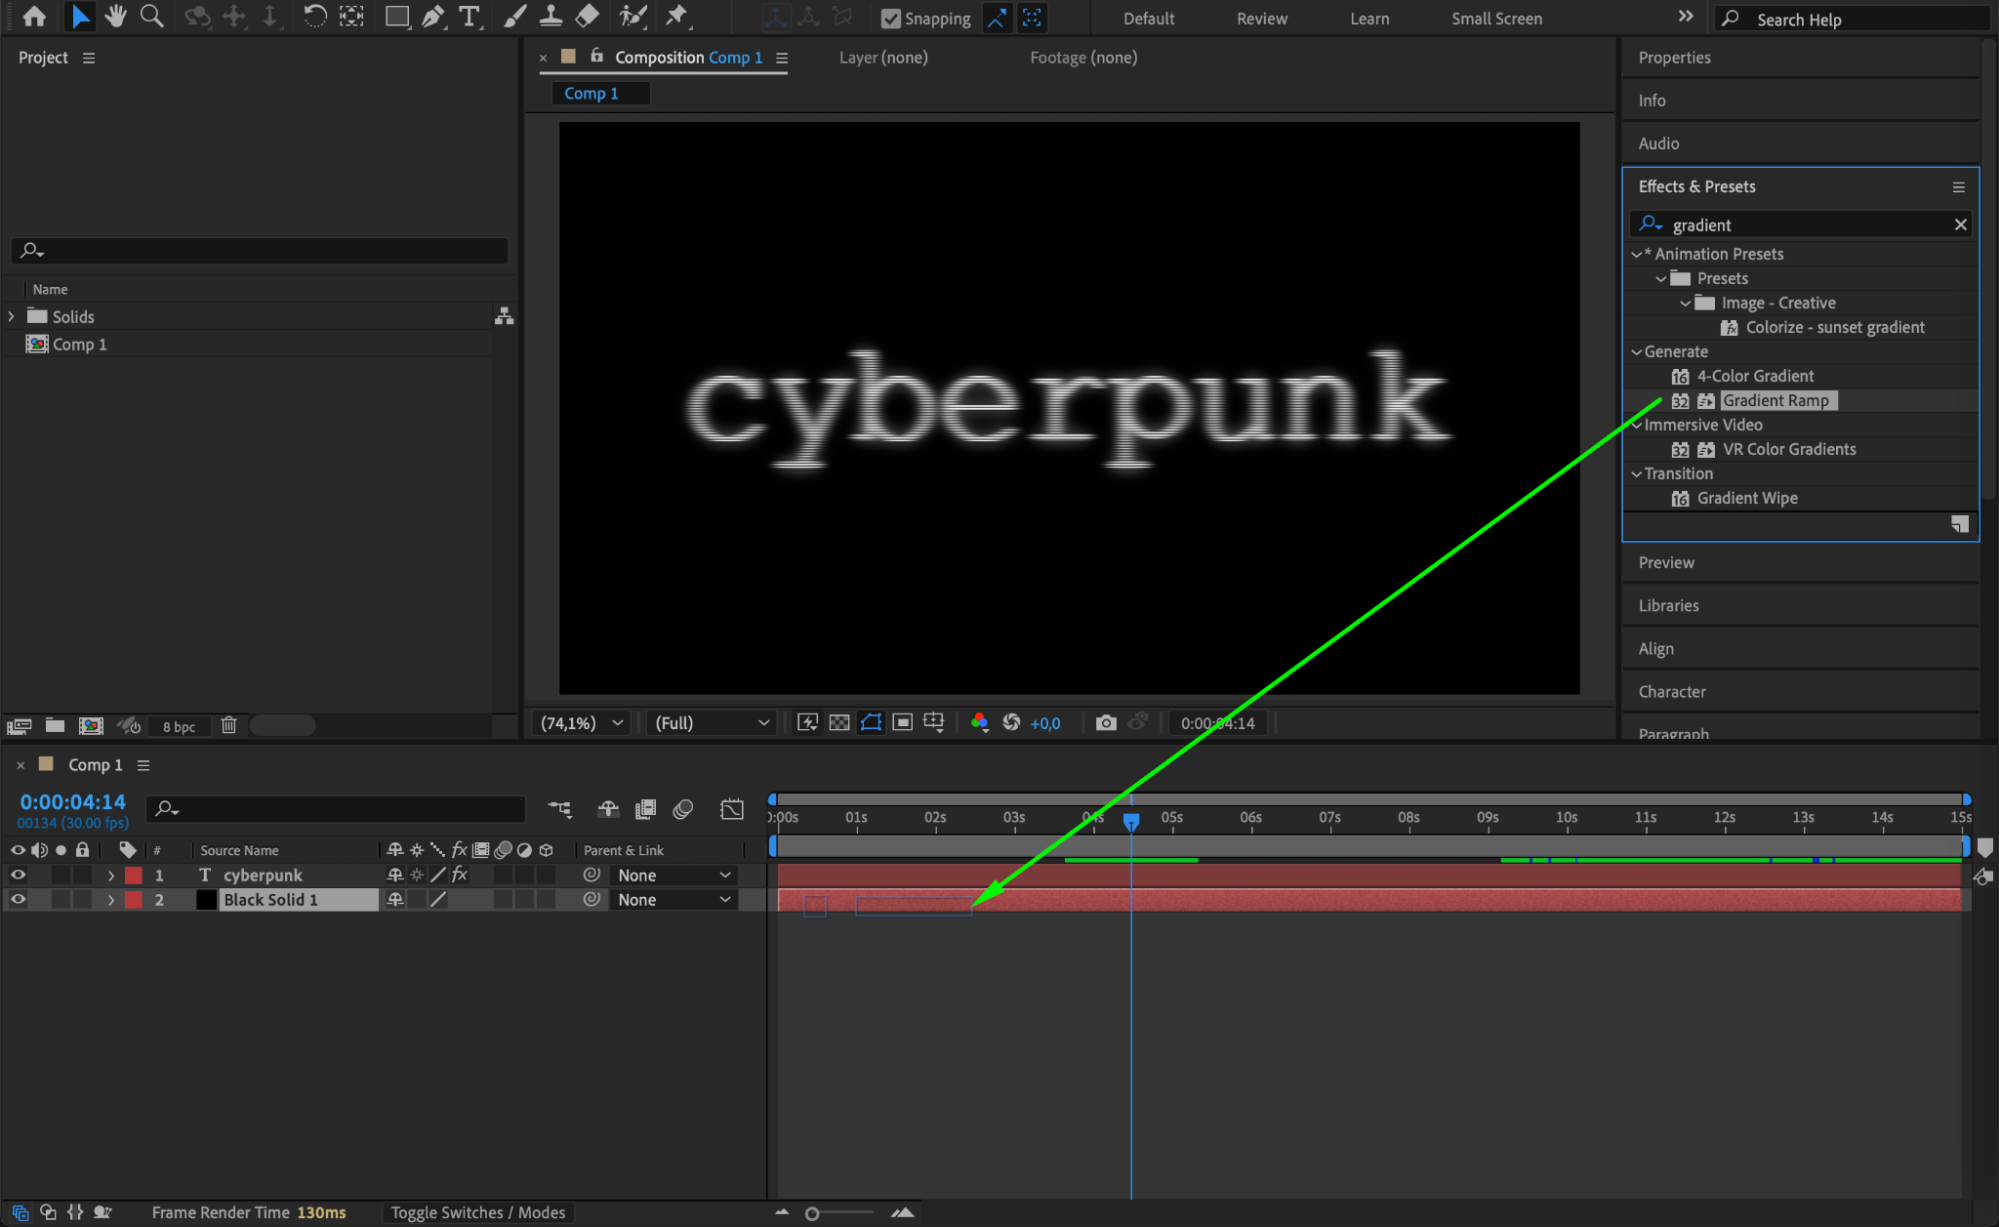

 Step 6: Preview Your Animation
Get 10% off when you subscribe to our newsletter

Press the spacebar to preview the animation. Make adjustments to the glitch effects or background if necessary to perfect the look. Ensure that the timing and intensity of the glitch align with your creative vision.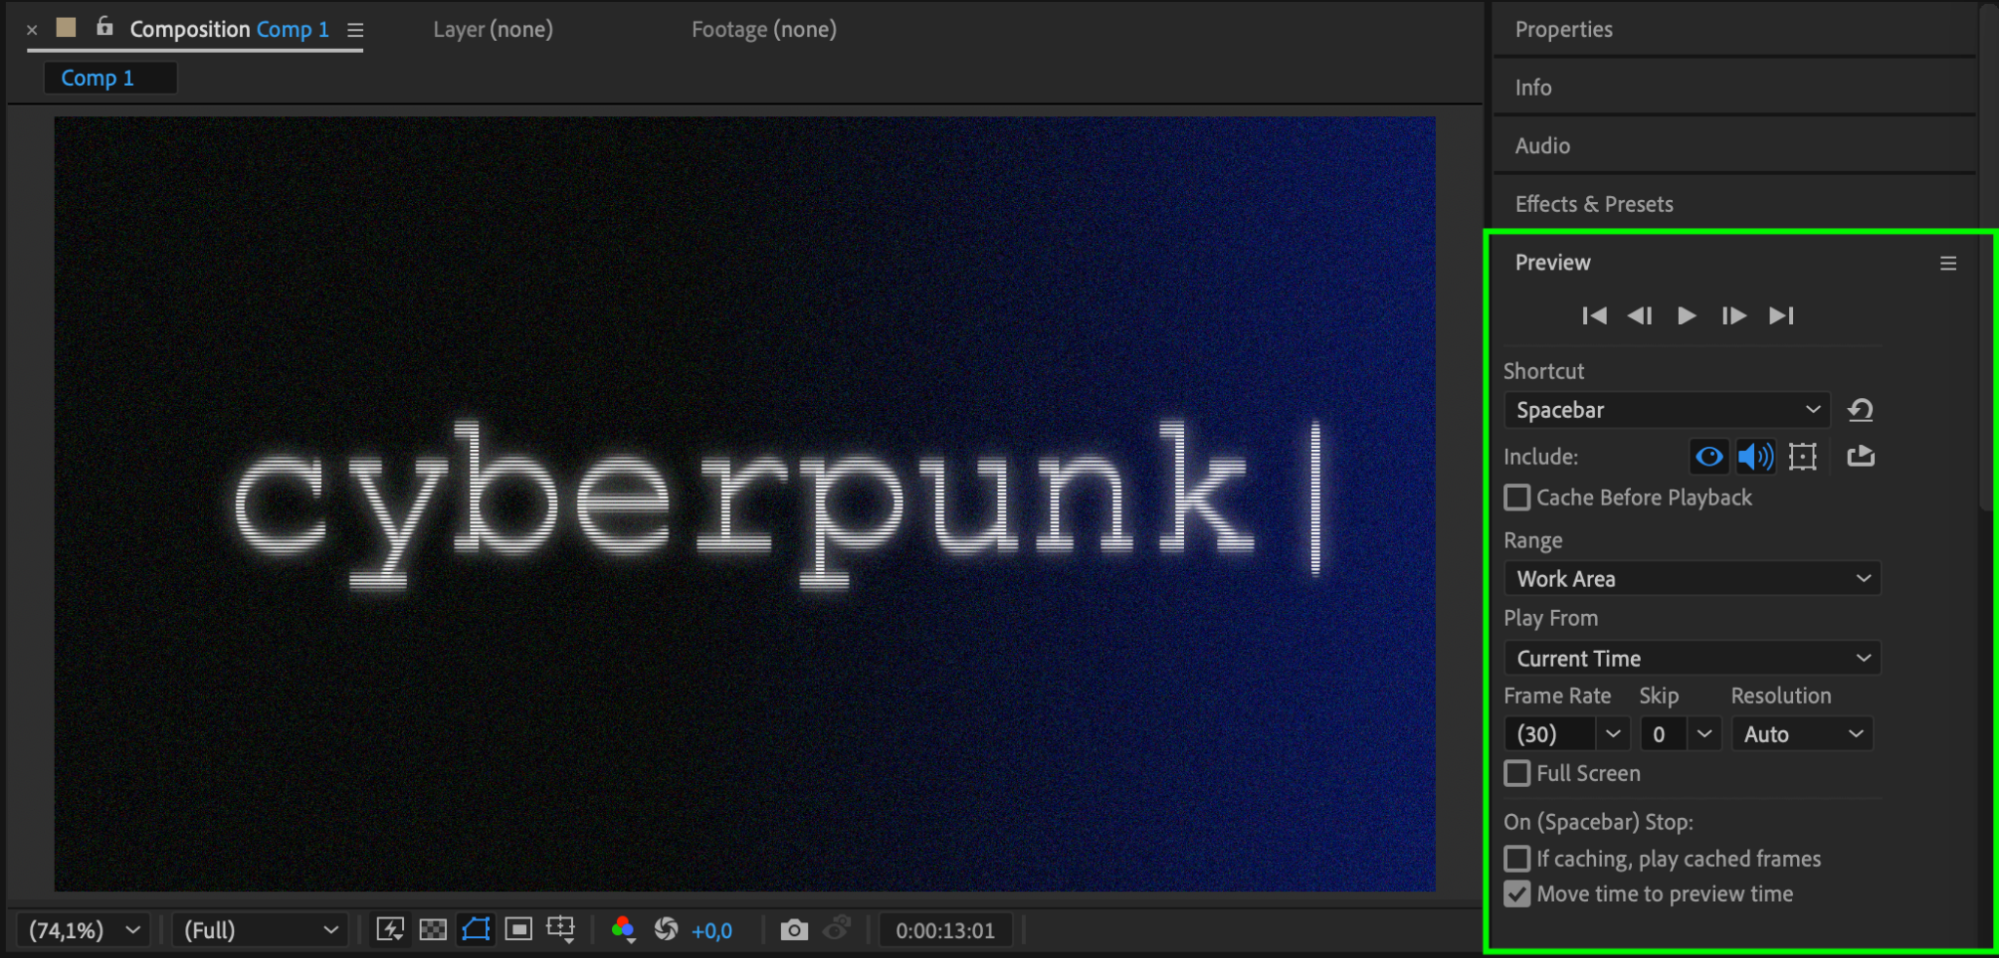 Step 7: Render Your Project
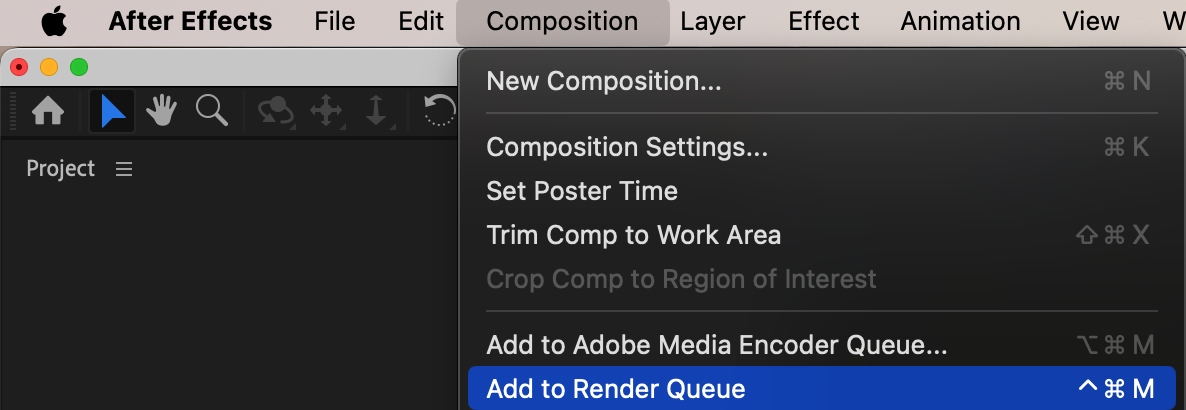
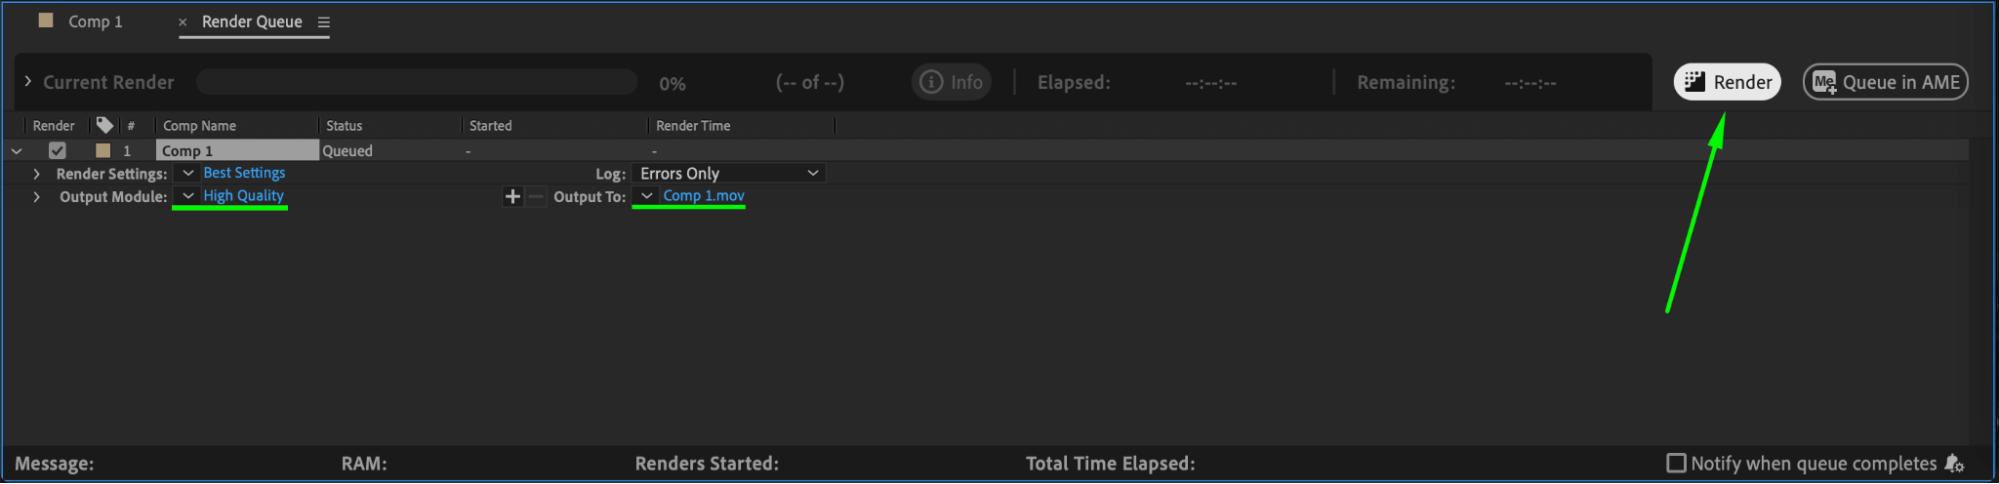
Once you’re satisfied with the result, render your project. Go to Composition > Add to Render Queue, configure your output settings, and click Render. This exports your glitch text animation, ready for use in any project.
 Conclusion
Creating glitch text in After Effects is a straightforward process that combines simple tools and effects to achieve a dynamic result. By following these steps, you can quickly add a professional glitch aesthetic to your text, perfect for modern or futuristic designs. Experiment with settings and colors to make the effect uniquely yours!
Our Bestsellers


