Easily Import After Effects Projects into Premiere Pro
Introduction to Integrating After Effects with Premiere Pro
Are you ready to elevate your video editing skills? In this article, we’ll guide you through the process of importing After Effects projects into Premiere Pro with ease. By integrating these two powerful Adobe applications, you can create visually stunning videos that captivate your audience. Let’s get started!
Get 10% off when you subscribe to our newsletter

Step-by-Step Guide to Importing After Effects Projects into Premiere Pro
Step 1: Organize Your After Effects Project
Before importing your After Effects project into Premiere Pro, it’s essential to keep your files organized. Create a dedicated folder for your project and ensure all related files, such as media assets, compositions, and project files, are stored within it. This will make the importing process smoother and help you maintain an organized workflow throughout the editing process.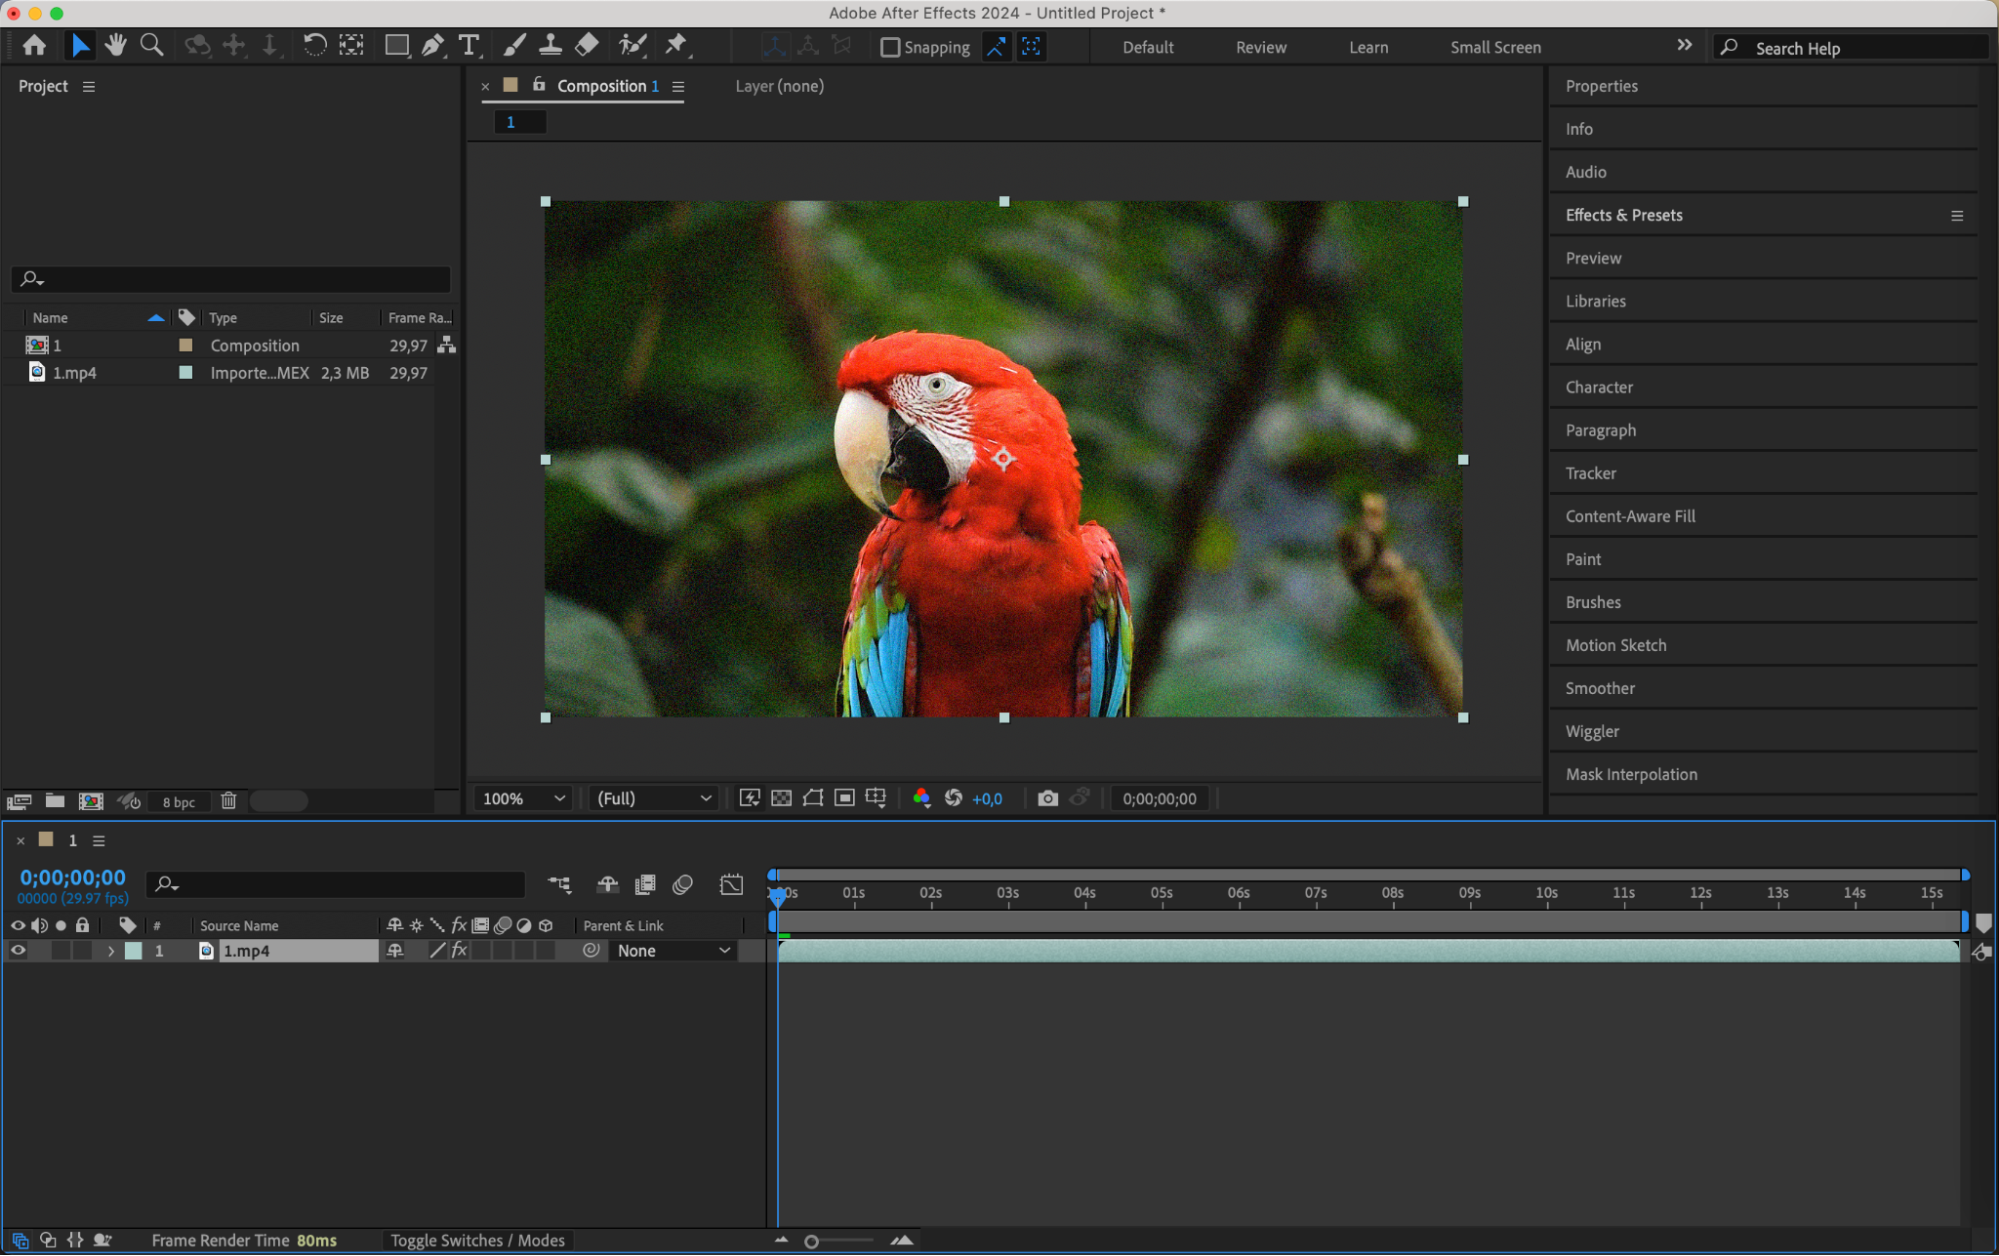
Step 2: Export Your After Effects Project
Once you’ve finalized your After Effects project, it’s time to export it for use in Premiere Pro. Go to the “Composition” menu in After Effects and select “Add to Render Queue.” In the Render Queue panel, choose your desired format, such as MP4, and set the file name and location. Click the “Render” button to start the rendering process. This will create a video file that can be easily imported into Premiere Pro.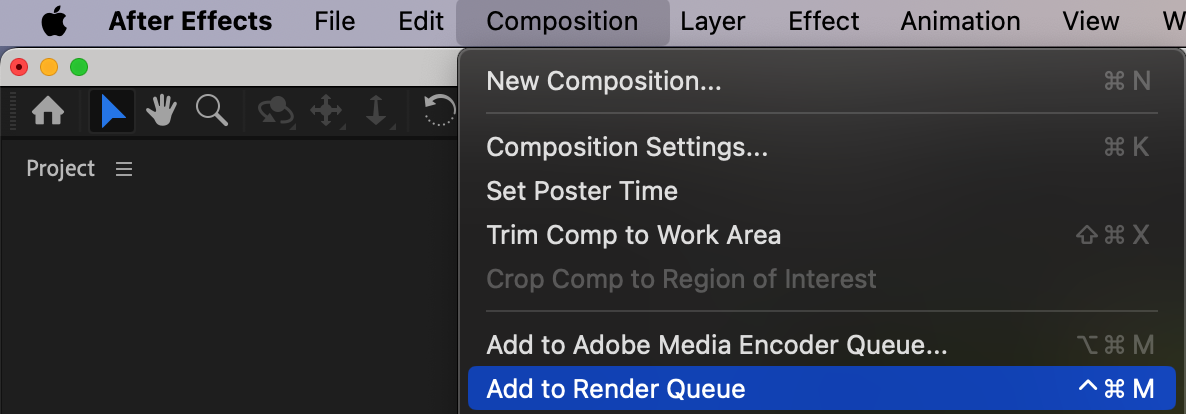

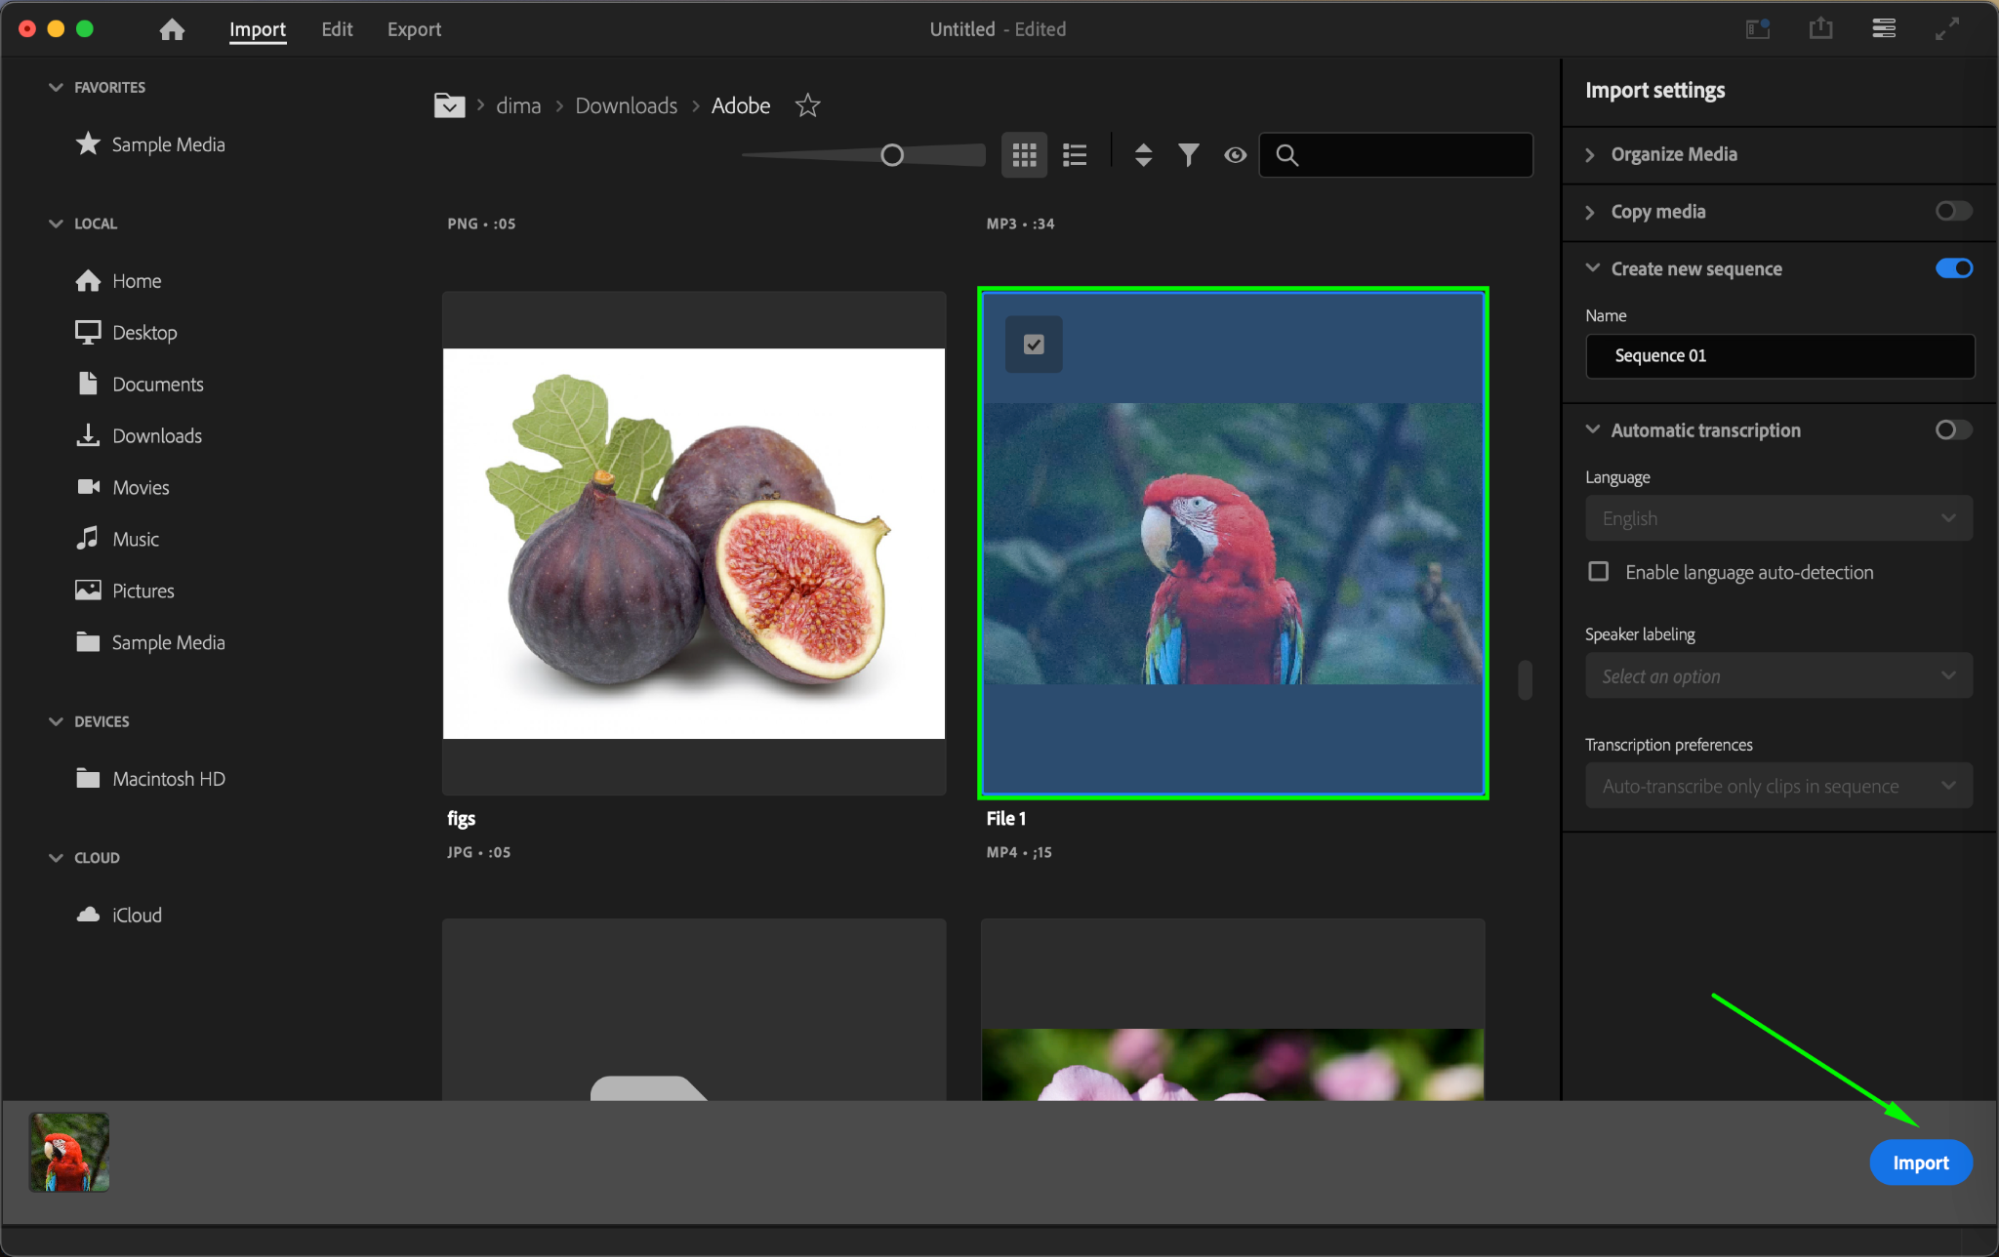
Step 3: Import Your After Effects Project into Premiere Pro
Now that your After Effects project is exported, open Premiere Pro and create a new project if you haven’t already. Navigate to the folder where your exported After Effects file is saved, select it, and click “Import.” The composition will now appear in your Premiere Pro Project panel, ready to be used in your editing timeline.
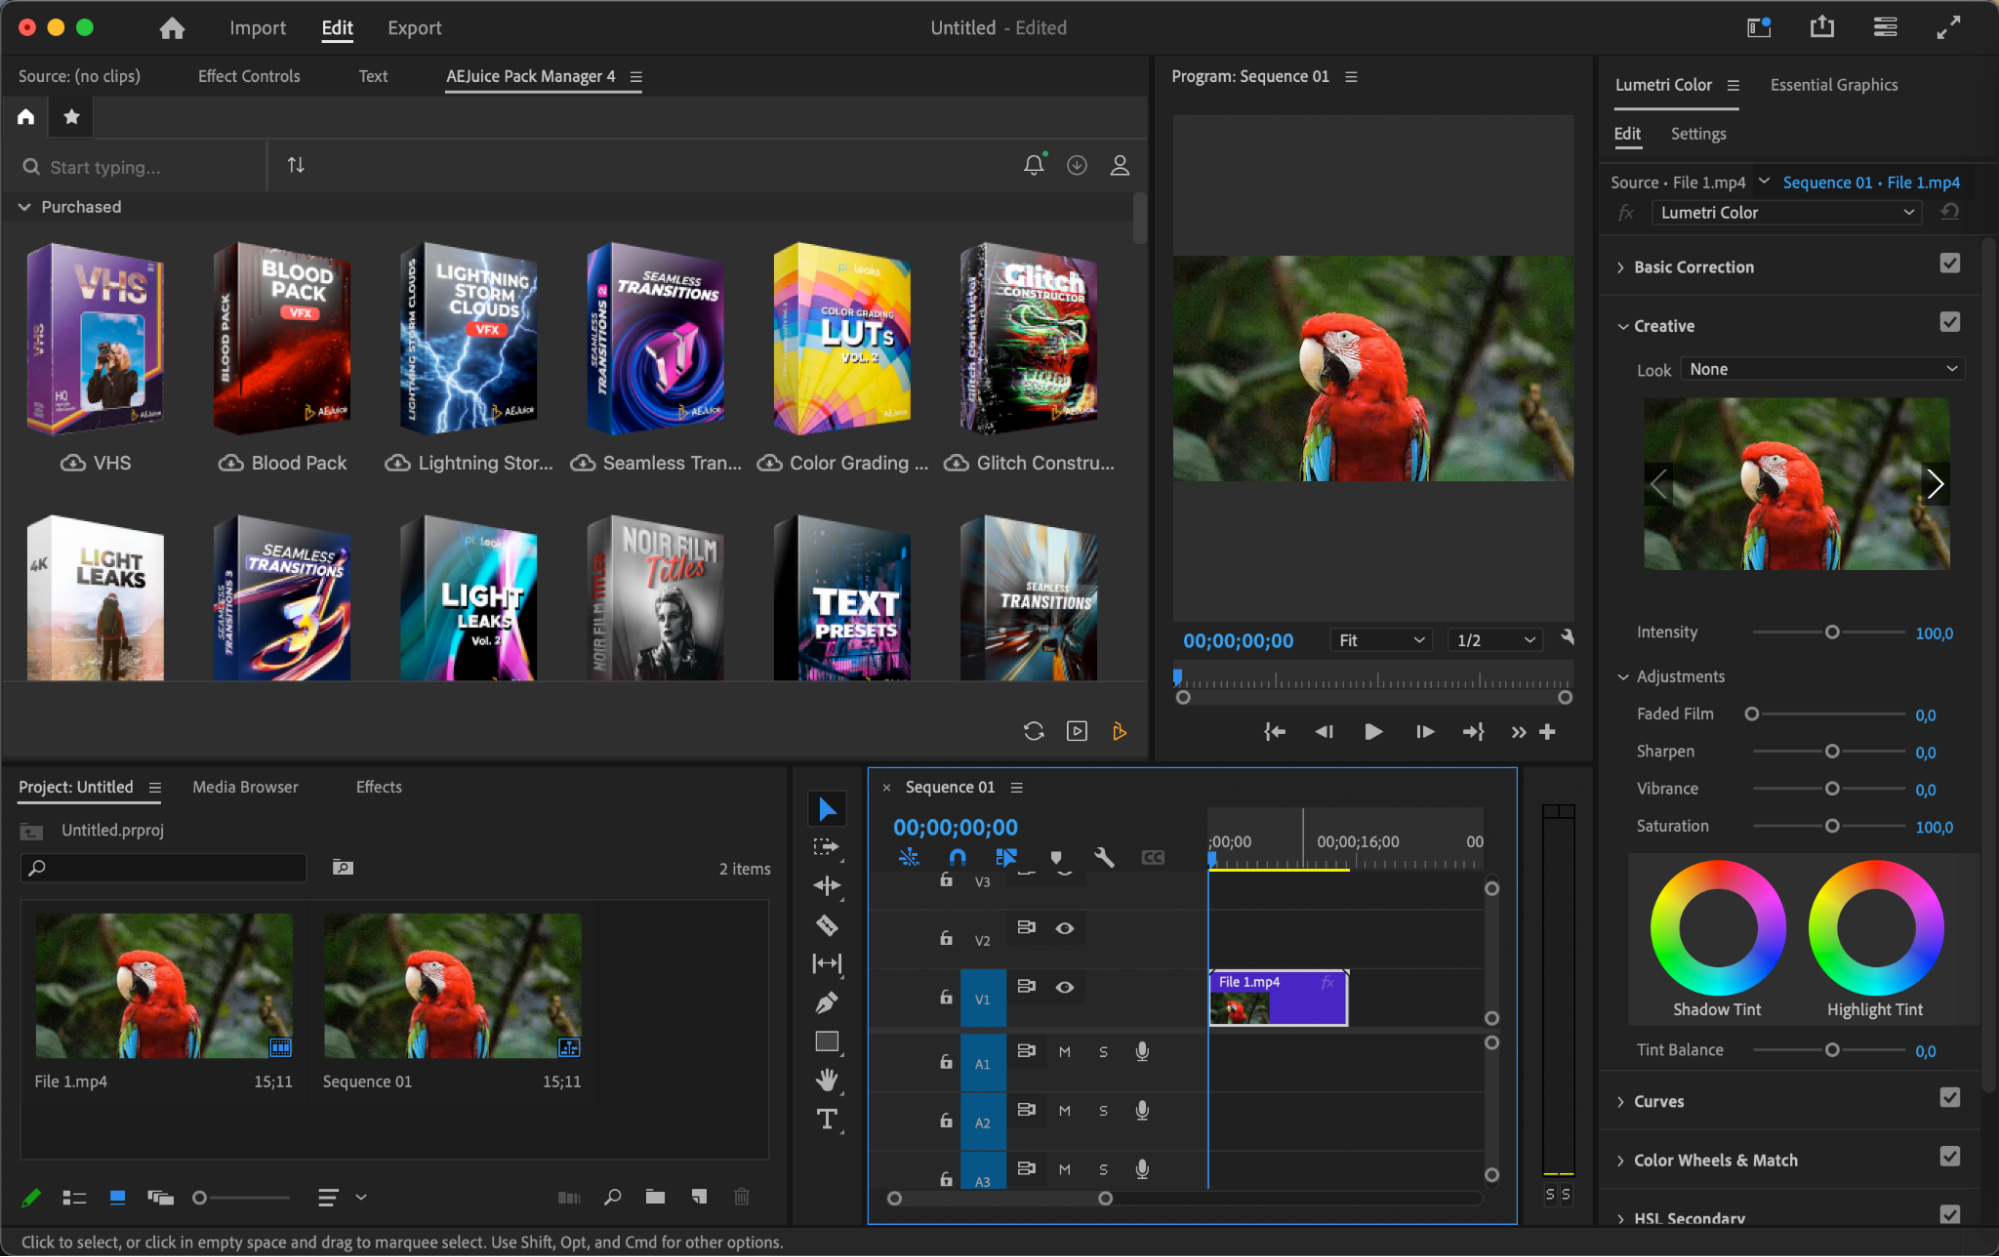
Step 4: Edit and Enhance Your Project in Premiere Pro
Now that your project is on the timeline as a sequence, you can begin editing and enhancing it. Premiere Pro’s intuitive interface and powerful editing tools allow you to make precise adjustments, ensuring your project is refined to perfection. Whether you’re adjusting timing, color grading, or adding audio effects, Premiere Pro provides the flexibility you need to create a polished final video.
Step 5: Export Your Final Video from Premiere Pro
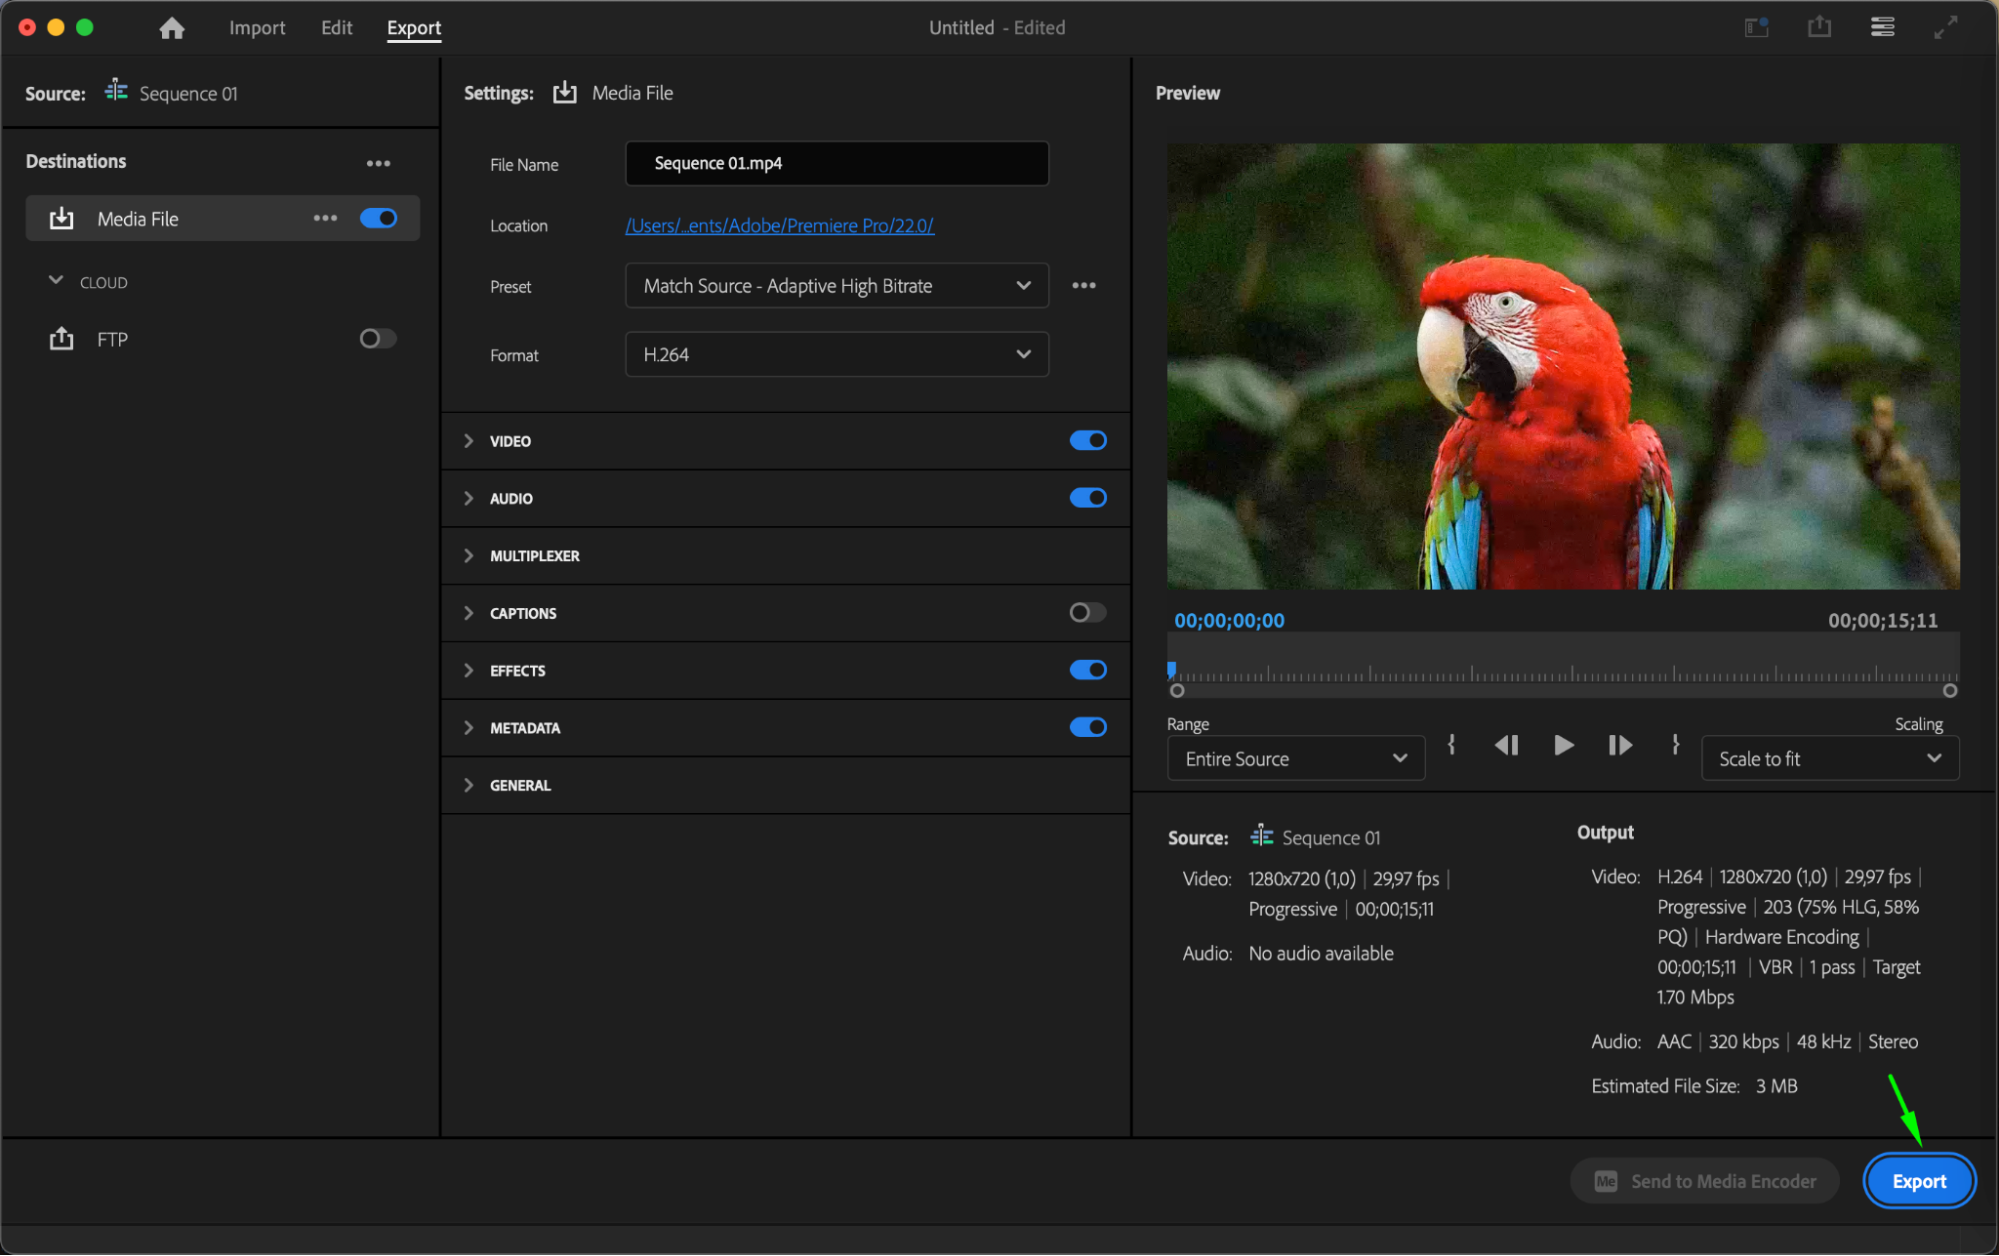
After finishing your edits in Premiere Pro, it’s time to export your final video. Go to “File” > “Export” > “Media.” In the Export Settings window, choose your preferred video format, resolution, and quality settings. Select the destination folder where you want to save the exported video. Click “Export,” and Premiere Pro will render your video with the settings you’ve chosen, producing a high-quality final product.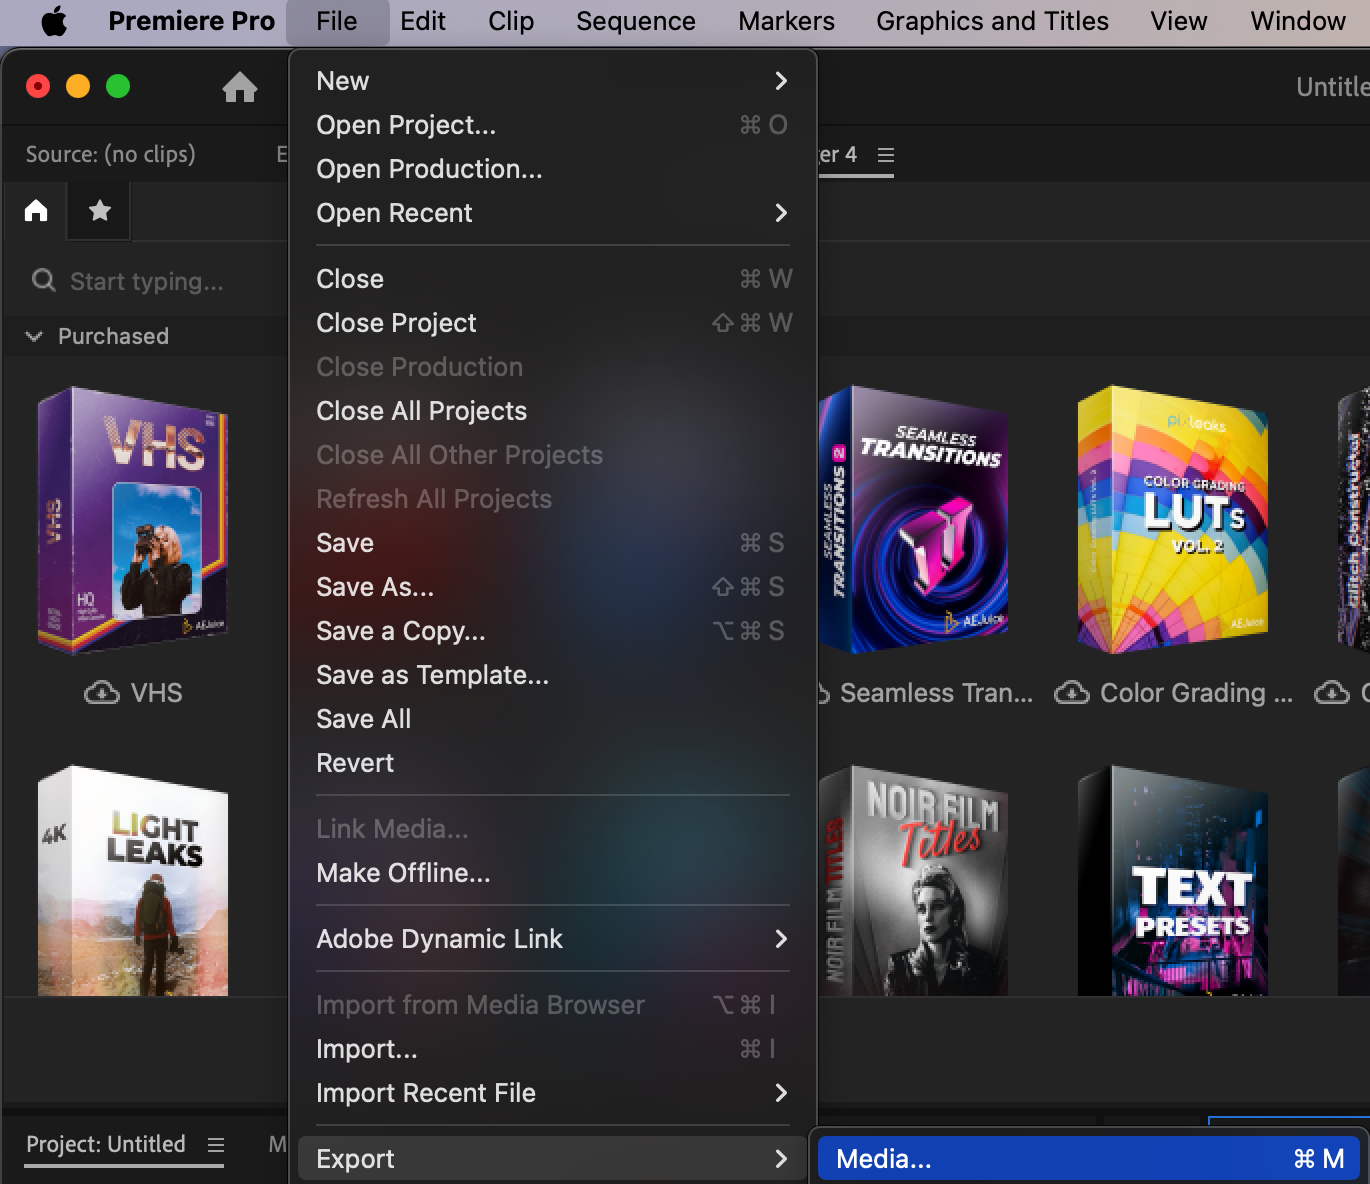
Conclusion
Congratulations! You’ve successfully integrated your After Effects project into Premiere Pro and created a stunning video. By combining the capabilities of these two powerful Adobe applications, you’ve unlocked a seamless workflow that enhances your video editing process and unleashes your creativity.
In conclusion, importing After Effects projects into Premiere Pro allows you to produce professional-quality videos with ease. By following these simple steps, you can harness the full potential of both applications and create visually captivating content that engages your audience. So, start experimenting, explore new techniques, and let your imagination run wild – the possibilities are endless!


