How to Enable and Use “Replace with After Effects Composition”
Introduction – Integrating Premiere Pro and After Effects with “Replace with After Effects Composition”
The “Replace with After Effects Composition” feature allows you to move clips from Premiere Pro directly into After Effects, making it easier to add advanced visual effects. This workflow enables smoother collaboration between the two programs, as any changes made in After Effects will automatically update in Premiere Pro. Here’s a step-by-step guide to enabling and using this feature effectively.
Get 10% off when you subscribe to our newsletter

Step 1: Open Premiere Pro and Select Your Clip
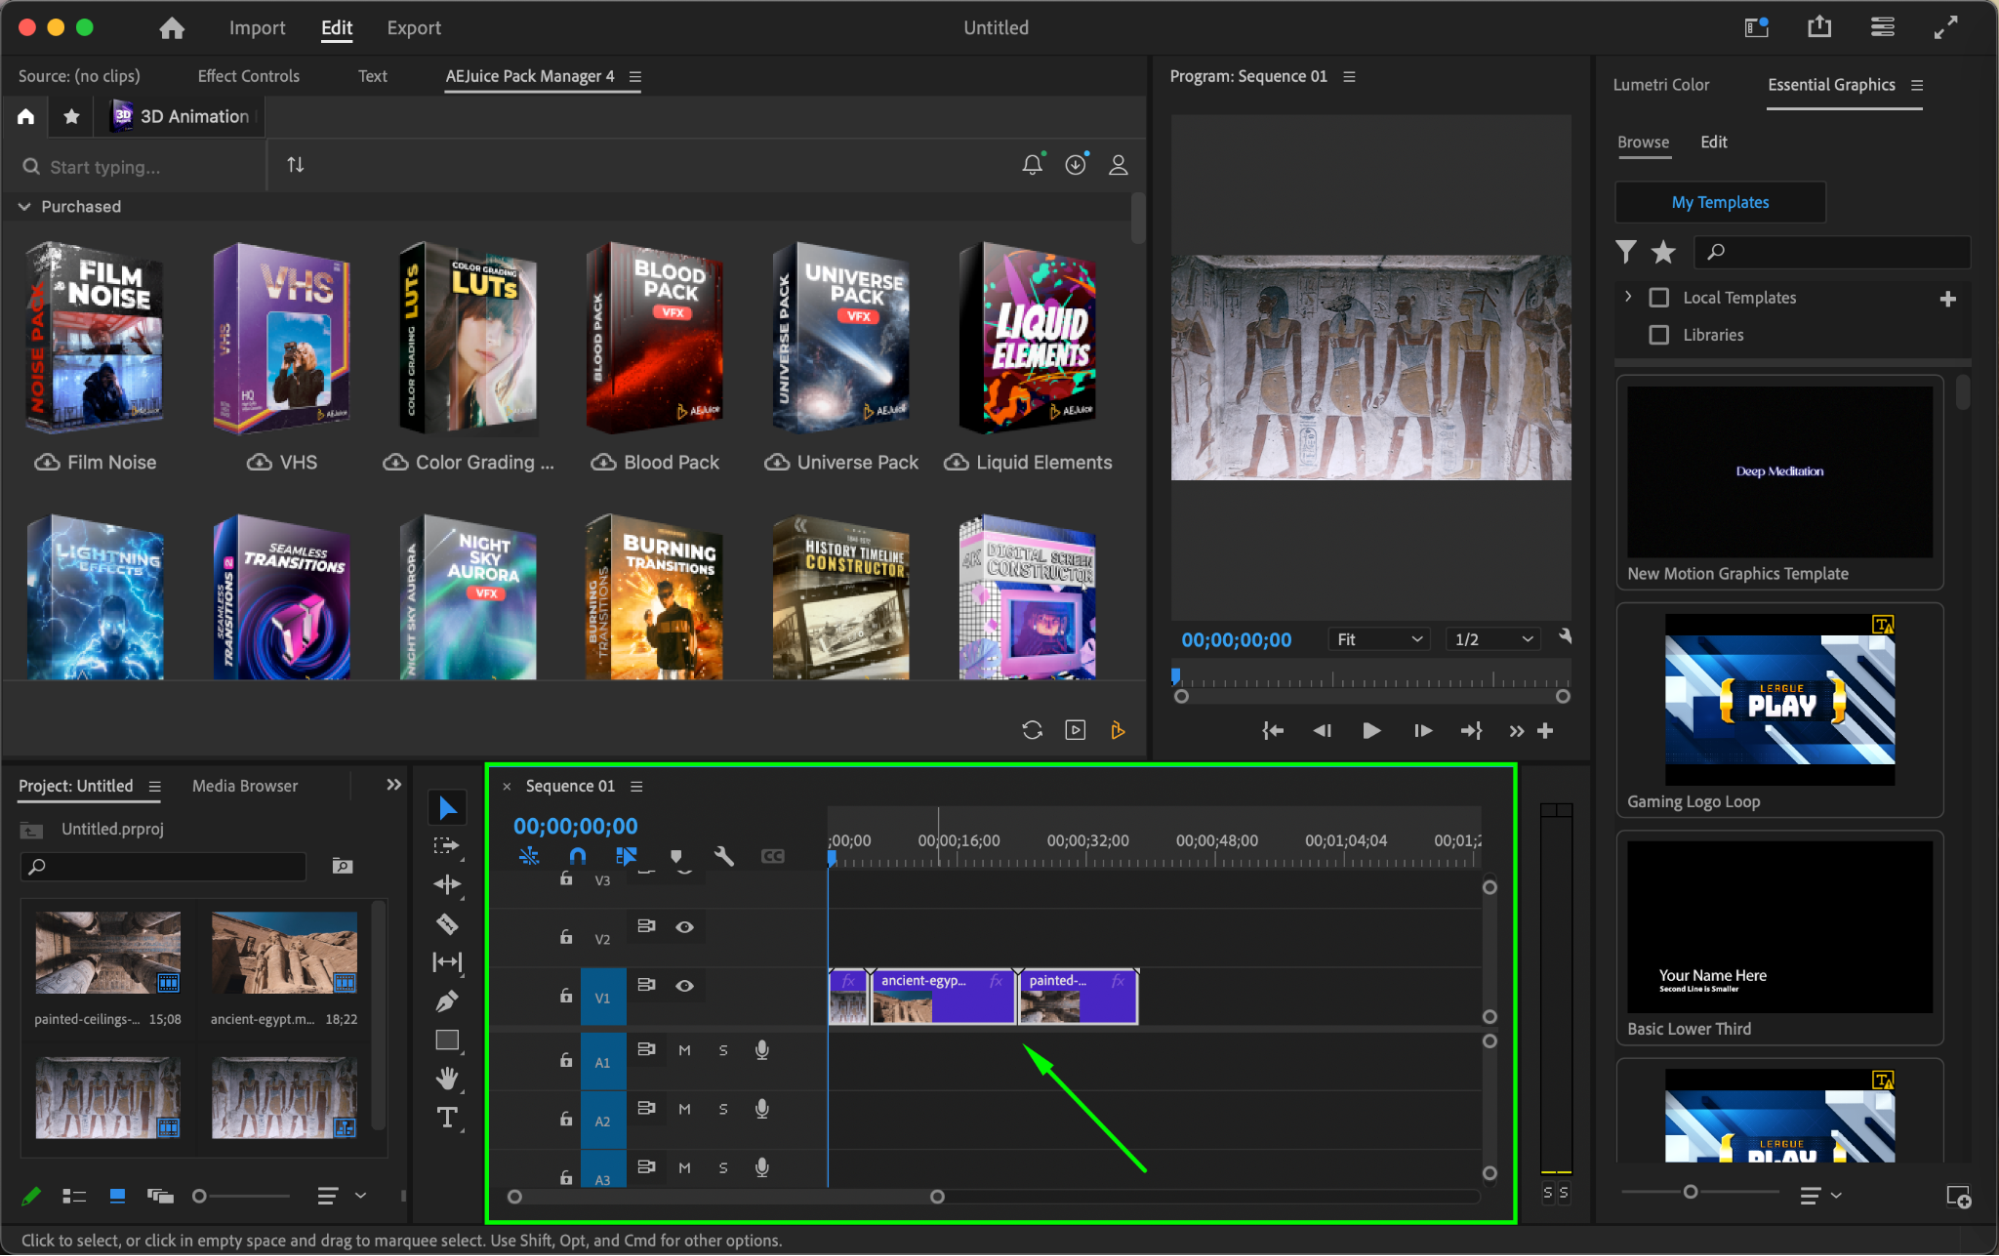
Start by opening your project in Premiere Pro and choosing the clip or sequence you want to enhance in After Effects. Select it in the timeline, and make sure you’ve saved your Premiere Pro project. This step ensures your edits are secure and allows you to easily return to your project.
 Step 2: Use the “Replace with After Effects Composition” Option
With your clip selected, right-click on it in the Premiere Pro timeline. Choose Replace with After Effects Composition from the context menu. This action will open After Effects and create a new composition based on the clip’s settings, ready for further enhancement.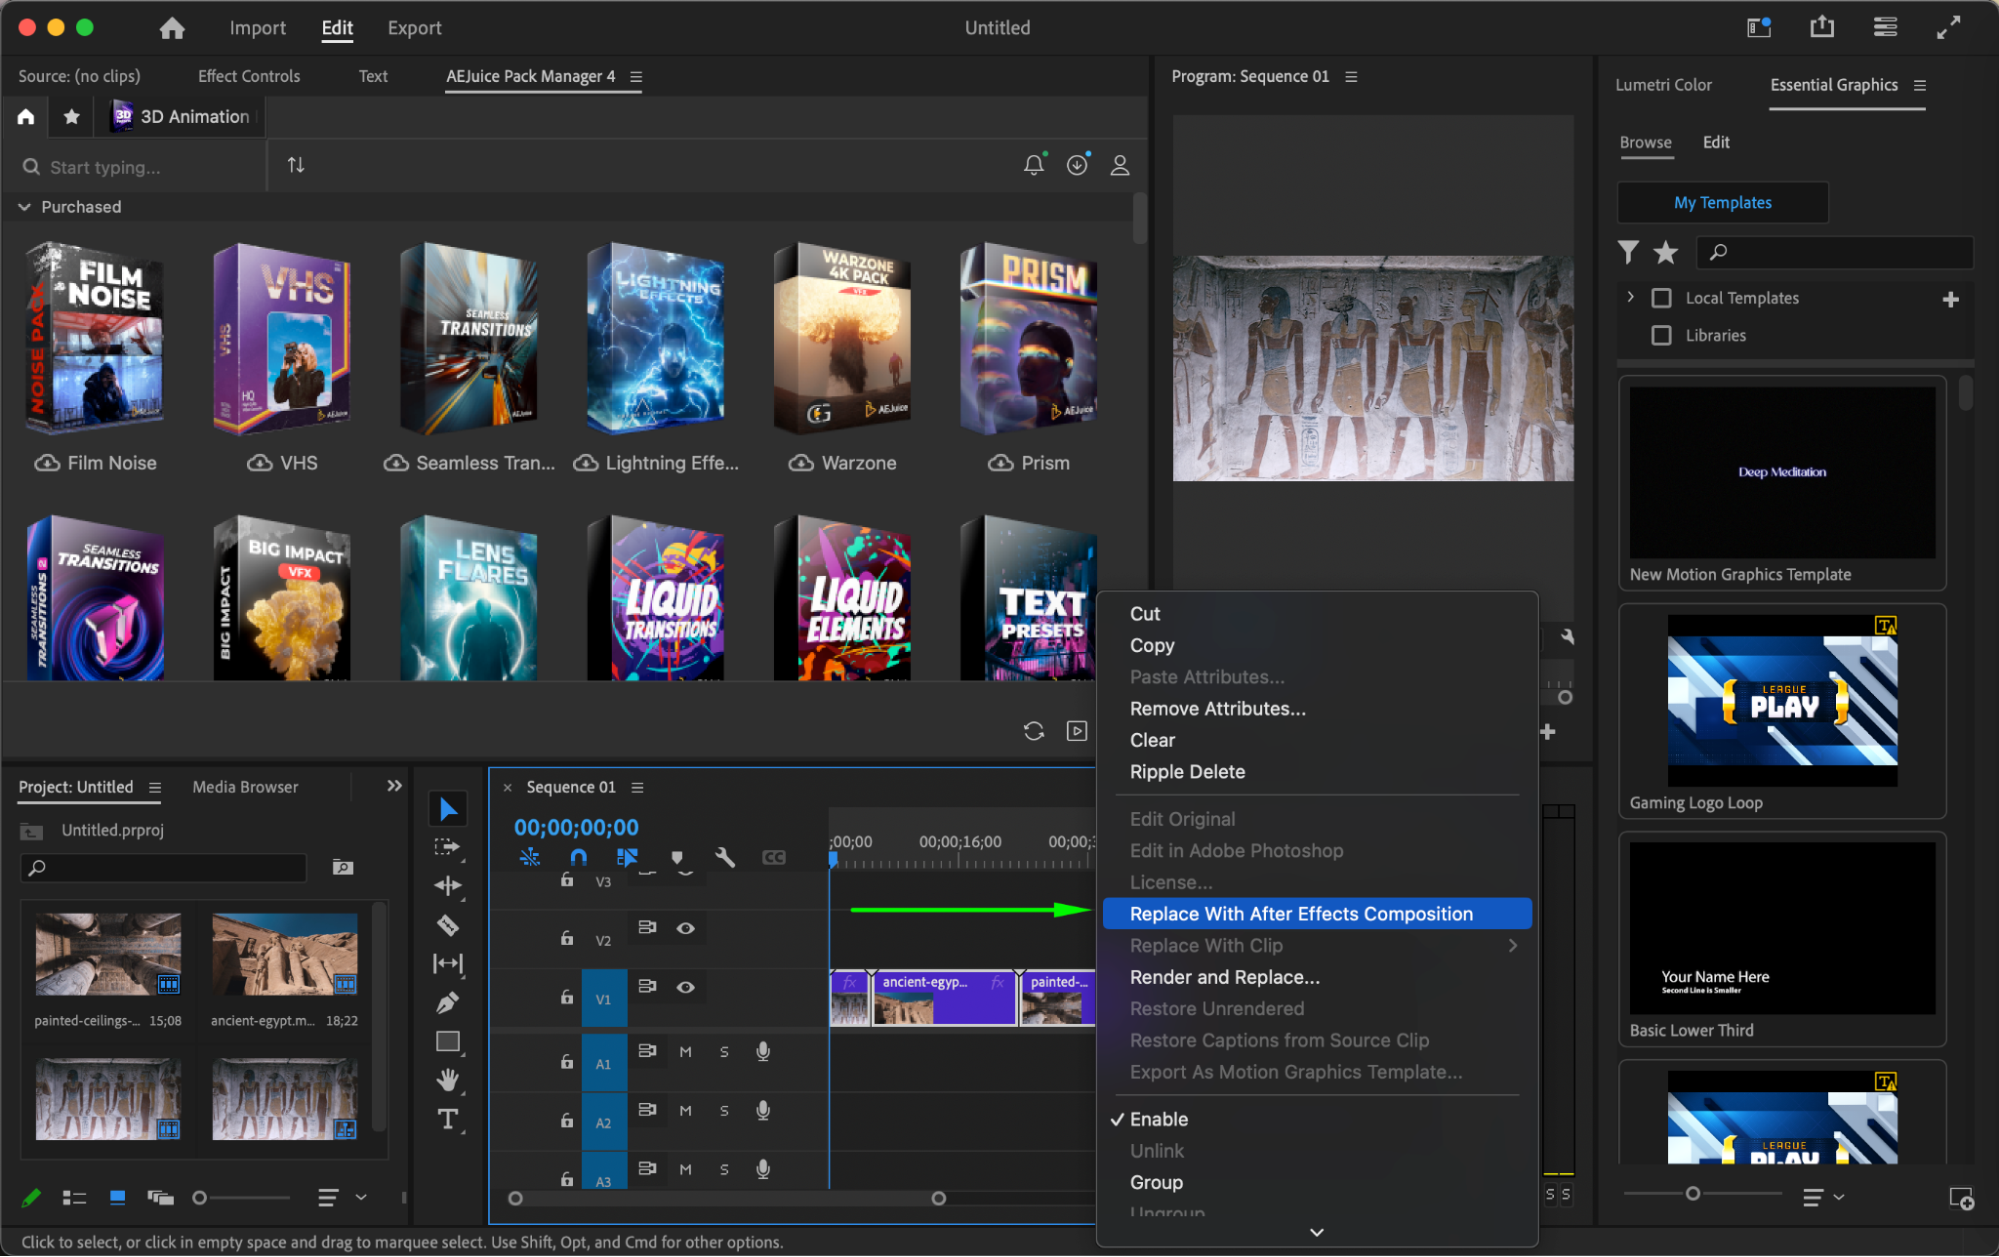 Step 3: Save the Linked After Effects Project
After Effects will prompt you to save the project. Choose a location and save the After Effects file. This file acts as a live link between After Effects and Premiere Pro, so any changes you make in After Effects will automatically reflect in Premiere Pro. Make sure you keep the After Effects file organized and accessible within your project files.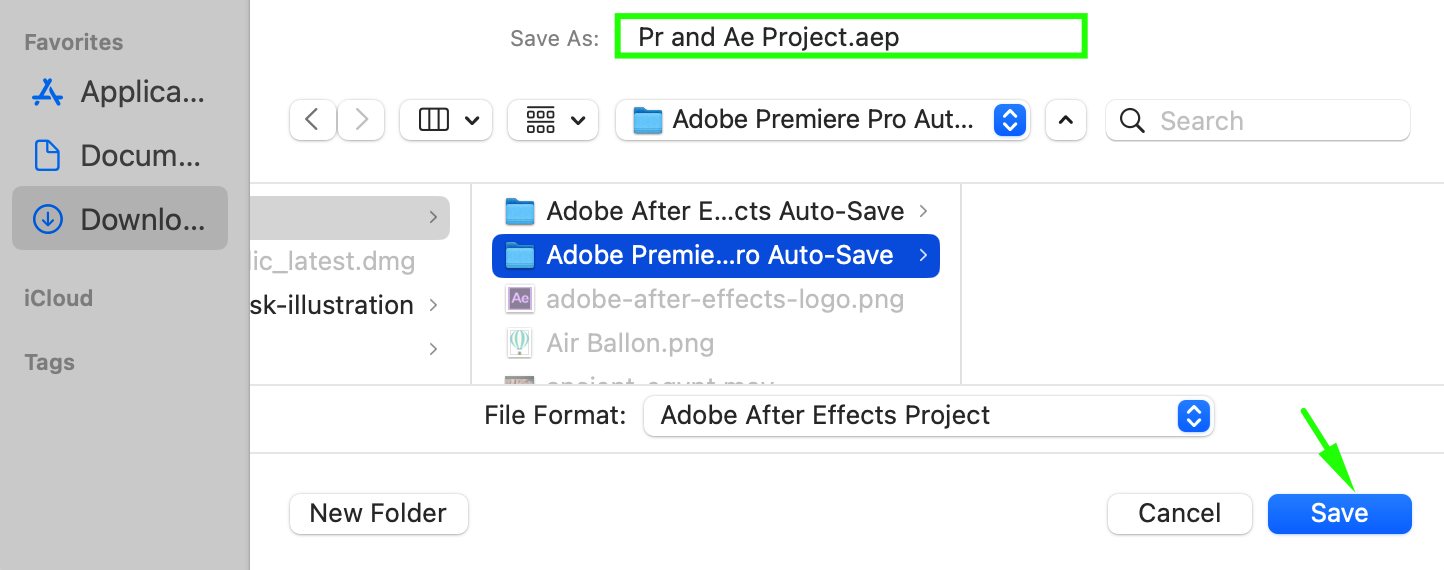 Step 4: Add Effects and Edits in After Effects
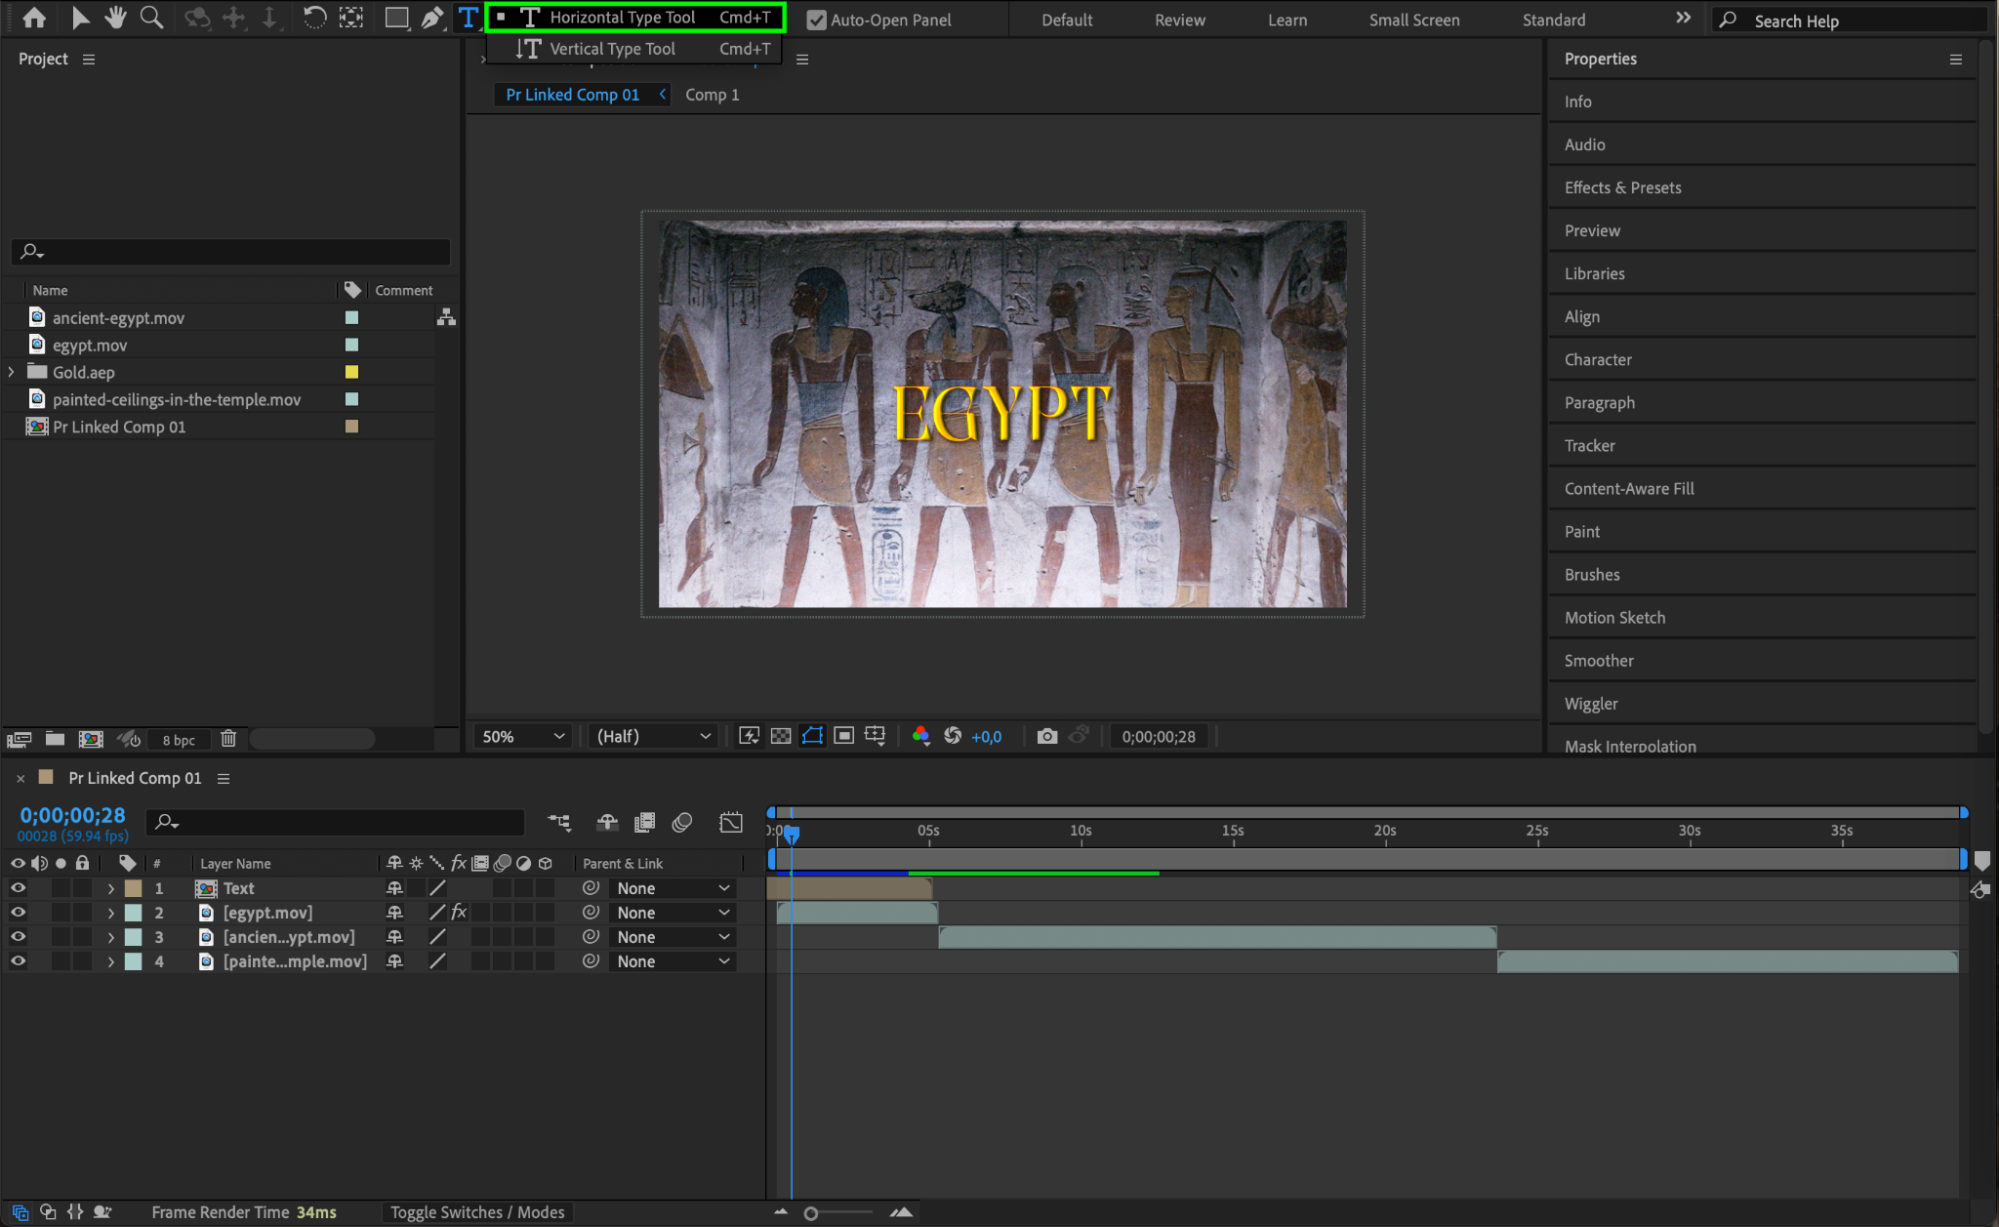
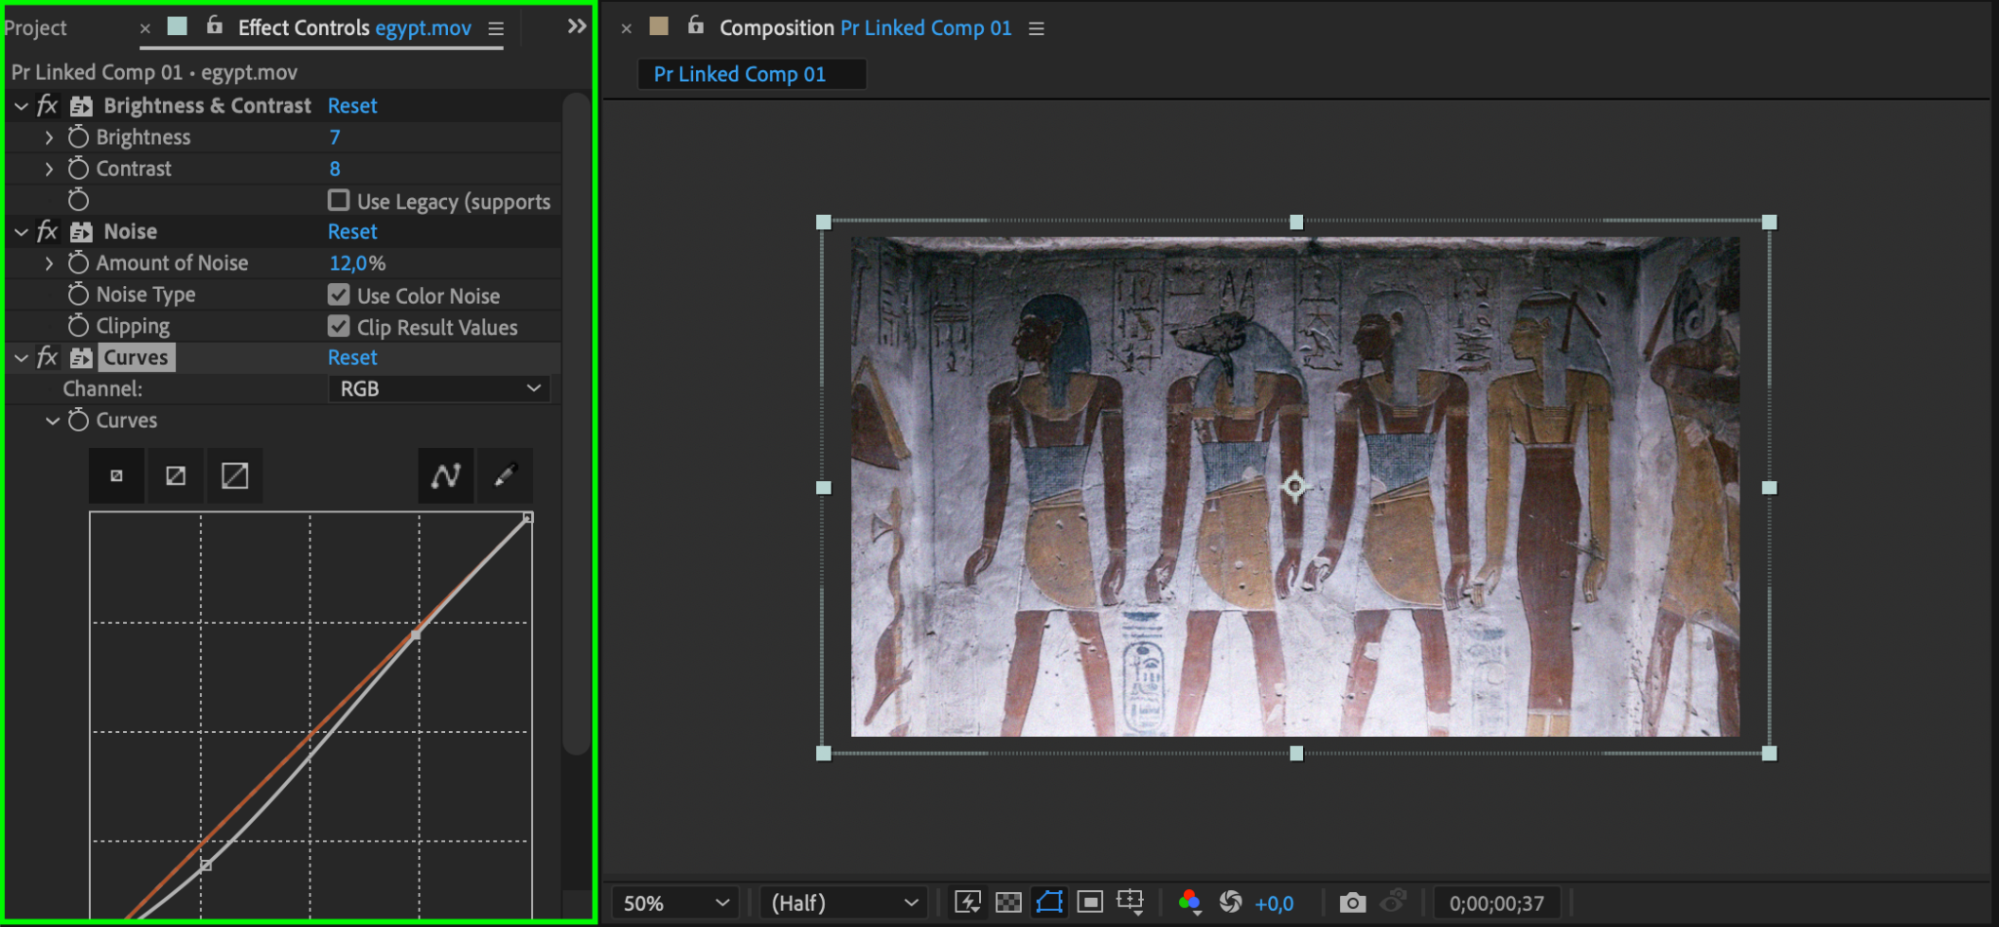
Now that the clip is linked to After Effects, you can add effects, text, animations, or any other enhancements. For example, add visual effects like color grading, motion graphics, or special transitions to make the clip more dynamic. Since this composition is linked, any adjustments you make will update automatically in Premiere Pro.
 Step 5: Preview the Updated Composition in Premiere Pro
Return to Premiere Pro and preview the updated composition to ensure everything looks as expected. Premiere Pro will display the edited After Effects composition in the timeline, showing the changes in real time. This integration helps you review and make final edits without having to re-import the clip.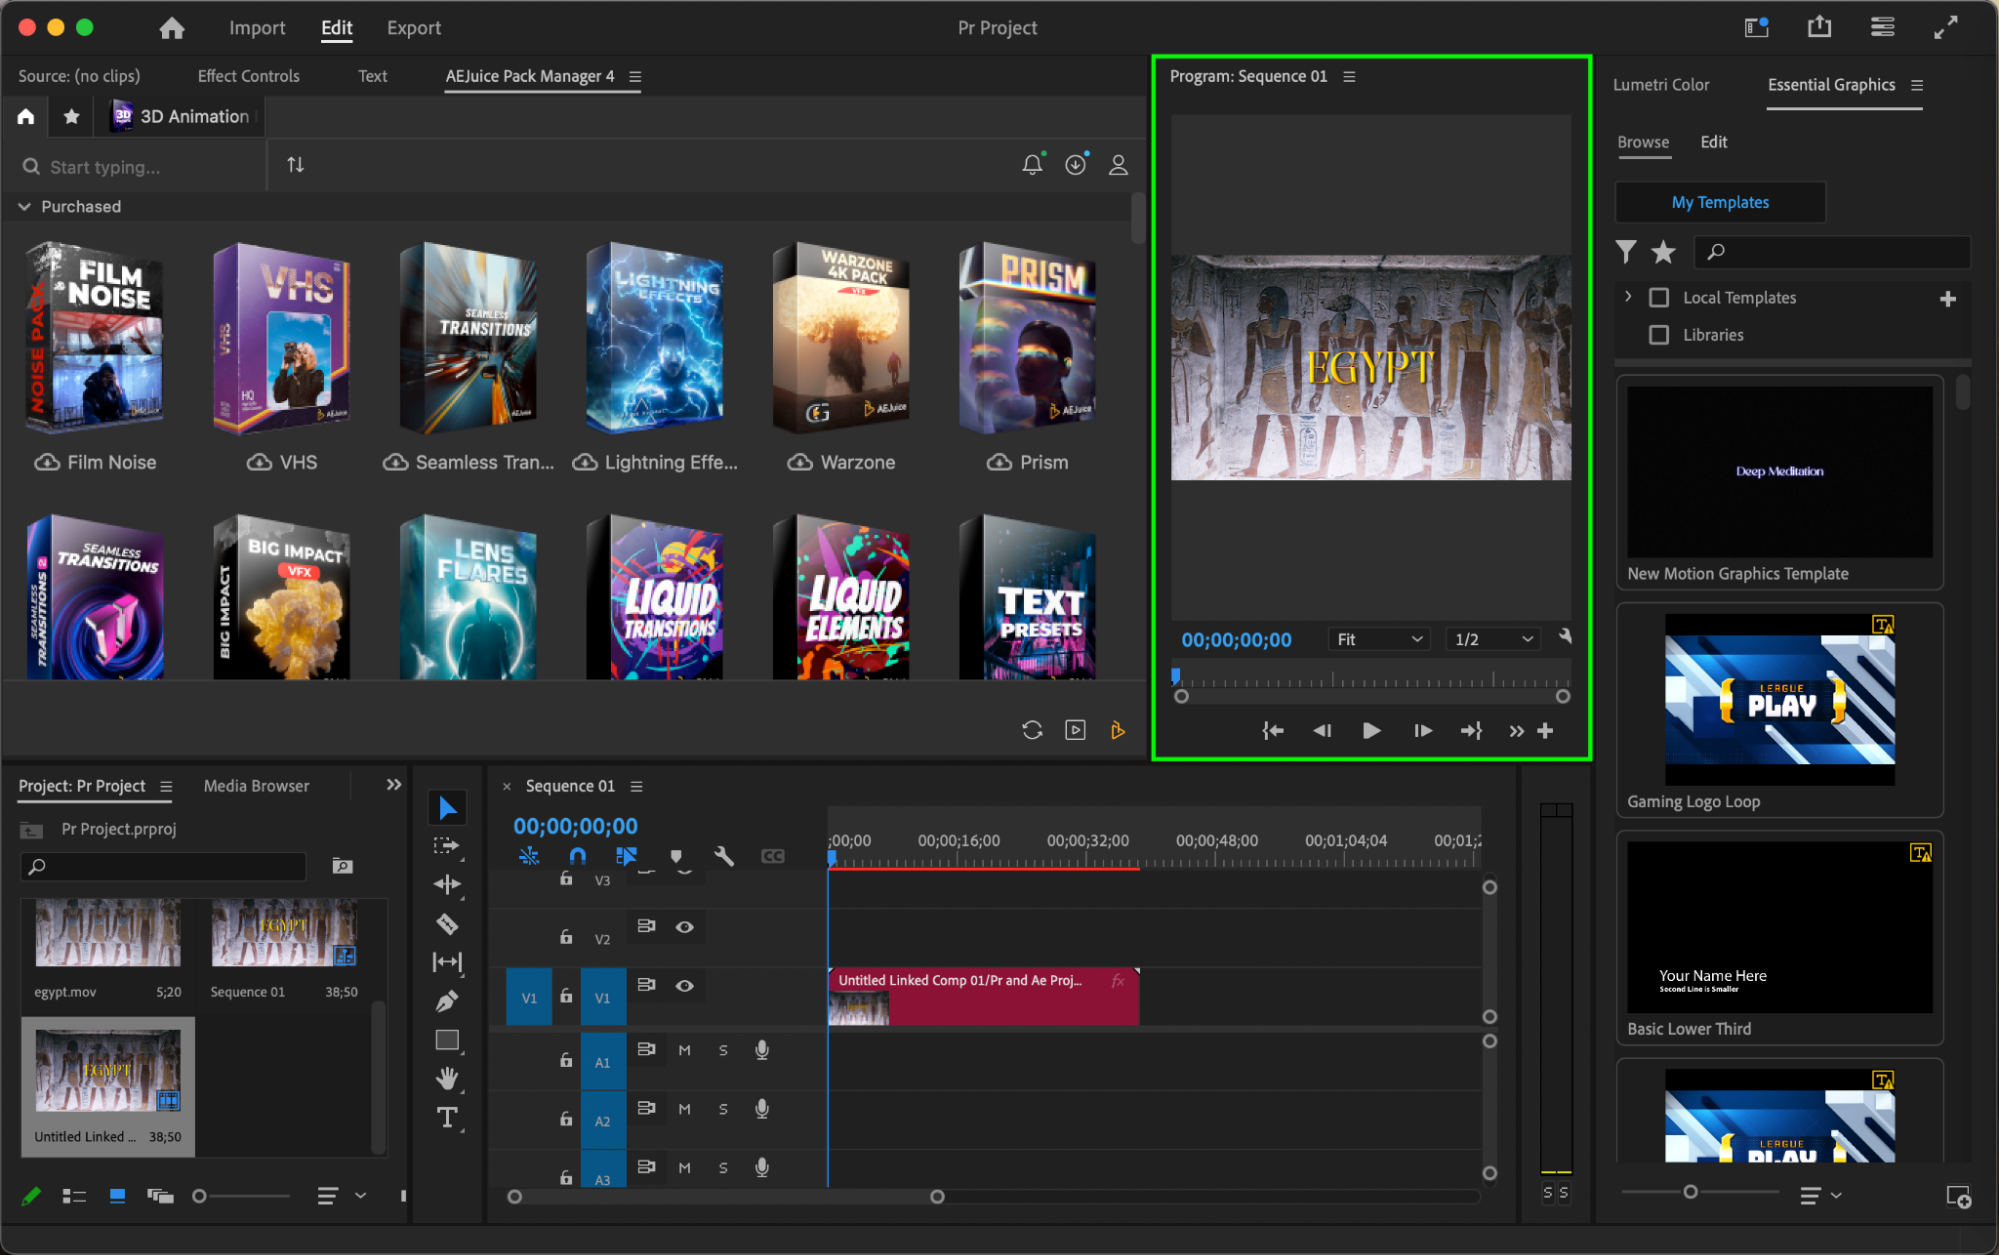 Step 6: Render and Export Your Final Project
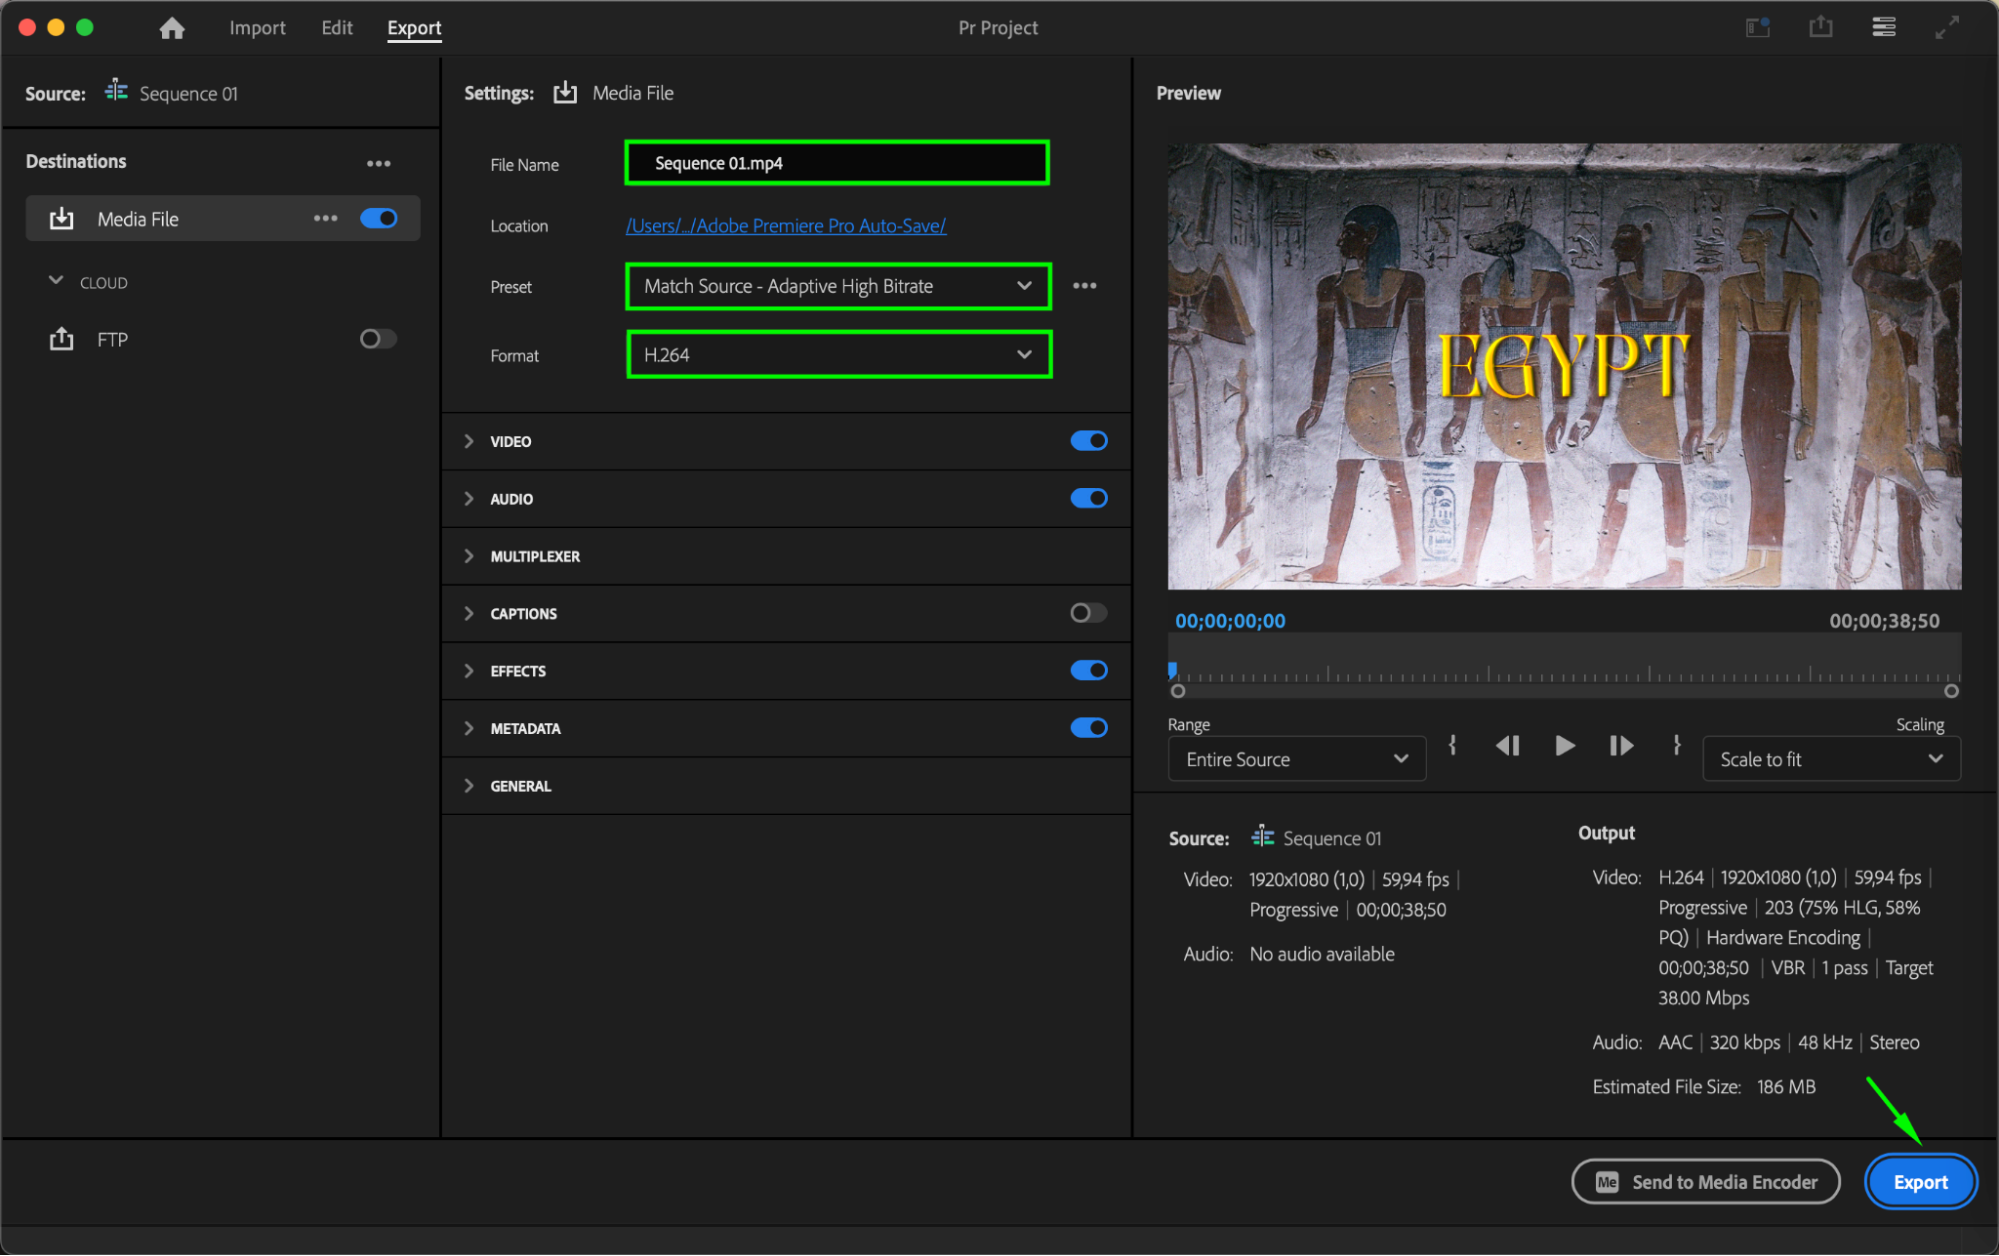
Once you’re satisfied with the edits, render the final project in Premiere Pro by going to File > Export > Media. Choose your preferred export settings, and the clip with After Effects enhancements will be included in the final render. This workflow allows you to complete your project with a polished, professional look.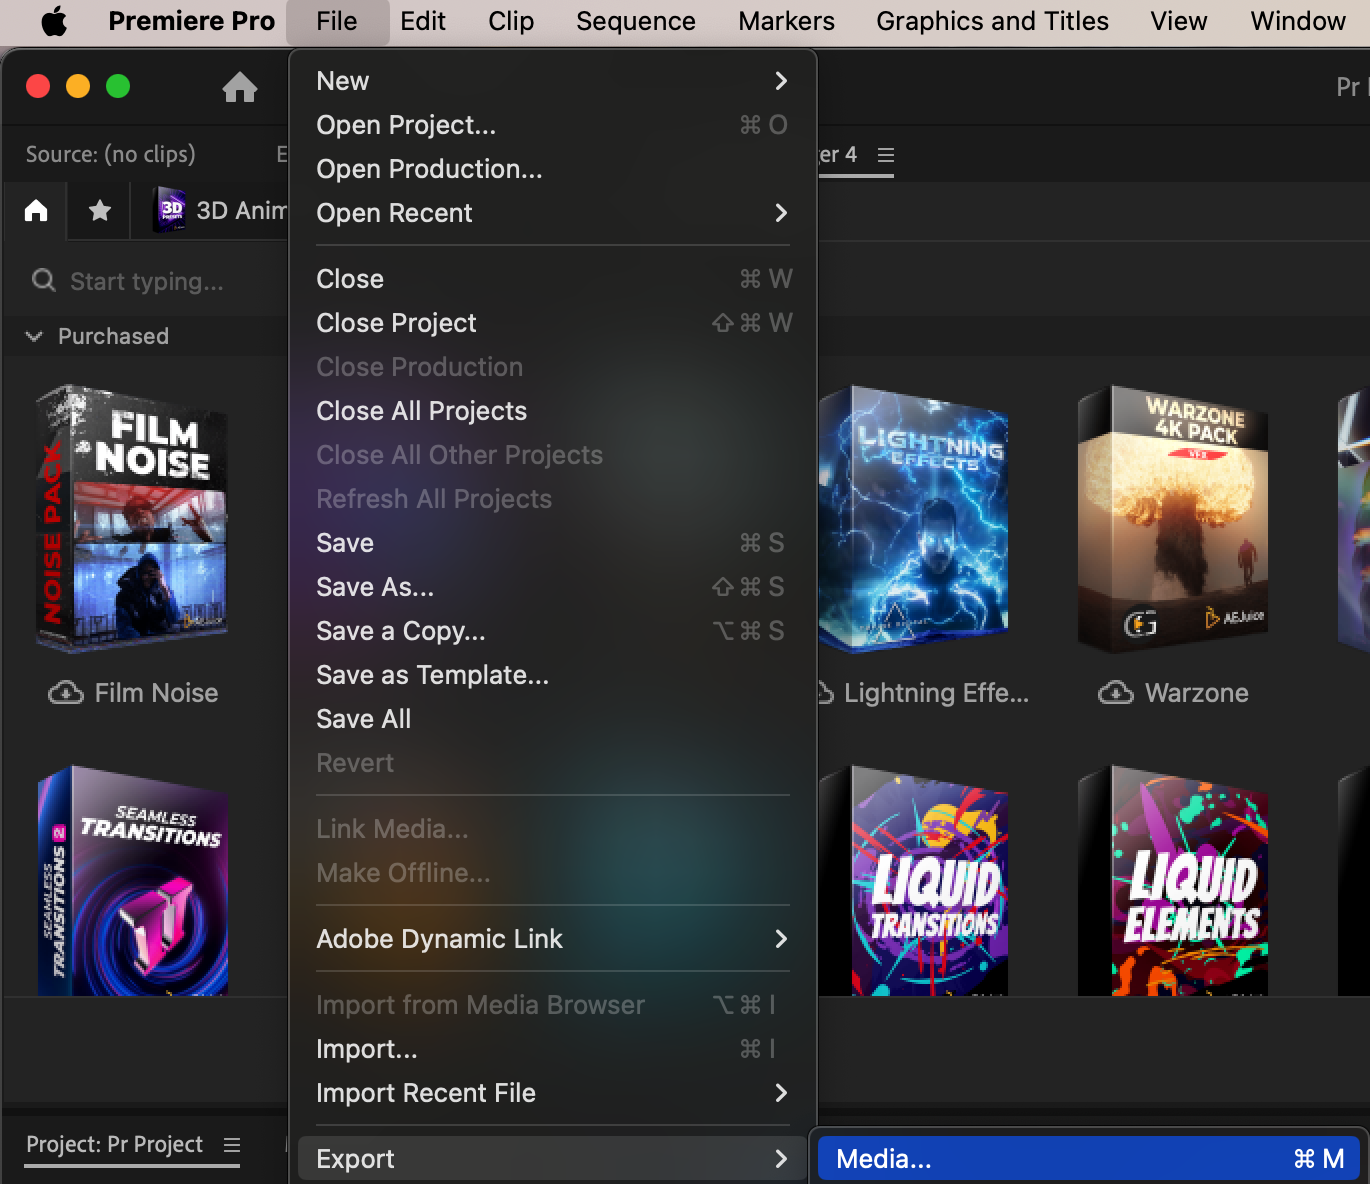
 Conclusion
Using the “Replace with After Effects Composition” feature bridges the gap between Premiere Pro and After Effects, allowing you to combine their strengths. By following these steps, you can streamline your editing process and enhance your projects with powerful effects and animations.
Our Bestsellers


