A Step-by-Step Guide to Exporting MOV Files from After Effects
Introduction to Exporting MOV Files from After Effects
Exporting your After Effects composition as a MOV file is a crucial step for sharing or using your project in other media applications. MOV files, known for their high quality and compatibility, are commonly used in professional video production. In this guide, we’ll take you through the steps to export a MOV file from After Effects, ensuring that your project is exported with the best possible quality.
Get 10% off when you subscribe to our newsletter

Step 1: Prepare Your Composition
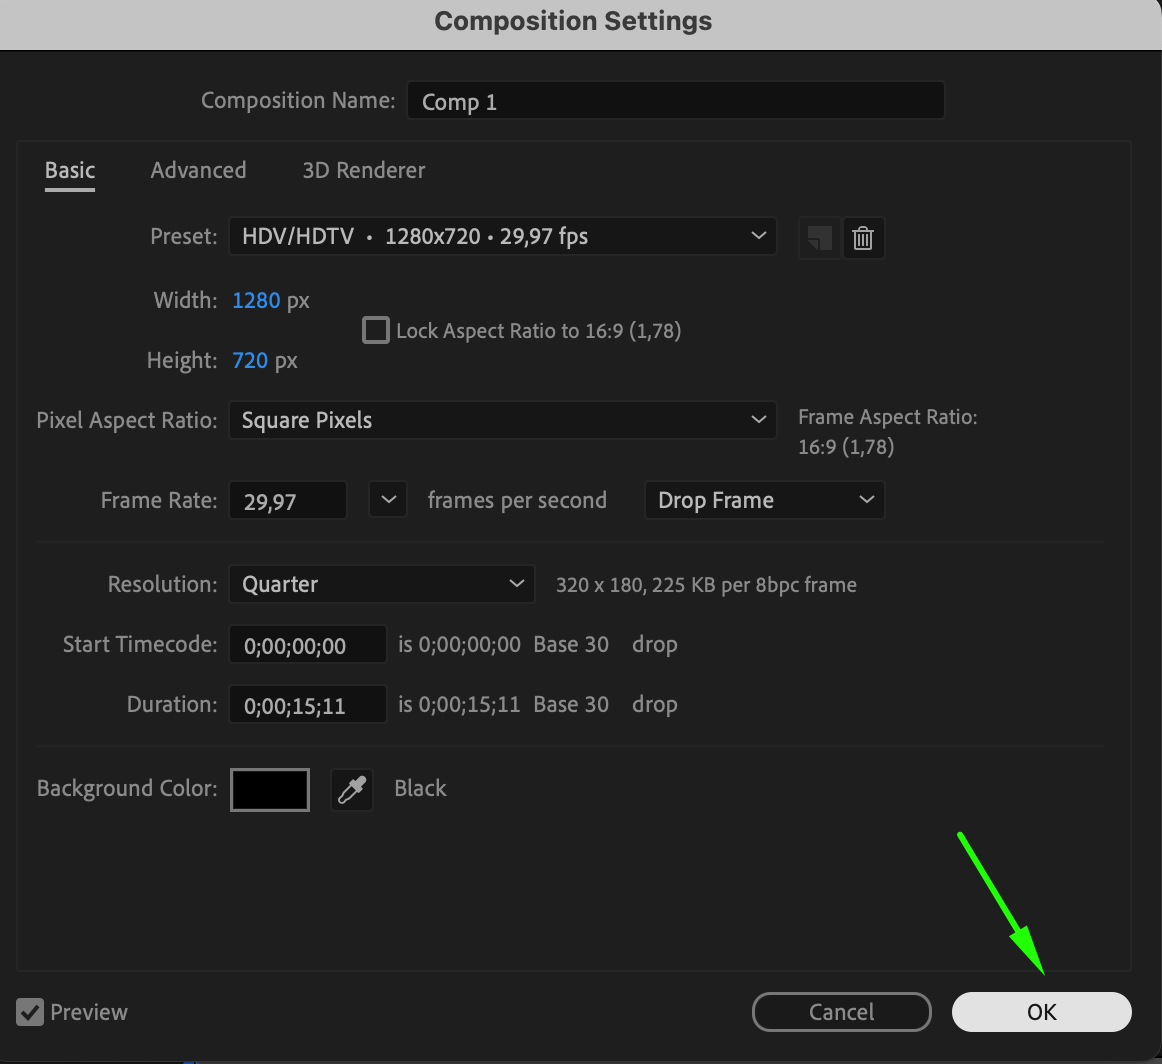
Before exporting, it’s essential to ensure that your composition is properly set up. Adjust the composition settings such as dimensions, frame rate, and duration according to your project requirements. Organize your layers and animations on the timeline for a clean and efficient export process. This preparation will help avoid any issues during rendering and ensure that your output meets your expectations.
 Step 2: Add to Render Queue
Get 10% off when you subscribe to our newsletter

Once your composition is ready, you need to add it to the Render Queue. Go to the Composition menu at the top of After Effects and select Add to Render Queue. This action will open the Render Queue panel at the bottom of your workspace, where you can customize your export settings.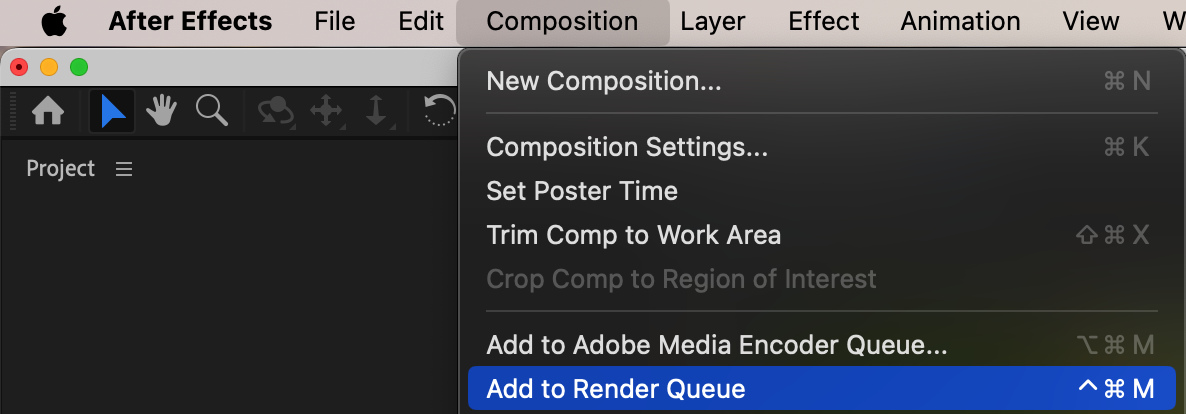 Step 3: Choose Output Module Settings
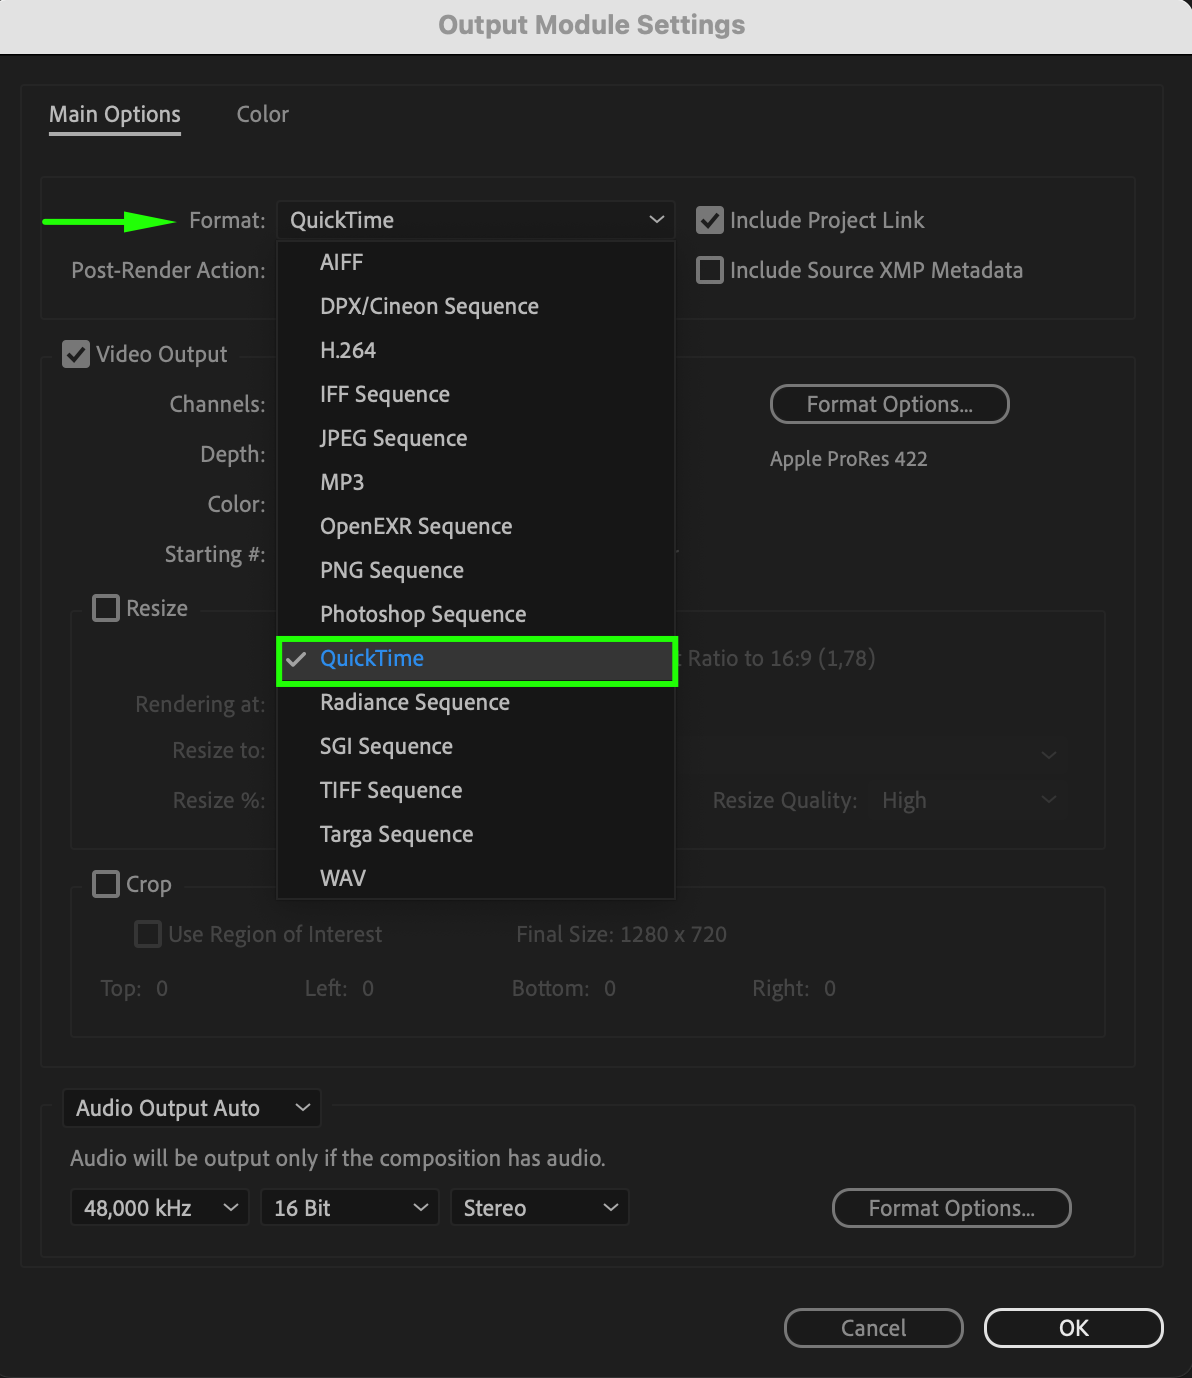
In the Render Queue panel, locate your composition and click on the Output Module link next to your composition. This is where you’ll define the export format. In the Output Module Settings window, select QuickTime as the format. Choosing QuickTime allows you to export your composition as an MOV file, which is ideal for high-quality video playback.
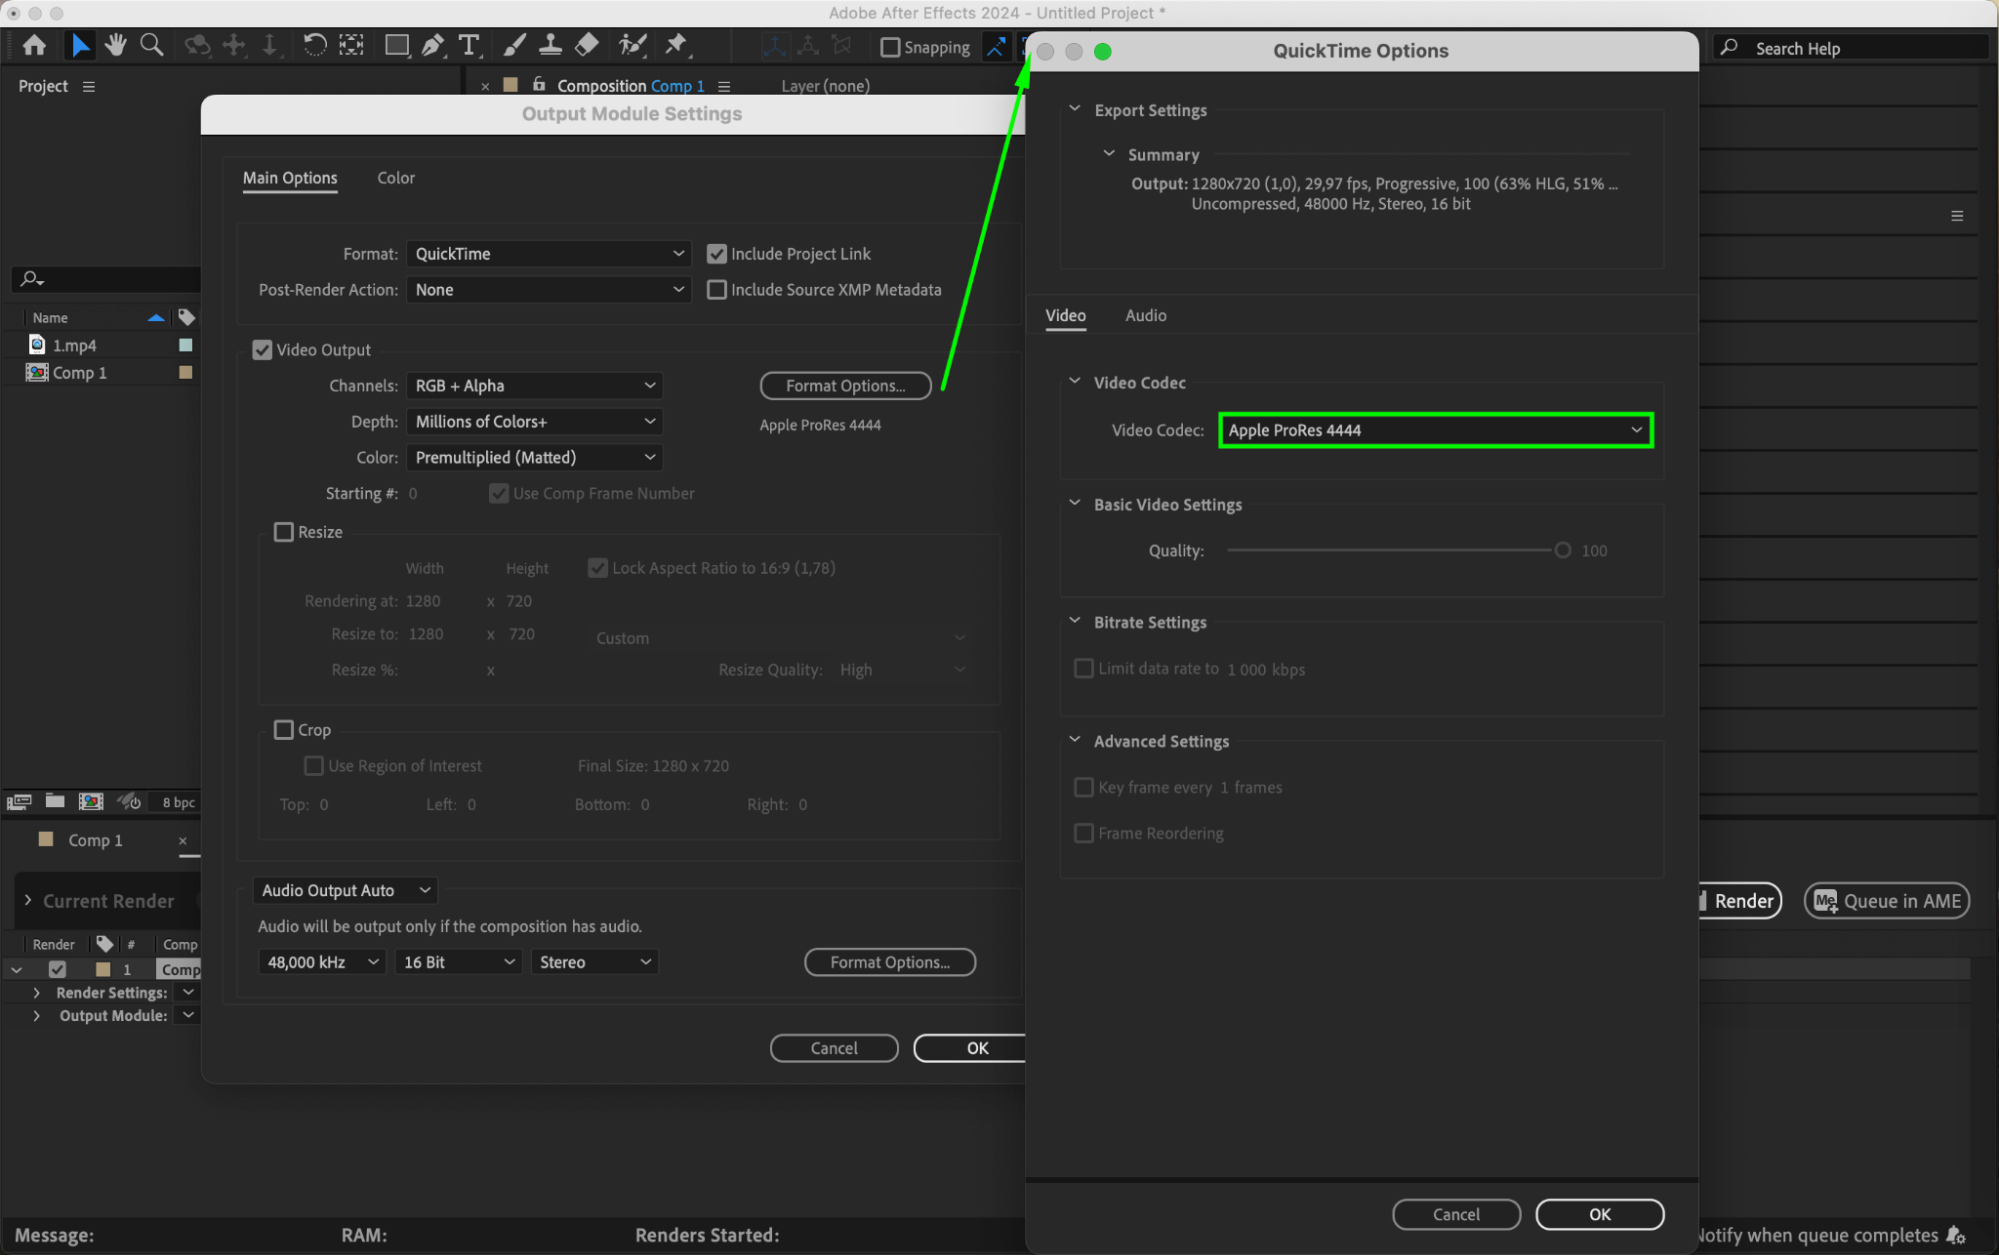 Step 5: Set the Output Destination
Get 10% off when you subscribe to our newsletter

Next, specify where you want to save the exported MOV file. In the Render Queue panel, click on the Output To link next to your composition. A dialog box will appear, allowing you to select the destination folder and name your file. Choose a location that is easy to access and remember, as this is where your final video will be saved.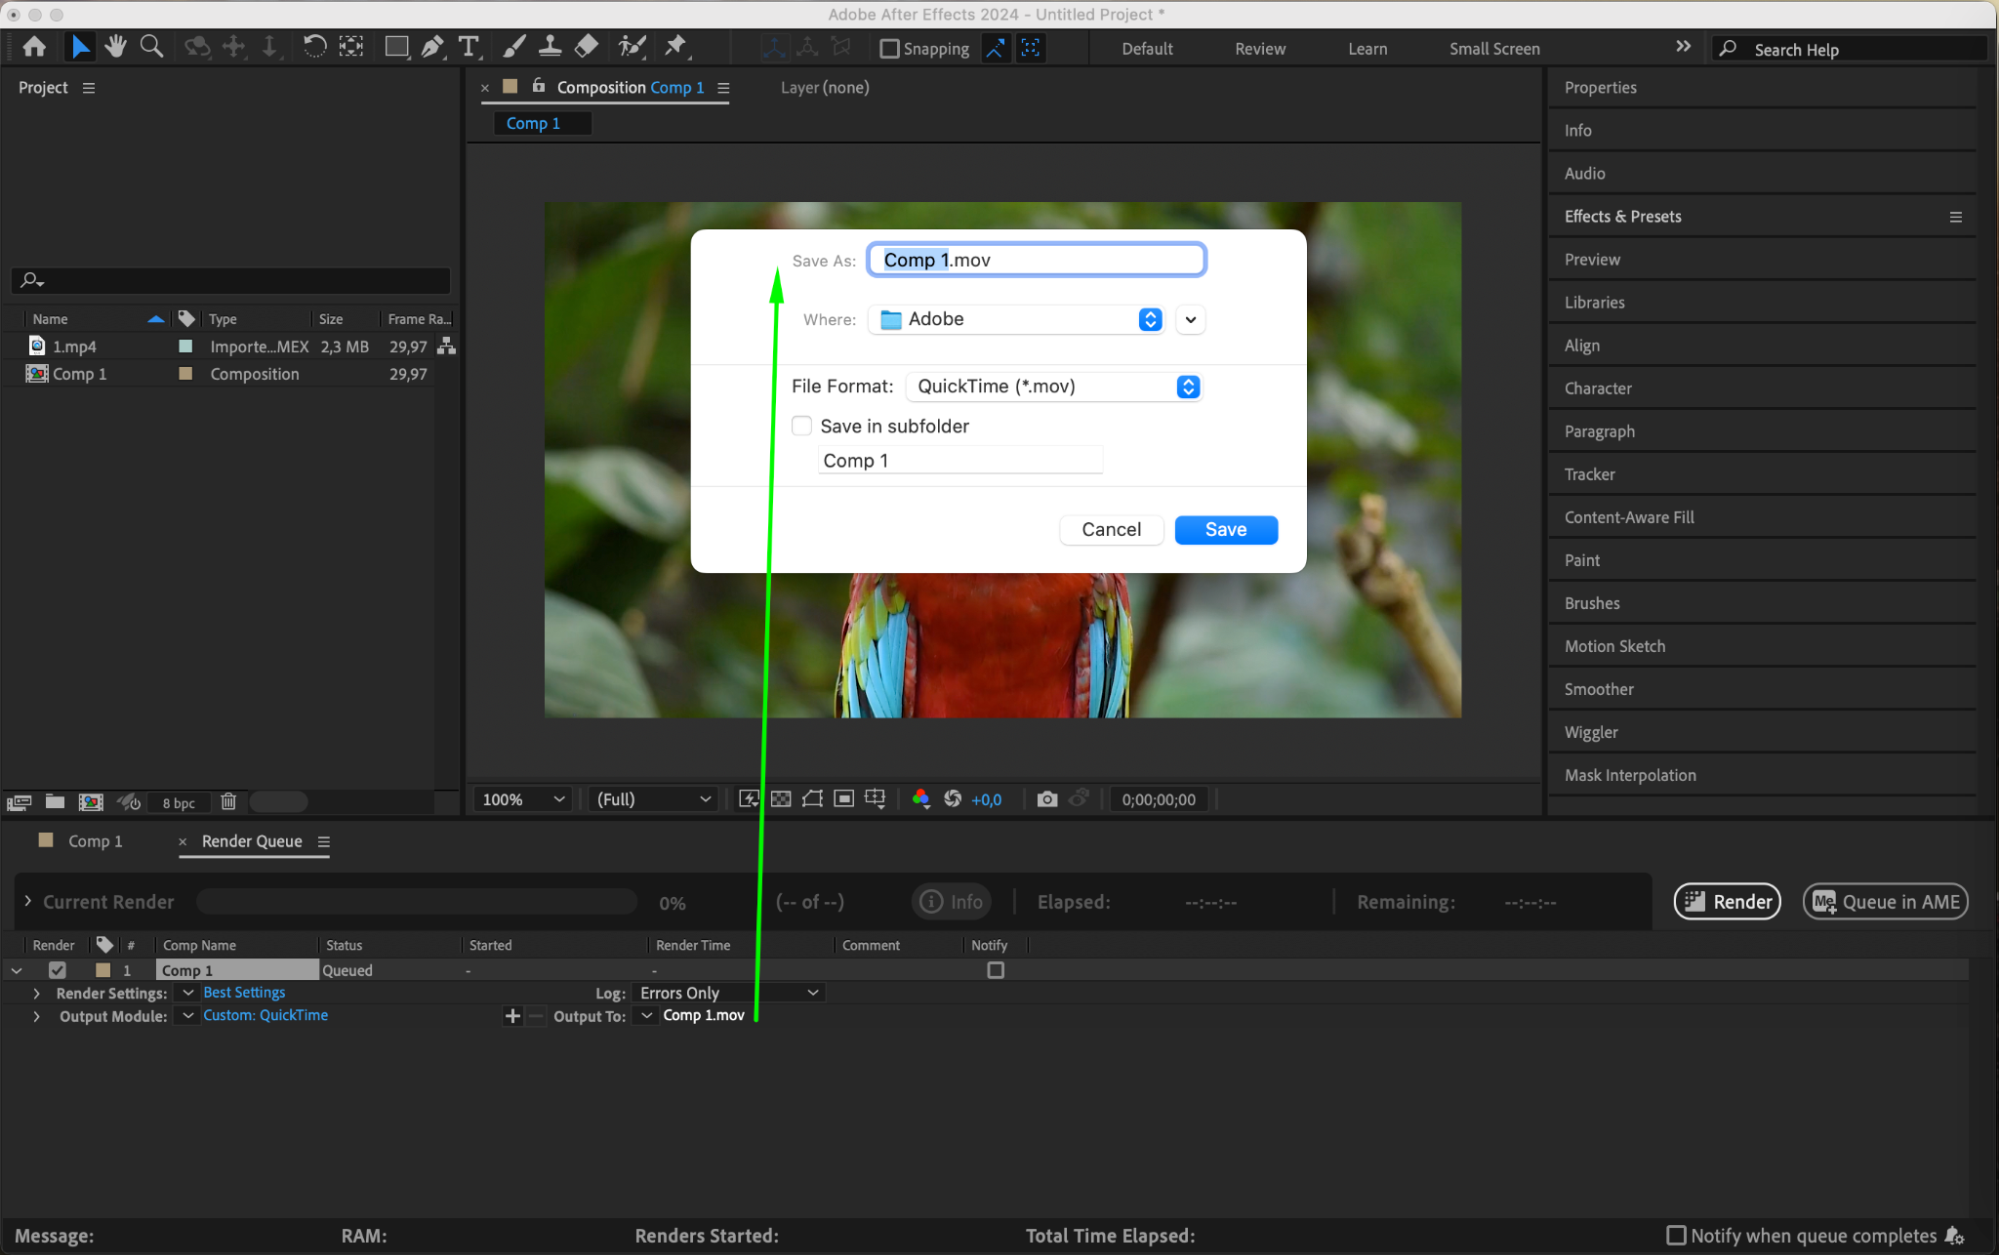 Step 6: Start the Rendering Process
With all settings configured, you’re ready to export your composition. Click on the Render button in the Render Queue panel to begin the process. After Effects will start rendering your composition and generating the MOV file. This process may take some time depending on the complexity of your project and the settings you’ve chosen. Step 7: Monitor the Export Progress
Get 10% off when you subscribe to our newsletter

While rendering, you can monitor the progress in the Render Queue panel. You’ll see a progress bar and an estimated time remaining for the export. It’s important to keep an eye on this to ensure the rendering is proceeding as expected and to make any necessary adjustments if issues arise.
Step 8: Verify the Exported MOV File
Get 10% off when you subscribe to our newsletter

Once the rendering is complete, navigate to the folder where you saved your MOV file. Play the video to ensure that the quality is as expected. Check for any color shifts, resolution changes, or audio discrepancies. This step is crucial to ensure that your final output meets the desired standards and is ready for use or sharing.
Conclusion
And there you have it! You’ve successfully exported your After Effects composition as a MOV file. This format is perfect for professional video work, and by following these steps, you’ve ensured that your project is of the highest quality. Now, you can share your creative work with others or use it in other projects with confidence. Happy exporting!


