A Step-by-Step Guide to Exporting a Video from Adobe After Effects
Simplifying the Video Export Process in Adobe After Effects
Exporting a video from Adobe After Effects may seem complex, but with the right approach, it becomes a straightforward task. This guide will walk you through each step, ensuring that your video is exported with the best quality and optimal settings. Whether you’re a beginner or an experienced user, these steps will help you achieve professional results.
Get 10% off when you subscribe to our newsletter

Step 1: Prepare Your Composition
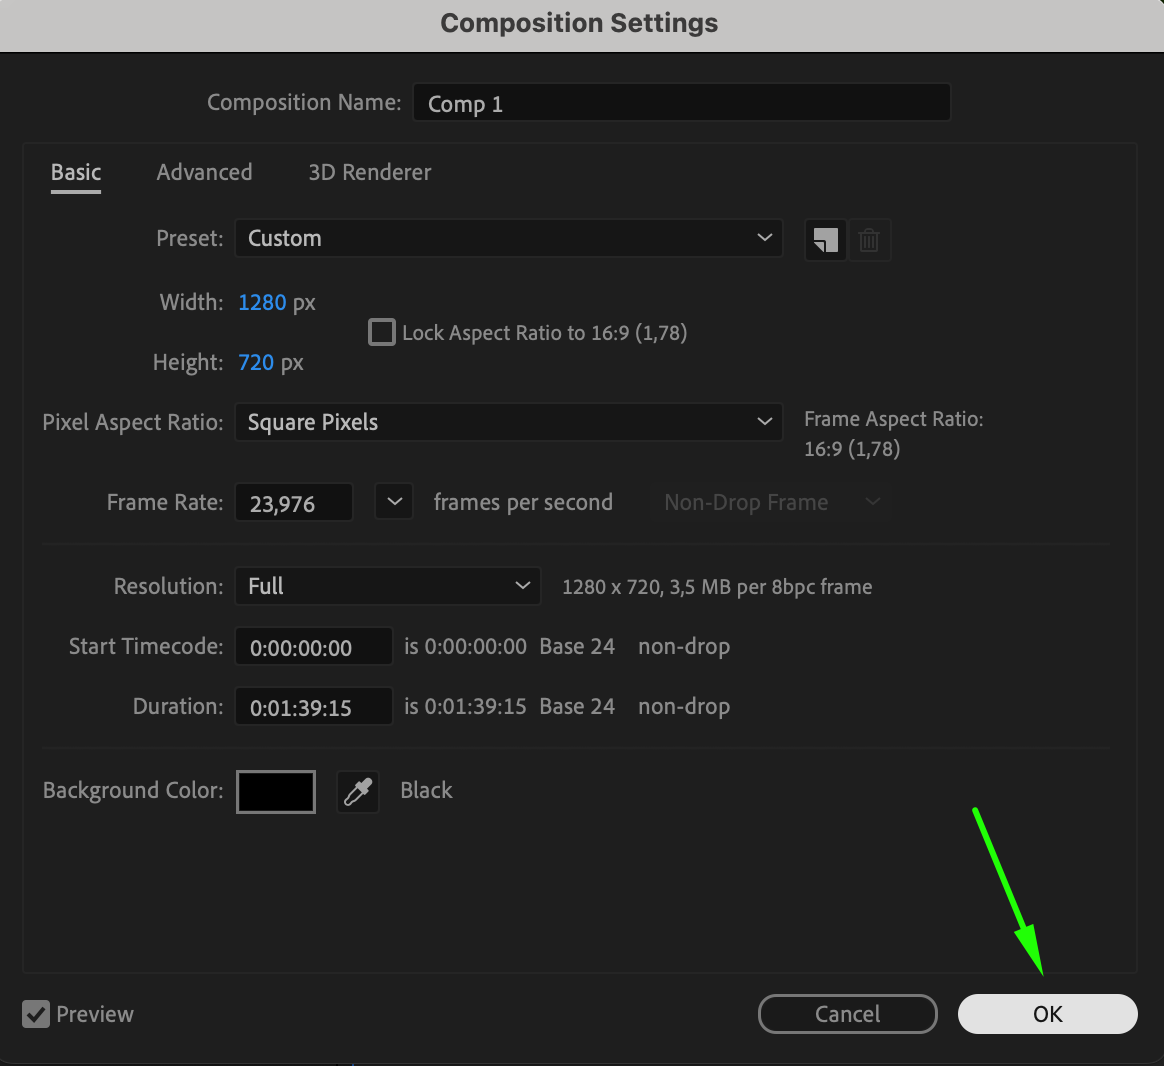
Before exporting, it’s essential to ensure that your composition is set up correctly. Go to the Composition menu > Composition Settings to review and adjust your resolution, frame rate, and duration. Double-check that all your assets, such as images, videos, and audio files, are correctly imported and placed within the composition. This step is crucial as it ensures that your final video will be of the desired quality and length.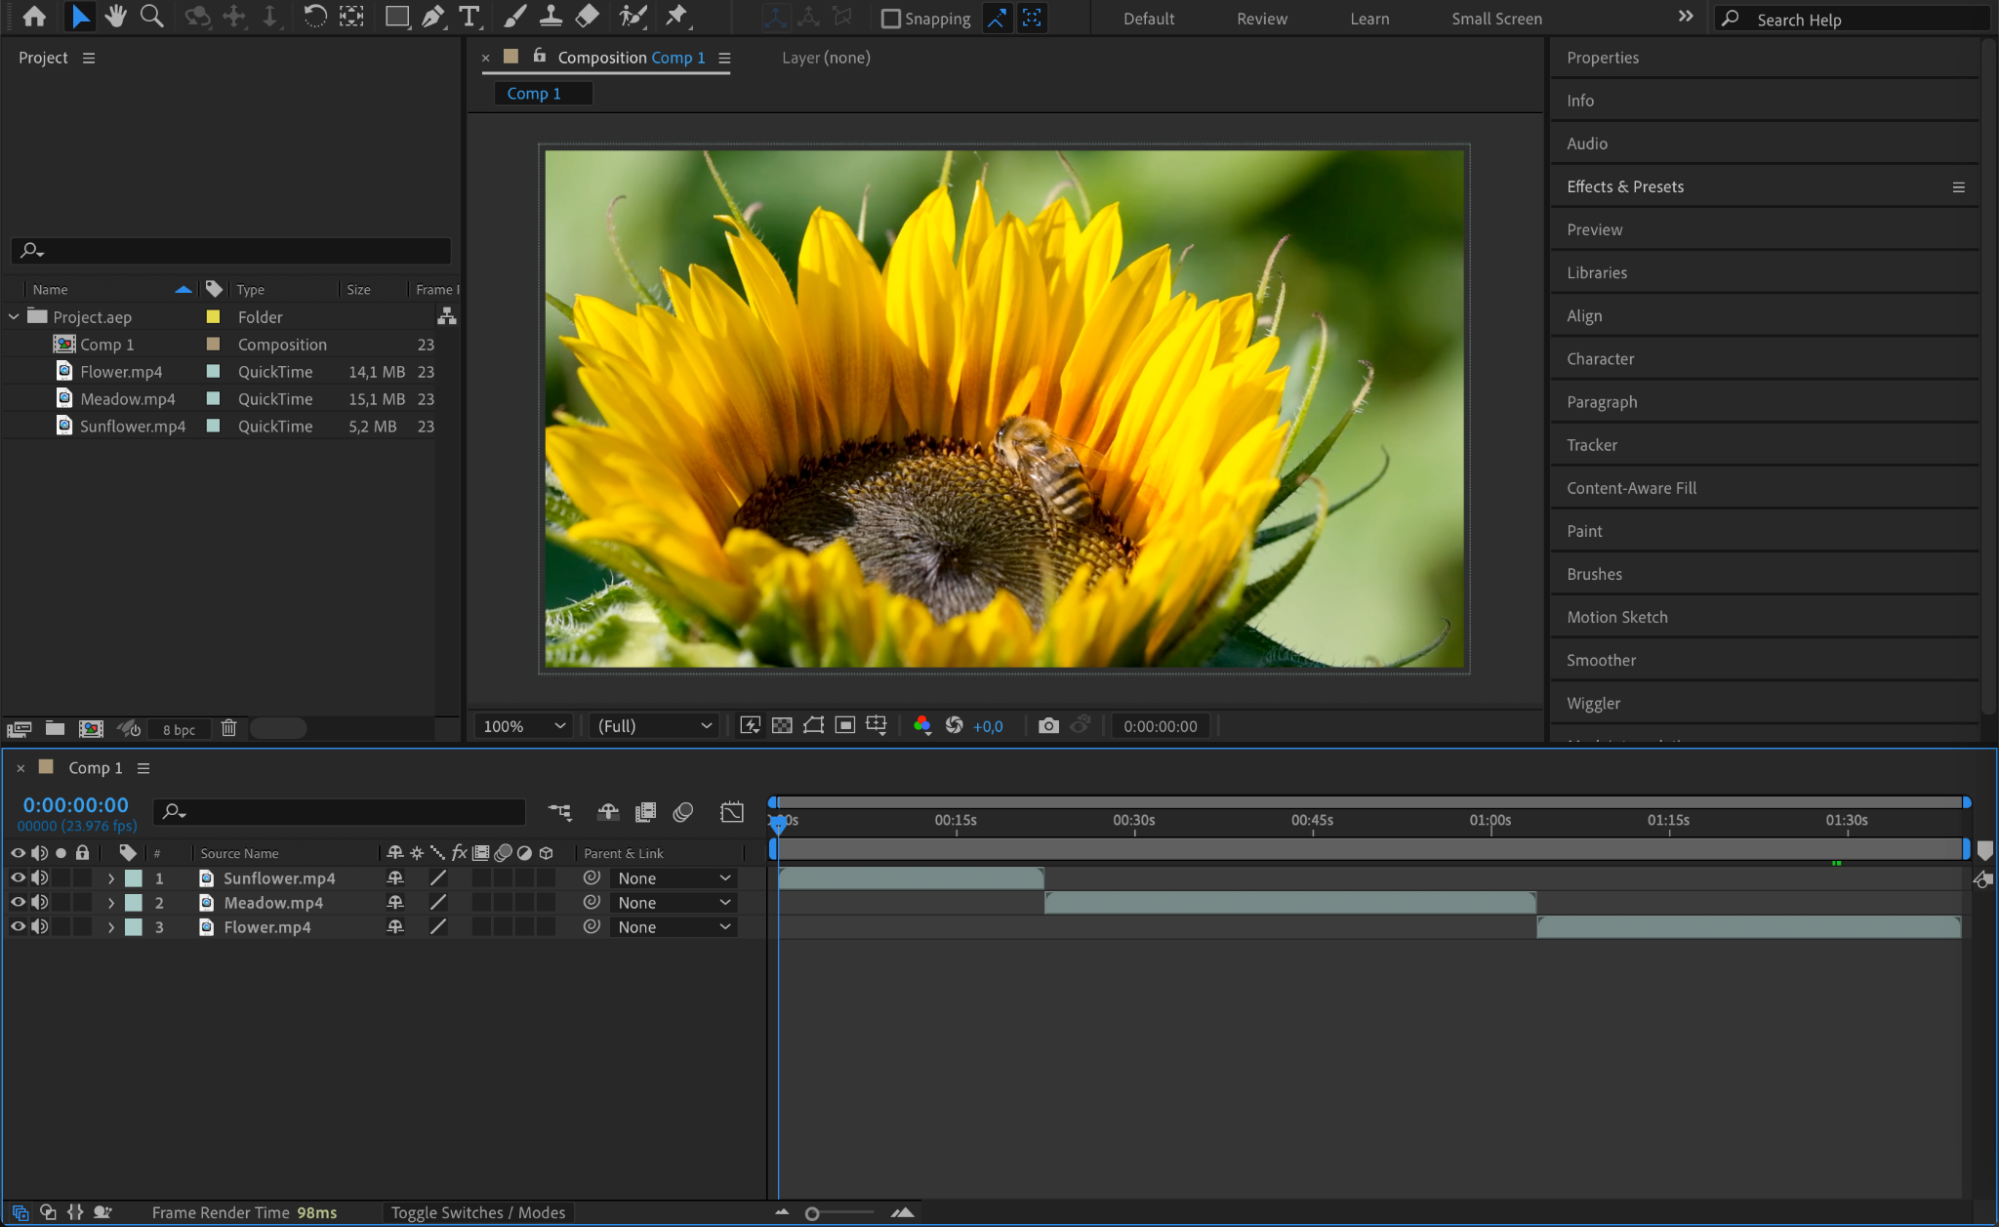

 Step 2: Add Composition to the Render Queue
Once your composition is ready, the next step is to add it to the Render Queue. To do this, go to the Composition menu and select Add to Render Queue. This action will open the Render Queue panel at the bottom of the After Effects interface, where you can configure the output settings for your video. The Render Queue is where you’ll manage the rendering process, choosing the format, codec, and output location for your video.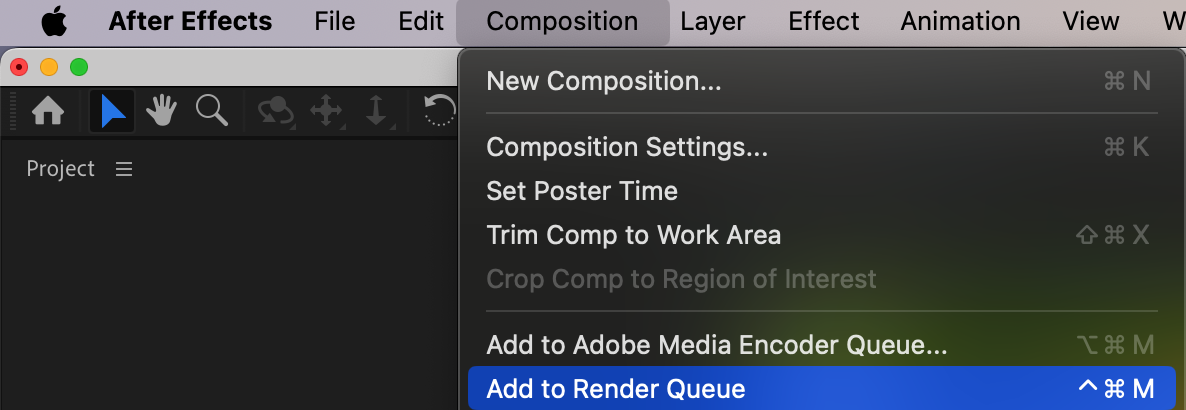 Step 3: Choose the Output Module Settings
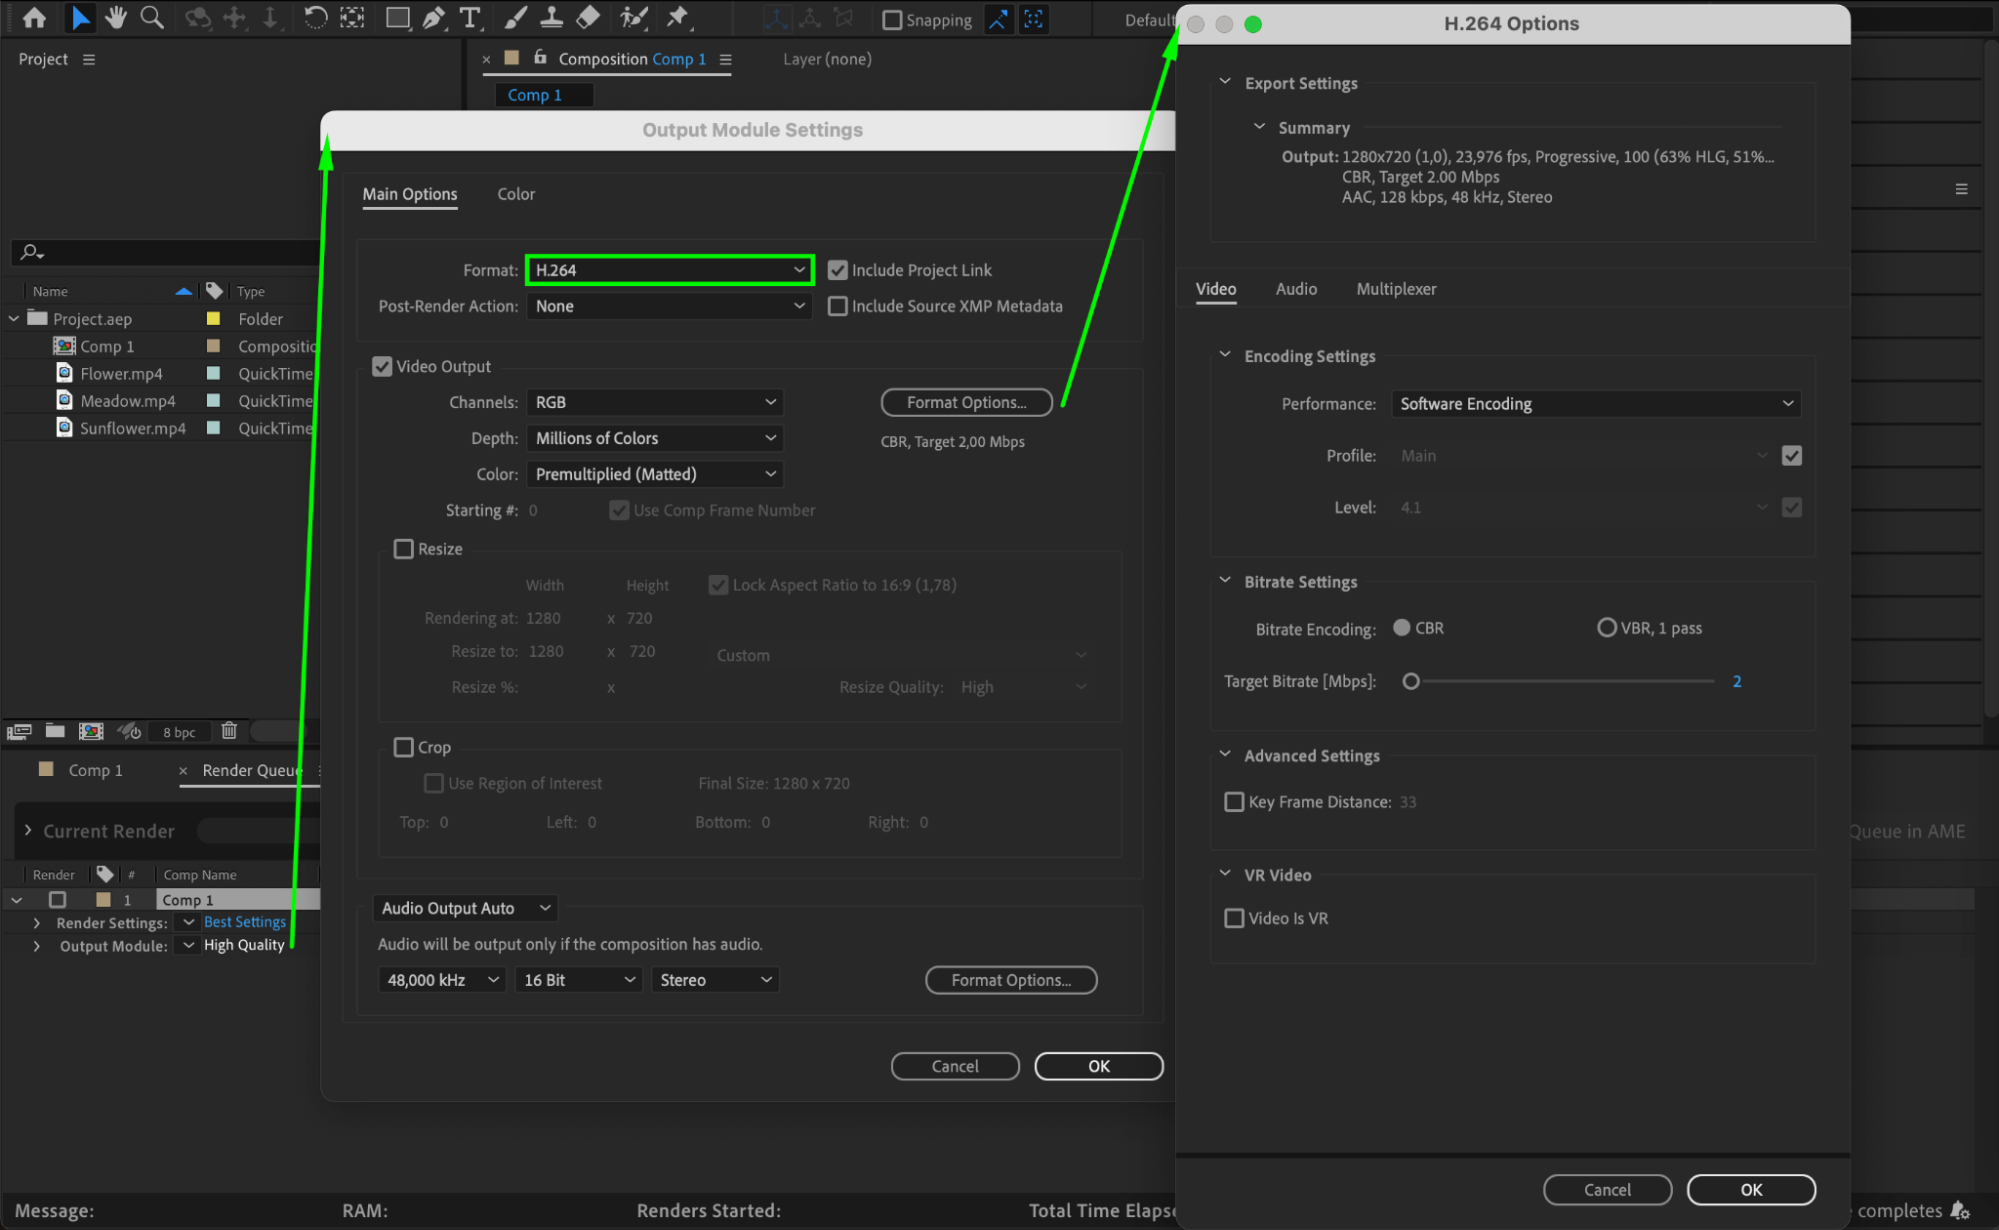
In the Render Queue panel, click on the text next to Output Module to open the output module settings. This is where you choose the format for your video file. For most purposes, selecting H.264 is a good option as it provides a balance between quality and file size. Additionally, click on the Format Options button to choose the appropriate codec settings that match your project’s needs. This step is essential for ensuring that your video plays back smoothly on various devices and platforms.
 Step 4: Set the Output Destination
After configuring the output module settings, it’s time to choose where your exported video will be saved. Click on the text next to Output To in the Render Queue panel. A file browser will open, allowing you to select a folder on your computer where you want to save the video file. Make sure to give your file a clear and descriptive name to easily identify it later. Organizing your files properly will save you time when managing your projects.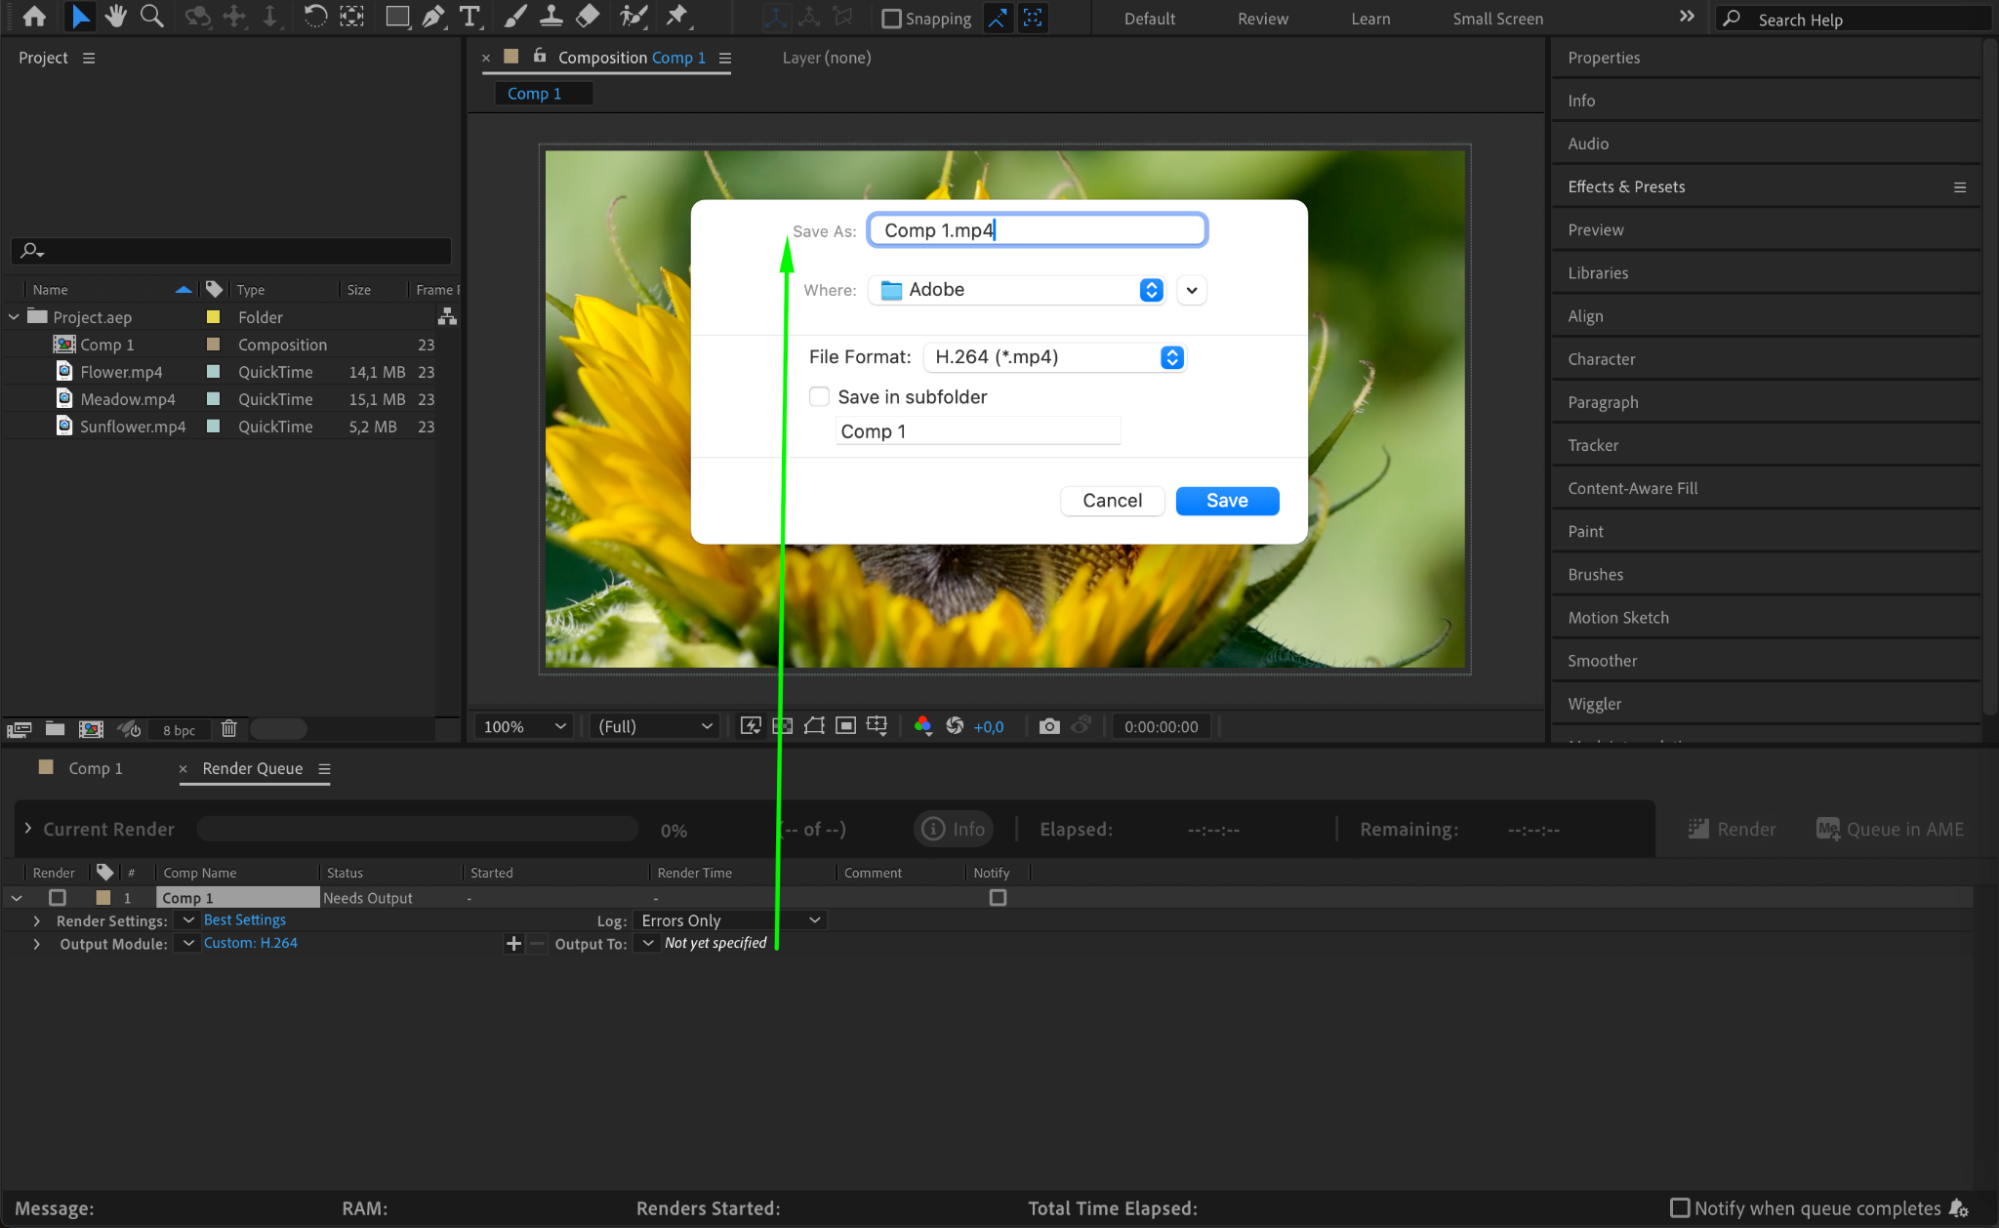 Step 5: Start the Rendering Process
With all settings configured, you’re ready to start the rendering process. Click on the Render button in the Render Queue panel. After Effects will begin processing your composition and exporting it according to the settings you specified. The rendering process may take some time, depending on the complexity of your composition and the power of your computer. Patience is key here, as the rendering quality often reflects the time taken.
Step 6: Monitor the Rendering Progress
As your video renders, you can monitor the progress in the Render Queue panel. This panel will display the estimated time remaining and the current status of the render. If any errors or issues arise, After Effects will provide error messages or warnings to help you troubleshoot the problem. It’s important to keep an eye on this panel to ensure that the render completes successfully. Step 7: Verify the Exported Video
Once the rendering process is complete, navigate to the folder where you saved your video file. Open the video in a media player or video editing software to verify its quality and compatibility. Check for any glitches, artifacts, or playback issues that may have occurred during the export. If the video looks good and plays smoothly, you’ve successfully exported your video from Adobe After Effects.
Conclusion
Exporting a video from Adobe After Effects is a crucial step in bringing your creative projects to life. By following these steps, you can ensure that your video is exported with the best quality and is ready to be shared with the world. With the power of After Effects at your fingertips, the possibilities for your video projects are endless. So, unleash your creativity, and enjoy the process of exporting your videos. Happy exporting!


