Exporting a file from Adobe After Effects involves a series of steps that ensure the final output is of the highest quality and ready for use. It is crucial to take the time to carefully consider each step of the process in order to produce a polished and professional result.
Before you begin exporting, it is essential to double-check that all your work on the composition is complete and that you are ready to move on to the next stage. This includes reviewing the composition to ensure that all elements are in place and functioning as intended and making any final adjustments or tweaks as needed.
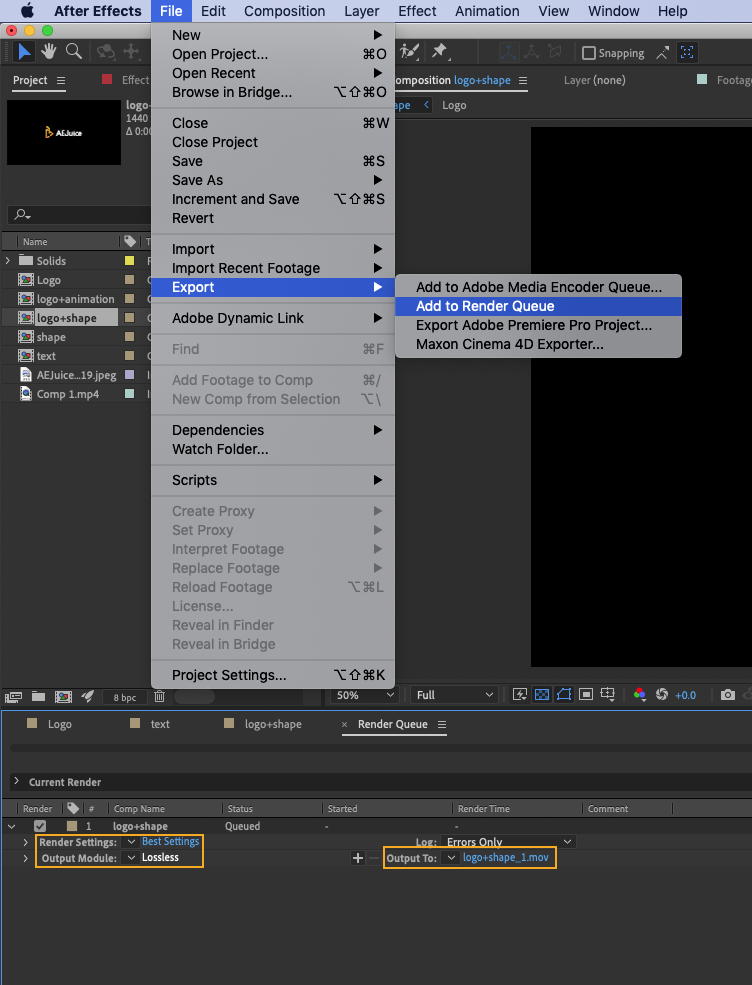
Once you are confident that everything is finalized and ready to go, you can start the exporting process by going to the File menu and selecting Export, followed by Add to Render Queue.
This will open up the Render Queue panel, which is where you can specify various options and settings for the export.
One of the key tasks in the Render Queue panel is choosing the output format for your file.
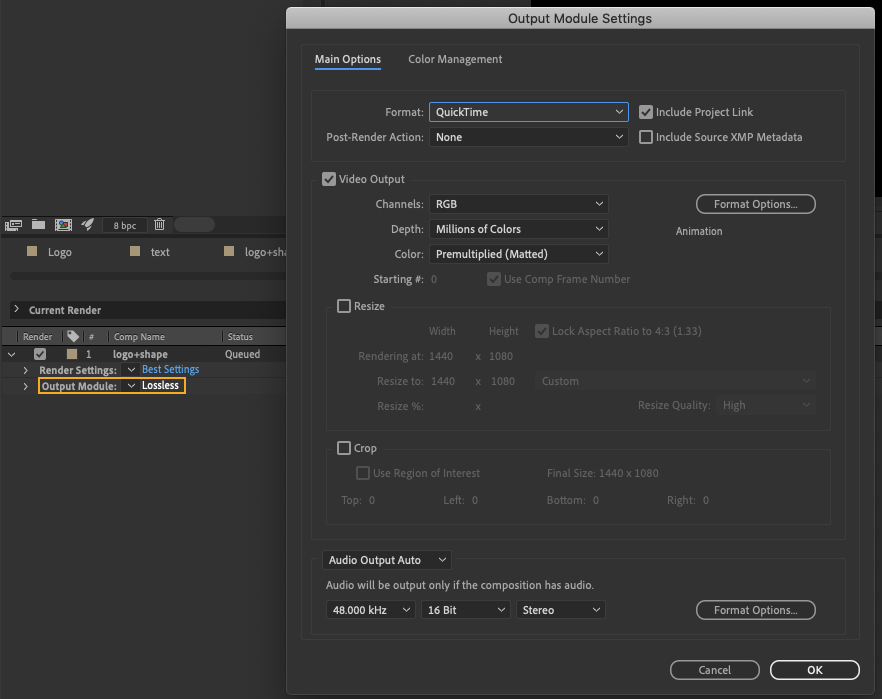
To do this, click on the blue text next to Output Module, which will bring up the Output Module Settings dialog box. This dialog box contains a dropdown menu with a variety of video and audio file formats to choose from. It is important to take the time to carefully consider which option is the best fit for your needs, keeping in mind the platform or application where the file will be used and the specific requirements for that platform or application.
Get 10% off when you subscribe to our newsletter

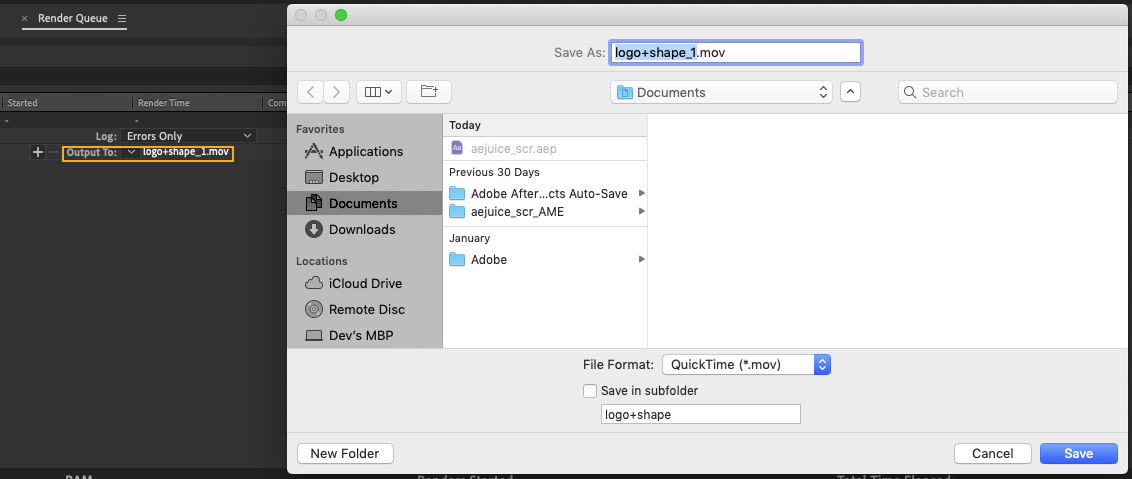
Once you have selected the appropriate file format, you will need to specify the location where you want to save the exported file.
To do this, click on the blue text next to Output To, which will open up the Output To folder dialog box. From here, you can browse your computer or network and choose the destination where you want to save the file. Once you have selected the desired location, click the Save button to confirm your choice.
With the output format and save location set, you are now ready to start the rendering process.
To begin rendering, simply click the Render button in the Render Queue panel. This will initiate the rendering process, which may take some time depending on the complexity and length of your composition and the speed of your computer.

The rendering process can be resource-intensive and may require a significant amount of time to complete, particularly for longer or more complex compositions. However, with a little patience and careful planning, you can produce high-quality output that is ready for use in a variety of applications.
Here is a short guide:
- Verify that composition is complete and ready for export
Rendering process may take time based on composition complexity and length, and computer speed


