How to Export Your Adobe After Effects Projects as GIFs
Introduction to Exporting GIFs from After Effects
Are you a fan of Adobe After Effects? Do you want to share your amazing animations as GIFs? Well, you’ve come to the right place! GIFs are a popular way to share short videos on social media and websites. In this guide, we will show you how to export your After Effects projects as GIF files step by step.
Step 1: Select Your Composition
First, you need to select the composition you want to export as a GIF. Open the composition in Adobe After Effects by double-clicking on it in the Project panel.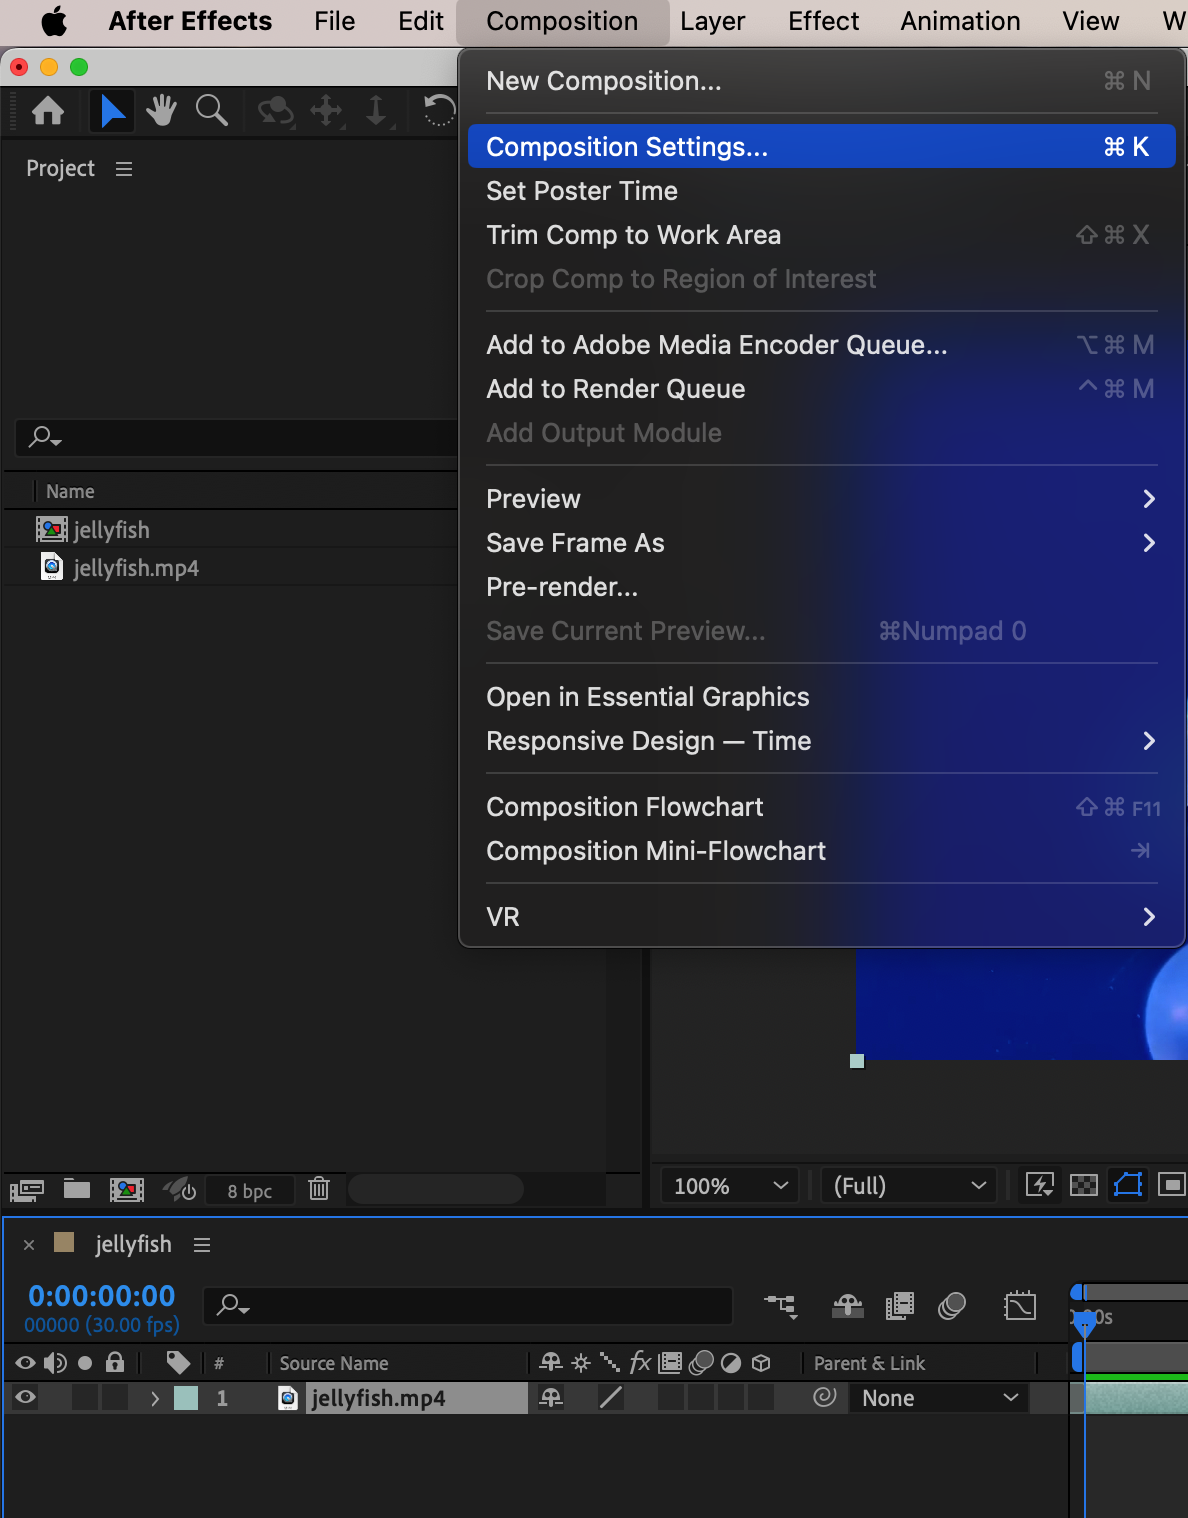
 Step 2: Adjust Composition Settings
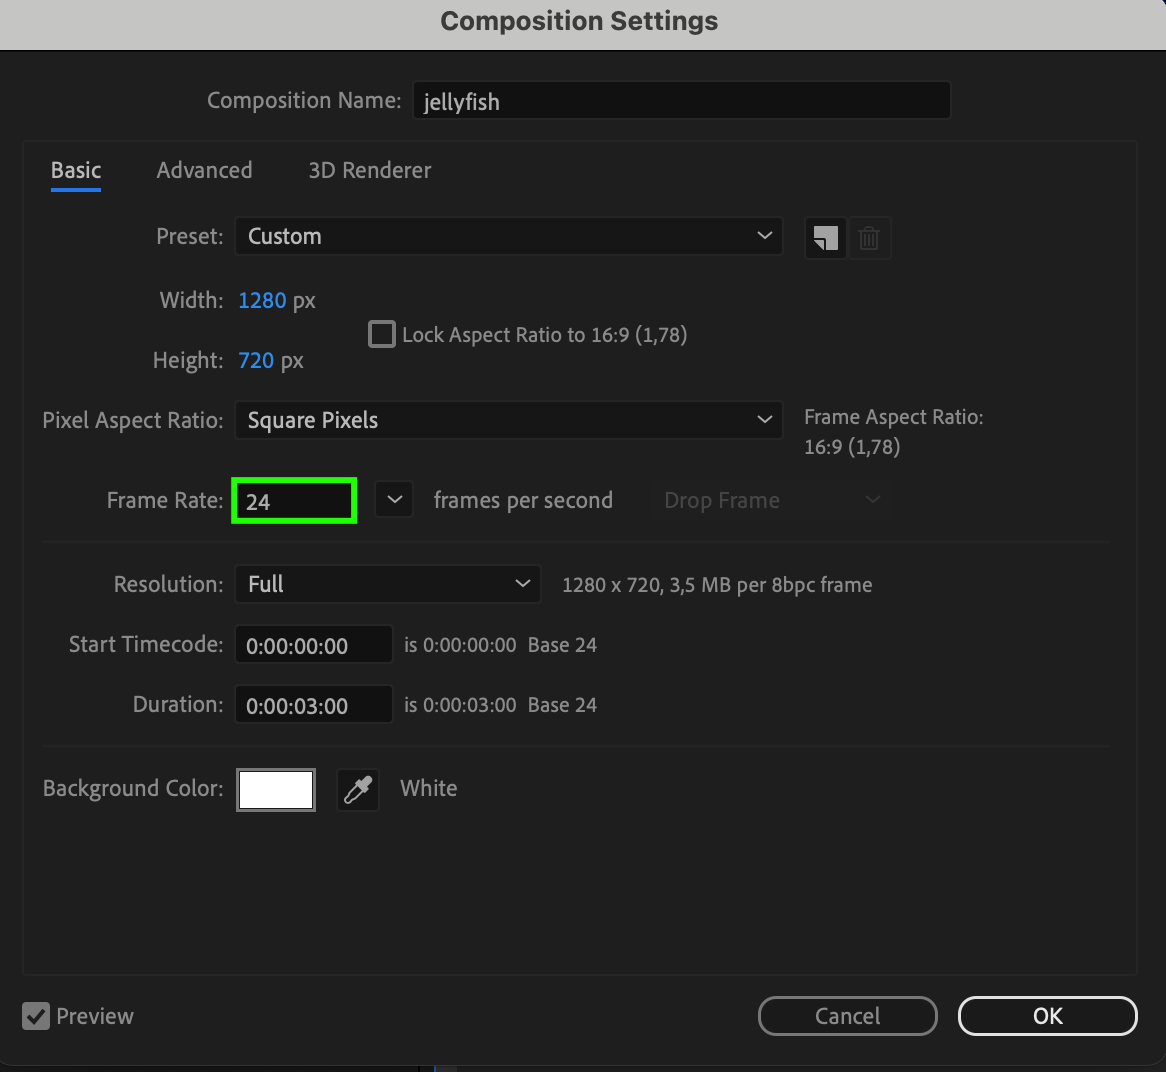
Next, adjust the composition settings to match the desired dimensions and duration of your GIF. To do this, select “Composition” from the menu and click on “Composition Settings”. Here, you can change the width, height, and frame rate of your composition. Ensure that the frame rate is set to a value suitable for a GIF, usually between 12-24 frames per second. Adjust the duration to fit the length of the animation you want to export.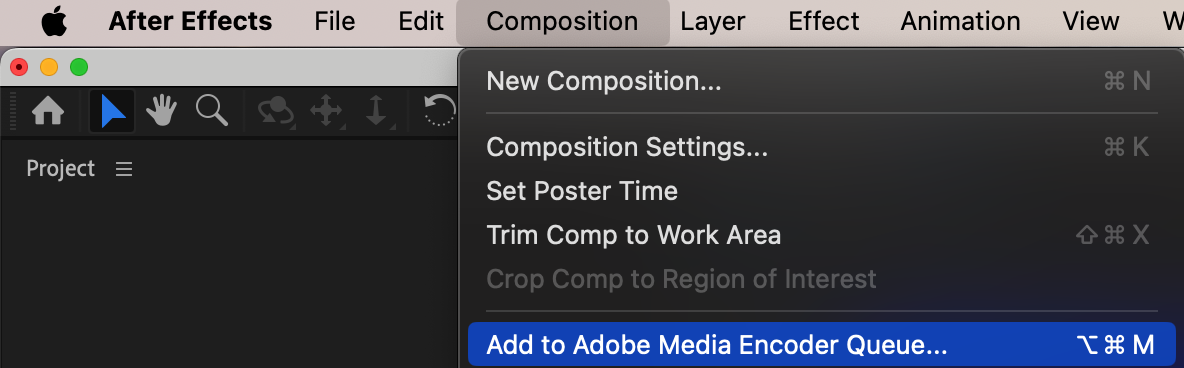 Step 3: Add to Adobe Media Encoder Queue
Once your composition is ready, go to the top menu and select “Composition”, followed by Add to “Adobe Media Encoder Queue”. This will open Adobe Media Encoder with your composition added to the queue.
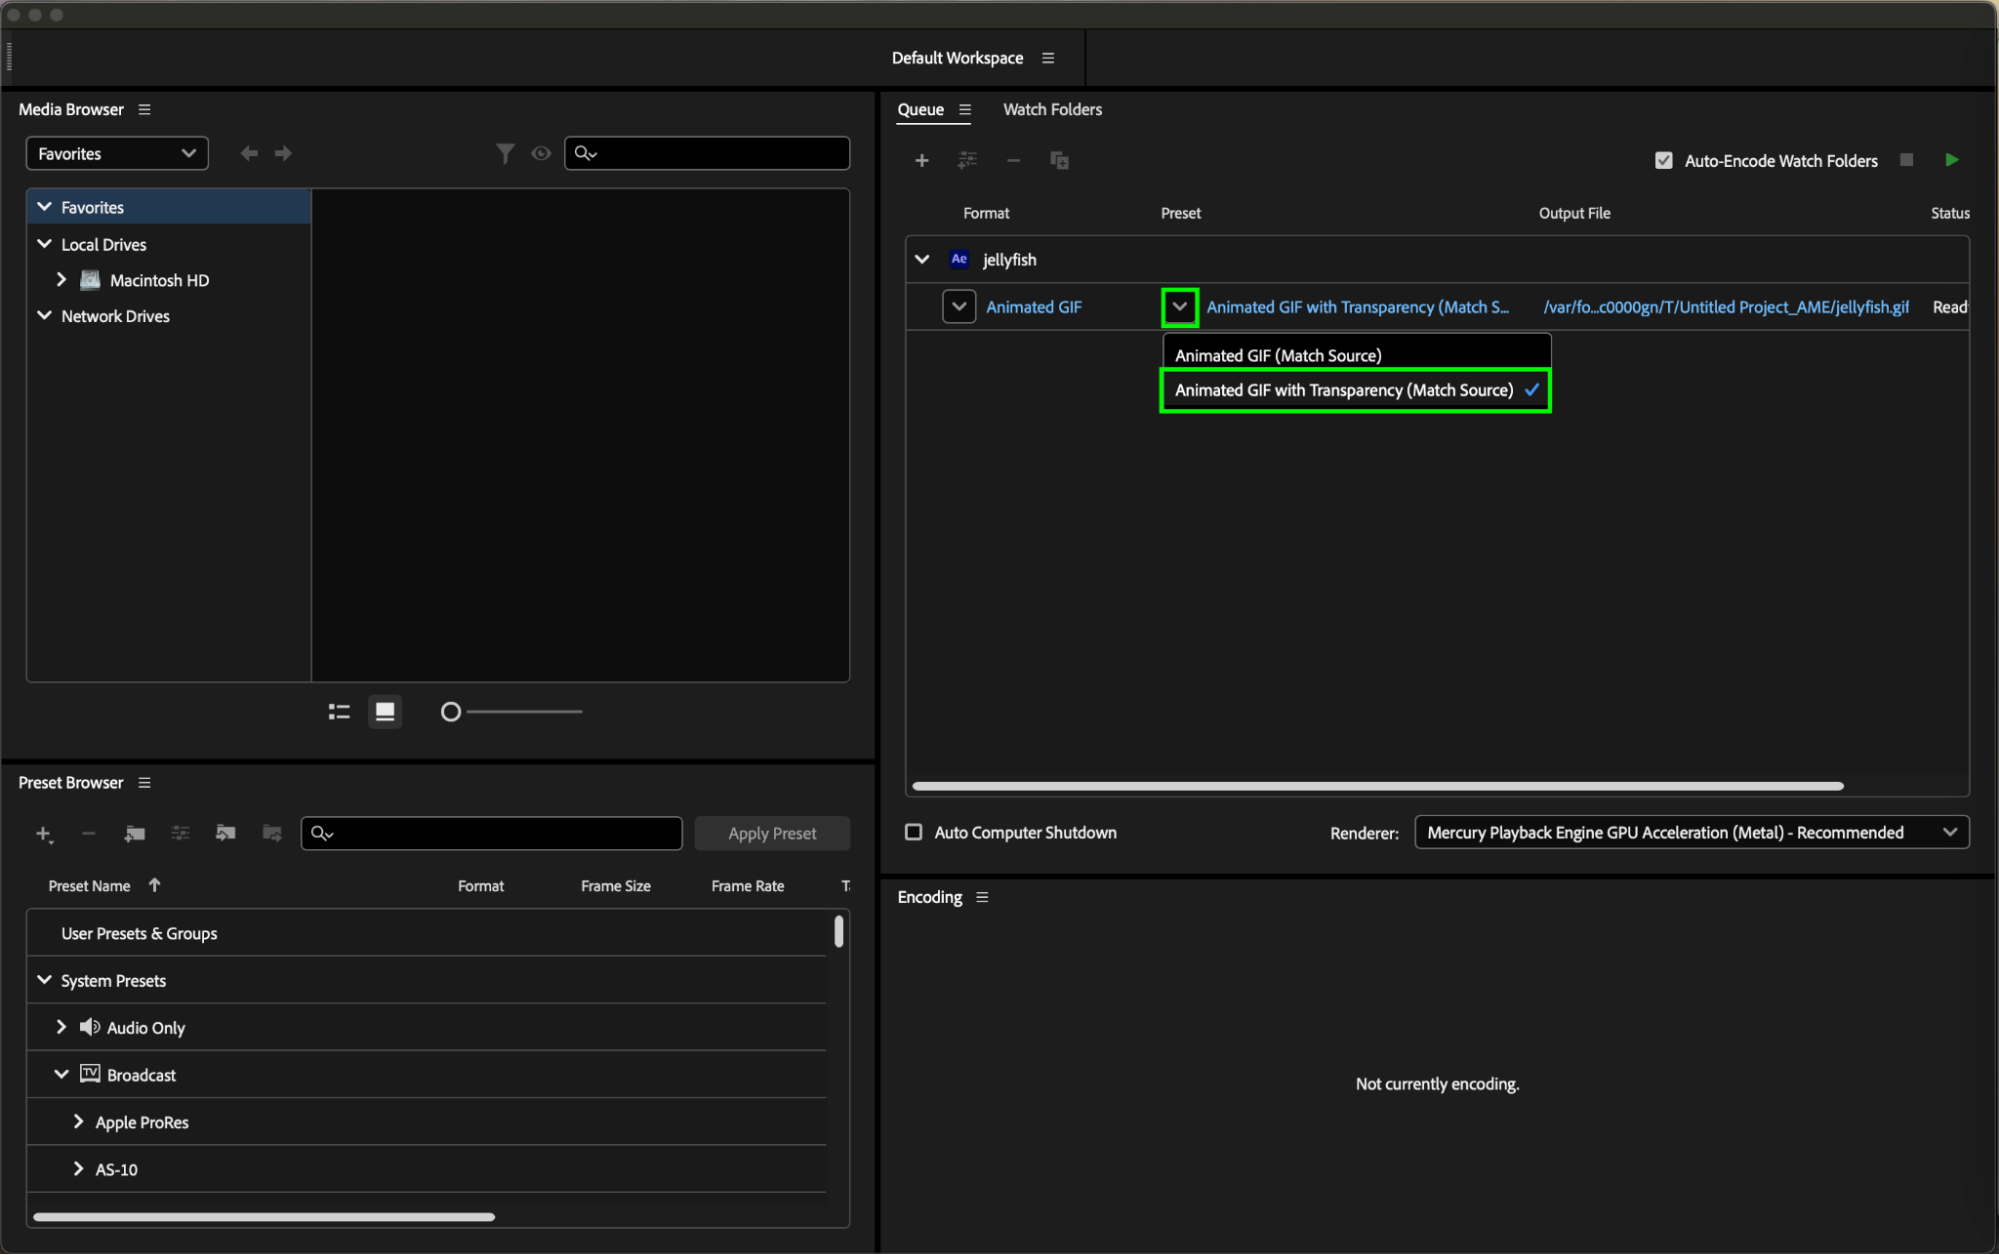
Step 4: Set GIF Export Settings in Adobe Media Encoder
In Adobe Media Encoder, select “Format” as “Animated GIF”. Then, choose a preset that fits your needs. If you need transparency in your GIF, select a preset with transparency. You can further adjust the settings by clicking on the format description. This allows you to fine-tune aspects like quality, frame rate, and color settings to ensure the best possible GIF output.Step 5: Start the Export Process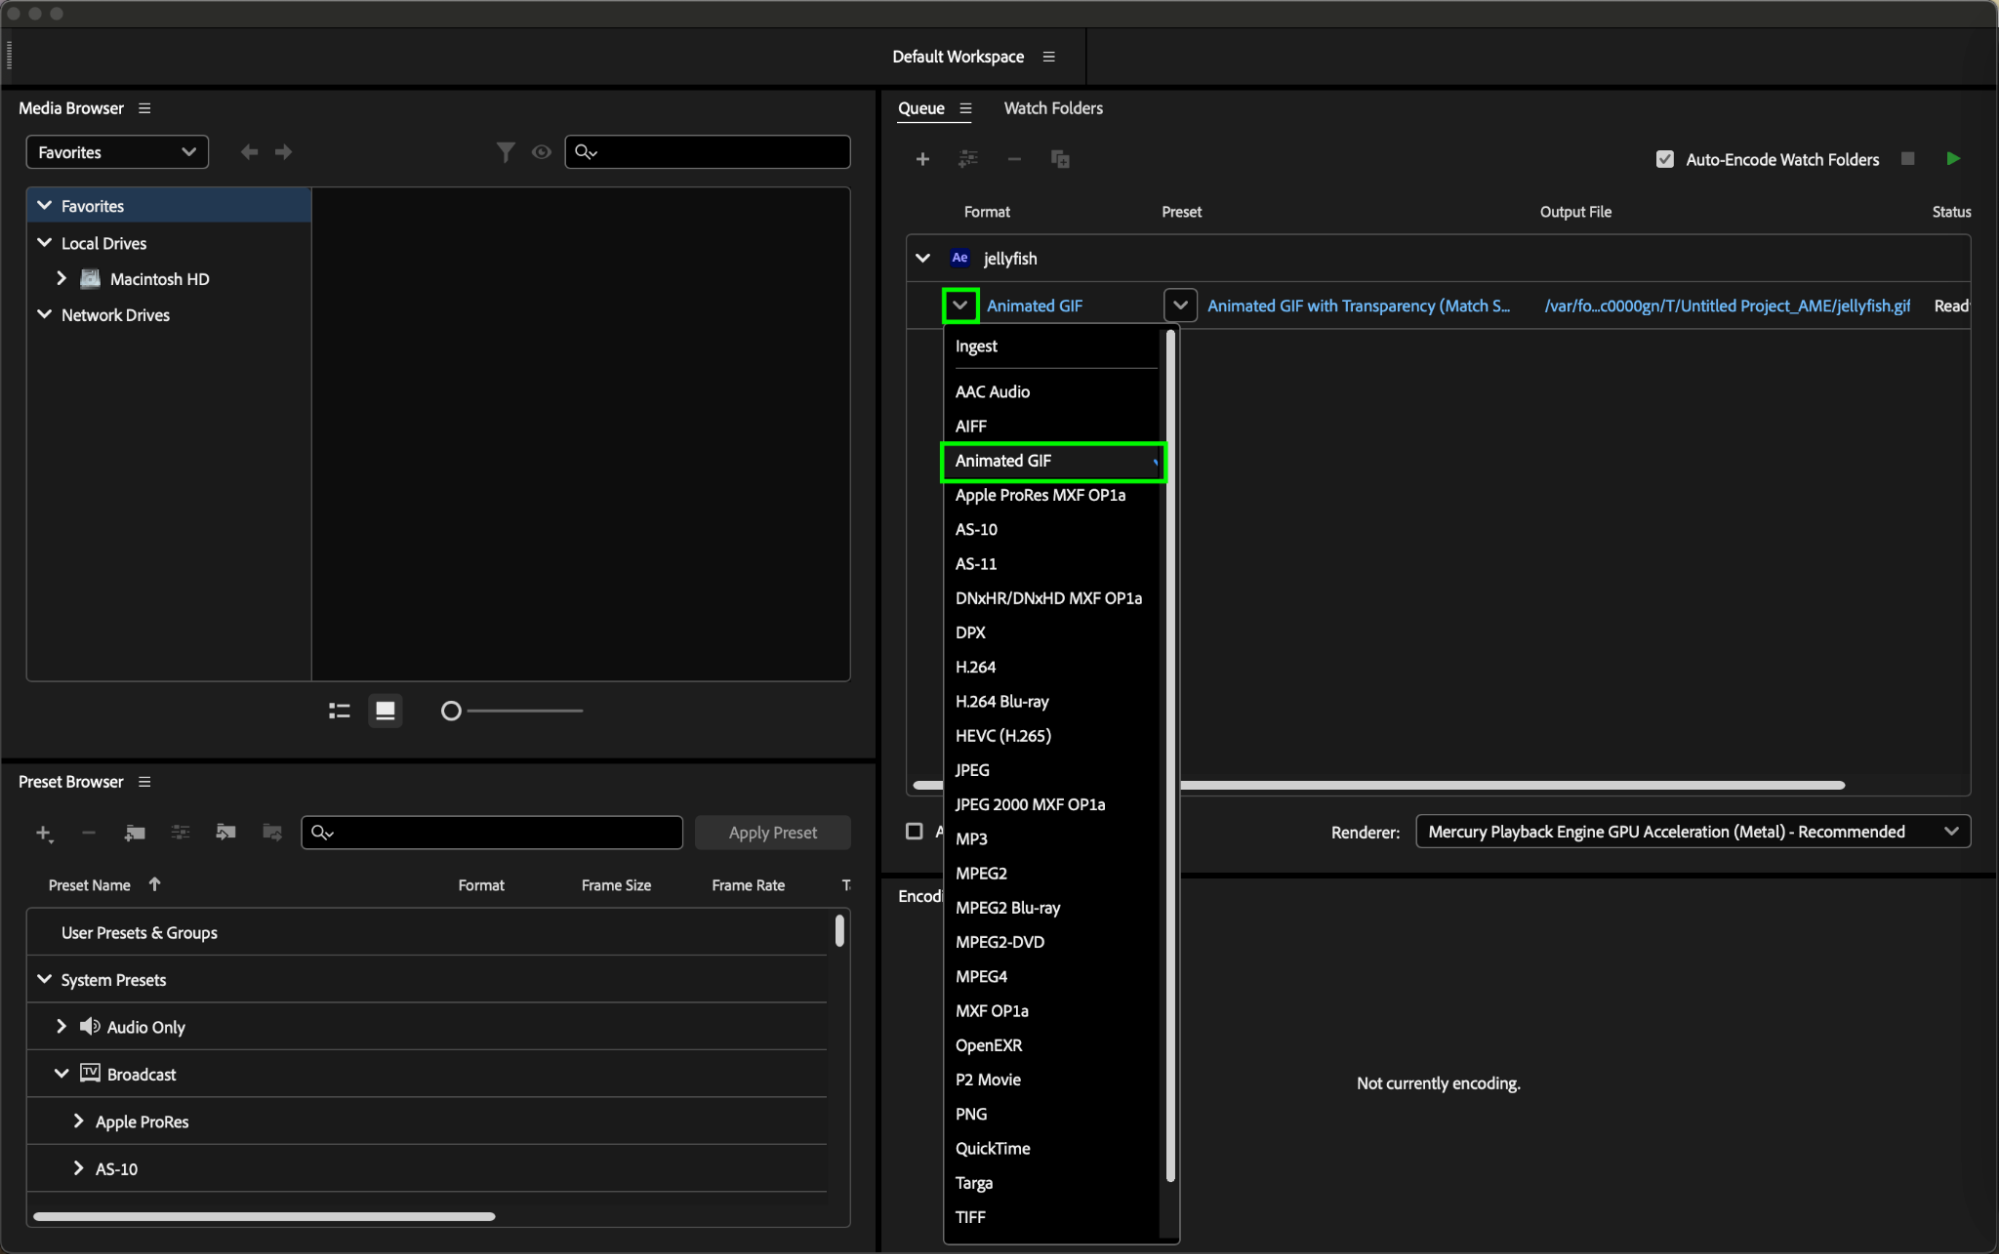
Get 10% off when you subscribe to our newsletter

In the top right corner of the “Adobe Media Encoder” panel, click the “Play” button in the Queue panel to start the export process. Adobe Media Encoder will begin rendering your composition as a GIF.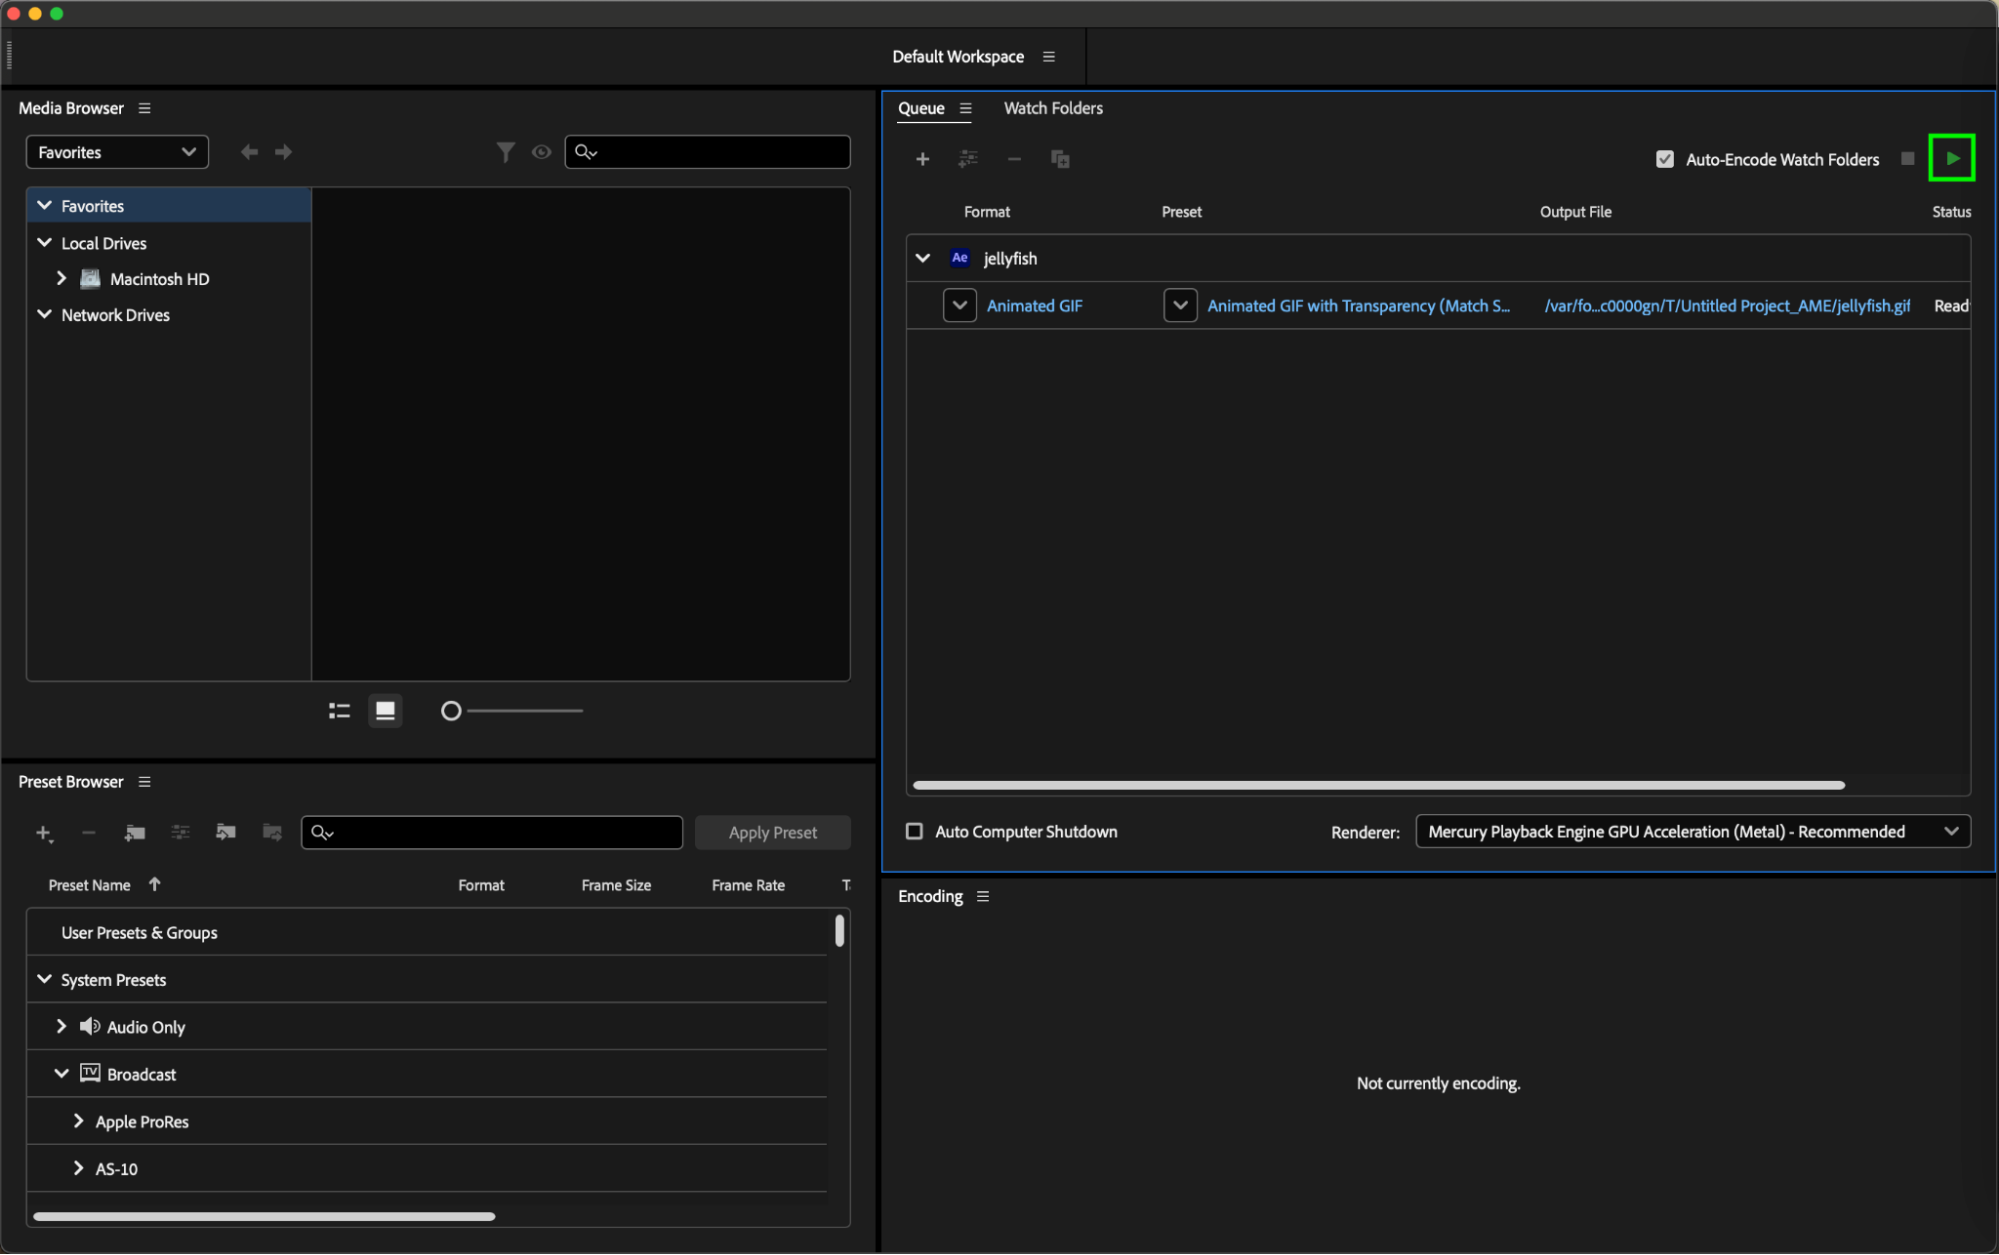
Step 6: Locate Your Exported GIF
After the export process is complete, the status of your file in the Queue panel will change to Done. To locate your exported GIF, click on the file path in the Output File column, which will open the folder containing your saved GIF. Additional Tips
Optimize for Web: When exporting a GIF, it’s essential to keep the file size manageable for faster loading times on the web. Adjust the resolution and quality settings in Adobe Media Encoder accordingly.
Looping: If you want your GIF to loop, ensure that you set the loop option in the export settings.
Color Settings: GIFs are limited to 256 colors. Be mindful of this when creating your composition to avoid banding or color issues.
Get 10% off when you subscribe to our newsletter
By following these steps, you can easily export your After Effects compositions as high-quality GIFs suitable for various uses, including social media, websites, and presentations. Experiment with different settings to find the perfect balance between quality and file size for your needs.
Conclusion
Congratulations! You’ve successfully exported your After Effects project as a GIF. Now you can impress your audience with captivating animations. Remember to experiment with different settings and optimize your GIFs for size and quality.
Get 10% off when you subscribe to our newsletter
For more tips and tricks on After Effects and to stay up-to-date with the latest techniques, visit AEJuice.com. Unleash your creativity and let your imagination run wild with the power of After Effects. Have fun creating stunning GIF animations that will leave your viewers in awe.
Our Bestsellers


