How to Export After Effects Video as GIF
Introduction to Exporting After Effects Videos as GIFs
Take your After Effects projects to the next level by exporting them as GIFs, captivating your audience with visually stunning animations. In this detailed guide, we’ll walk you through the step-by-step process of exporting videos as GIFs in After Effects, ensuring you can create high-quality and captivating GIFs.
Get 10% off when you subscribe to our newsletter

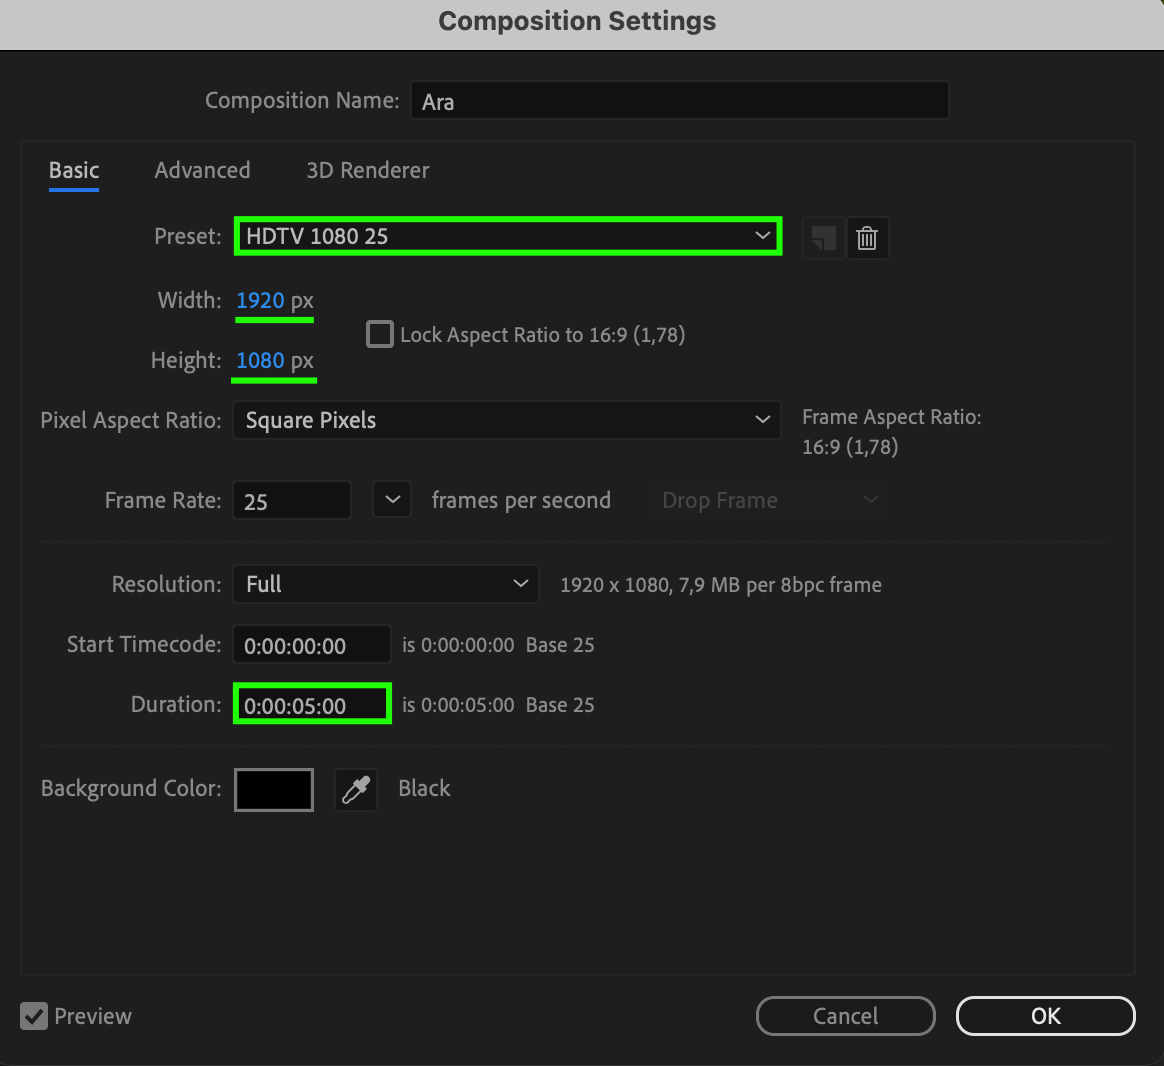
Step 1: Prepare Your Composition
To begin, it’s crucial to set up your composition correctly. Make sure that your composition dimensions and duration match your final GIF requirements. You can adjust these parameters by selecting your composition, heading to the “Composition” menu, and choosing “Composition Settings.”
 Step 2: Trim Your Composition
To ensure your GIF file size remains manageable and to reduce unnecessary animation loops, it’s a good idea to trim your composition’s duration. Select your composition layer in the timeline, and use the work area markers (B and N) to define the portion you want to include in your GIF. Then, go to the “Composition” menu, select “Trim Comp to Work Area,” and make any adjustments as needed.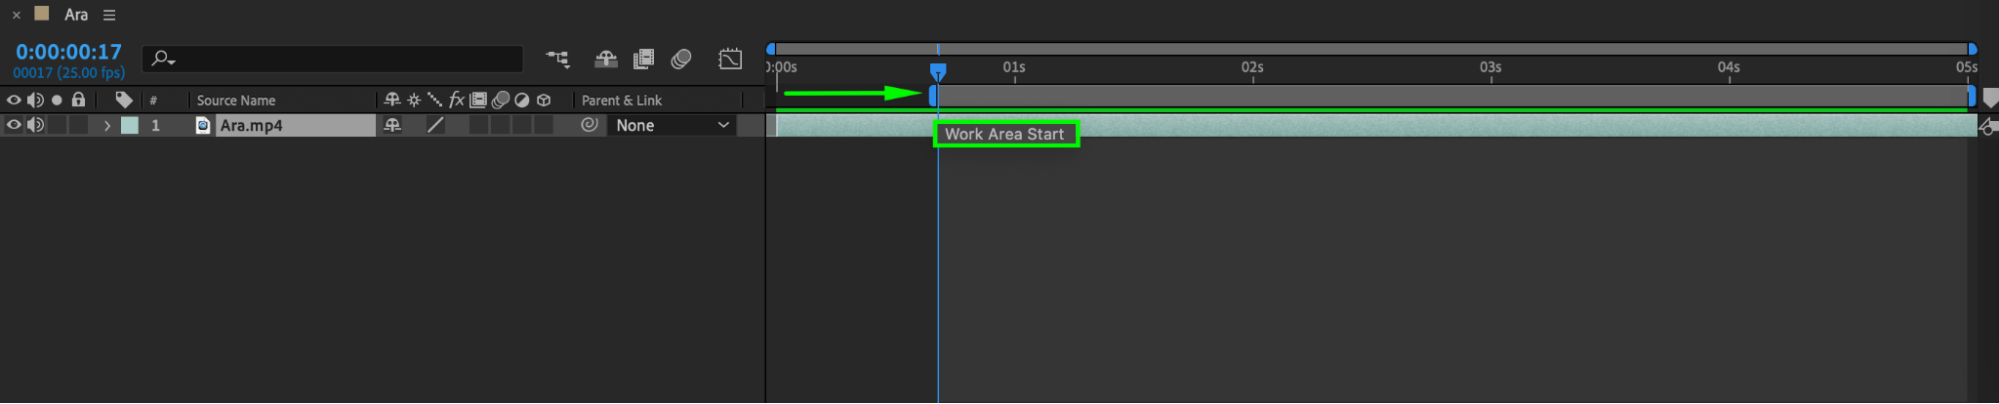

 Step 3: Choose the Ideal Frame Rate
Get 10% off when you subscribe to our newsletter
Remember, GIFs have limited color palettes and rely on a sequence of discrete images. It’s important to set an appropriate frame rate to achieve smooth animation. Go to the “Composition” menu, select “Composition Settings,” and choose a frame rate that suits your GIF’s desired speed and style. For creating GIFs, a frame rate of 10-15 FPS is ideal for simple animations to keep the file size small, while 20-24 FPS provides a good balance for smoother motion without significantly increasing the file size.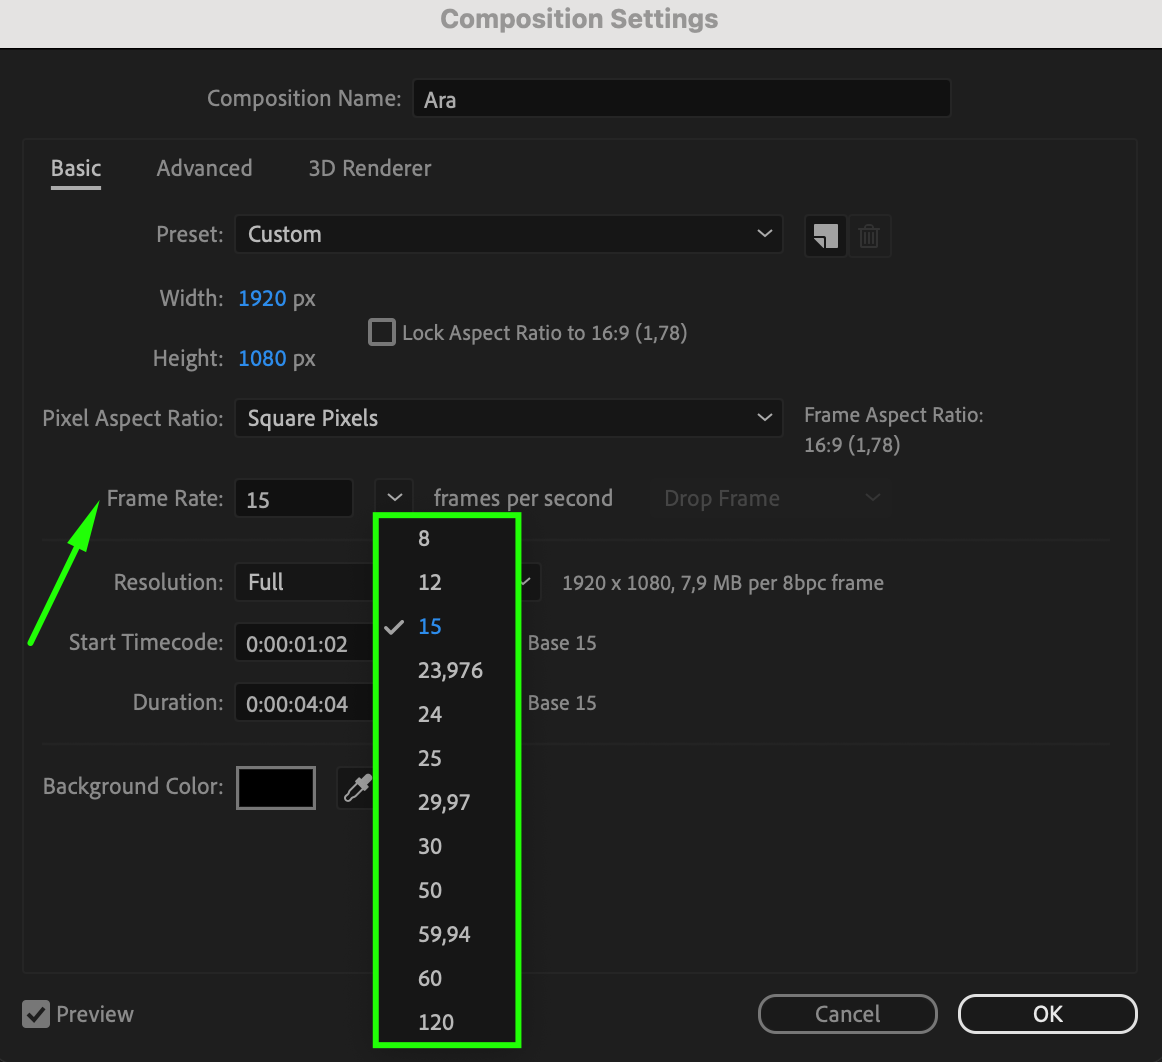 Step 4: Add to Adobe Media Encoder Queue
Get 10% off when you subscribe to our newsletter
Navigate to “Composition” and click on “Add To Adobe Media Encoder Queue.”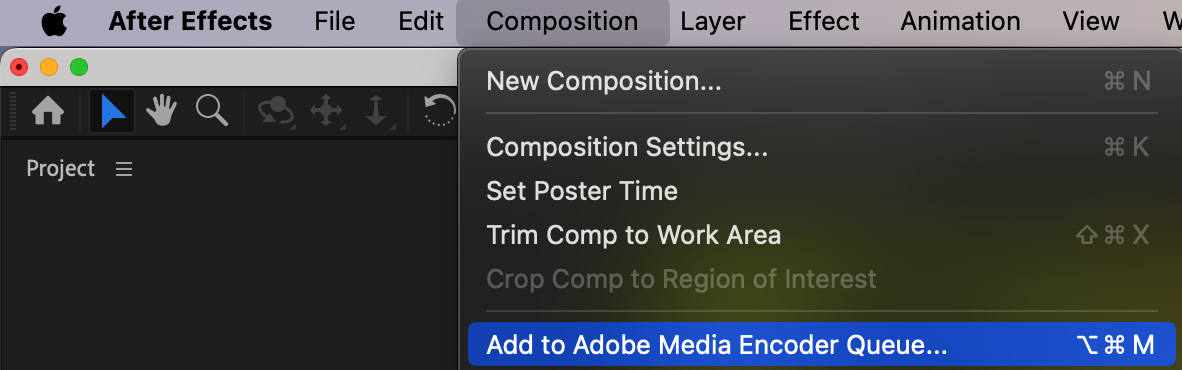 Step 5: Select GIF Format
In Adobe Media Encoder, choose “Animated GIF” from the format dropdown menu.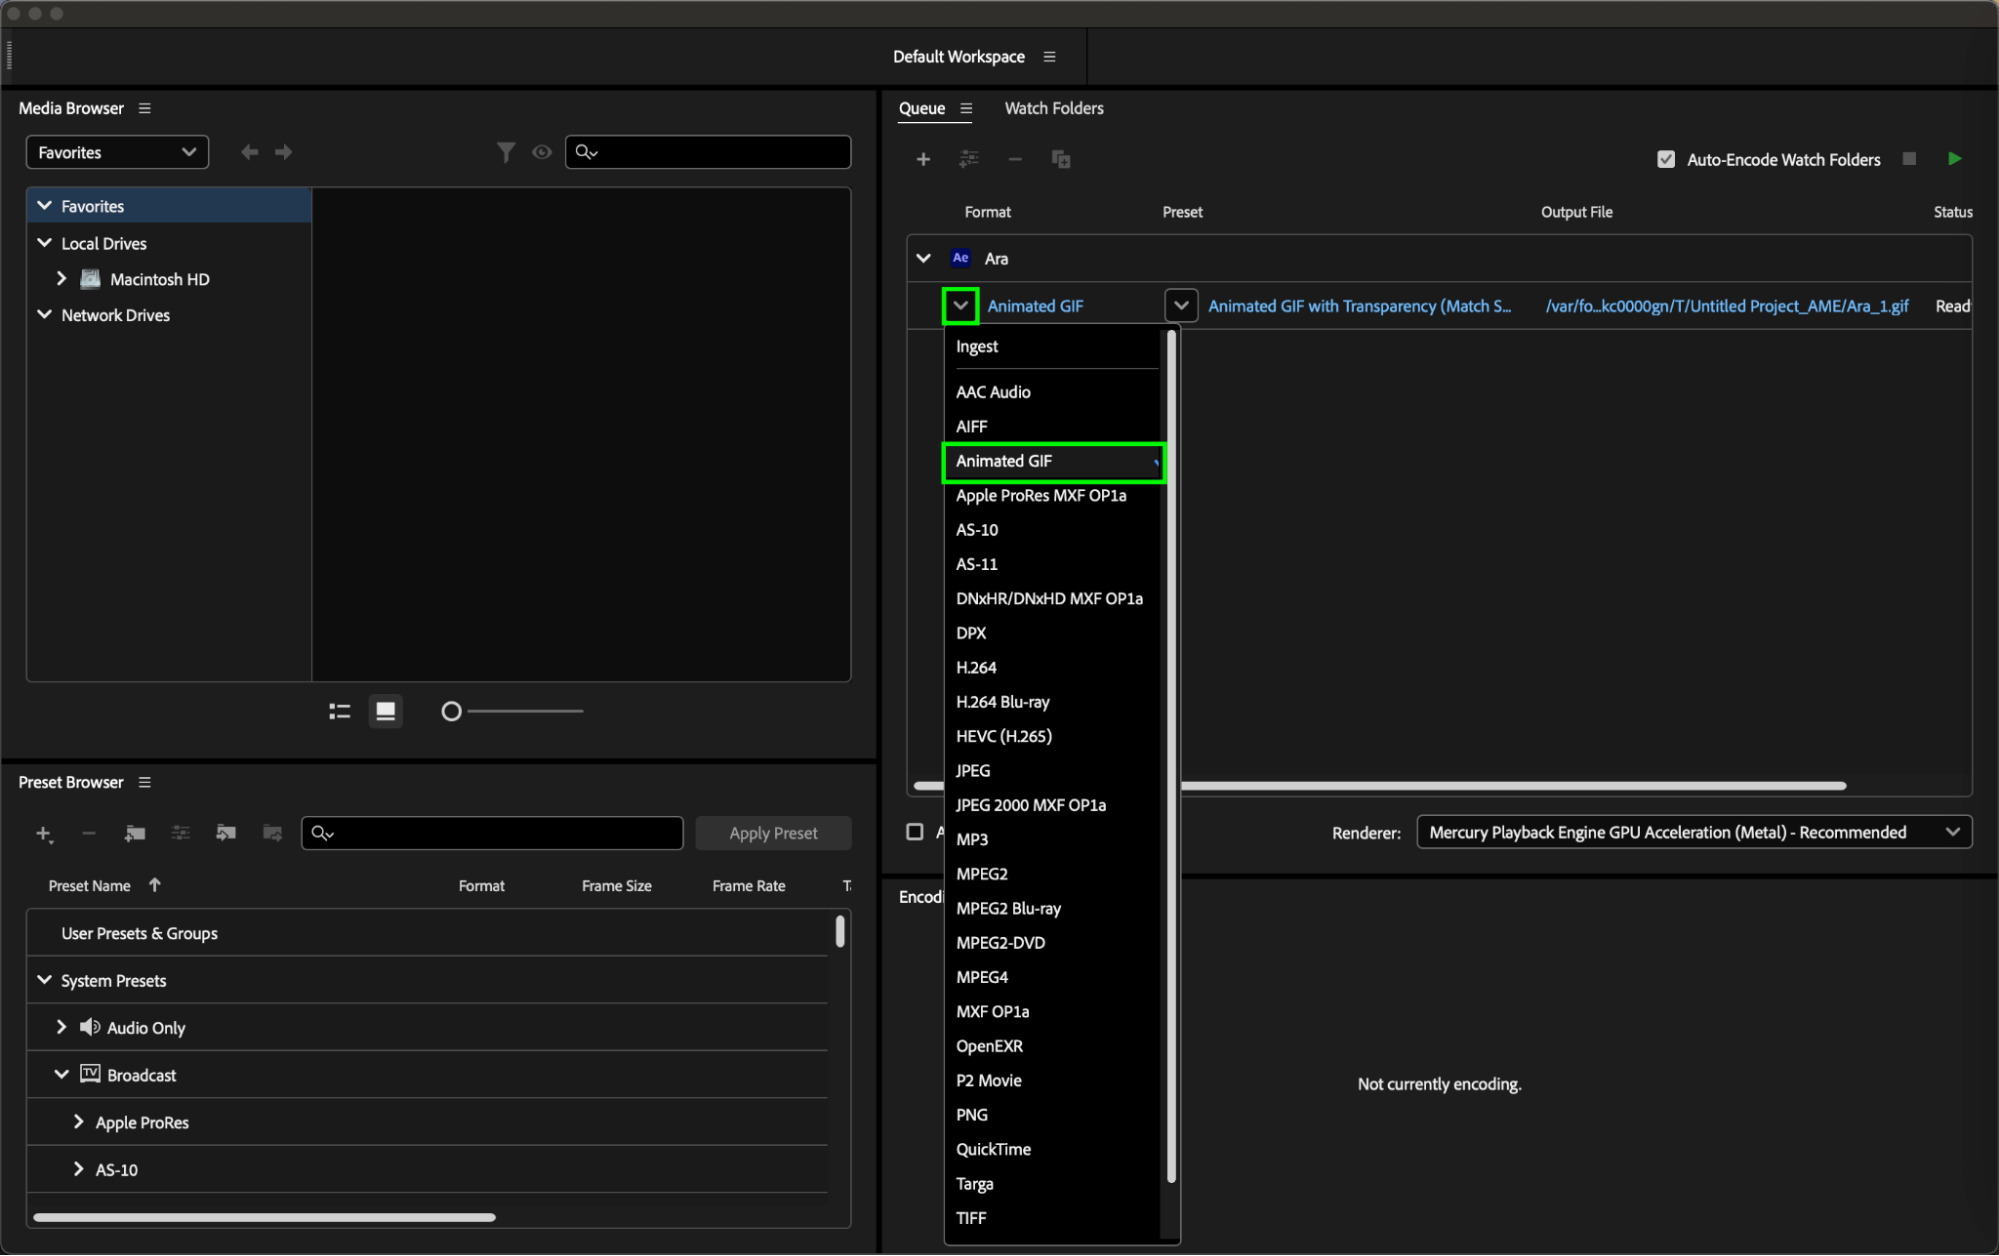 Step 6: Customize GIF Settings
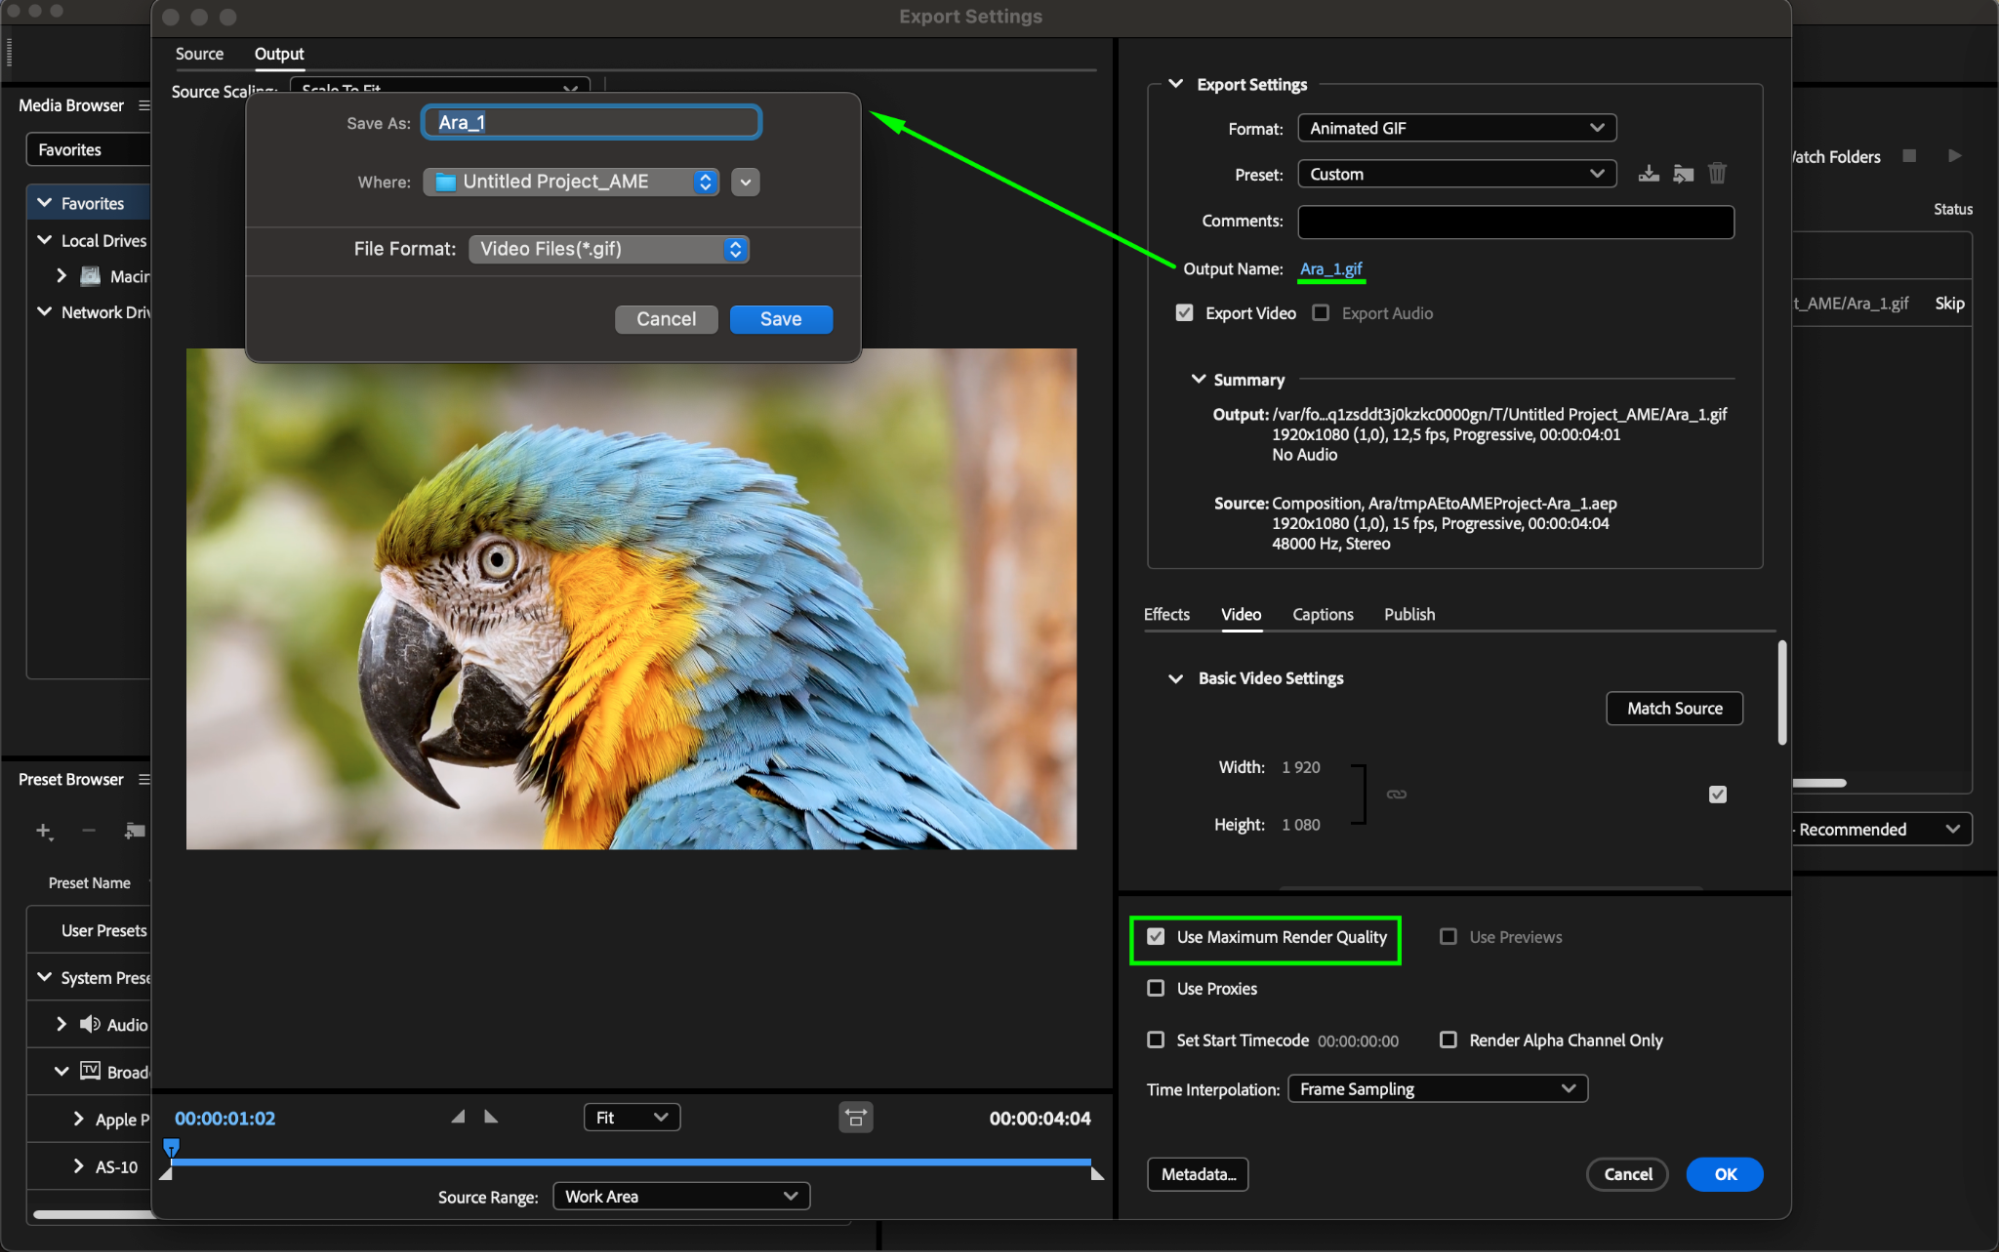
Choose the desired settings, including file name and destination, by clicking on the format dropdown menu and selecting “animated GIF (Match Source)” or “with transparency” if applicable.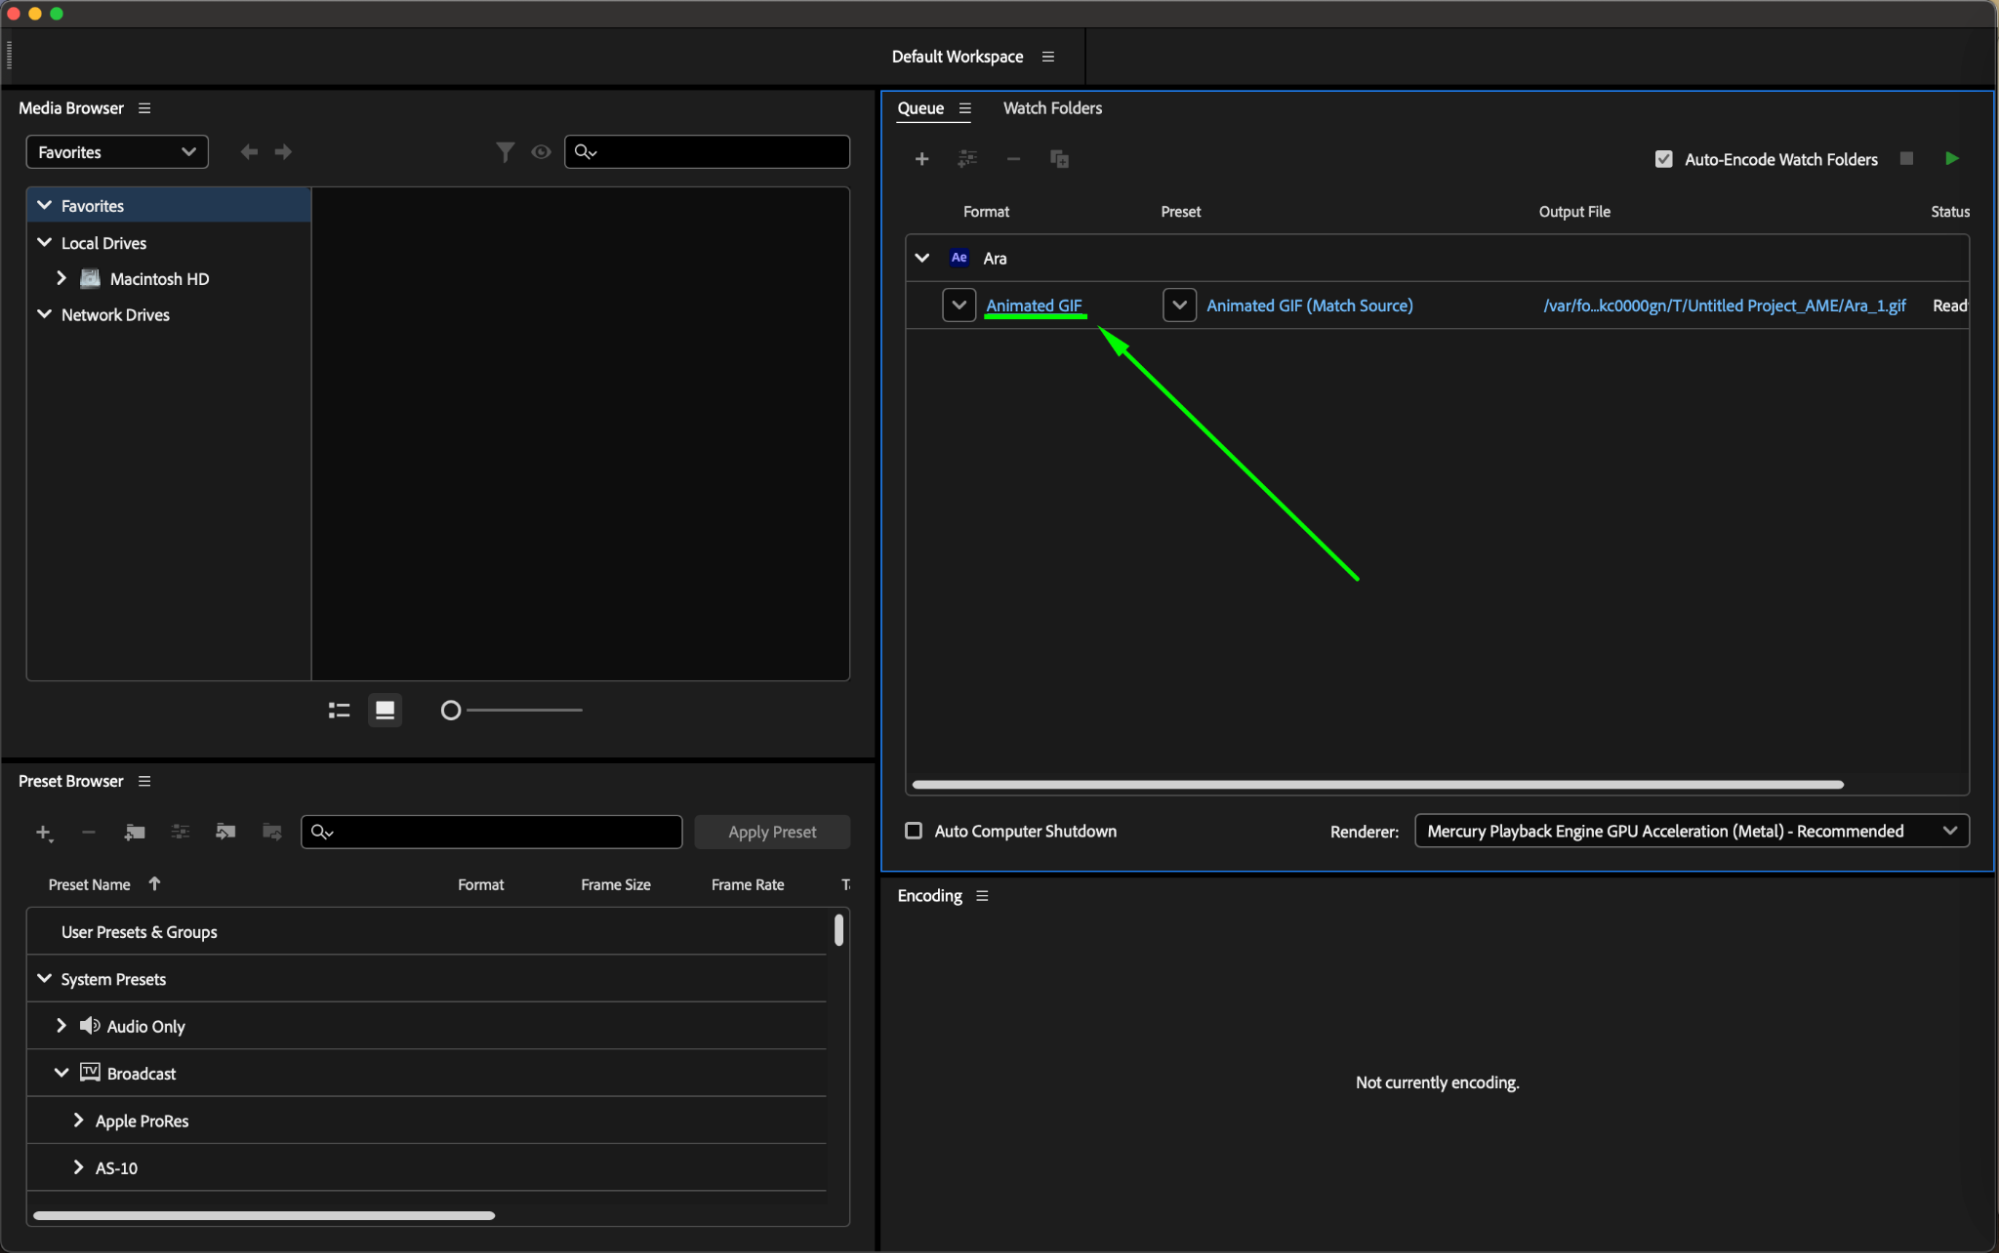
 Step 7: Start Export Process
Get 10% off when you subscribe to our newsletter
Click the “Start Queue (Play)” button in the top-right corner of the queue panel to start the export process.
 Step 8: Preview and Share Your GIF
Preview your GIF in a web browser or dedicated viewer software to ensure it meets your expectations. Share your creation on social media platforms, websites, or any desired medium.
Get 10% off when you subscribe to our newsletter
Conclusion
Congratulations! You’ve successfully exported your video as a GIF, ready to captivate your audience with mesmerizing animations. With this guide, you can create high-quality GIFs from your After Effects projects and share them with the world.
Our Bestsellers


