How to Properly Export Videos from After Effects for Instagram
Preparing Your Video for Instagram
Instagram has specific requirements for video uploads, including resolution, aspect ratio, and file size. To ensure your video looks great on Instagram, you need to export it using the right settings in After Effects. Follow these steps to export your video correctly.
Step 1: Set the Correct Composition Settings
Before exporting, make sure your composition is optimized for Instagram. Go to Composition > Composition Settings and set the resolution based on the type of post:
Square post: 1080×1080
Portrait post/Reels: 1080×1350
Story: 1080×1920
Landscape post: 1920×1080
Set the frame rate to 30 fps and duration according to Instagram’s limits (up to 60 seconds for posts, longer for Reels).


 Step 2: Adjust Scale and Position
Get 10% off when you subscribe to our newsletter

Resize and reposition your video to fit correctly within the chosen aspect ratio. Use the Scale and Position properties in the Transform panel to make sure the content is framed properly without unwanted cropping.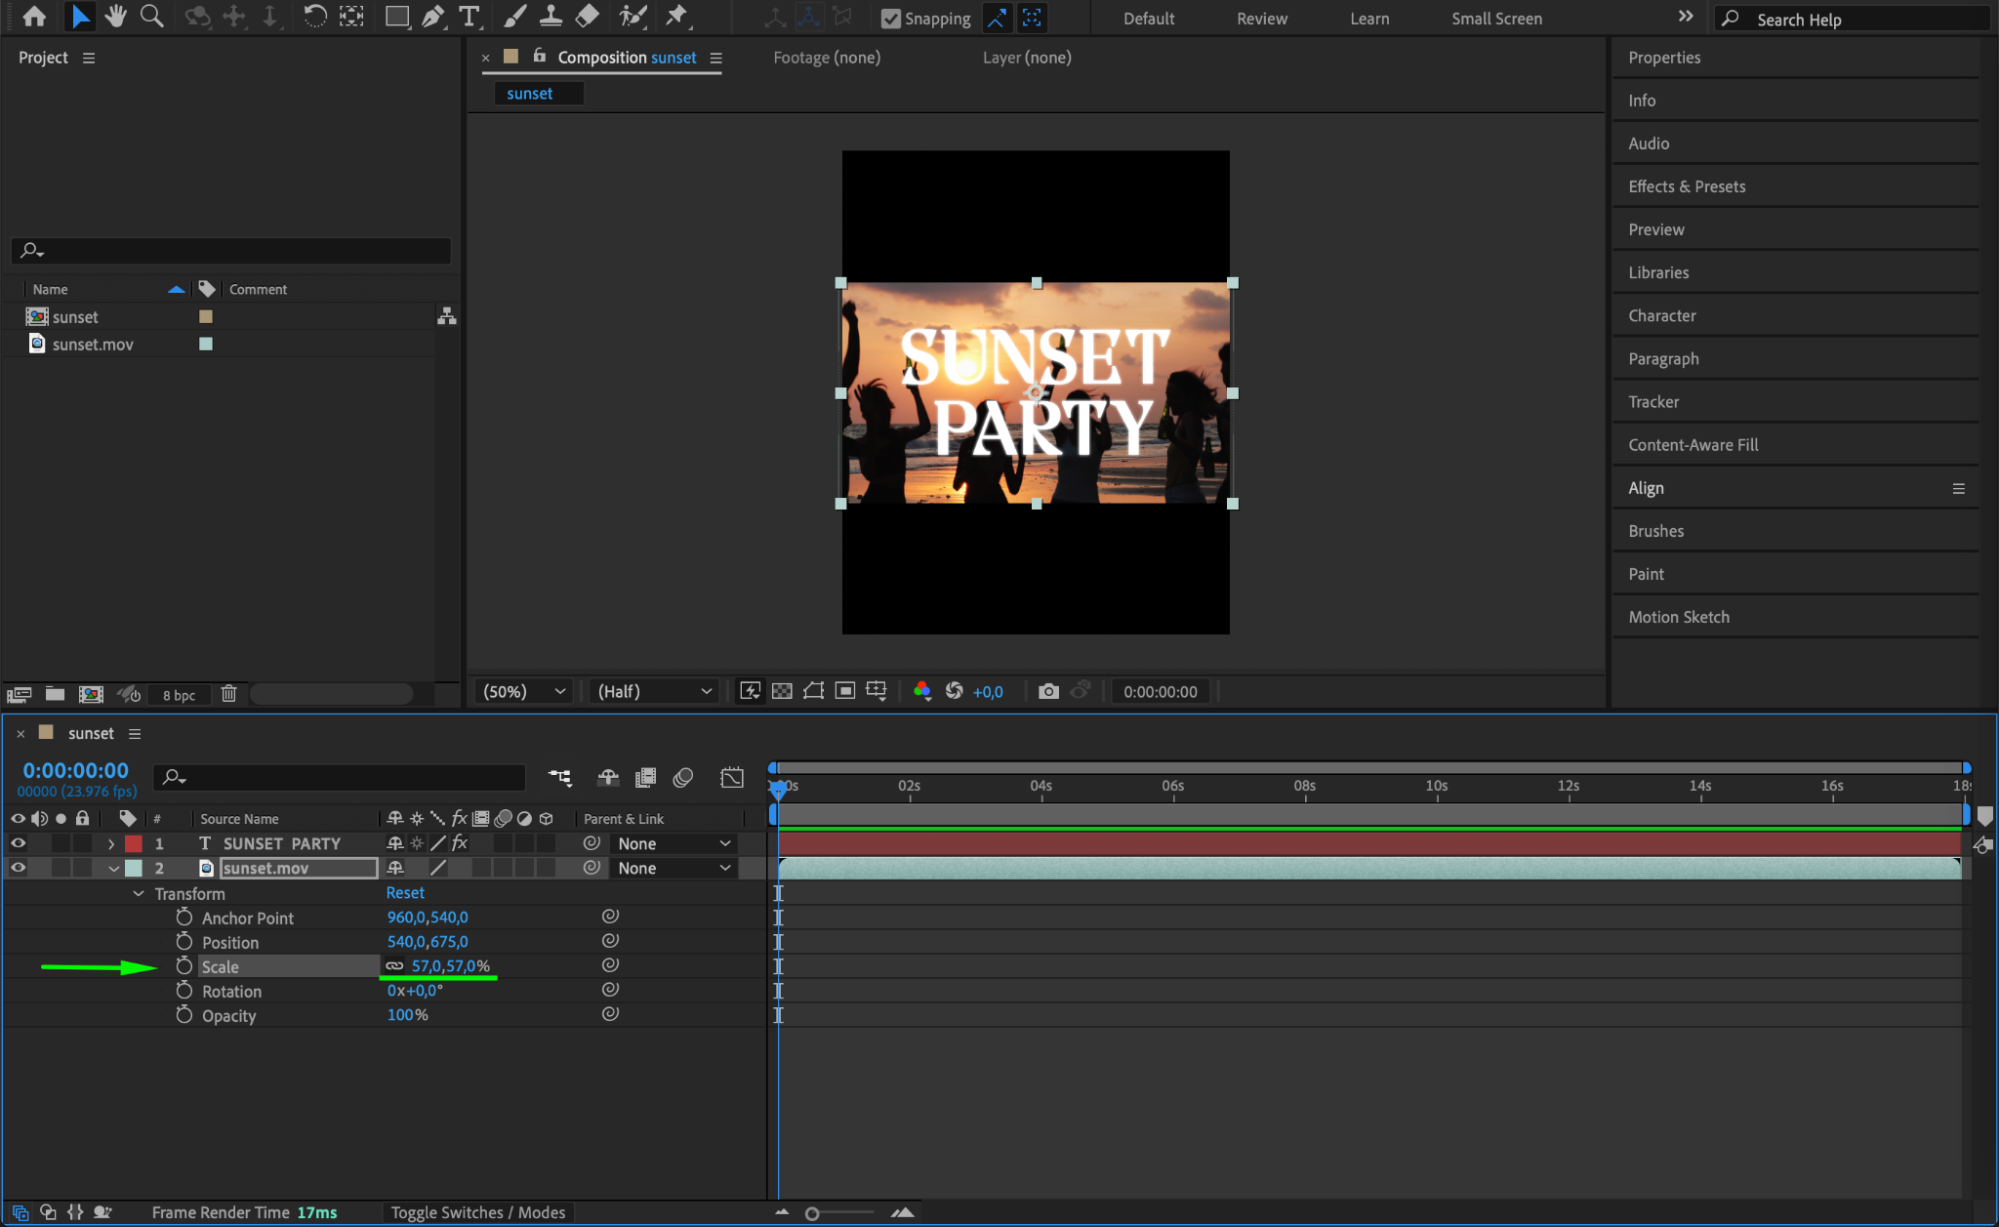 Step 3: Add the Composition to the Render Queue
Once your video is ready, go to Composition > Add to Render Queue. This will open the Render Queue panel, where you can set the output format and quality.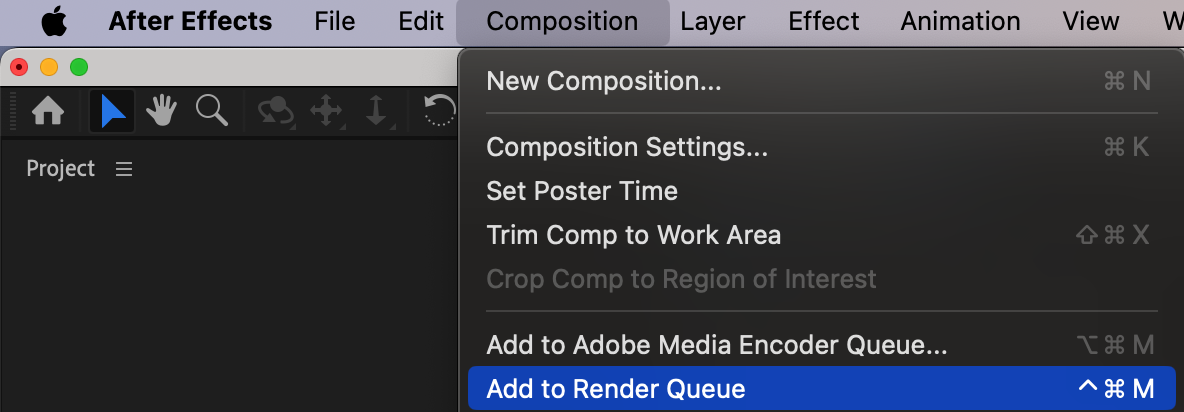
Step 4: Choose the Right Export Format
Click on the Output Module, then select H.264 (MP4) as the format. This ensures compatibility with Instagram while maintaining good video quality with a manageable file size.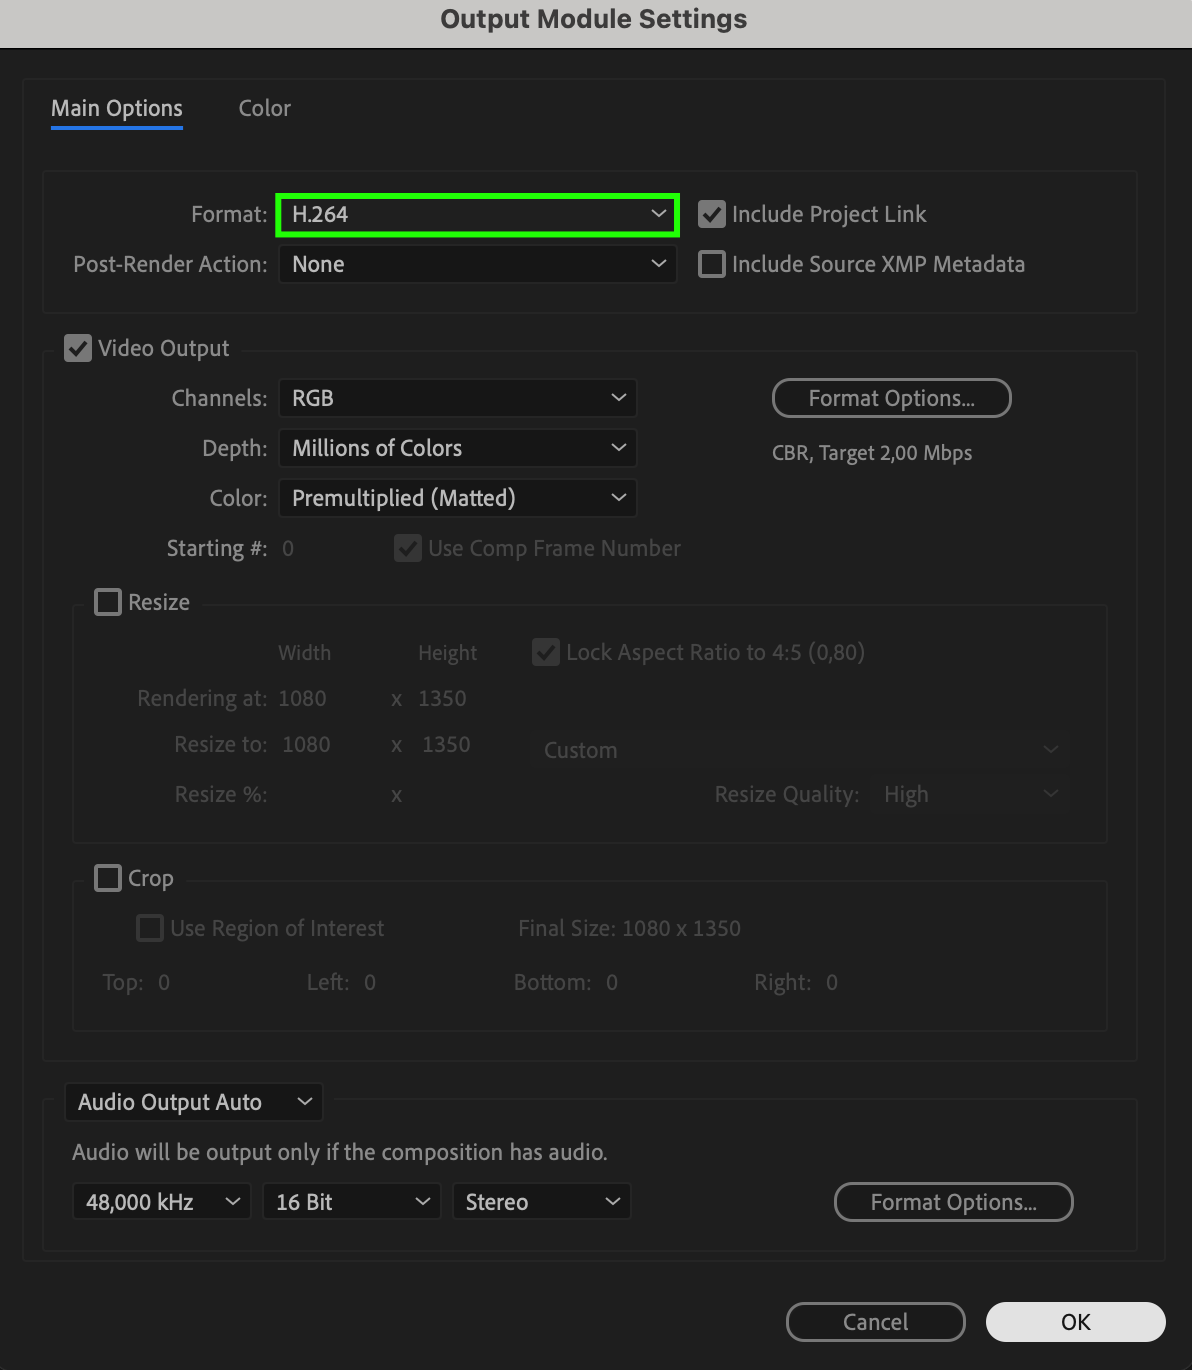 Step 5: Adjust Audio Settings (If Needed)
If your video includes audio, make sure sound is enabled in the export settings. Set the following audio properties for the best quality:
Sample Rate: 48,000 Hz
Bit Depth: 16-bit
Channels: Stereo
These settings ensure clear and professional sound for your Instagram video.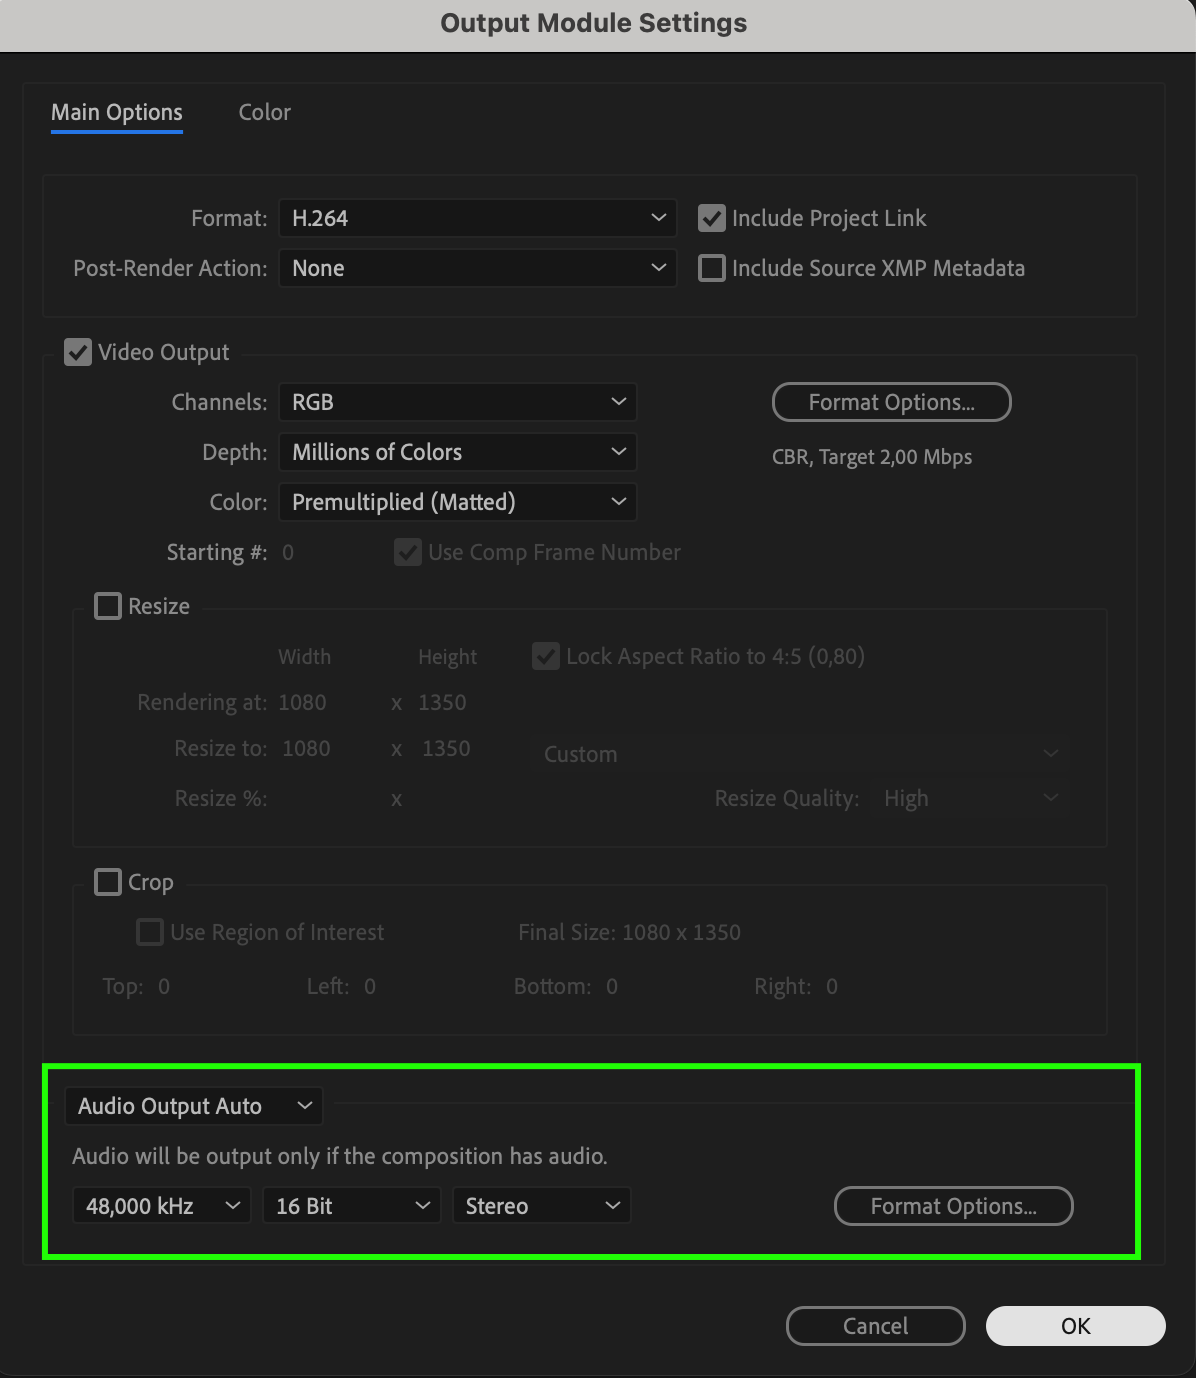 Step 6: Choose the Output Location
Click on Output To and select the folder where you want to save your exported video. Name your file appropriately for easy identification.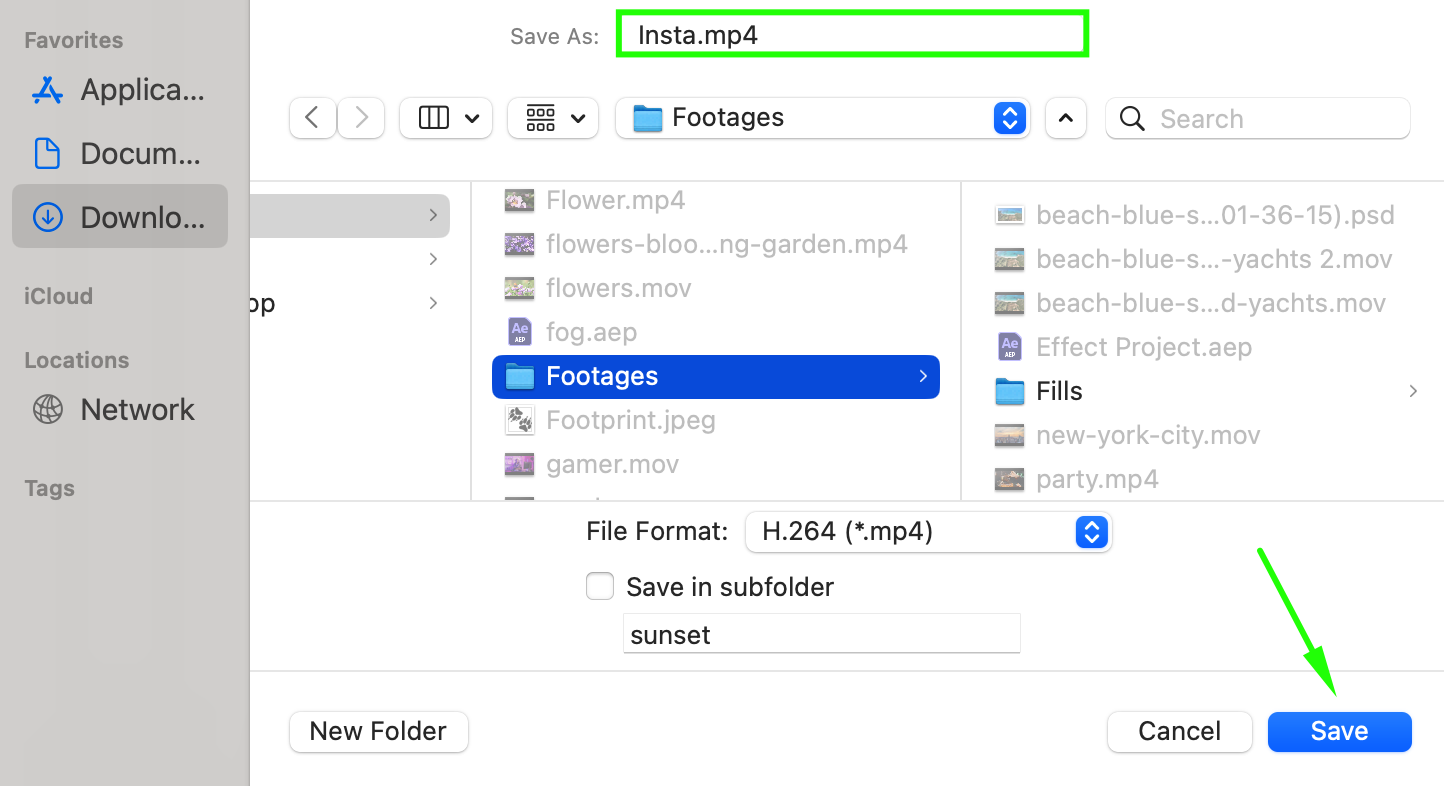 Step 7: Render the Video
Click Render to start exporting your video. The rendering time depends on the complexity of your project and your computer’s performance.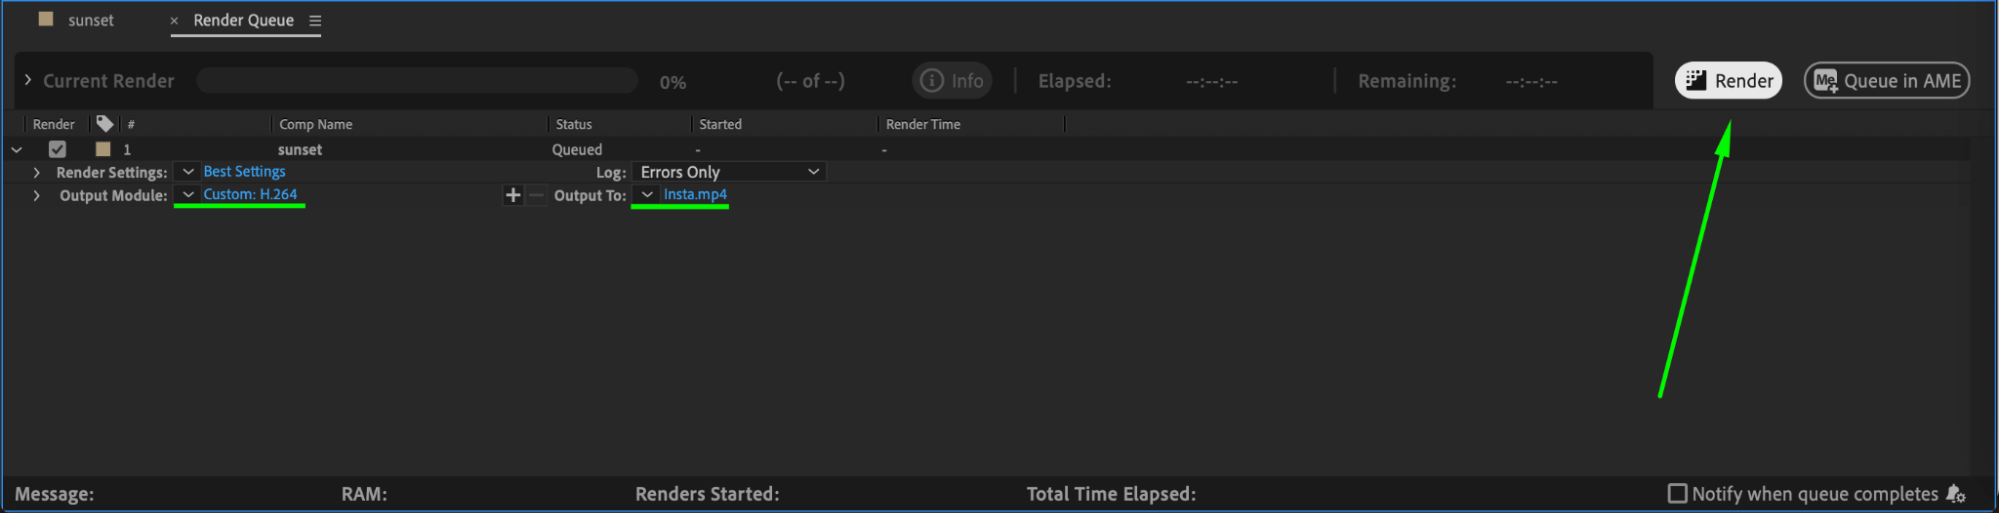 Step 8: Transfer the Video to Your Phone
Once the video is exported, transfer it to your phone using a USB cable, AirDrop (Mac), Google Drive, Dropbox, or any other file-sharing method.
Step 9: Upload to Instagram
Open Instagram, go to the upload section, and select your video. Adjust the thumbnail, add captions, tags, and any other details before posting.
Conclusion
Exporting videos from After Effects for Instagram requires the correct settings to ensure high quality and compatibility. By choosing the right resolution, format, and bitrate, you can create professional videos that look great on Instagram. Follow these steps to optimize your workflow and make sure your content stands out!
Our Bestsellers


