How to Extrudand Animate Text in After Effects
Introduction: Why Extruded Text Enhances Your Design
Extruding text in After Effects lets you transform flat, 2D text into a three-dimensional element, adding depth and sophistication to your animations. Combined with the Cinema 4D Renderer, you can achieve stunning visuals with adjustable geometry, lighting, and color options. This guide explains how to extrude, animate, and render text effectively.
Note: While the title references After Effects CS6, this tutorial was created using the 2024 version of After Effects. The steps provided are compatible with CS6 and later versions, as the fundamental process remains largely unchanged. Minor interface differences may exist, but the core functionality for extruding and animating text is consistent across these versions.
Step 1: Create a New Composition
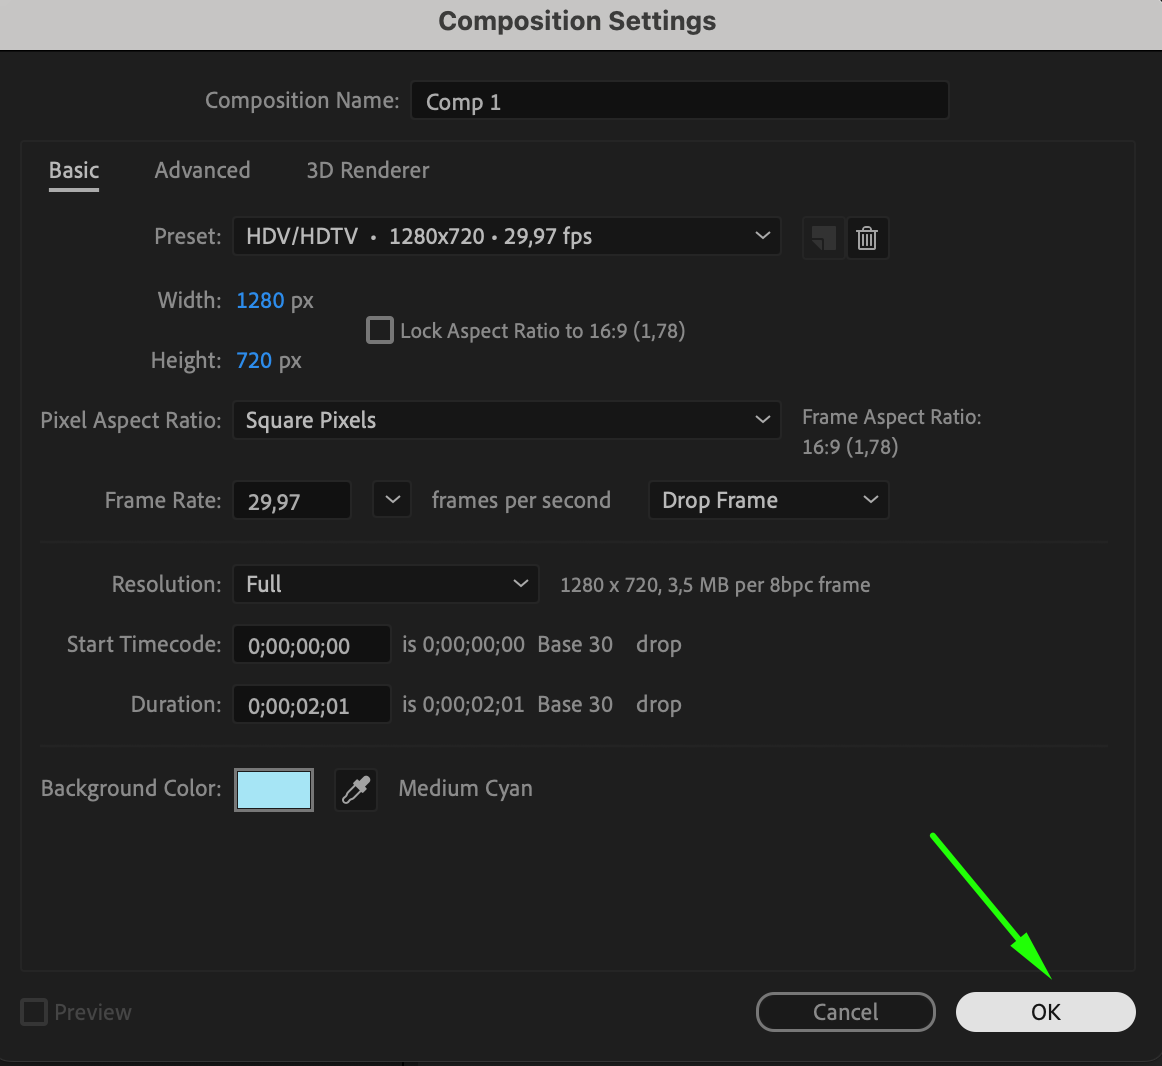
Start by creating a new composition via Composition > New Composition. Set the desired resolution, frame rate, and duration for your project. This will serve as the workspace where you’ll create and animate your 3D text.
 Step 2: Add and Customize Text
Get 10% off when you subscribe to our newsletter

Select the Text Tool (Ctrl/Cmd + T) from the toolbar and click anywhere in the composition to type your text. Use the Properties Panel to adjust the font, size, color, and alignment to fit your design. Step 3: Enable Cinema 4D Renderer
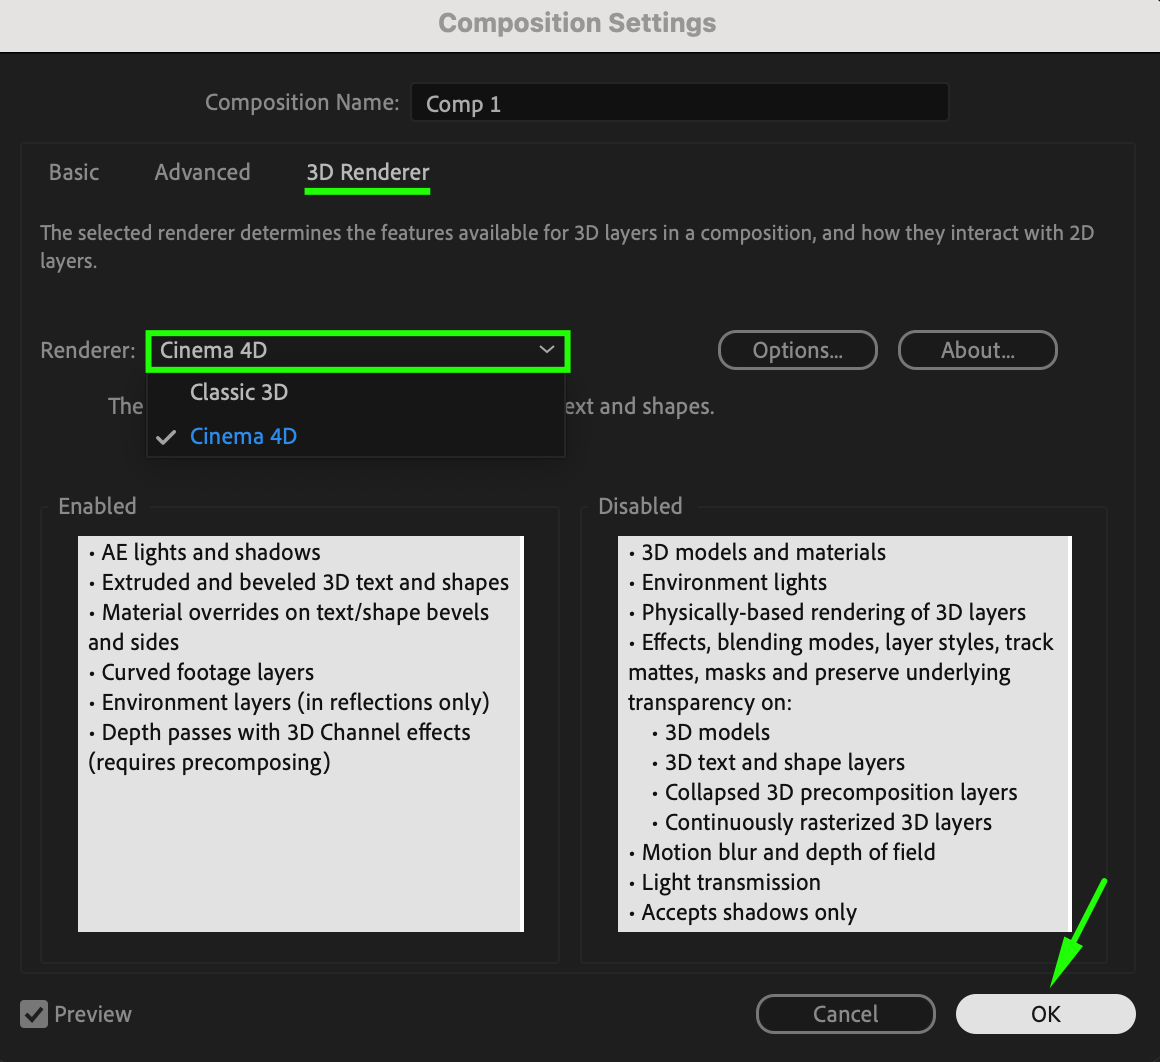
Navigate to Composition > Composition Settings, then switch to the 3D Renderer tab. Choose Cinema 4D Renderer from the dropdown menu and click OK. This renderer unlocks the ability to extrude text and use advanced 3D properties.
 Step 4: Make the Text Layer 3D
In the Timeline Panel, enable the 3D switch for the text layer (the cube icon). This activates 3D transformations and geometry options for the selected layer.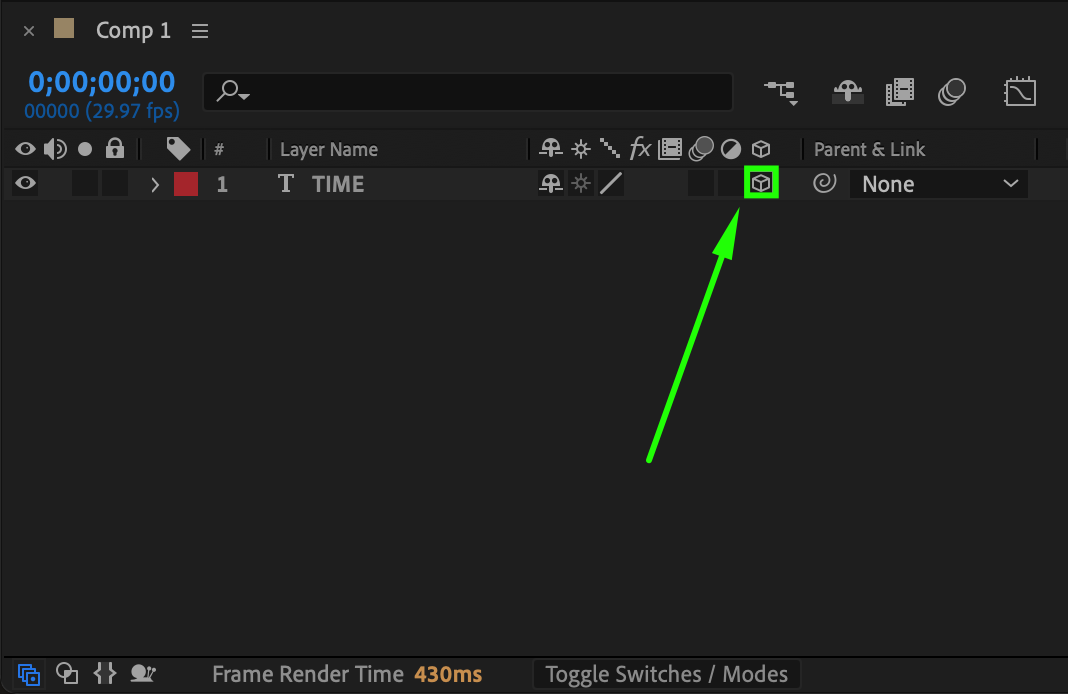 Step 5: Adjust Geometry Options
Expand the text layer’s properties and locate the Geometry Options section. Here, you can adjust parameters like:
Extrusion Depth: Increases the thickness of the text.
Bevel Depth: Adds beveled edges for a more refined, realistic look.
Experiment with these values to achieve your desired effect.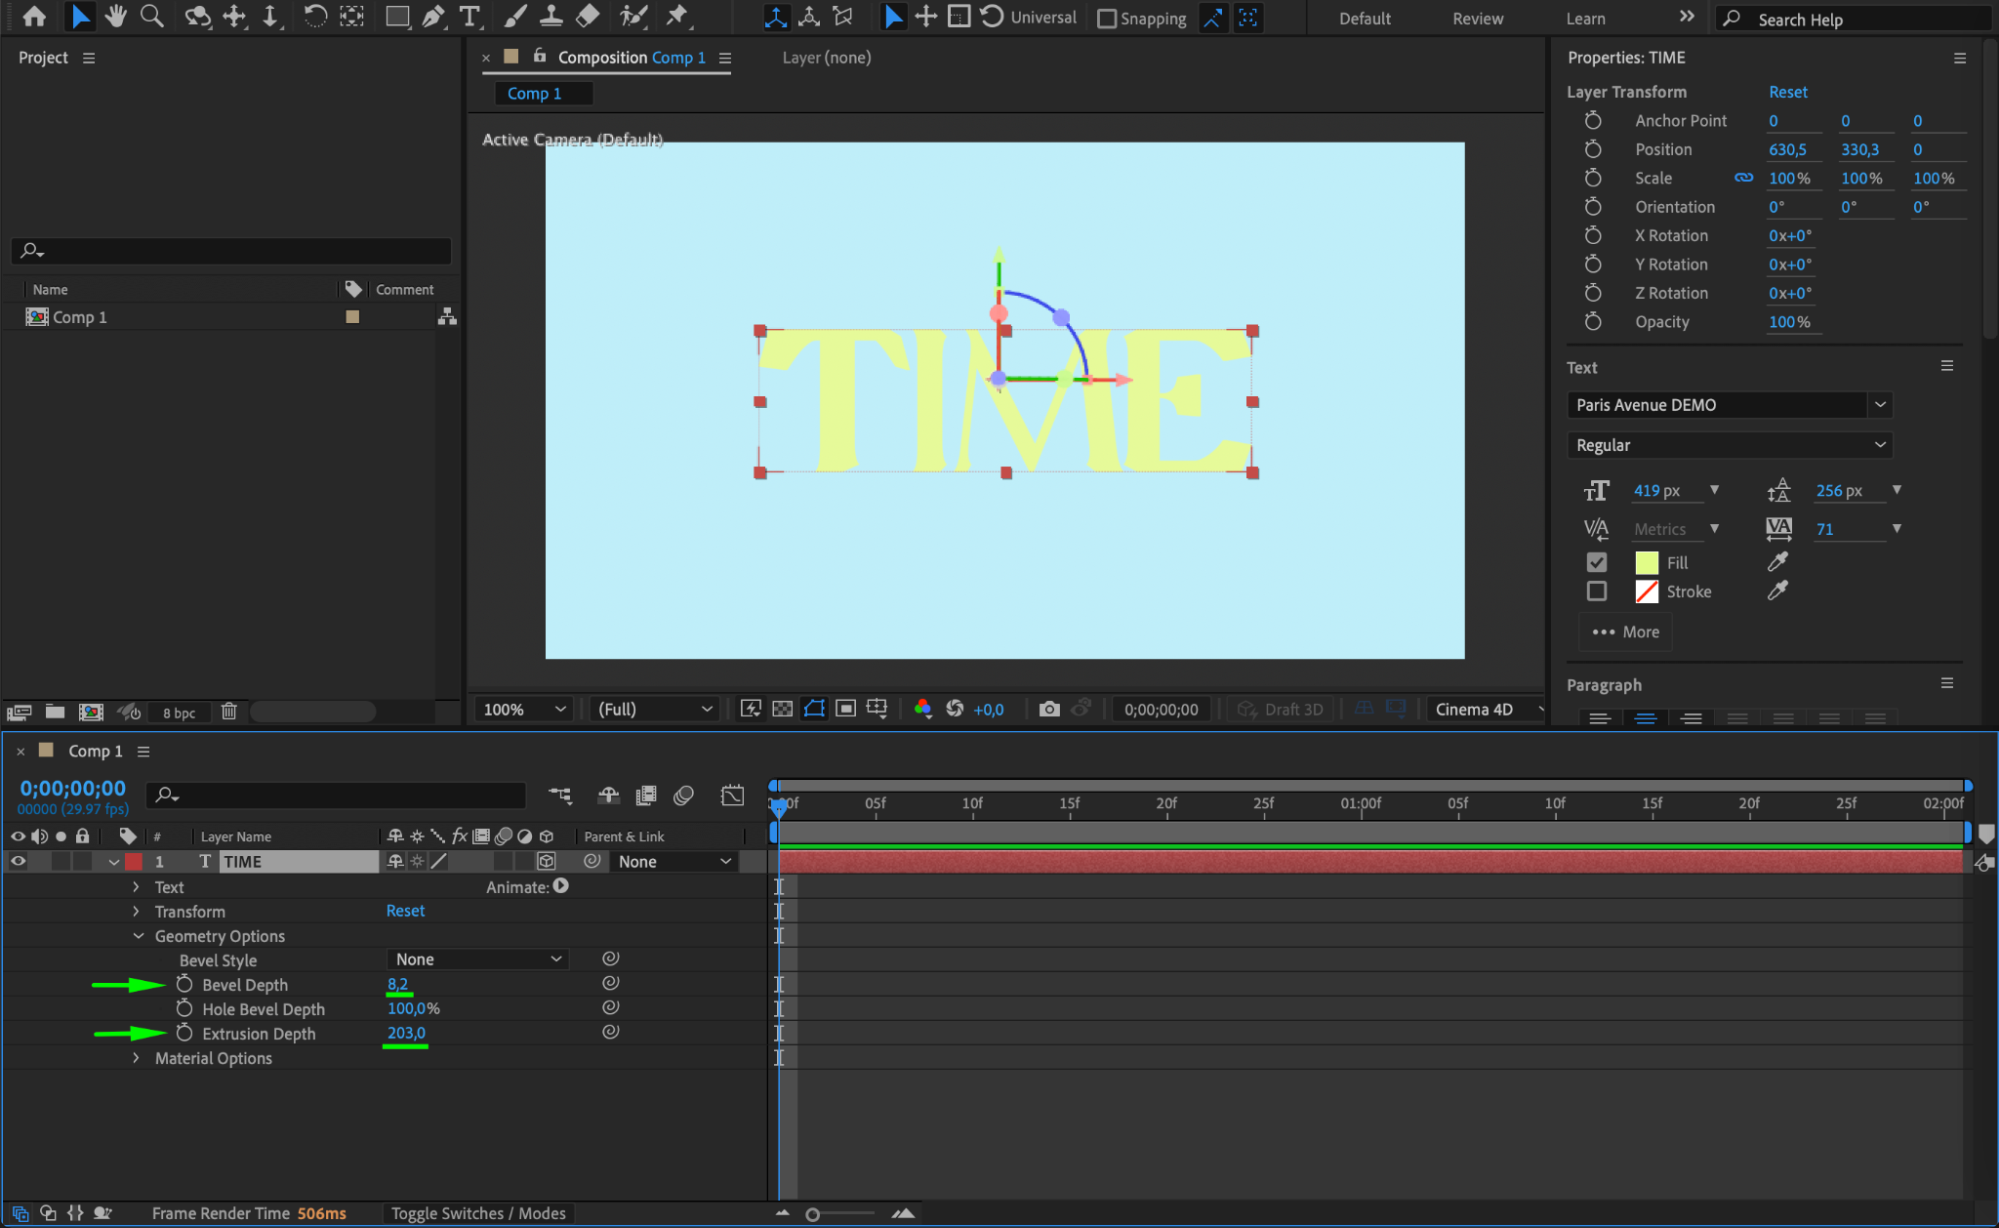 Step 6: Add a Camera and Null Object
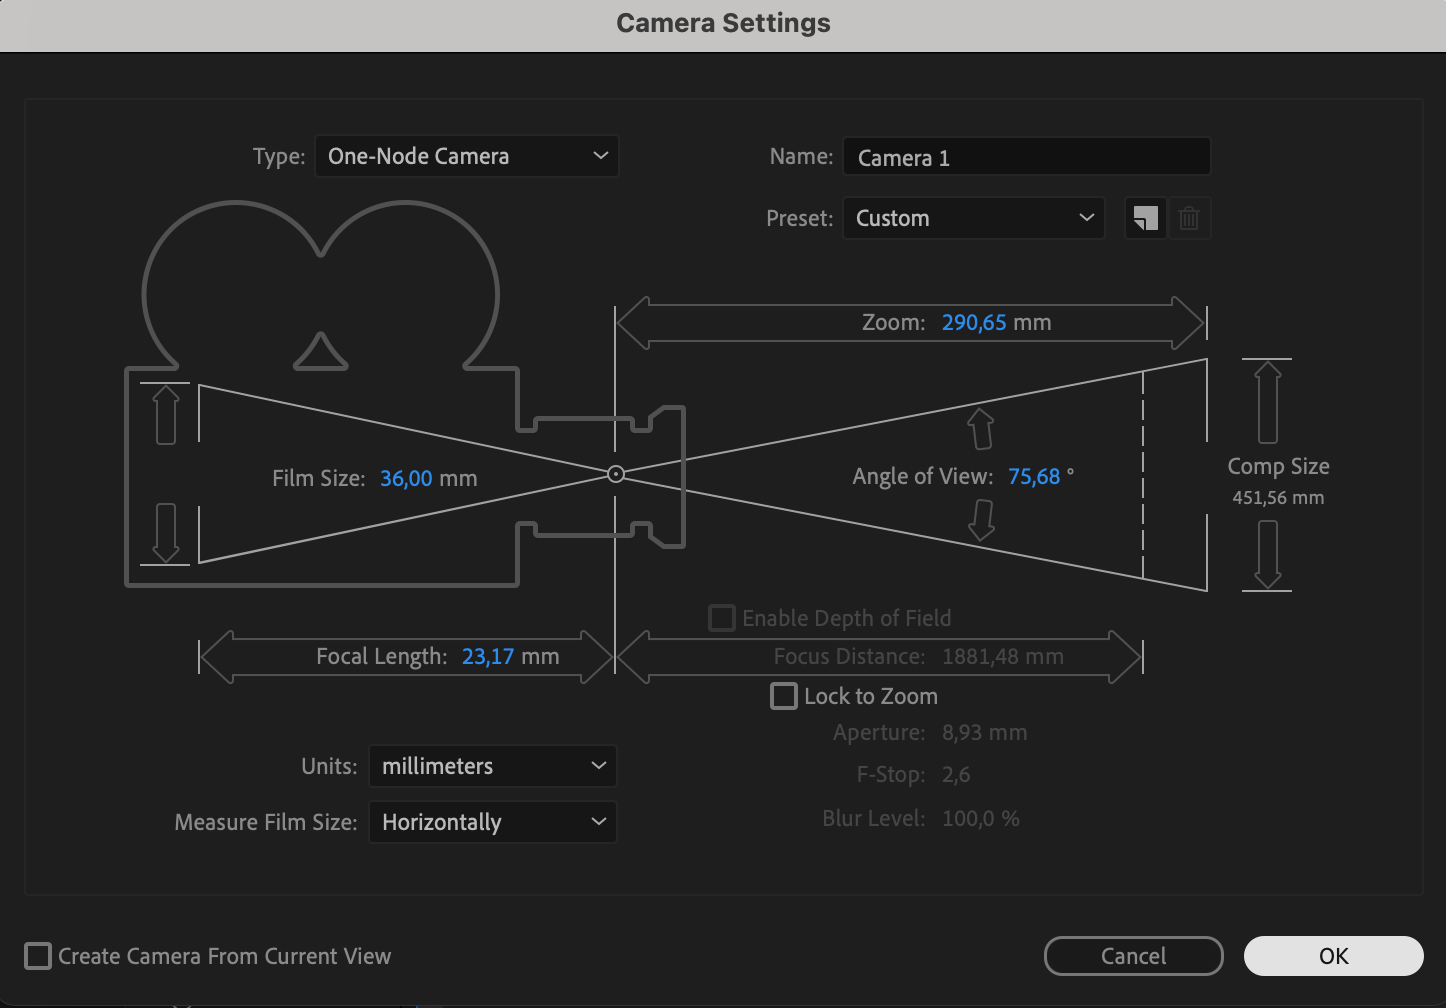
Go to Layer > New > Camera to create a camera for 3D navigation. Then, add a Null Object via Layer > New > Null Object. The camera provides depth-of-field control, while the null object allows smooth manipulation of the camera movement

 Step 7: Parent the Camera to the Null Object
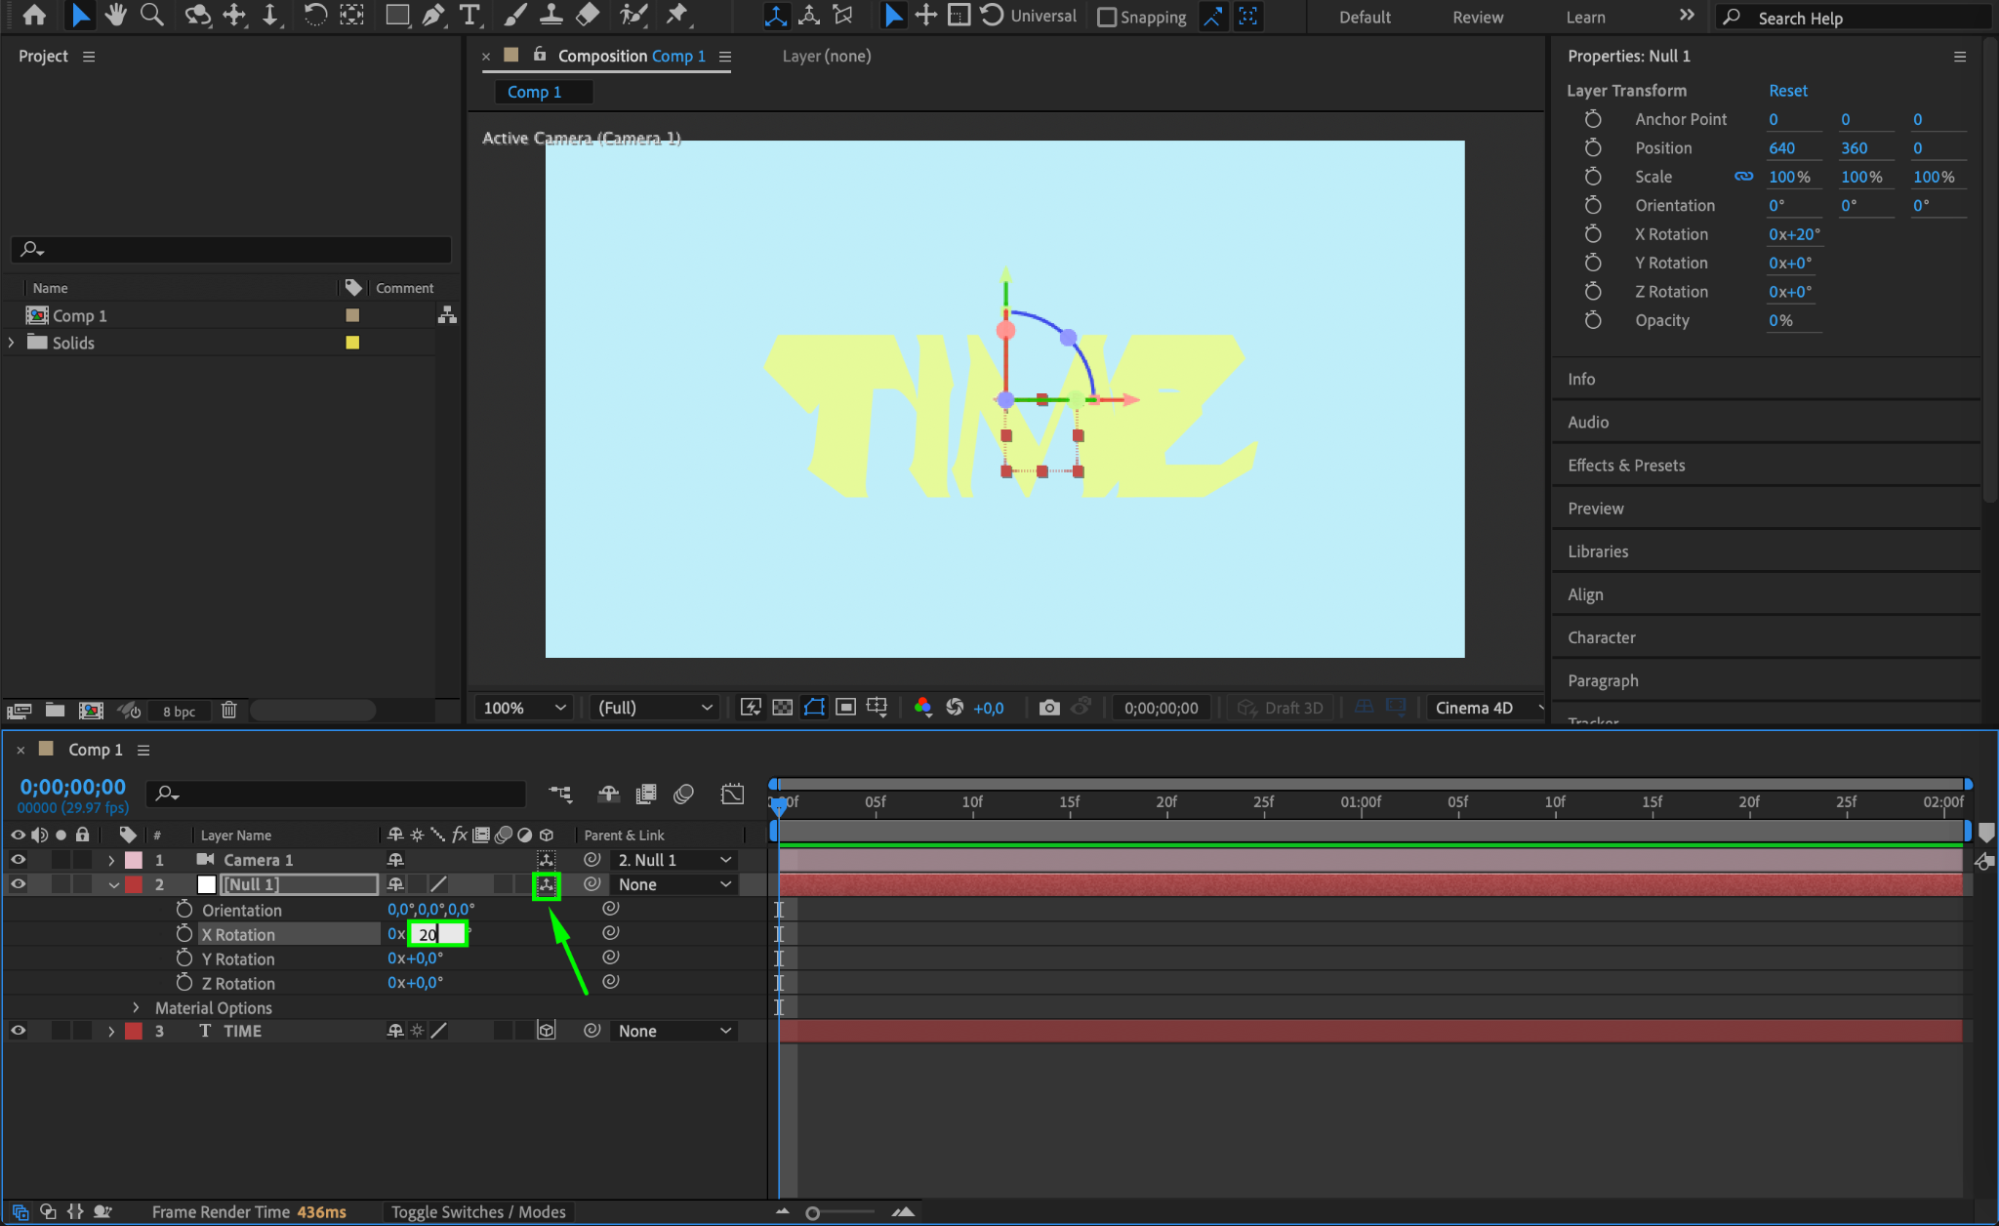
Parent the camera layer to the null object by dragging the Pick Whip (spiral icon) from the camera to the null object. Enable the 3D switch for the null object, then rotate it on the X, Y, or Z axes using the Rotation Properties. This creates dynamic camera angles for your 3D text.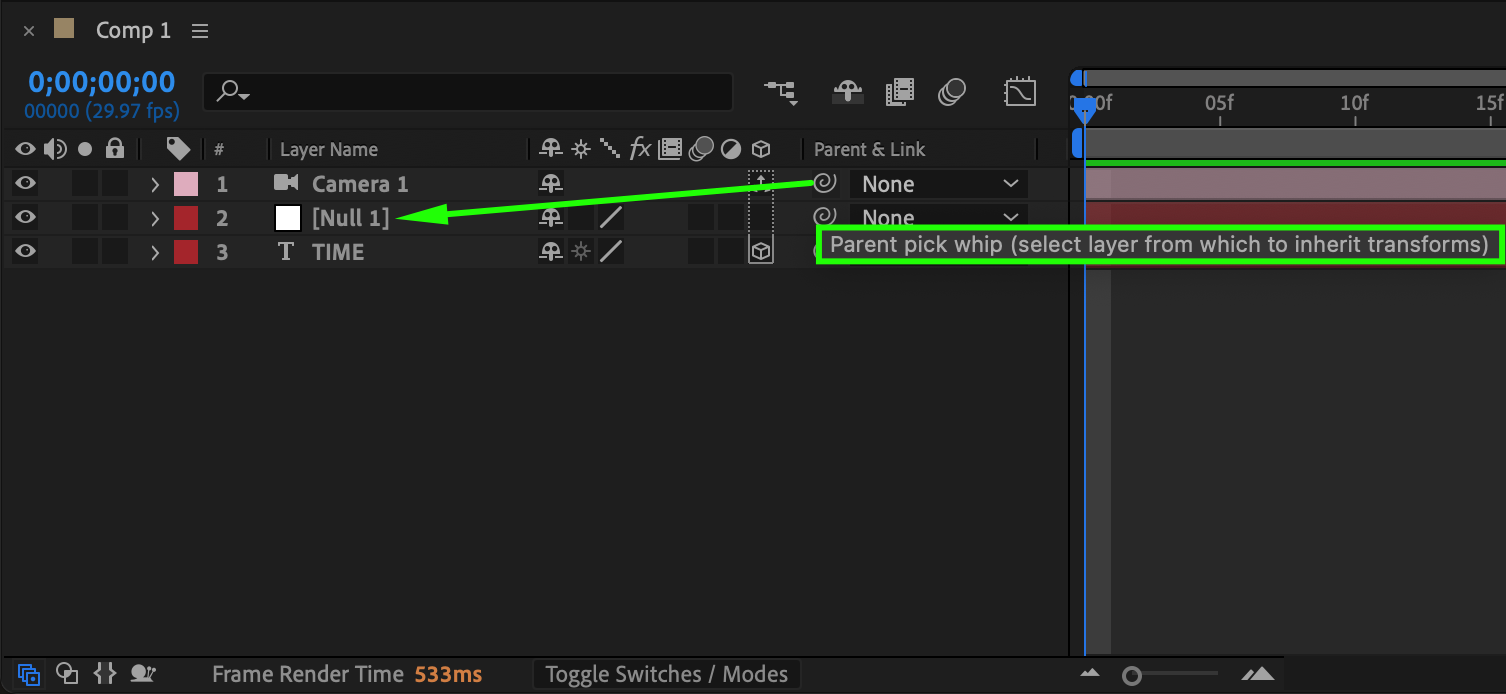
 Step 8: Add and Animate Text Color
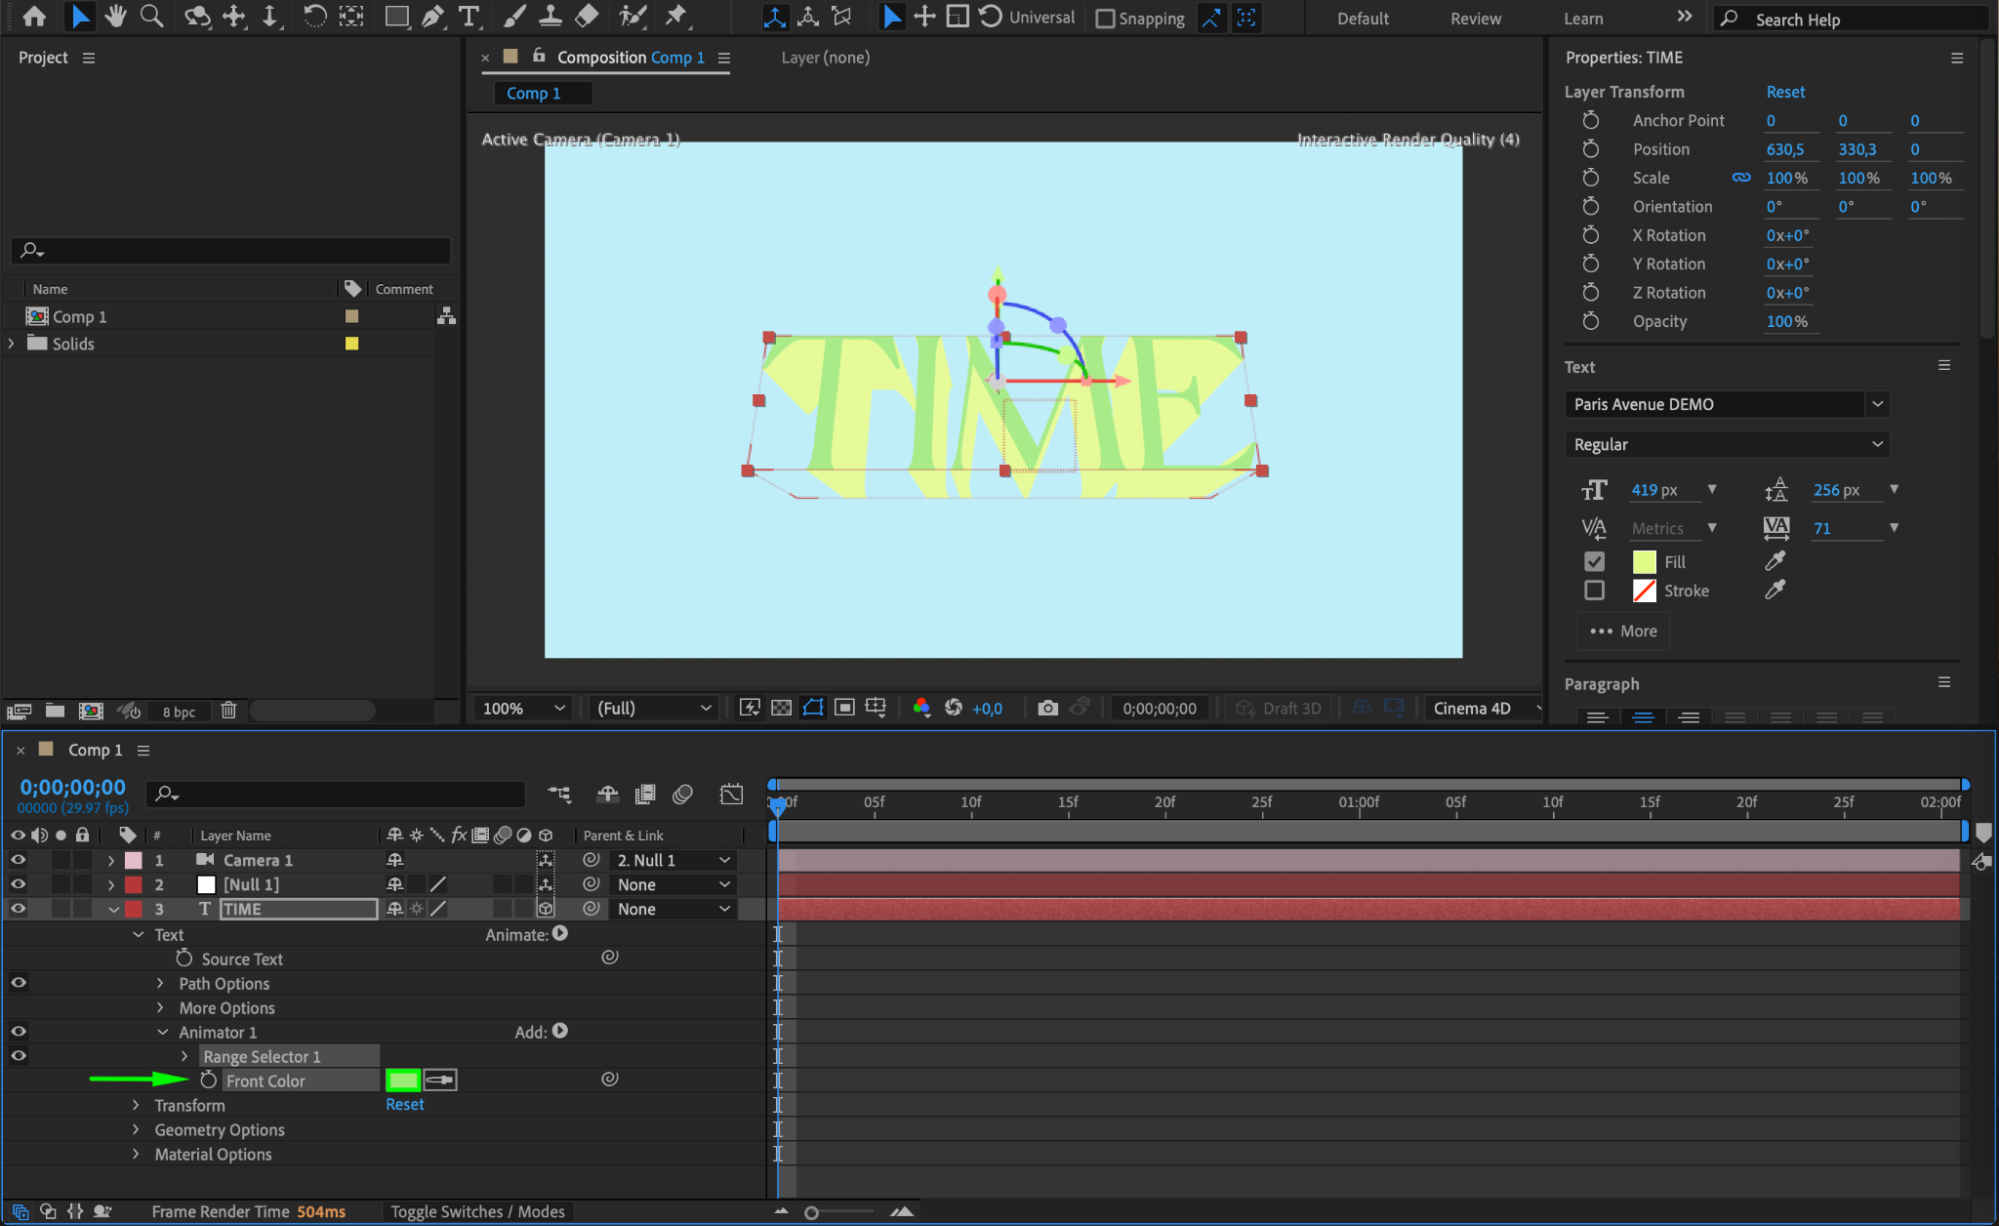
To animate the text color, expand the text layer’s properties and click Animate > Fill > RGB. A new Animator 1 will appear. Expand Animator 1 > Range Selector 1, and adjust the Front Color to define the color you want. 
 Step 9: Animate Camera and Null Object
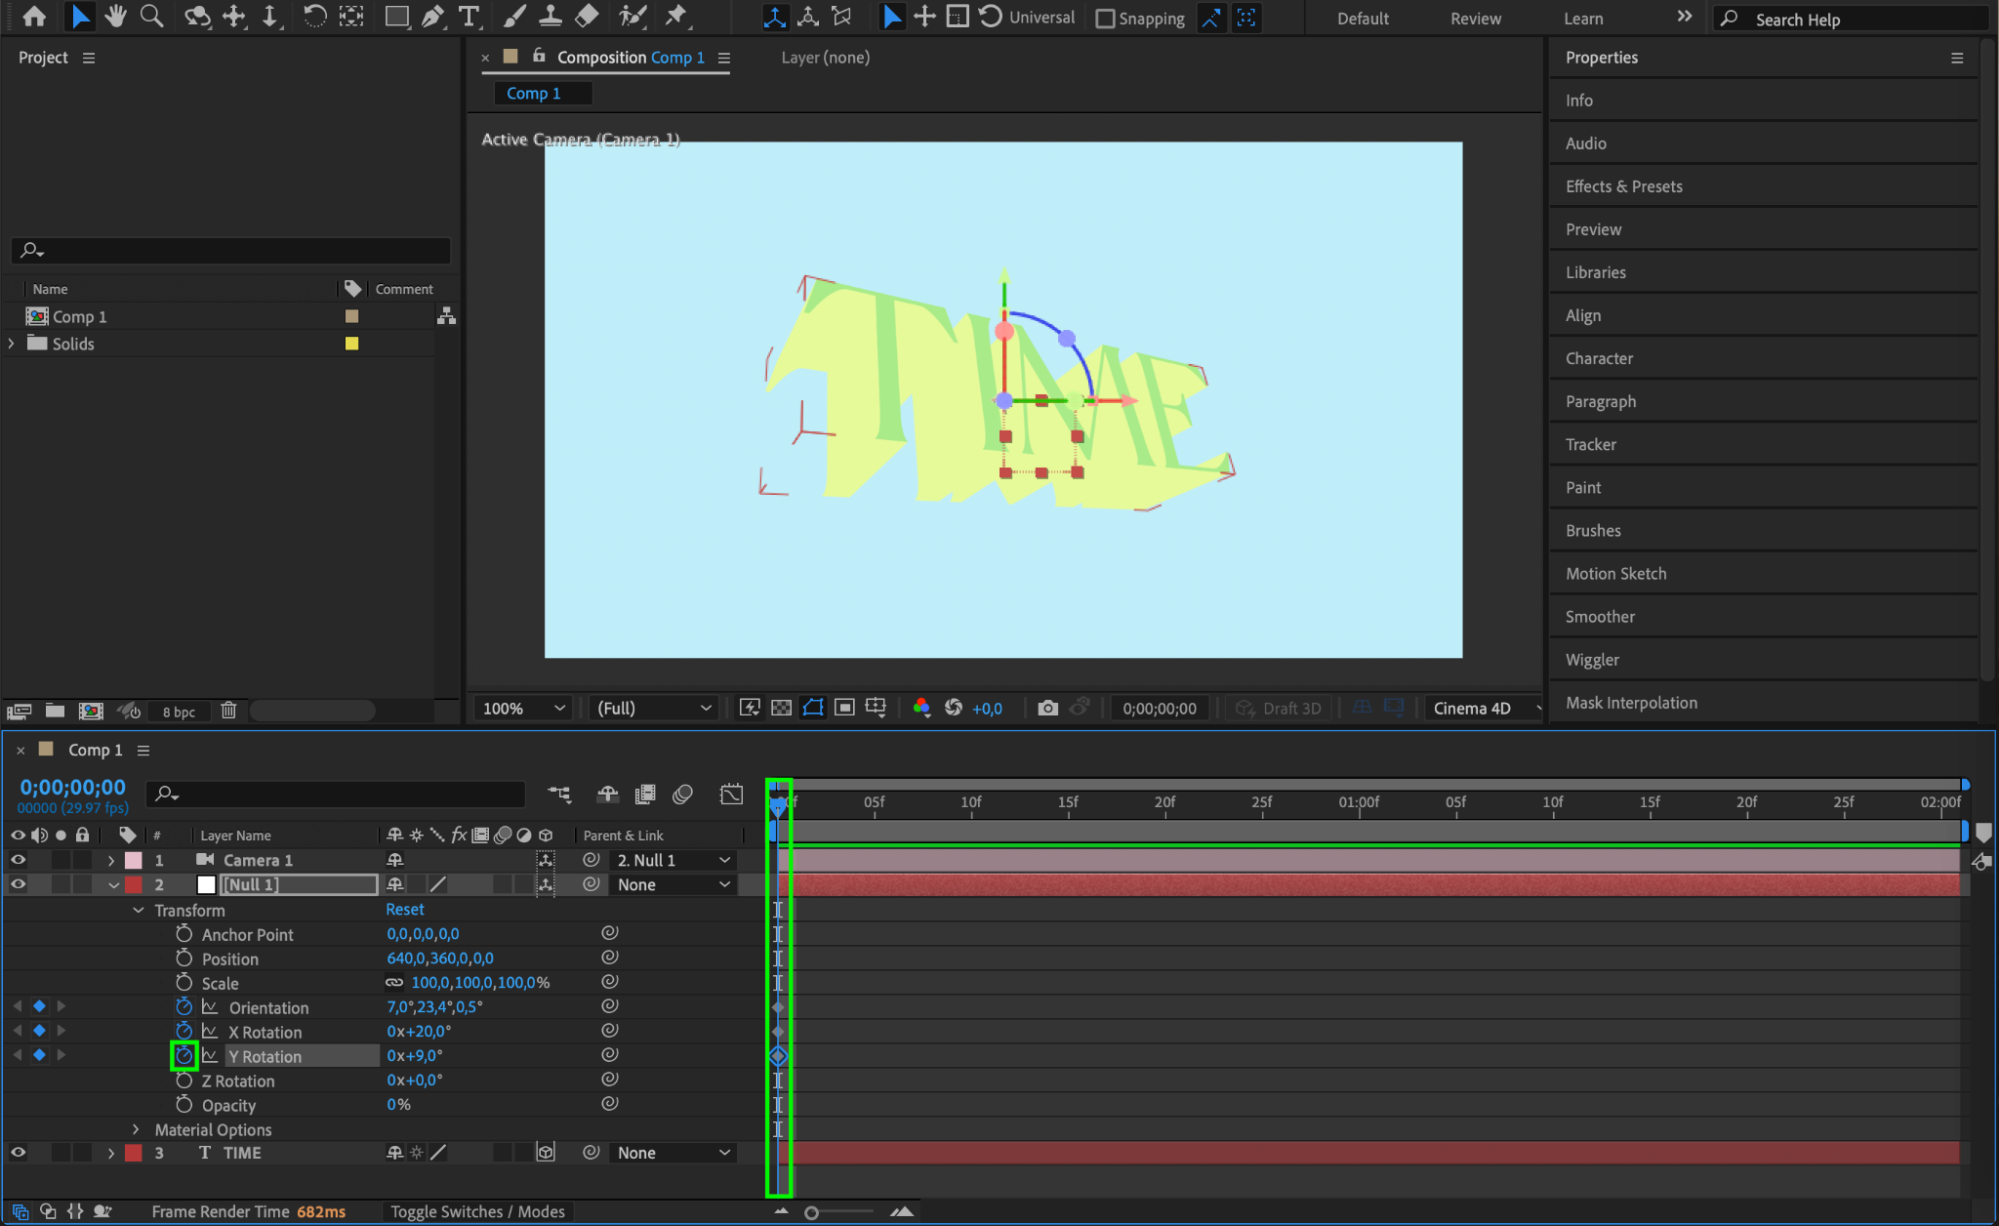
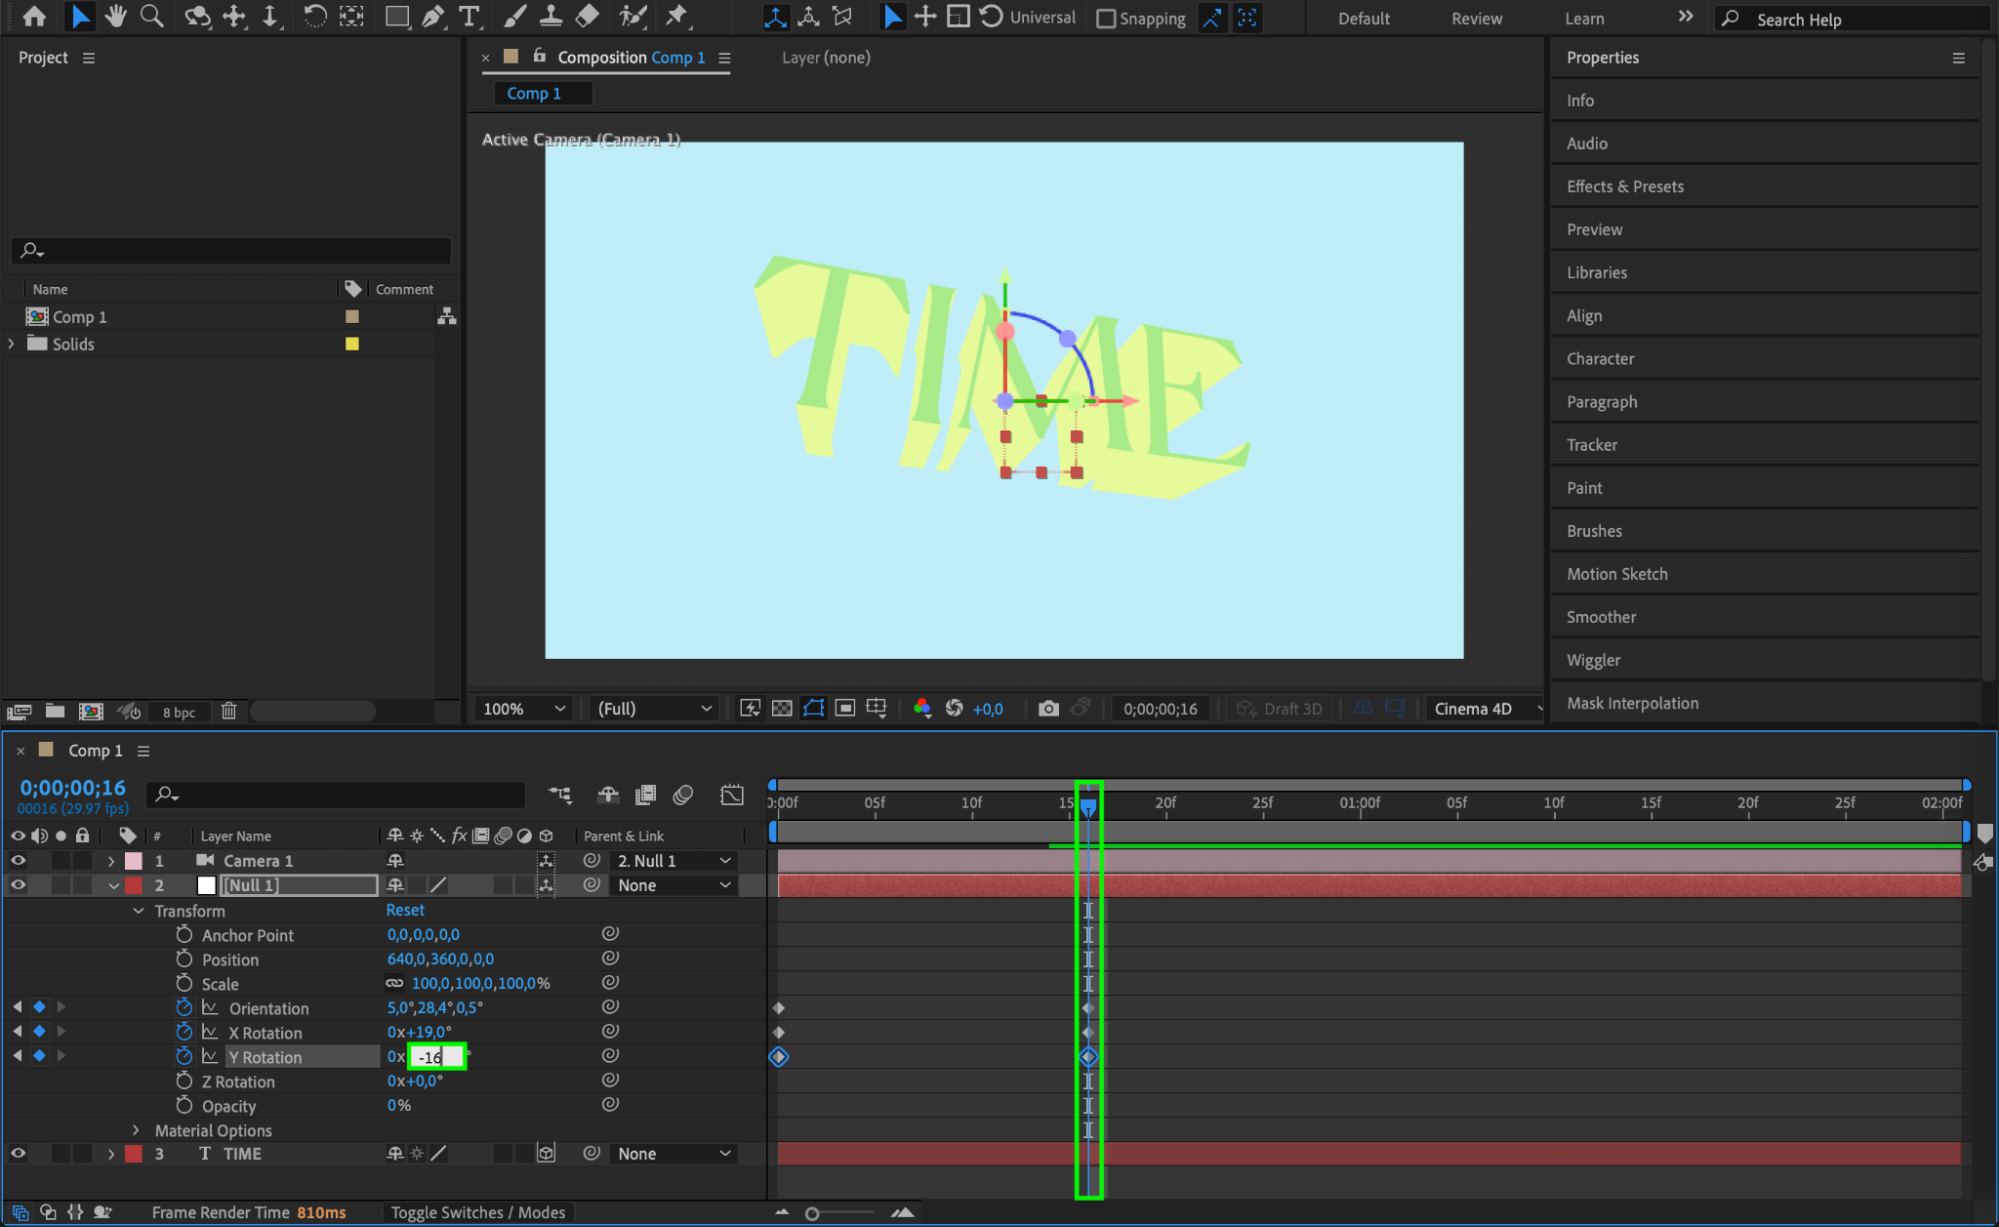
Select the null object and animate its properties, such as Orientation and Rotation, to create sweeping or rotating camera movements. These animations make the 3D text more dynamic and engaging.
 Step 10: Preview Your Animation
Press Spacebar to preview your composition. Check for smooth transitions, proper lighting, and the desired 3D depth. Adjust any parameters or keyframes as needed to refine your design.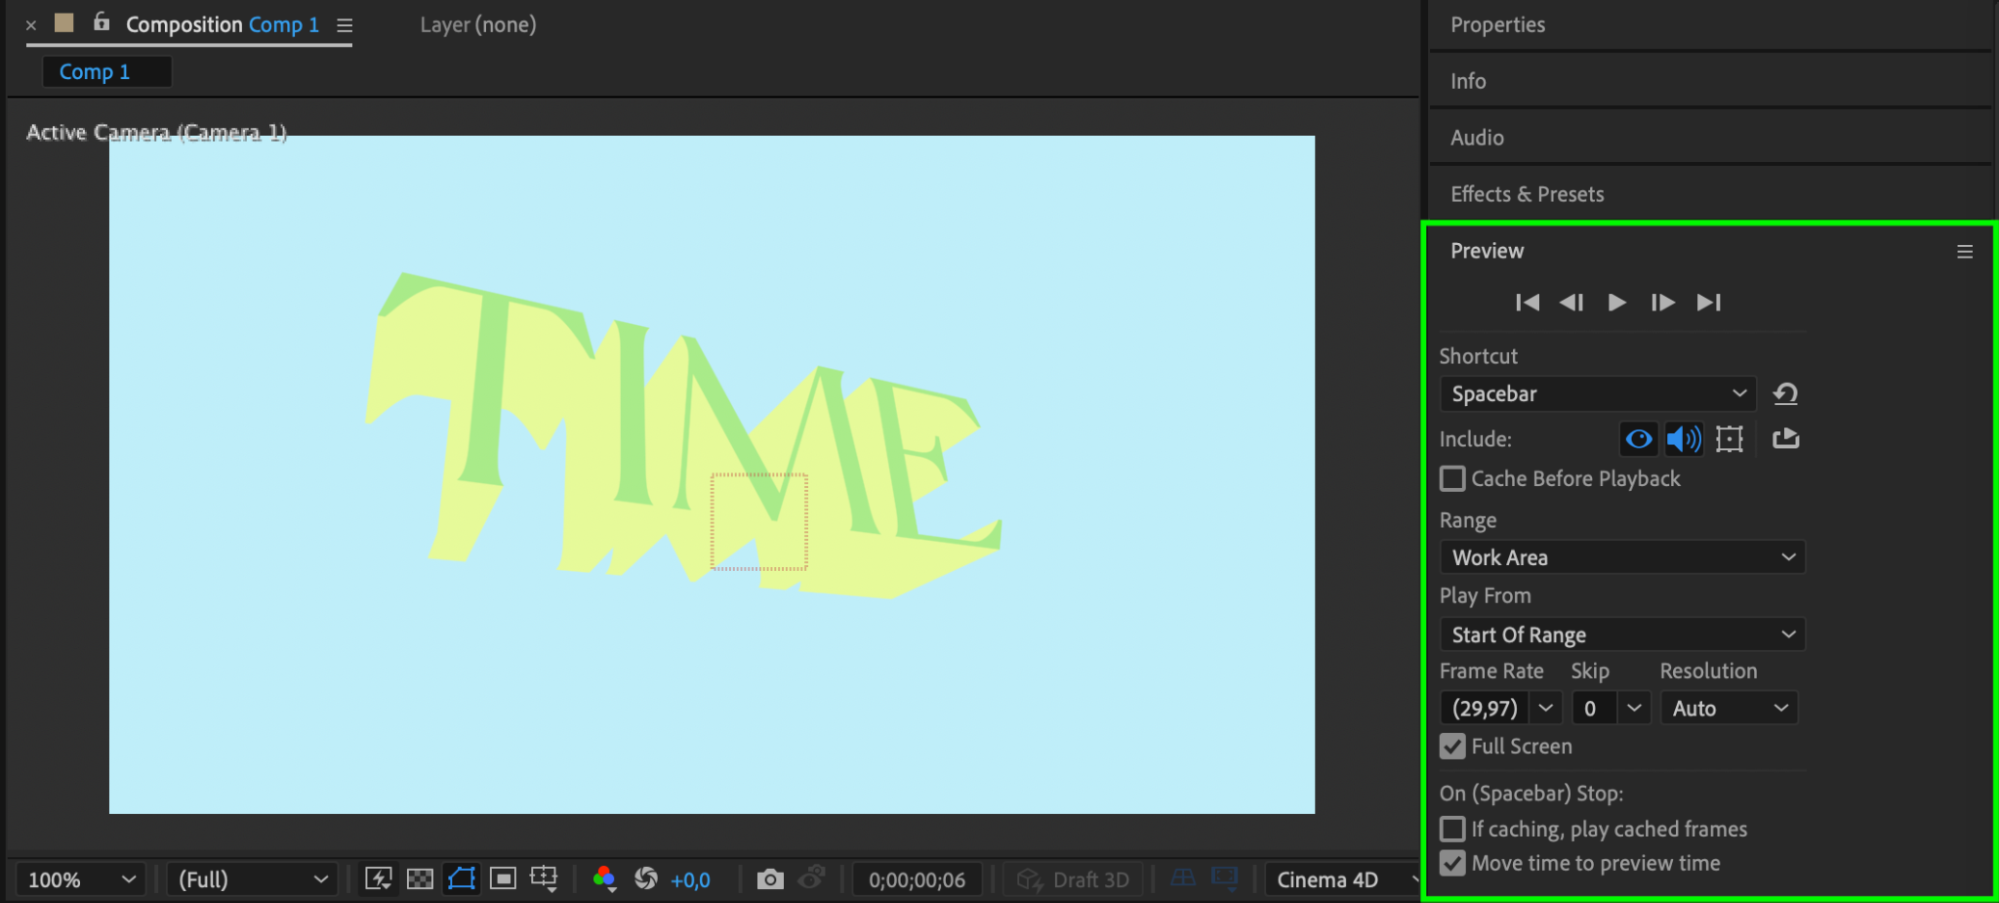 Step 11: Render the Final Composition
Go to Composition > Add to Render Queue. Select the output format and quality settings that suit your needs. Click Render to finalize your project.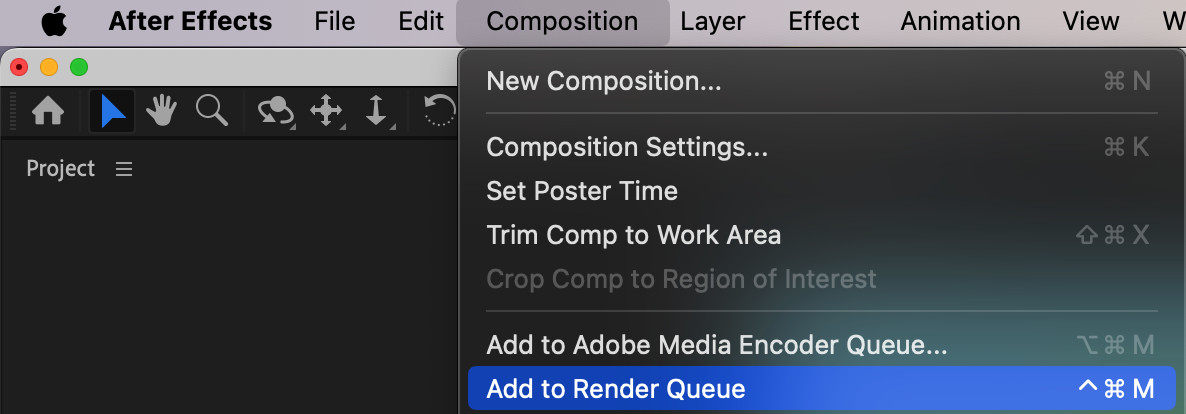
 Conclusion
Extruding and animating text in After Effects can significantly enhance your projects by adding depth and polish. With the Cinema 4D Renderer and tools like cameras and null objects, you can bring flat designs to life. Experiment with different settings, animations, and colors to create unique and professional 3D text effects.


