How to Import an Image Sequence in After Effects
Why Use an Image Sequence?
Image sequences are often used in motion graphics, 3D rendering, and time-lapse photography. Unlike video files, an image sequence maintains the highest quality without compression artifacts. In this guide, we’ll show you how to properly import an image sequence into After Effects and use it in your composition.
Get 10% off when you subscribe to our newsletter

Step 1: Open the Import Window
Go to File > Import > File or press “Ctrl/Cmd + I” to open the import window. This will allow you to locate your image sequence on your computer.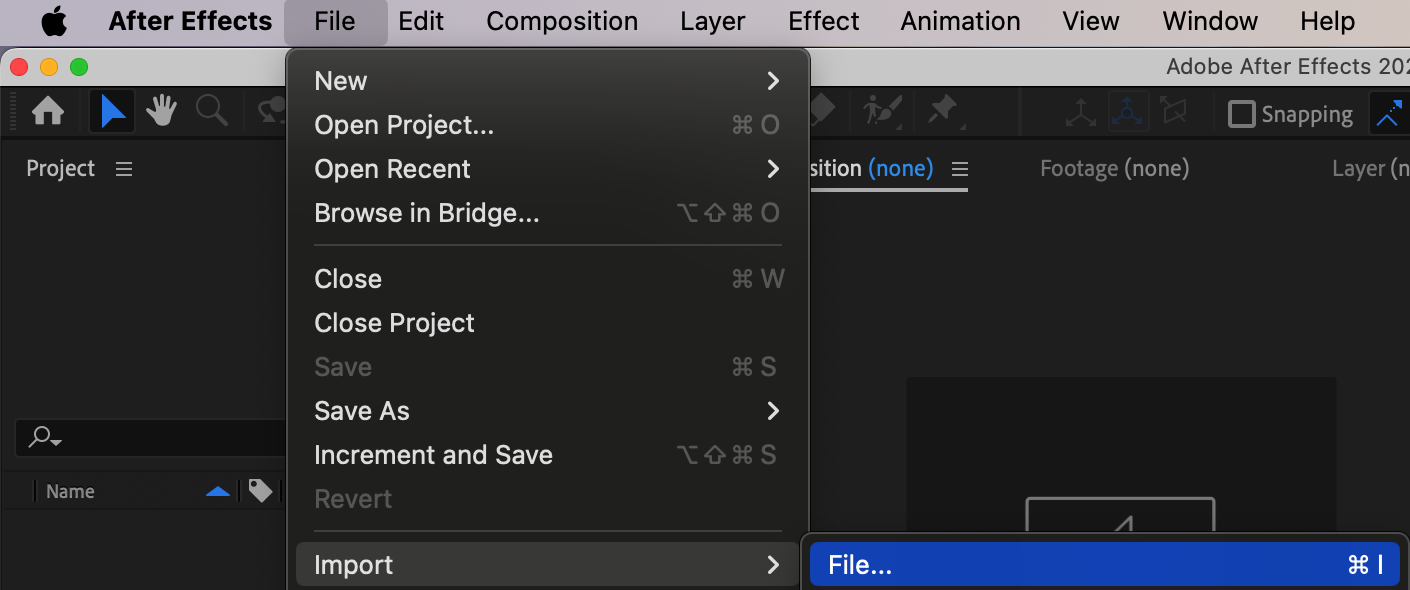 Step 2: Select the Image Sequence
In the import window, navigate to the folder containing your images. Select the sequence, then check the box labeled “Importer Sequence” (for formats like JPEG or PNG). Click Open to import the sequence.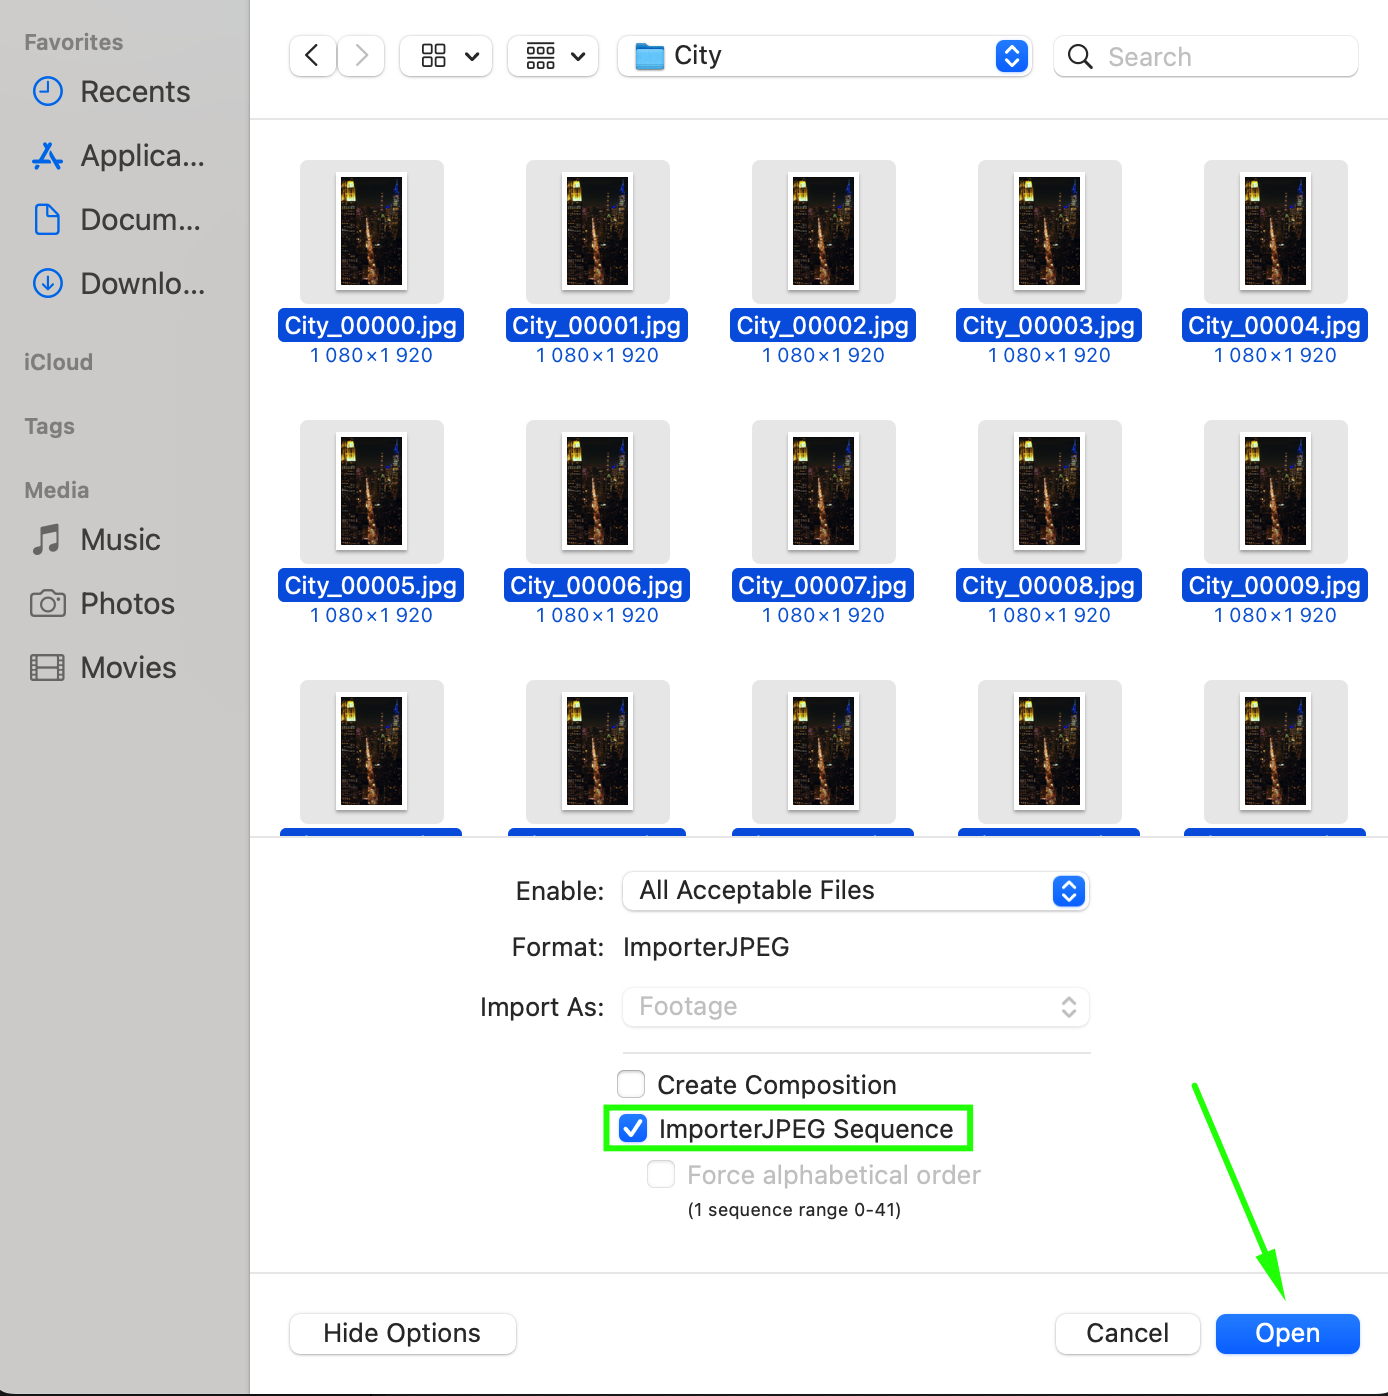 Step 3: Create a Composition from the Sequence
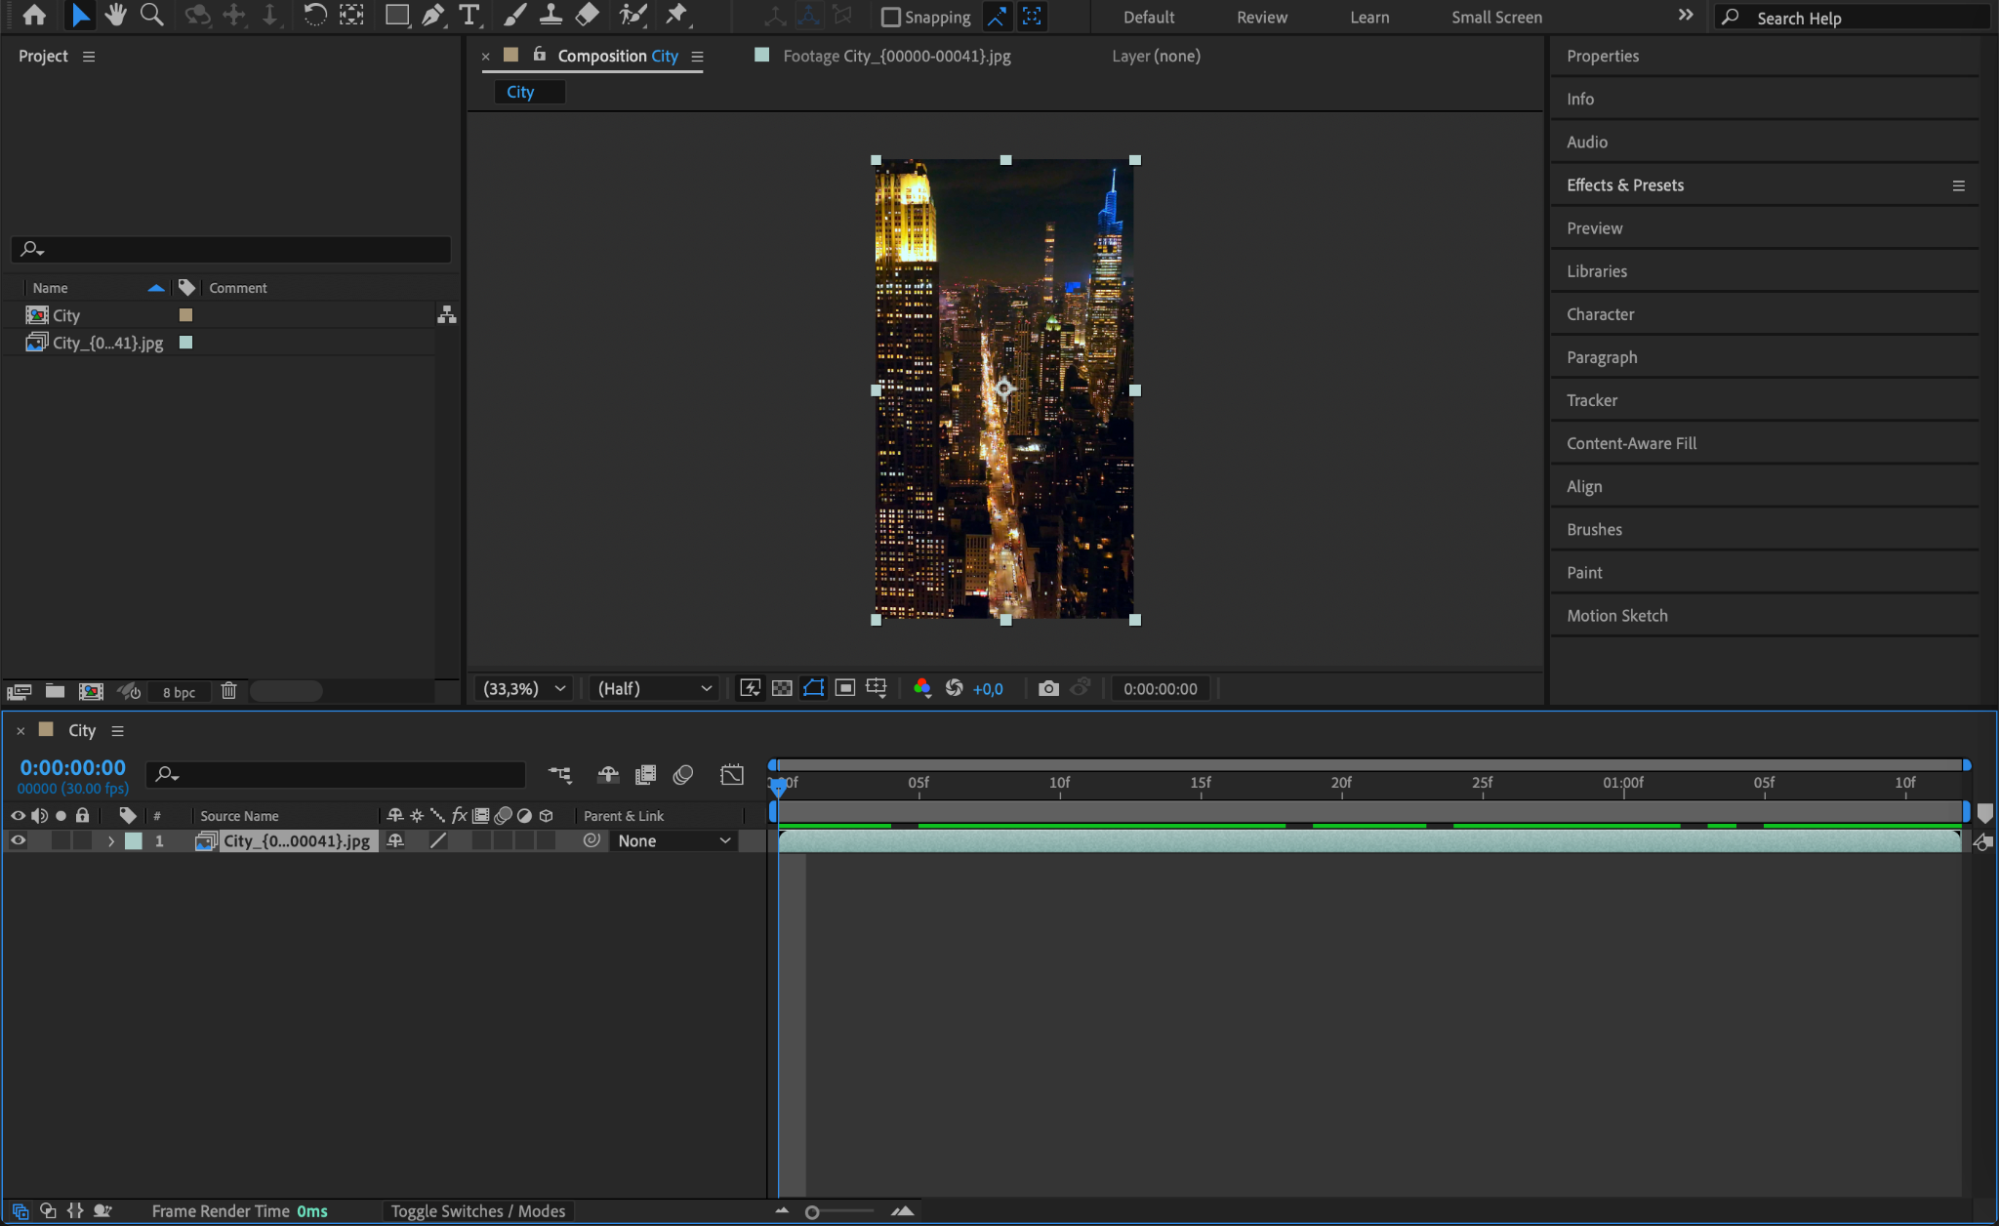
Once the image sequence appears in the Project Panel, right-click on it and choose New Composition from Selection. This will create a composition where the images are combined into a single animated layer.
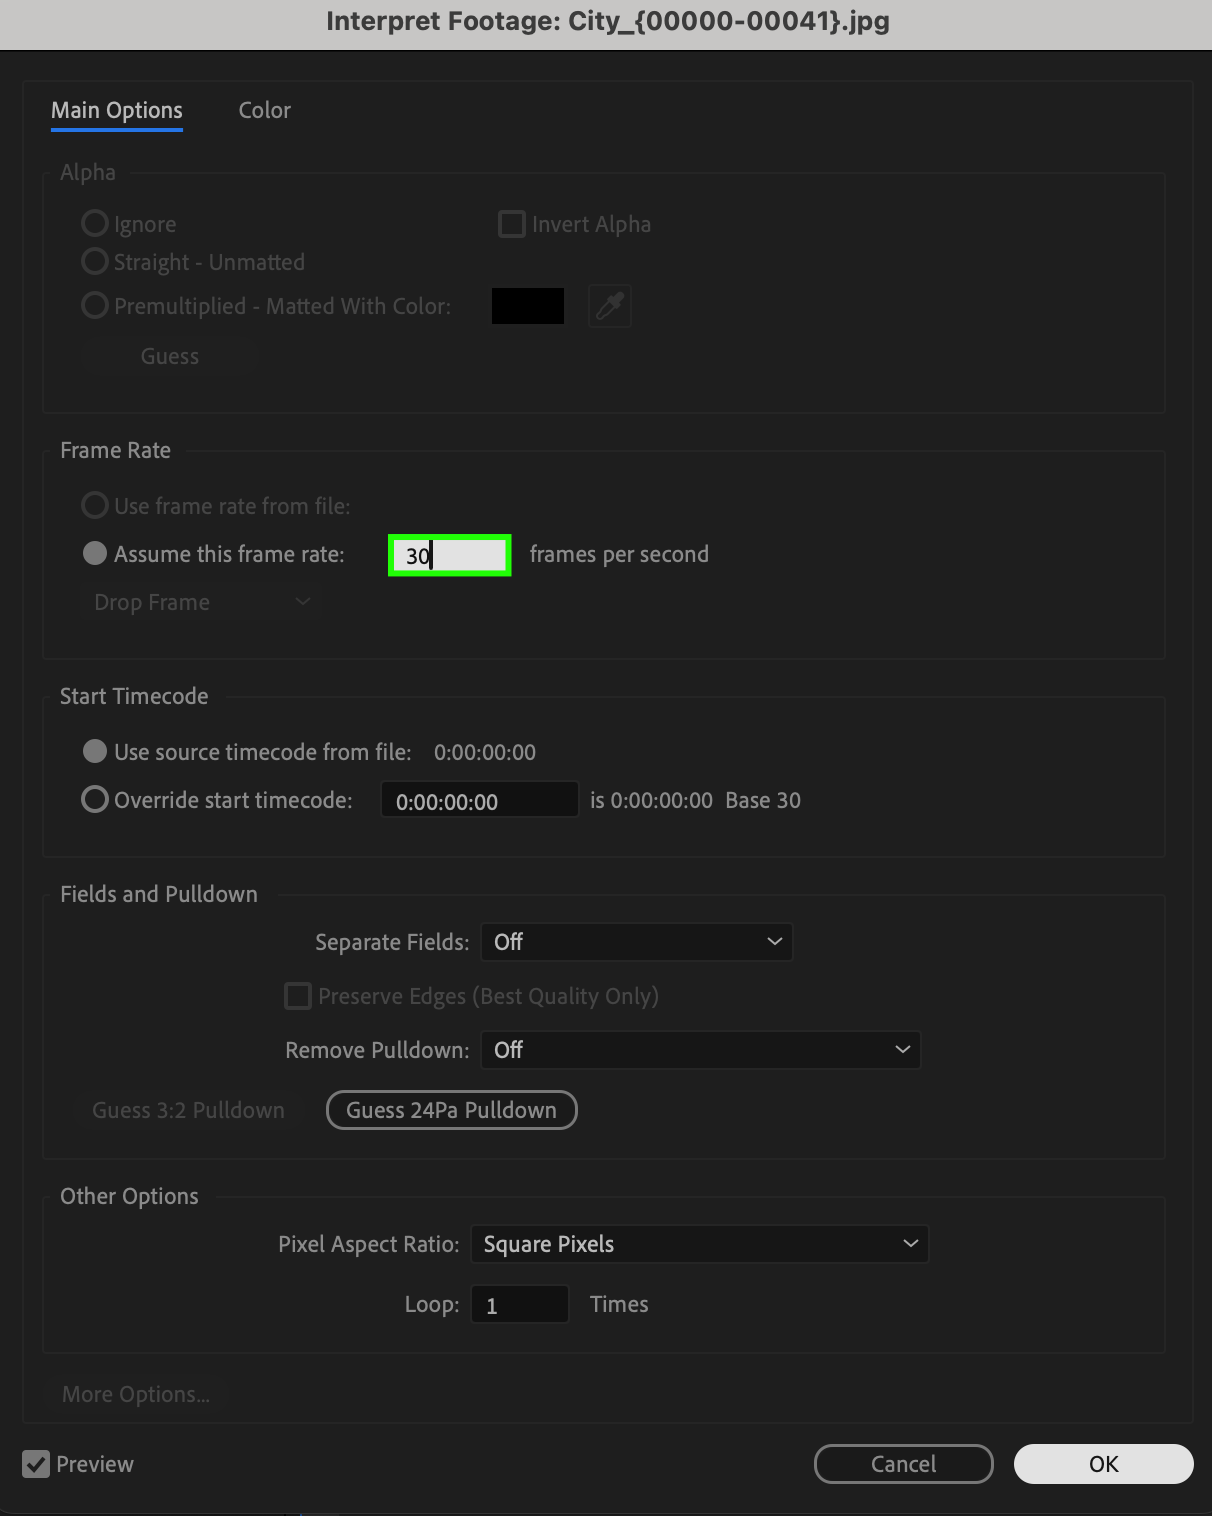
 Step 4: Adjust the Frame Rate (If Needed)
By default, After Effects may assume a different frame rate for the sequence. To adjust it, right-click the sequence in the Project Panel, select Interpret Footage > Main, and change the Assumed Frame Rate to match your project settings.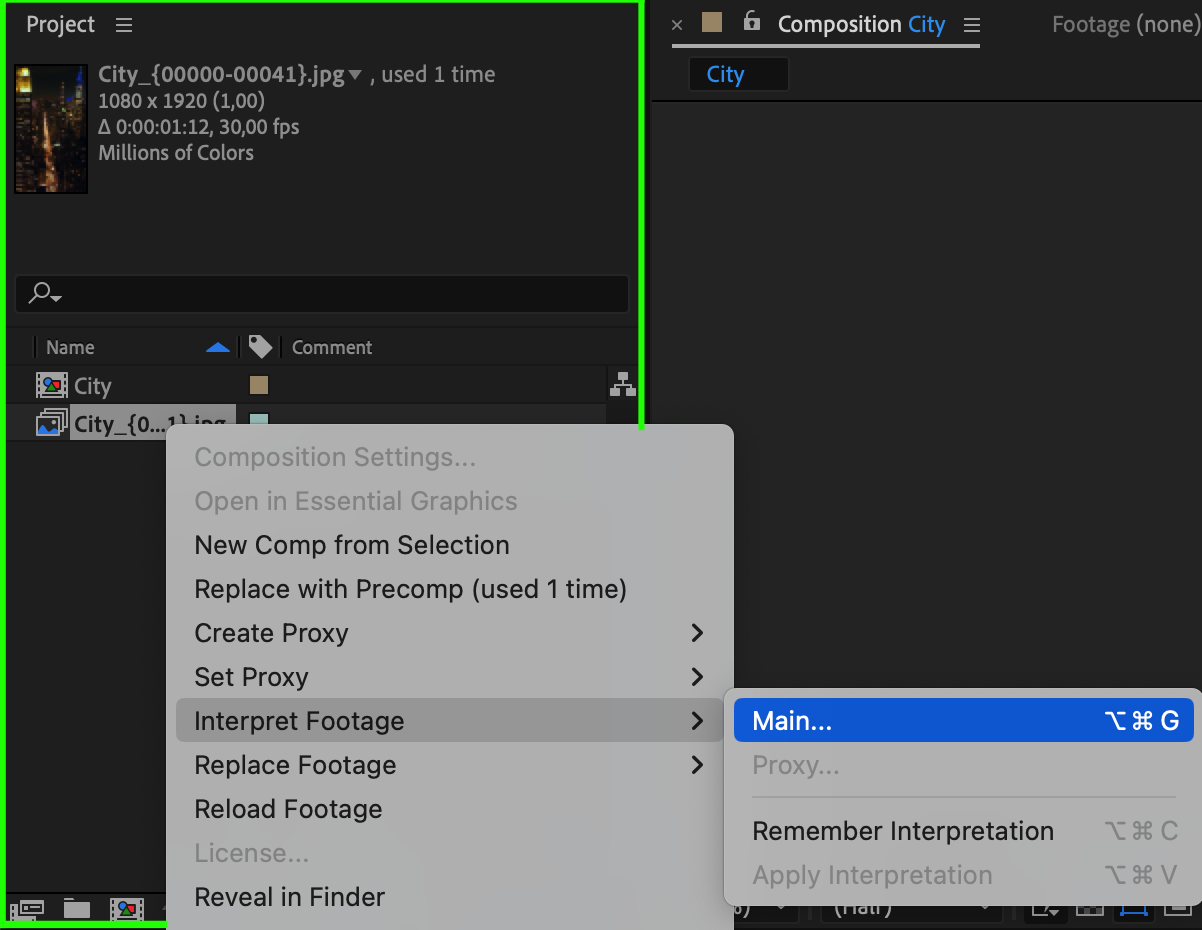
 Step 5: Preview Your Animation
After making adjustments, press the Spacebar to preview your image sequence. If necessary, tweak the speed or add effects to enhance the animation.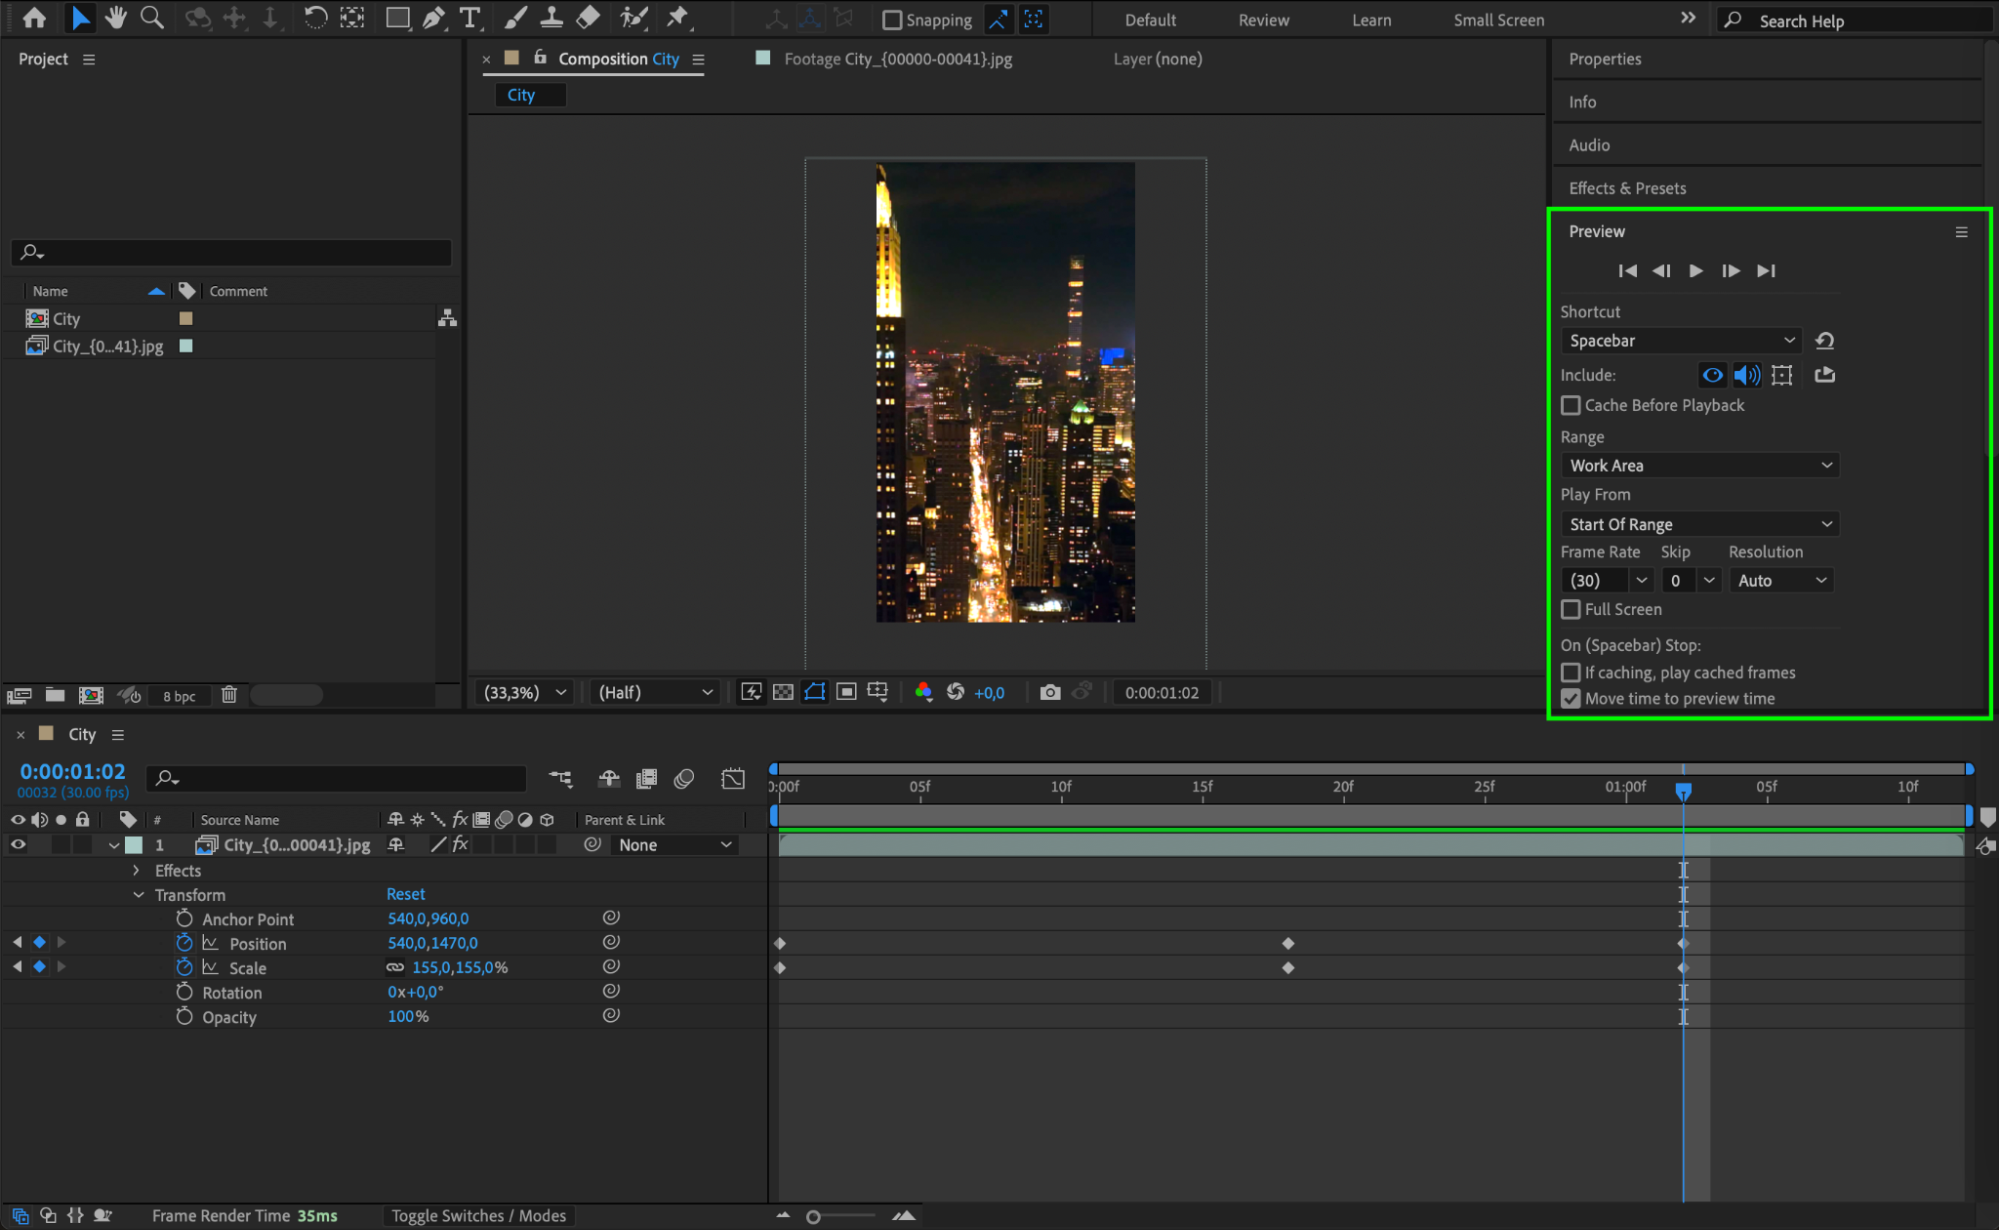 Conclusion
Importing an image sequence in After Effects is a simple process that allows for high-quality animations and seamless video integration. With the right settings, you can achieve smooth motion and professional results in your projects.
Our Bestsellers


