Seamlessly Importing Illustrator Vectors into After Effects
Introduction to Importing Illustrator Vectors into After Effects
For motion graphics artists and video designers, integrating Illustrator vectors into After Effects is crucial for creating high-quality animations. This process allows you to maintain the scalability of vector graphics while leveraging After Effects’ powerful animation and effects tools. In this guide, we’ll walk you through the steps to import Illustrator files into After Effects, as well as provide tips to help you optimize your workflow and achieve stunning results.
Step 1: Import Your Illustrator File
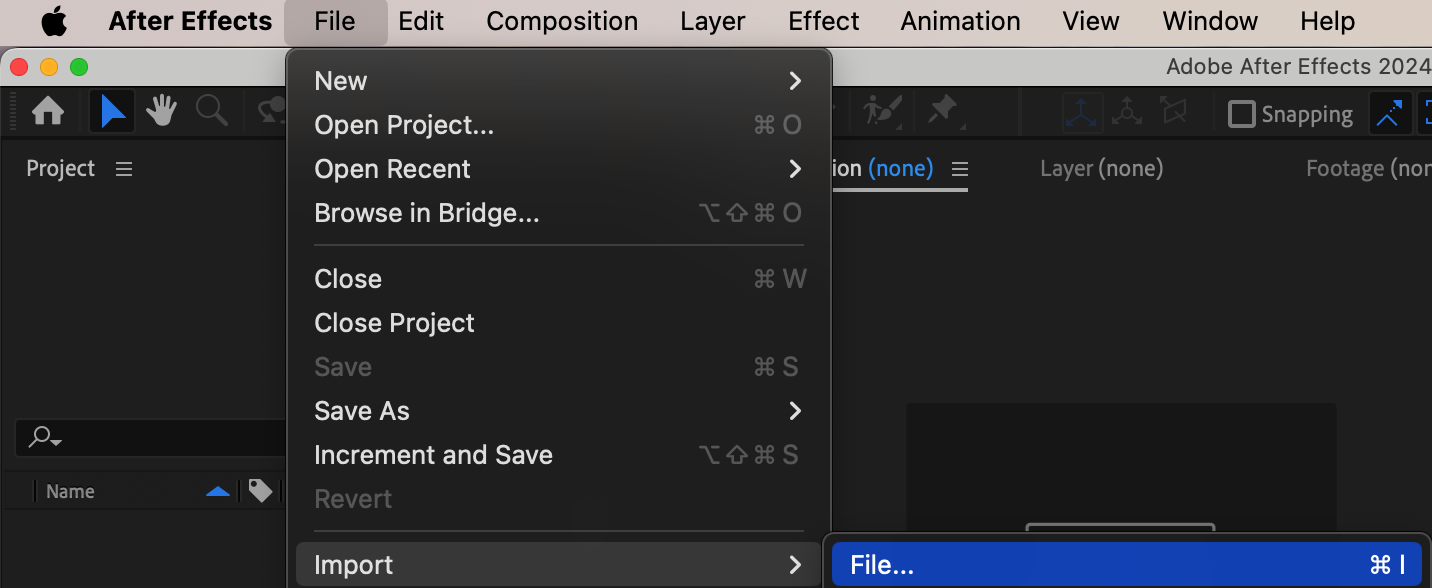
Open After Effects and navigate to File > Import > File to import your Illustrator vector file, typically saved in EPS format. Once the file is imported, it will appear in the Project Panel. By importing the file, you preserve the vector quality, which is essential for maintaining sharpness and scalability in your animations.
 Step 2: Create a New Composition
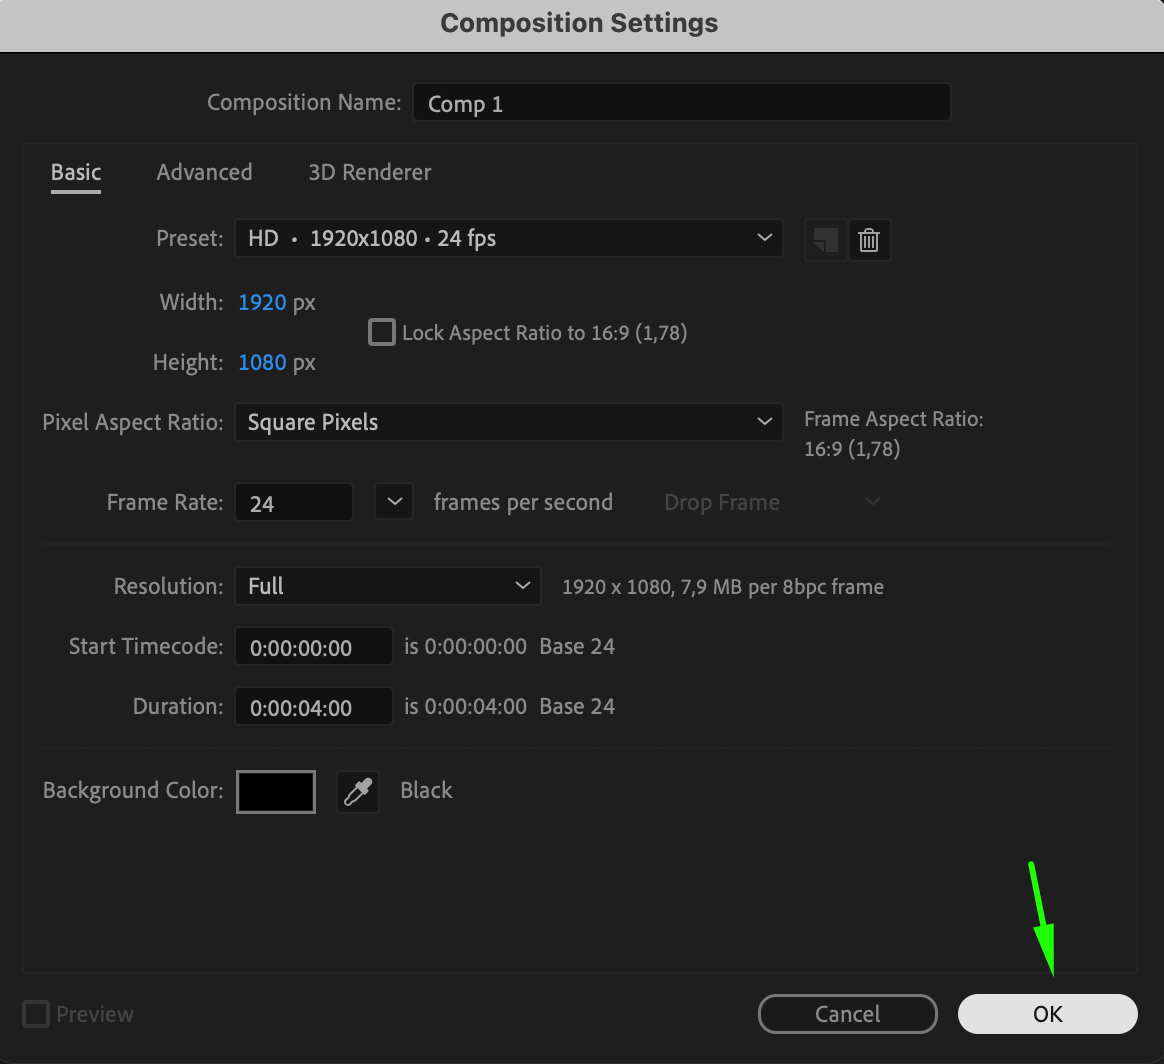
Next, you need to create a new composition to work with your imported vector. Go to Composition > New Composition and set the composition parameters according to your project’s needs, such as resolution, frame rate, and duration. This step establishes the workspace where you’ll animate your vectors, ensuring it matches your project specifications.
 Step 3: Add the Vector File to the Timeline
Drag the imported vector file from the Project Panel onto the Timeline Panel to start working with it. This action places your vector graphic into the composition, allowing you to begin animating and transforming it within the After Effects environment.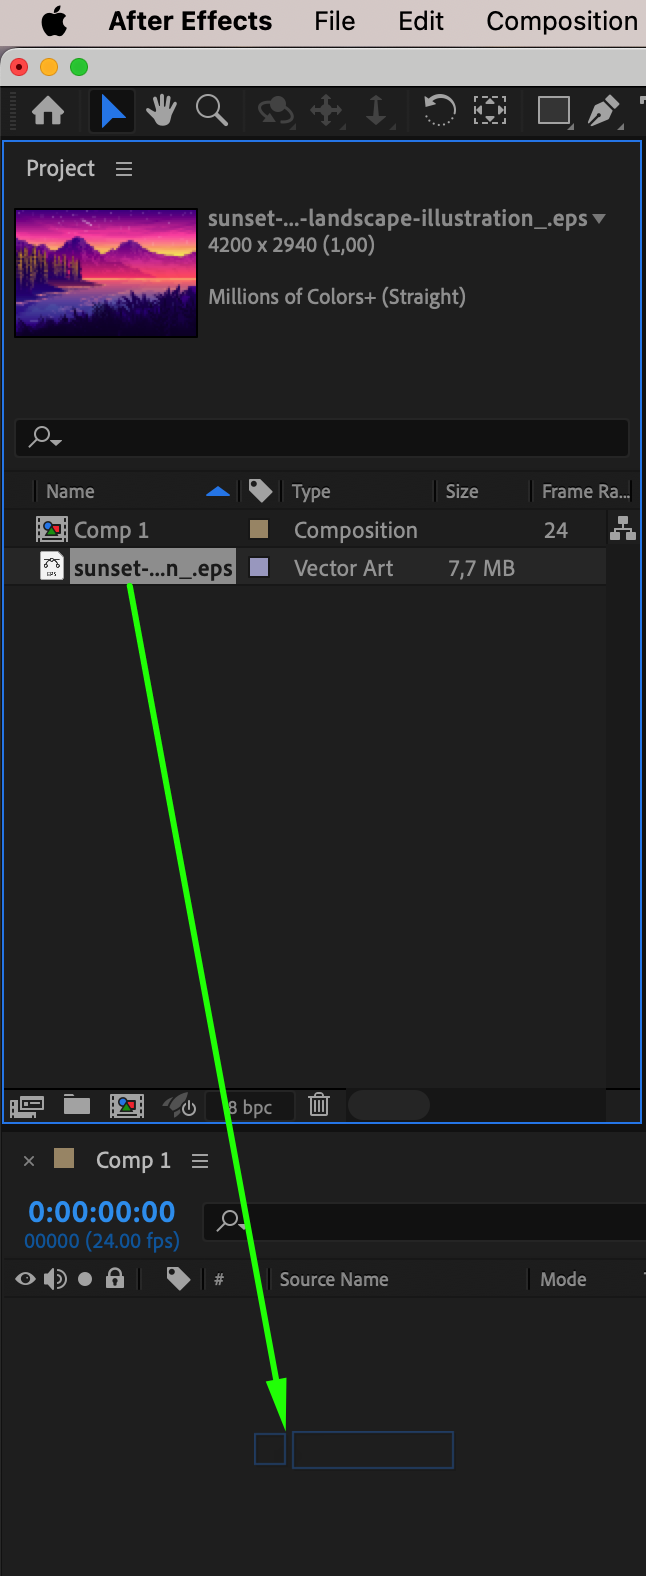 Step 4: Adjust Layer Properties
Expand the properties of your vector layer by clicking the arrow next to the layer name in the timeline. Use the Transform parameters, such as Scale and Position, to adjust the vector graphic within the composition. This ensures that the vector is positioned and sized correctly according to your design requirements.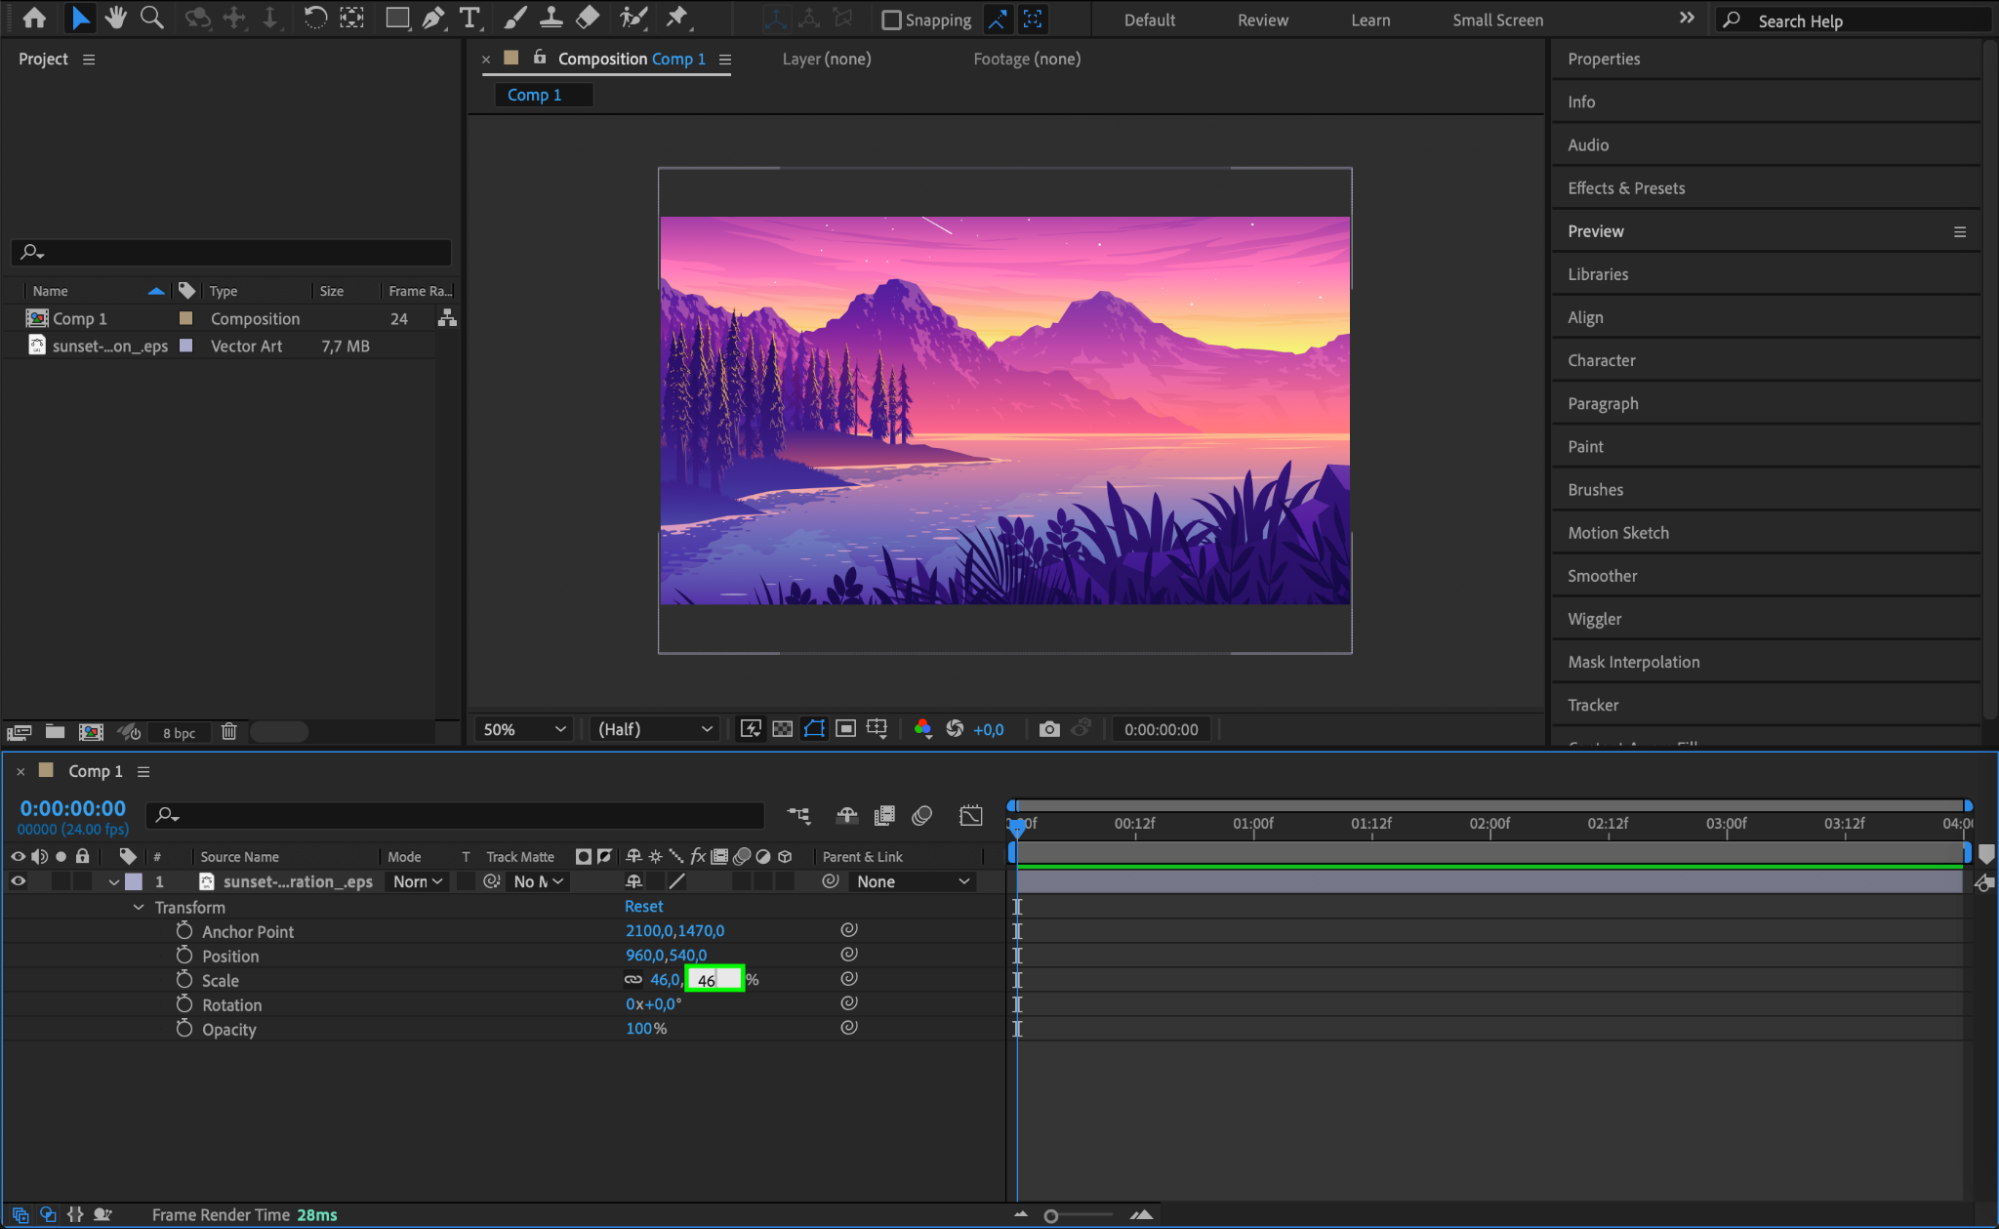 Step 5: Animate Your Vector Layer
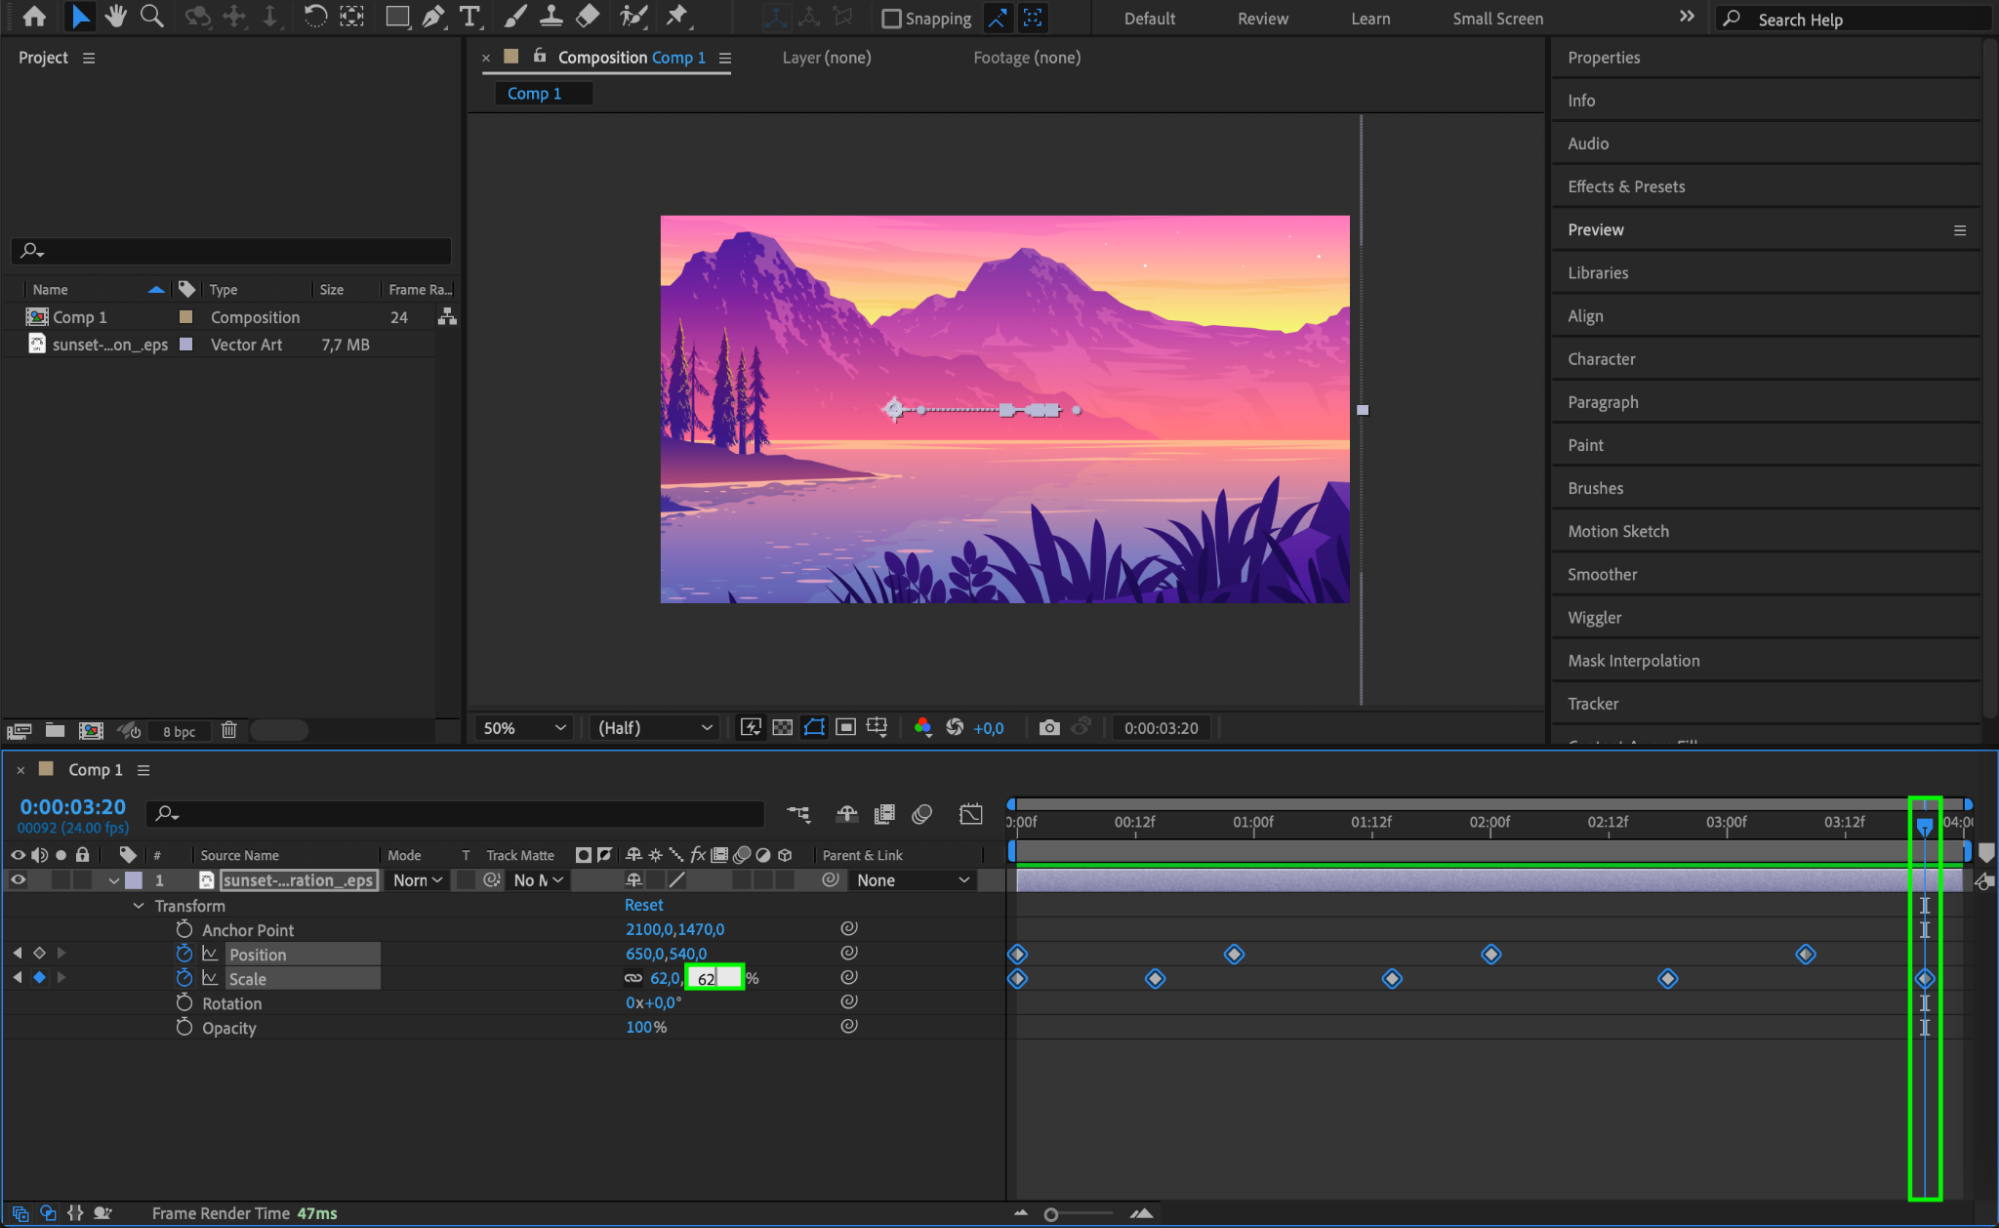
To add animation to your vector layer, use keyframes. Click the stopwatch icon next to the parameter you want to animate (e.g., Position or Scale) to create the first keyframe. Move the timeline indicator forward to a new point in time and change the parameter value to create additional keyframes. After Effects will interpolate the changes between keyframes, resulting in smooth animation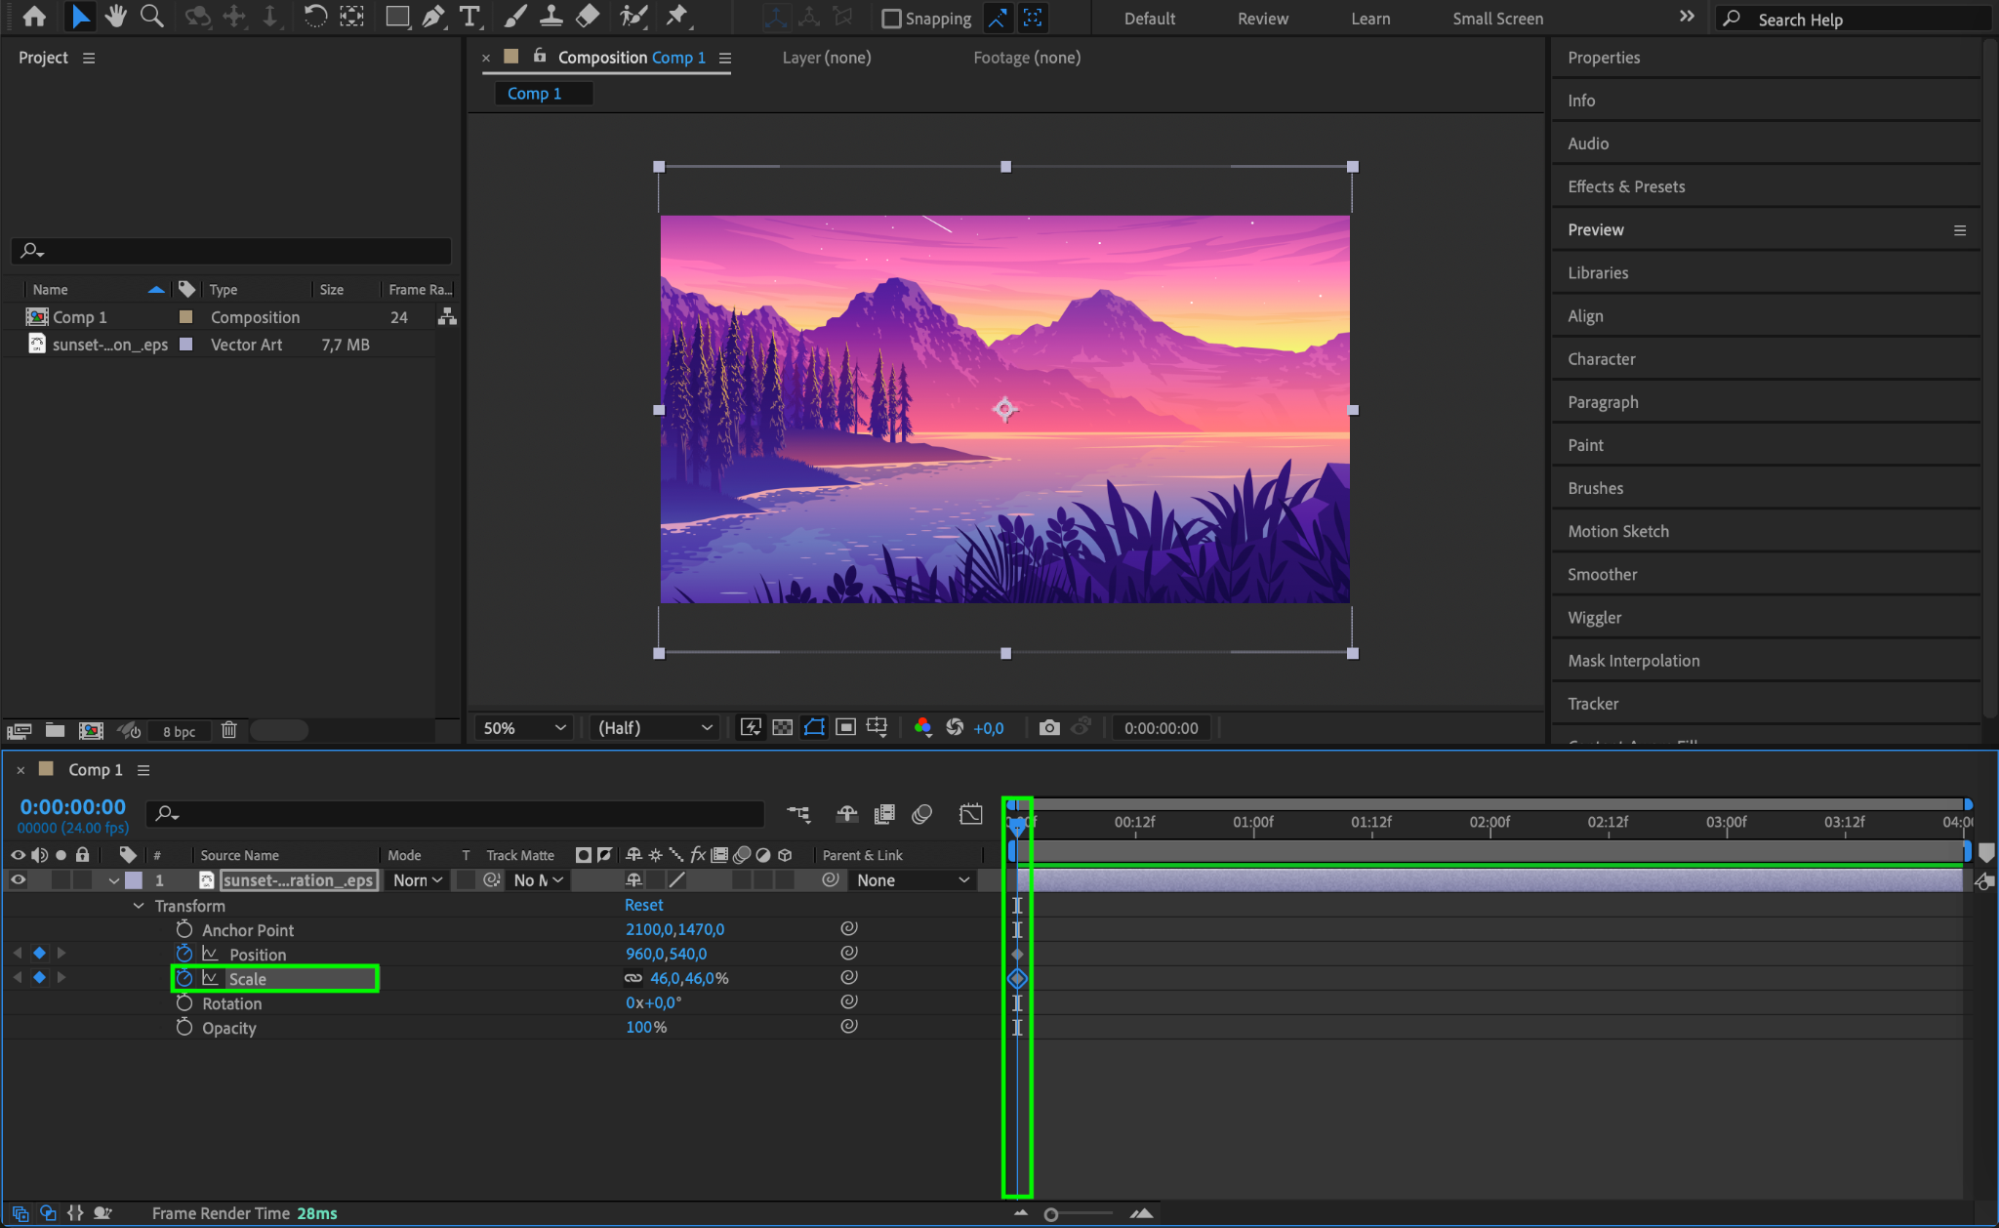
 Step 6: Refine Your Animation
Continue adjusting and refining your animation by adding more keyframes or tweaking existing ones. You can modify parameters like opacity, rotation, and more to achieve the desired effect. Use the Graph Editor to fine-tune the animation curves for more natural motion.
 Step 7: Apply Effects and Presets
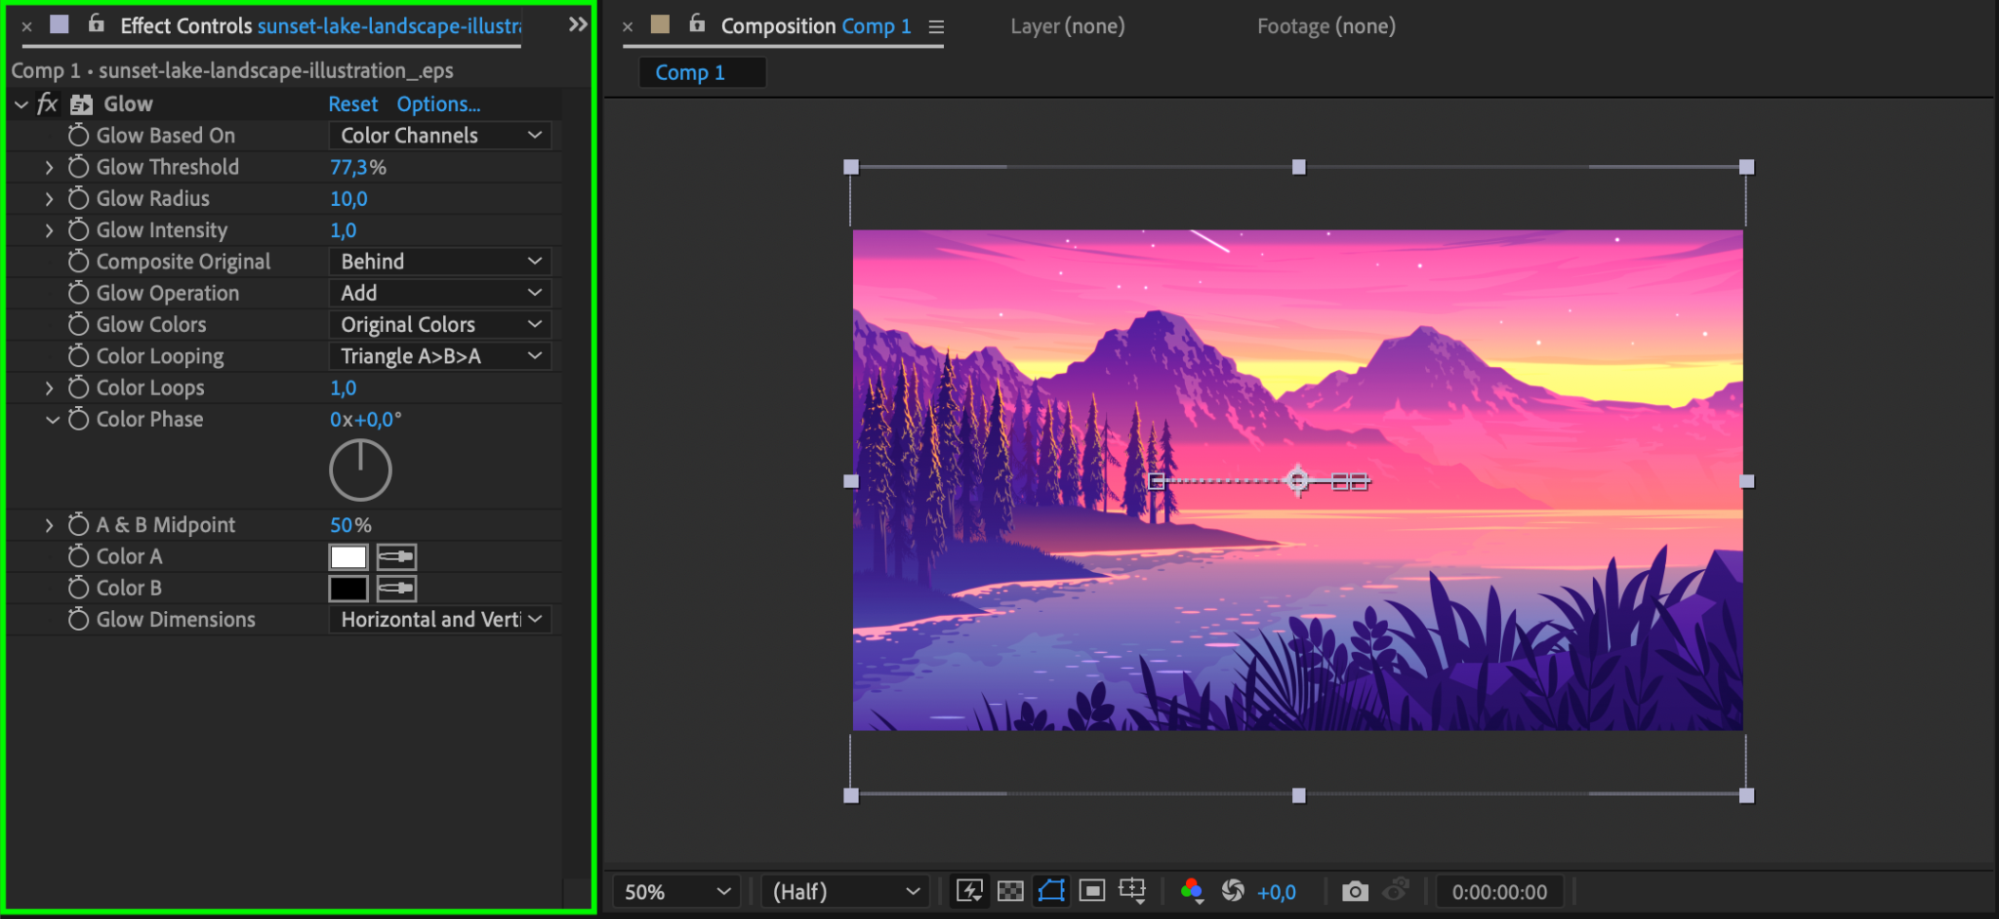
Enhance your animation by applying effects and presets from the Effects & Presets Panel. For instance, you might use the Glow effect to give your vector a radiant appearance or add other visual enhancements to make your animation stand out. Effects can significantly elevate the visual appeal of your animation.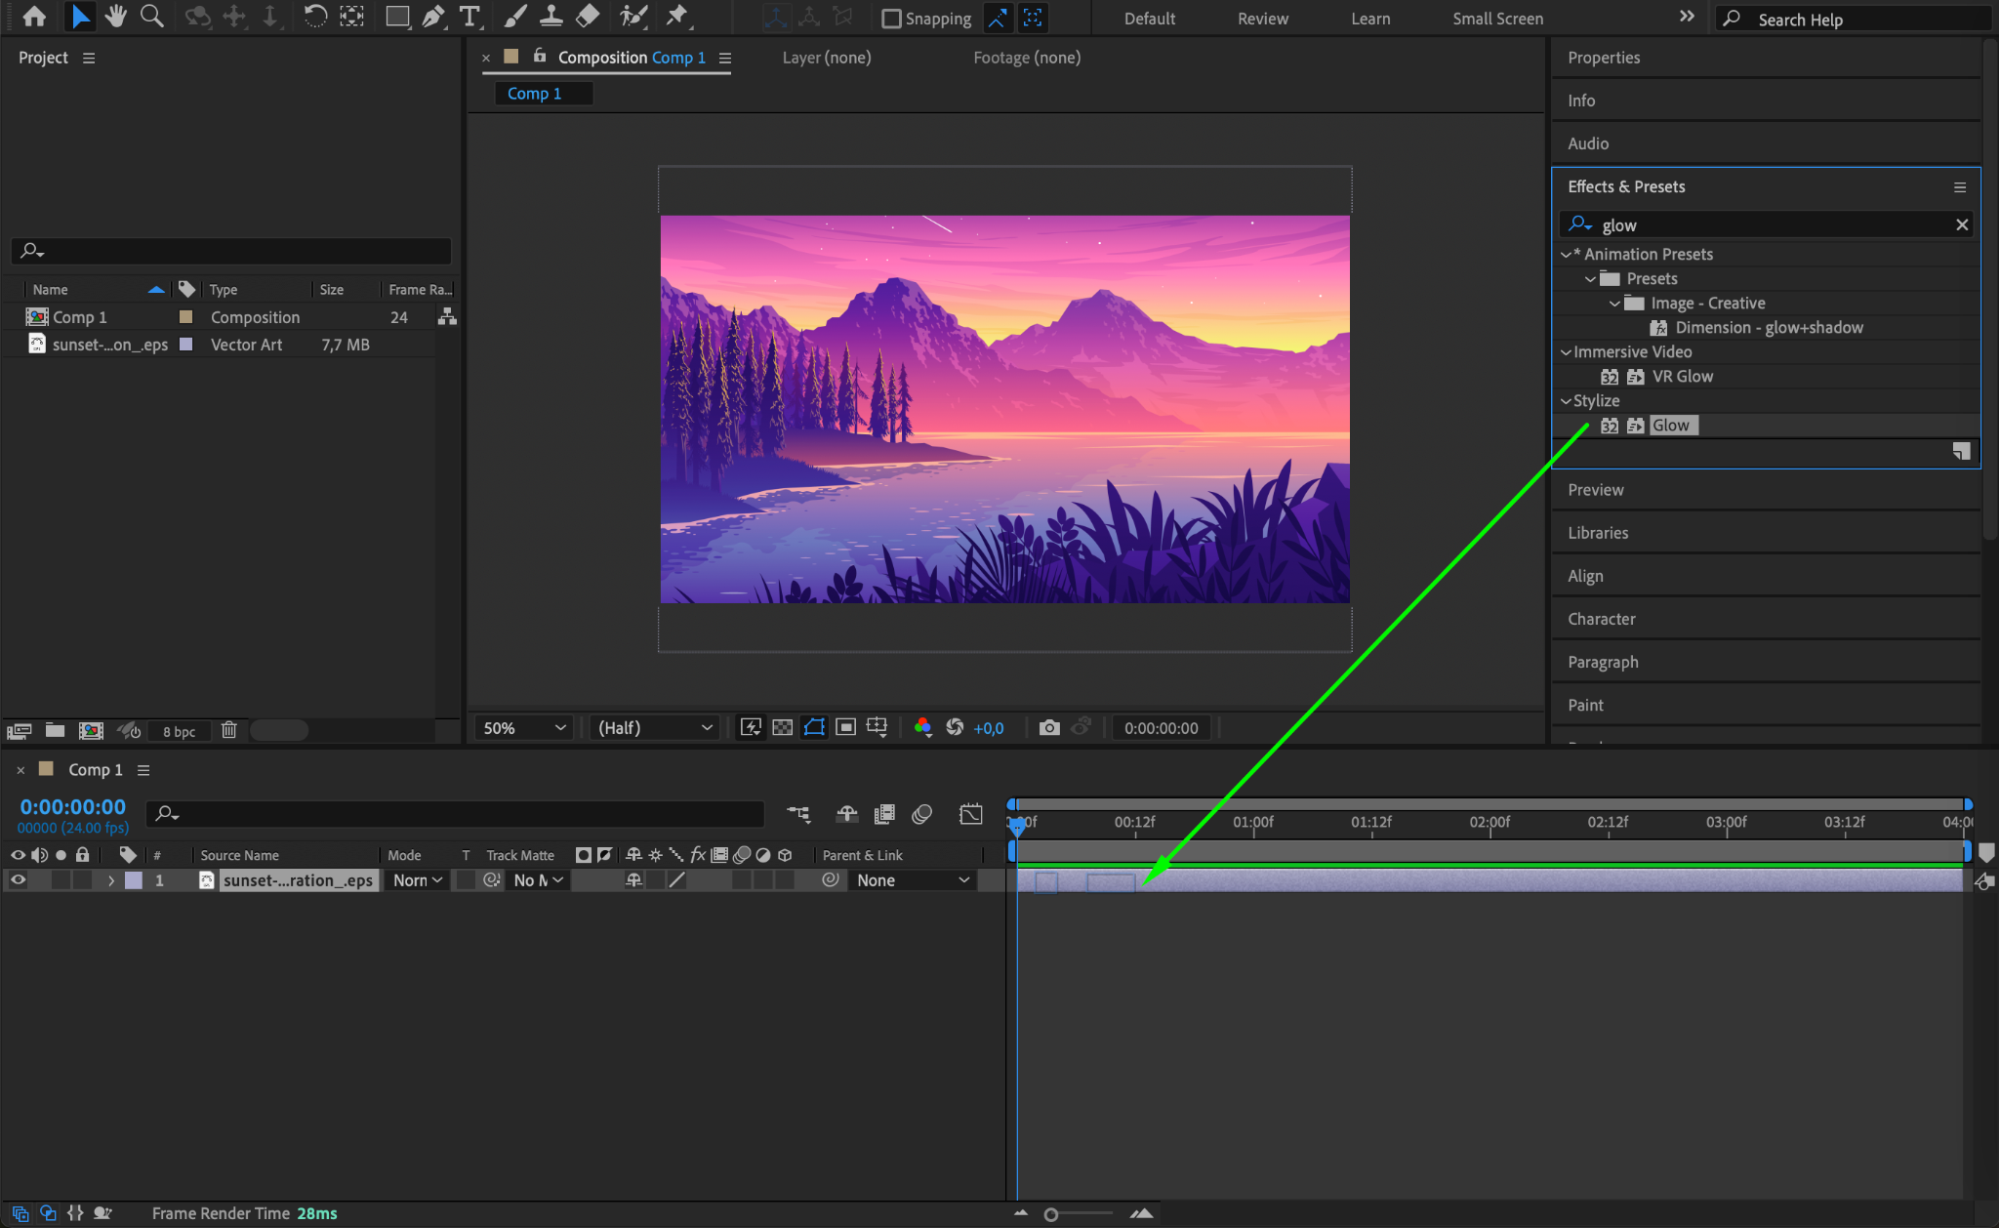
 Step 8: Preview Your Animation
Before finalizing, preview your composition to ensure everything looks as expected. Press the Spacebar to play the animation in the Composition Panel. Reviewing your animation helps identify any issues and allows you to make adjustments before rendering.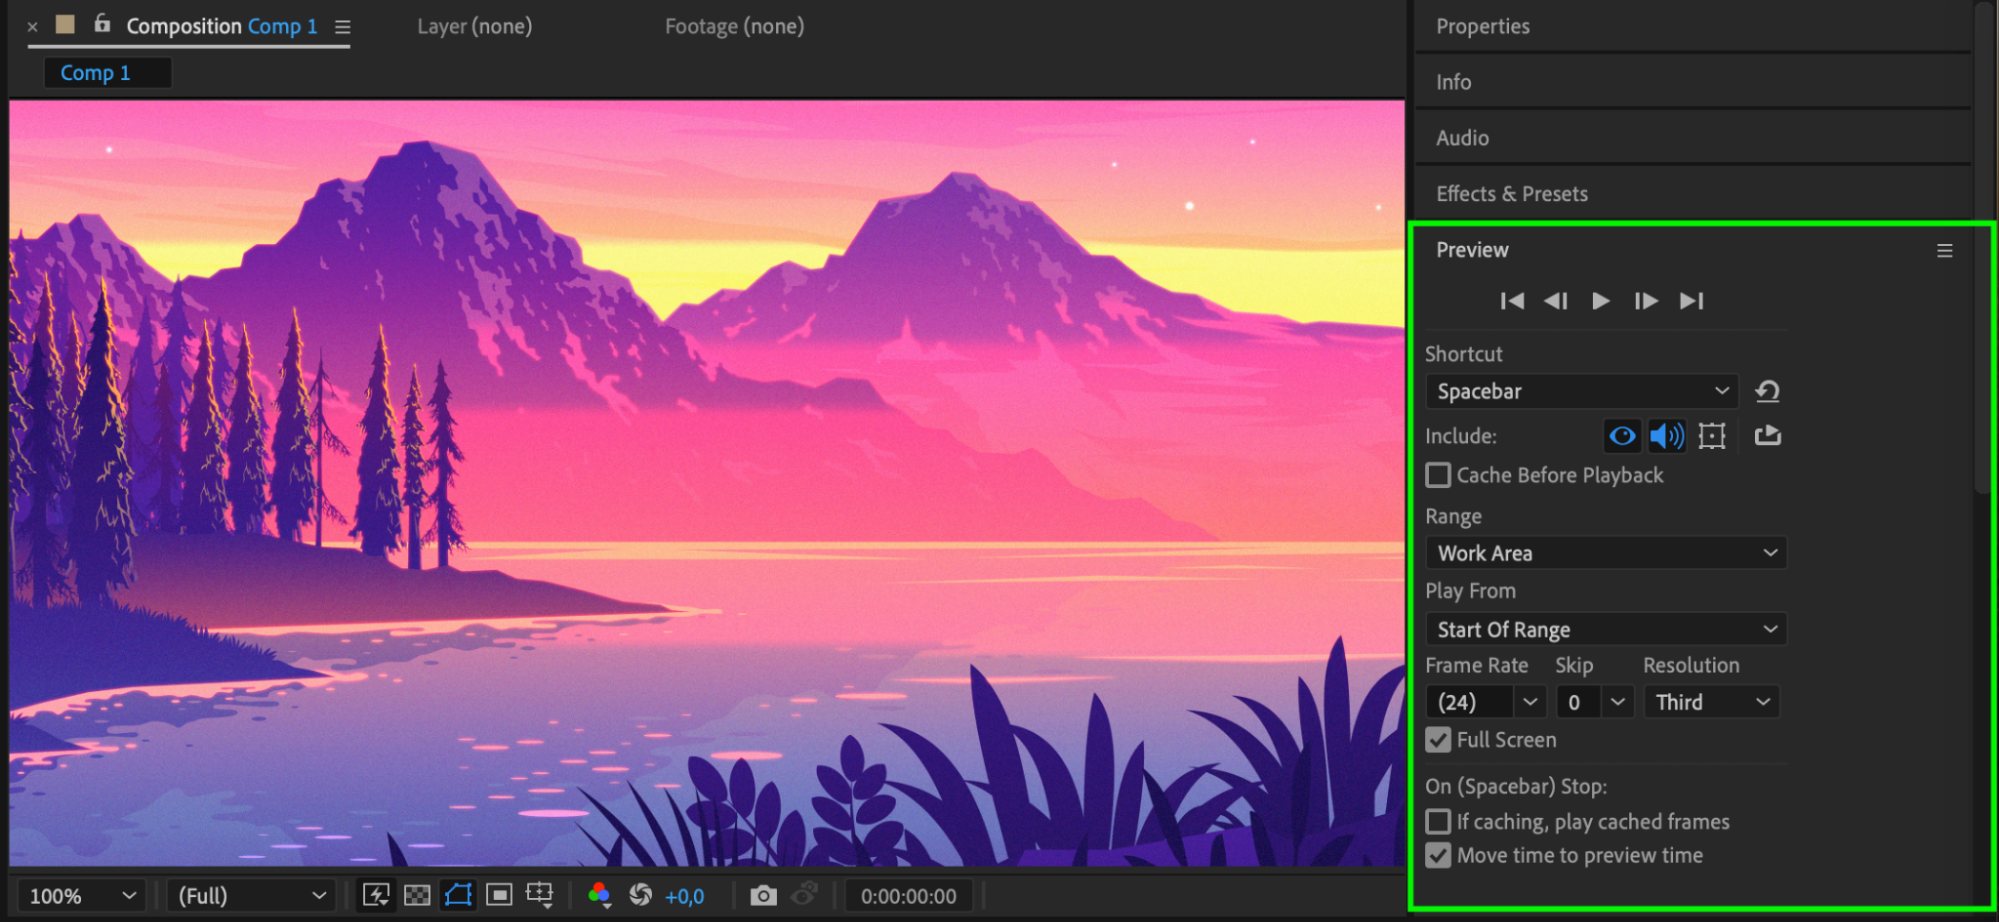 Step 9: Render and Export Your Composition
When you’re satisfied with your animation, go to Composition > Add to Render Queue to start the rendering process. Adjust the render settings as needed, then click Render to export your animated composition as a video file. This step finalizes your project, making it ready for distribution or further editing.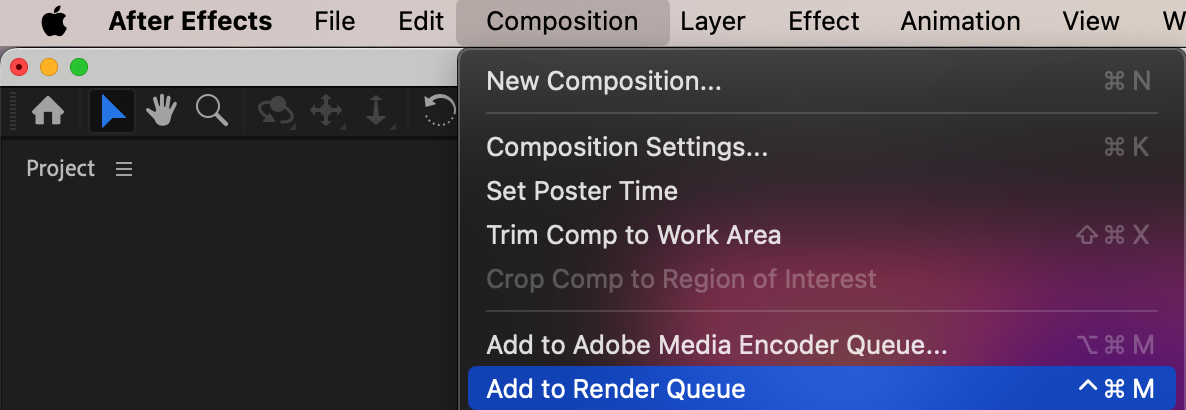
 Conclusion
By following these steps and utilizing the tools and features in After Effects, you can seamlessly integrate your Illustrator vectors and bring them to life with captivating animations and effects. It’s time to dive in and take your motion graphics projects to new heights!

