How to Import Files into After Effects: A Comprehensive Guide
Getting Started with Importing Files in After Effects
How to Import Files into After Effects: A Step-by-Step Guide
If you’re a video designer or motion graphics artist, you probably use Adobe After Effects for creating visual effects and animations. And one of the most important steps in any project is importing the necessary files into After Effects and organizing them for smooth editing and compositing. In this guide, we’ll walk you through the process of importing different file types into After Effects, whether it’s images, videos, audio files, or even 3D models.
So, let’s get started with these step-by-step instructions, designed to help you import files like a pro and manage your assets effectively in After Effects.
Step 1: Open After Effects
First, launch After Effects on your computer. If you don’t have it installed, you can download a free trial from the Adobe website.
 Step 2: Import Files
Get 10% off when you subscribe to our newsletter

To import files, navigate to the “File” menu and choose “Import” > “File.” Alternatively, use the shortcut “Ctrl/Cmd+I.” A file browser window will open, allowing you to locate and select the files you want to import, including videos, images, audio, and even 3D models.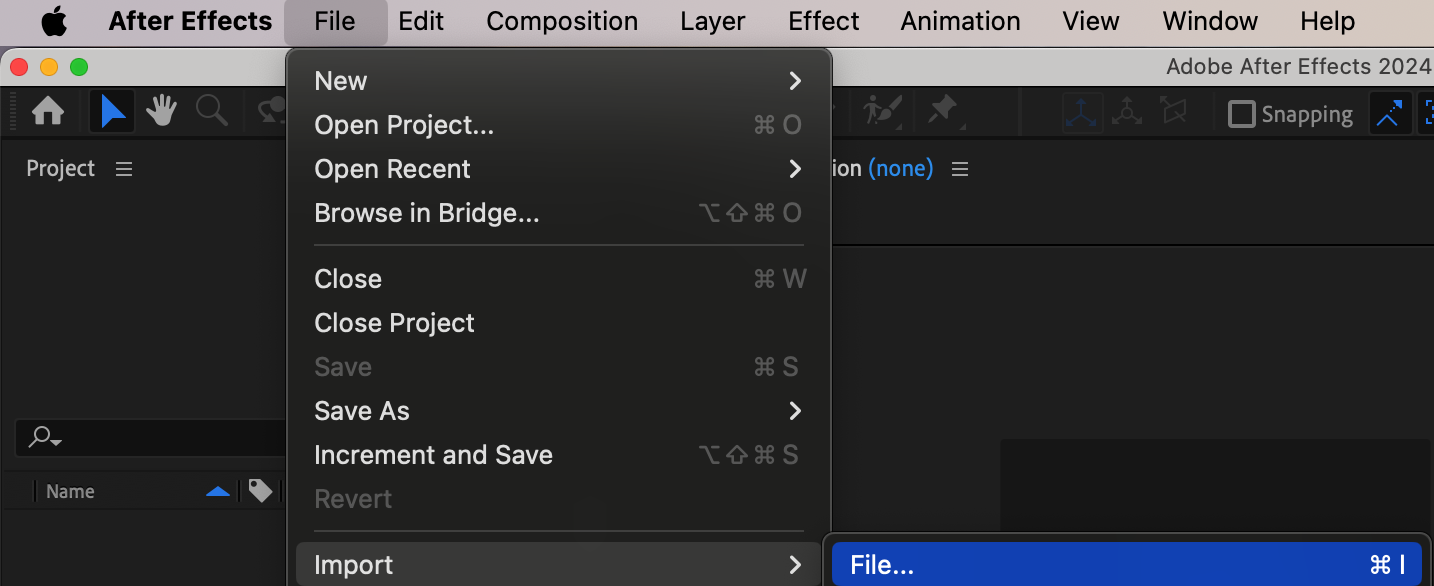 Step 3: Select Multiple Files
When the file browser window opens, you can select multiple files by holding the “Ctrl/Cmd” key while clicking on the files. This is particularly useful when importing multiple assets for your project. Once you’ve selected your files, click the “Open” button to bring them into After Effects.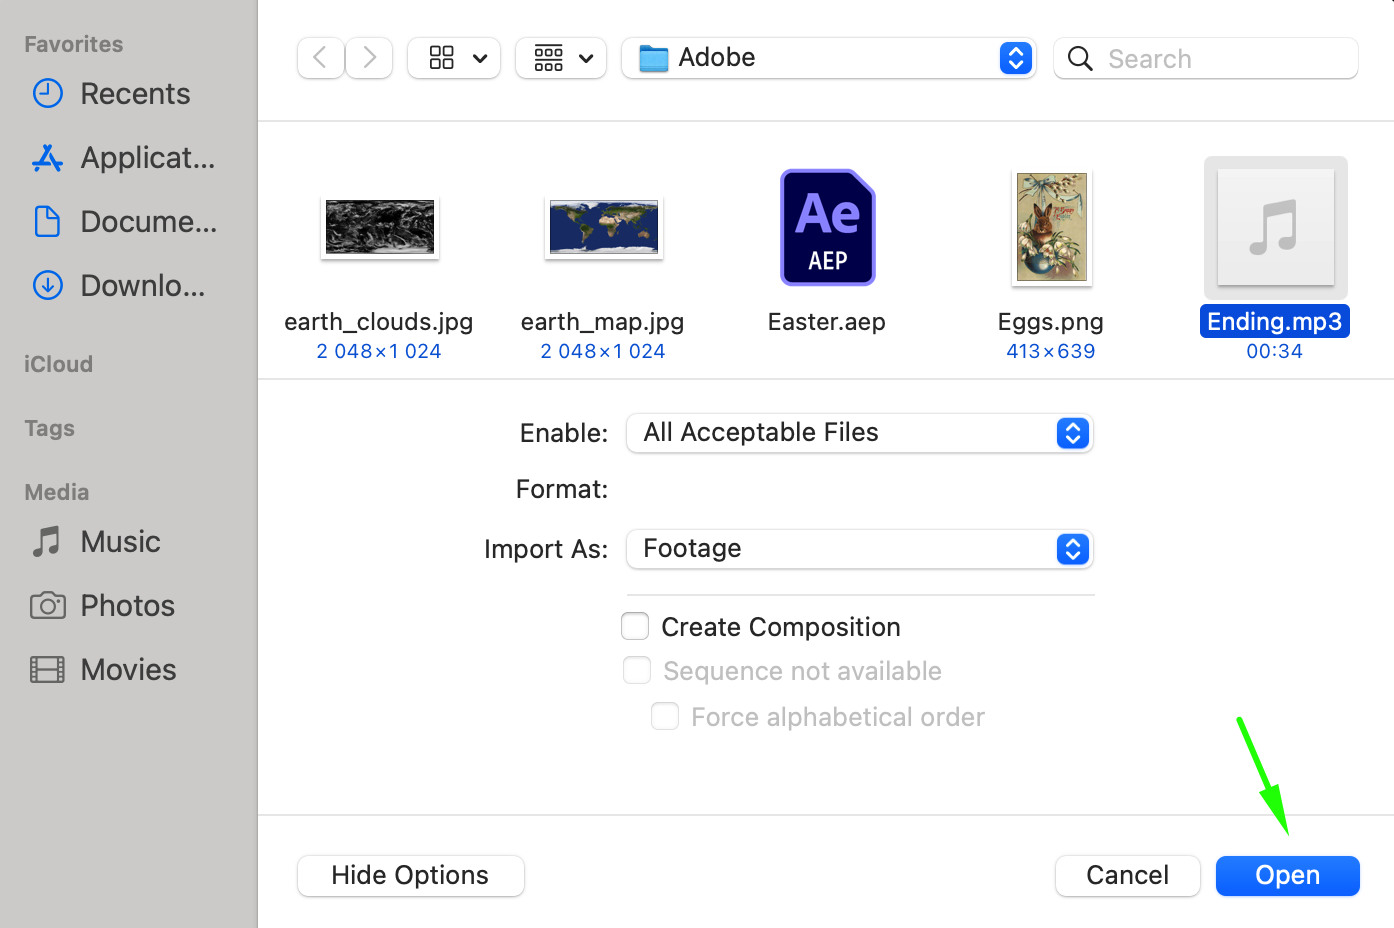 Step 4: Organize and Manage Footage
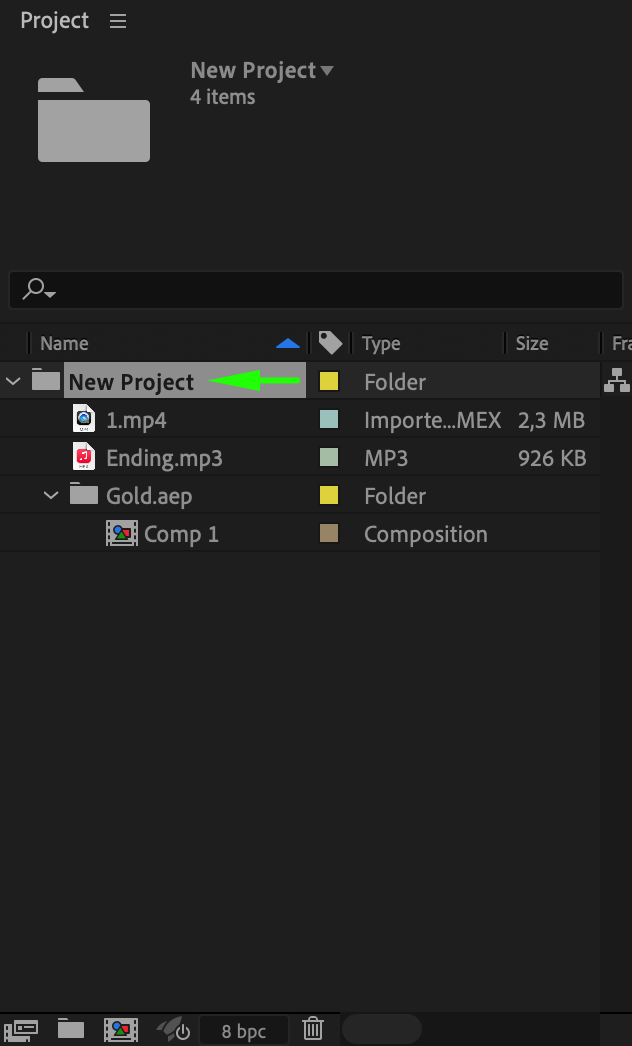
After importing, your files will appear in the Project panel, typically located on the left side of the interface. Here, you can organize your files into folders for better management. To create a folder, right-click in the Project panel and select “New Folder.” Drag and drop your files into these folders to keep your workspace tidy and efficient.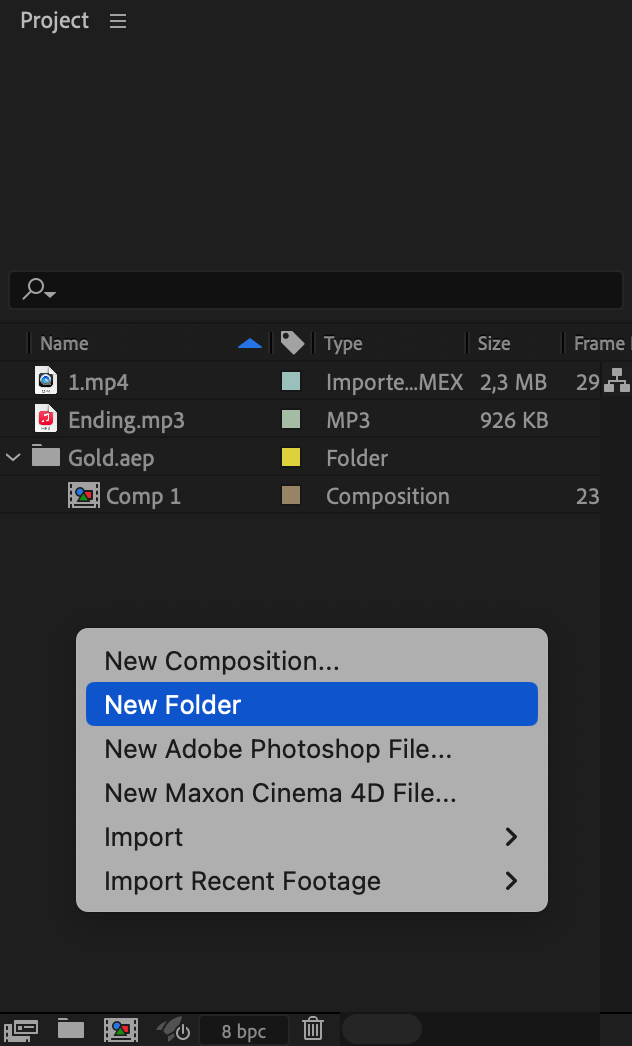
 Step 5: Create a Composition from Imported Files
To use your imported files, select them in the Project panel by holding the “Ctrl/Cmd” key and clicking on the desired files. Then, right-click and choose “New Comp from Selection.” This action will create a new composition with the selected files, ready for editing.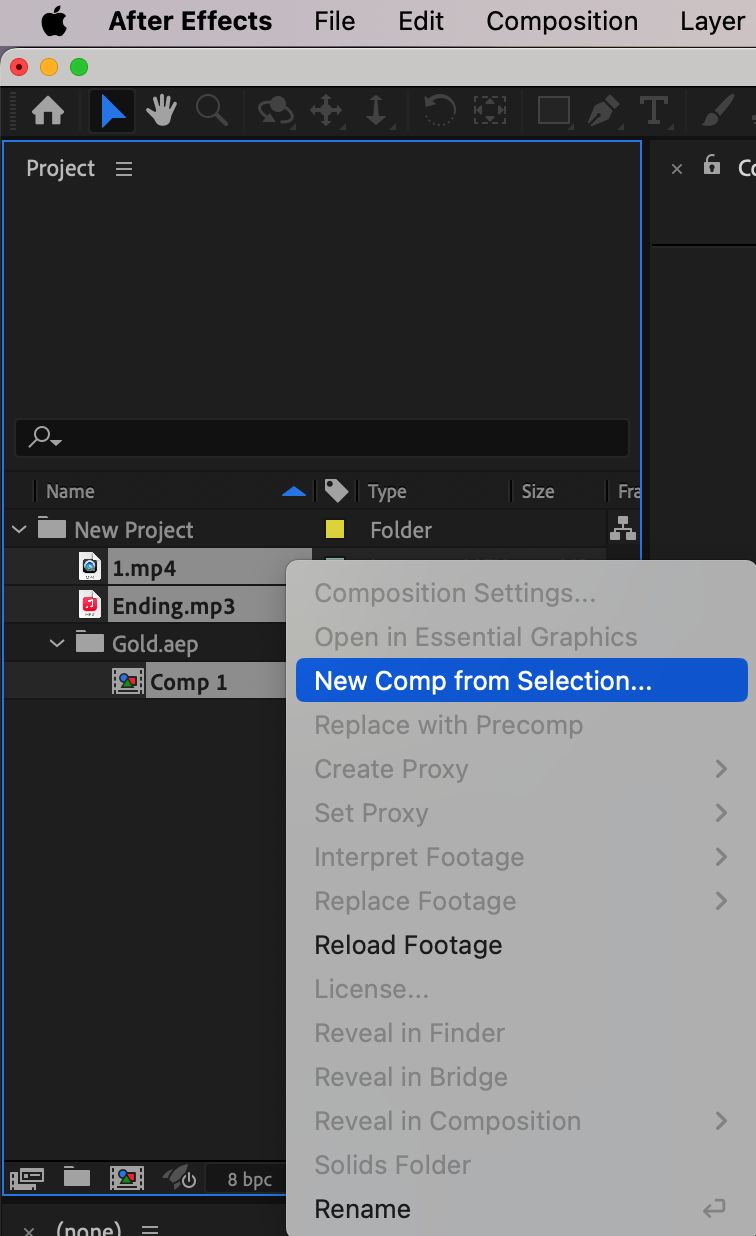
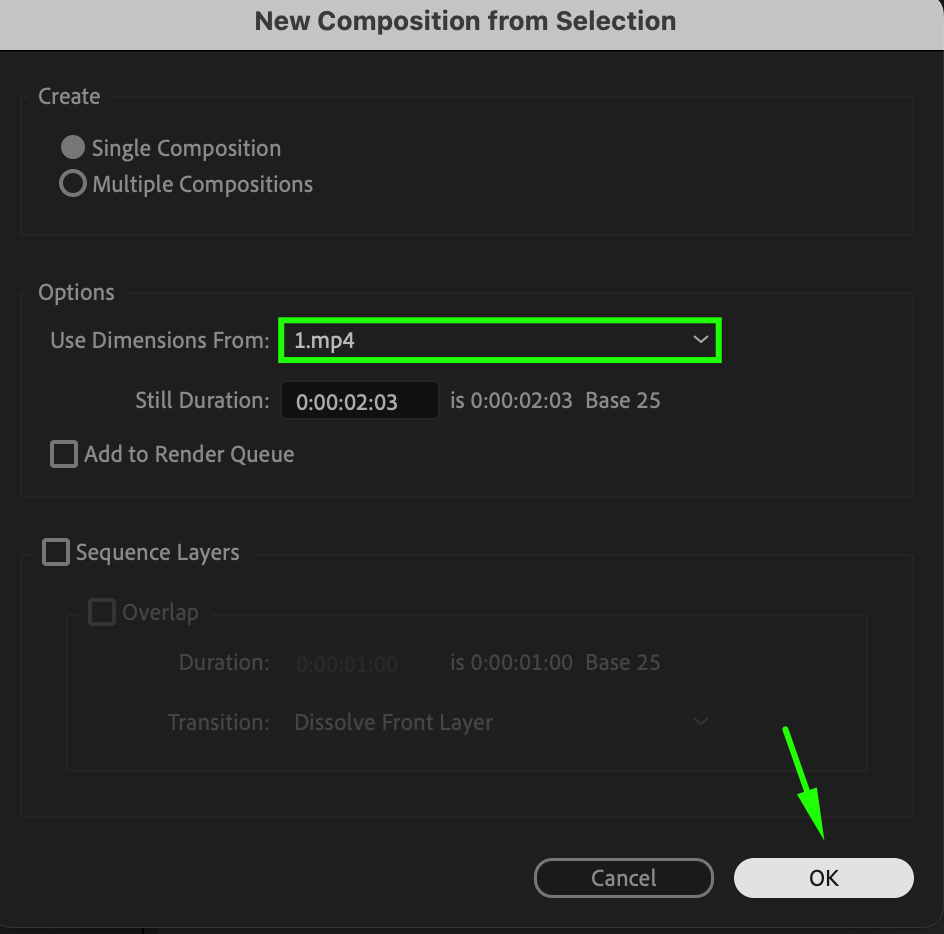 Step 6: Preview Your Composition
Once your files are arranged in a composition, you can preview your work by pressing the spacebar or using the preview panel and hitting the play button. This playback allows you to see your project in motion, making it easier to adjust animations and effects.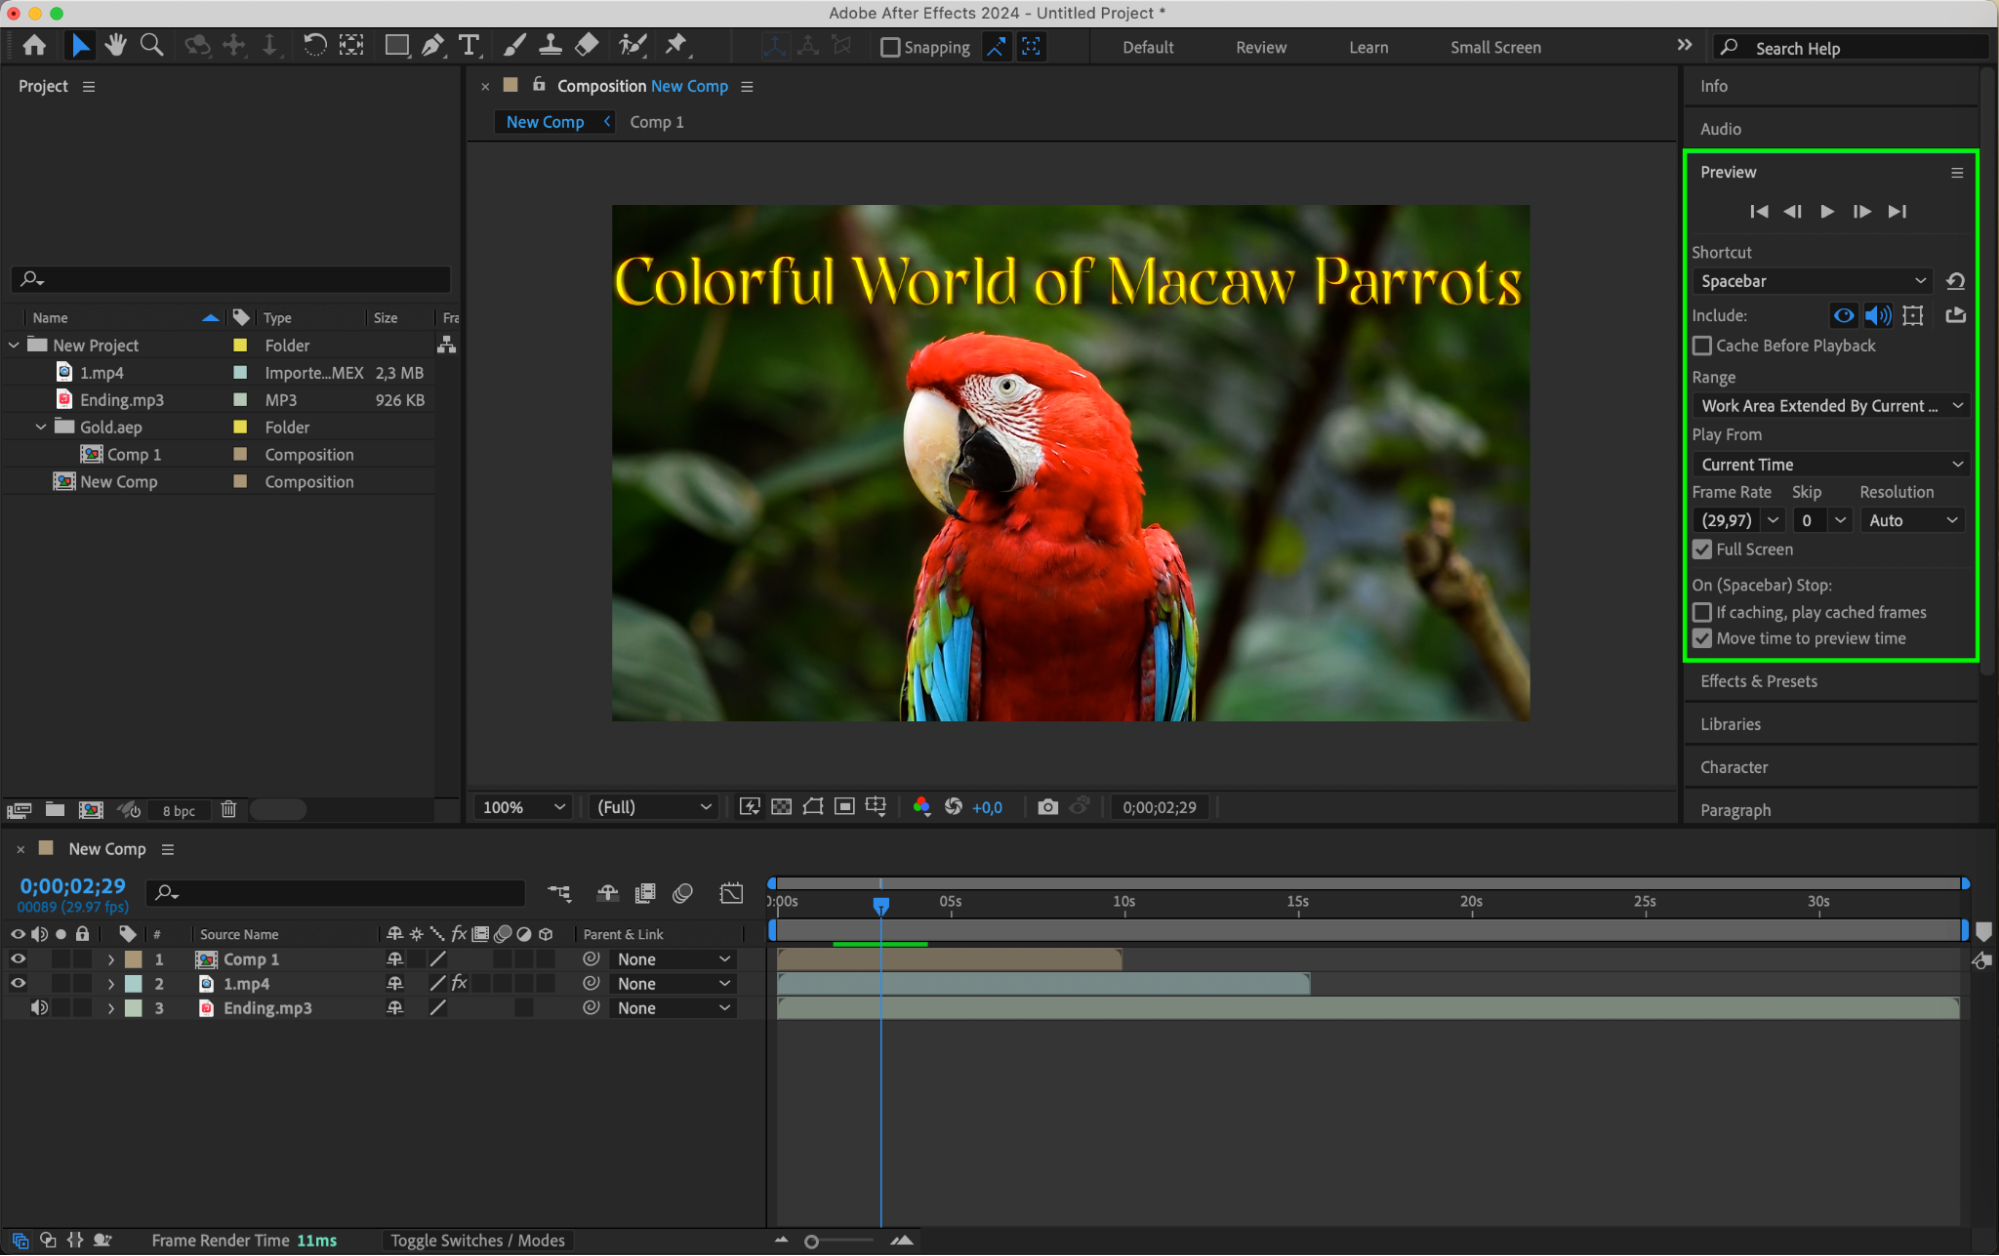 Step 8: Render Your Composition
When you’re satisfied with your composition, it’s time to render the final output. Go to “Composition” > “Add to Render Queue”. Here, you can adjust settings like output format and destination. Once configured, hit the “Render” button to export your video.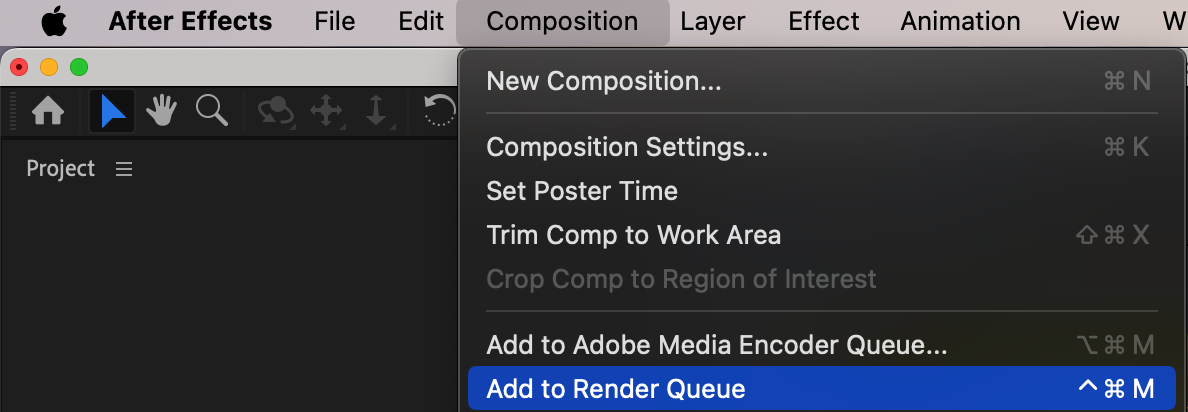
 Conclusion
Importing files into After Effects is a crucial step in any video project. By following this comprehensive guide, you now have the knowledge and skills to import various file types into After Effects and organize them for seamless editing and compositing. Remember to explore the different import options and leverage the powerful tools within After Effects to unlock your creativity and bring your vision to life. So let your imagination run wild, import your files, and create stunning motion graphics and visual effects with Adobe After Effects!


