Seamlessly Importing Photoshop Layers into After Effects
Introduction – Integrating Photoshop Designs with After Effects
Importing Photoshop layers into After Effects is essential for those working in motion graphics and animation. By combining the strengths of these two powerful tools, you can bring your static designs to life and add dynamic elements to your projects. This guide will walk you through the process, ensuring you can efficiently use your Photoshop files within After Effects.
Step 1: Import Your Photoshop File
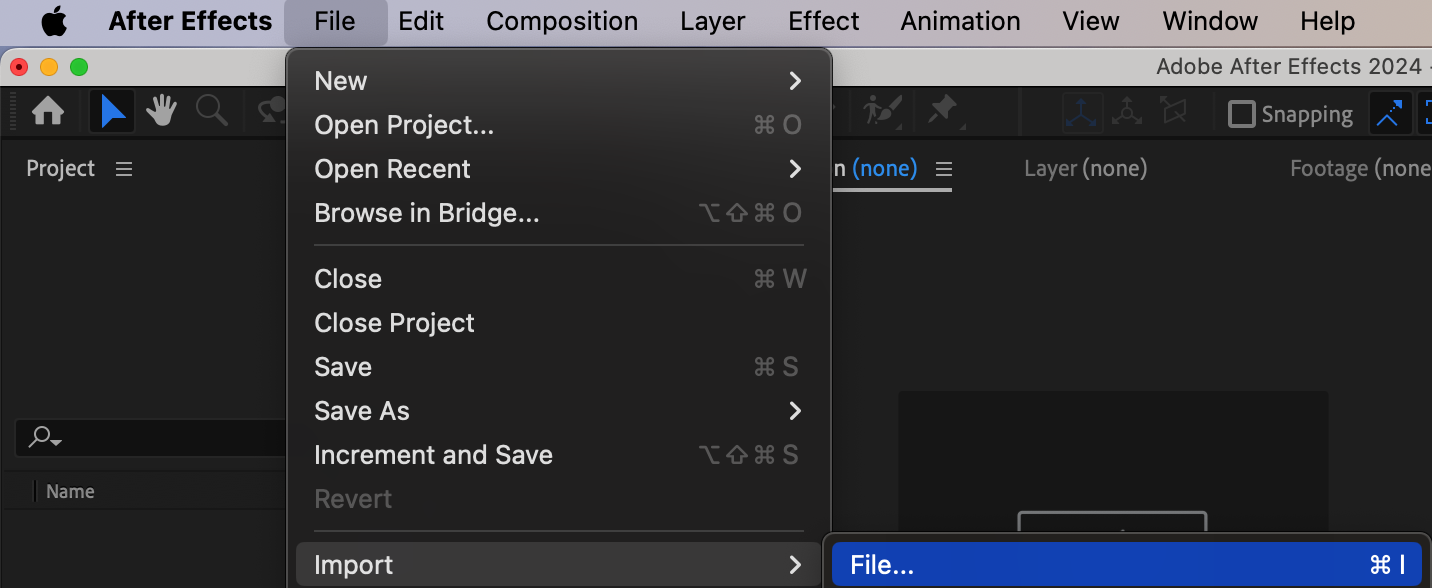
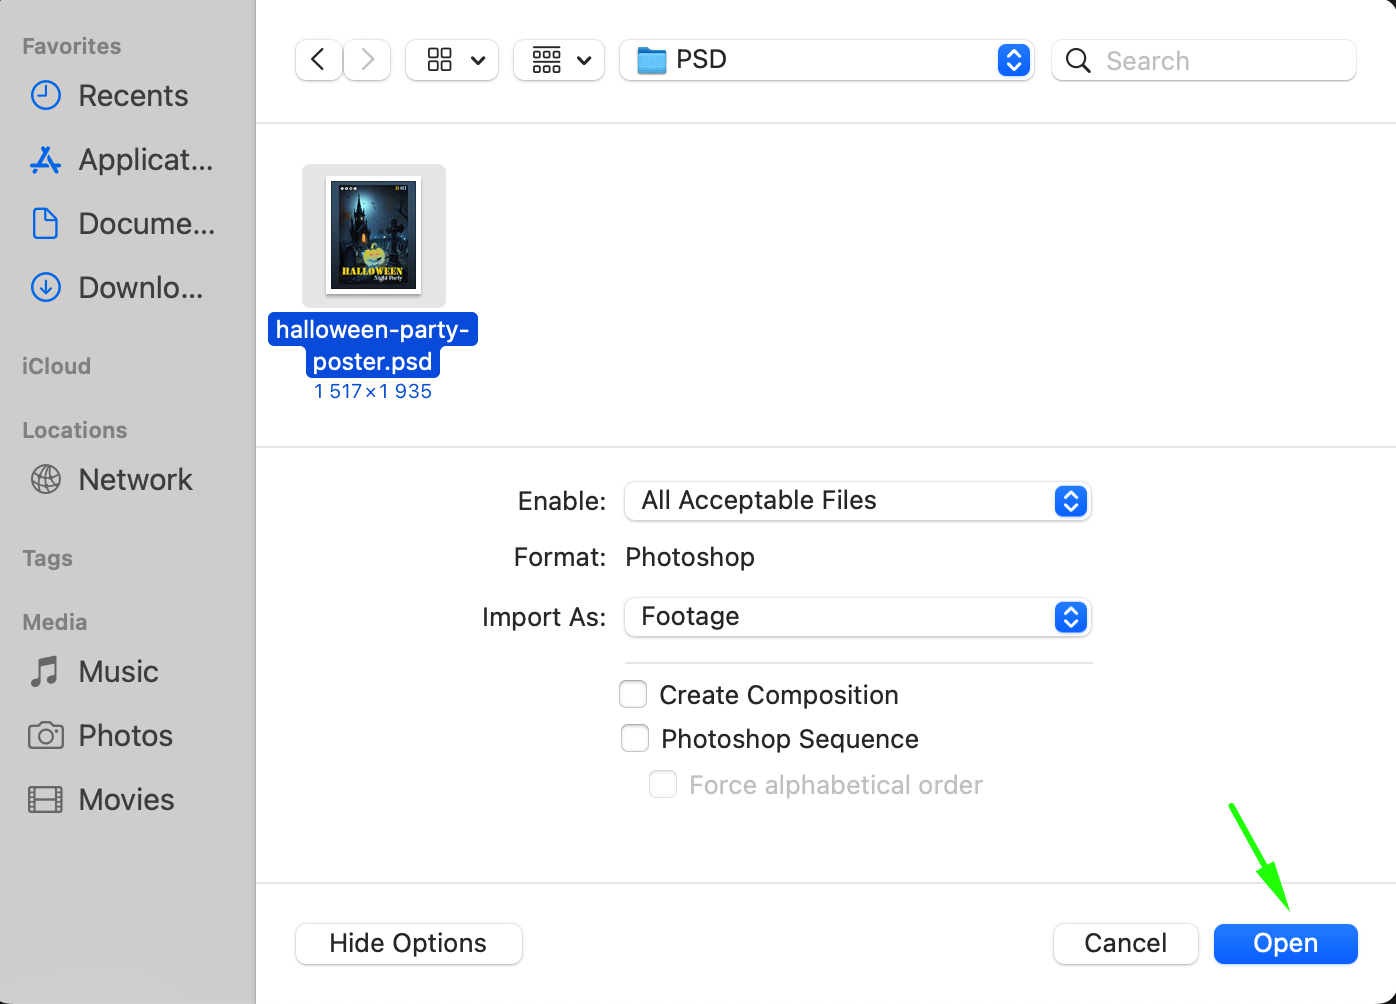
Start by importing your Photoshop file into After Effects. Go to File > Import > File. In the dialog box that appears, locate your PSD file on your computer and click Open. This initiates the import process, bringing your Photoshop layers into After Effects.
 Step 2: Choose Import Settings
Get 10% off when you subscribe to our newsletter

When the import options dialog appears, select Import Kind: Composition – Retain Layer Sizes. This setting ensures that each Photoshop layer is preserved as it is and imported into After Effects as a separate layer within a composition, maintaining the original sizes and positions.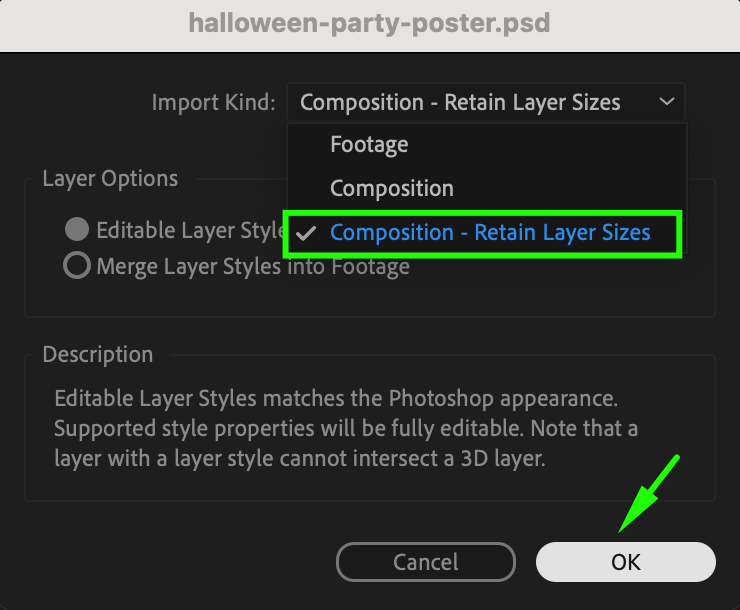 Step 3: Open the Composition
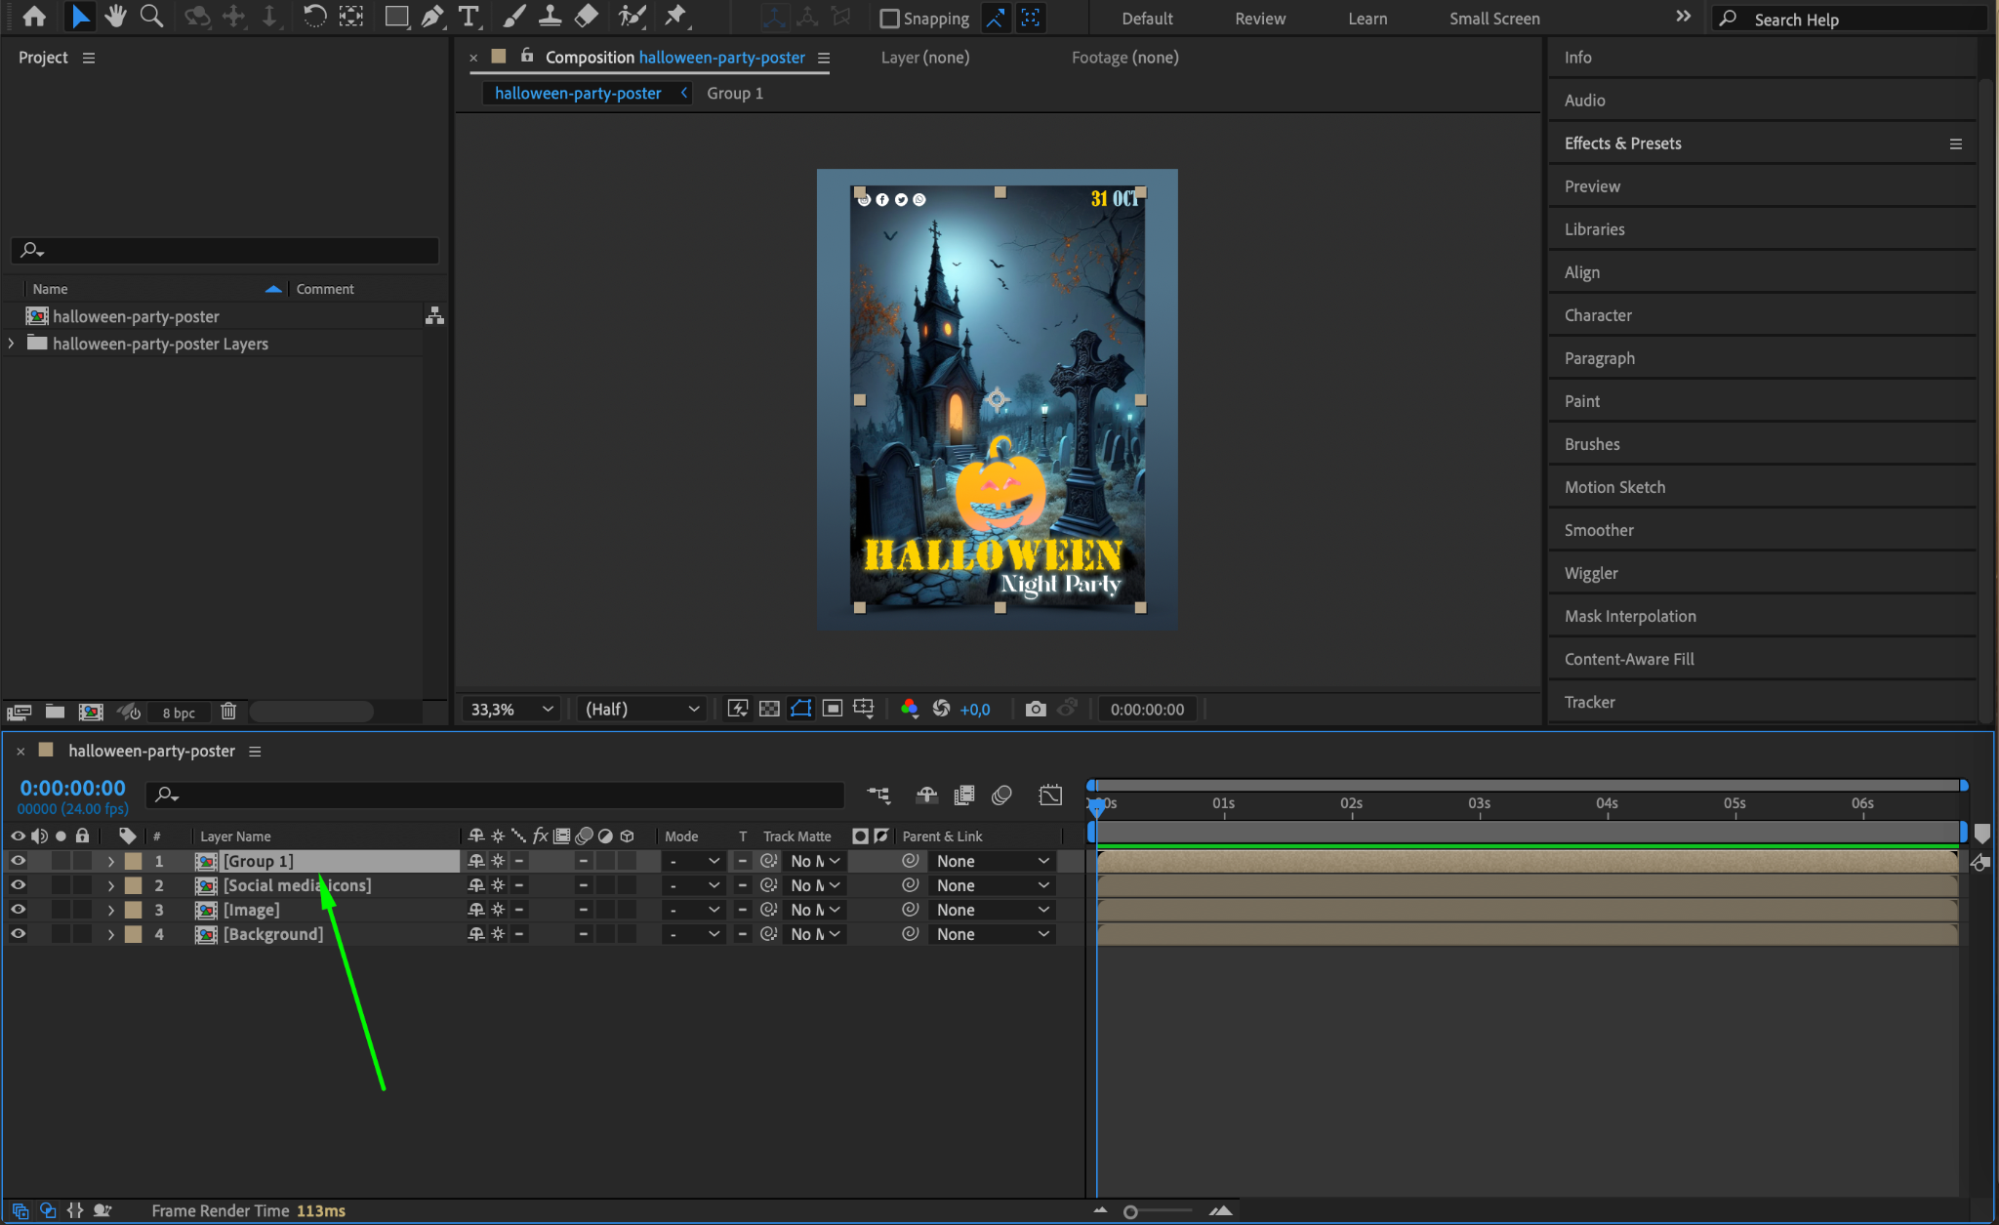
Your imported file will appear in the Project panel as a composition. Double-click on this composition to open it. You’ll now see all your Photoshop layers within the After Effects timeline, ready for animation and editing.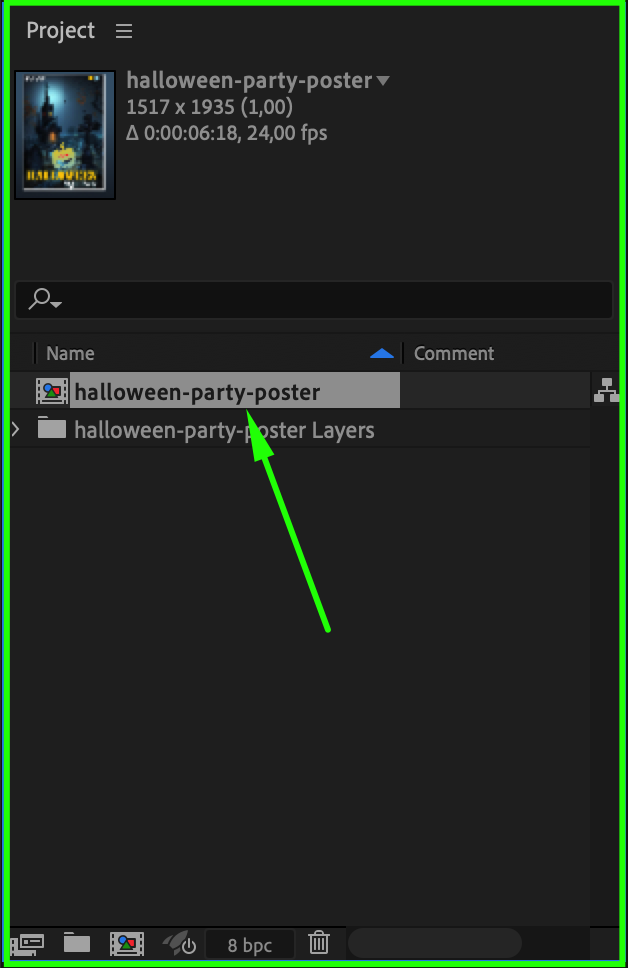
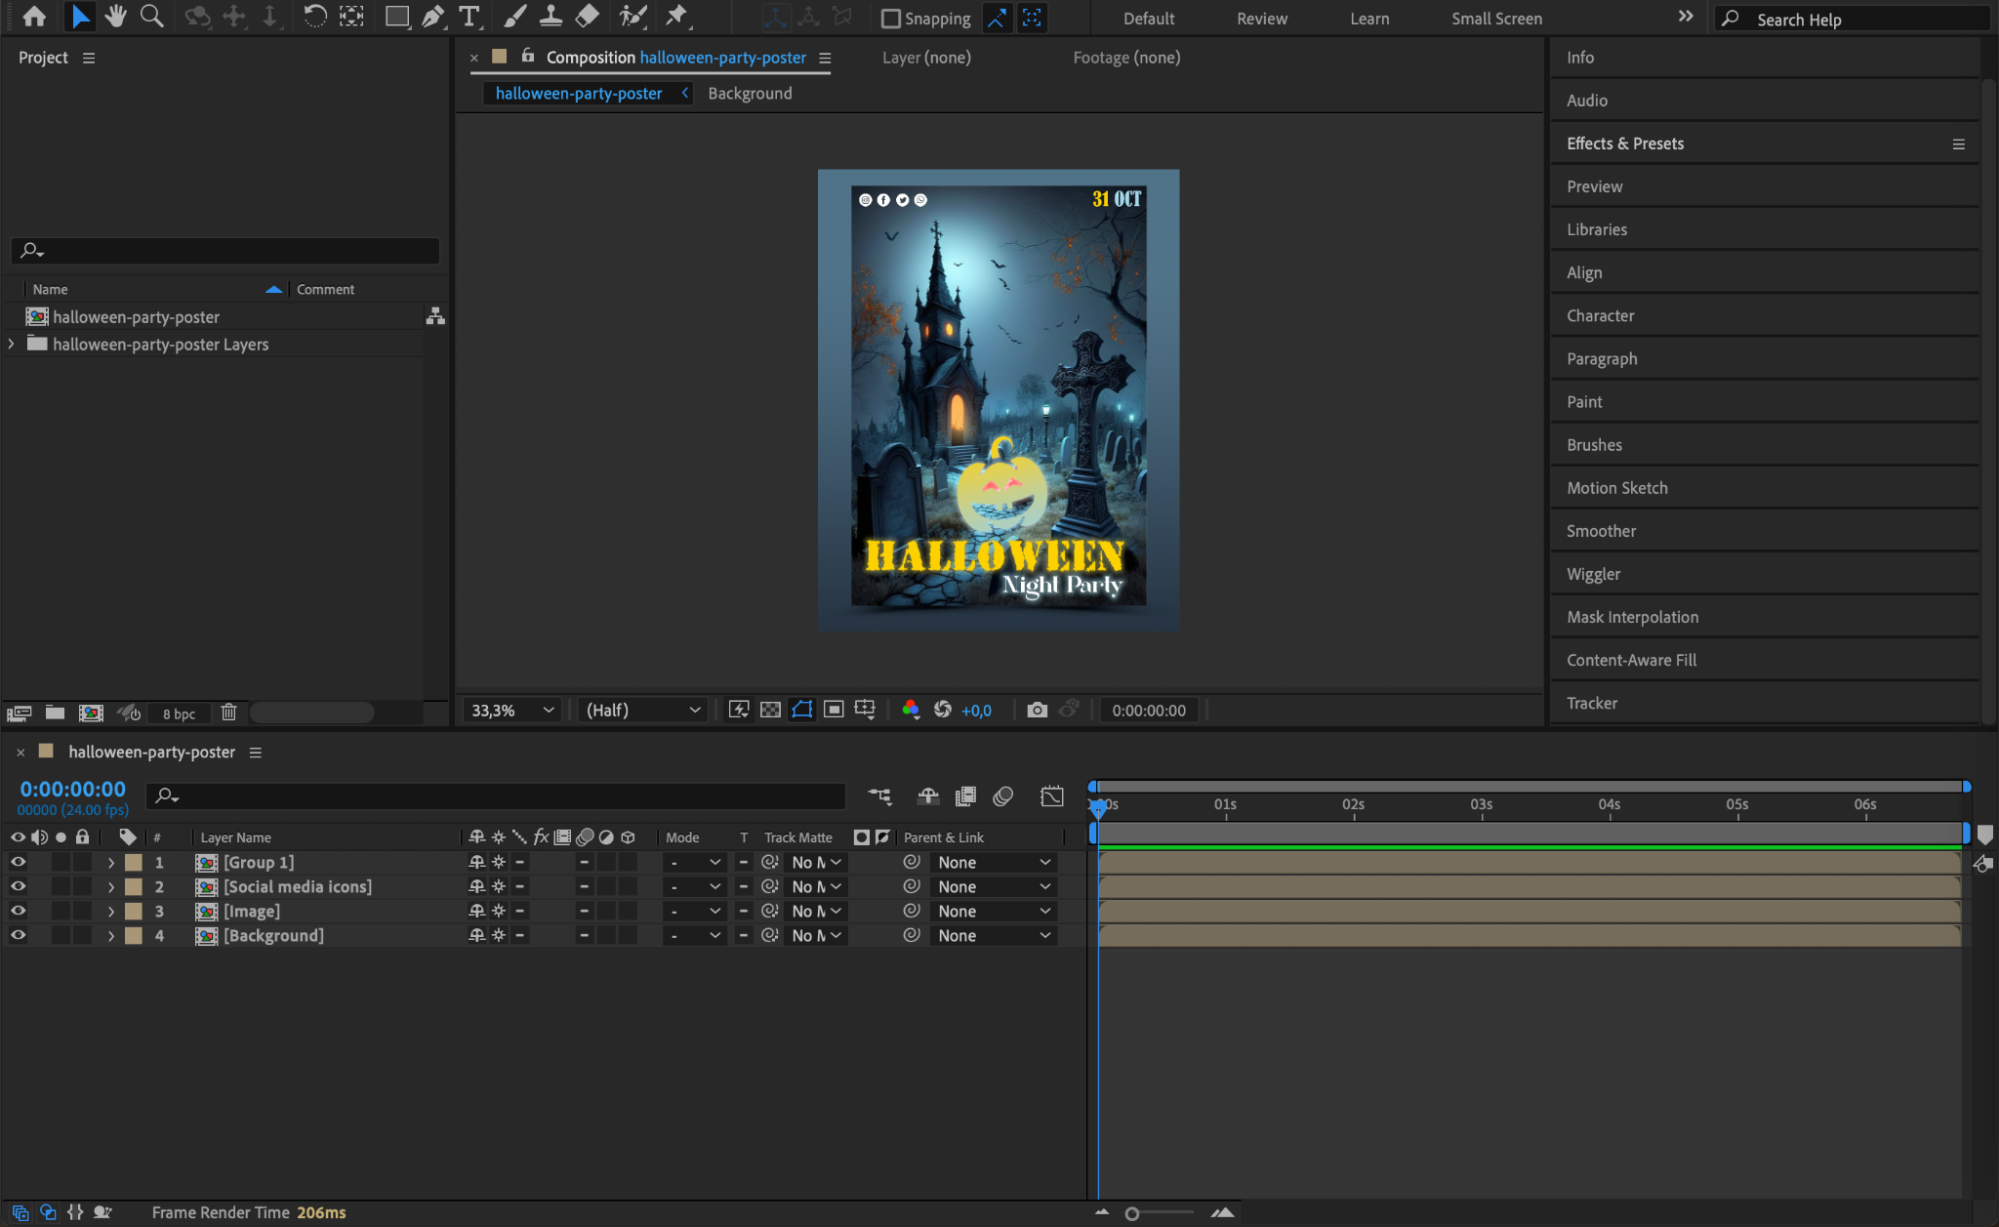
Step 4: Edit Individual Layers
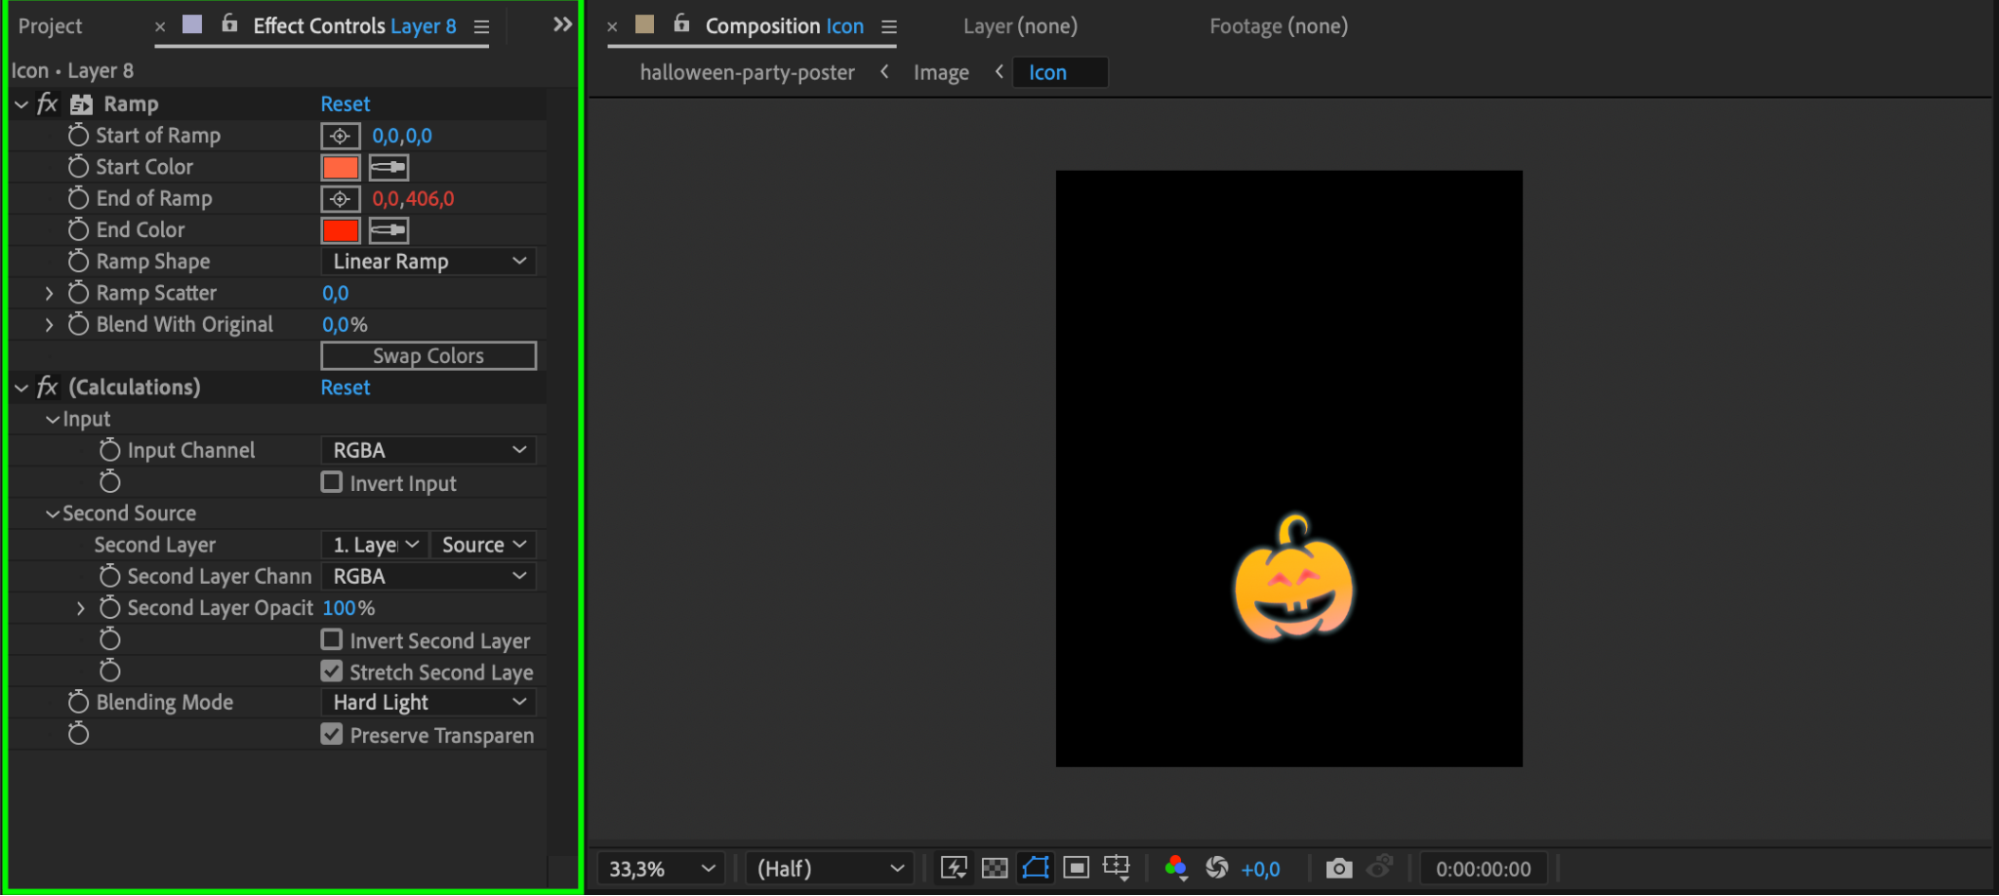
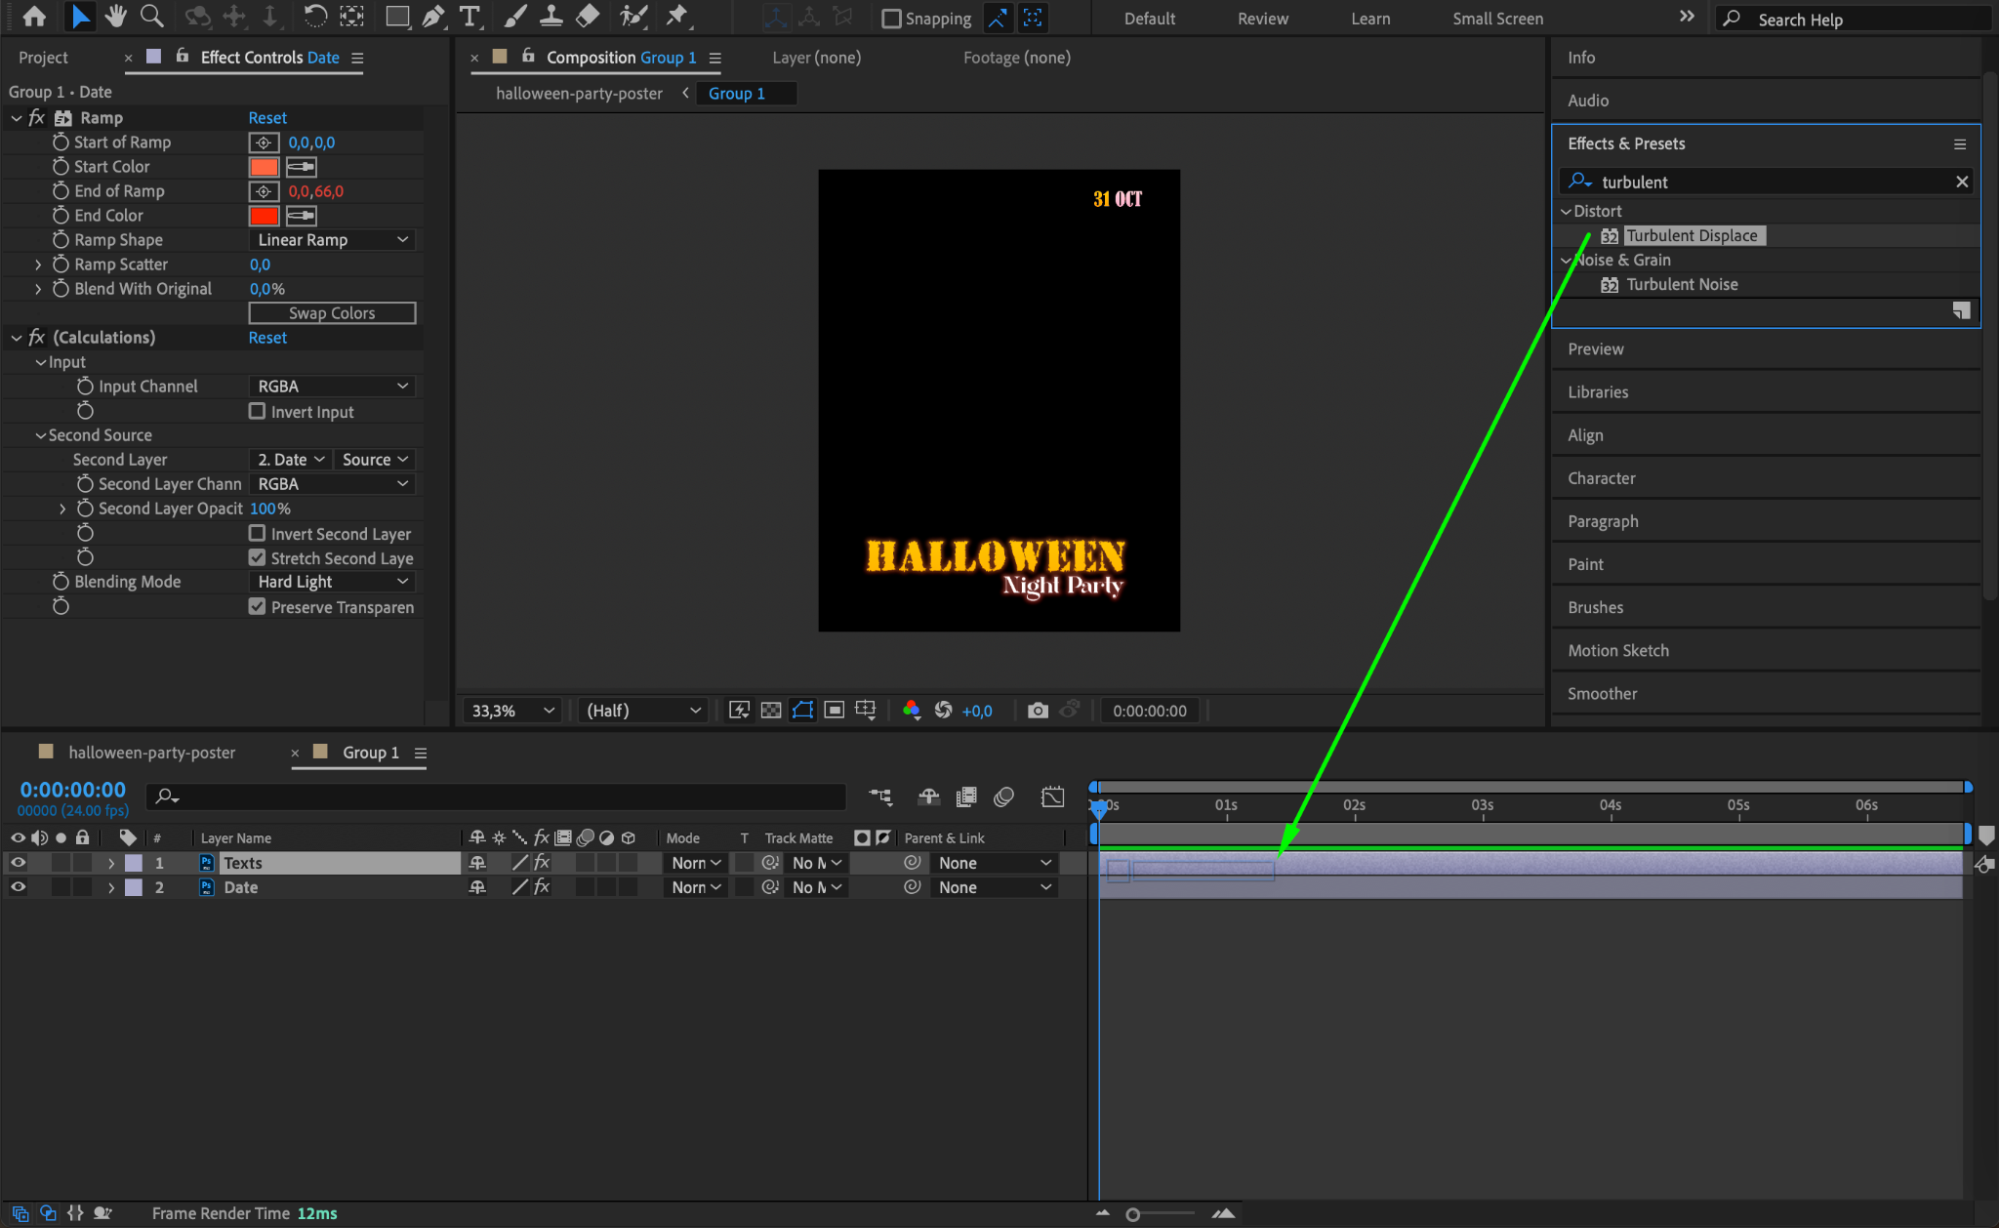
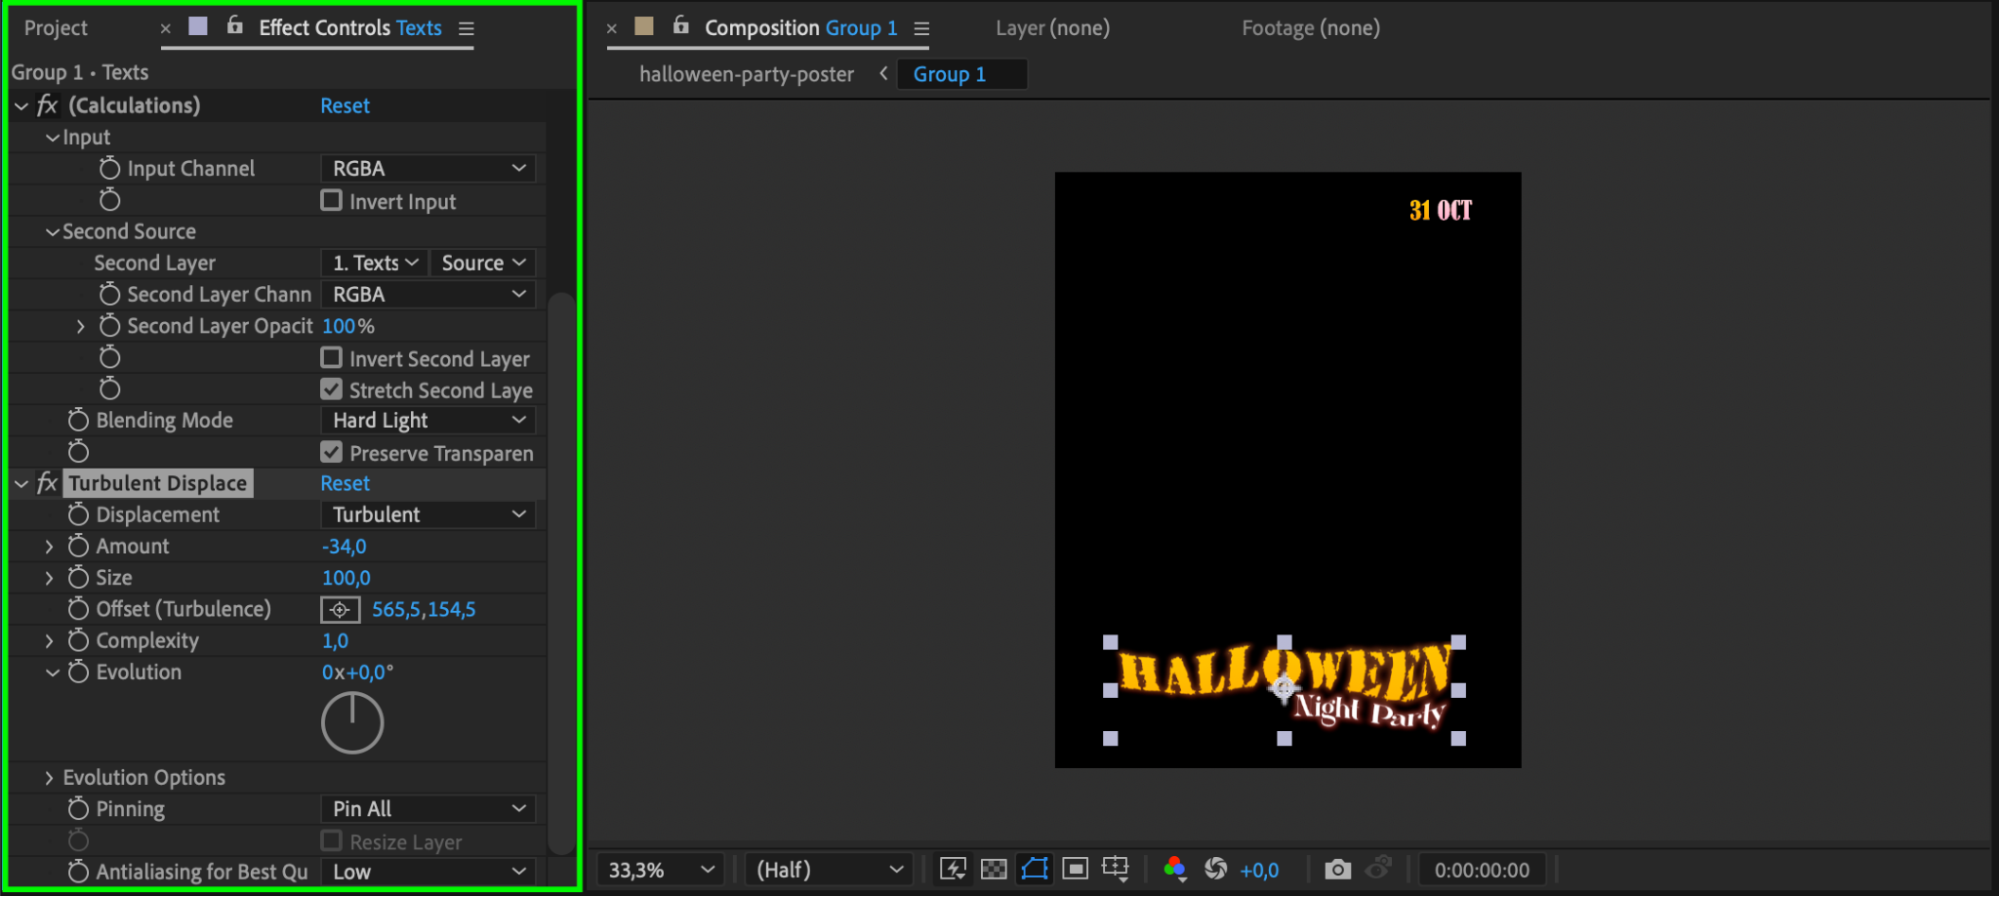
In the Timeline panel, you’ll find all the layers from your Photoshop file. If any layers are nested compositions, double-click on them to open and edit them separately. Use the Effects & Presets panel to add various effects such as noise, color correction, and turbulent displacement to enhance your design.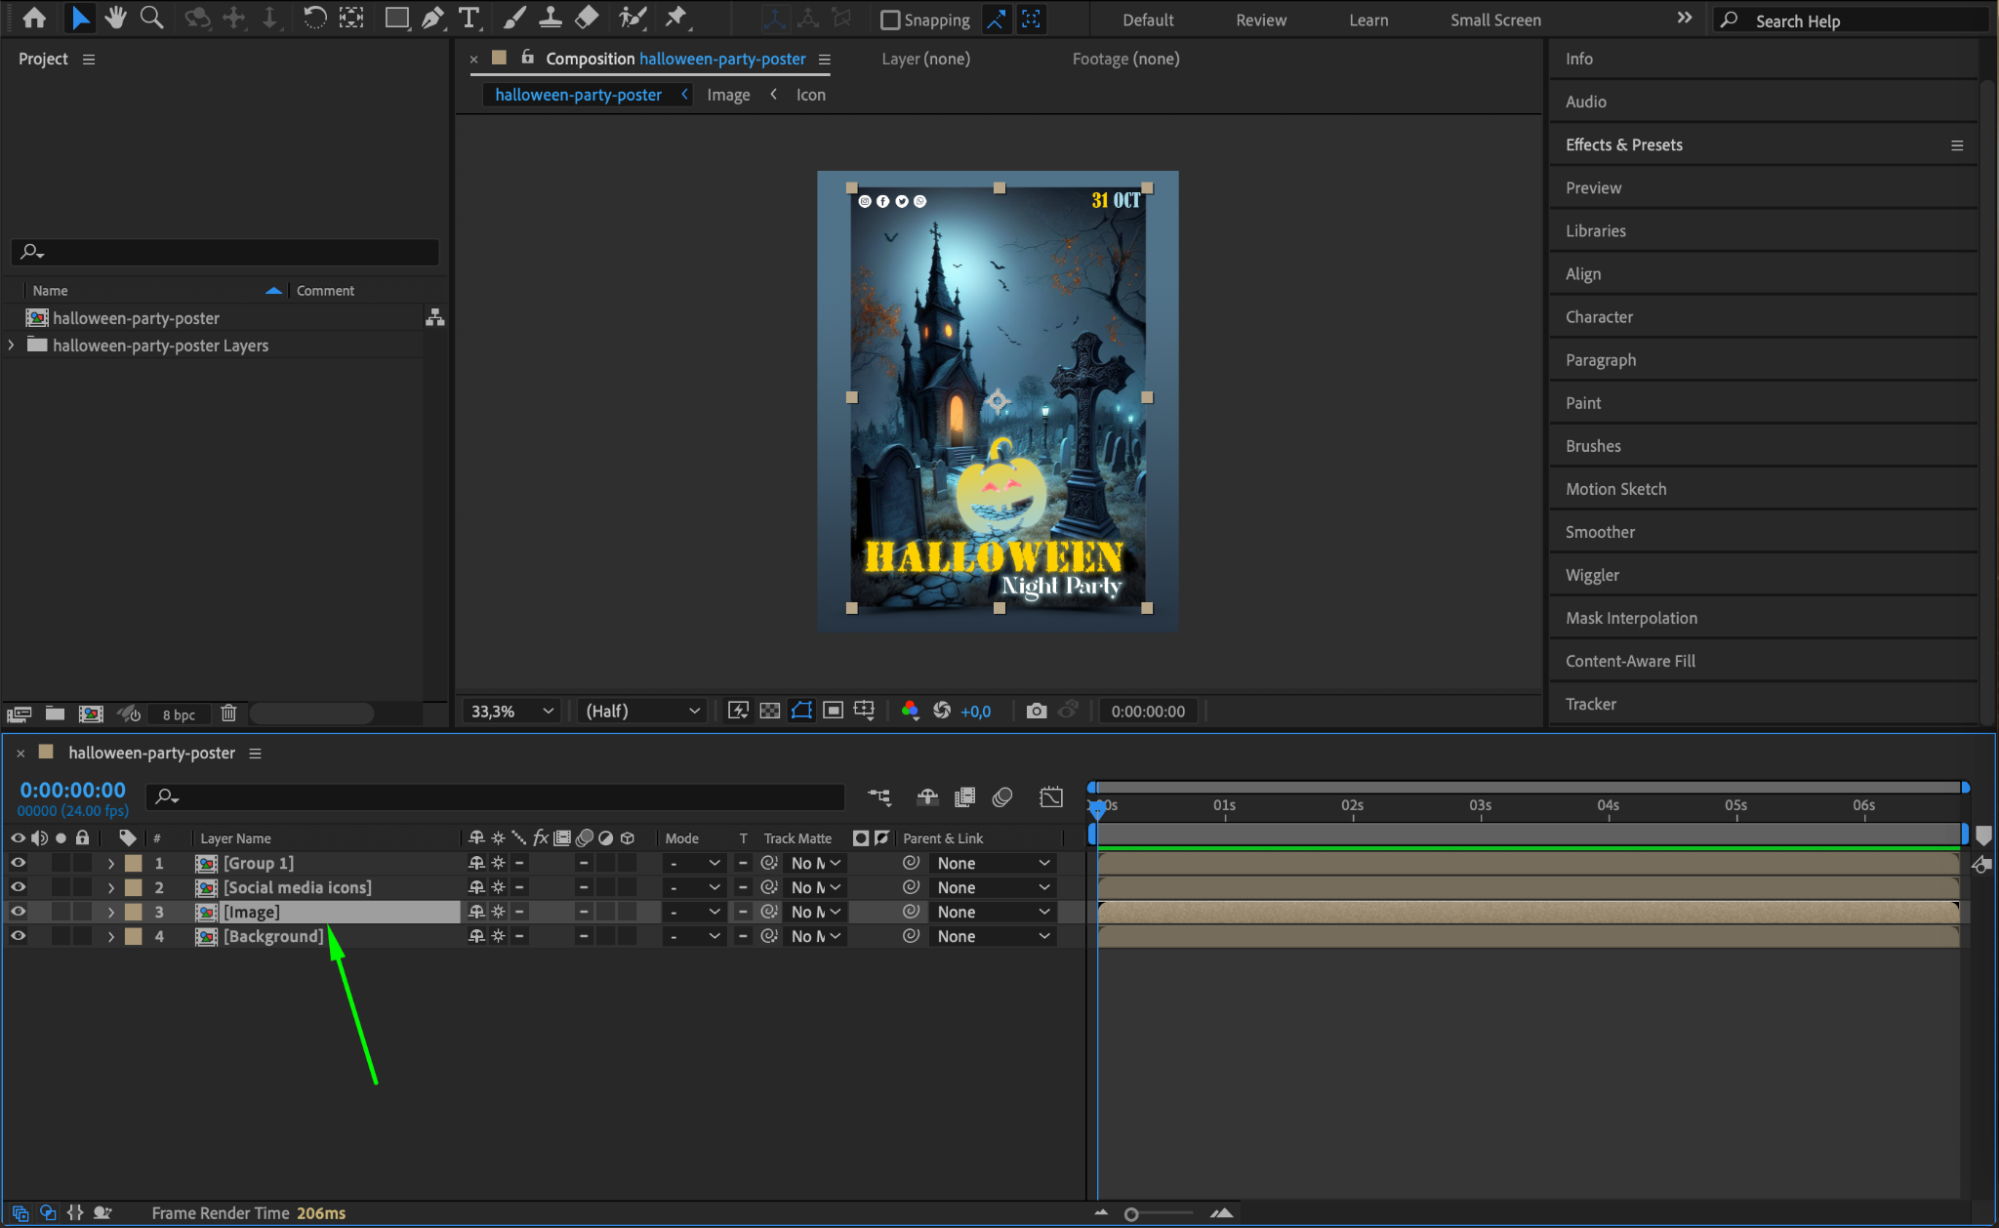
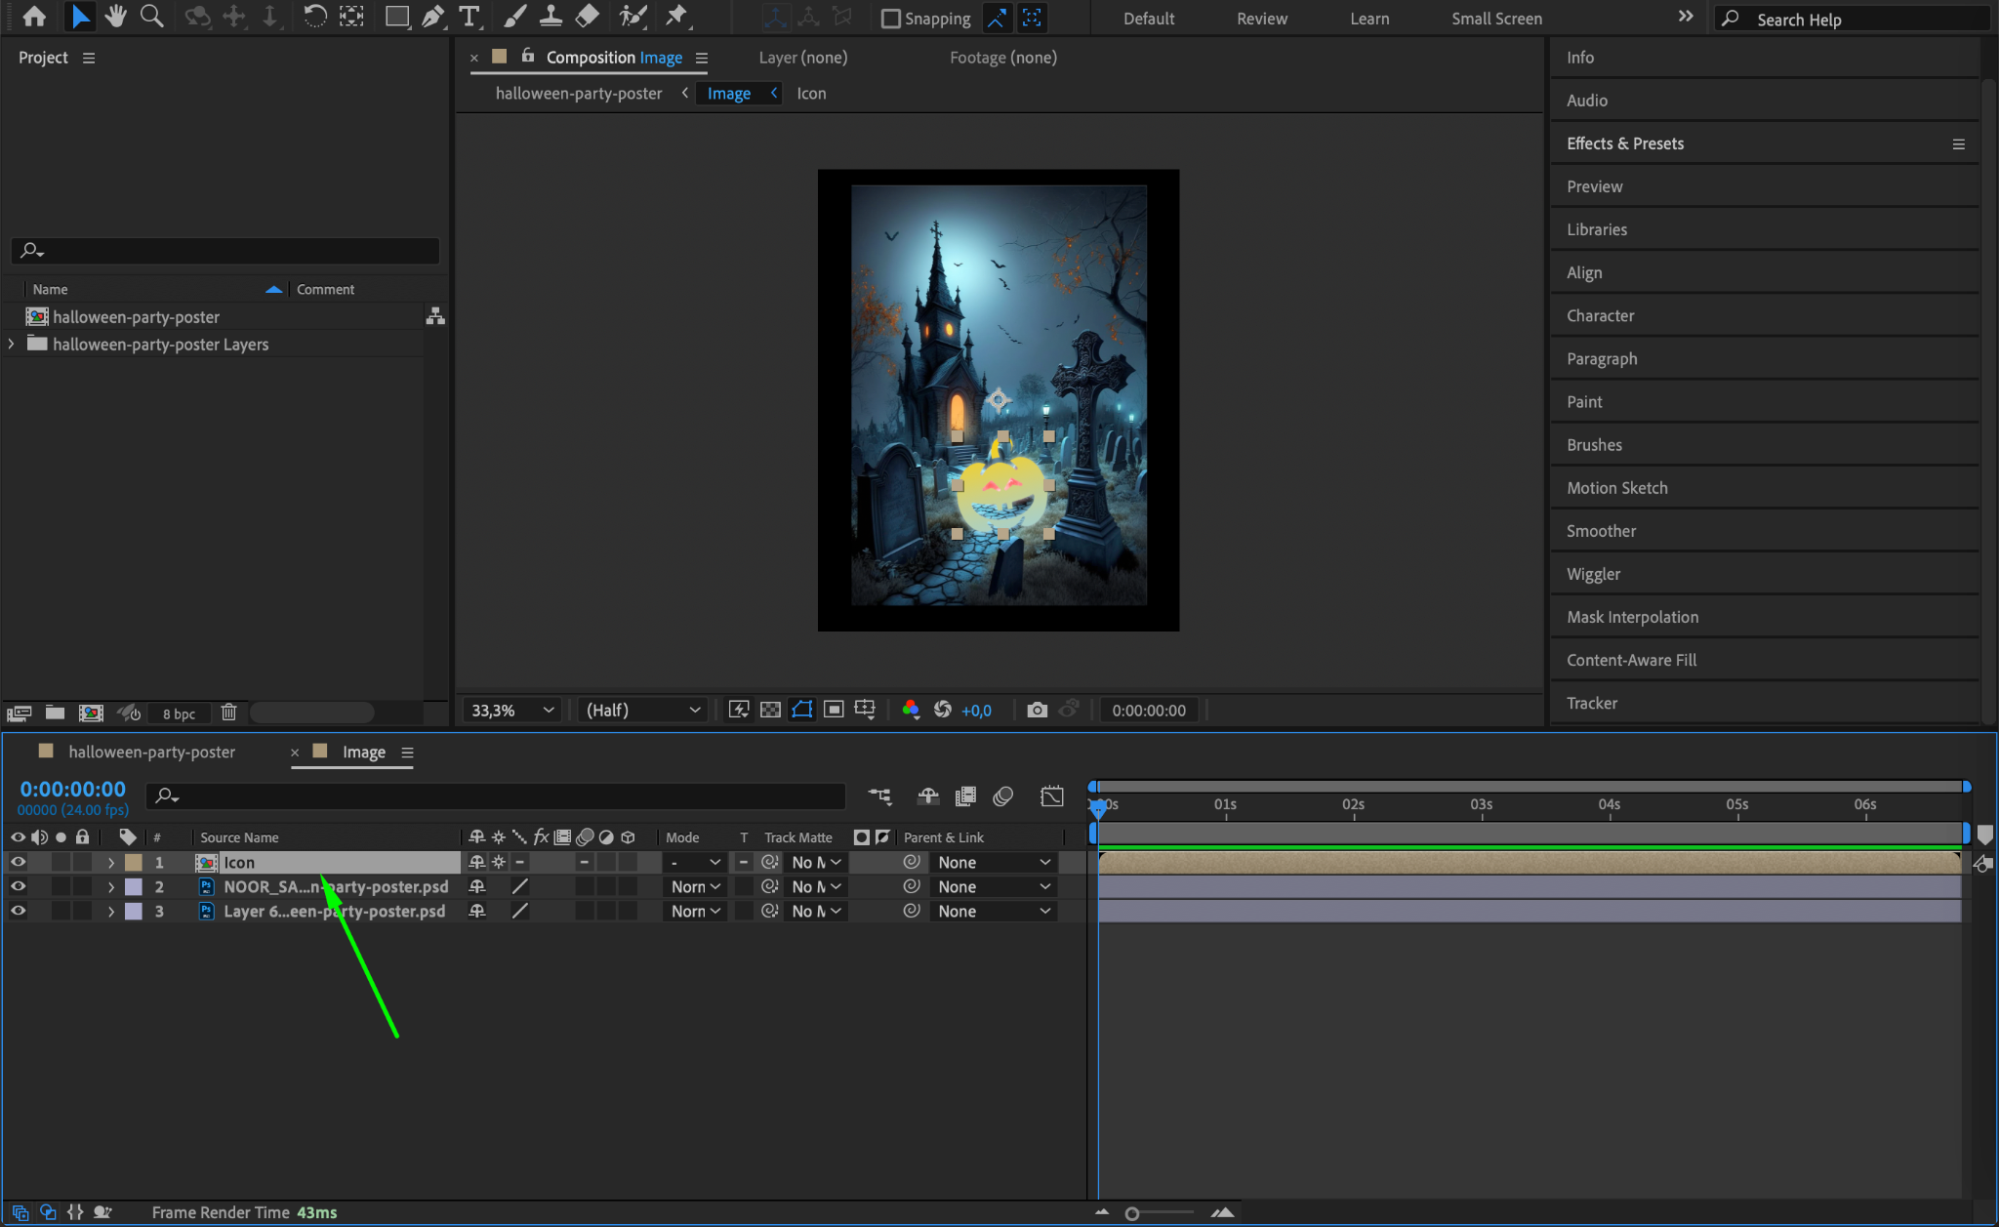
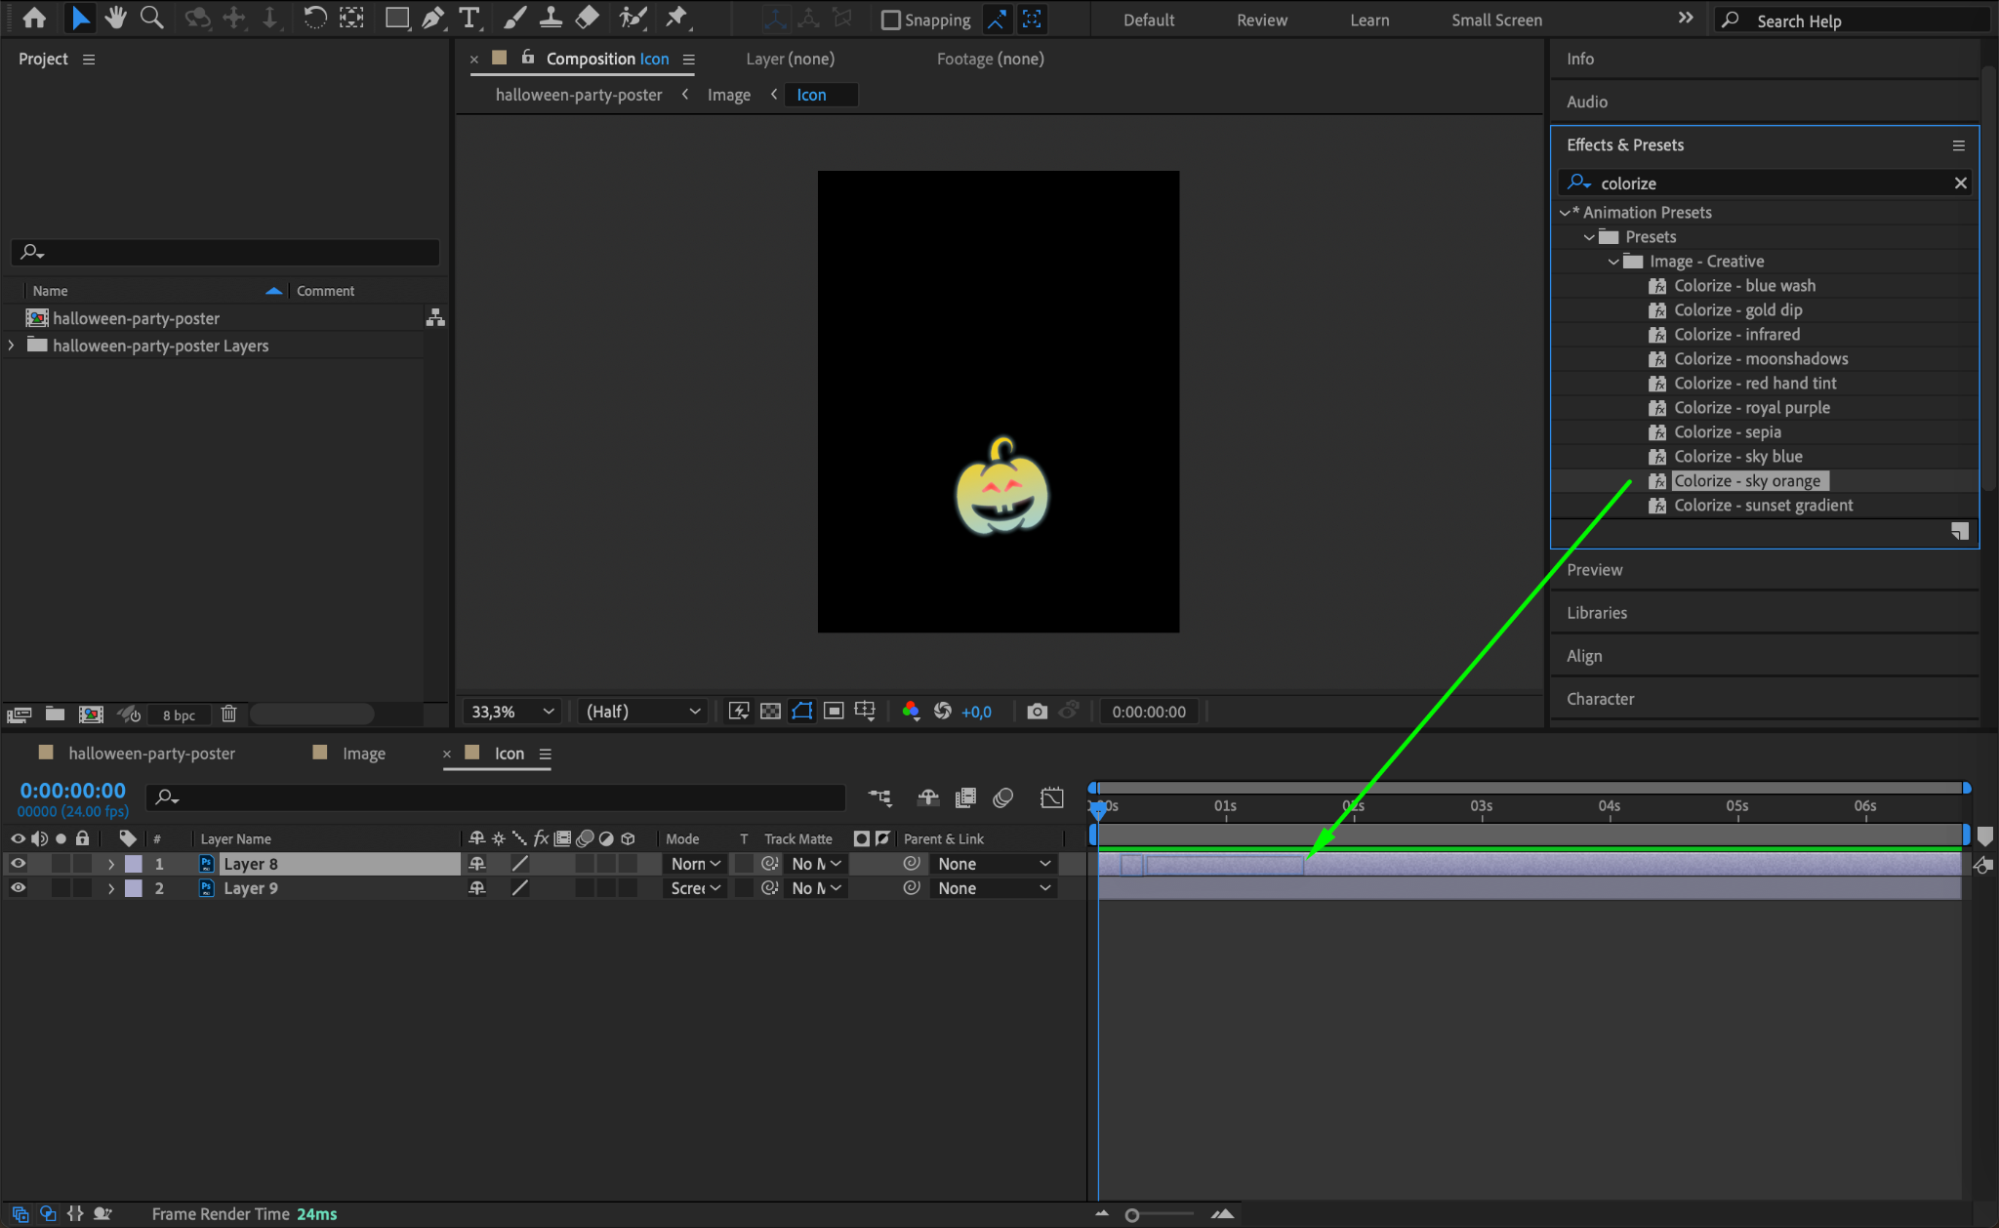
 Step 5: Create and Apply Adjustment Layers
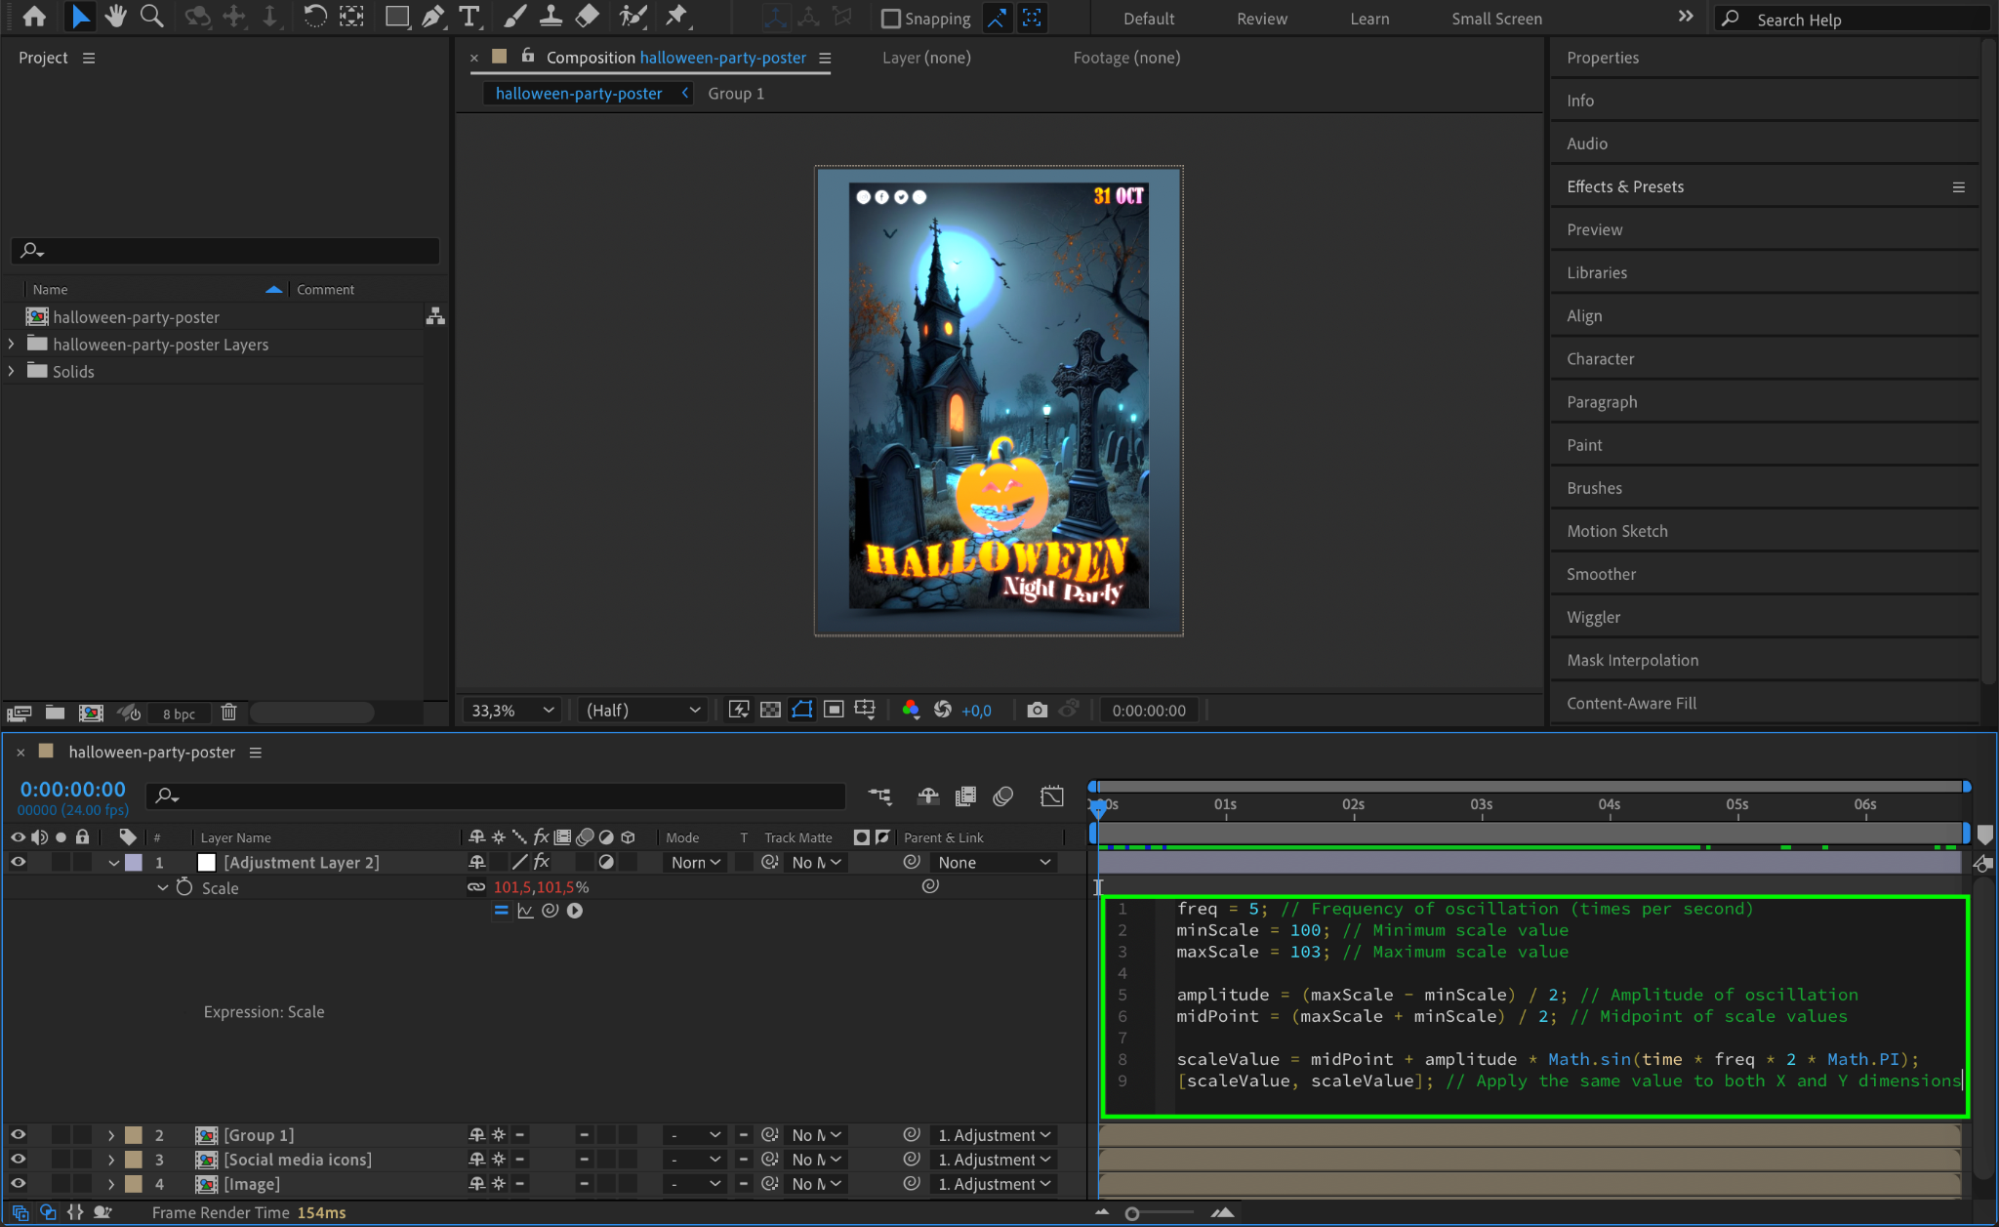
To apply effects or animations uniformly across multiple layers, create an Adjustment Layer. Go to Layer > New > Adjustment Layer. This layer can be used to apply effects that affect all underlying layers in the composition, simplifying your workflow.
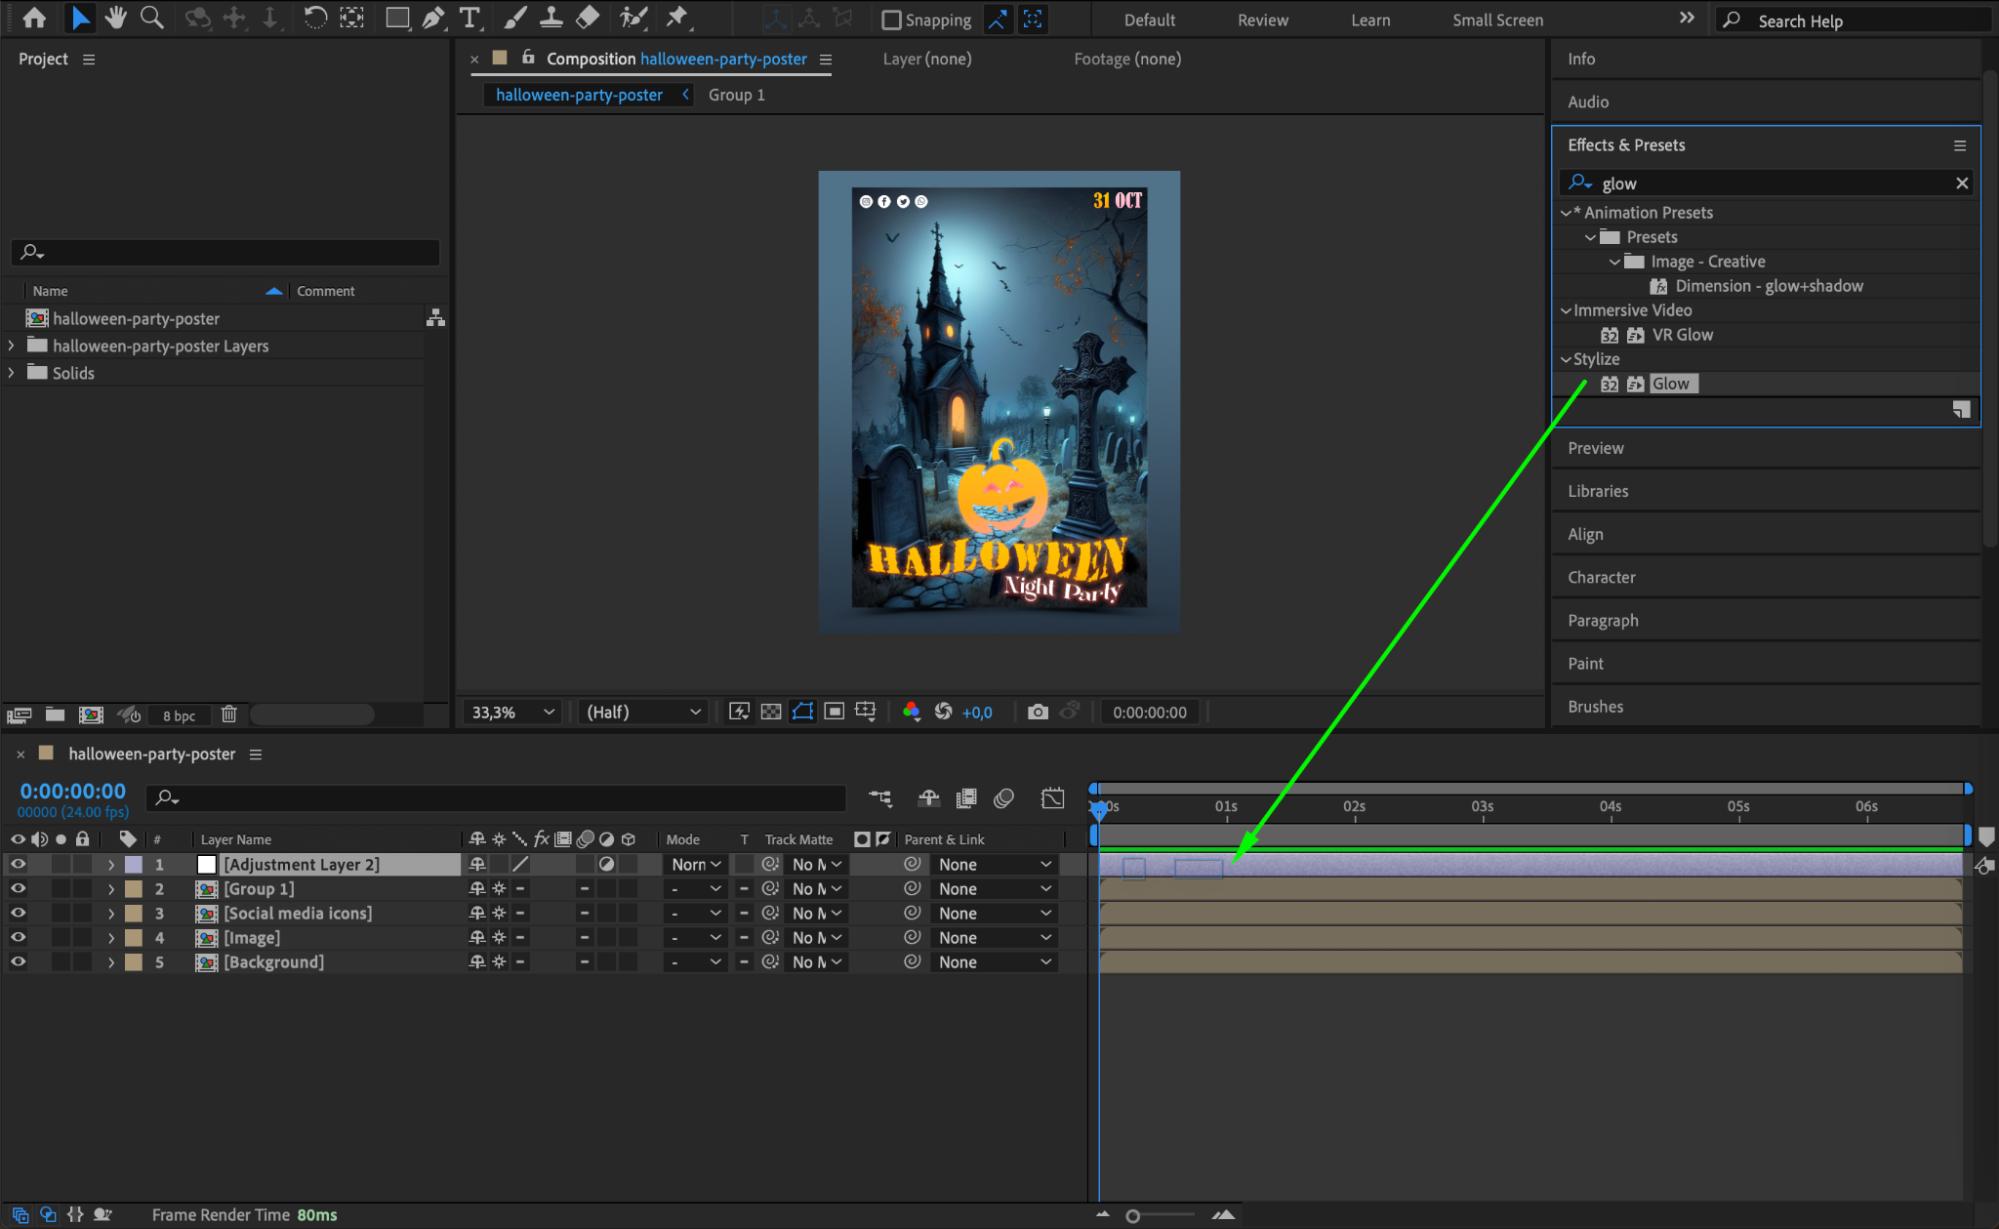
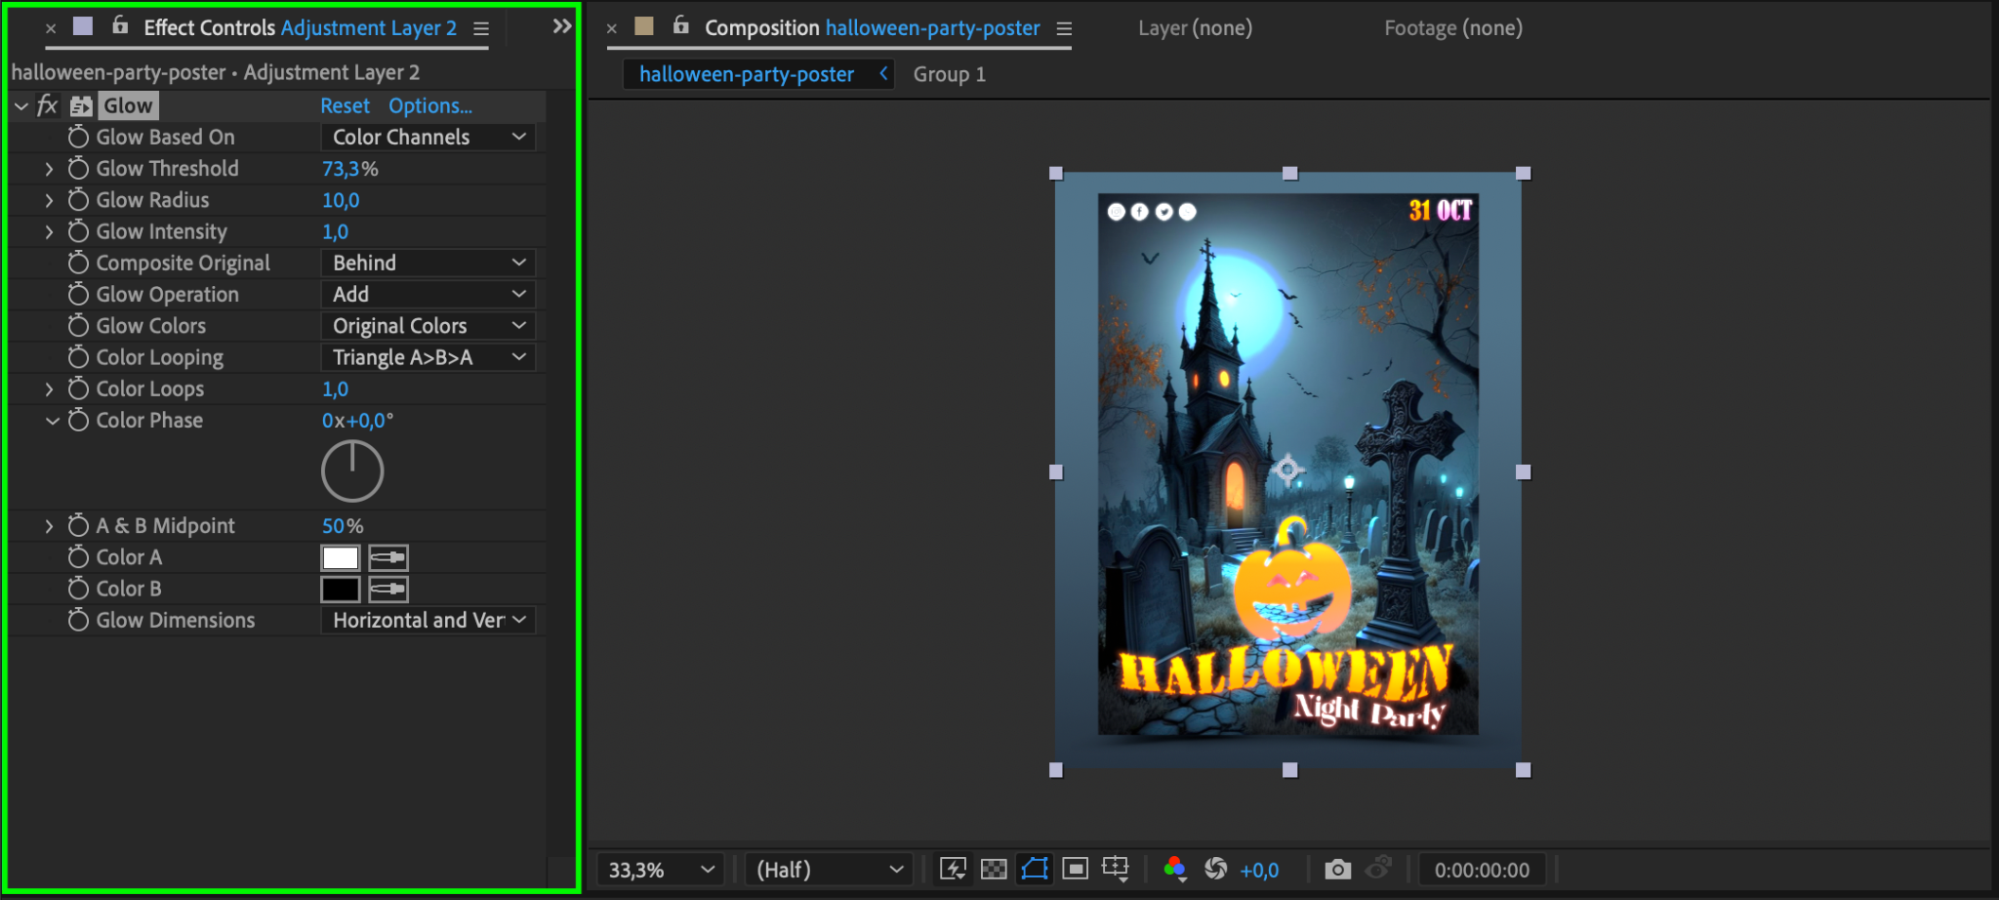
Step 6: Parent Layers to Adjustment Layer
In the Parent & Link column of the timeline, make each layer a child of the adjustment layer. This setup ensures that any changes made to the adjustment layer will affect all the linked layers, allowing for coordinated adjustments across your composition.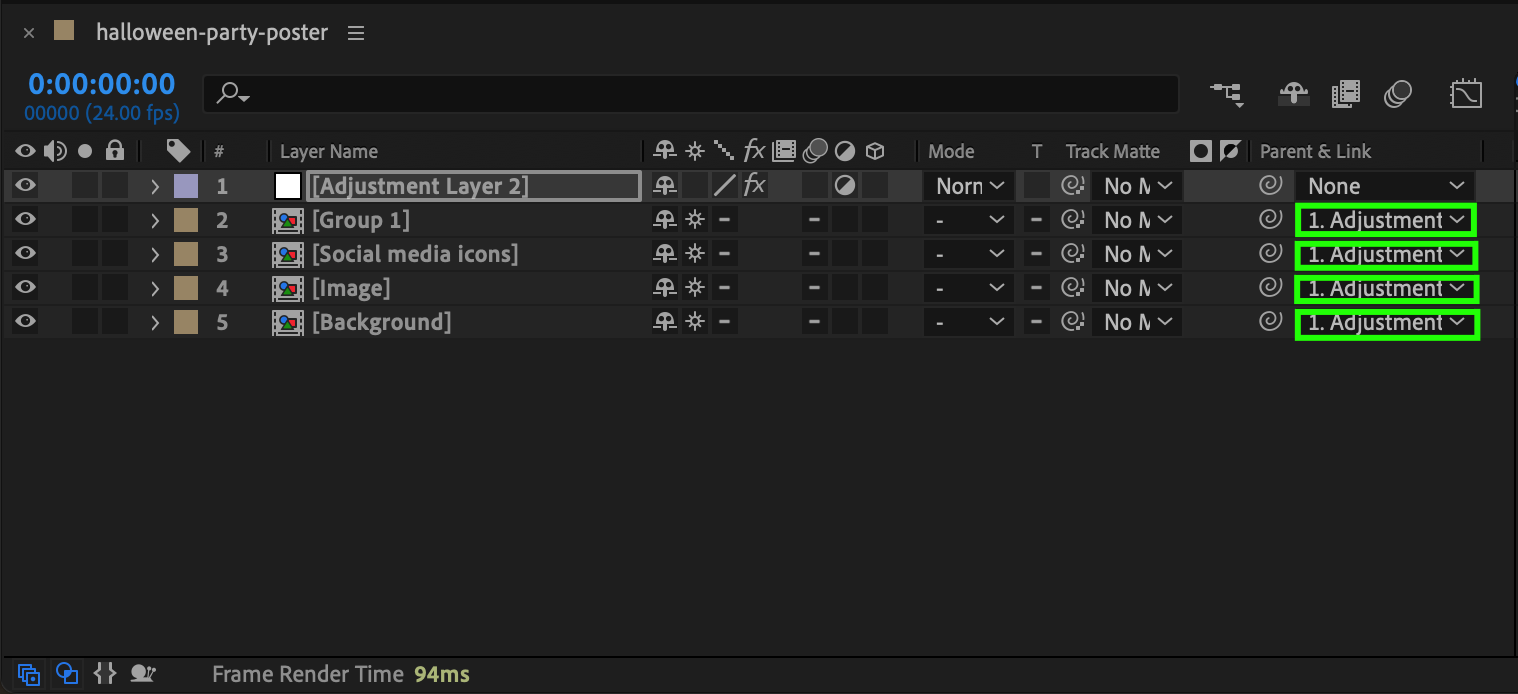 Step 7: Edit the Adjustment Layer
You can now modify the adjustment layer to apply effects or create expressions that affect the entire composition. This allows for global changes that can enhance the overall look of your project.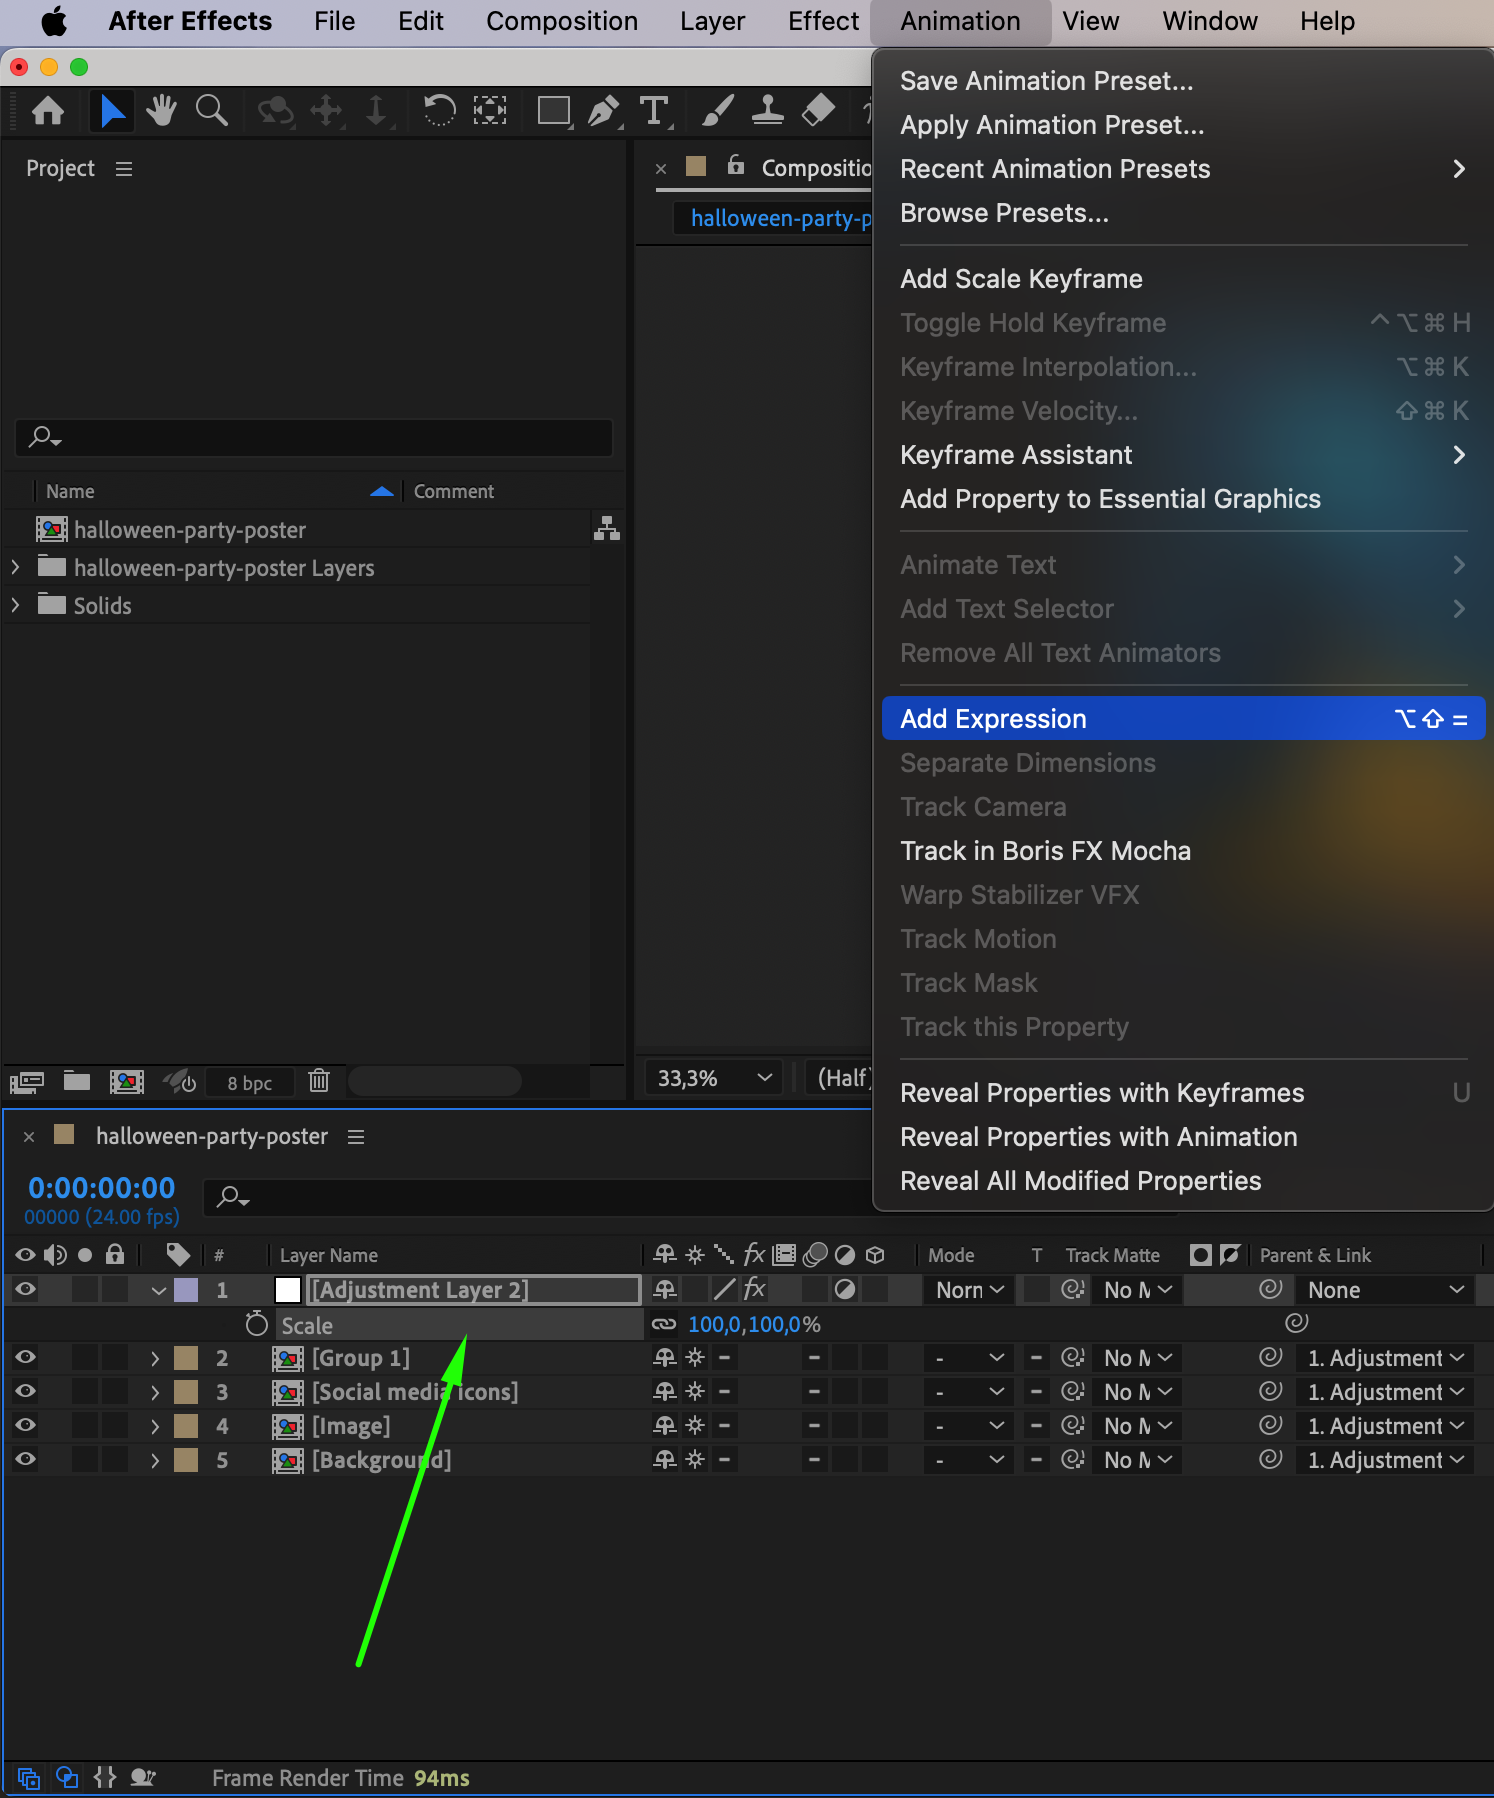
Step 8: Use Preview to Review Your Work
Preview your composition to see how the imported layers and effects come together. Make any necessary adjustments to ensure that everything looks as intended and that your animations or effects are functioning correctly.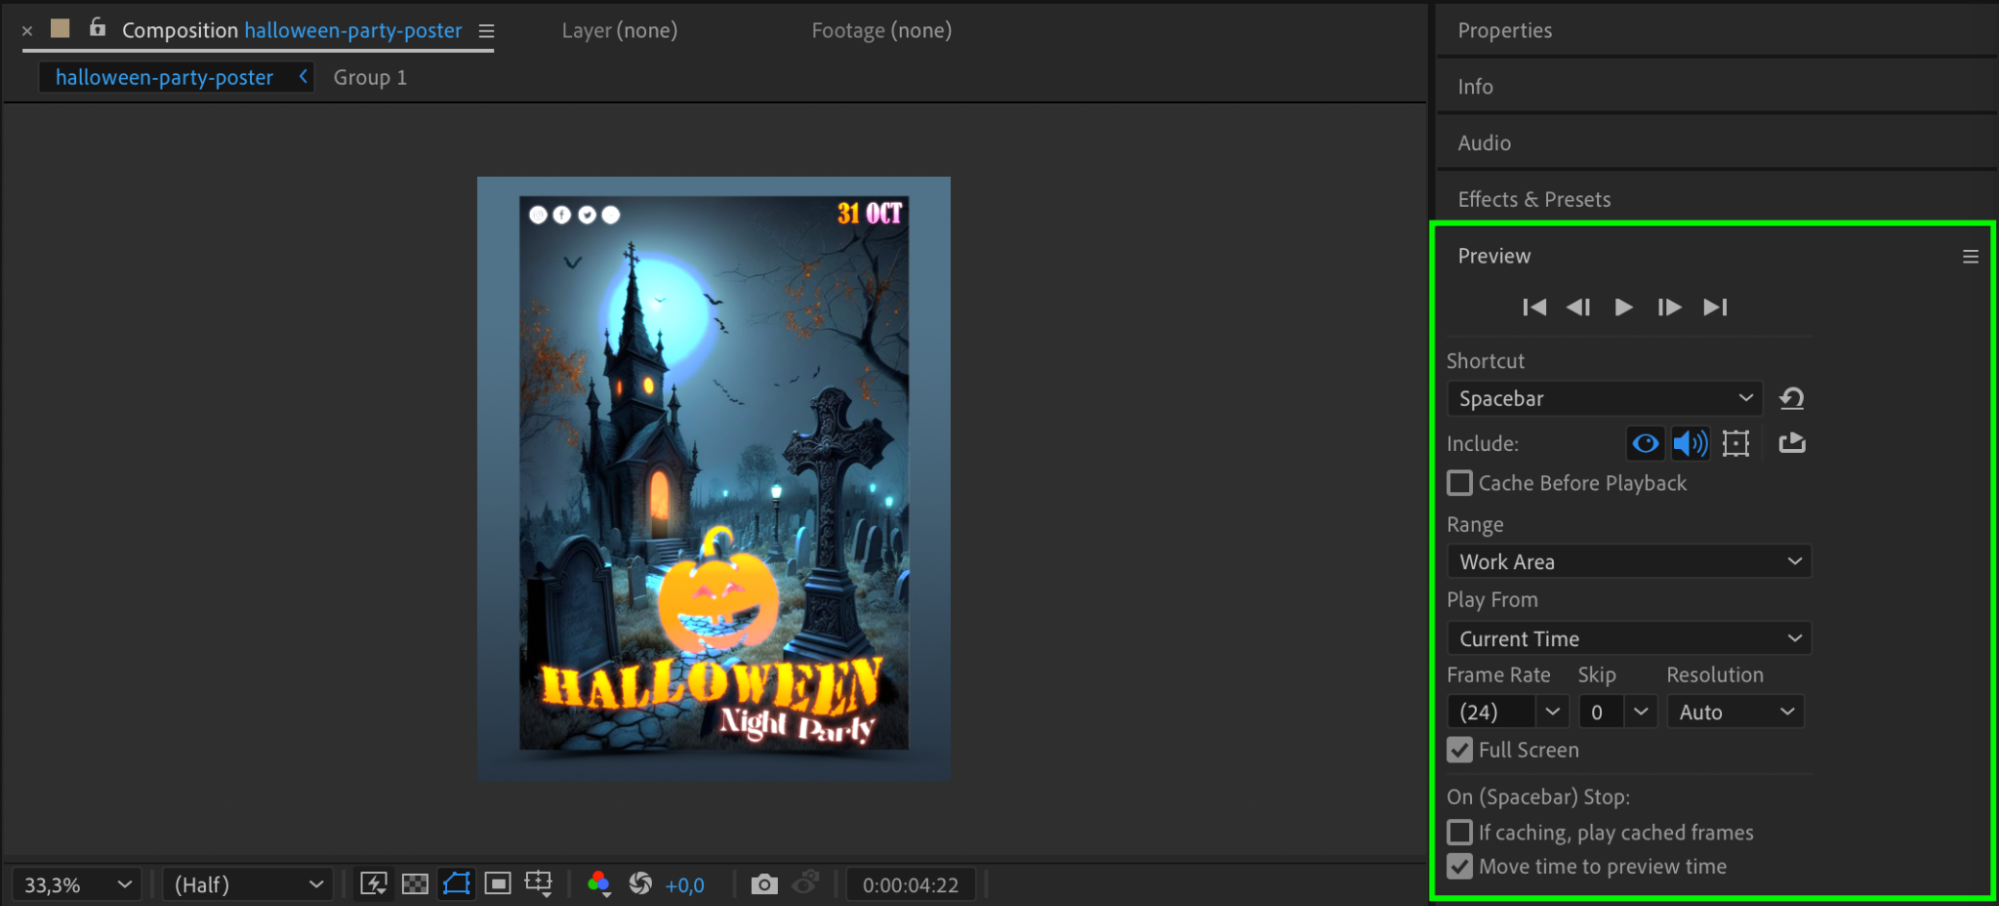
Conclusion
By following these steps, you can effectively import and utilize Photoshop layers within After Effects, expanding your creative possibilities and enhancing your motion graphics projects. Regularly save your work and experiment with different techniques to fully leverage the capabilities of both programs. With practice, importing and integrating Photoshop layers into After Effects will become a seamless part of your workflow, enabling you to create more dynamic and visually captivating animations.


