How to Import and Animate Text in After Effects: A Complete Guide
Introduction to Importing and Animating Text in After Effects
Are you ready to learn how to import text into Adobe After Effects and bring your video designs to life? Great! In this guide, we’ll walk you through the process step by step, and we’ll even share some tips and tricks along the way.
Step 1: Create a New Composition
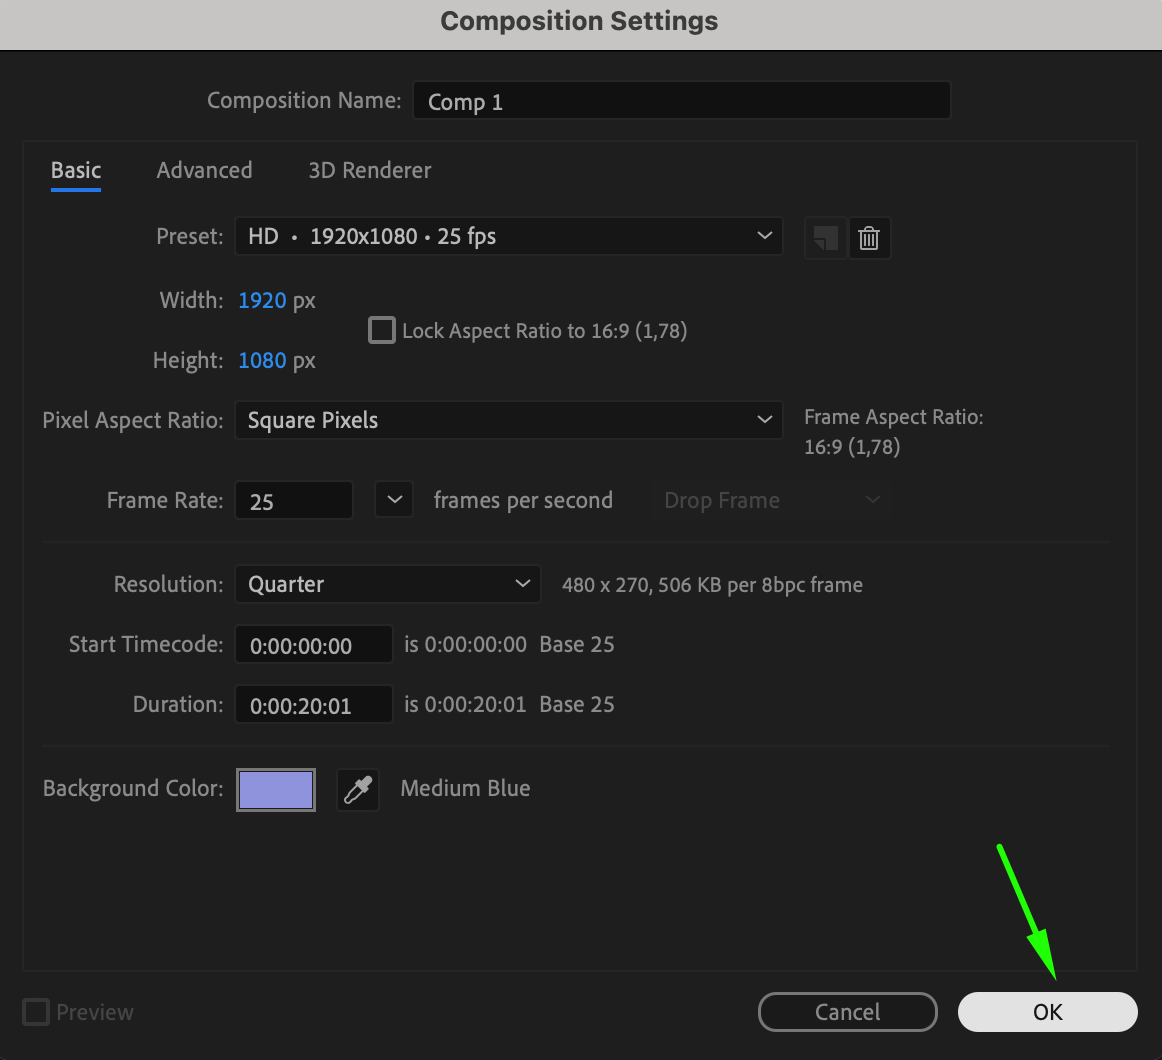
Start by opening Adobe After Effects and creating a new composition. Go to the “Composition” menu and select “New Composition.” Set the dimensions, duration, and frame rate according to your project’s needs. This composition will be the canvas where you add and animate your text.
 Step 2: Prepare Your Text
Find the text you want to use in your project and copy it. This can be any text, whether from a document, website, or script. Having your text ready ensures a smooth workflow when adding it to After Effects.
Step 3: Add a Text Layer
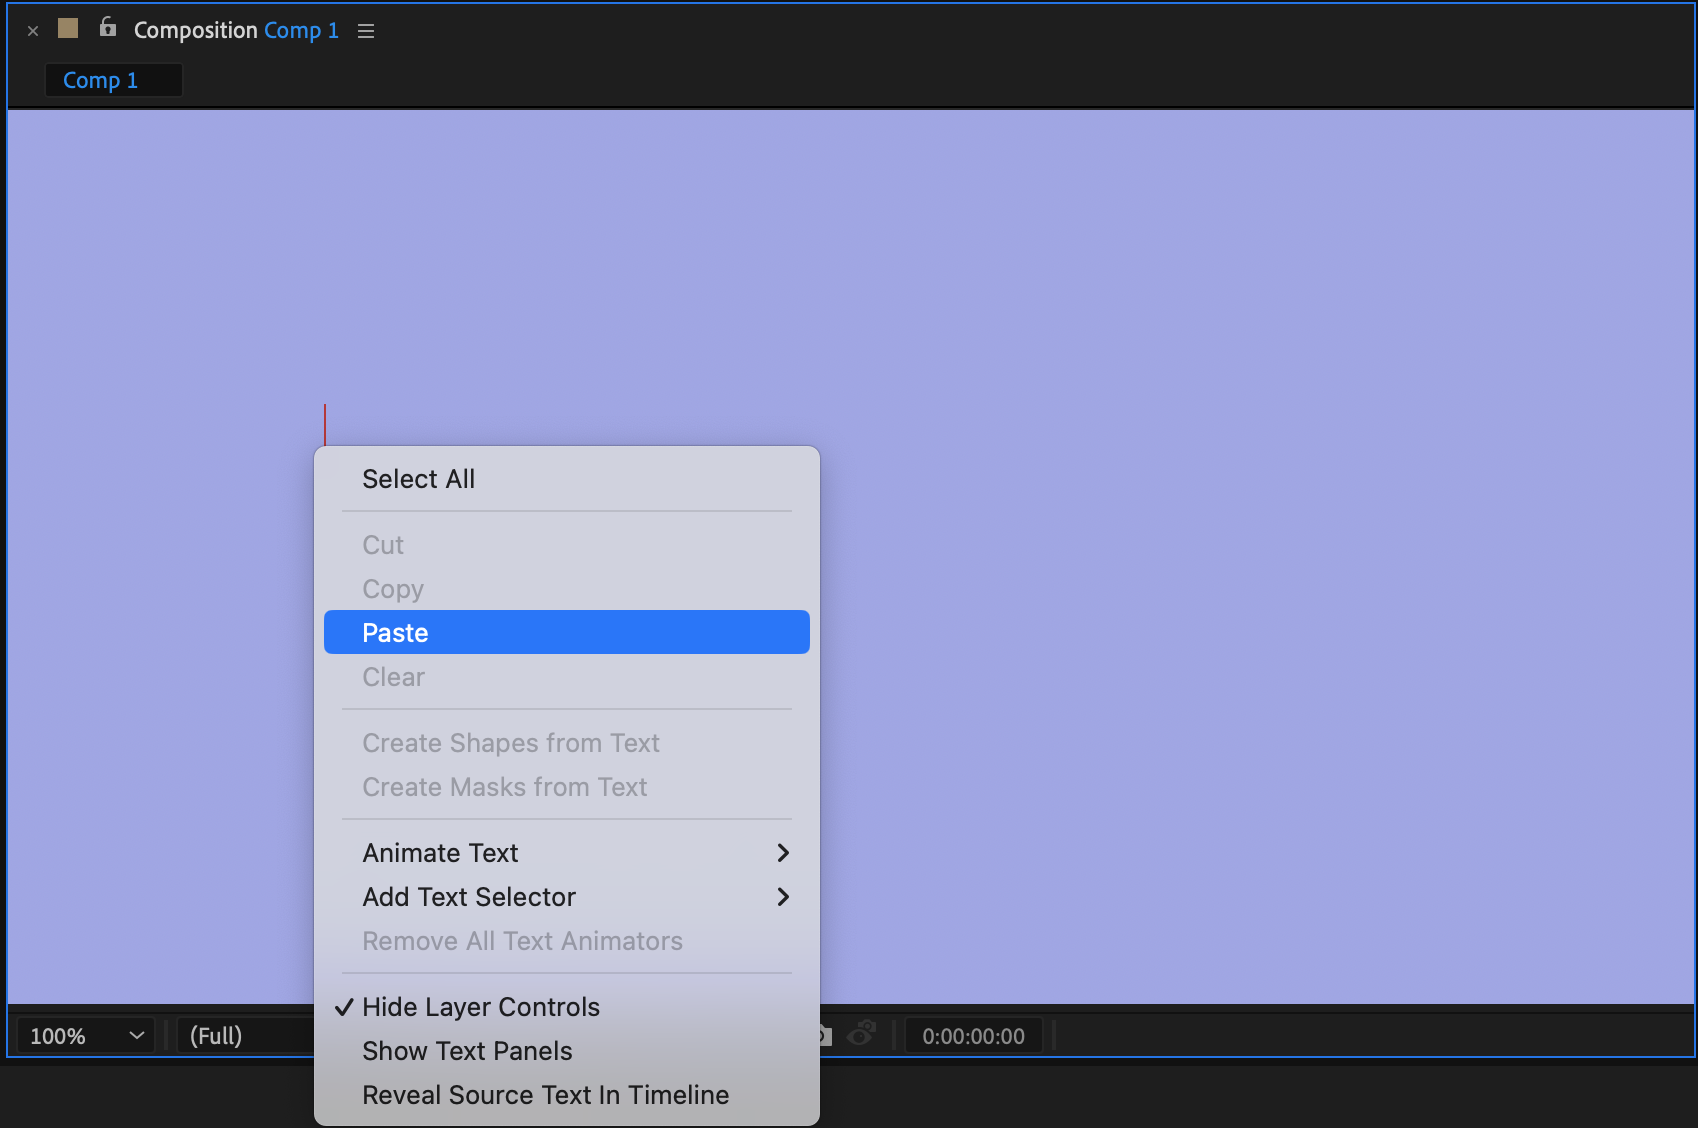
Now it’s time to add the text to your composition. Select the Text tool from the toolbar or use the shortcut key (Ctrl/Cmd + T). Click anywhere in the composition window to create a text box. When the text cursor appears, right-click and select “Paste” from the submenu to insert your copied text. This creates a new text layer that you can further customize.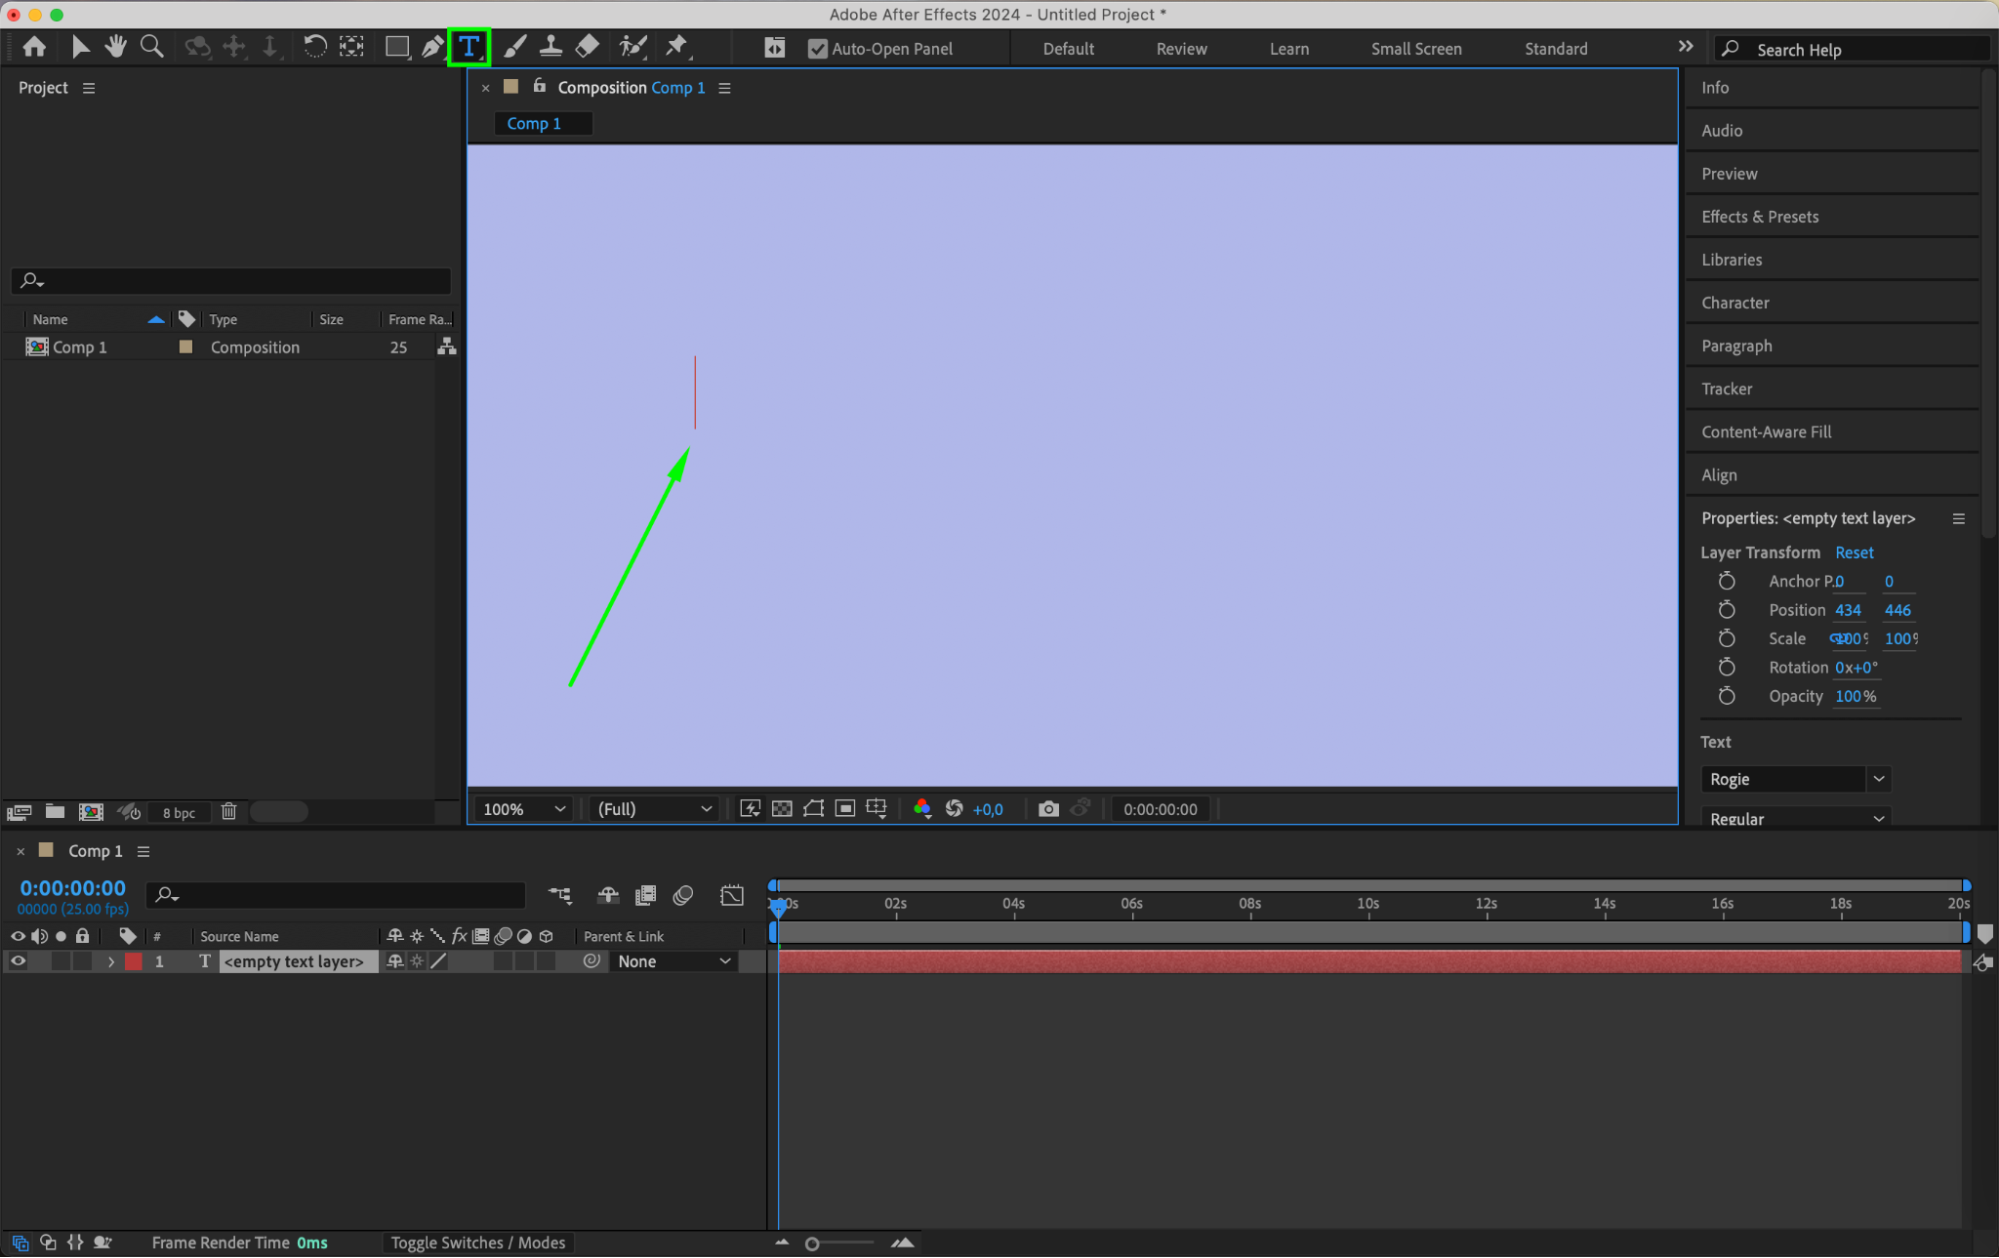
 Step 4: Customize Your Text
Get 10% off when you subscribe to our newsletter

With the text layer selected, use the Character panel to edit your text’s font, size, color, and other properties. This panel offers extensive options to style your text, making it look exactly how you want it. Take your time to adjust the settings to match your design vision.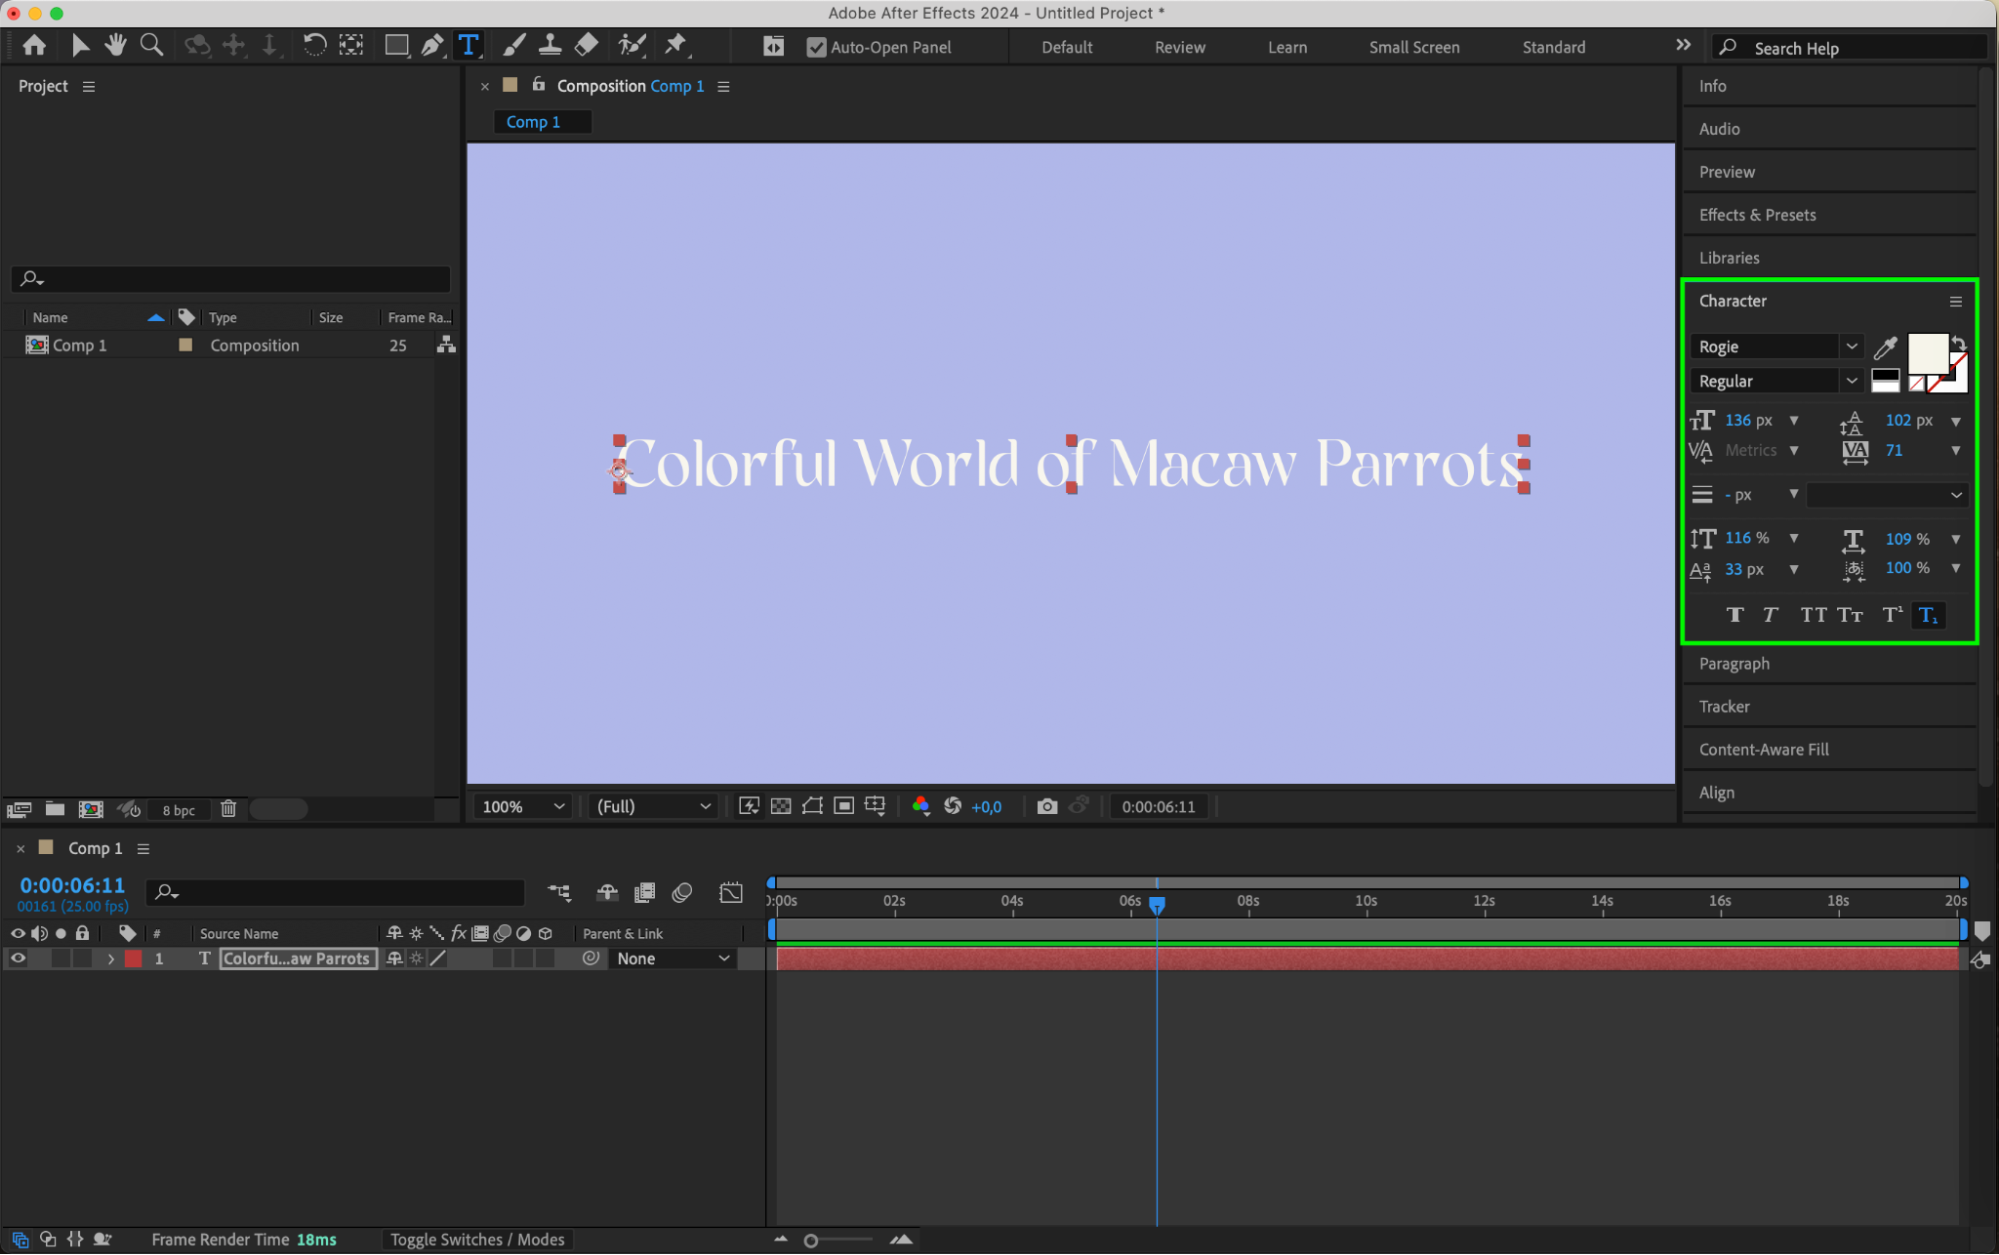
Step 5: Animate Your Text
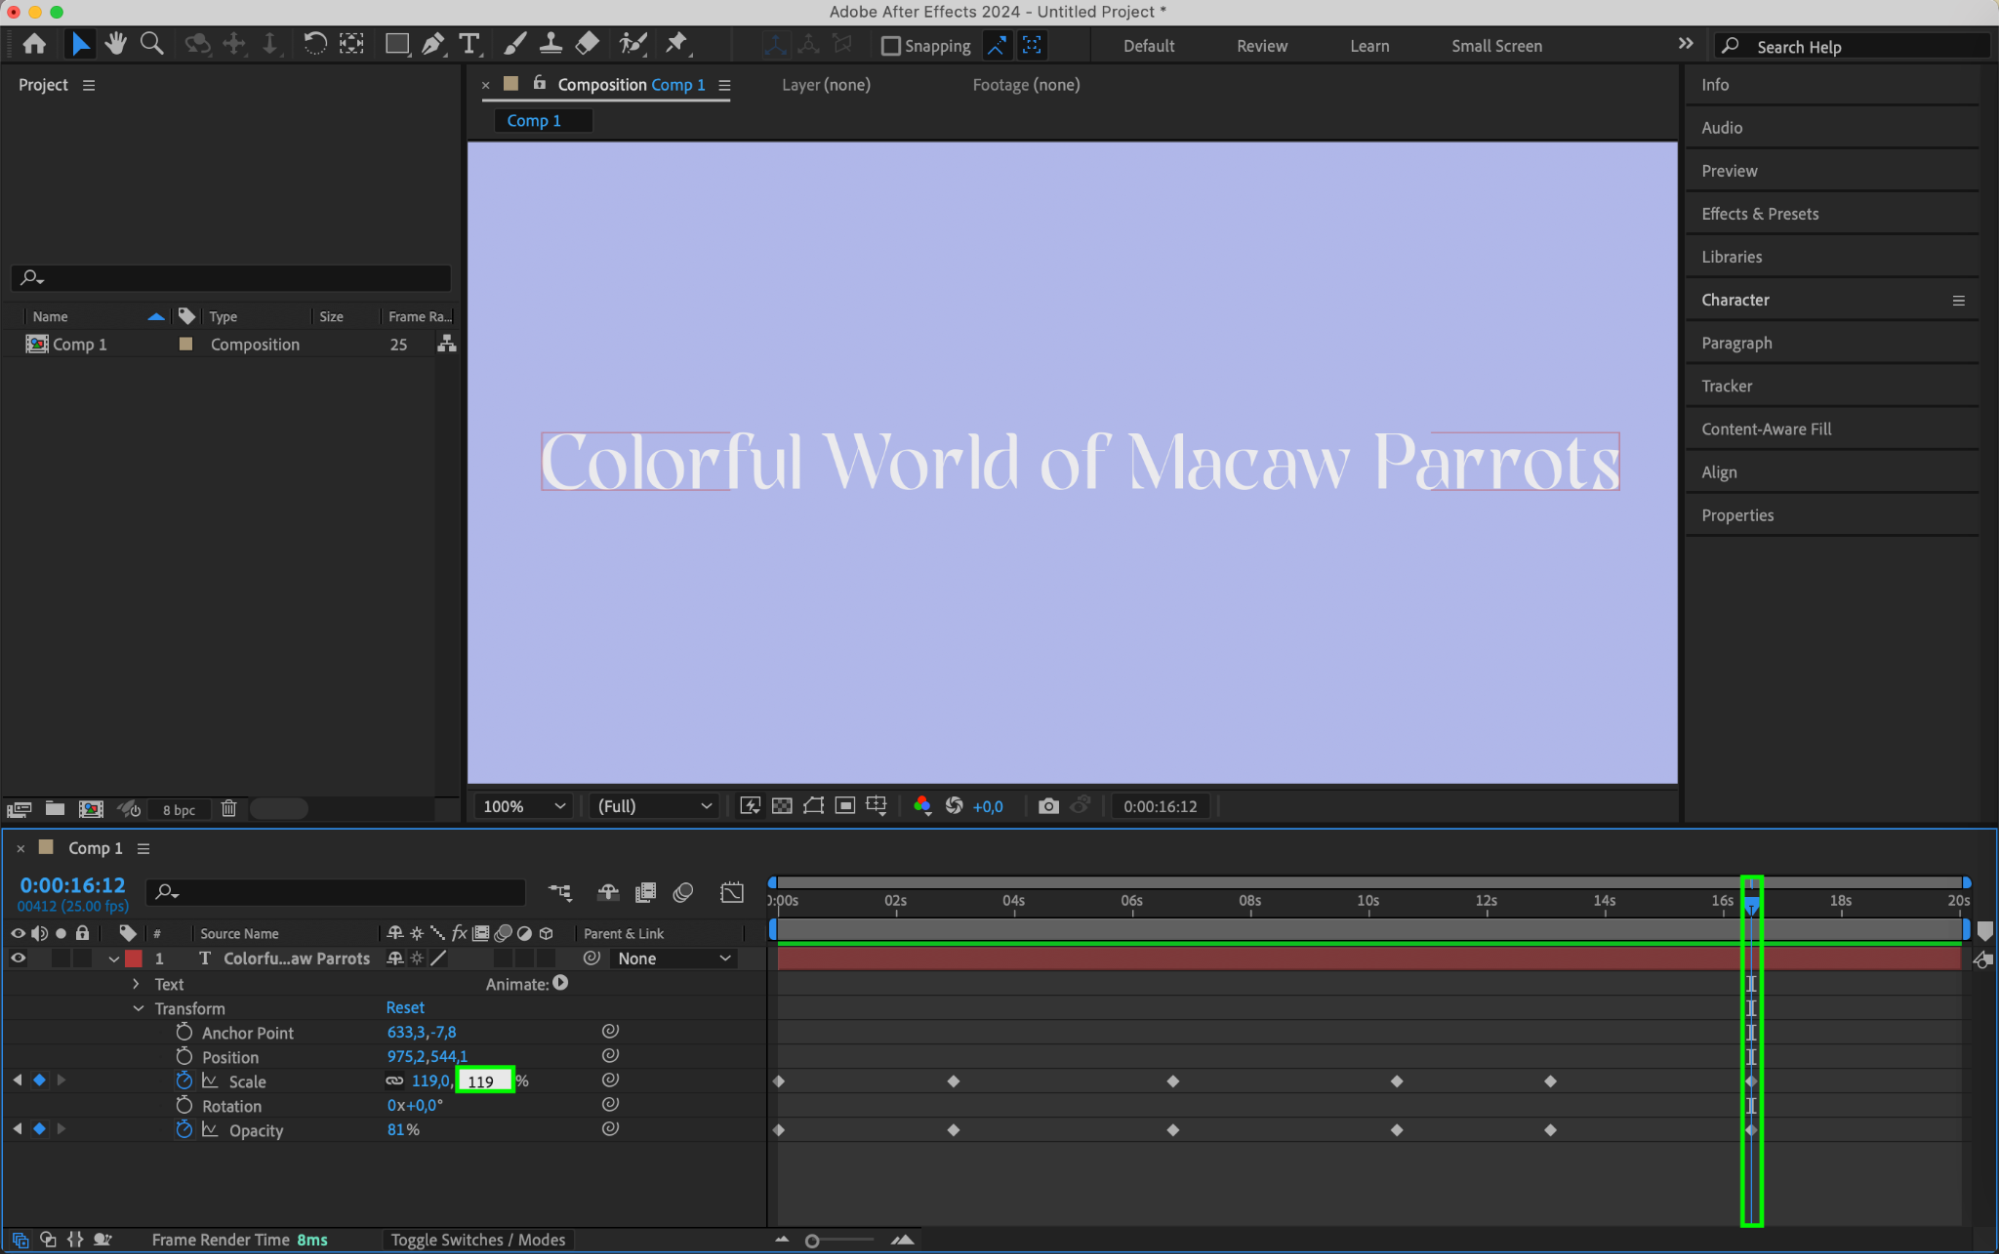
Once your text is in place, it’s time to bring it to life with animations. You can use preset animations by dragging them from the Effects & Presets panel onto your text layer, or you can create custom animations using keyframes. Experiment with parameters like position, scale, opacity, and rotation to achieve the desired effect.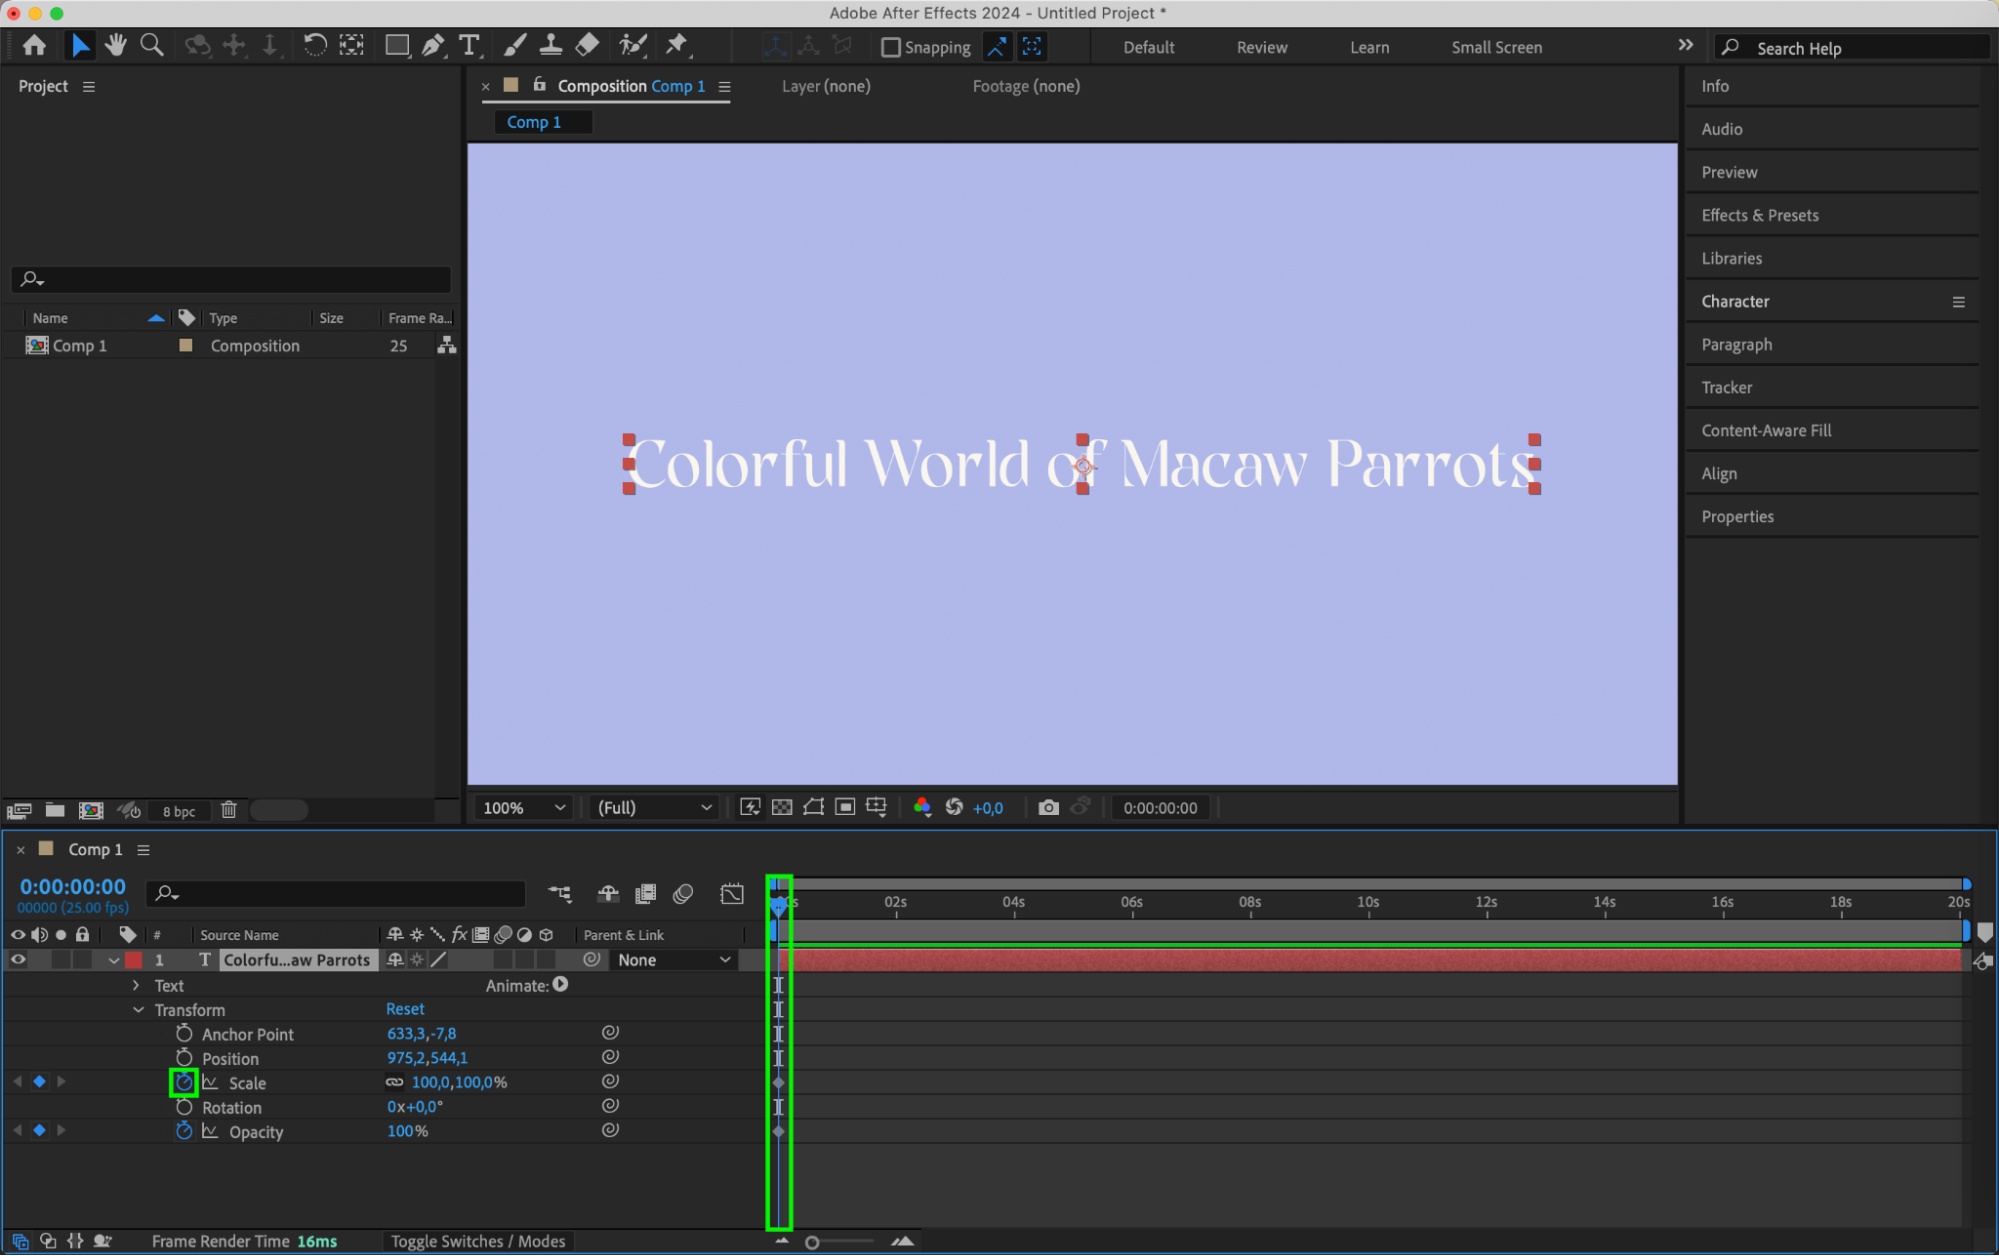
 Step 6: Fine-Tune Your Animation
Get 10% off when you subscribe to our newsletter

To refine your text animation, adjust the timing and easing. Select the text layer and open the Timeline window. Here, you can manipulate keyframes to control the speed and smoothness of the animation. For more precise adjustments, use the Graph Editor to fine-tune the motion curves, ensuring your animation flows naturally.


 Step 7: Enhance with Effects
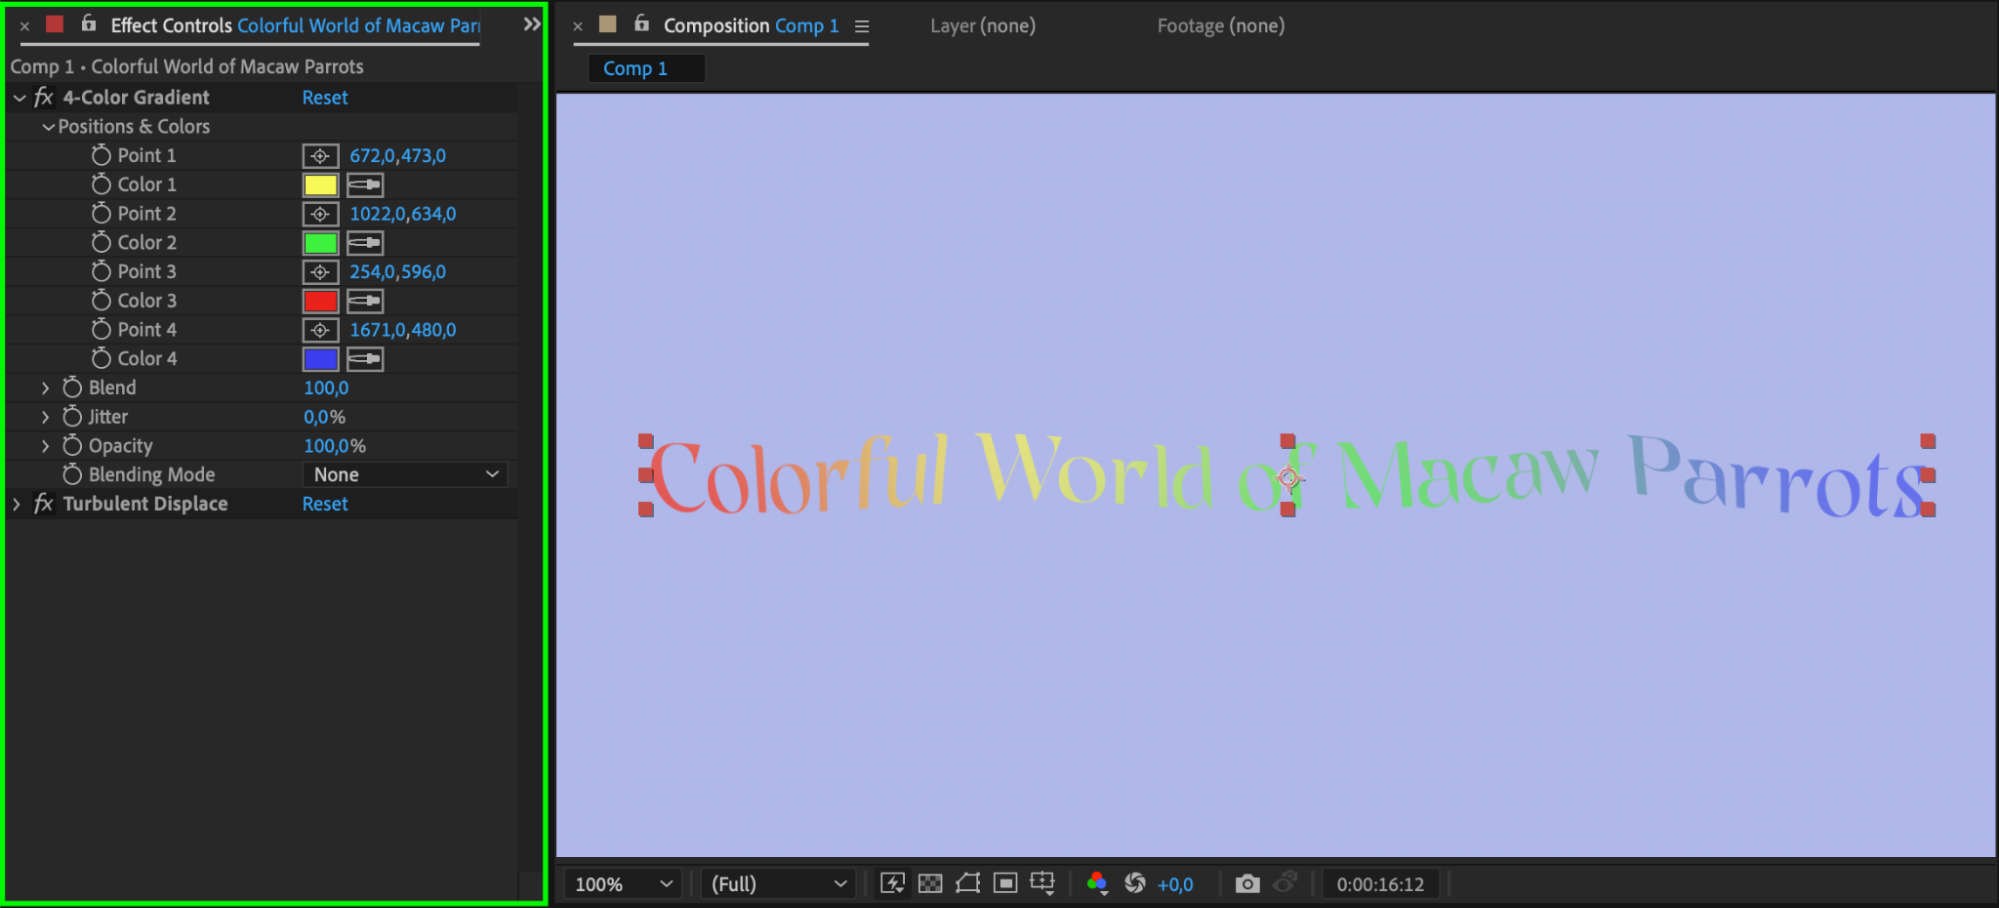
After Effects offers a wide range of effects to enhance your text animations. Explore effects like drop shadows, glows, blurs, and transitions to add depth and visual interest. Access these by selecting the text layer, navigating to the Effects & Presets panel, and applying your chosen effect.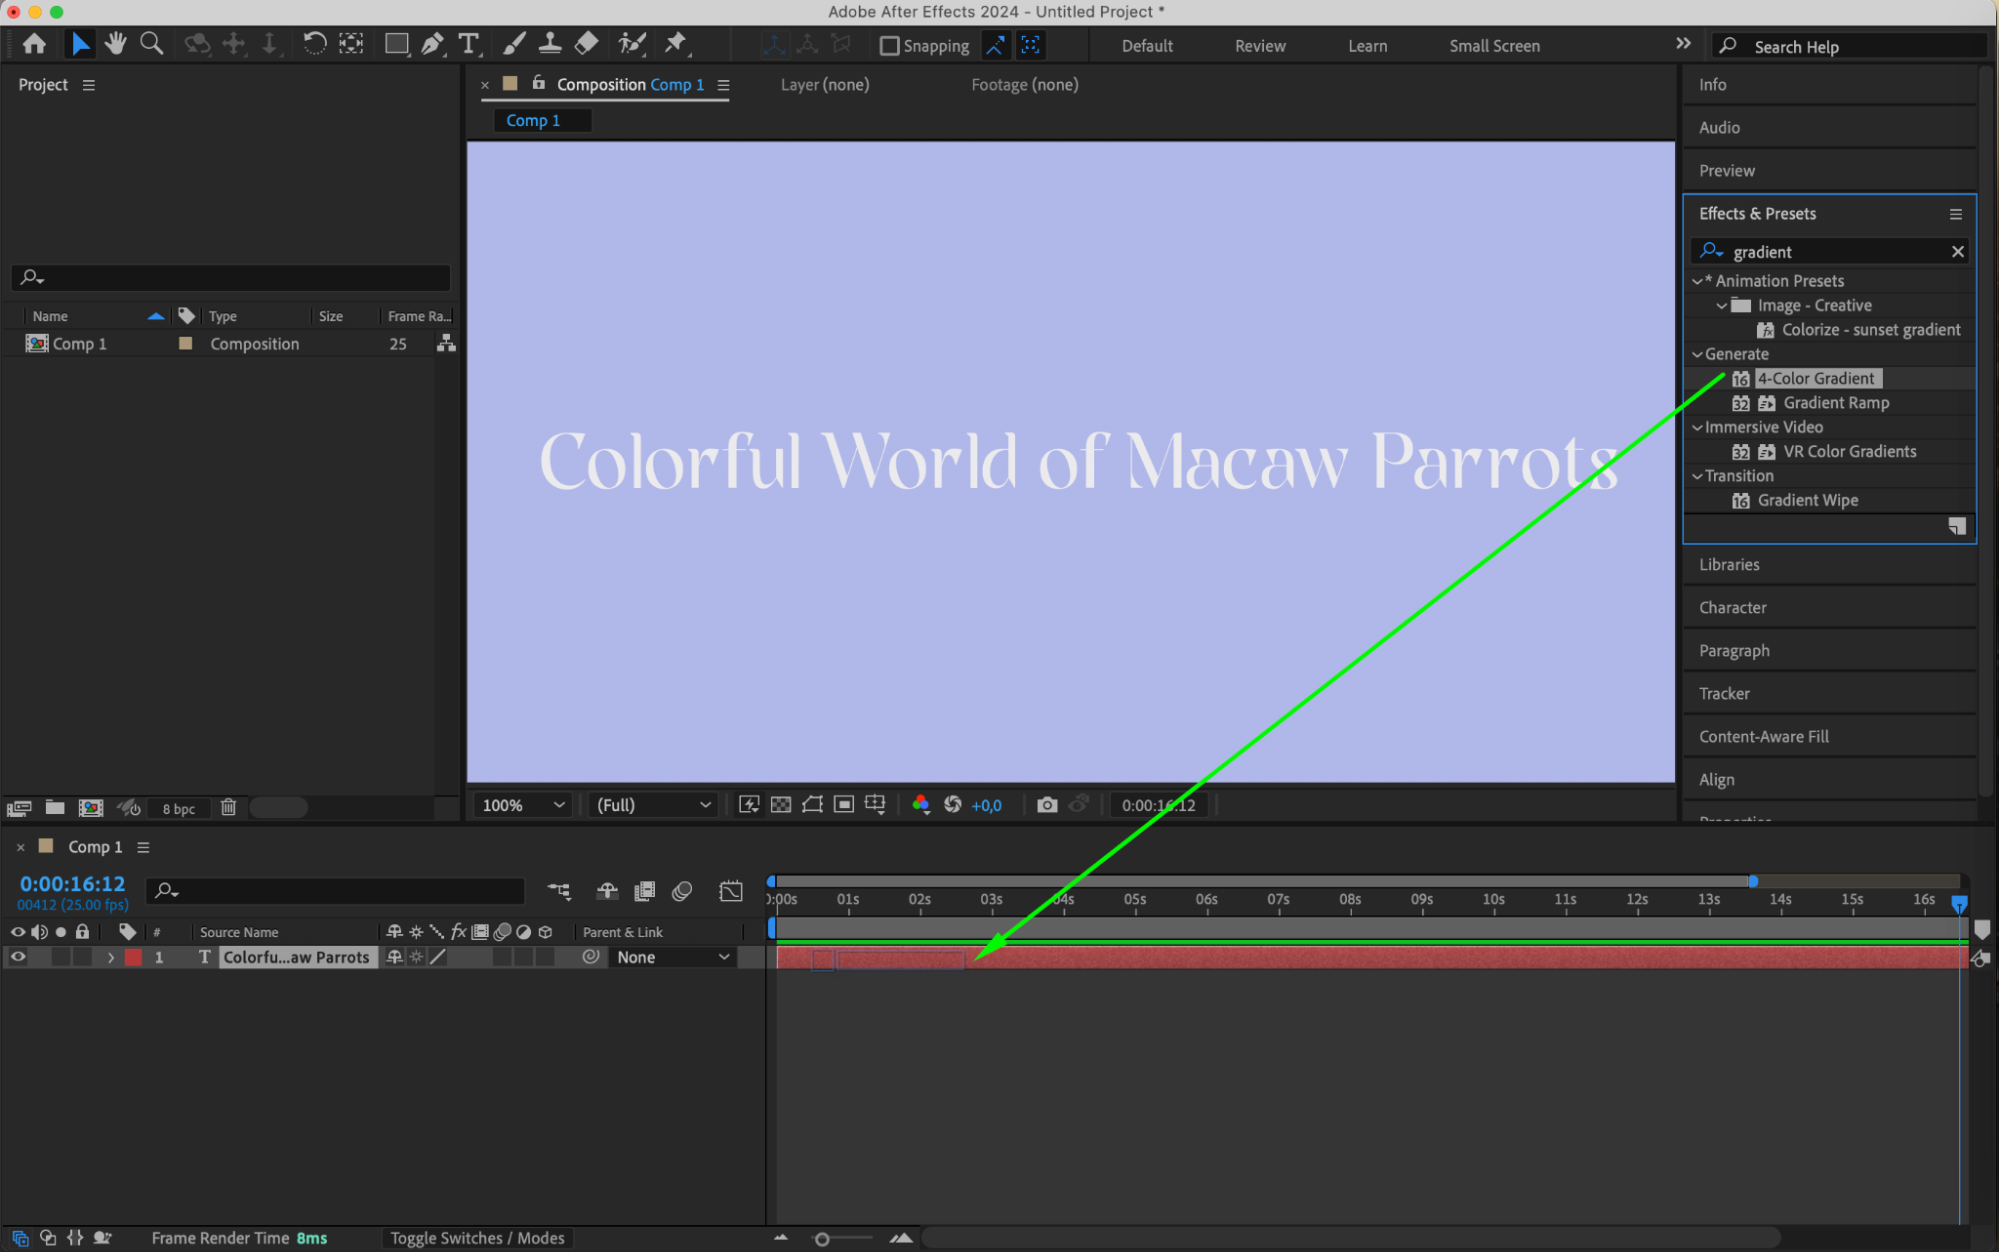
 Step 8: Add a Background
Get 10% off when you subscribe to our newsletter

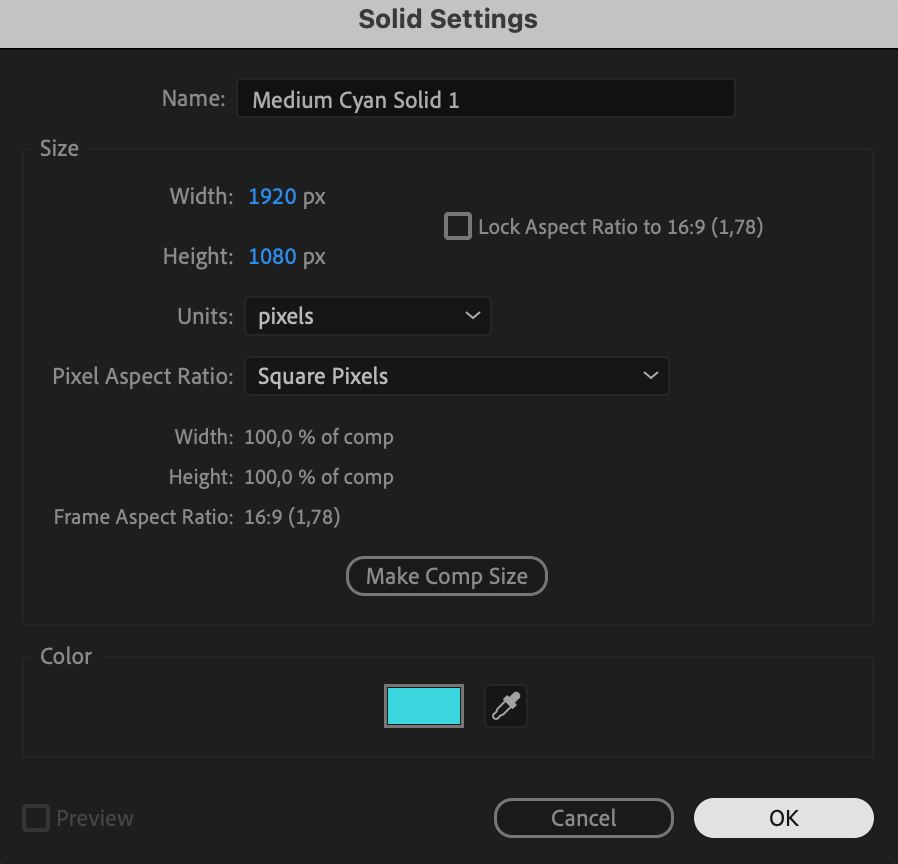
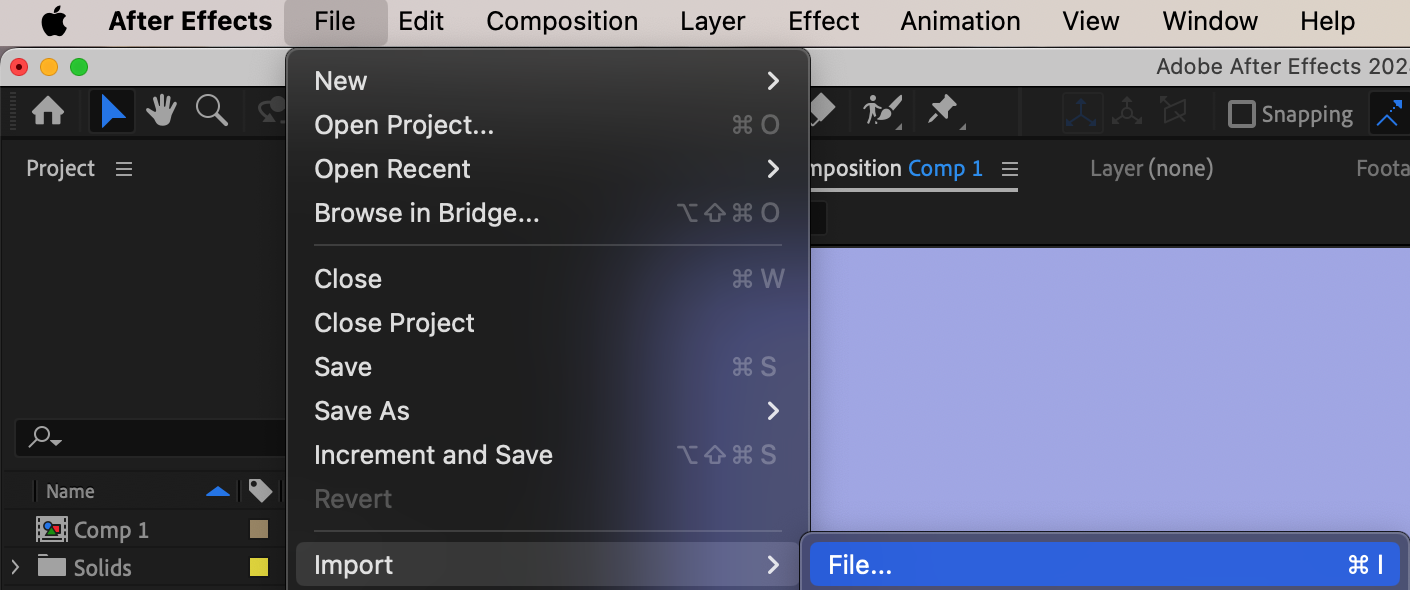
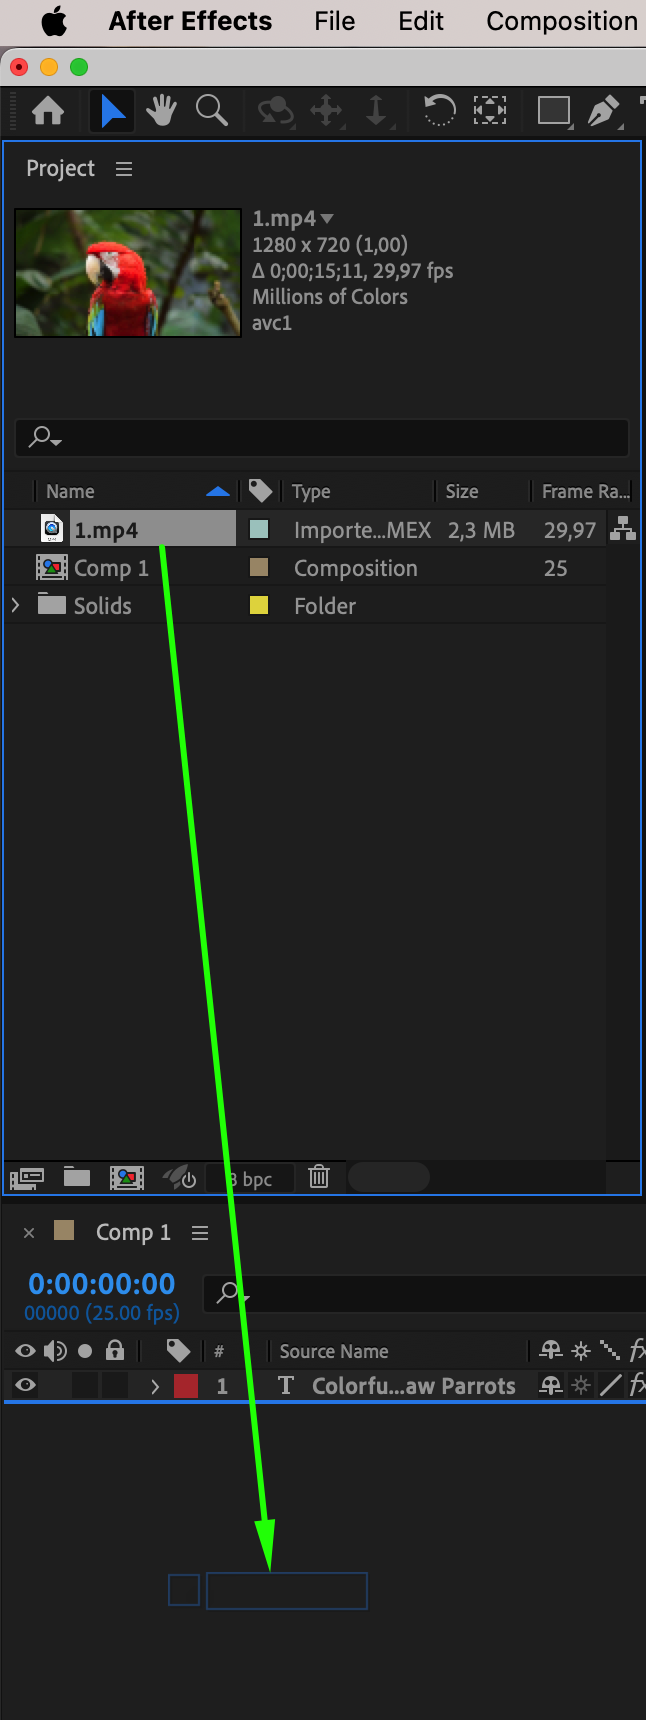
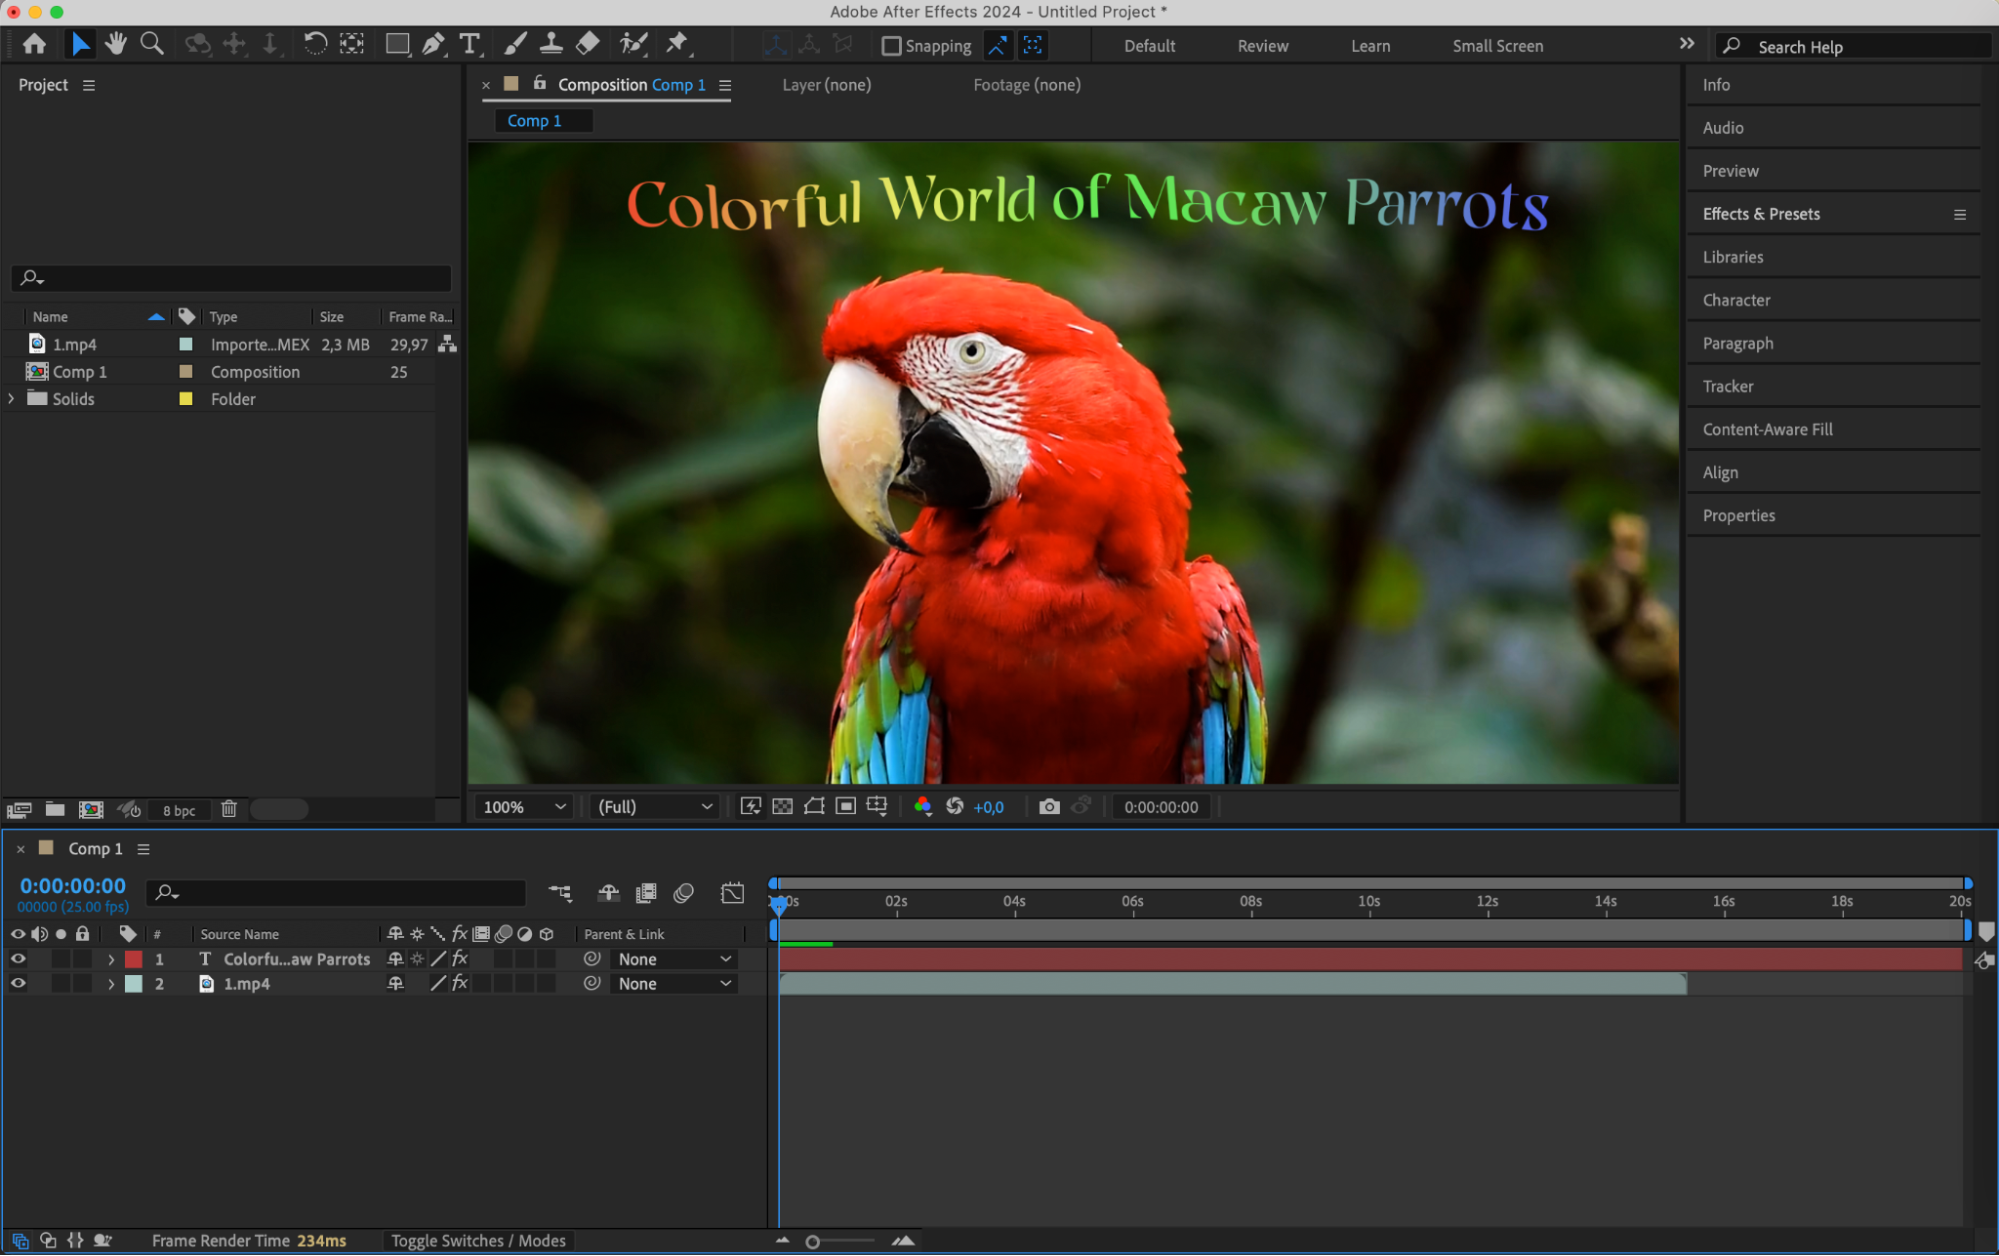
To make your text stand out, consider adding a background. You can create a solid background layer by going to “Layer” > “New” > “Solid” and customizing its color. Alternatively, import a video or image as a background. Adjust the background layer’s position in the timeline to sit behind your text.
 Step 9: Export Your Composition
Get 10% off when you subscribe to our newsletter

Once you’re satisfied with your text animation, it’s time to export the composition as a video file. Go to the “Composition” menu and select “Add to Render Queue.” Choose your preferred file format, settings, and output location. Click the “Render” button to export your video, which is now ready for sharing.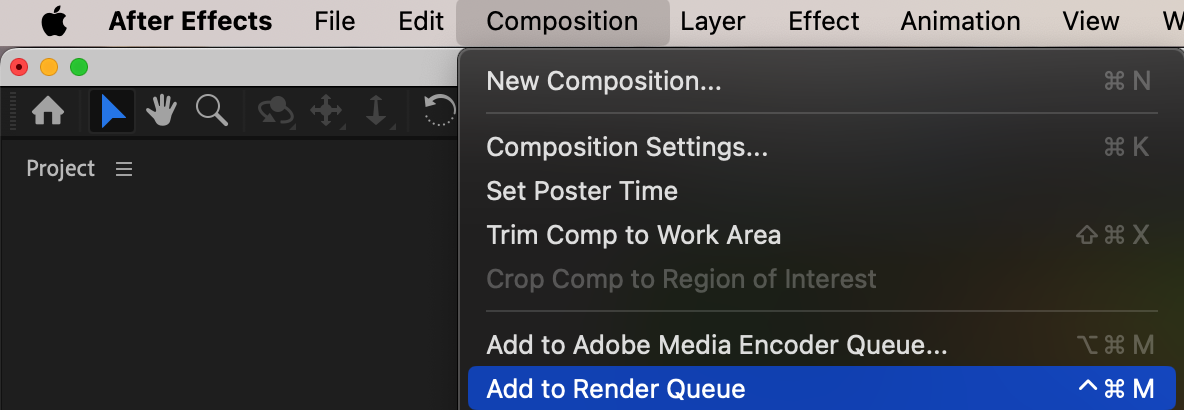
 Conclusion
By following these steps and getting creative with your text animations, you can elevate your video designs and make them truly captivating. So go ahead, import that text, add some animations, experiment with effects, and let your imagination run wild in Adobe After Effects. Happy designing!

