A Step-by-Step Guide to Importing YouTube Videos into After Effects
Introduction to Importing YouTube Videos
If you’ve ever wanted to edit YouTube videos in After Effects for creating fan edits, mashups, or adding special effects, the first step is importing the video. While After Effects can handle many video formats, importing YouTube videos directly isn’t as straightforward as clicking a button. In this guide, we’ll walk you through a simple process to import YouTube videos into After Effects, step by step.
Get 10% off when you subscribe to our newsletter

Step 1: Download the YouTube Video
Before you can edit a YouTube video in After Effects, you need to download it to your
computer. Since After Effects doesn’t support direct importing from YouTube, follow these steps:
Choose the Video: Select the YouTube video you want to work with.
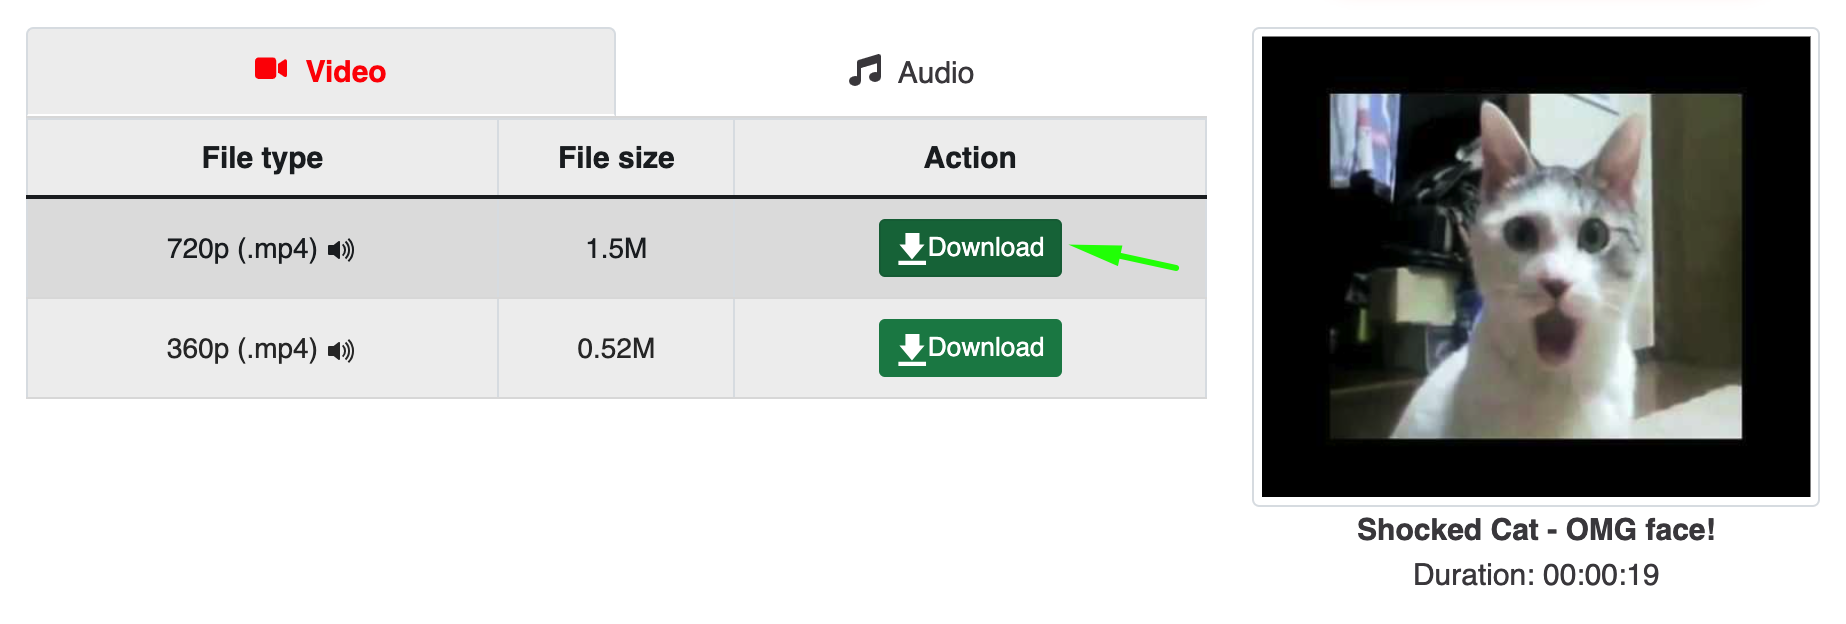
Use a Downloader: Utilize a reliable YouTube downloader tool or website like Y2Mate, SaveFrom.net, or 4K Video Downloader. Ensure you’re downloading legally, respecting copyright laws and terms of use.
Select the Format: Choose MP4 as your video format for optimal compatibility and quality. Aim for the highest resolution available (e.g., 720p or 4K) for the best editing results.
Save the File: Download and save the file to an easily accessible location on your computer.
 Step 2: Open After Effects
With your YouTube video downloaded, it’s time to bring it into After Effects. Start by setting up your project:
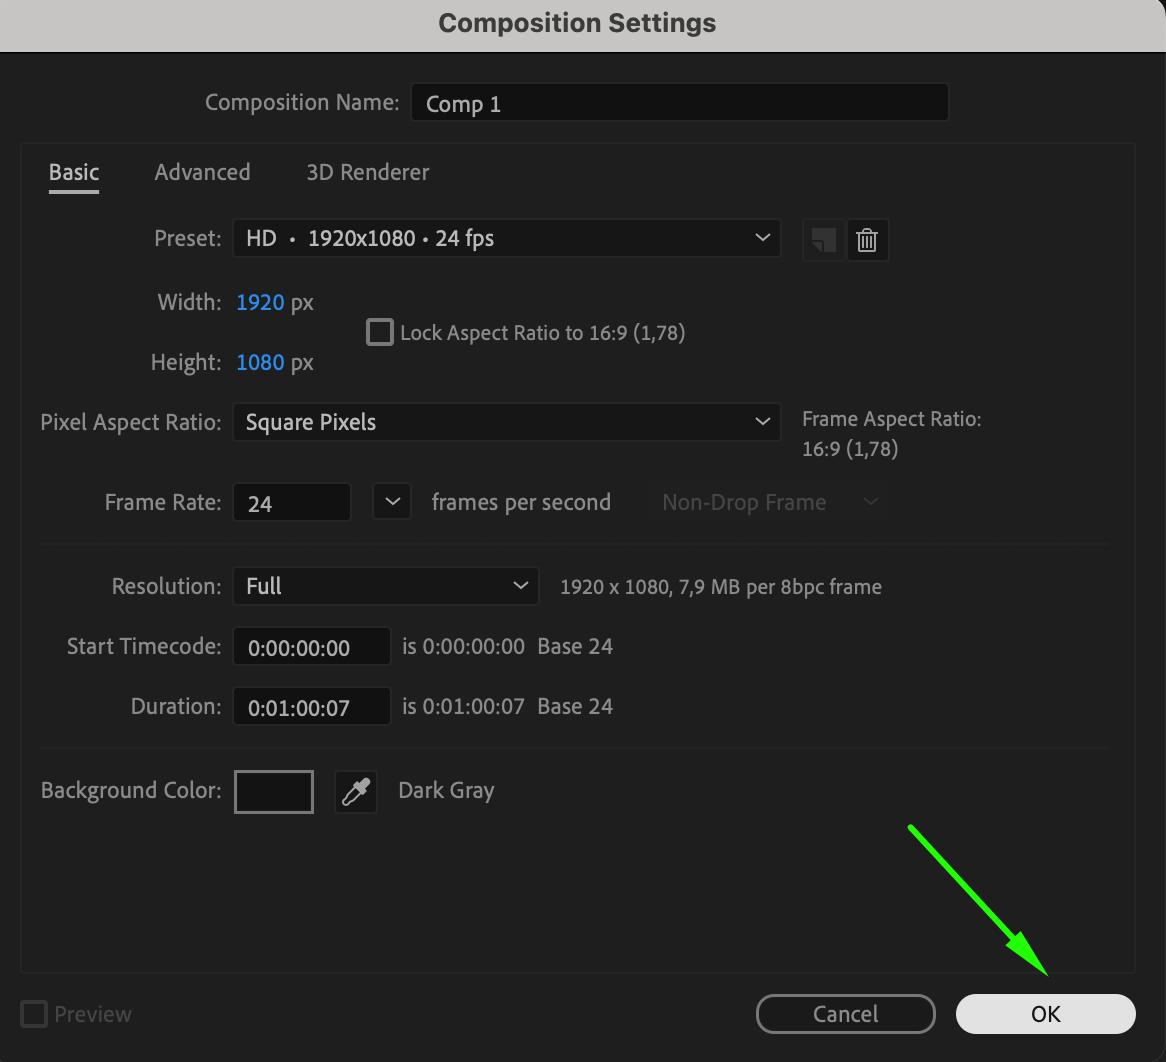
Create a New Composition: Go to Composition > New Composition.
Adjust Settings: Choose resolution, frame rate, and duration to match your downloaded video, such as 1920×1080 for Full HD or 3840×2160 for 4K.
Name Your Composition: Give your composition a name that reflects your project and click OK.
Step 3: Import the YouTube Video into After Effects
Now that your project is set up, you can import the downloaded video:
Import the Video: Go to File > Import > File (or use the shortcut “Ctrl/Cmd + I”).
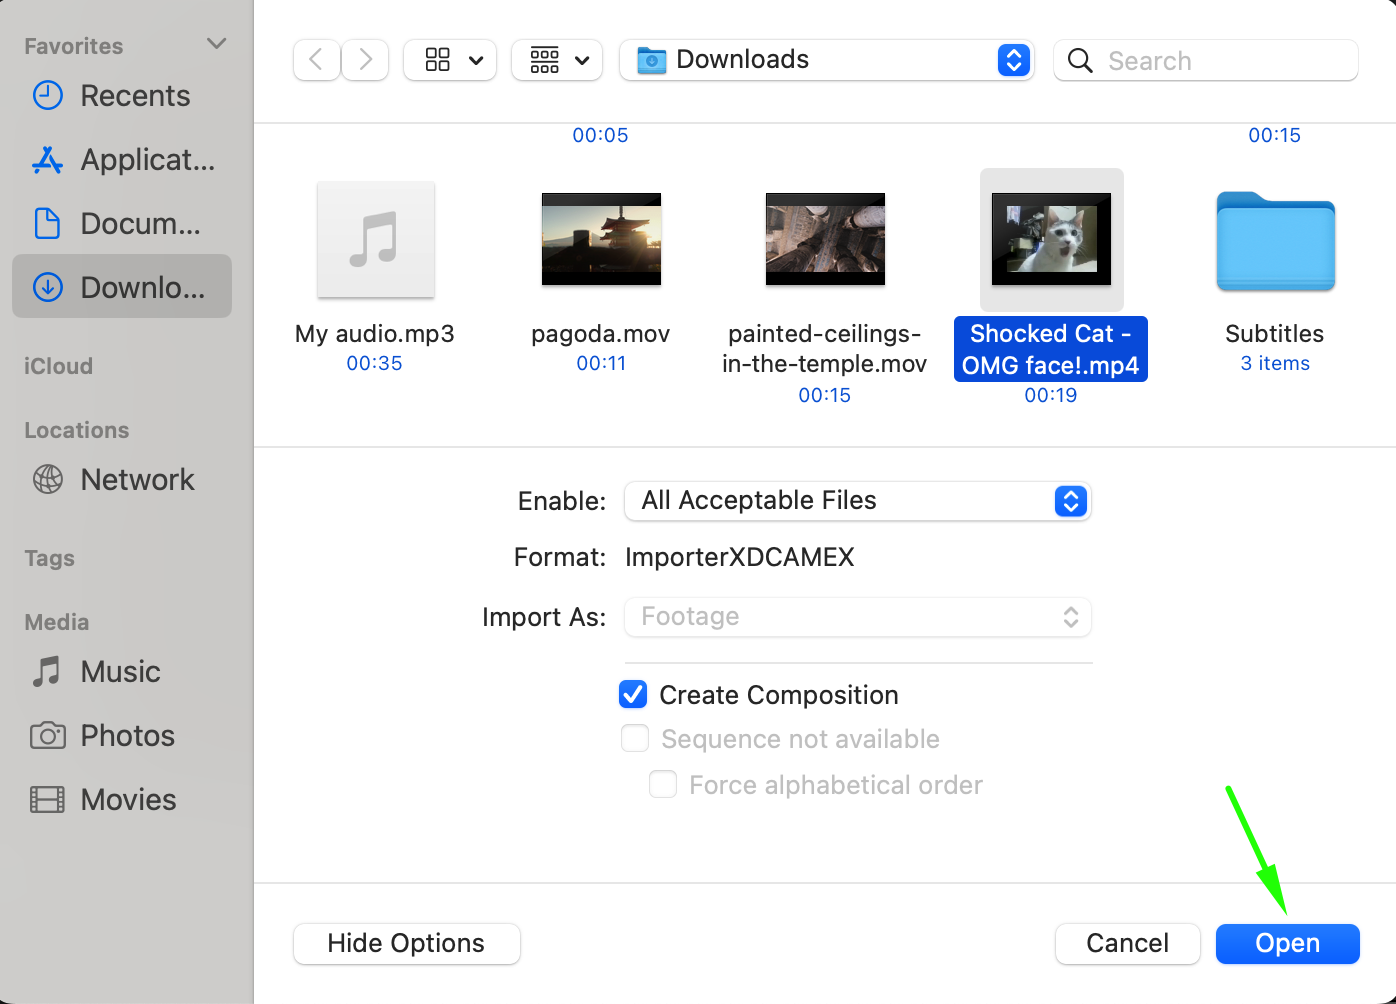
Locate the File: Navigate to the folder where you saved your downloaded video.
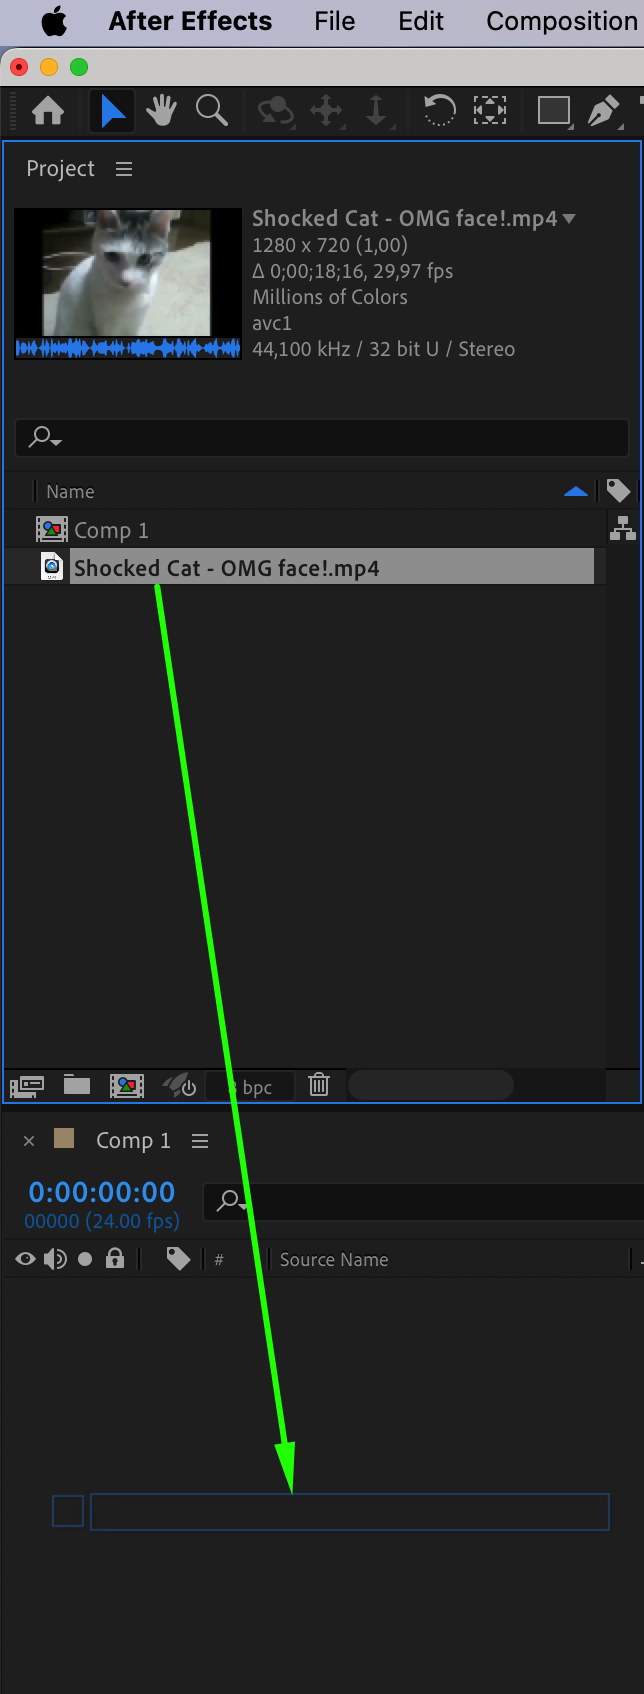
Select and Open: Choose the video file and click Open. The video will now appear in your Project panel.
Add to Timeline: Drag the video from the Project panel onto the Timeline or Composition panel to start working with it.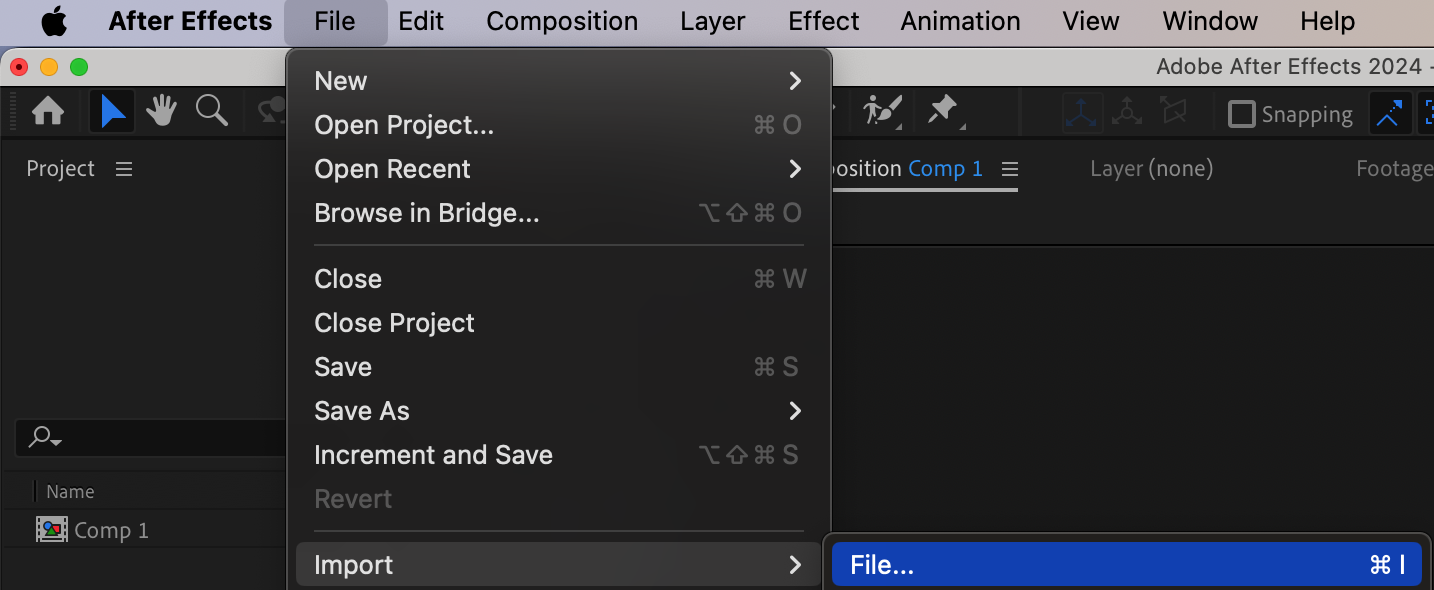
 Step 4: Apply Effects and Adjustments
Enhance your imported video using After Effects’ powerful tools:
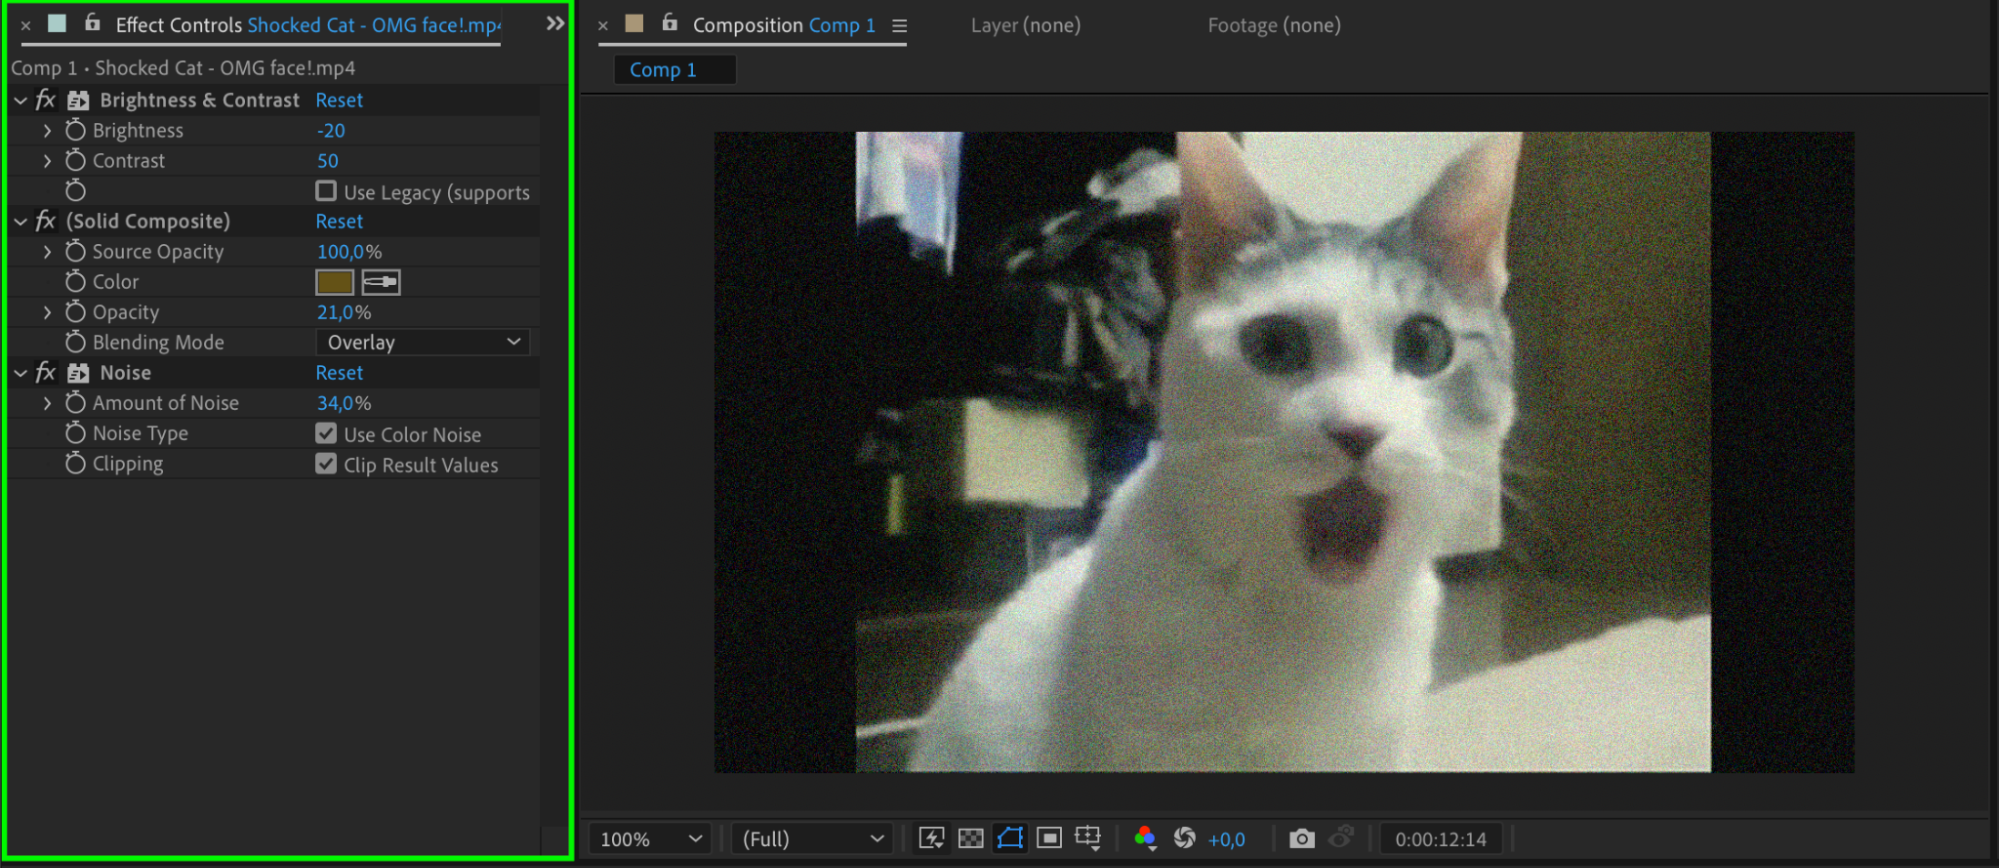
Add Effects: Use the Effects & Presets panel to apply effects like color correction, transitions, or motion graphics.
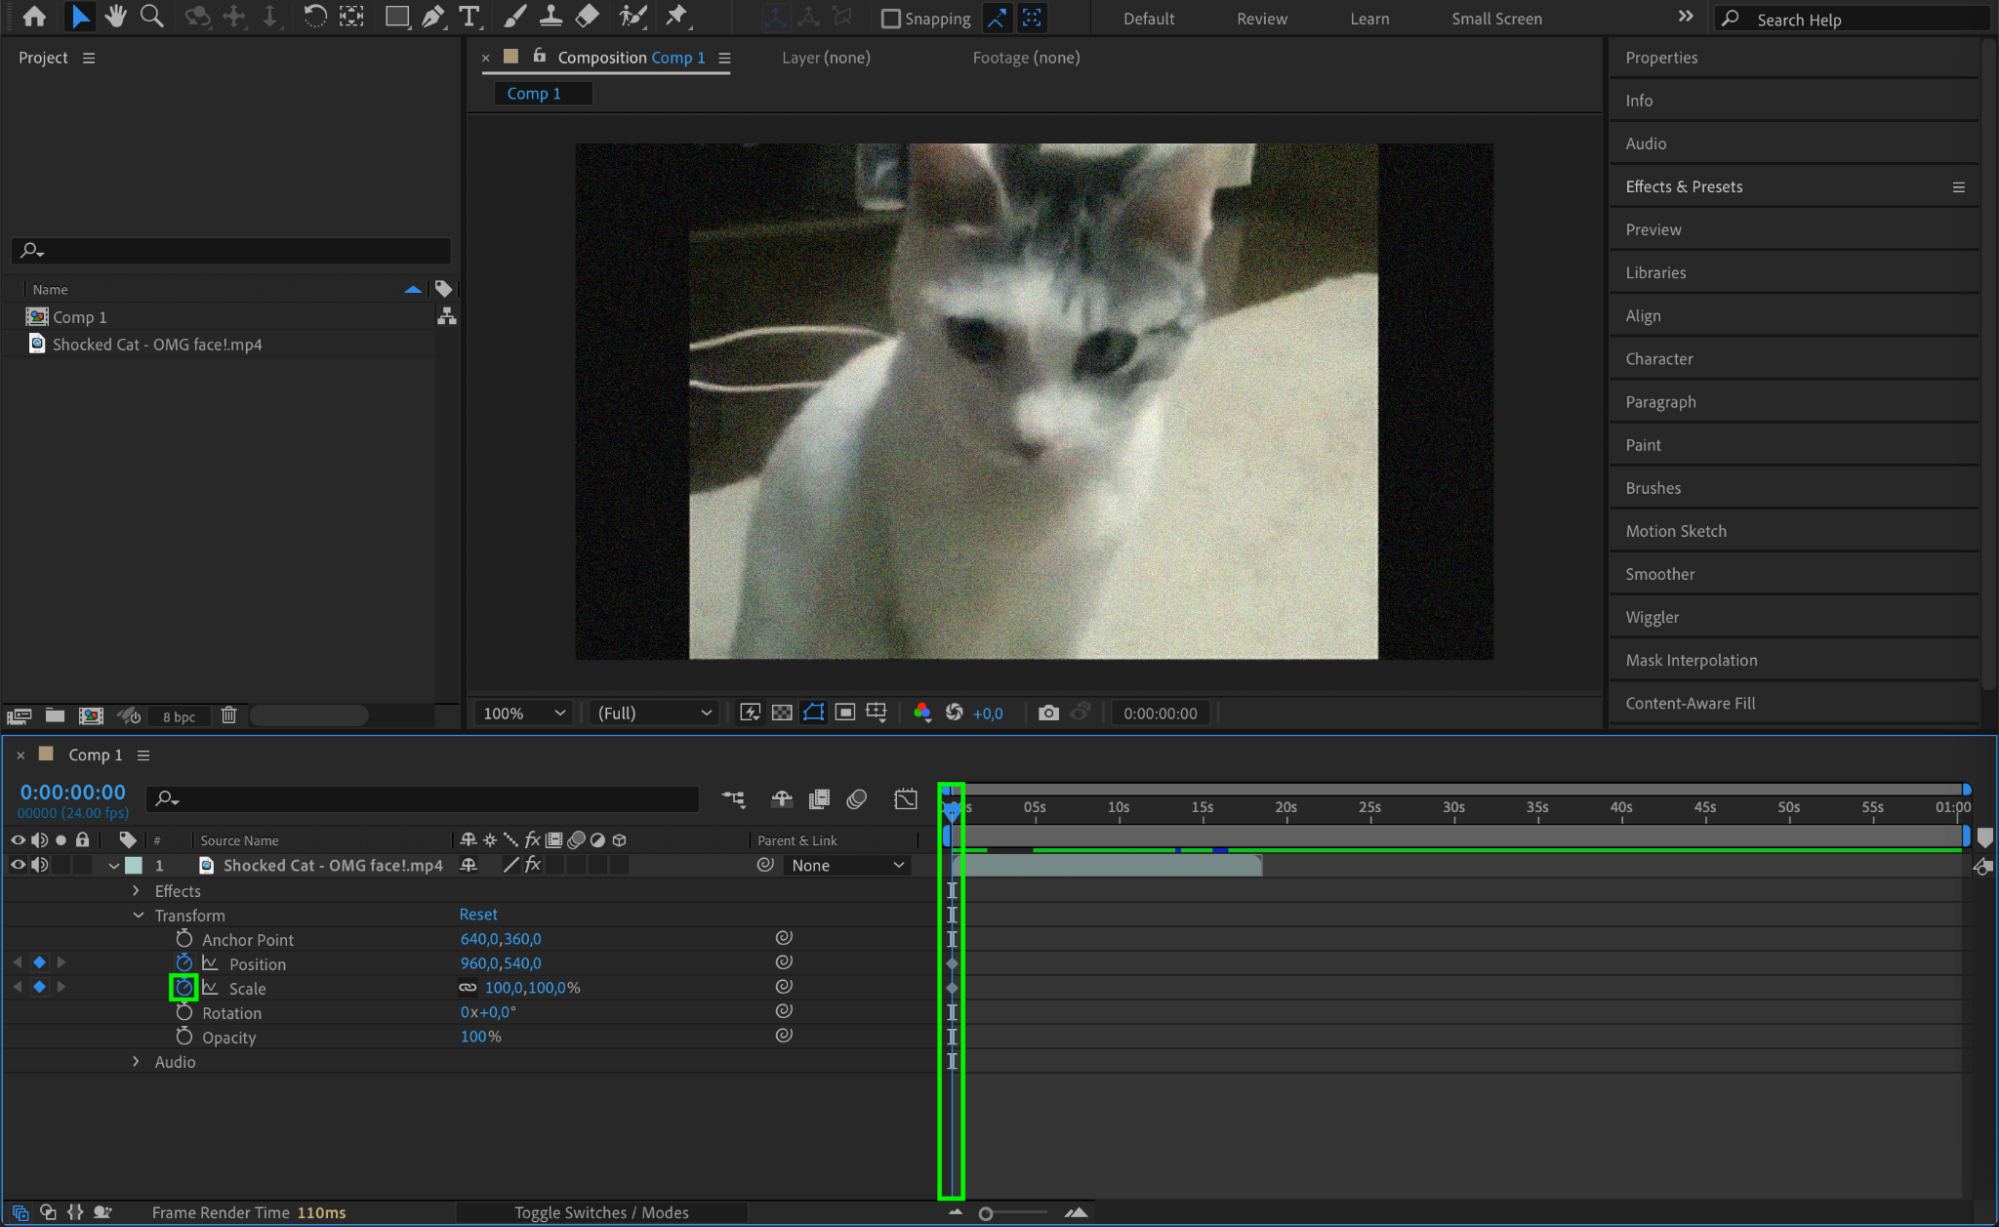
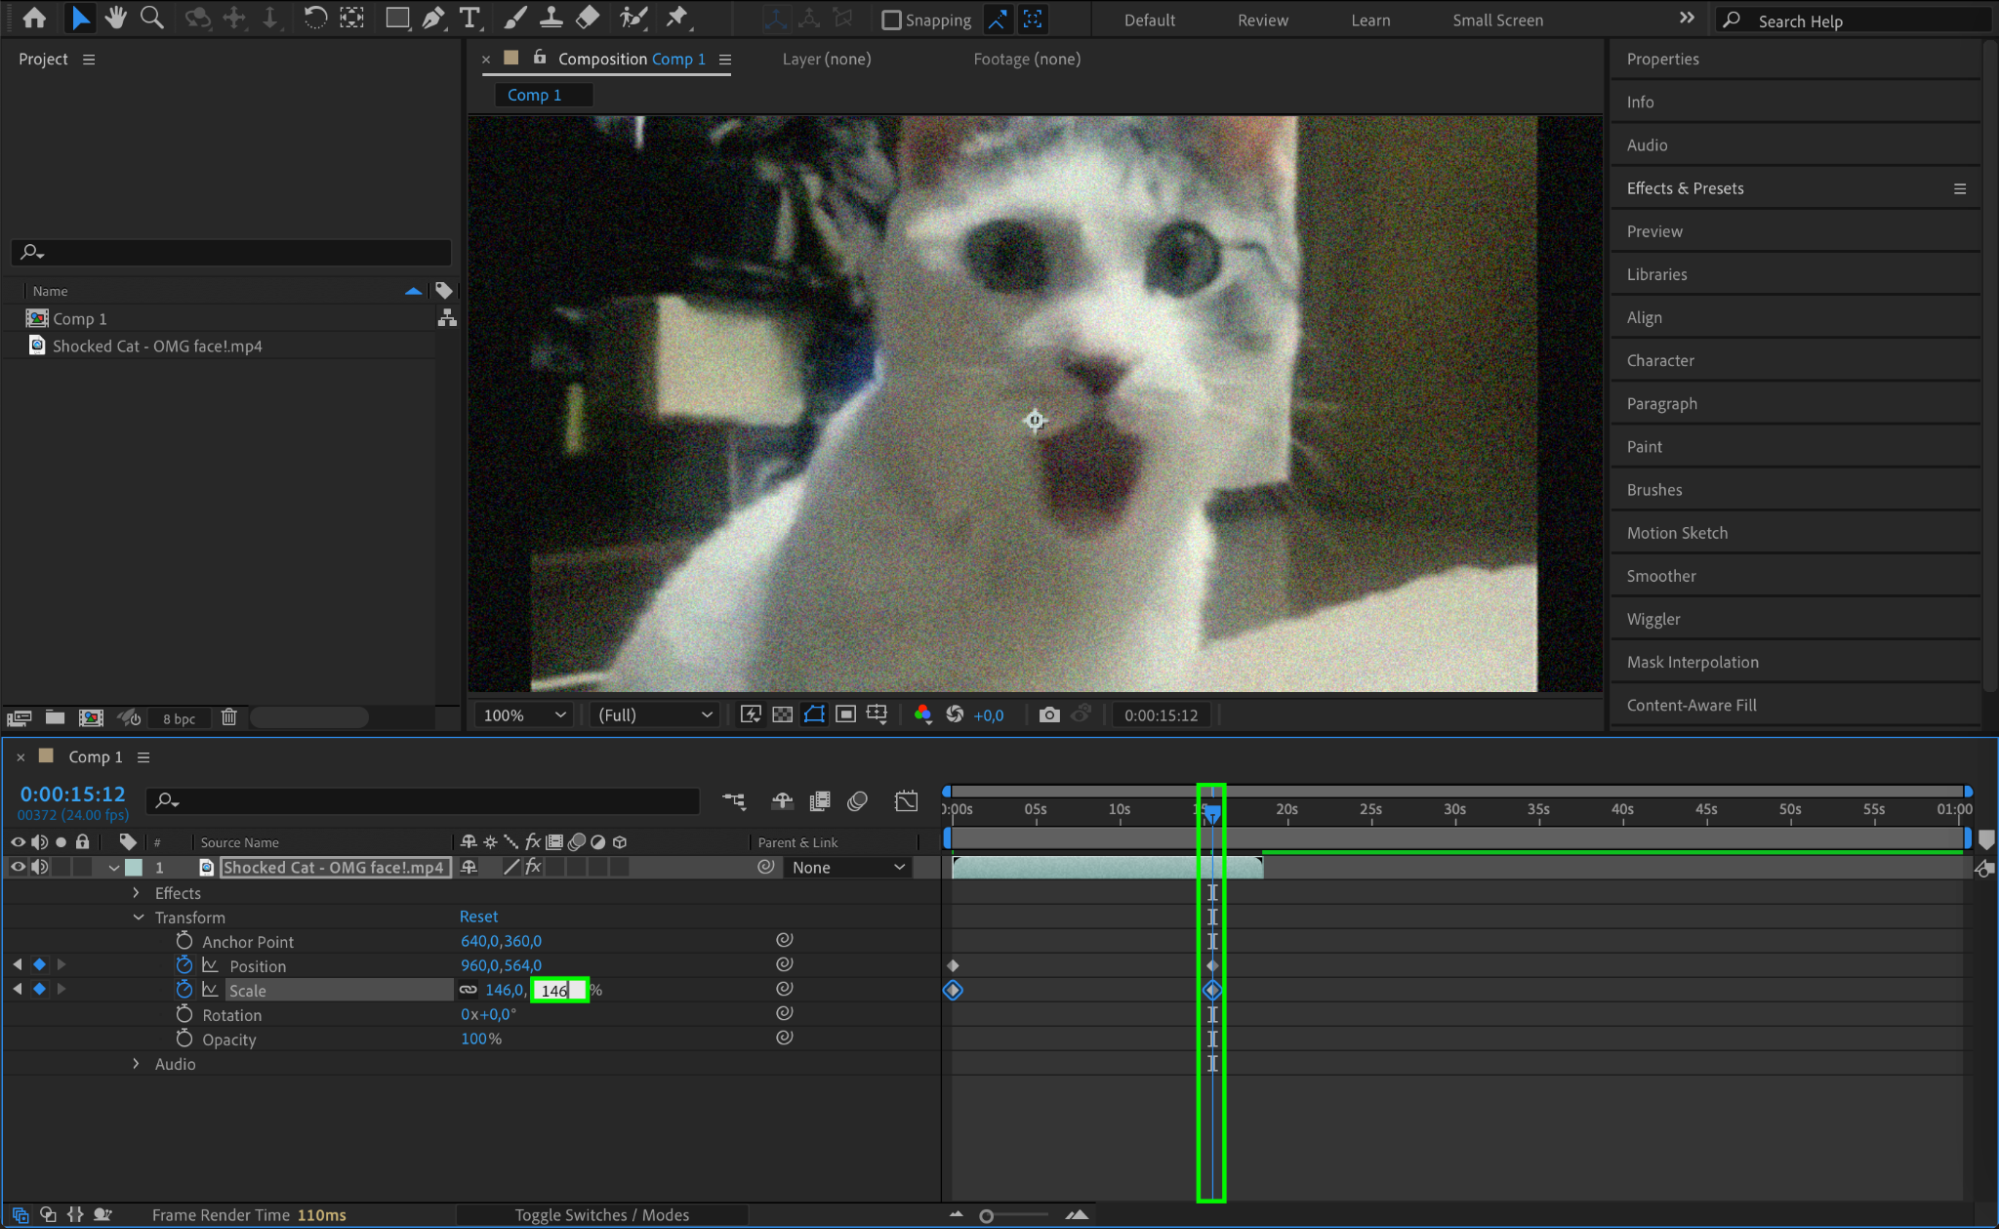
Animate Properties: Use keyframes to animate properties like opacity, scale, or position for dynamic results. Experiment with different effects to see what works best for your project.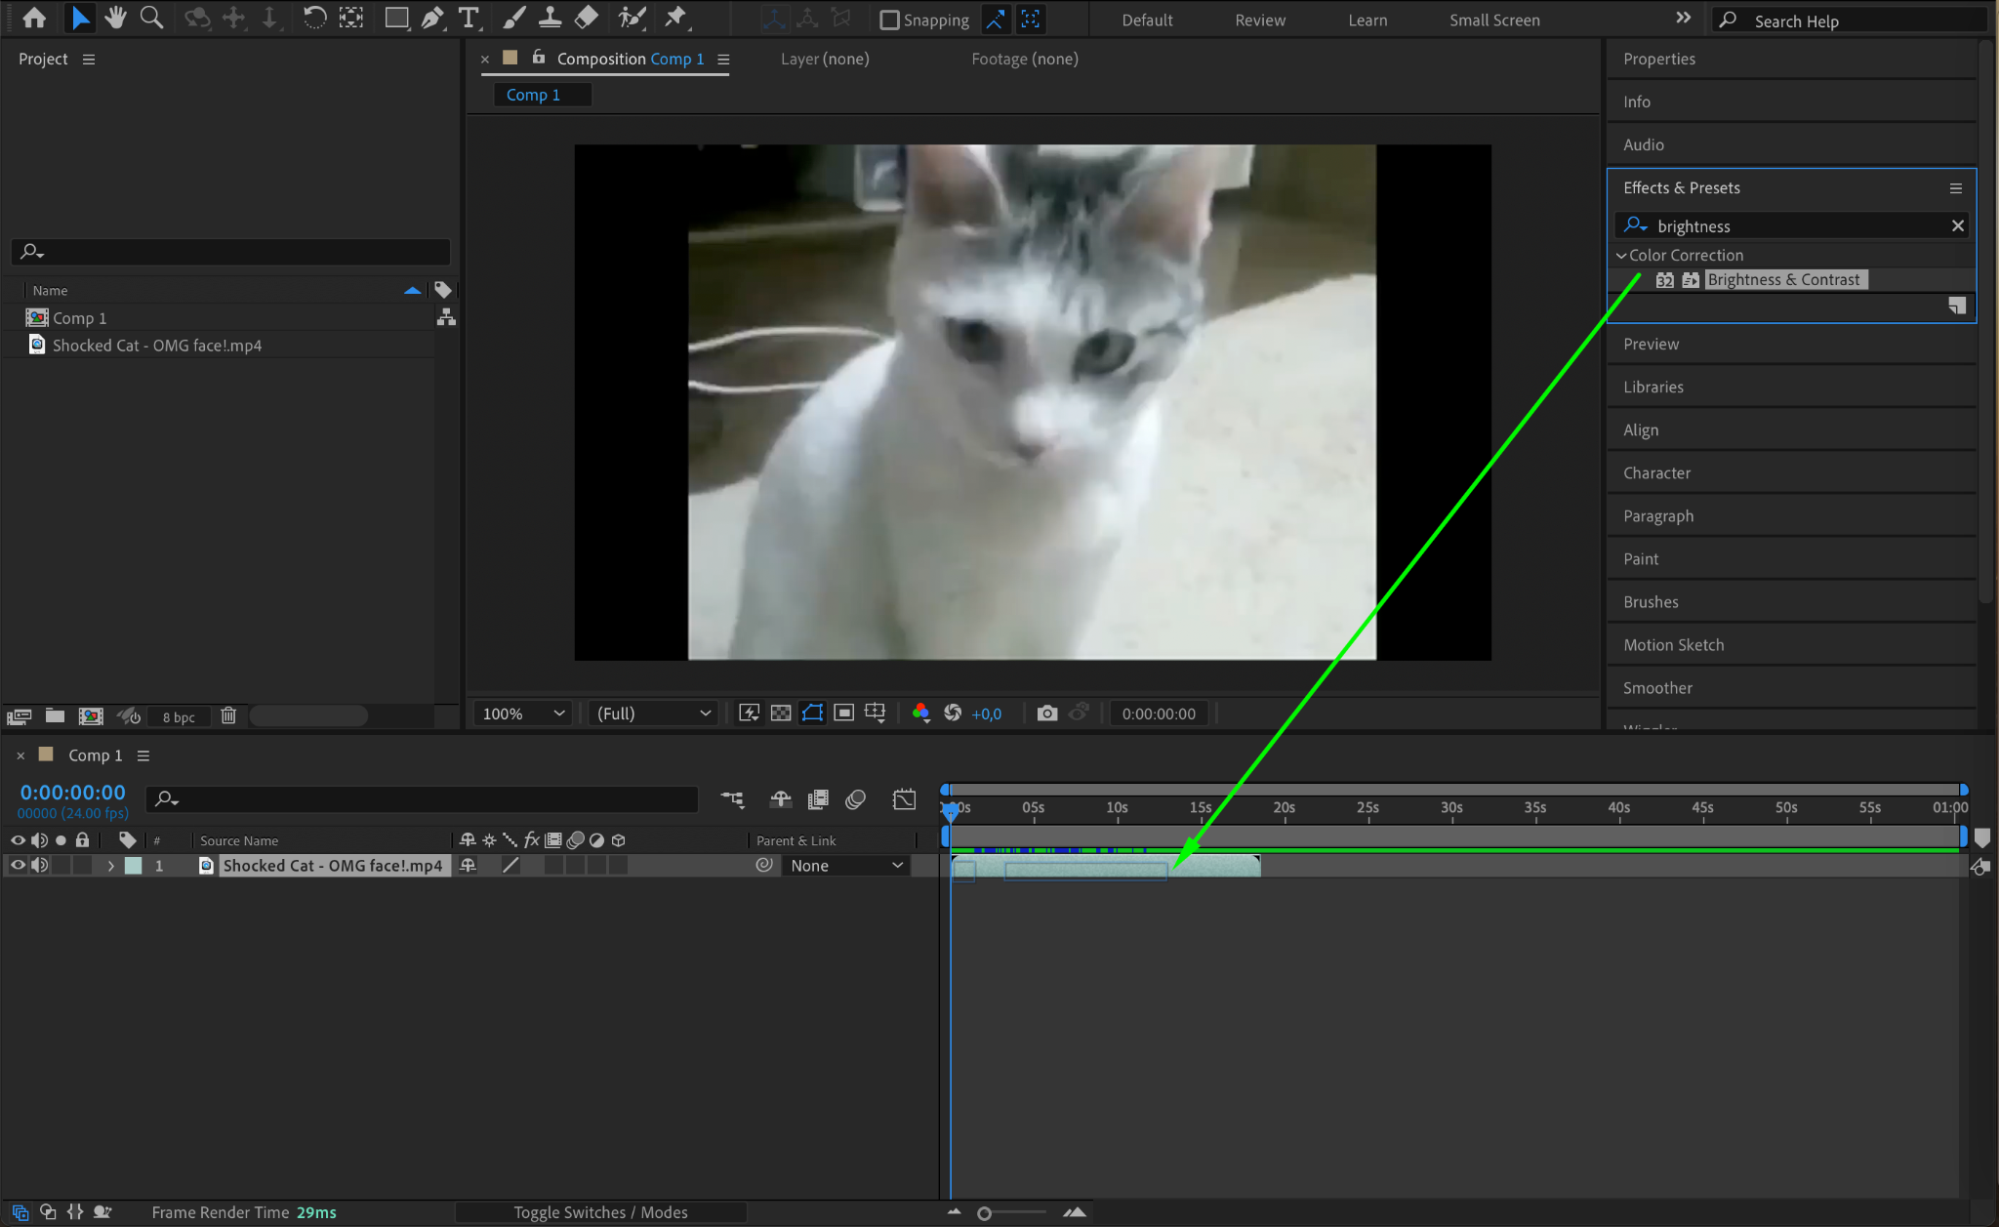
Step 5: Preview and Export
Once you’ve completed your edits, it’s time to preview and export your project:
Preview Your Edits: Press the spacebar or use the preview panel for smoother playback.
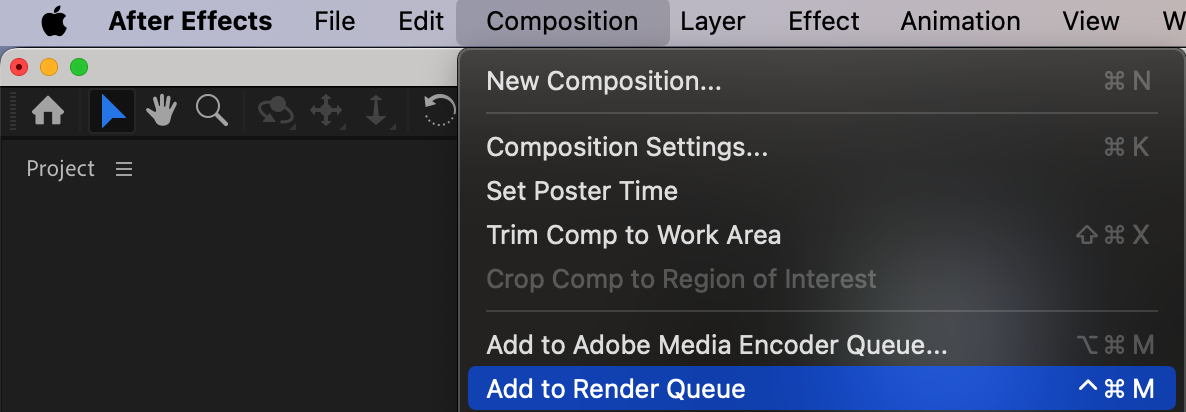
Add to Render Queue: Go to Composition > Add to Render Queue once you’re satisfied with your edits.
Select Output Format: Choose the output format, typically QuickTime or H.264 (MP4) for YouTube uploads, and set your desired resolution and file destination.
Render Your Video: Click Render and let After Effects process your final video.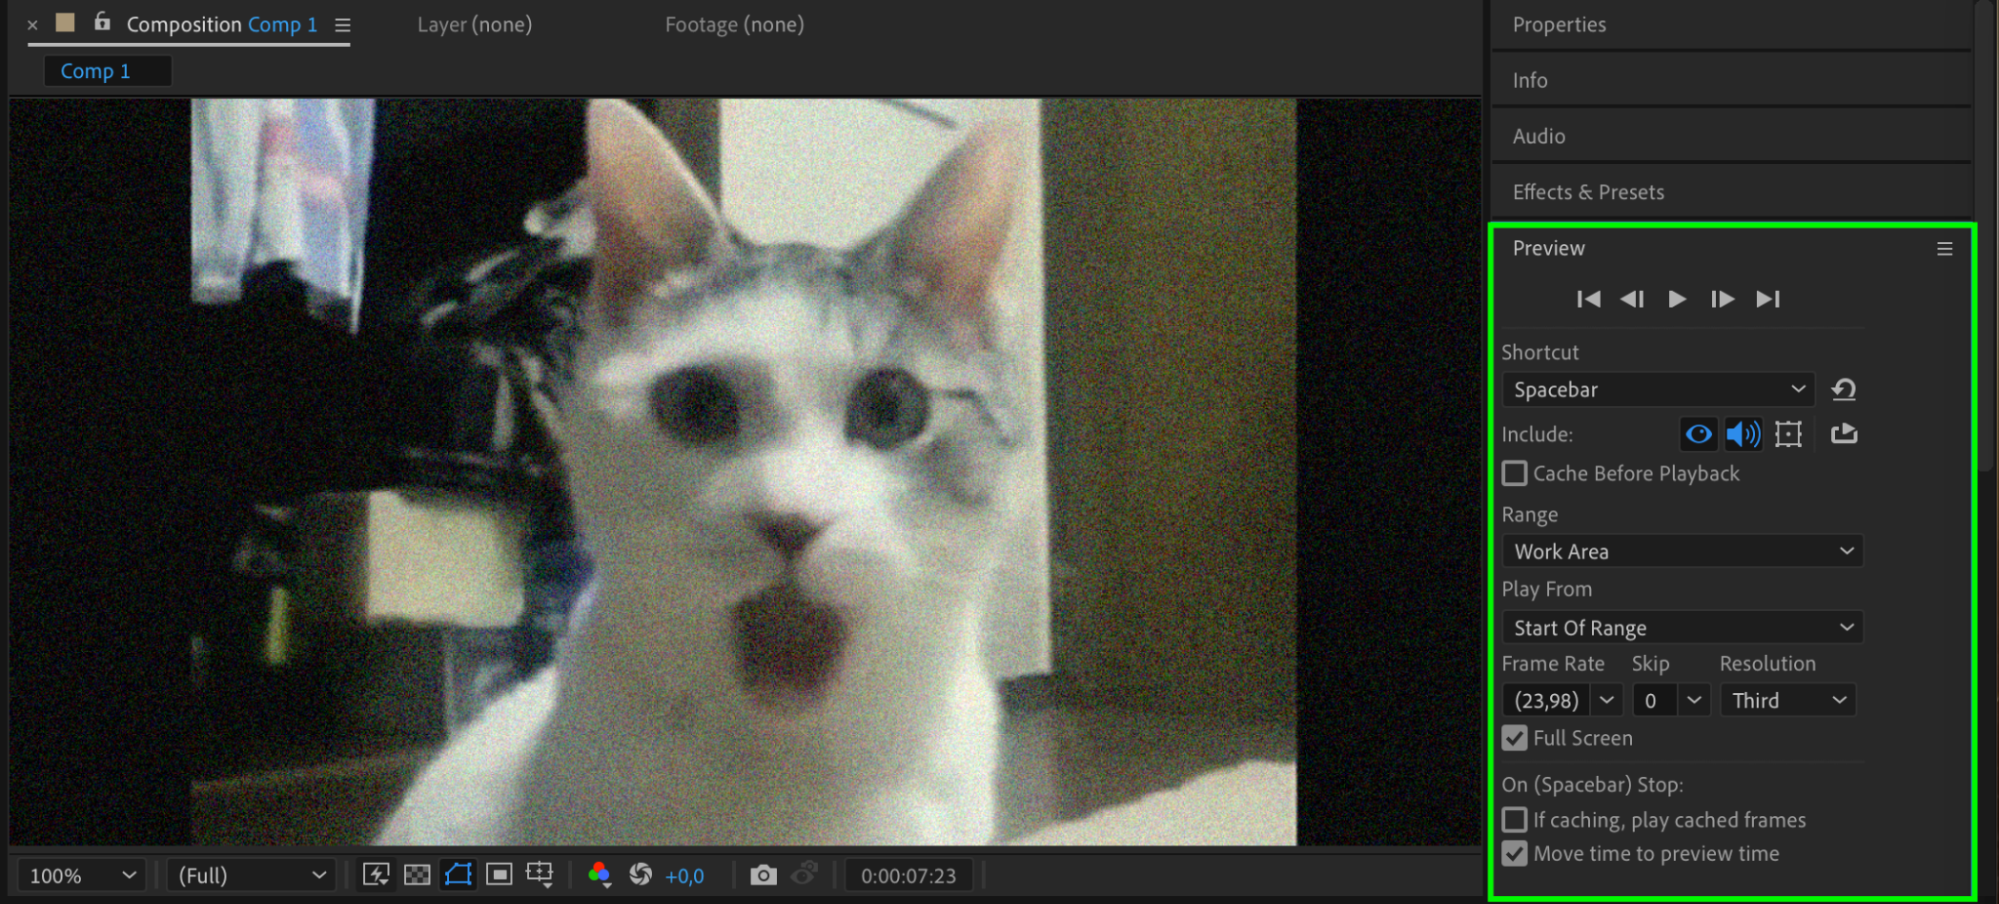

Conclusion: Importing YouTube Videos to After Effects is Easy and Exciting!
Congratulations! You have now learned how to import YouTube videos into After Effects effortlessly. By following this step-by-step guide, you can seamlessly integrate YouTube footage into your projects and create stunning visual effects and animations.
Remember, After Effects offers endless possibilities for video editing and motion graphics. With the vast library of inspiring videos available on YouTube, you have an abundance of creative resources at your fingertips. Explore different video styles, experiment with effects and transitions, and let your imagination run wild!


