How to Speed Up Your Rendering Process in After Effects
Introduction: Optimize Your Rendering Efficiency
Are you tired of long rendering times in Adobe After Effects? Rendering can be a lengthy process, but there are several effective techniques to speed it up. This guide provides actionable tips to help you optimize your workflow and reduce rendering times, making your video production more efficient and less time-consuming.
Step 1: Reduce Composition Resolution
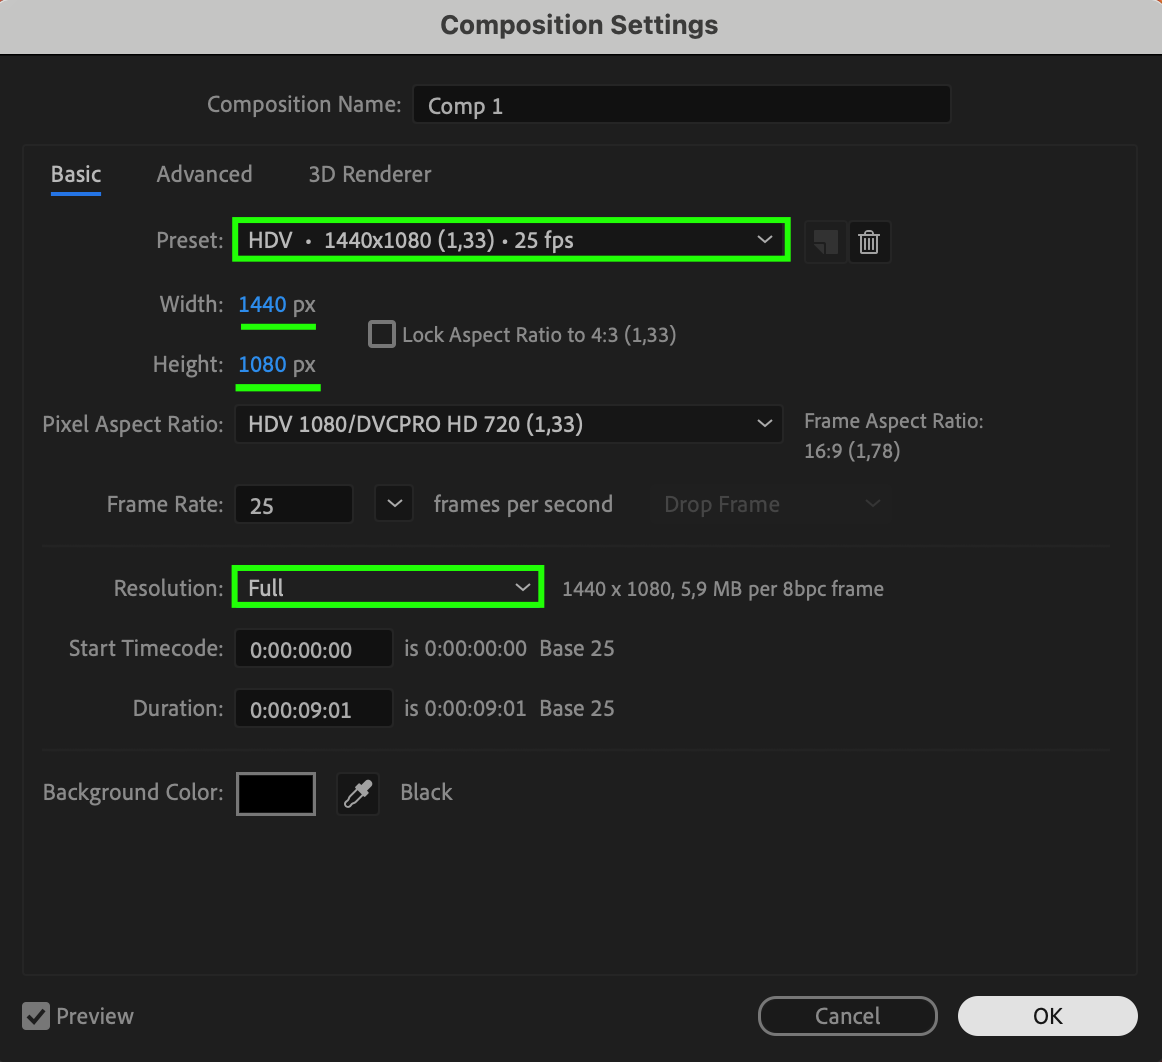
One of the simplest ways to speed up rendering is by reducing the resolution of your composition. If high resolution is not essential for your final output, lower the width and height settings in your composition settings. This reduction decreases the number of pixels that need to be processed, thus speeding up the rendering process.
 Step 2: Disable Unnecessary Effects and Layers
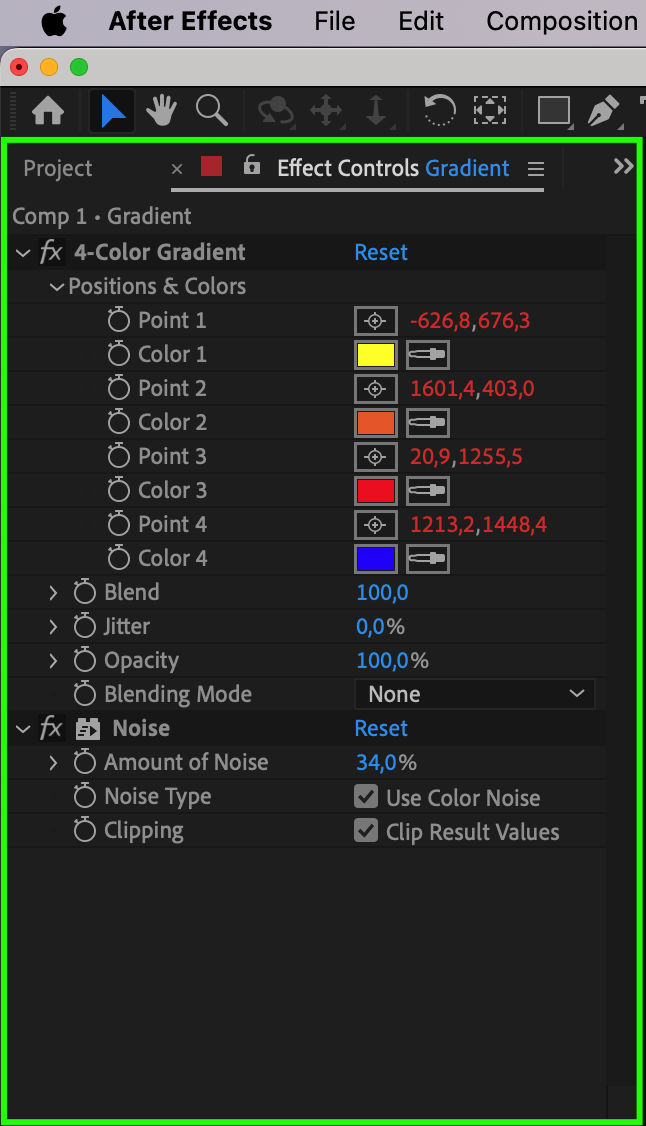
Effects like motion blur, glow, or reflections can significantly impact rendering times. Disable or remove any effects and layers that are not crucial for the final output during the editing phase. You can enable these effects later, just before final rendering, to ensure they do not slow down your workflow.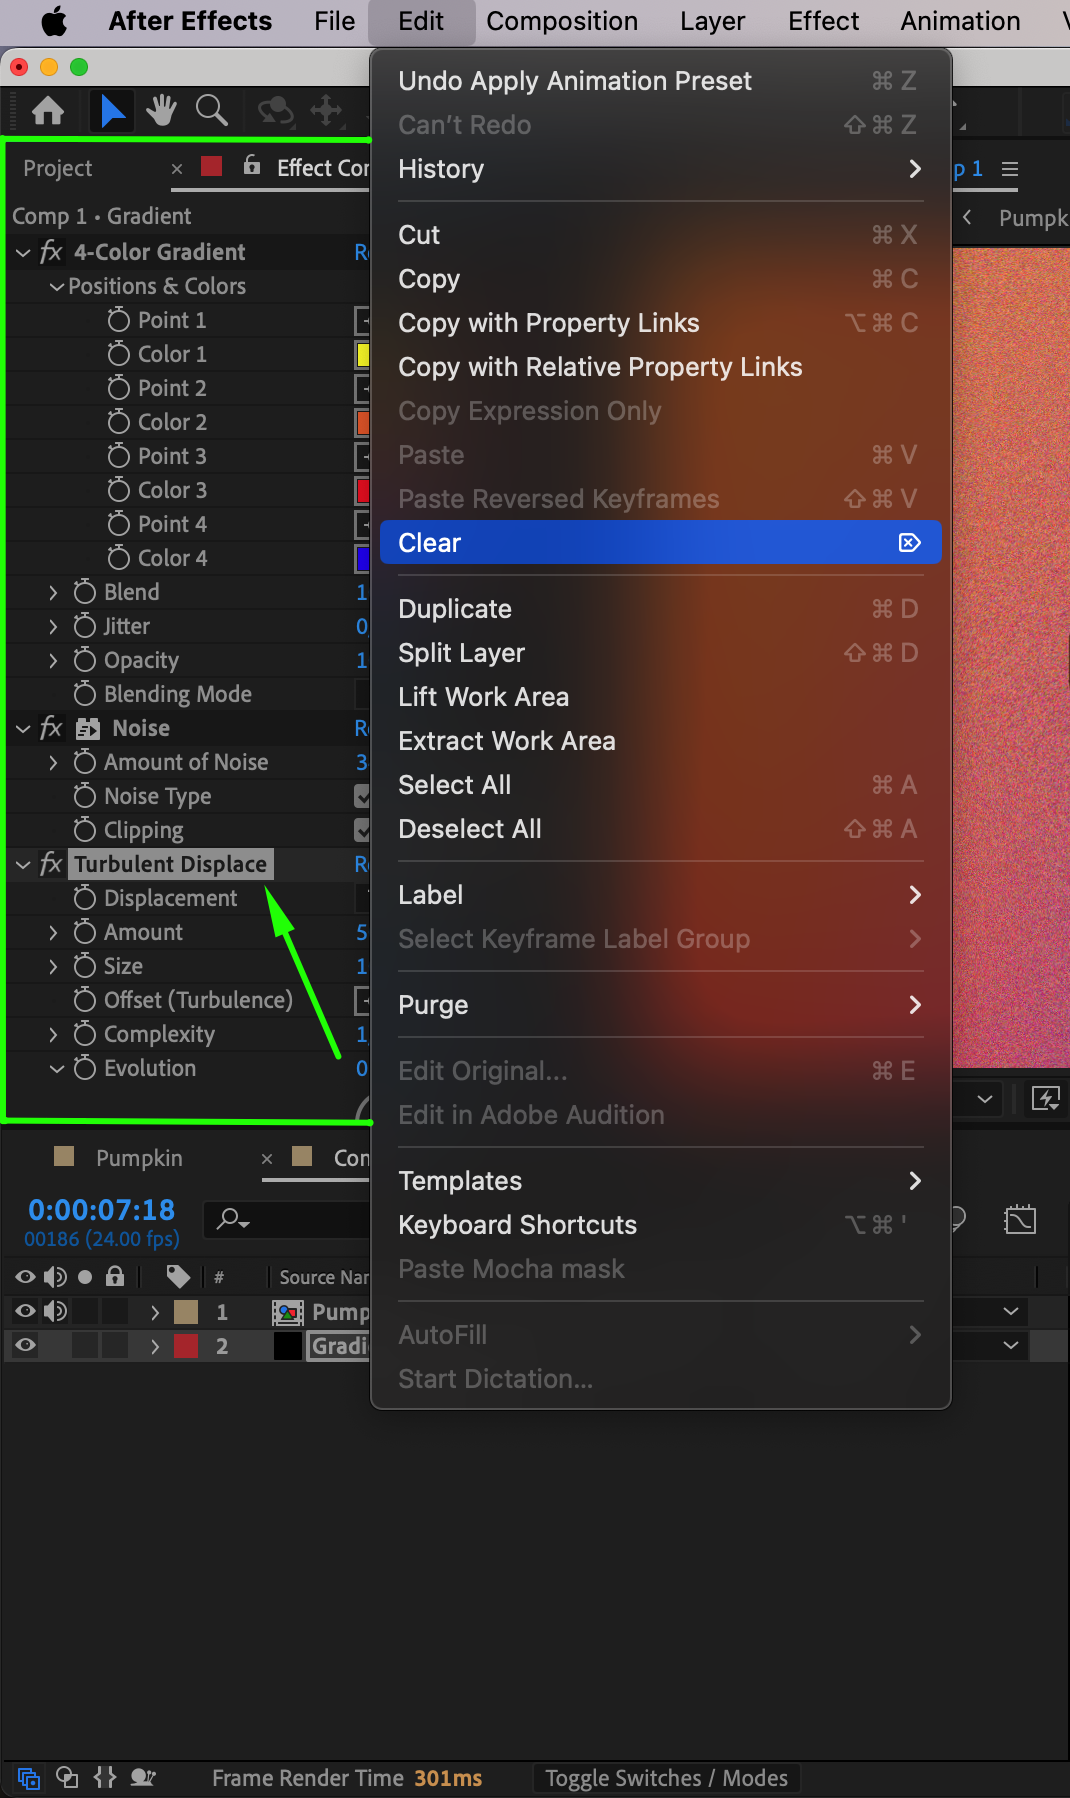
 Step 3: Enable Multi-Frame Rendering
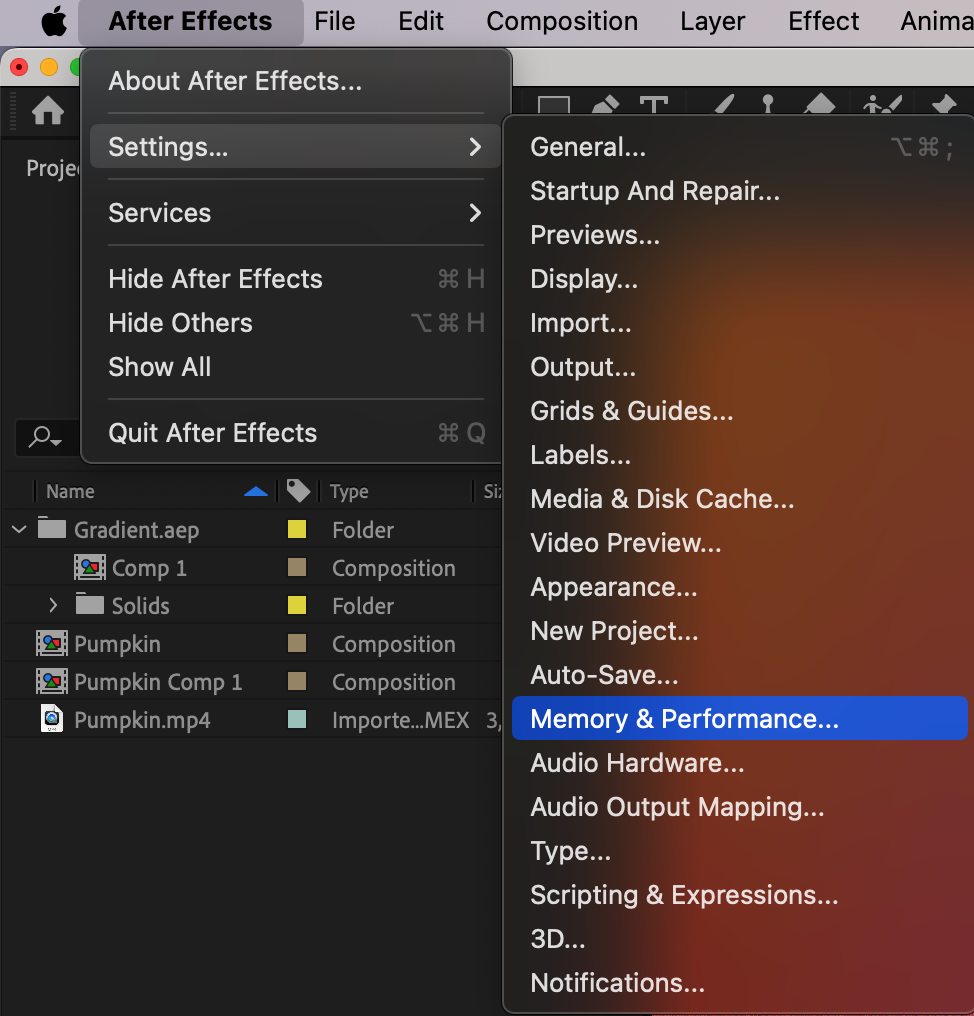
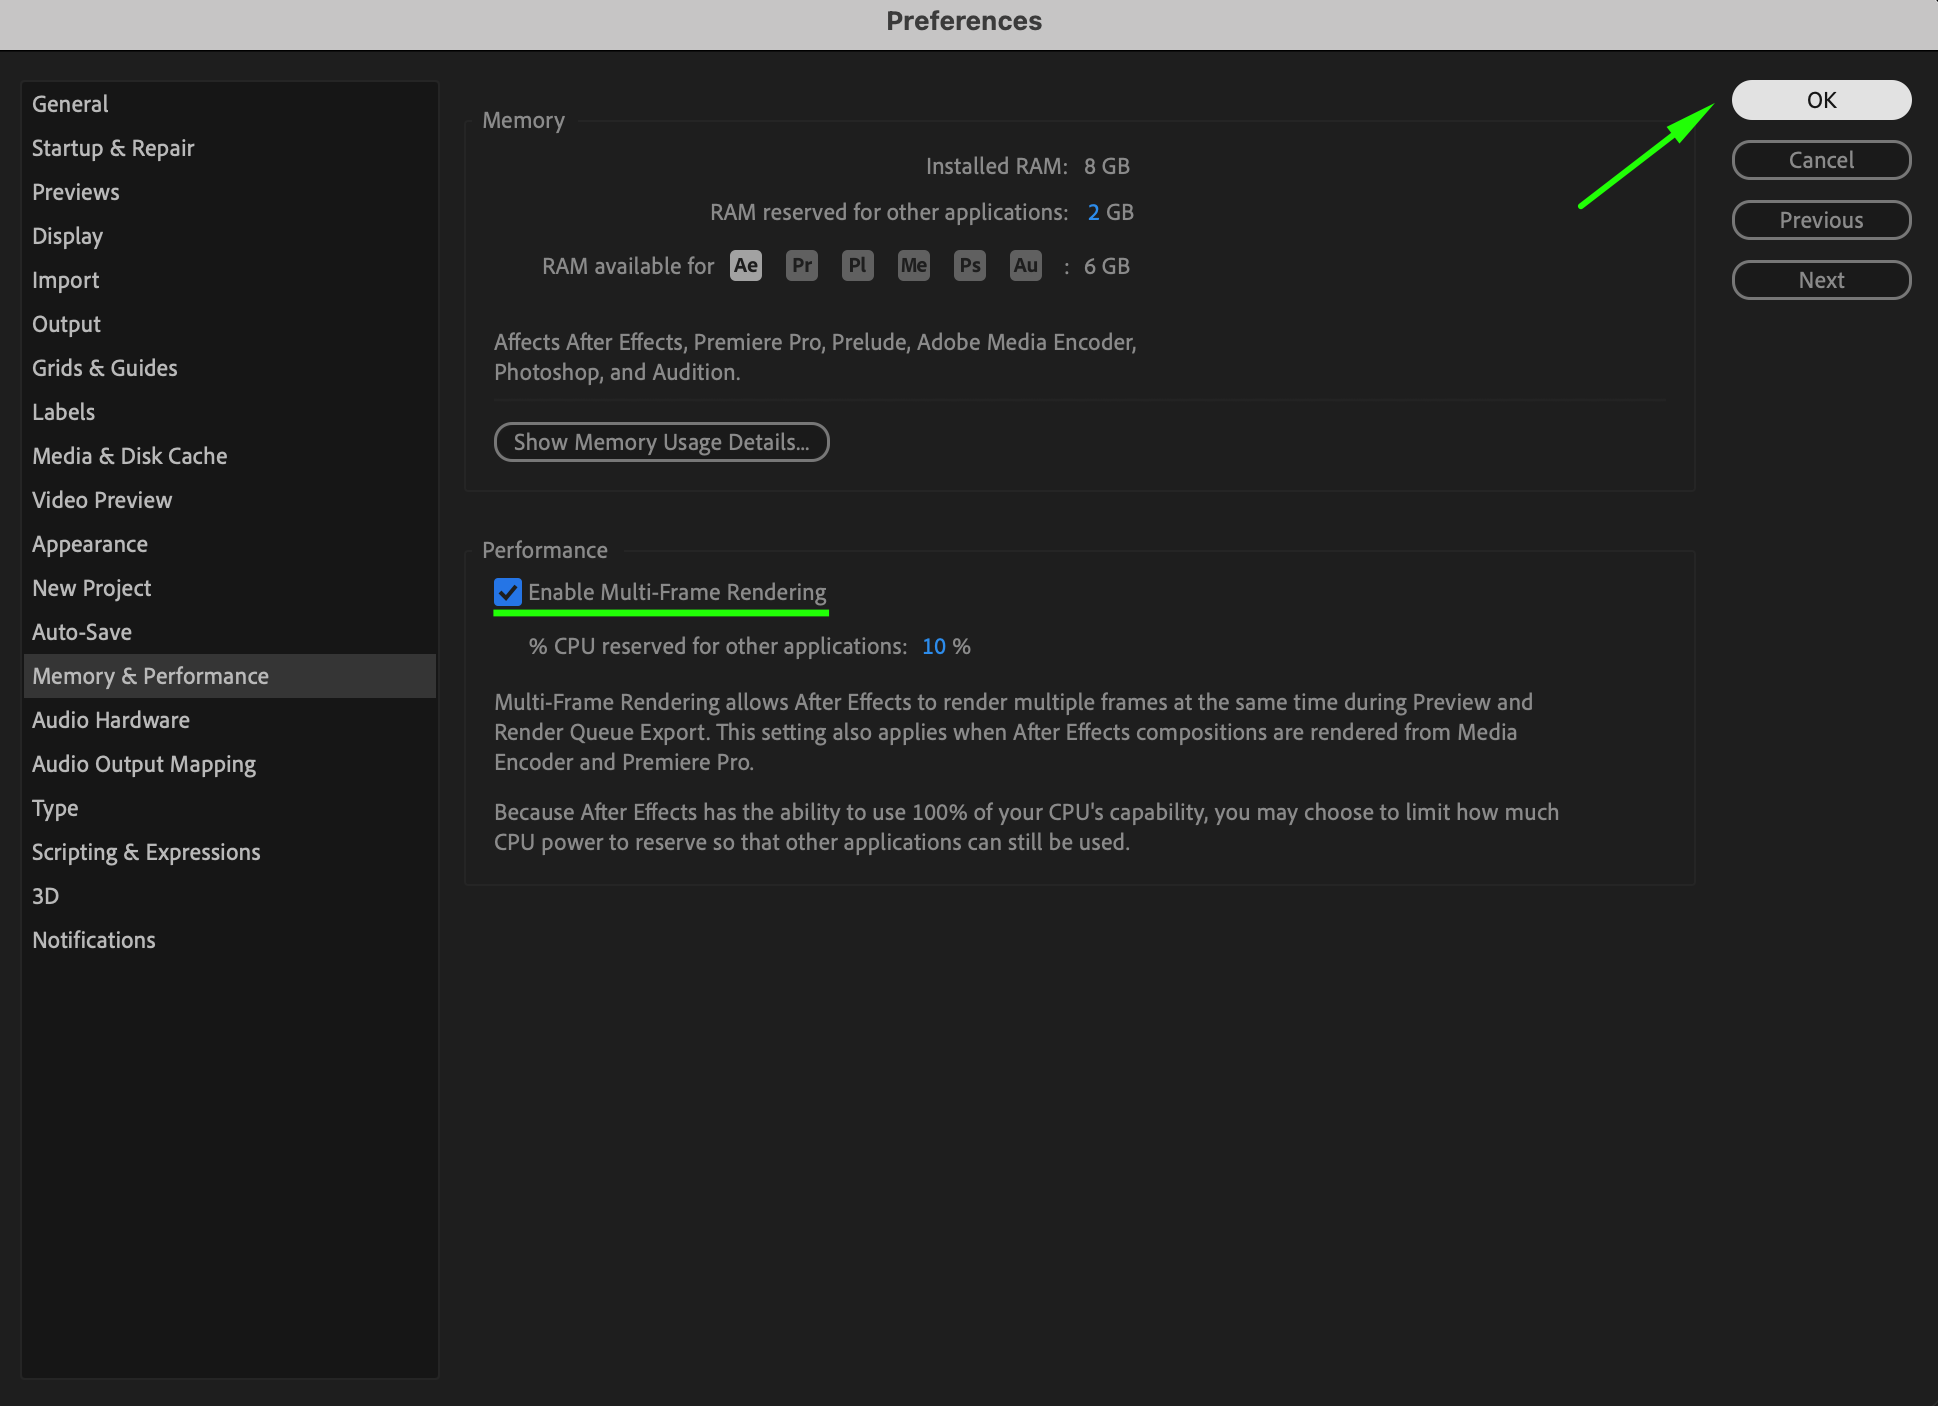
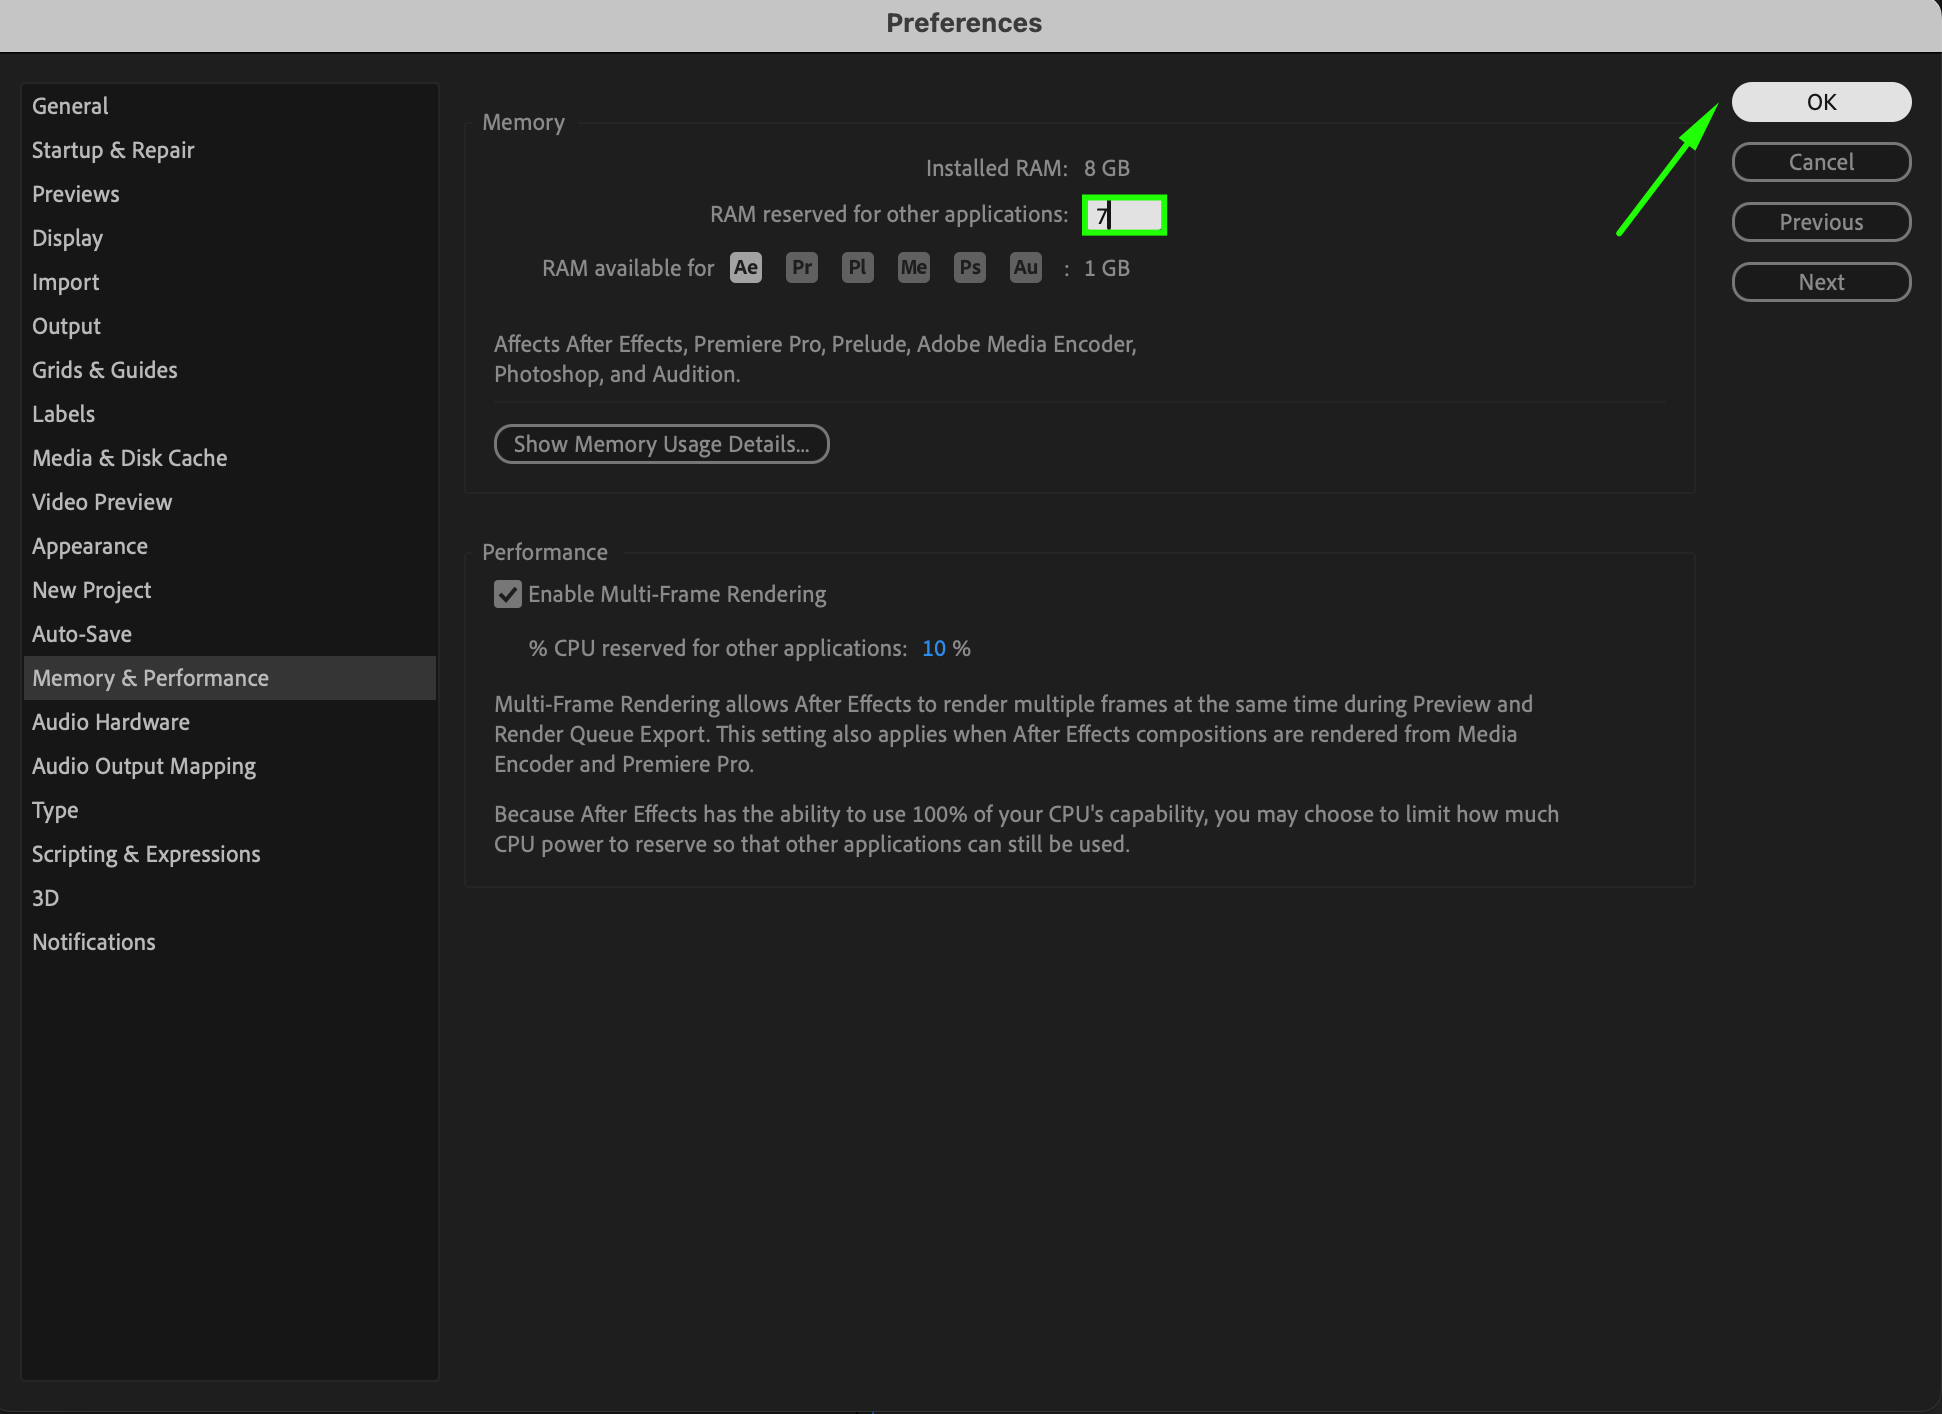
To leverage your computer’s multi-core processor and speed up the rendering process, enable Multi-Frame Rendering in After Effects. On Windows, go to “Edit” > “Preferences” > “Memory & Performance.” On Mac, navigate to “After Effects” > “Settings” > “Memory & Performance.” Check the box for “Enable Multi-Frame Rendering” and click “OK” to save your changes. This feature allows After Effects to process multiple frames simultaneously, enhancing rendering efficiency by utilizing several CPU cores.
 Step 4: Utilize a Proxy Workflow
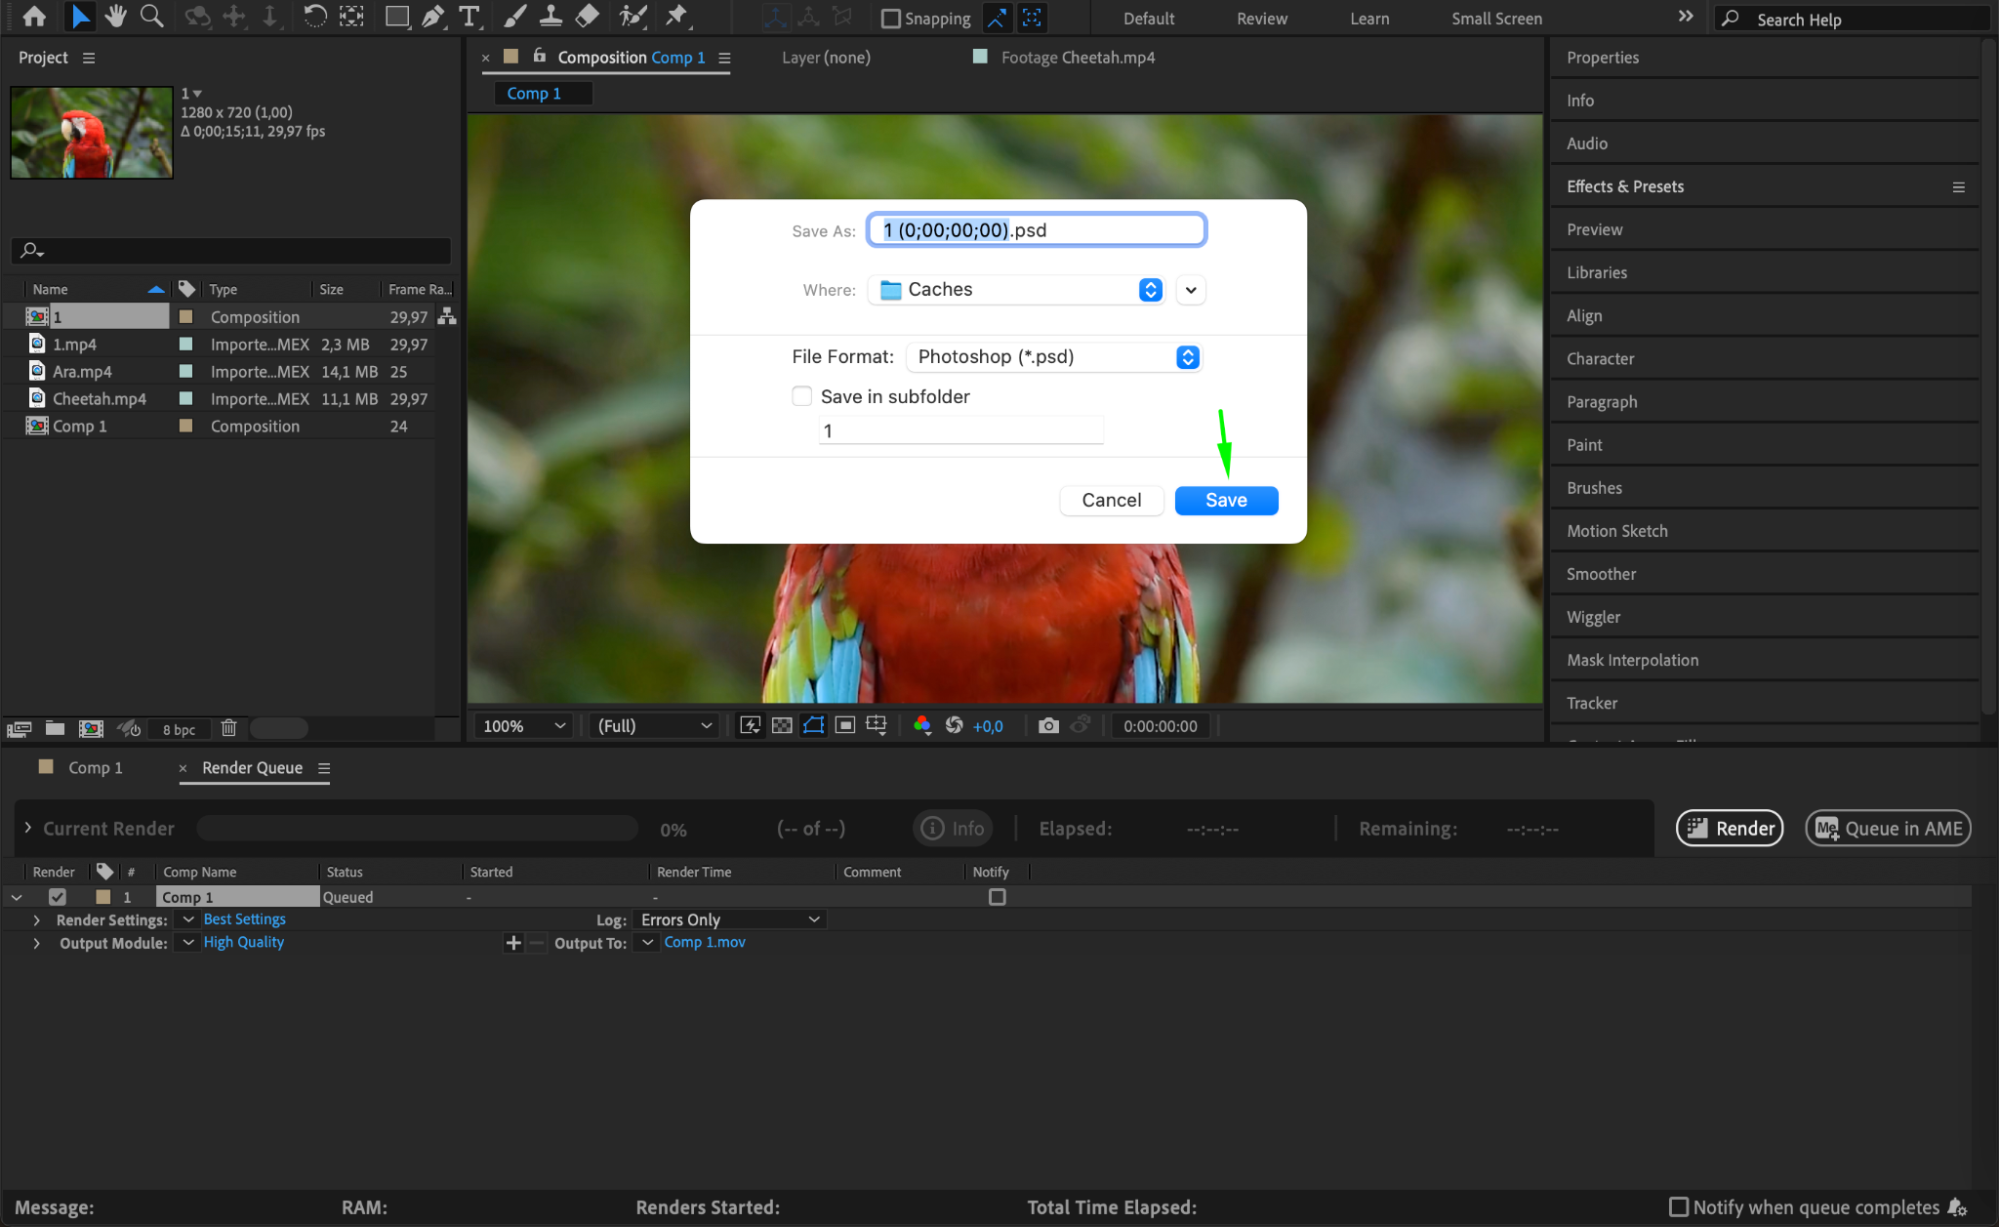
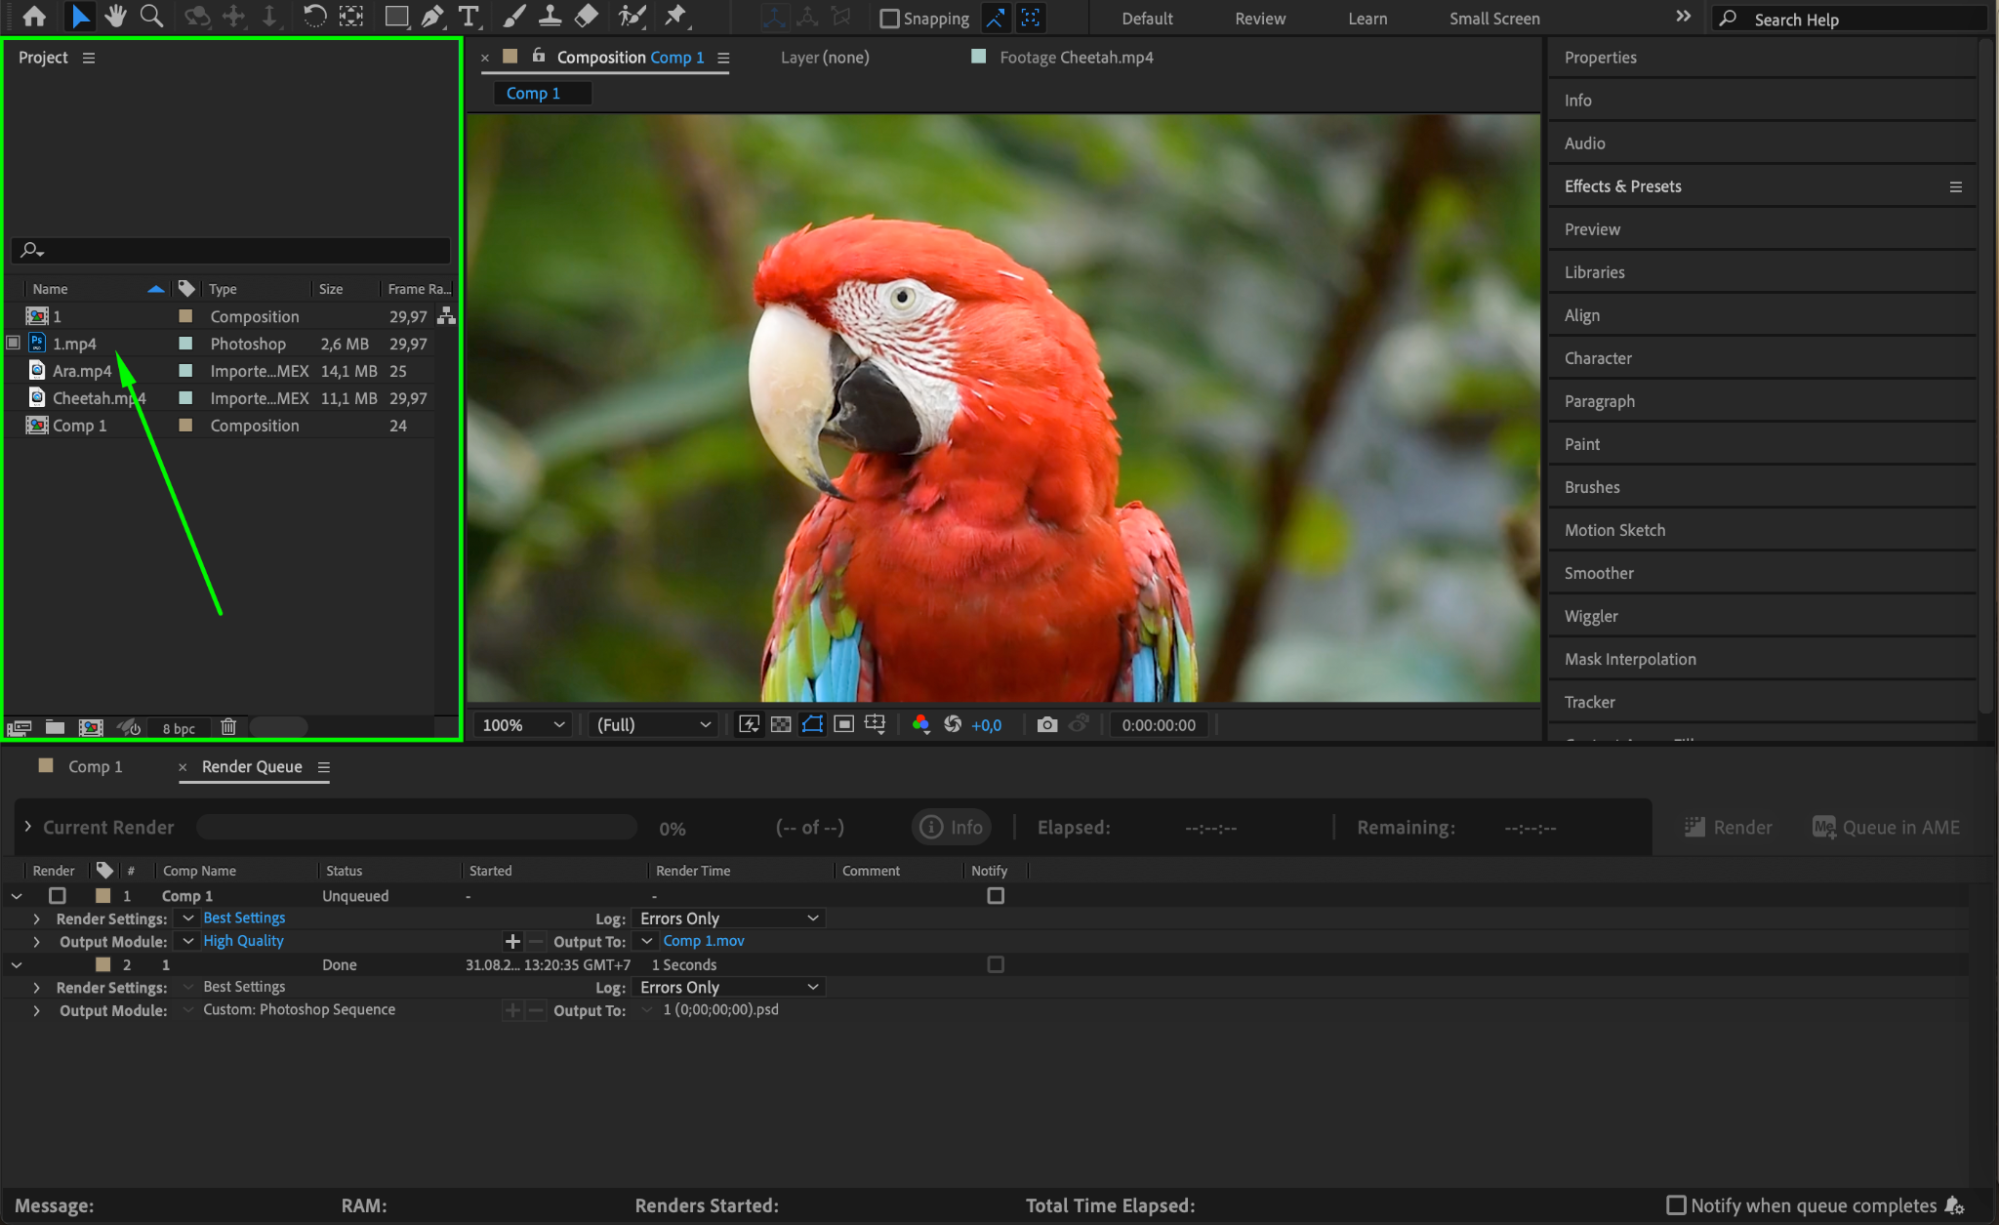
Using proxies is an effective method for working with high-resolution footage while minimizing rendering time. Proxies are lower-resolution versions of your source footage that you can use during the editing process. After creating and applying proxies, After Effects will render your final output more quickly.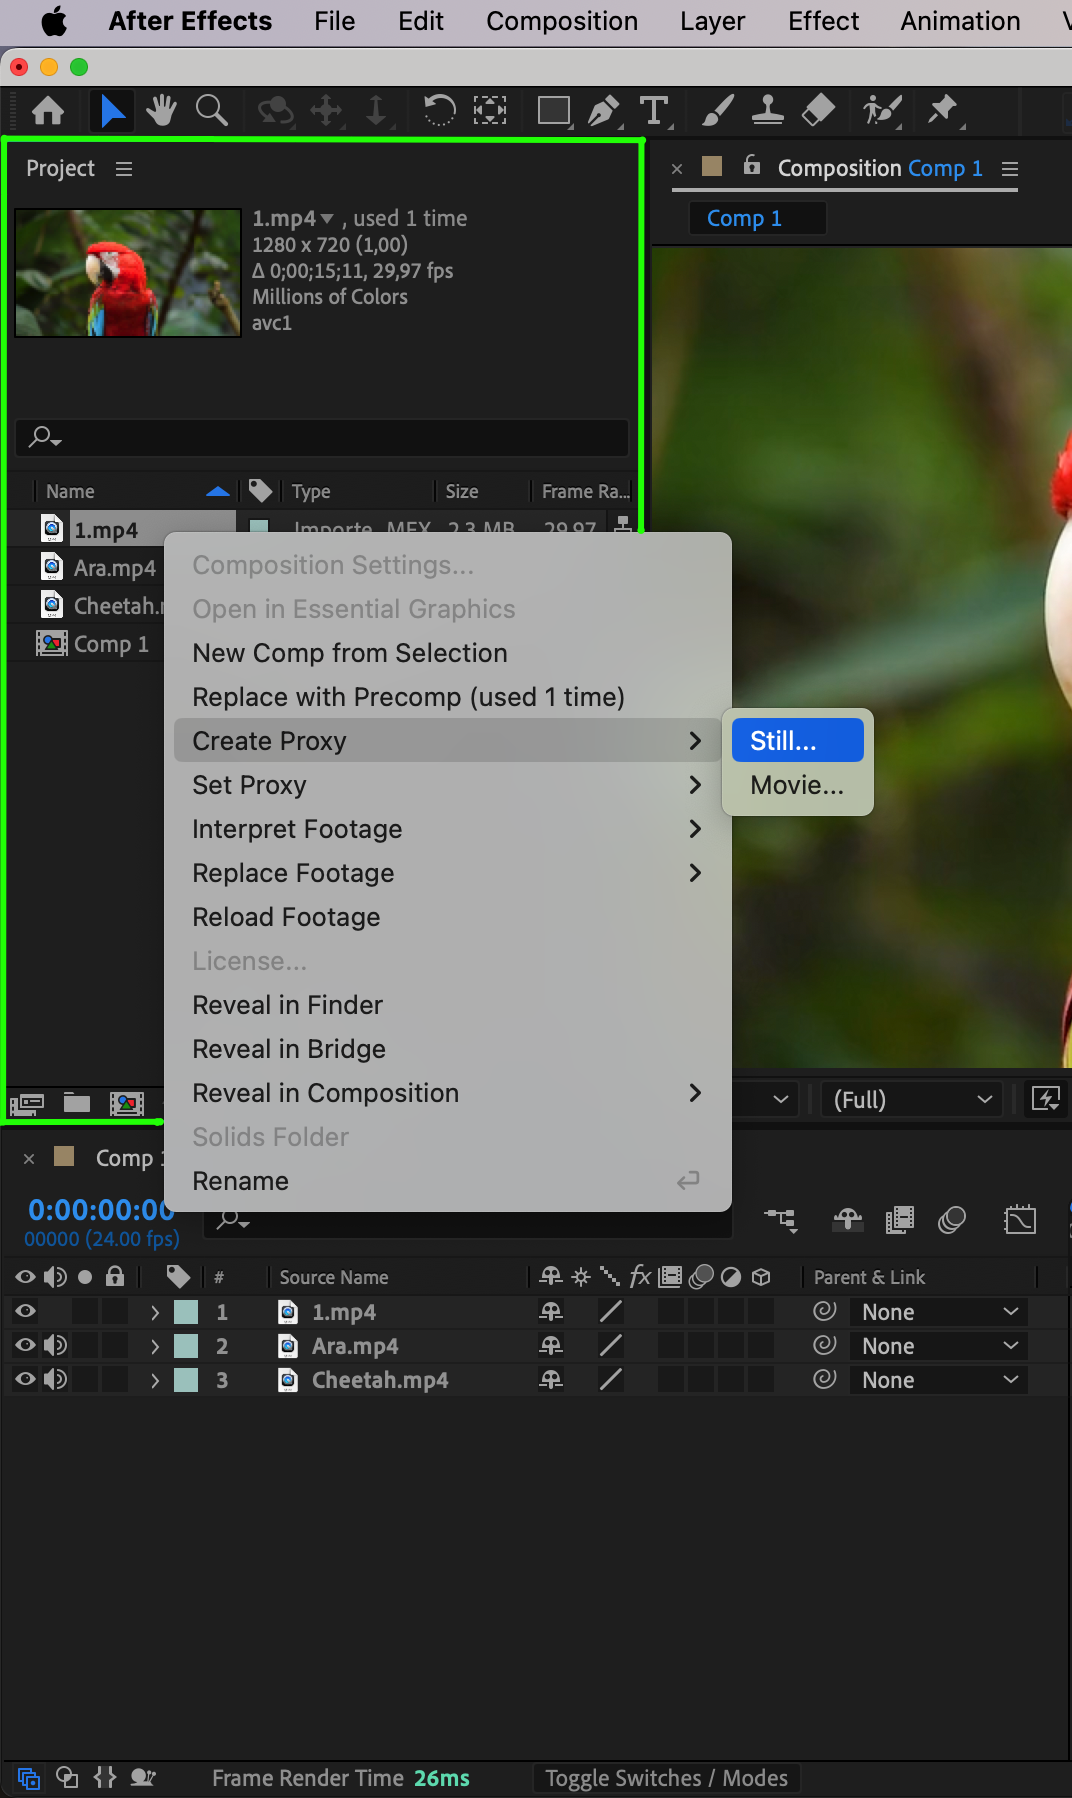

 Step 5: Adjust RAM Reserved for Other Applications
In the “Memory & Performance” settings, you can allocate a portion of your RAM for other applications. By reserving sufficient RAM for After Effects, you ensure that it has enough resources to handle rendering more efficiently. Adjust this setting based on your system’s RAM capacity to balance performance between After Effects and other applications.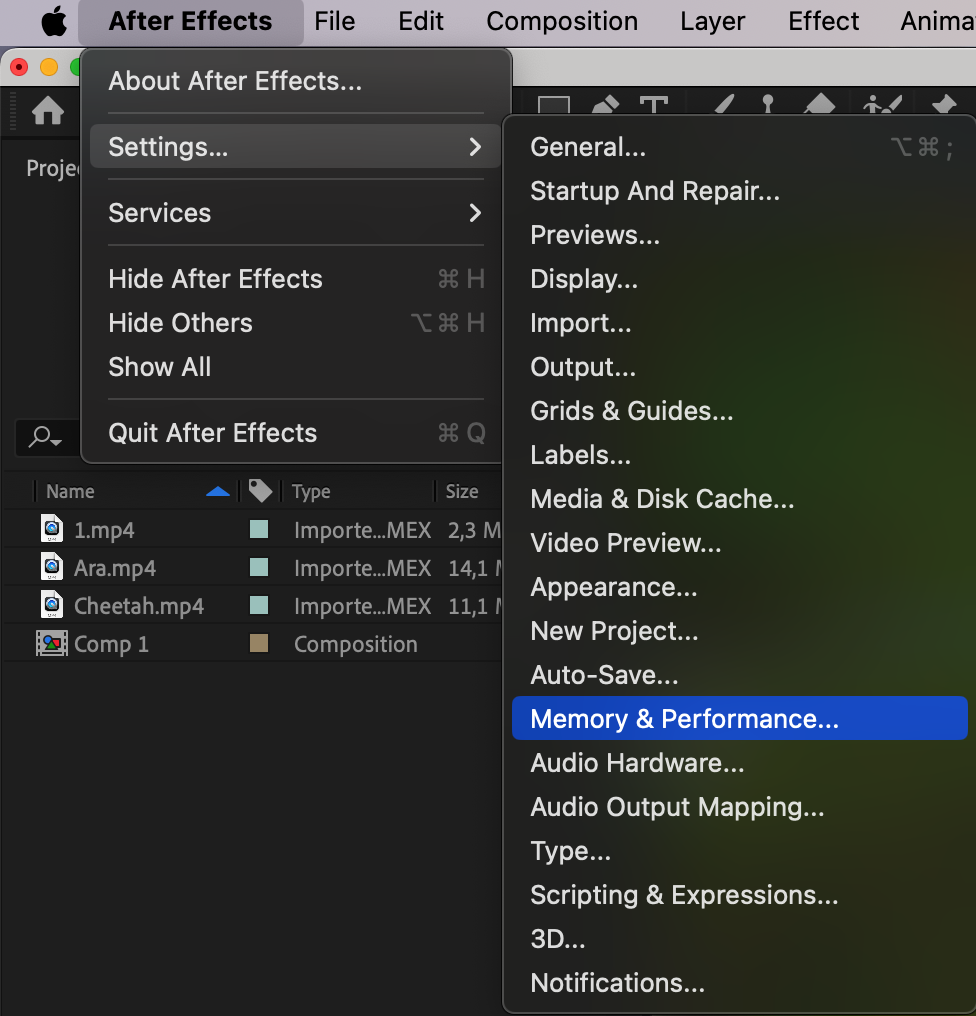
 Step 6: Use the Right Format and Codec
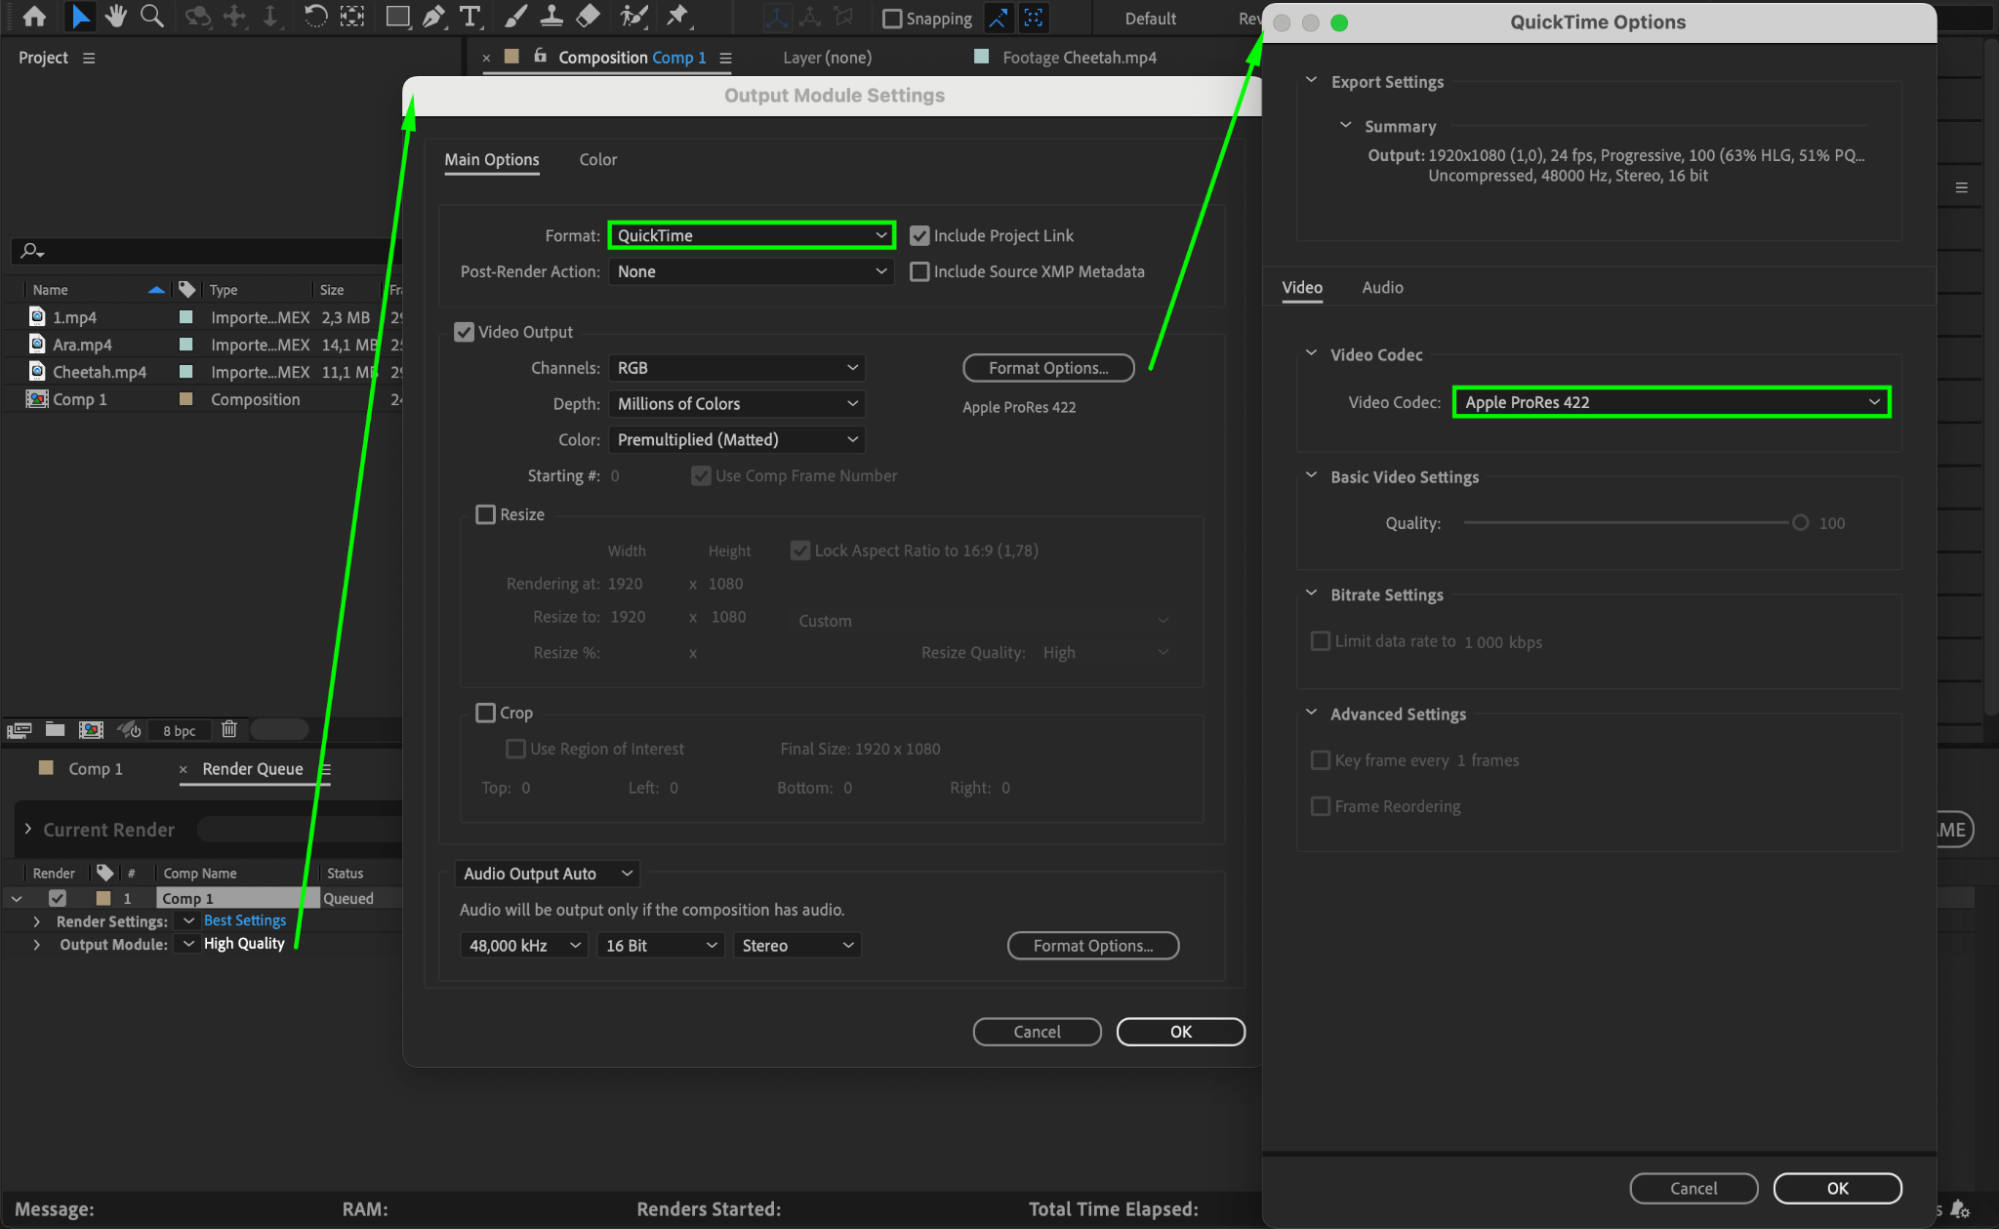
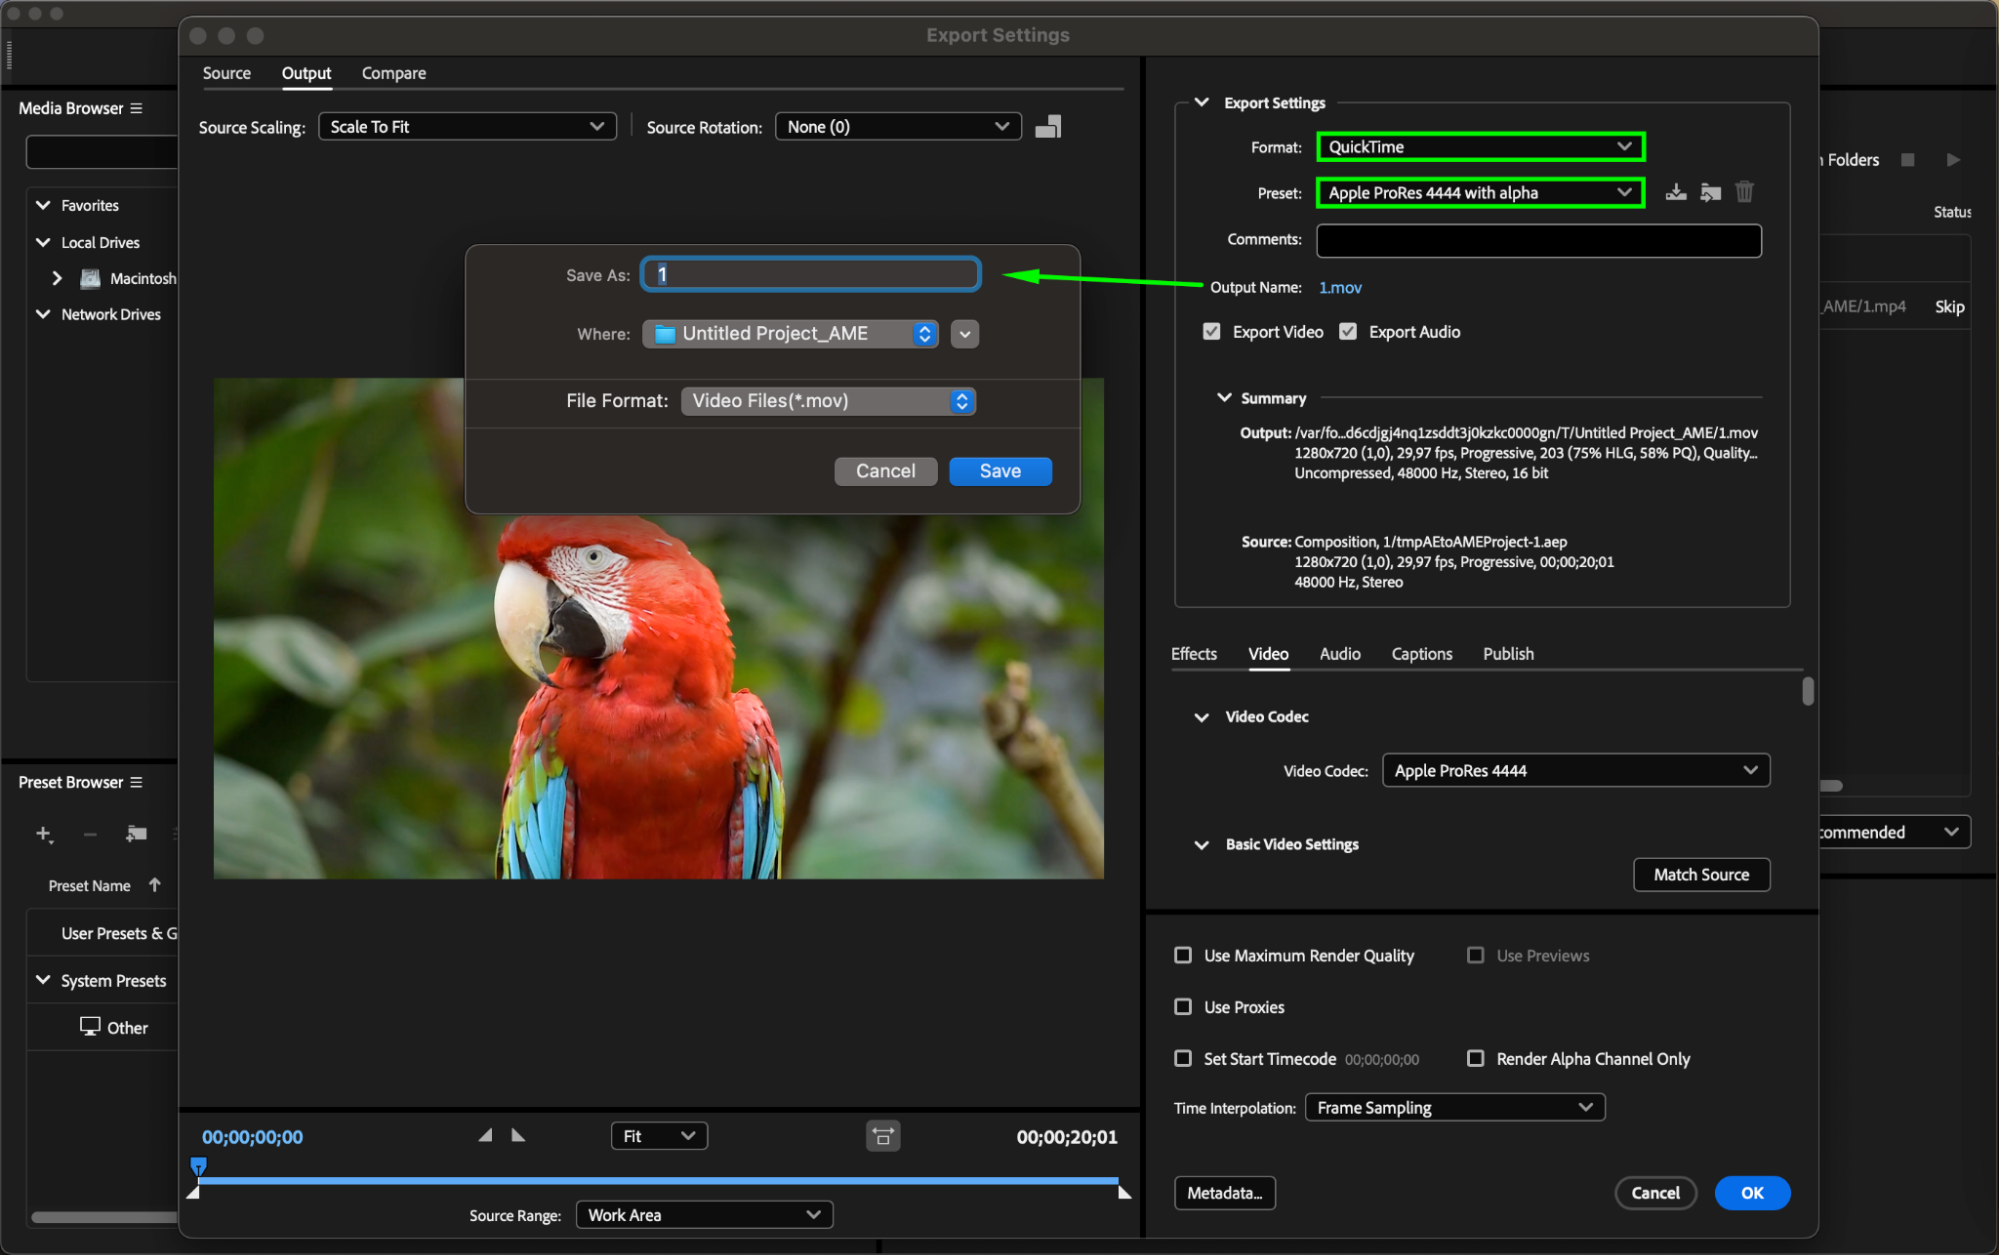
Selecting an appropriate codec can significantly impact rendering speed. To do this, go to the “Composition” menu and select “Add to Render Queue.” Click on the text next to “Output Module” to open the Output Module Settings. Choose a codec and format that balances quality and performance. For instance, using the QuickTime format with the Apple ProRes 422 codec provides a good balance between quality and file size, optimizing both rendering speed and output quality.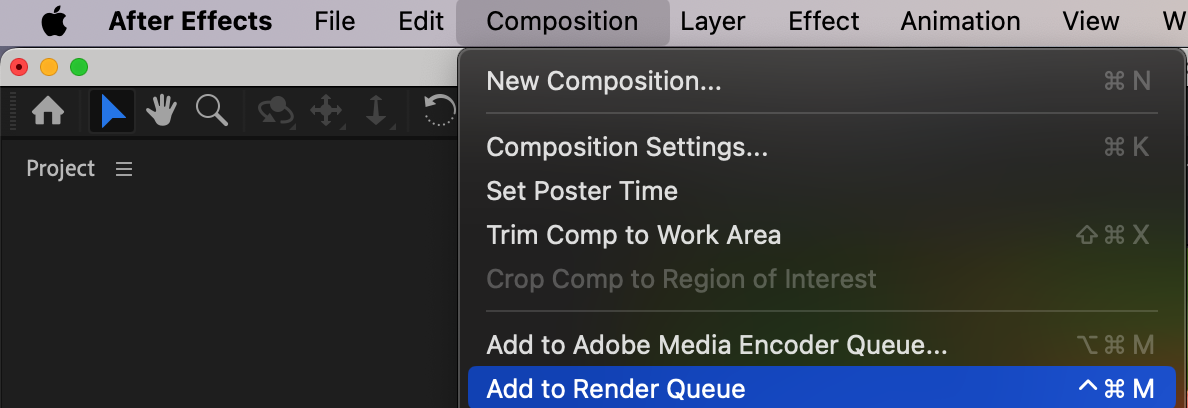
 Step 7: Render in the Background or Use Media Encoder
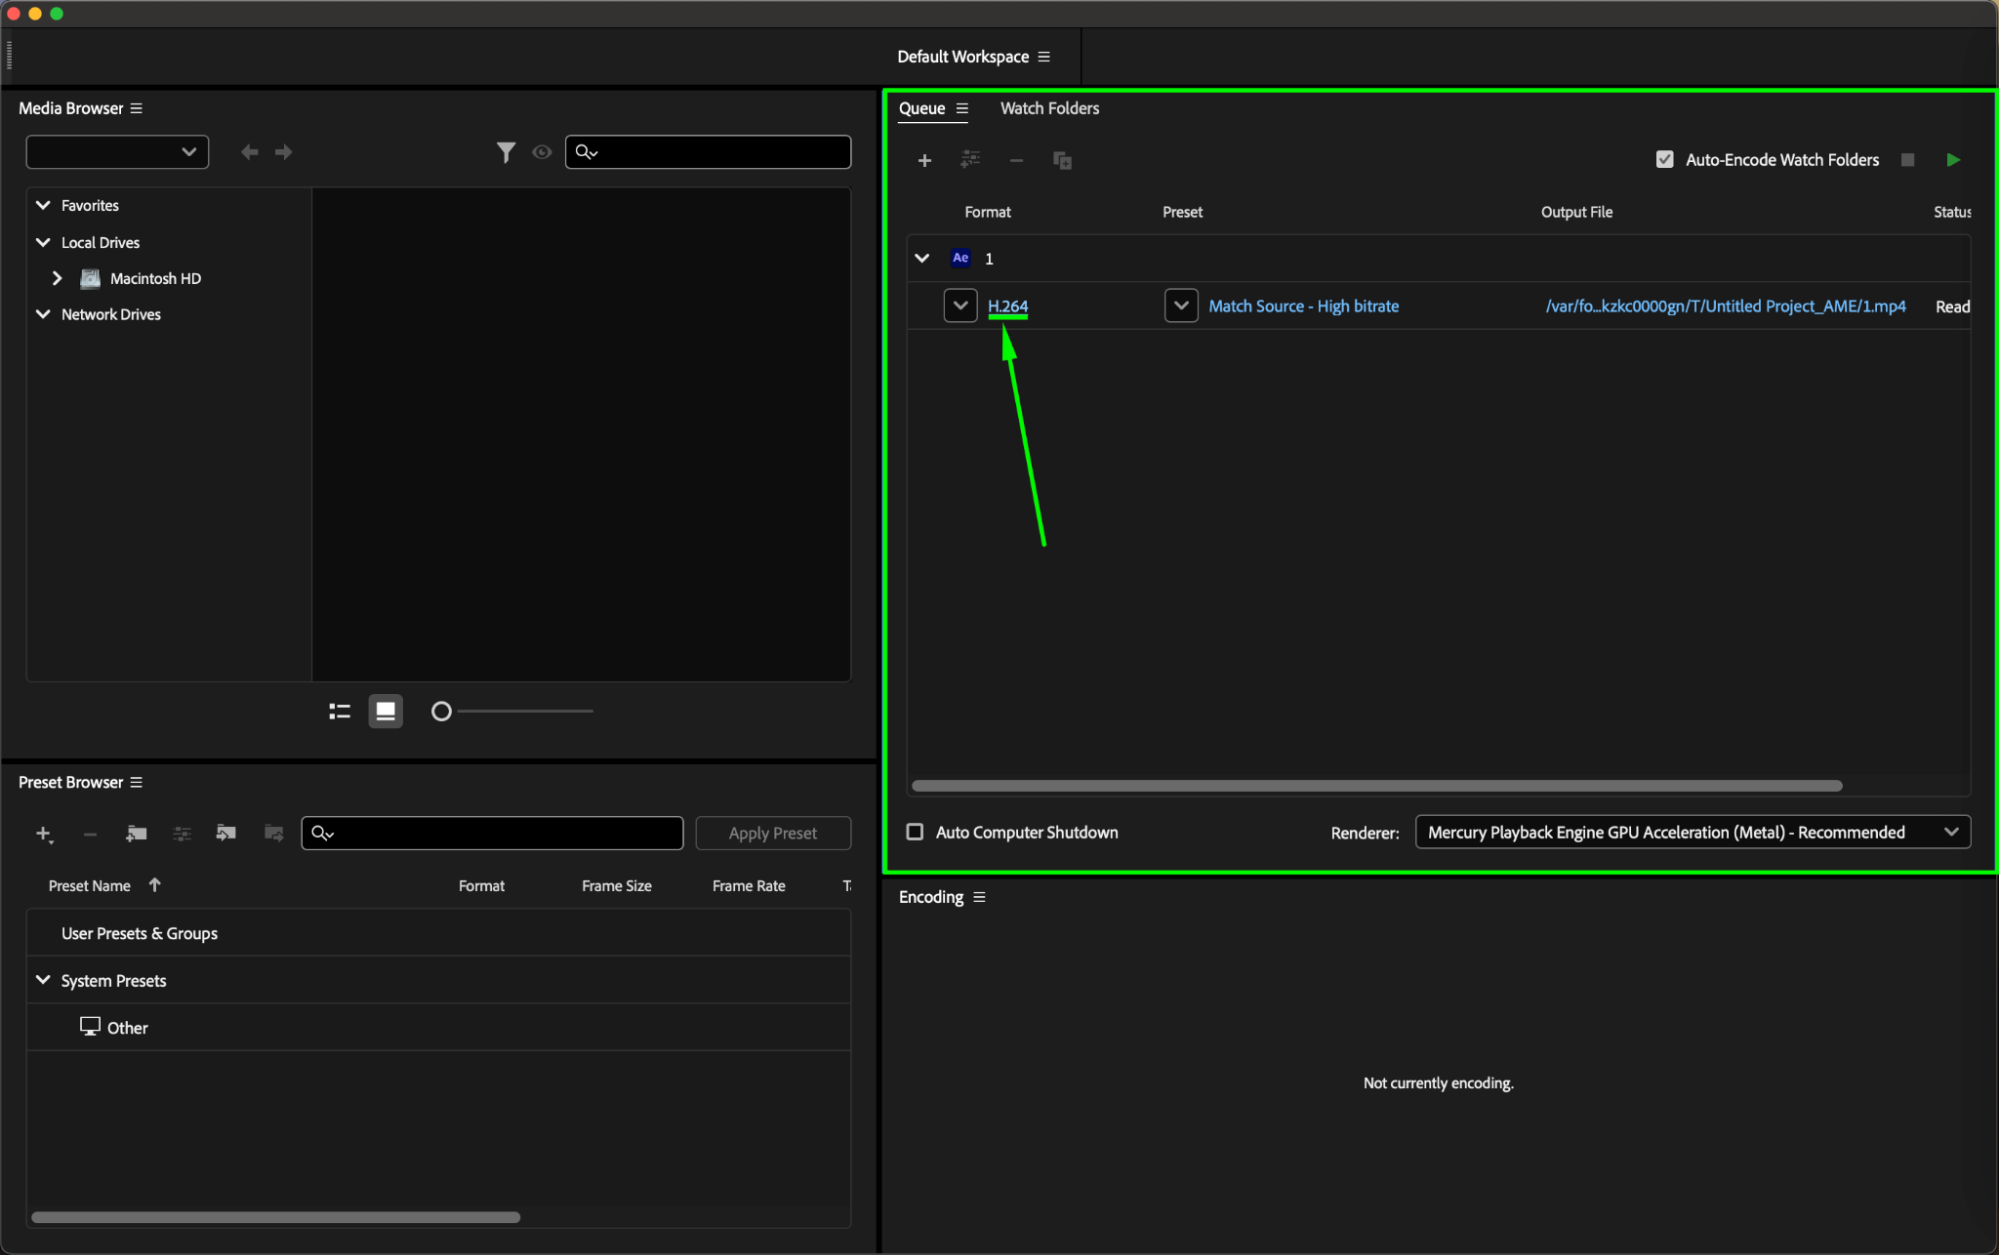
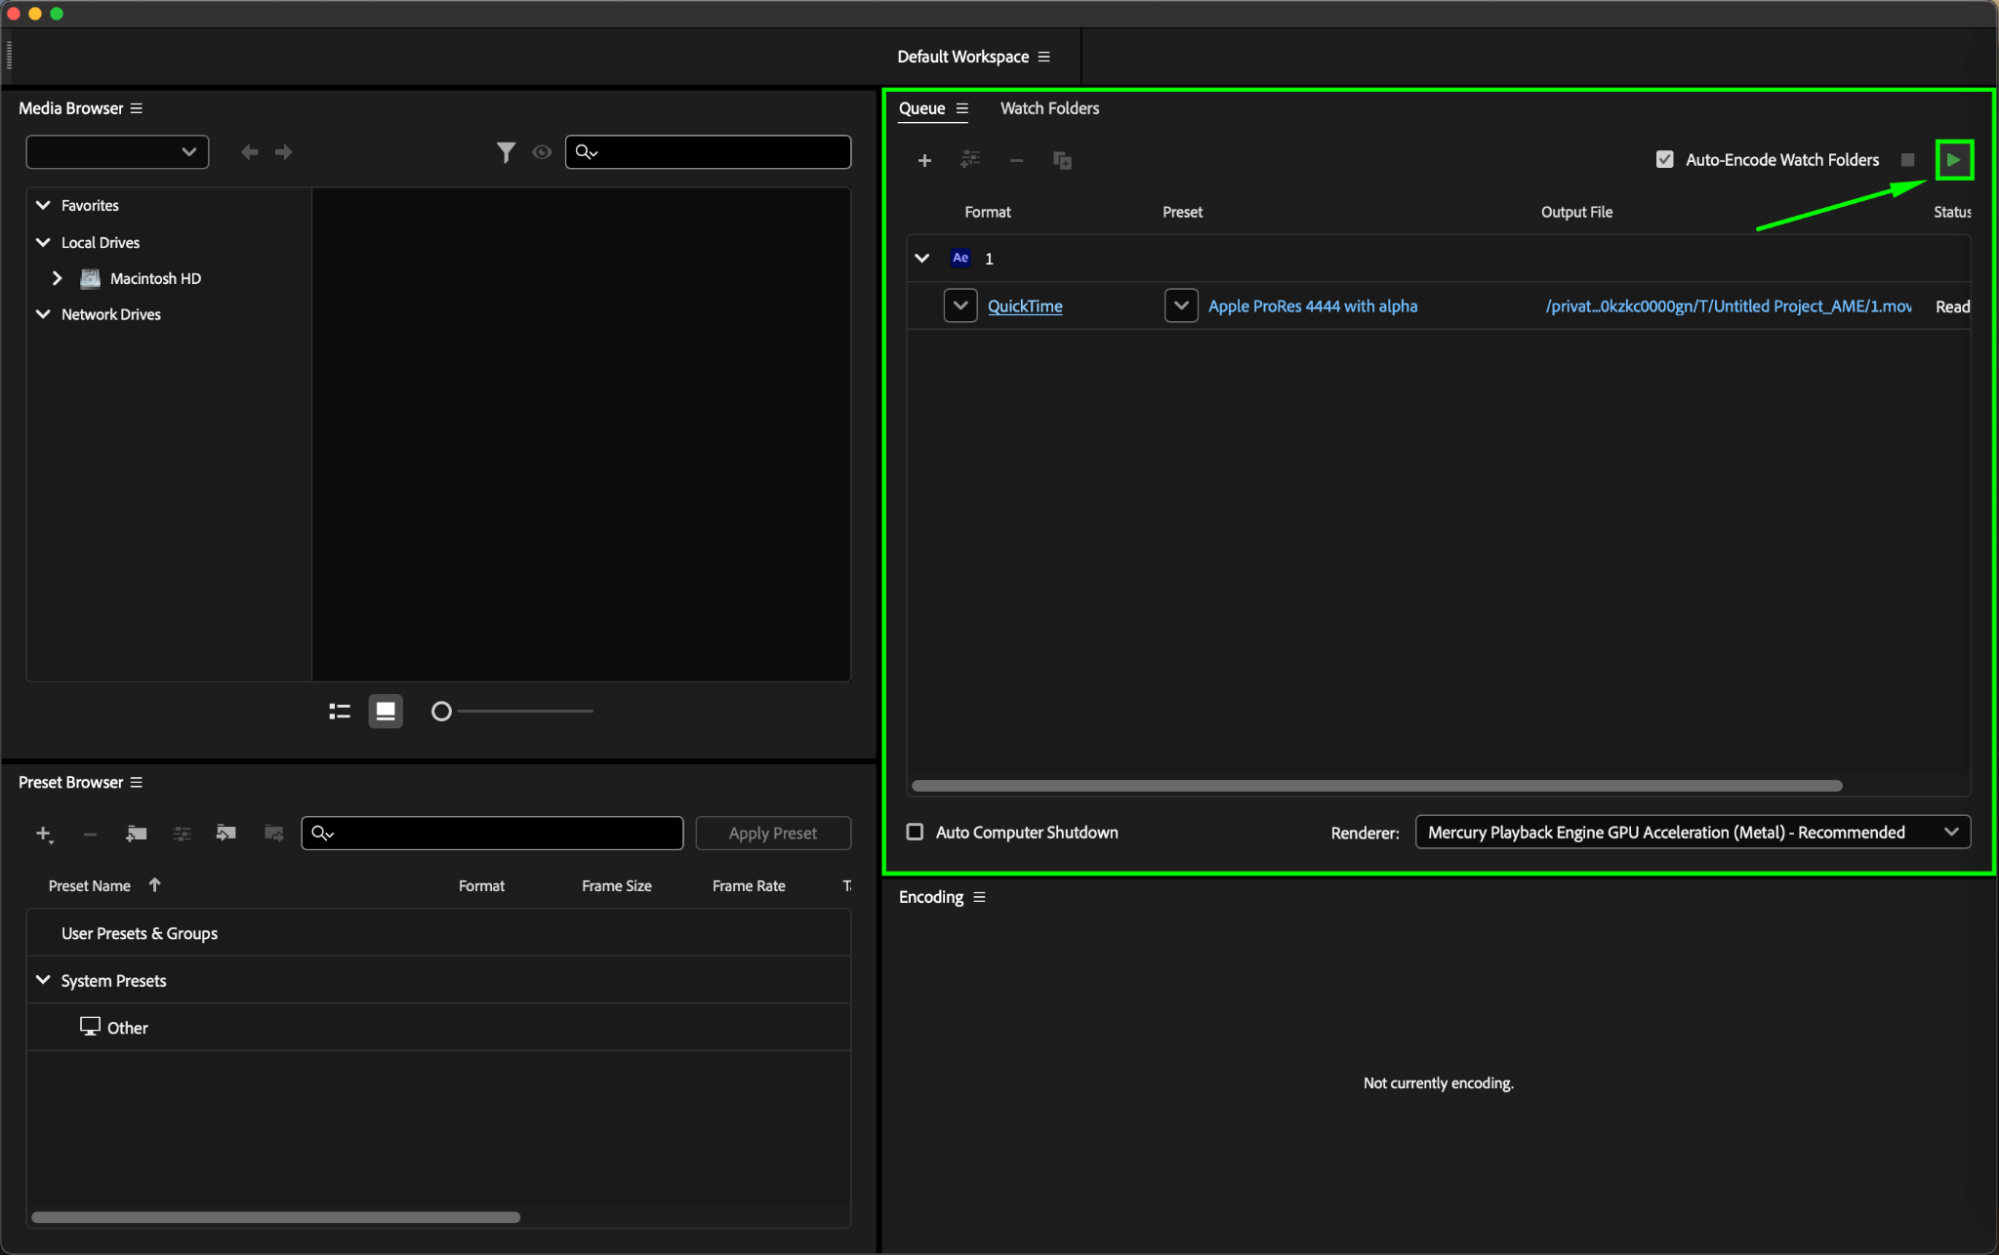
Instead of rendering directly in After Effects, consider rendering in the background or using Adobe Media Encoder. These options allow you to continue working on other tasks while your composition is being rendered. Media Encoder also provides additional export options and settings to streamline the rendering process.
 Conclusion
By applying these strategies, you can significantly reduce rendering times and enhance your workflow in Adobe After Effects. While rendering times can vary based on project complexity and system specifications, these tips will help you work more efficiently and get your projects done faster. Experiment with these techniques to find the best combination for your needs. Happy rendering!

