The Ultimate Guide to Interpreting Footage in After Effects
Understanding the Basics of Footage Interpretation in After Effects
Are you an aspiring visual effects artist or a video editor looking to enhance your skills? If so, then you’ve likely heard about After Effects – a powerful software that enables you to create stunning visual effects, motion graphics, and animations. One essential skill you need to master in After Effects is interpreting footage. This process allows you to optimize and harmonize your footage, ensuring a smooth workflow and impeccable visual results.
In this article, we will take you through the step-by-step process of interpreting footage in After Effects. From understanding the key concepts to effectively using the interpretation options, we will provide you with a comprehensive guide
So, whether you’re working on a complex visual effects project, creating a dynamic motion graphics piece, or simply editing a video, understanding how to interpret footage in After Effects is crucial for achieving professional results. Let’s dive in and explore the world of footage interpretation together.
When it comes to interpreting footage in After Effects, there are several vital aspects to consider. Let’s break them down and provide you with some helpful advice along the way.
If So, Four Aspects Footage INTERPRETATION IS for You
1. Frame Rate:
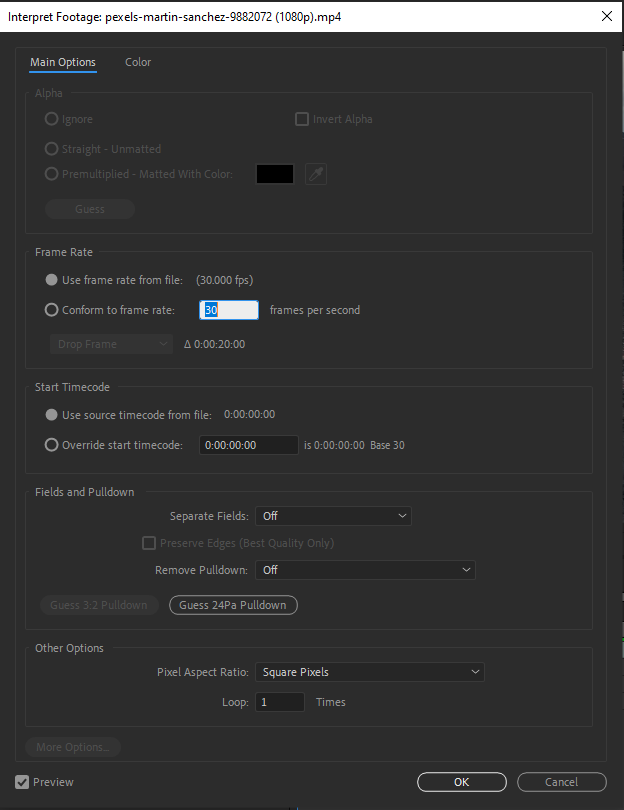
The frame rate of your footage determines how smoothly it plays back. If you’re working with footage that has a different frame rate than your project settings, you may encounter issues such as stuttering or frame blending. To overcome this, use the hotkey “Ctrl+Alt+G” to open the Interpret Footage dialog box. Here, you can easily adjust the frame rate of your footage to match the project settings, ensuring seamless playback.
 2. Pixel Aspect Ratio:
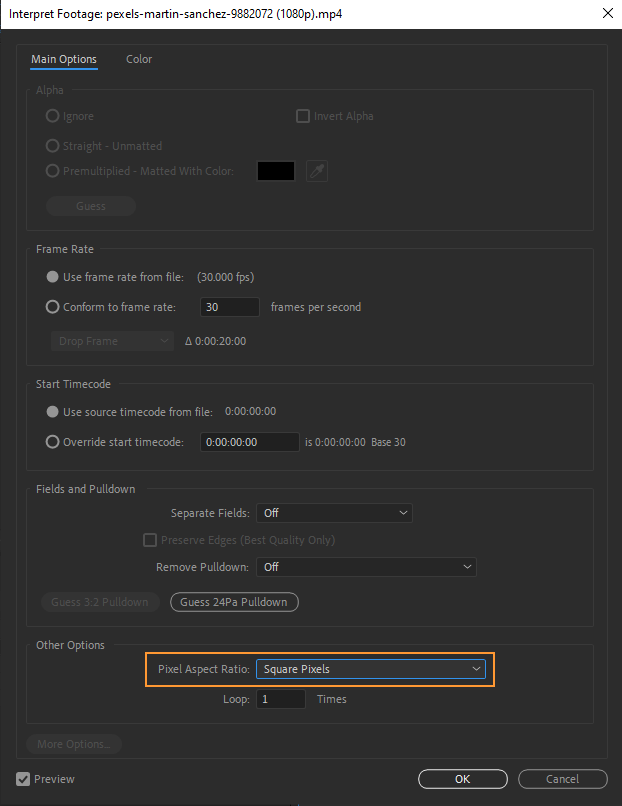
Pixel aspect ratio refers to the relationship between the width and height of individual pixels in your footage. It is crucial to set the correct pixel aspect ratio, especially when working with non-square pixels, like those found in old television formats. To adjust the pixel aspect ratio, use the hotkey “Ctrl+Alt+G” to open the Interpret Footage dialog box once again. Here, you can specify the appropriate pixel aspect ratio for your footage, ensuring proper scaling and aspect ratio in your composition.
 3. Field Order:
Field order determines how interlaced video footage is displayed. If you’re working with interlaced footage, it is essential to set the correct field order to avoid flickering or jagged edges. To change the field order, use the hotkey “Ctrl+Alt+G” to open the Interpret Footage dialog box. Here, you can select the appropriate field order, such as “Upper Field First” or “Lower Field First,” depending on the characteristics of your footage.
Get 10% off when you subscribe to our newsletter

 4. Alpha Channel:
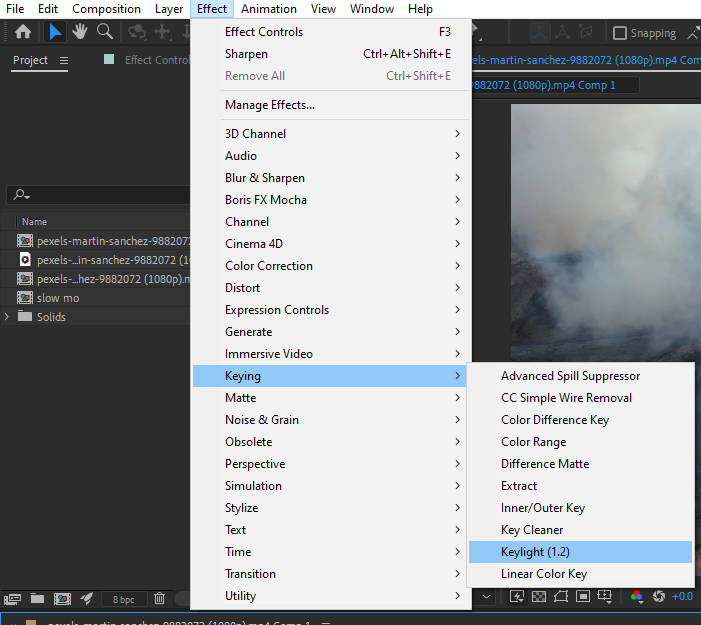
If your footage contains an alpha channel (transparent background), After Effects can automatically detect and interpret it. However, if your footage doesn’t have an alpha channel, you can create one by using effects such as Keylight or Rotobrush, enabling you to composite your footage seamlessly with other elements in your composition.

Remember, footage interpretation is not a one-size-fits-all process. Each video file may require different adjustments depending on its characteristics. Understanding and utilizing the various options in After Effects’ Interpret Footage dialog box allows you to tailor the interpretation to best suit your specific footage and project requirements.
Interpreting footage in After Effects is a vital skill that can greatly enhance your workflow and the quality of your visual projects. By understanding the key aspects of frame rate, pixel aspect ratio, field order, and alpha channel, you can optimize your footage for seamless integration into your compositions.
Remember to utilize the hotkeys we’ve mentioned: “Ctrl+Alt+G” for adjusting frame rate, modifying pixel aspect ratio, changing field order, and various effects like Keylight or Rotobrush for creating alpha channels. These hotkeys make the process of interpreting footage more efficient and streamline your workflow.
Taking the time to interpret your footage correctly ensures smooth playback, proper scaling, and precise compositing. It allows you to harness the full power of After Effects and unleash your creativity with stunning visual effects, motion graphics, and animations.
So, whether you’re a beginner or an experienced user, mastering the art of footage interpretation in After Effects is crucial. By following the steps and tips outlined in this article, you can confidently interpret your footage and create visually captivating projects that leave a lasting impact.
Keep practicing, experimenting, and exploring the possibilities of footage interpretation in After Effects. Embrace the flexibility and creative control that this software offers. With time and dedication, you’ll become a confident and skilled interpreter, opening up new doors for your video editing, motion graphics, and visual effects endeavors


