Get 10% off when you subscribe to our newsletter

How to Maintain Accurate Beat Detection in Adobe After Effects
Introduction
Keeping beat detection consistent in Adobe After Effects is essential for syncing animations to music. Whether you’re creating a visualizer, lyric video, or rhythm-based motion graphics, aligning visuals with the audio beat makes your project feel dynamic and polished. In this guide, you’ll learn how to detect beats, use them to drive animations, and keep your sync smooth and reliable throughout the timeline.
Step 1: Import Your Audio File
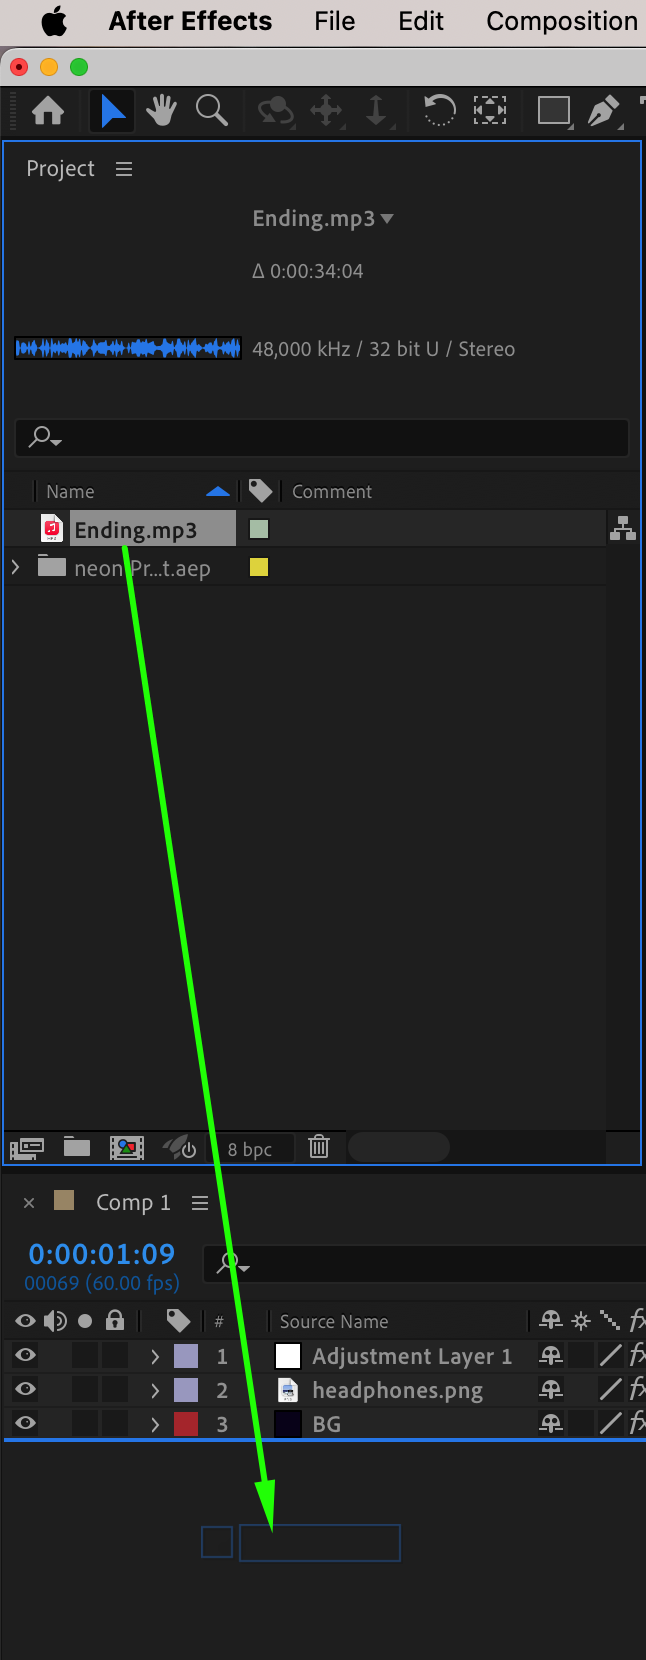
Go to File > Import > File and select the audio track you want to work with. Drag the file into the timeline to begin building your animation around the music. Make sure the audio starts exactly where you need it to sync with your visuals.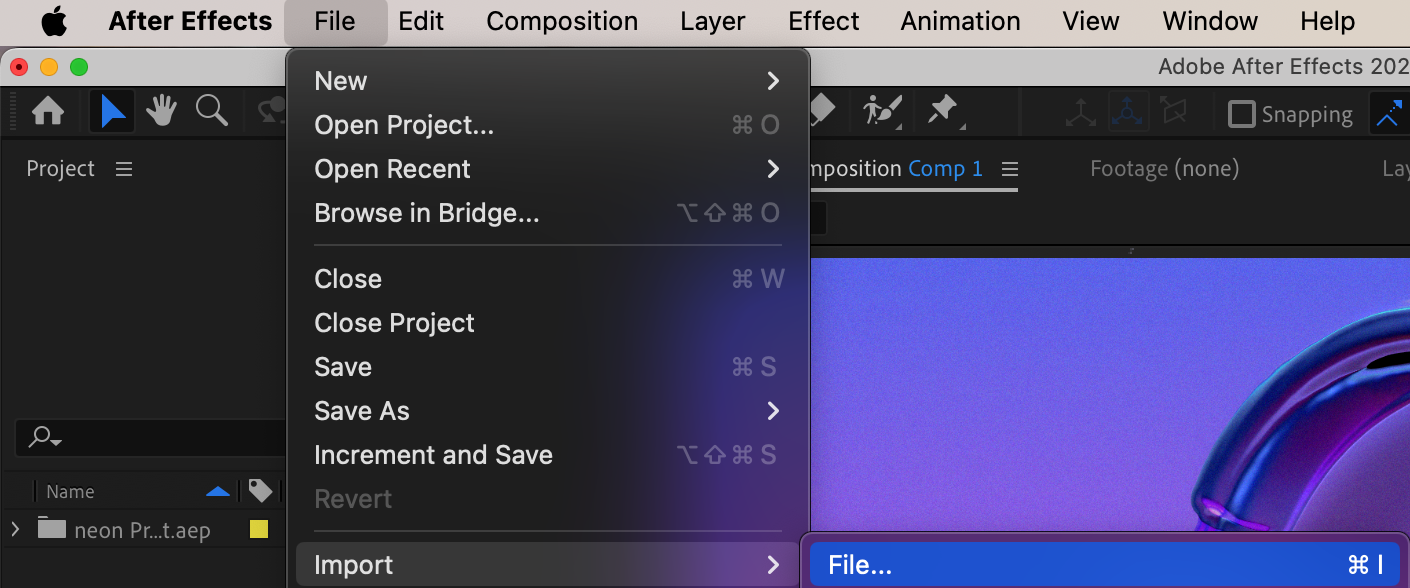
 Step 2: Convert Audio to Keyframes
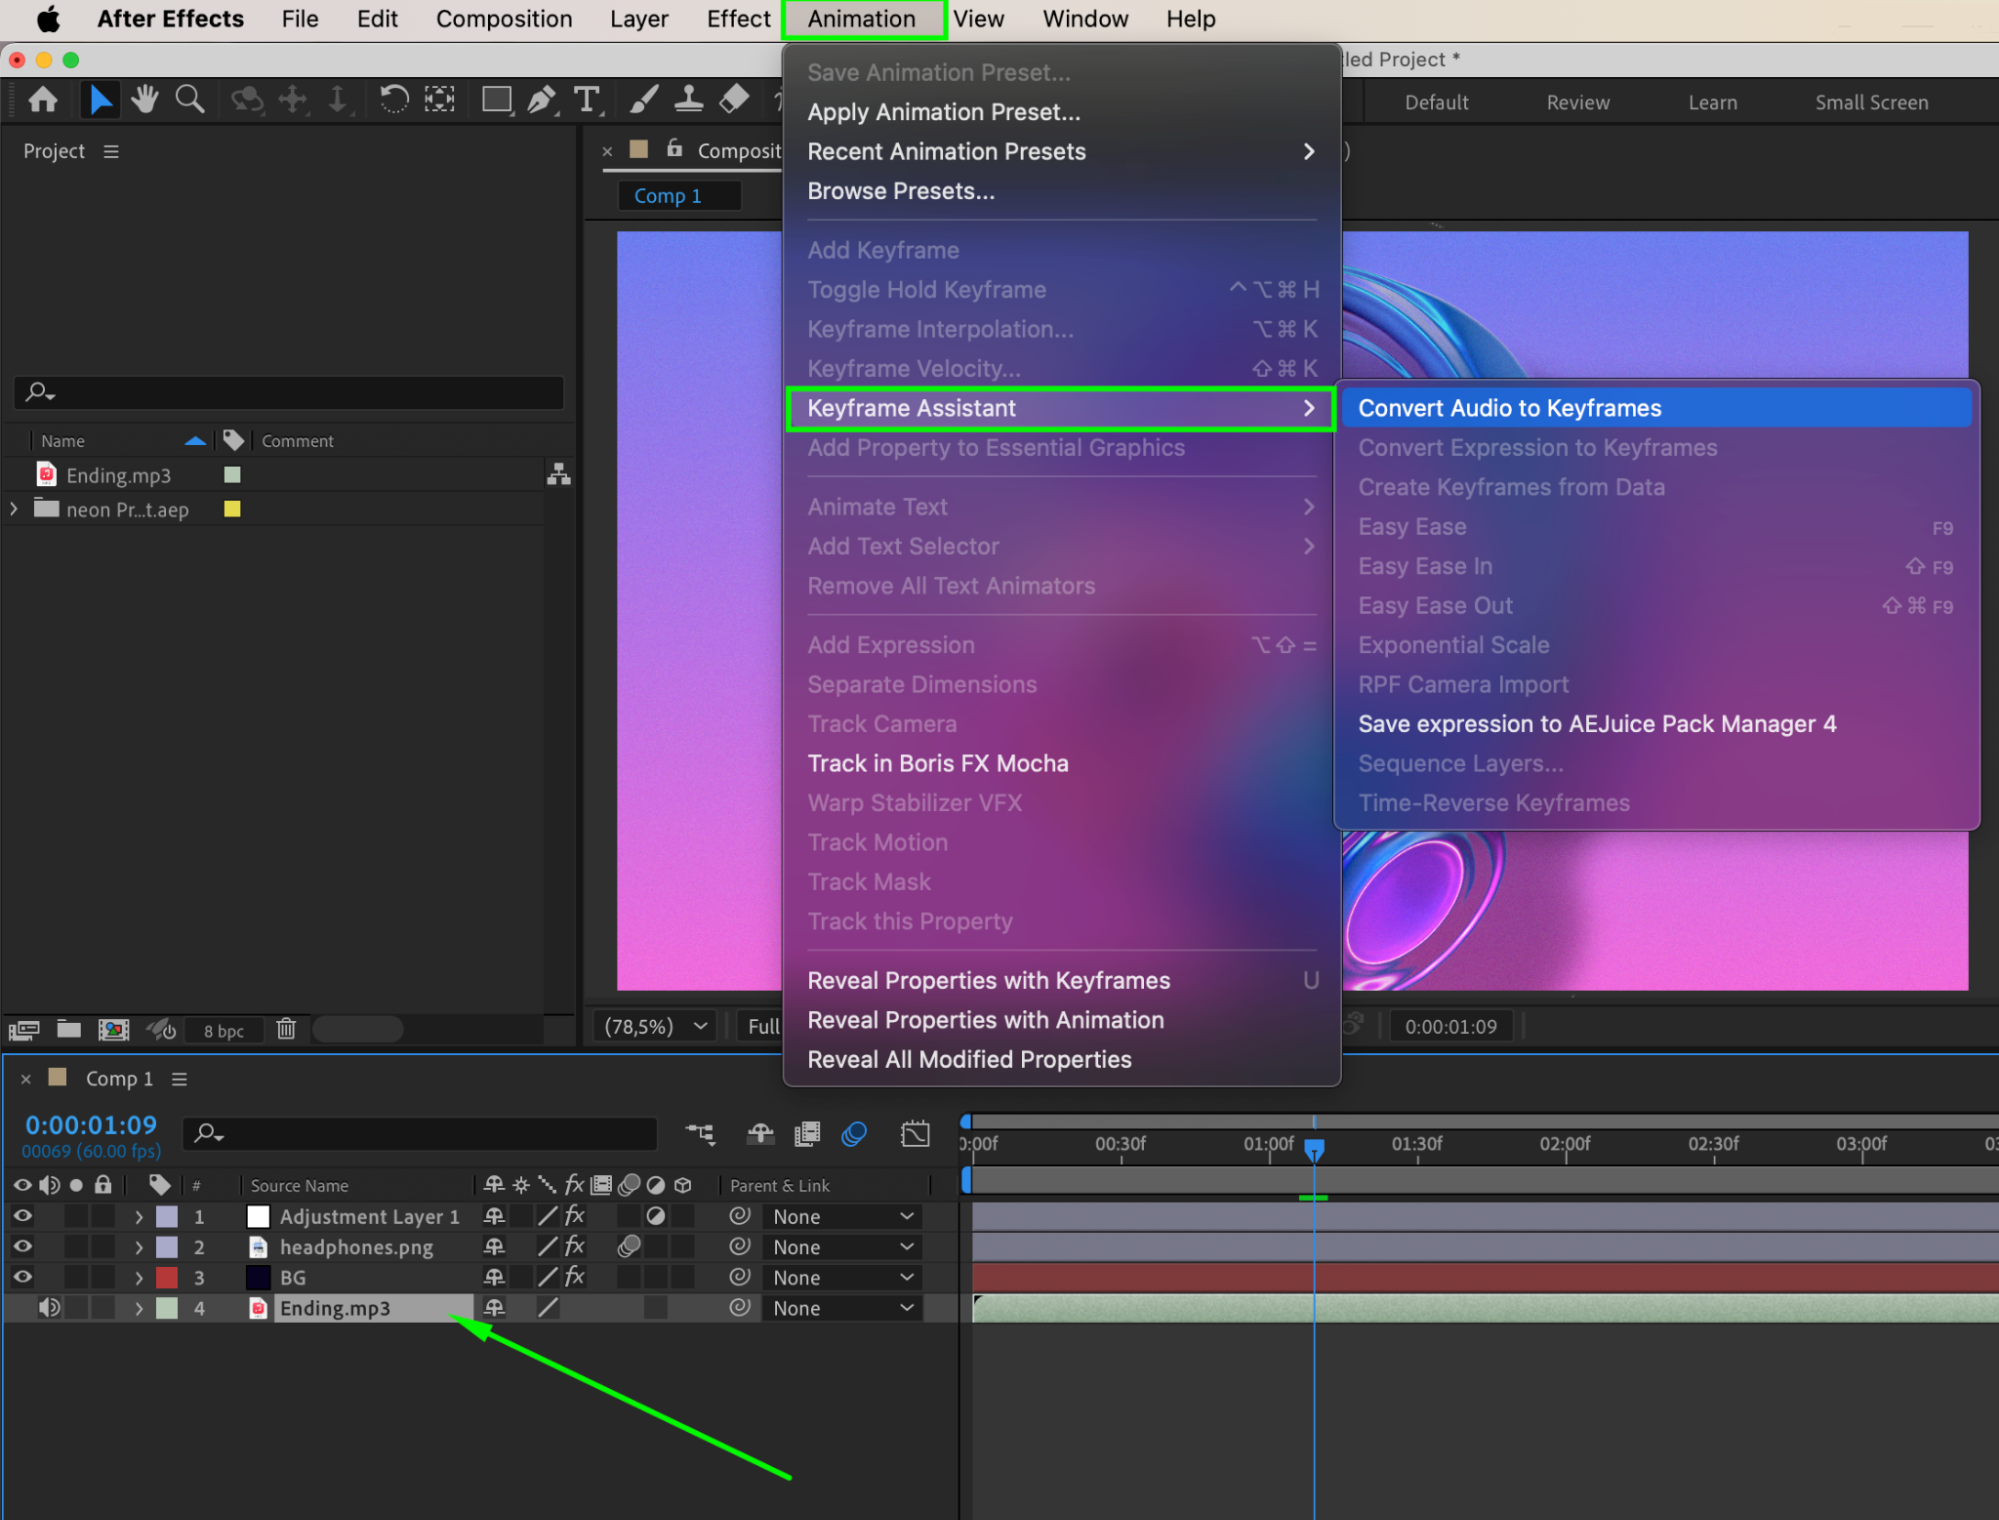
Select your audio layer, then go to Animation > Keyframe Assistant > Convert Audio to Keyframes. After Effects will generate a new null layer named Audio Amplitude, which contains three properties: Left Channel, Right Channel, and Both Channels. These represent the volume changes over time and will serve as the base for beat detection.
Step 3: Use Both Channels Slider for Beat Reference
In most cases, Both Channels > Slider is the best property to use for detecting beats. It averages the left and right channels, giving a more balanced signal. You’ll use this value to drive visual elements like scale, opacity, or position in sync with your audio.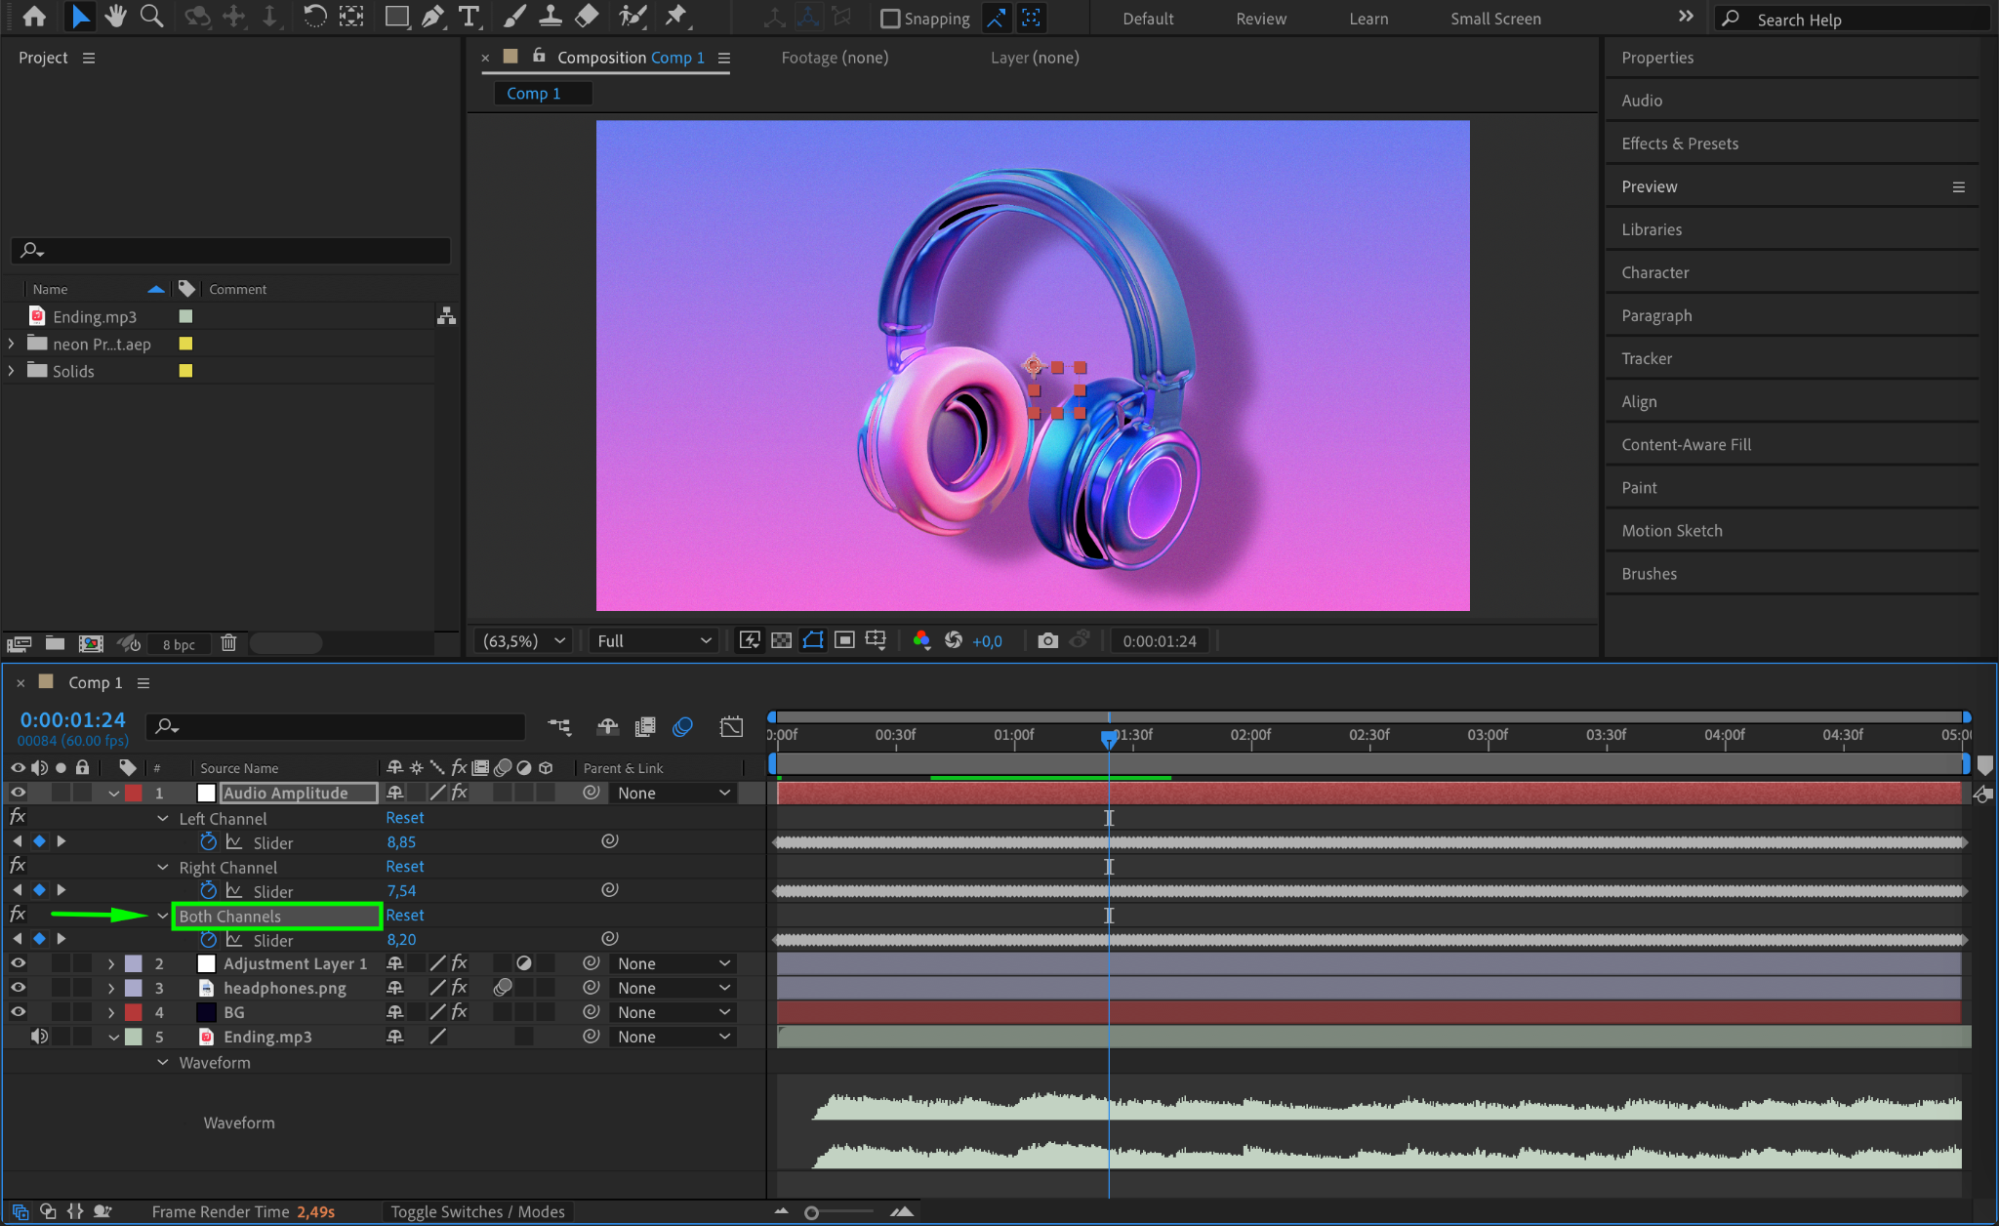 Step 4: Link Animation Properties to the Beat
Choose the property you want to animate (e.g., Scale, Opacity, or Rotation) and Alt-click (or Option-click on Mac) the stopwatch next to it to open the expression field. Use the Pick Whip tool to drag from the expression box to the Both Channels > Slider on the Audio Amplitude layer. This will connect your animation directly to the audio levels.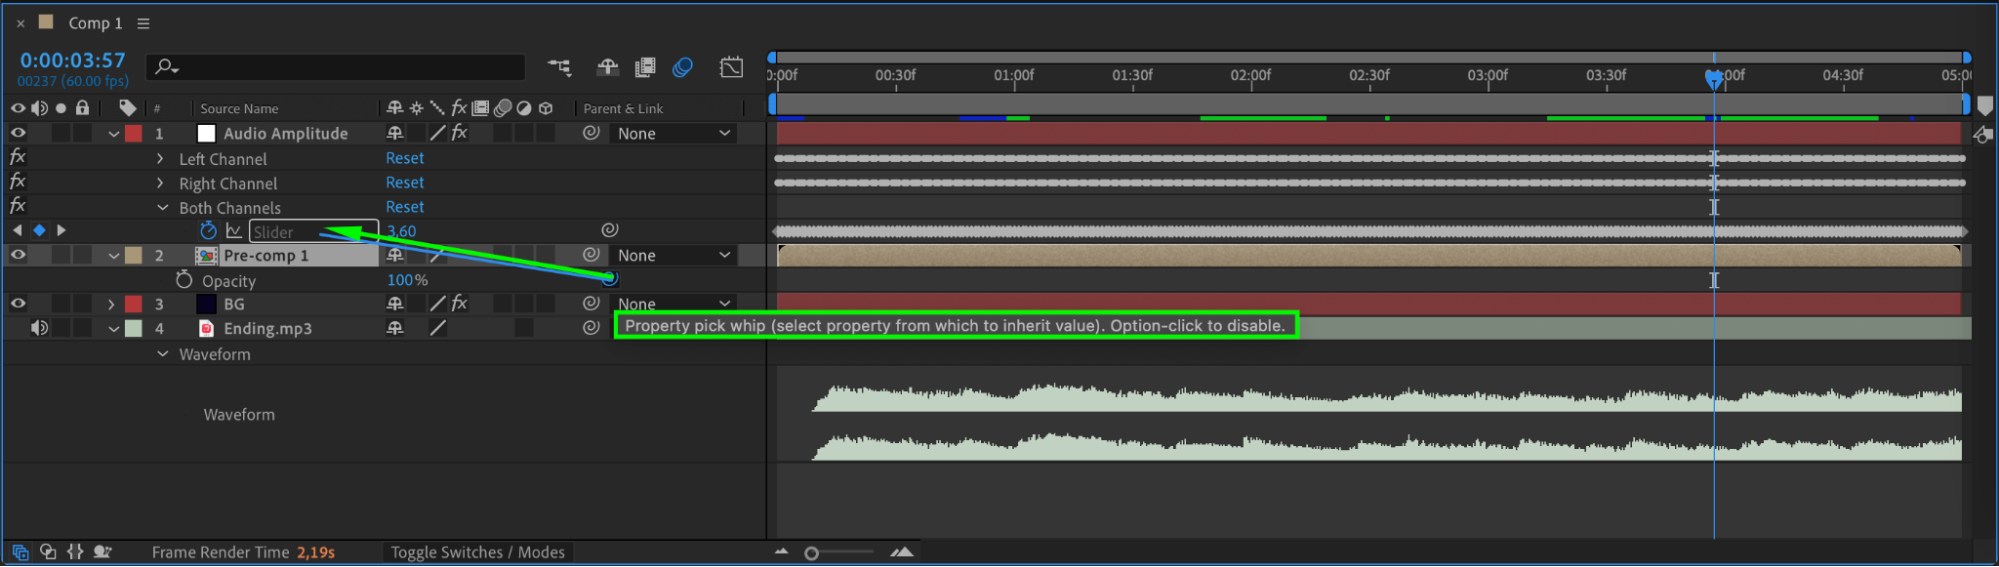 Step 5: Create Smooth Audio-Driven Animation
For a smoother visual response instead of sharp jumps, use a simple expression like this:
thisComp.layer(“Audio Amplitude”).effect(“Both Channels”)(“Slider”) * 5
This makes the property respond fluidly to the audio amplitude. The multiplier (* 5) increases the effect’s intensity. Adjust the number to fit the needs of your animation.
Step 6: Create a Breathing Effect with Audio
To simulate a “breathing” or pulsing rhythm in sync with the beat, you can use a sine-based expression:
amp = thisComp.layer(“Audio Amplitude”).effect(“Both Channels”)(“Slider”);
Math.sin(time * amp / 10) * 50 + 50
This causes the property (such as Opacity) to pulse softly, which is ideal for abstract or ambient visual styles.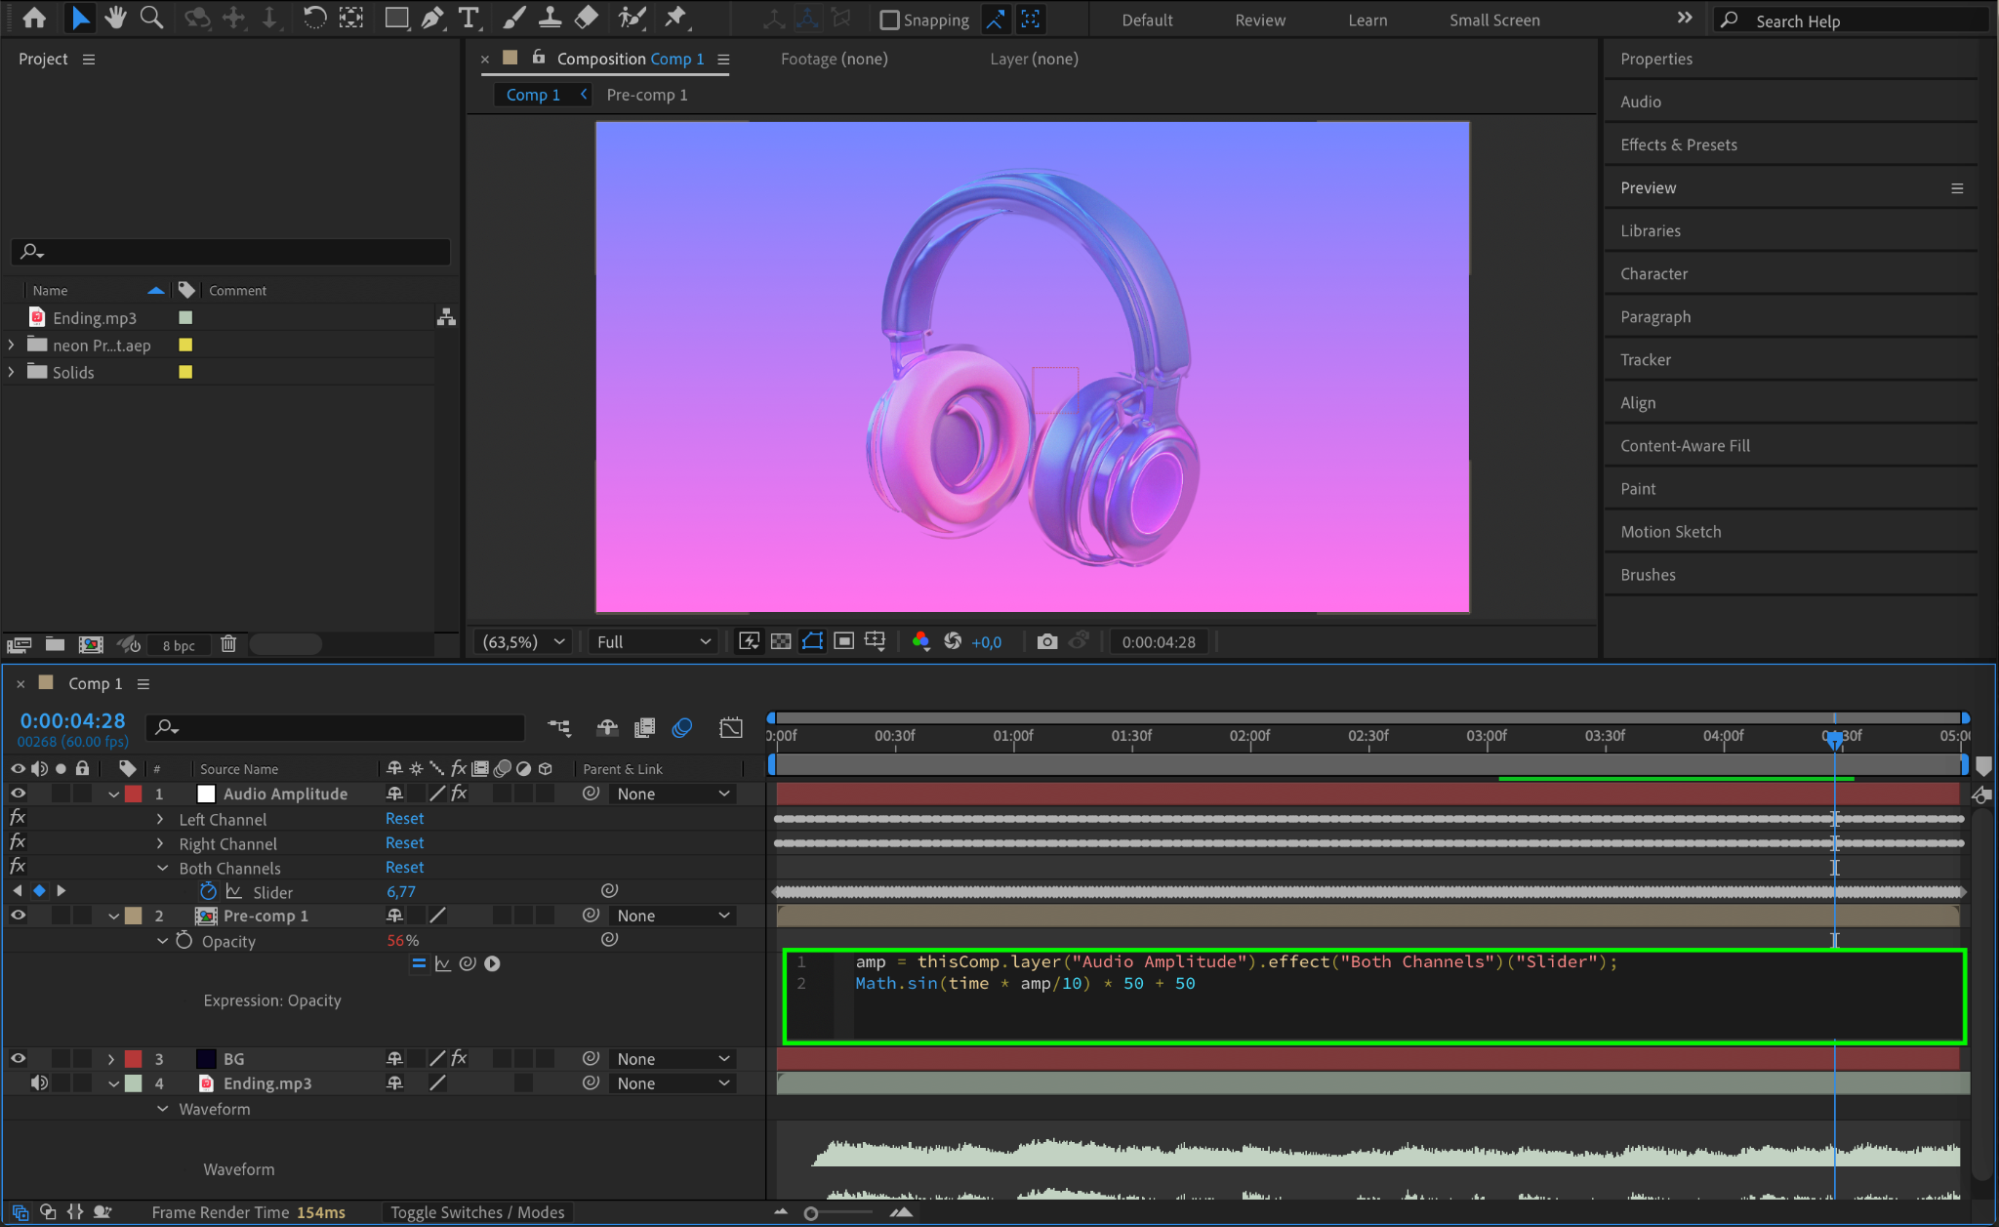 Step 7: Preview and Fine-Tune
Press the spacebar to preview your animation. Observe how the motion syncs with the music. If needed, adjust the expressions or add keyframes to emphasize specific beats or reduce sensitivity in quieter moments. Conclusion
Maintaining accurate beat detection in After Effects allows your animation to move in harmony with music. By converting audio to keyframes and linking them through expressions, you can create visuals that pulse, scale, or flicker to the beat. With just a few simple steps and expression tweaks, your project will feel more immersive and rhythmically engaging.
Our Bestsellers


