How to Convert Your 2D Logo into a 3D Animation Using After Effects
Introduction to 3D Logo Animation
Are you tired of your flat, 2D logo lacking visual impact? With After Effects, you can bring your logo to life by converting it into a stunning 3D animation. This guide will walk you through the process of creating a 3D version of your logo, enhancing its visual appeal and making it stand out. Let’s dive into transforming your logo into a captivating 3D design!
Get 10% off when you subscribe to our newsletter

Step 1: Set Up Your Composition
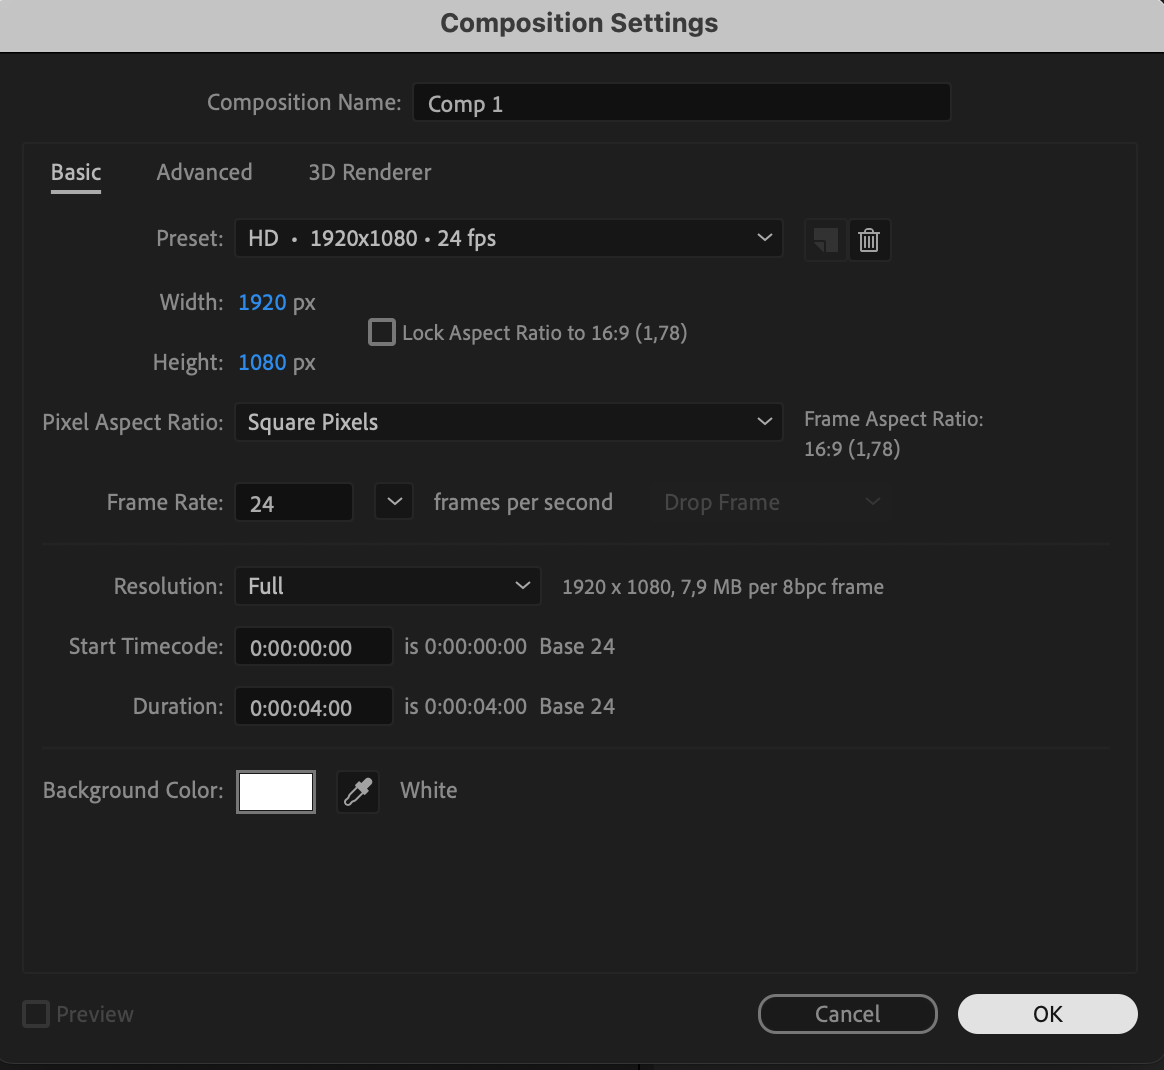
Start by creating a new composition in After Effects. Go to Composition > New Composition, and set the desired dimensions and duration for your animation. 
 Step 2: Import Your Logo
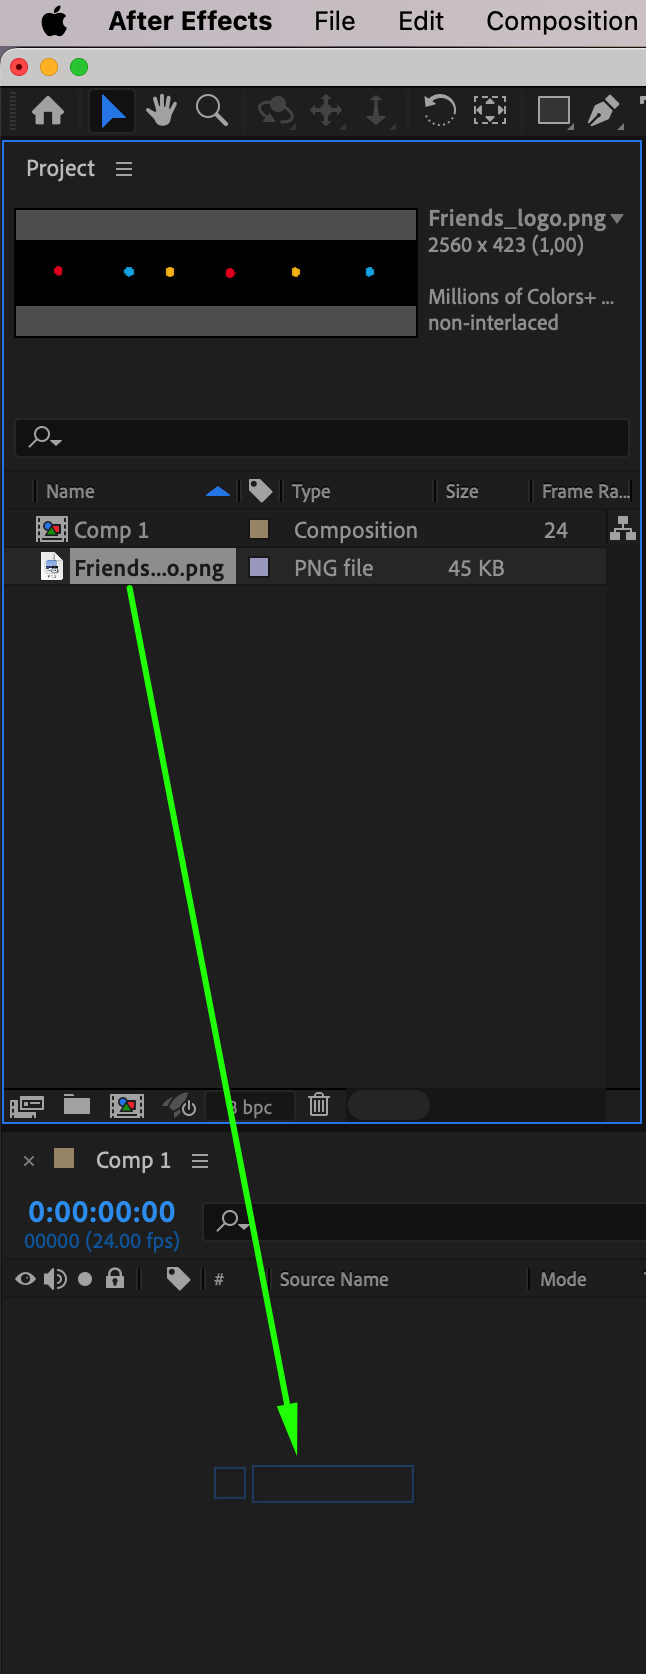
Import your logo file by navigating to File > Import > File. Once the logo appears in the Project Panel, drag it onto the Timeline Panel to begin working with it in your composition. This prepares your logo for the 3D transformation process.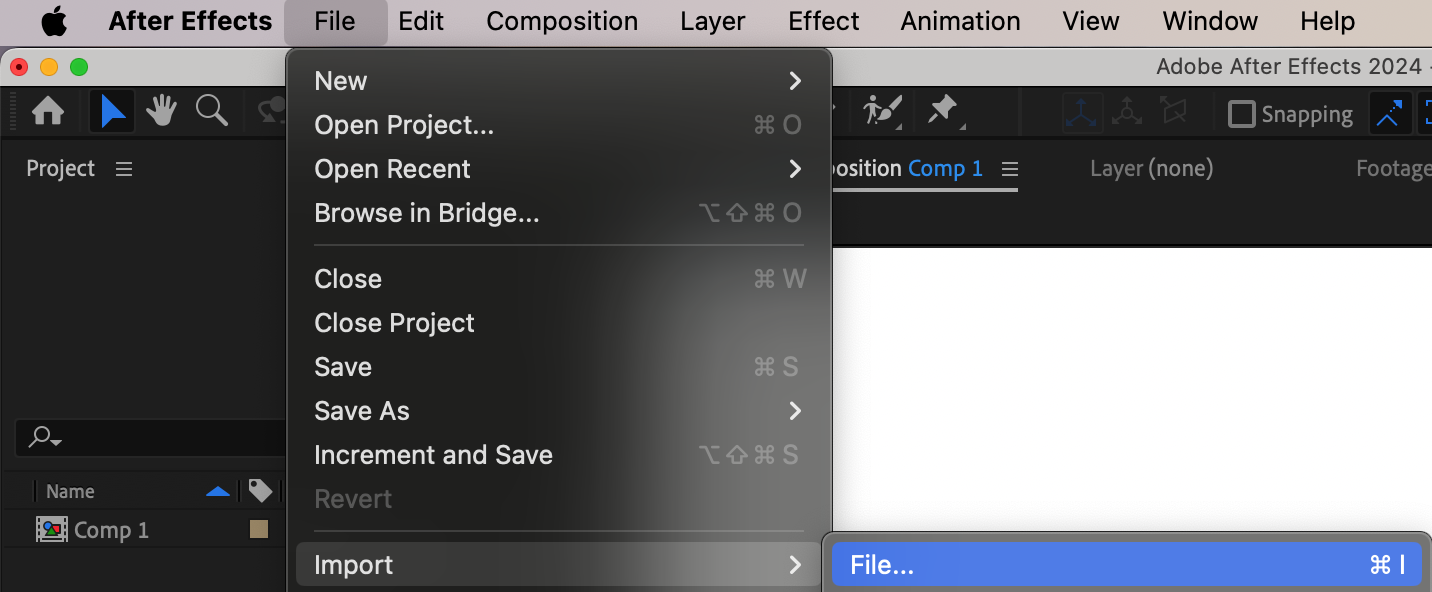
 Step 3: Position and Scale Your Logo
Place your logo on the Composition Panel using the Position and Scale parameters. Adjust these settings to fit your logo perfectly within the composition. Ensuring proper placement and sizing will help the 3D effect integrate smoothly.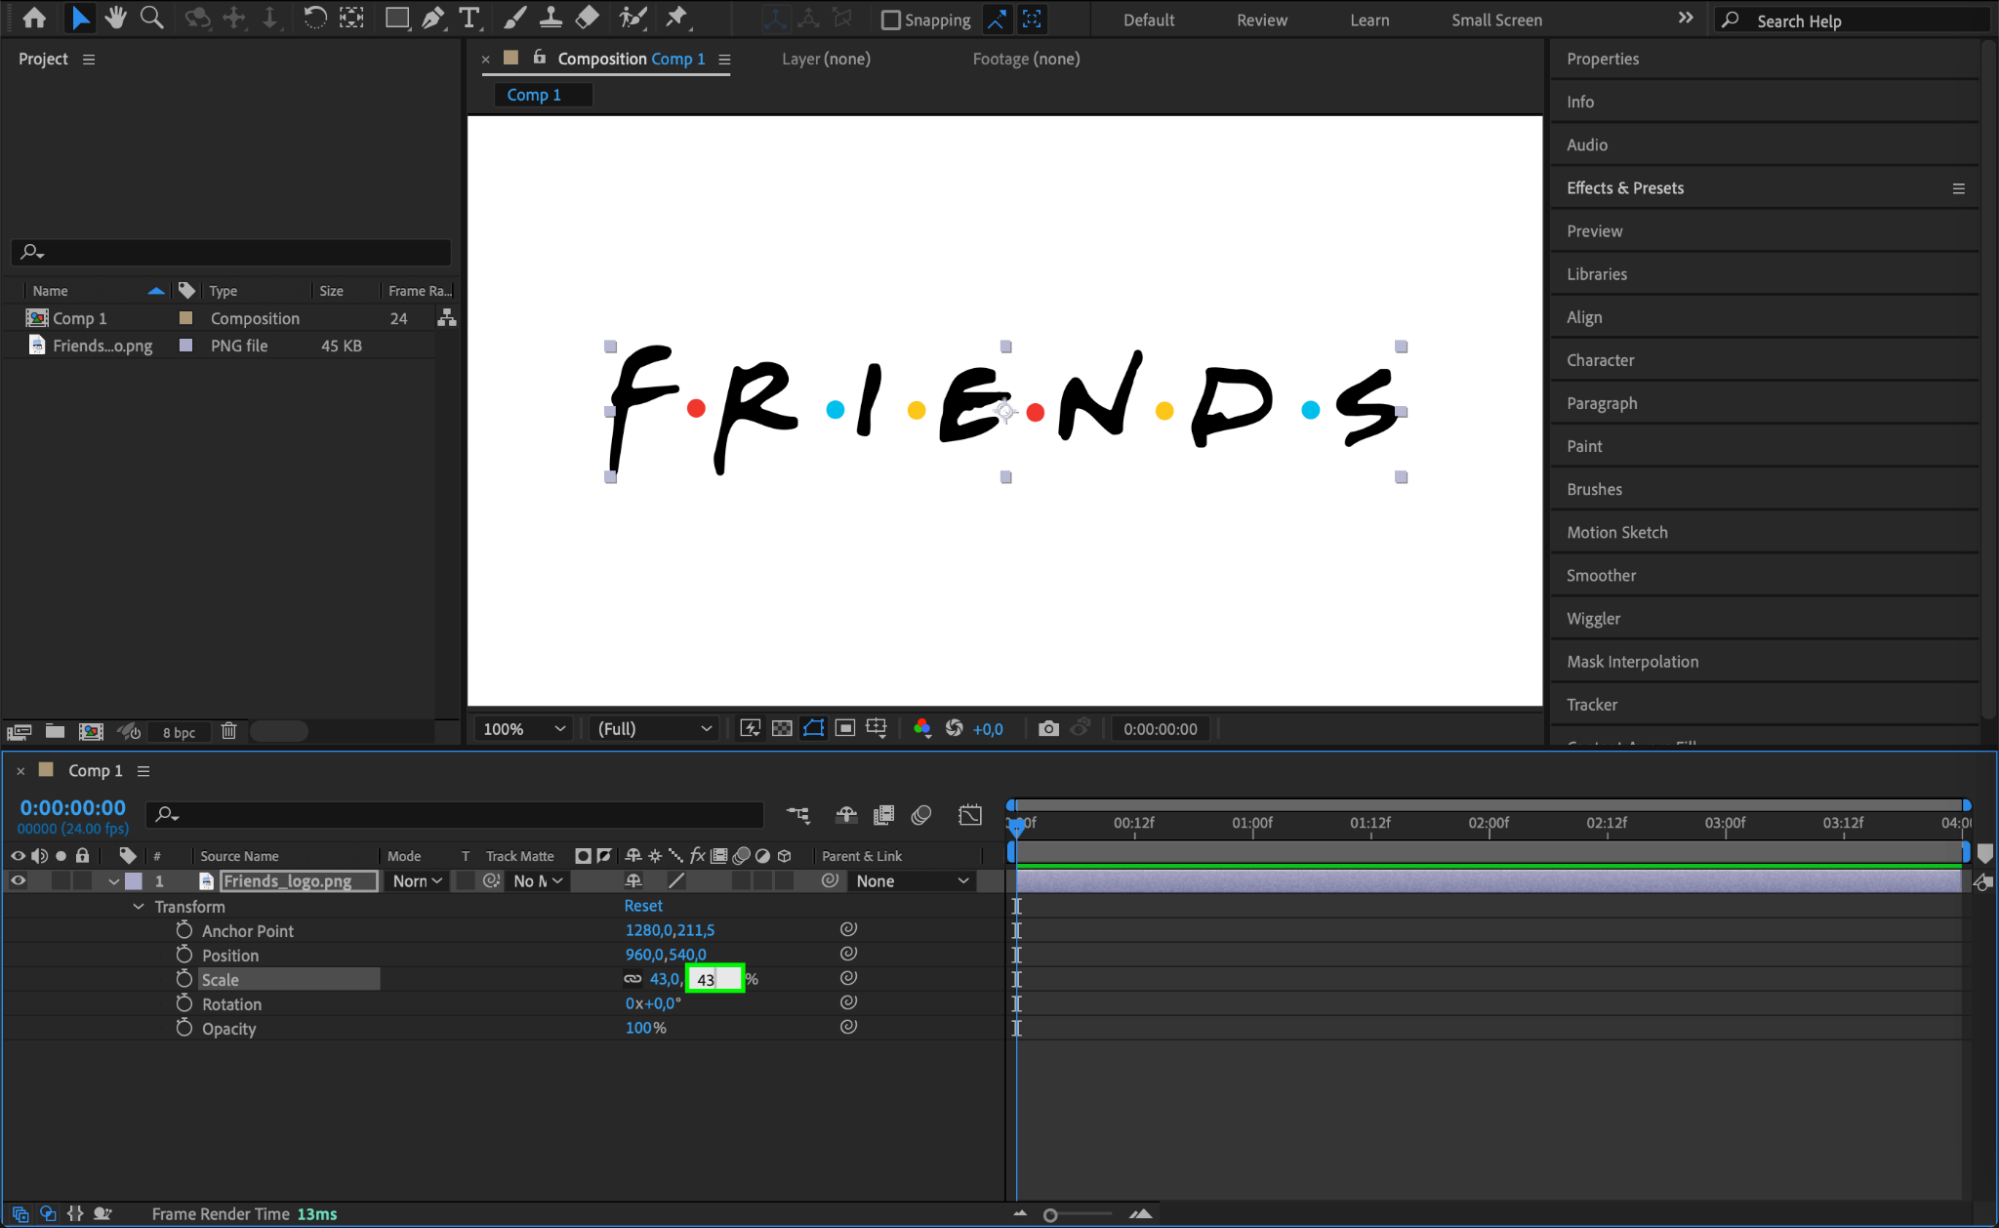
Step 4: Pre-Compose Your Logo Layer
Get 10% off when you subscribe to our newsletter

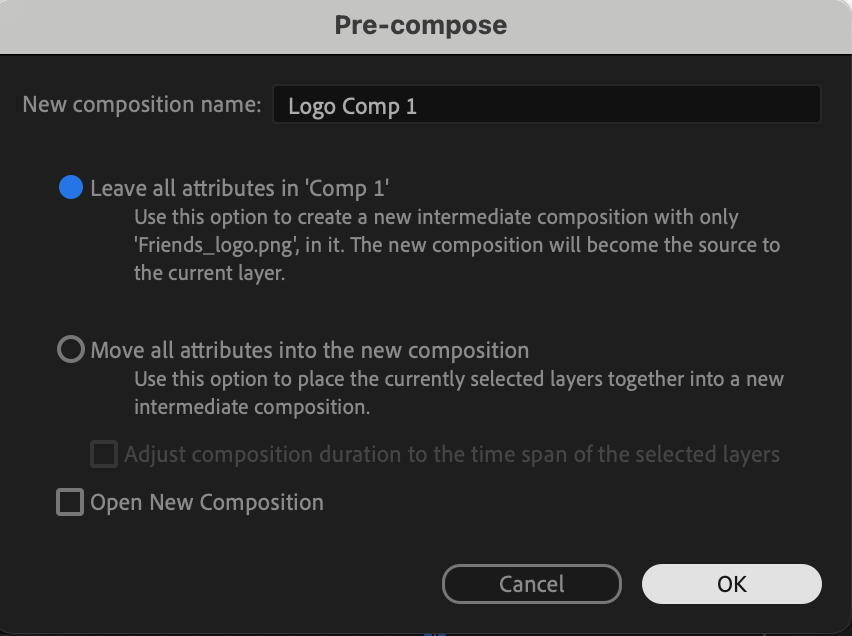
Right-click on your logo layer and select Pre-compose from the context menu. This action groups your logo layer into a new composition, allowing you to apply effects and animations more efficiently.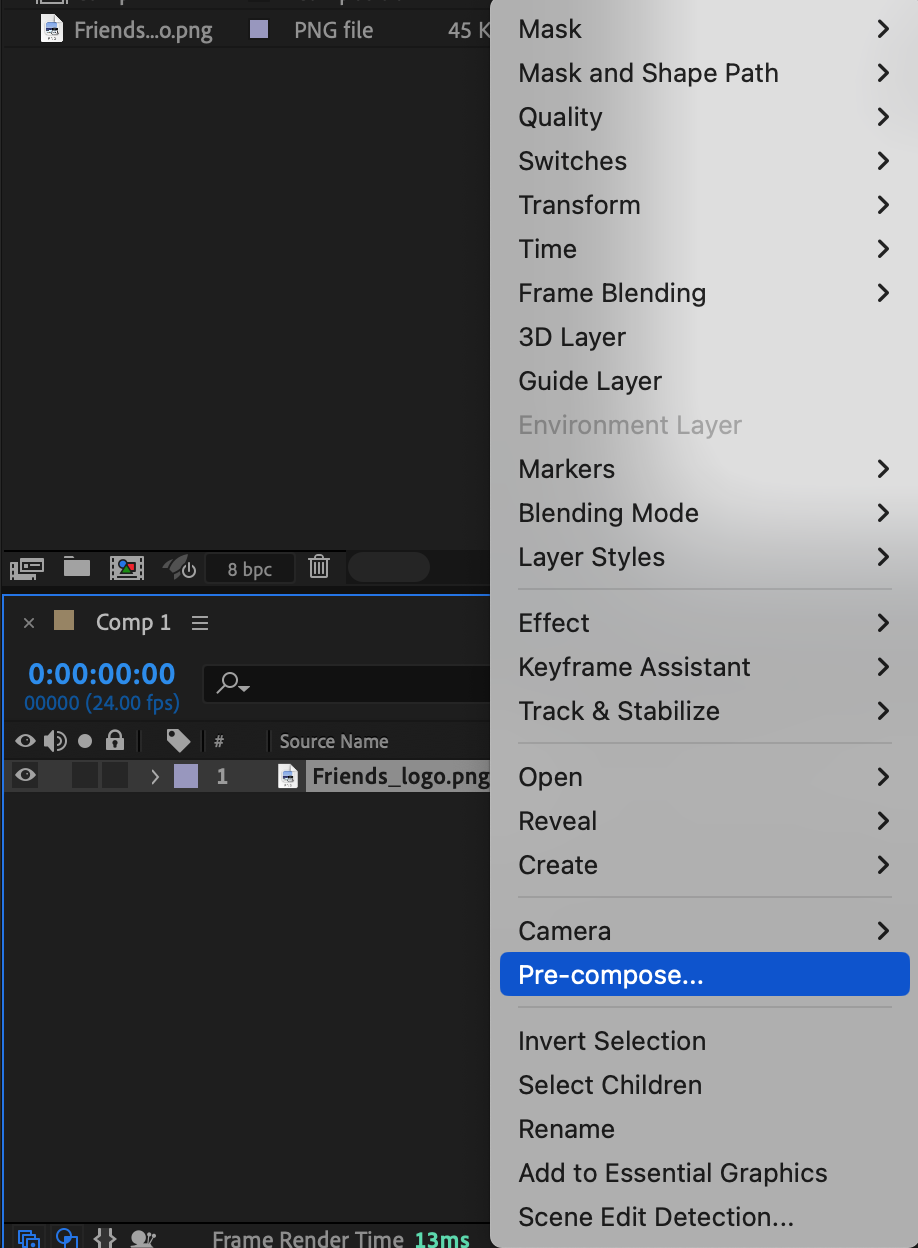
 Step 5: Apply the Shatter Effect
Go to the Effects & Presets panel and search for the Shatter effect. Drag and drop this effect onto your pre-composed logo layer. This effect will enable you to create a 3D appearance by breaking the logo into pieces.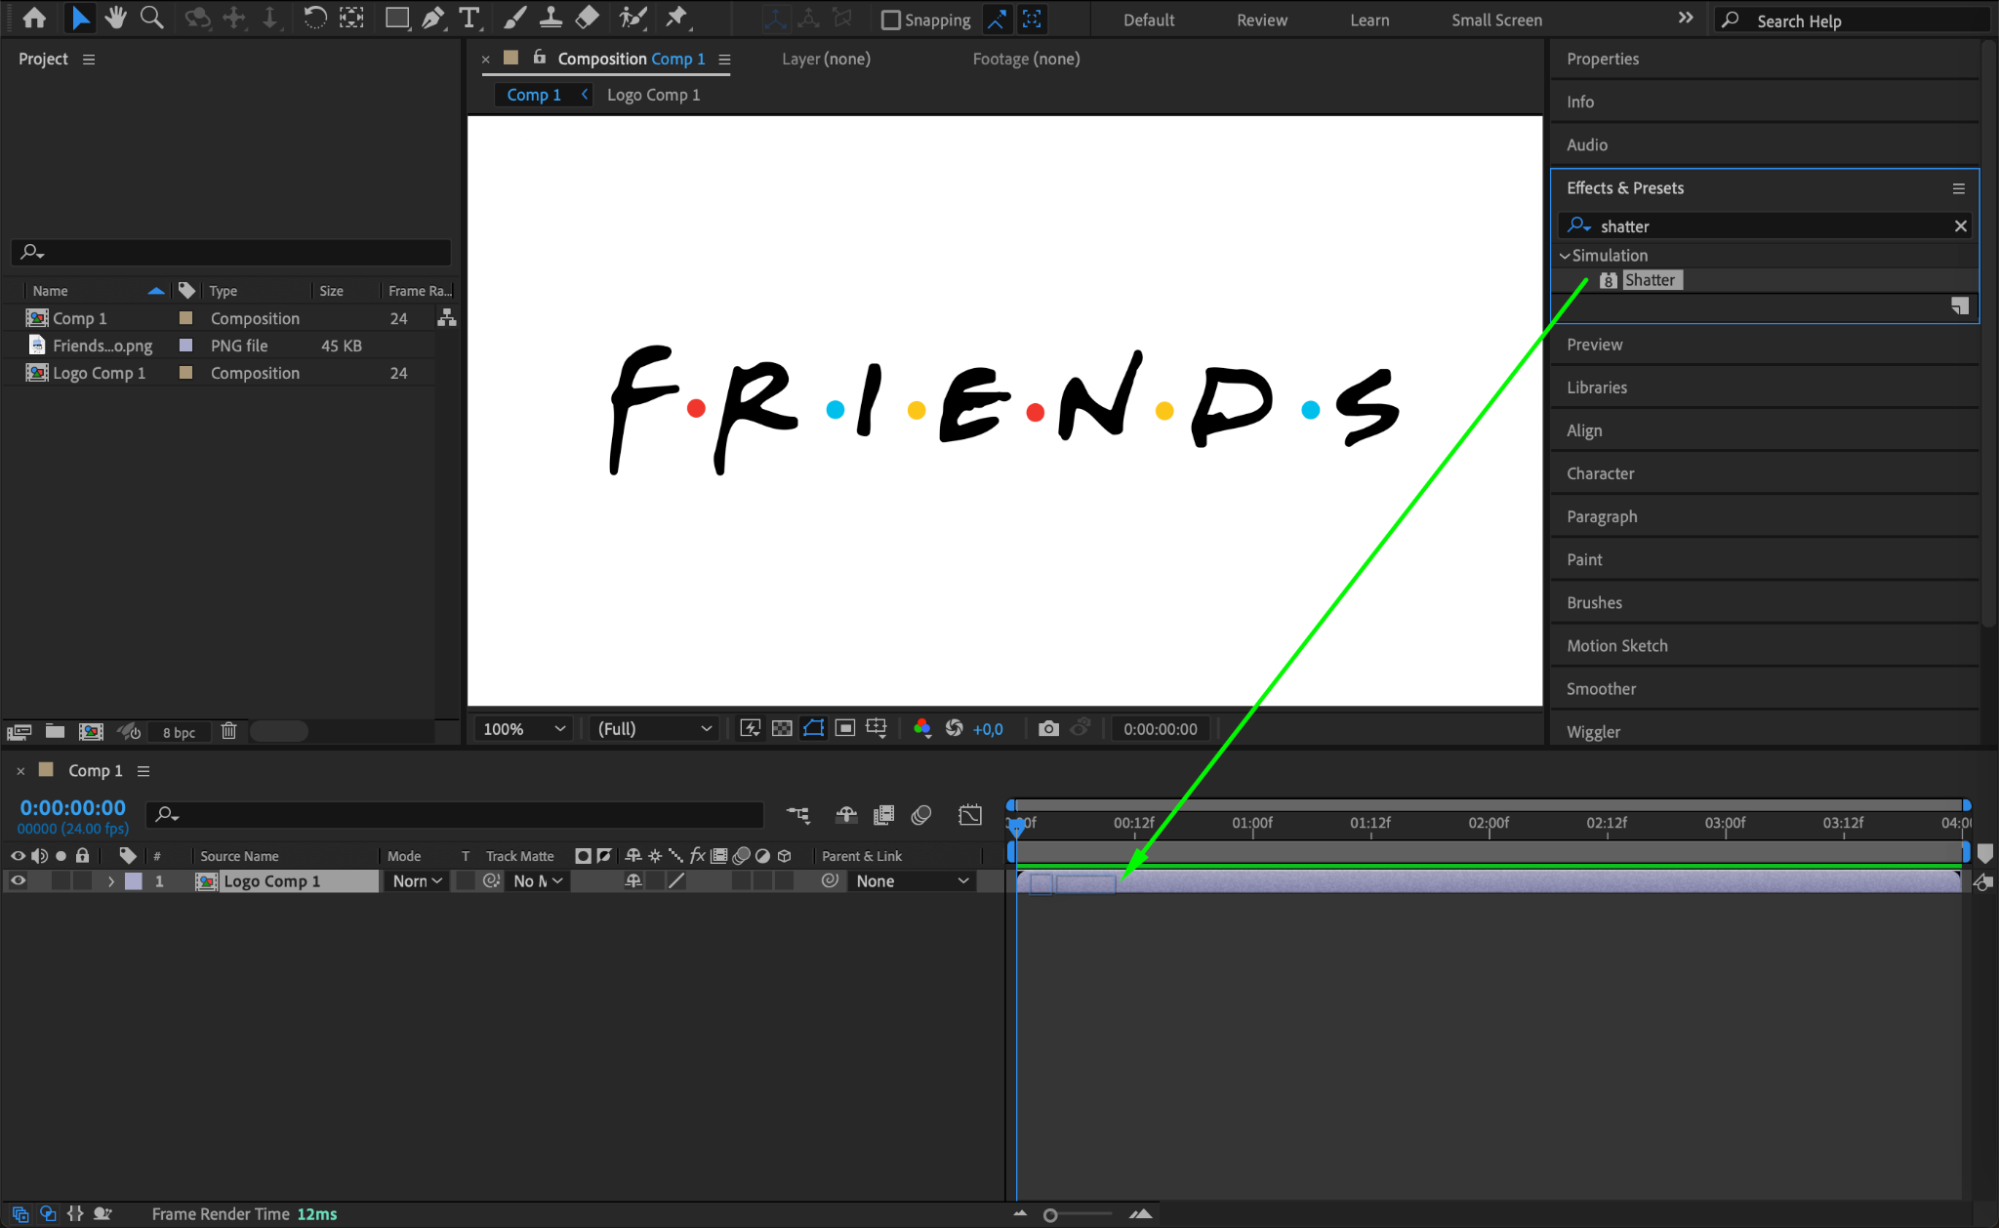
Step 6: Configure Shatter Effect Parameters
In the Effect Controls panel, set the following parameters for the Shatter effect:
View: Set to Rendered to see the effect applied to your logo.
Pattern: Choose Custom, and set the Custom Shatter Map to your logo layer.
Extrusion Depth: Set this to 1 to give some depth to your logo.
Front Mode: Set to Layer, with the Front Layer as your logo layer.
Side Mode: Choose Color, with the Side Layer set to your logo layer.
Back Mode: Set to Layer, with the Back Layer as your logo layer.
Optionally, customize the Color parameter to enhance the appearance of your logo.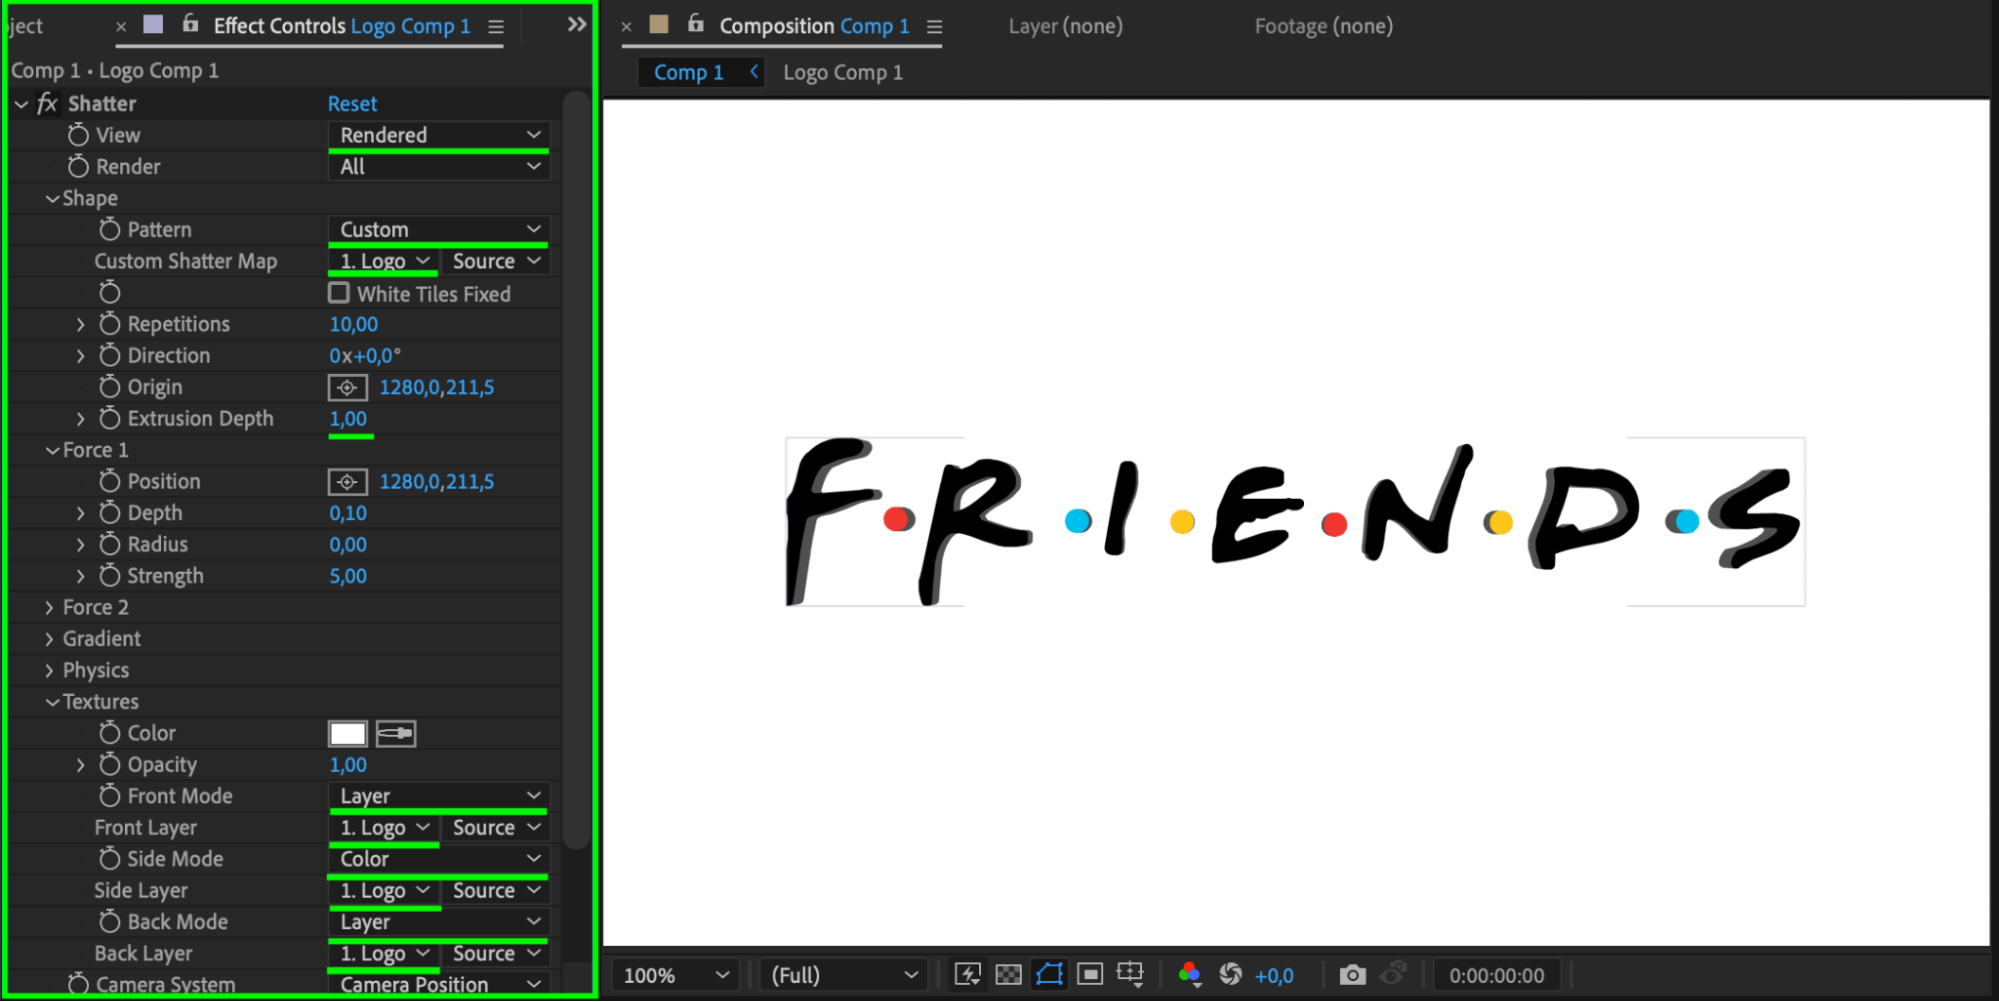
Step 7: Add Animation
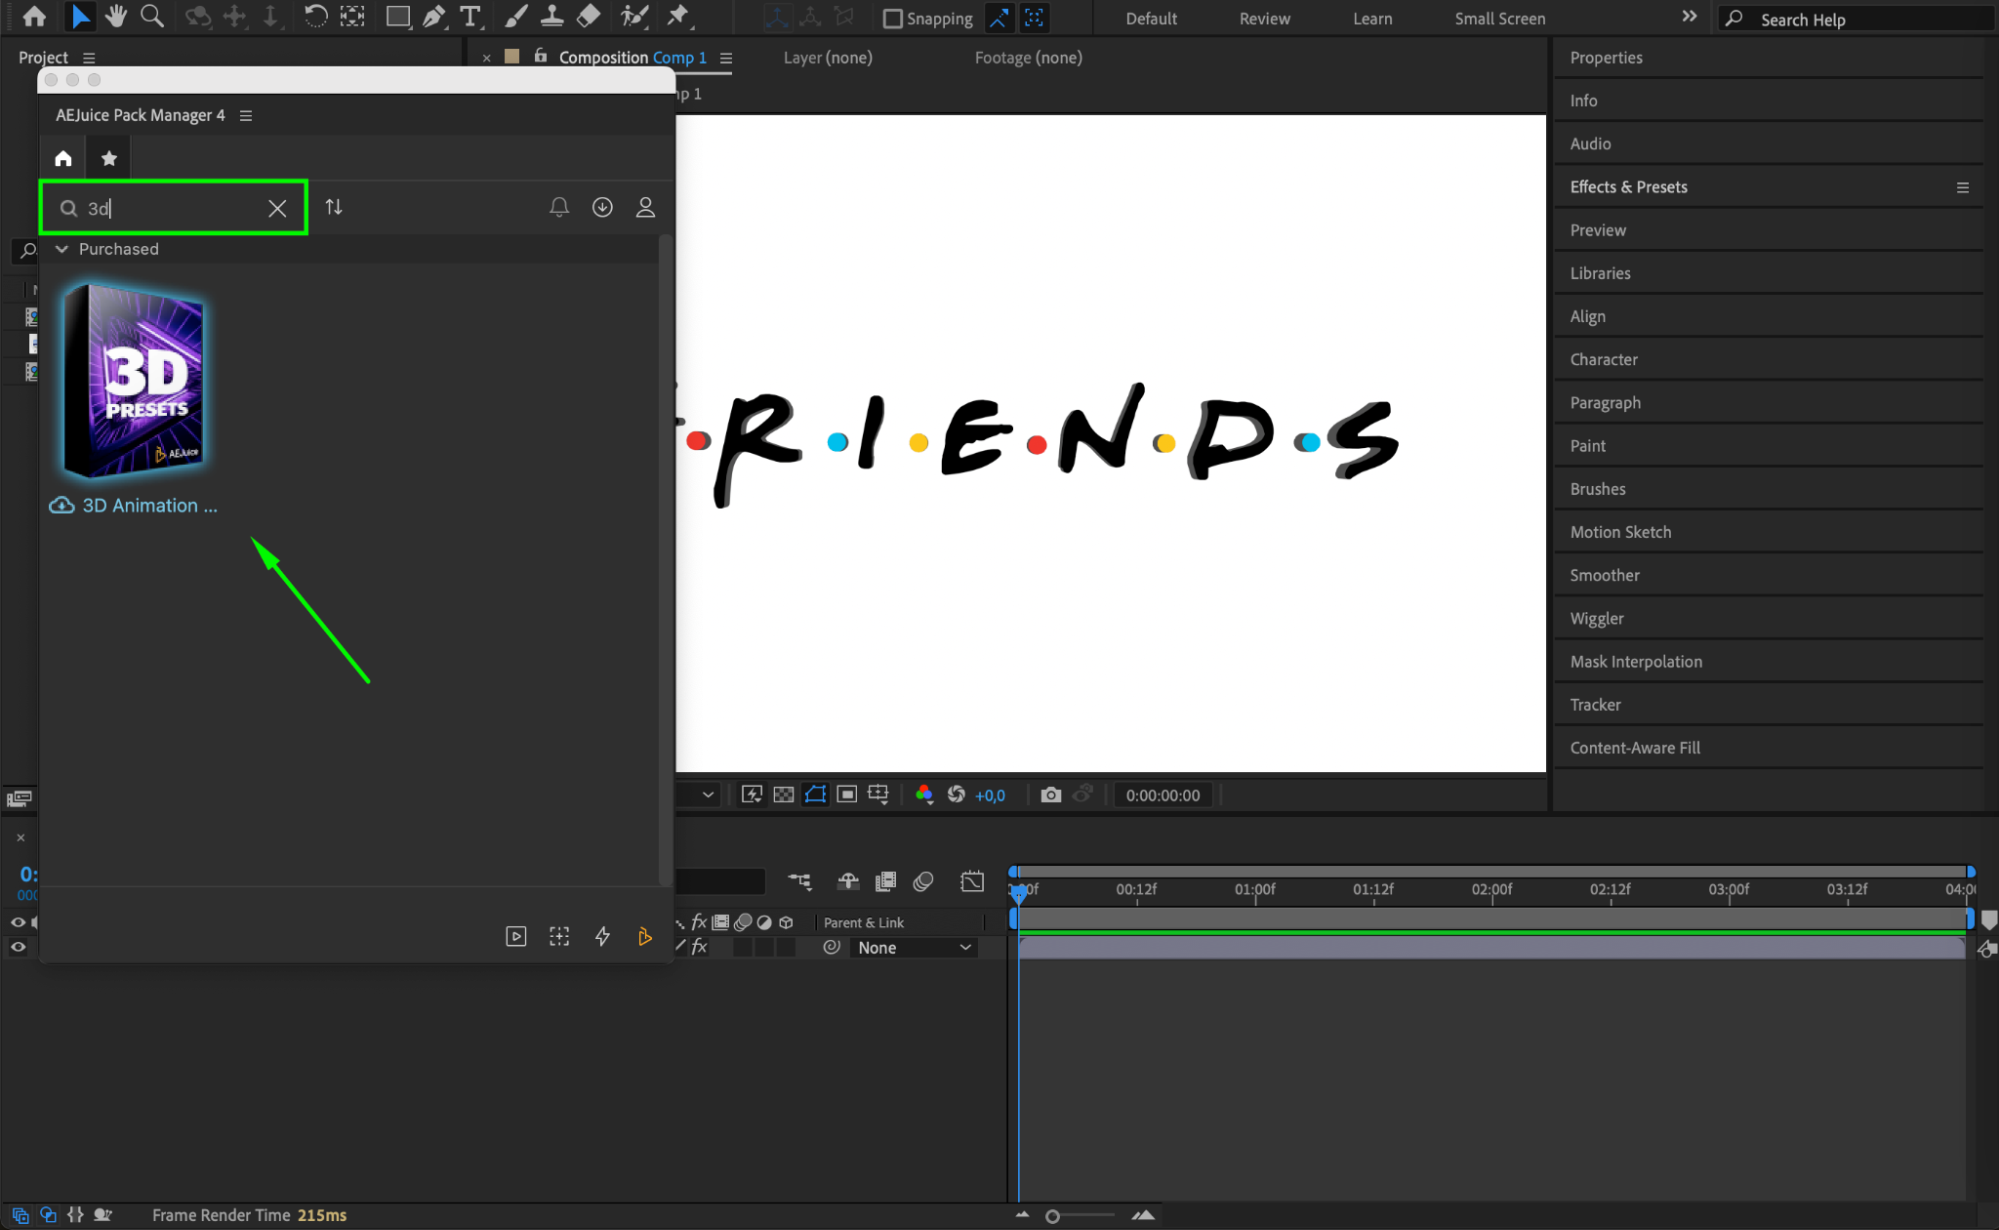
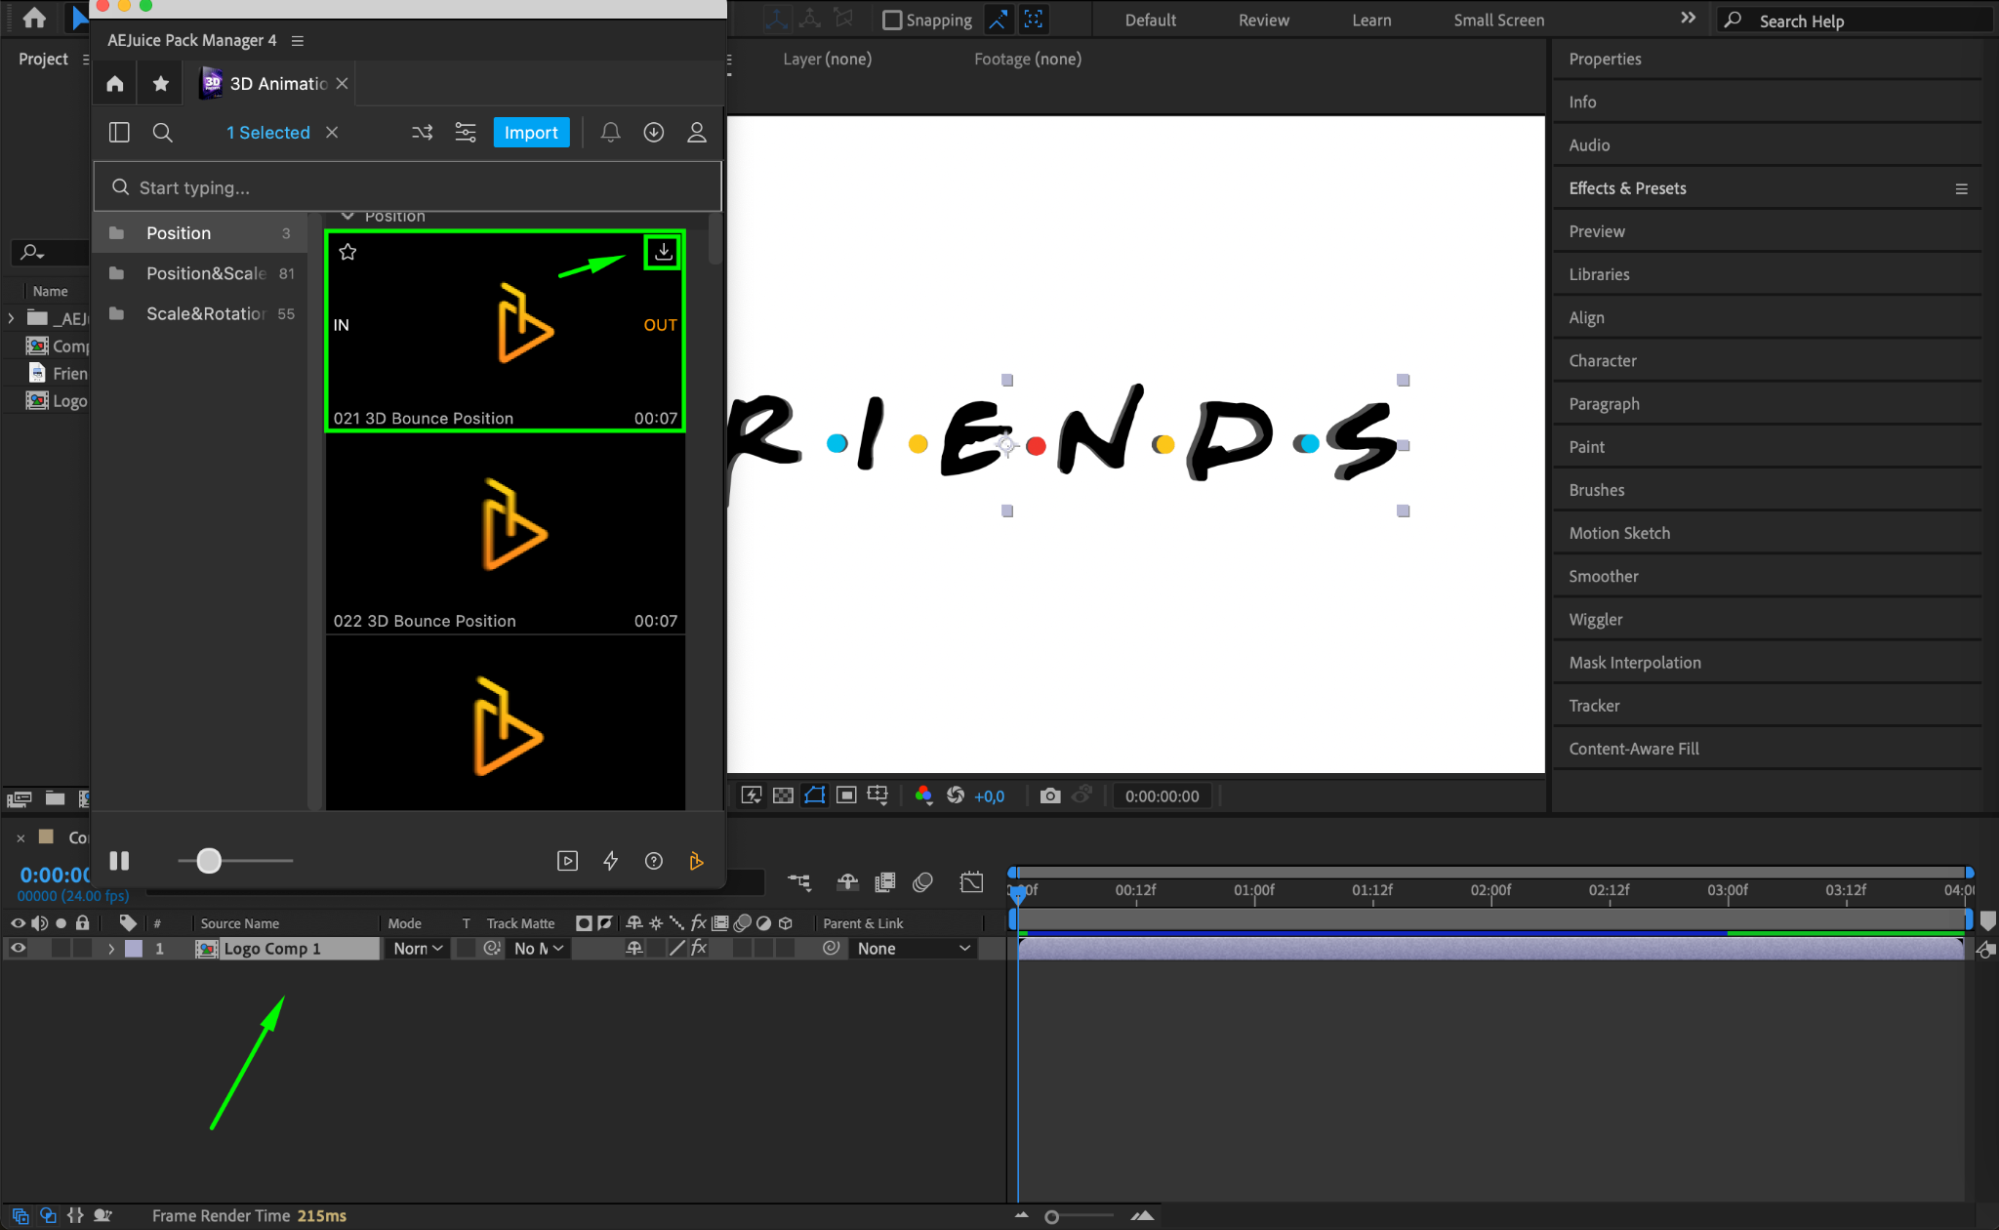
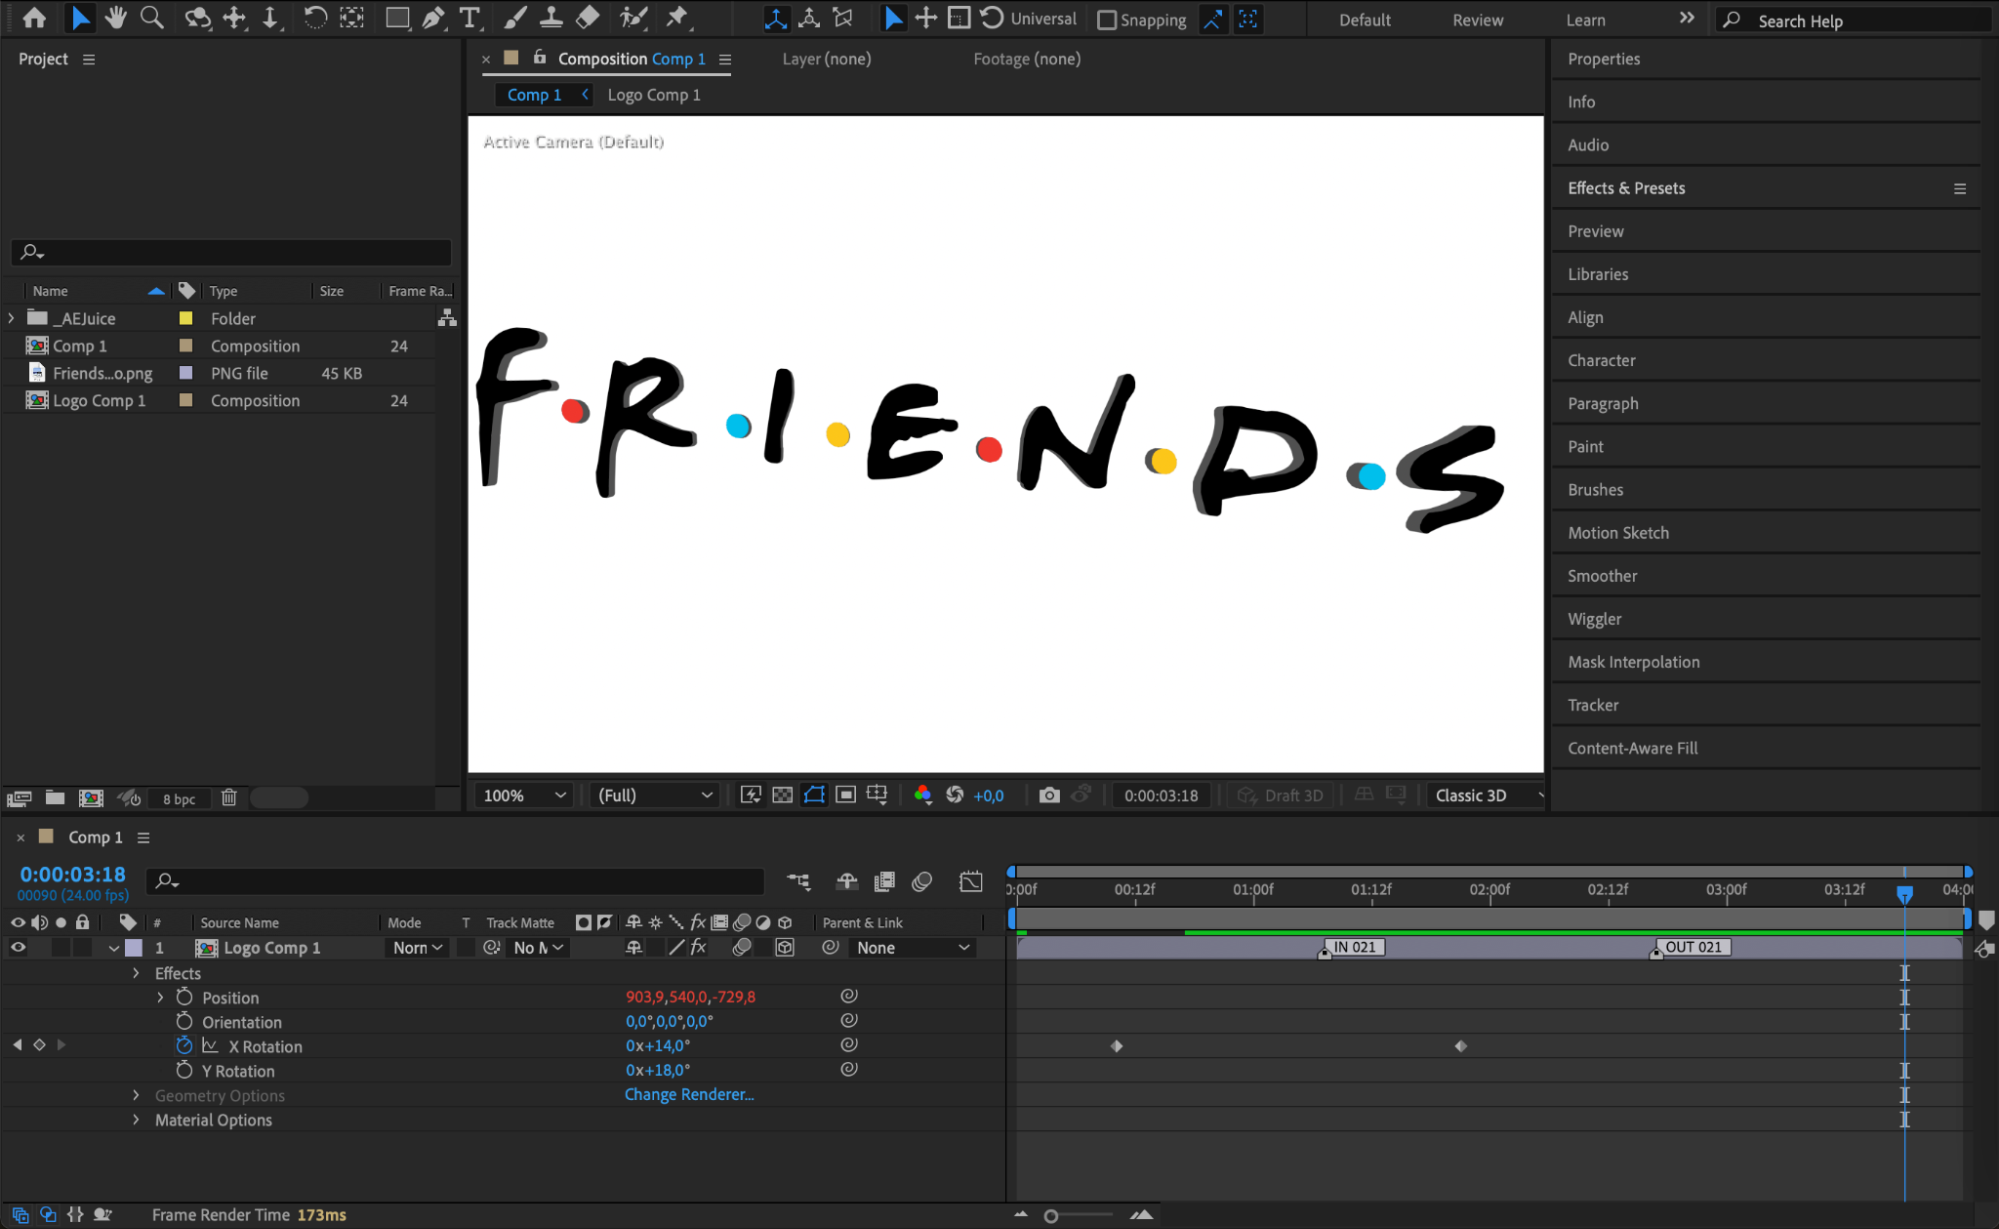
Animate your 3D logo by adding keyframes to various parameters, such as Position, Rotation, and Scale. Alternatively, you can use plugins like AEJuice to simplify the animation process and add dynamic effects to your logo.
Step 8: Preview Your Animation
Use the Preview feature to review and refine your 3D logo animation. Ensure that the animation meets your expectations and make any necessary adjustments to enhance the visual impact.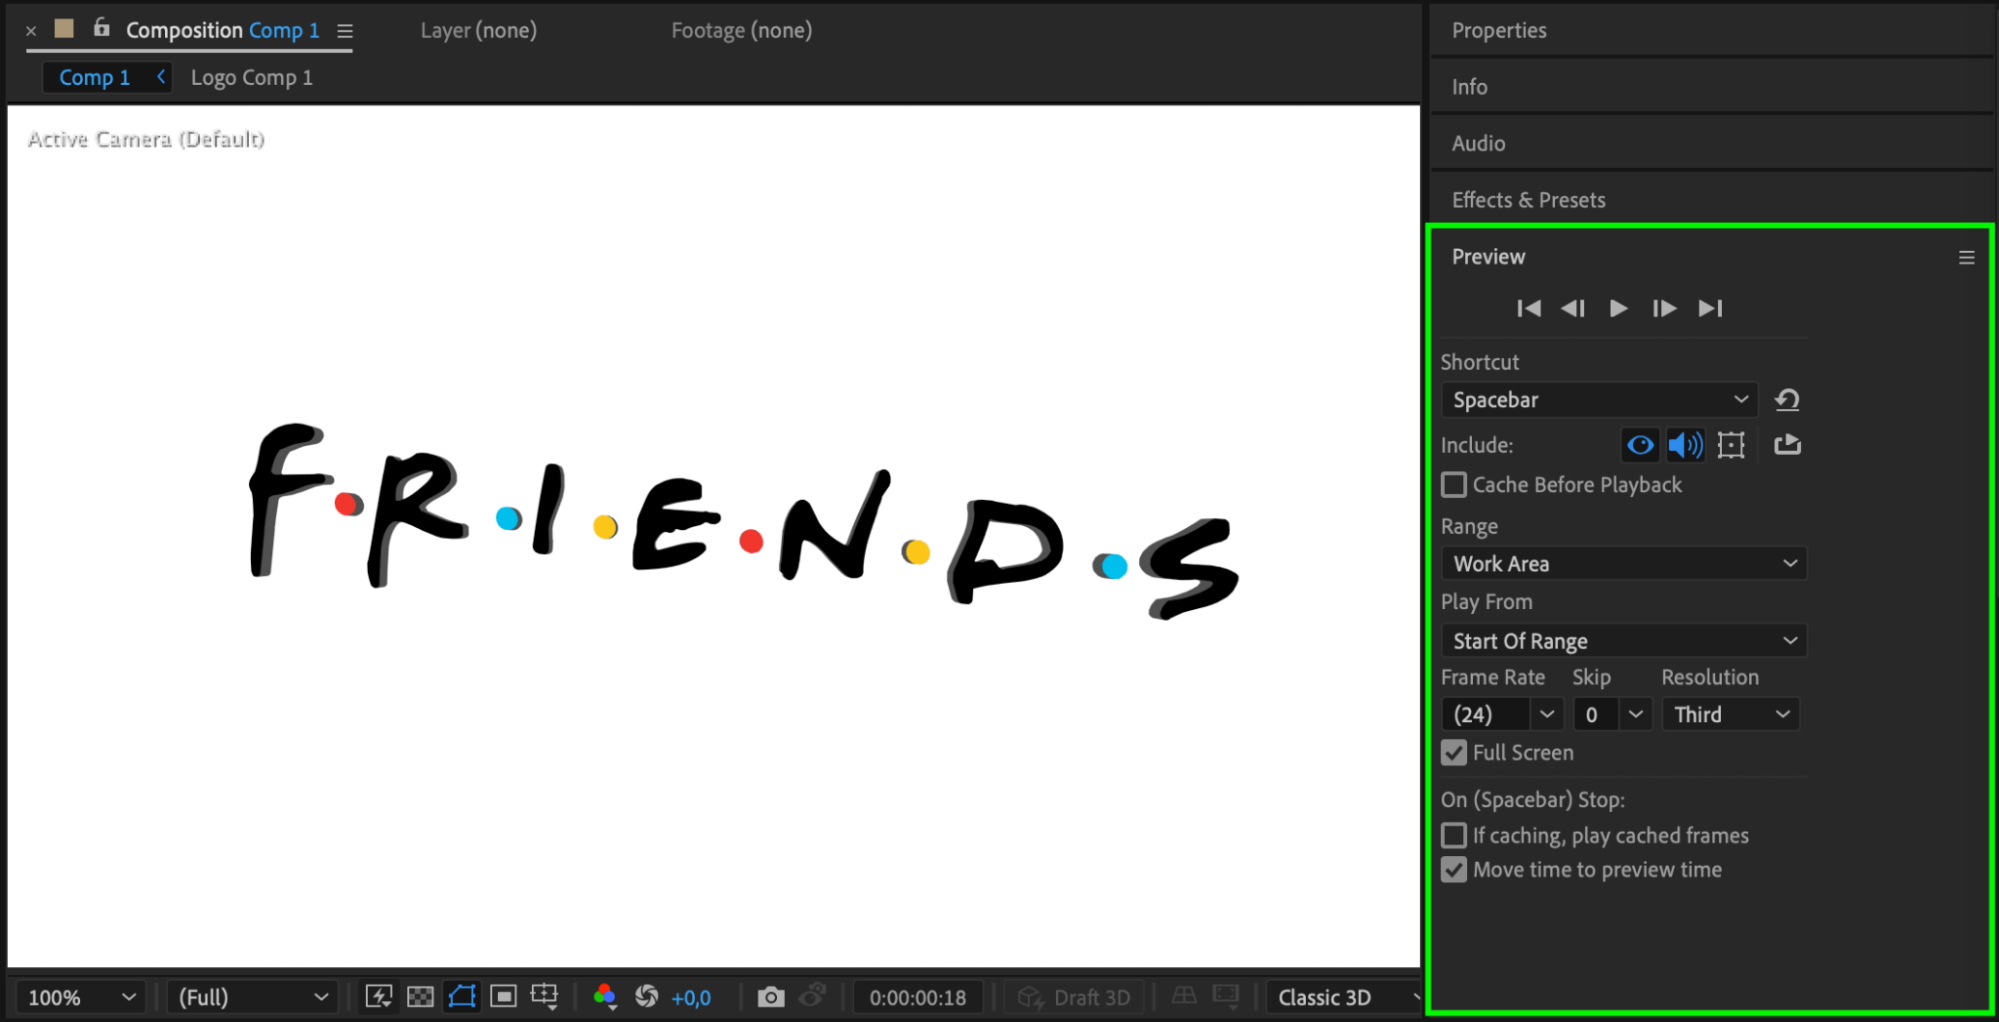
Conclusion
By following these steps, you can transform your flat 2D logo into a stunning 3D animation using After Effects. The possibilities are endless, so let your creativity run wild! Don’t settle for a boring logo – make it pop with depth and dimension. Start creating amazing 3D logo animations with After Effects today!


