How to Create Realistic Blood Splatters in After Effects
Introduction to Crafting Blood Splatter Effects in After Effects
Welcome to this tutorial on creating realistic blood splatter effects in After Effects. Whether you’re crafting a horror masterpiece or adding intensity to a scene, mastering blood splatter effects can elevate your visual storytelling.
Creating a Realistic Blood Splatter Effect in After Effects: Want to add gore and intensity to your project? Creating a realistic blood splatter effect in After Effects is the answer. Whether it’s a horror film, crime scene recreation, or special effects project, mastering blood splatters can transform your visuals.
Getting Started: Begin by sourcing high-quality blood splatter footage or images as references. Stock image sites or free resources are excellent places to find suitable assets.
Step-by-Step Process: Follow these steps to achieve a convincing blood splatter effect:
1. Import Your Footage:
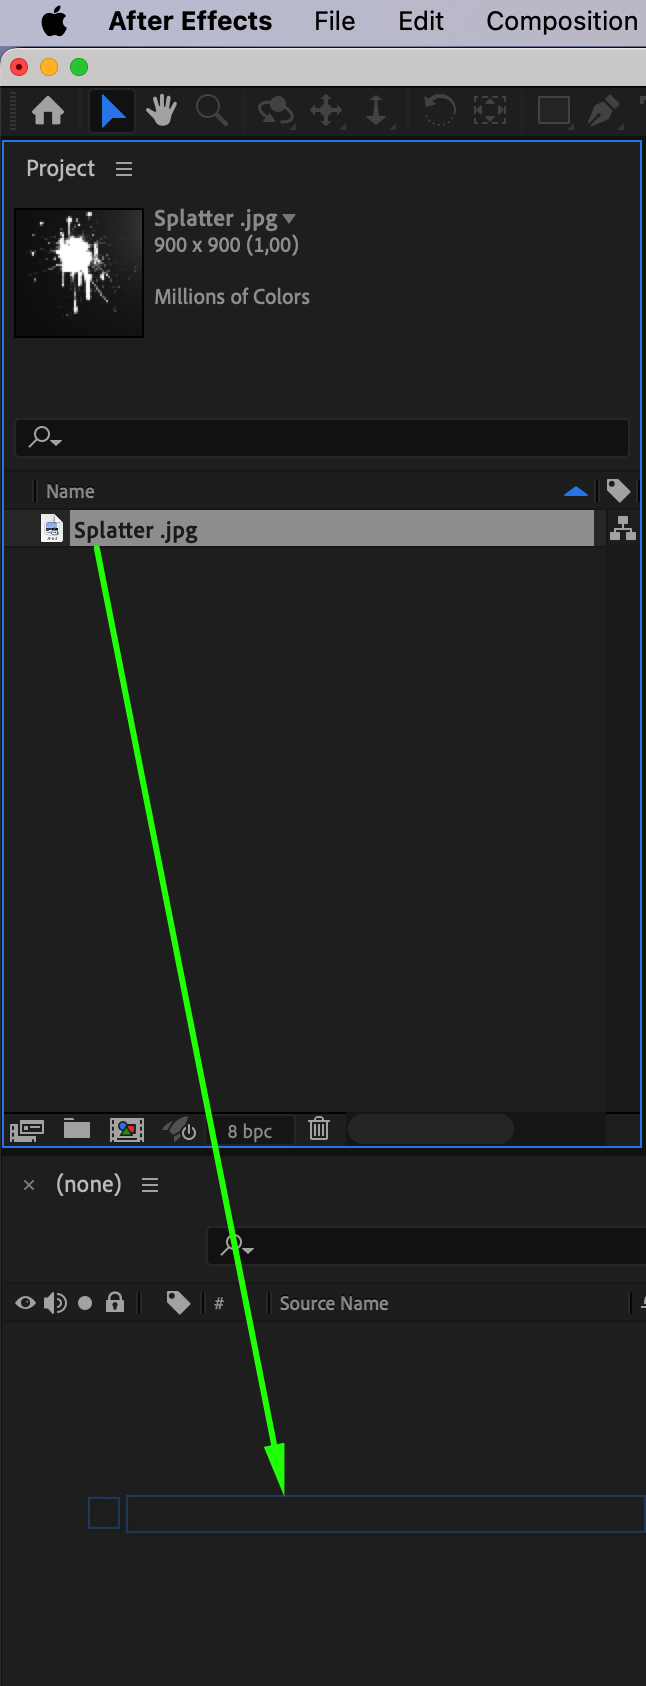
Start by importing your blood splatter footage or image into After Effects using File > Import > File. Once the file appears in the Project panel, drag it onto the Timeline panel to begin working with it.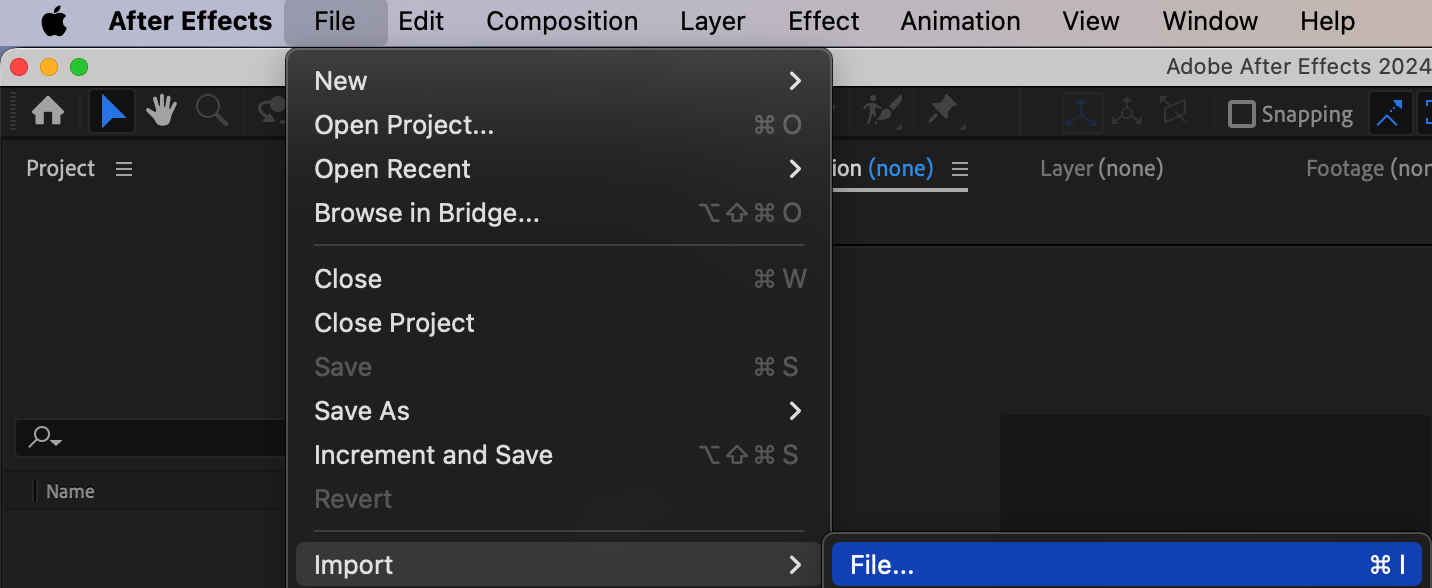
 2. Apply the Linear Color Key Effect
Get 10% off when you subscribe to our newsletter

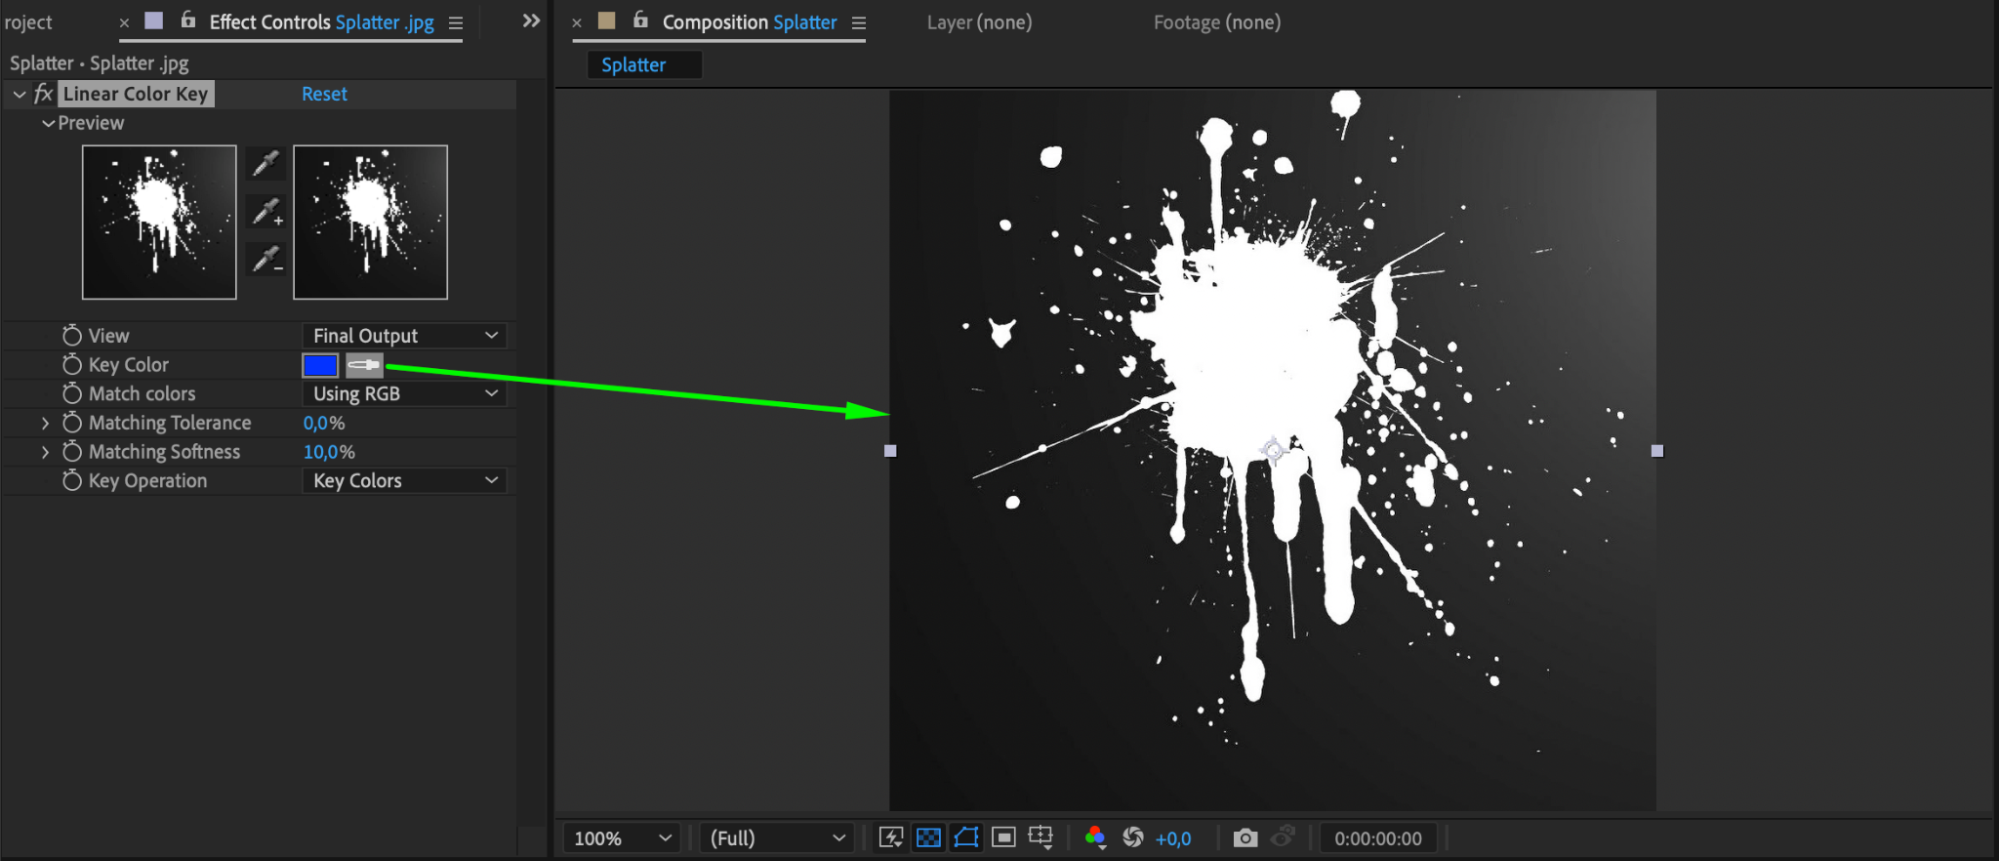
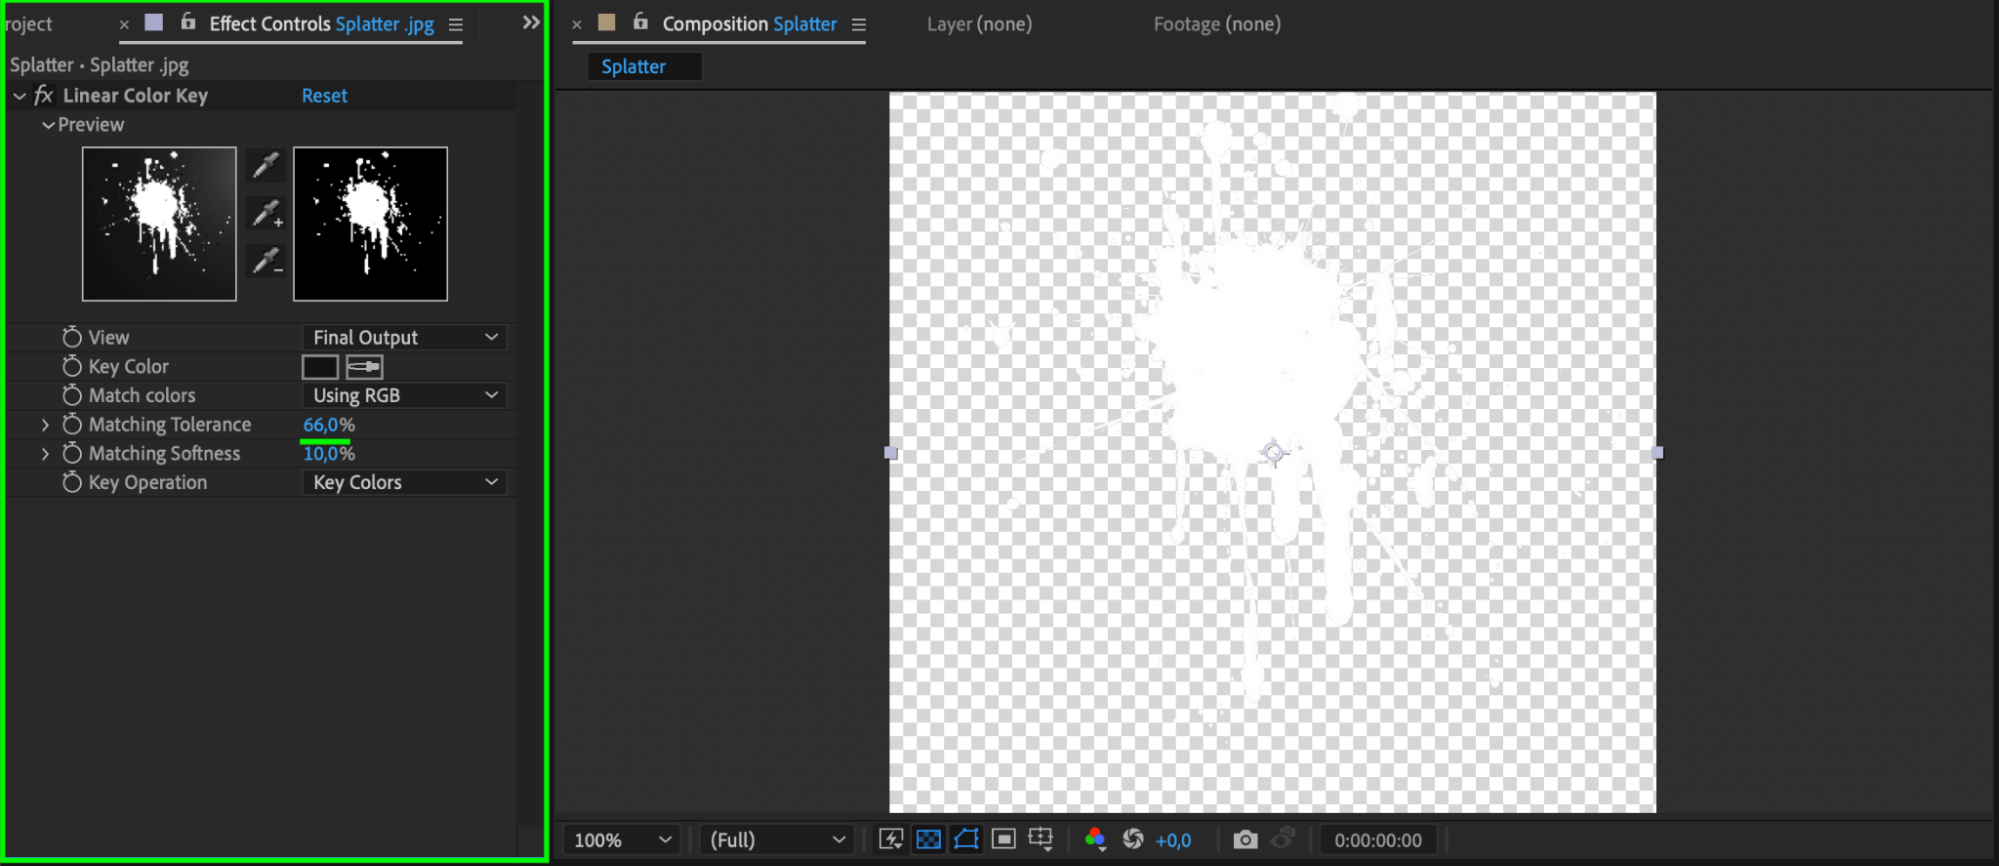
With the blood splatter layer selected, go to the Effects & Presets panel and search for the Linear Color Key effect. Apply it to your layer. In the Effect Controls panel, use the eyedropper tool to click on the background color of your blood splatter footage, which will remove it.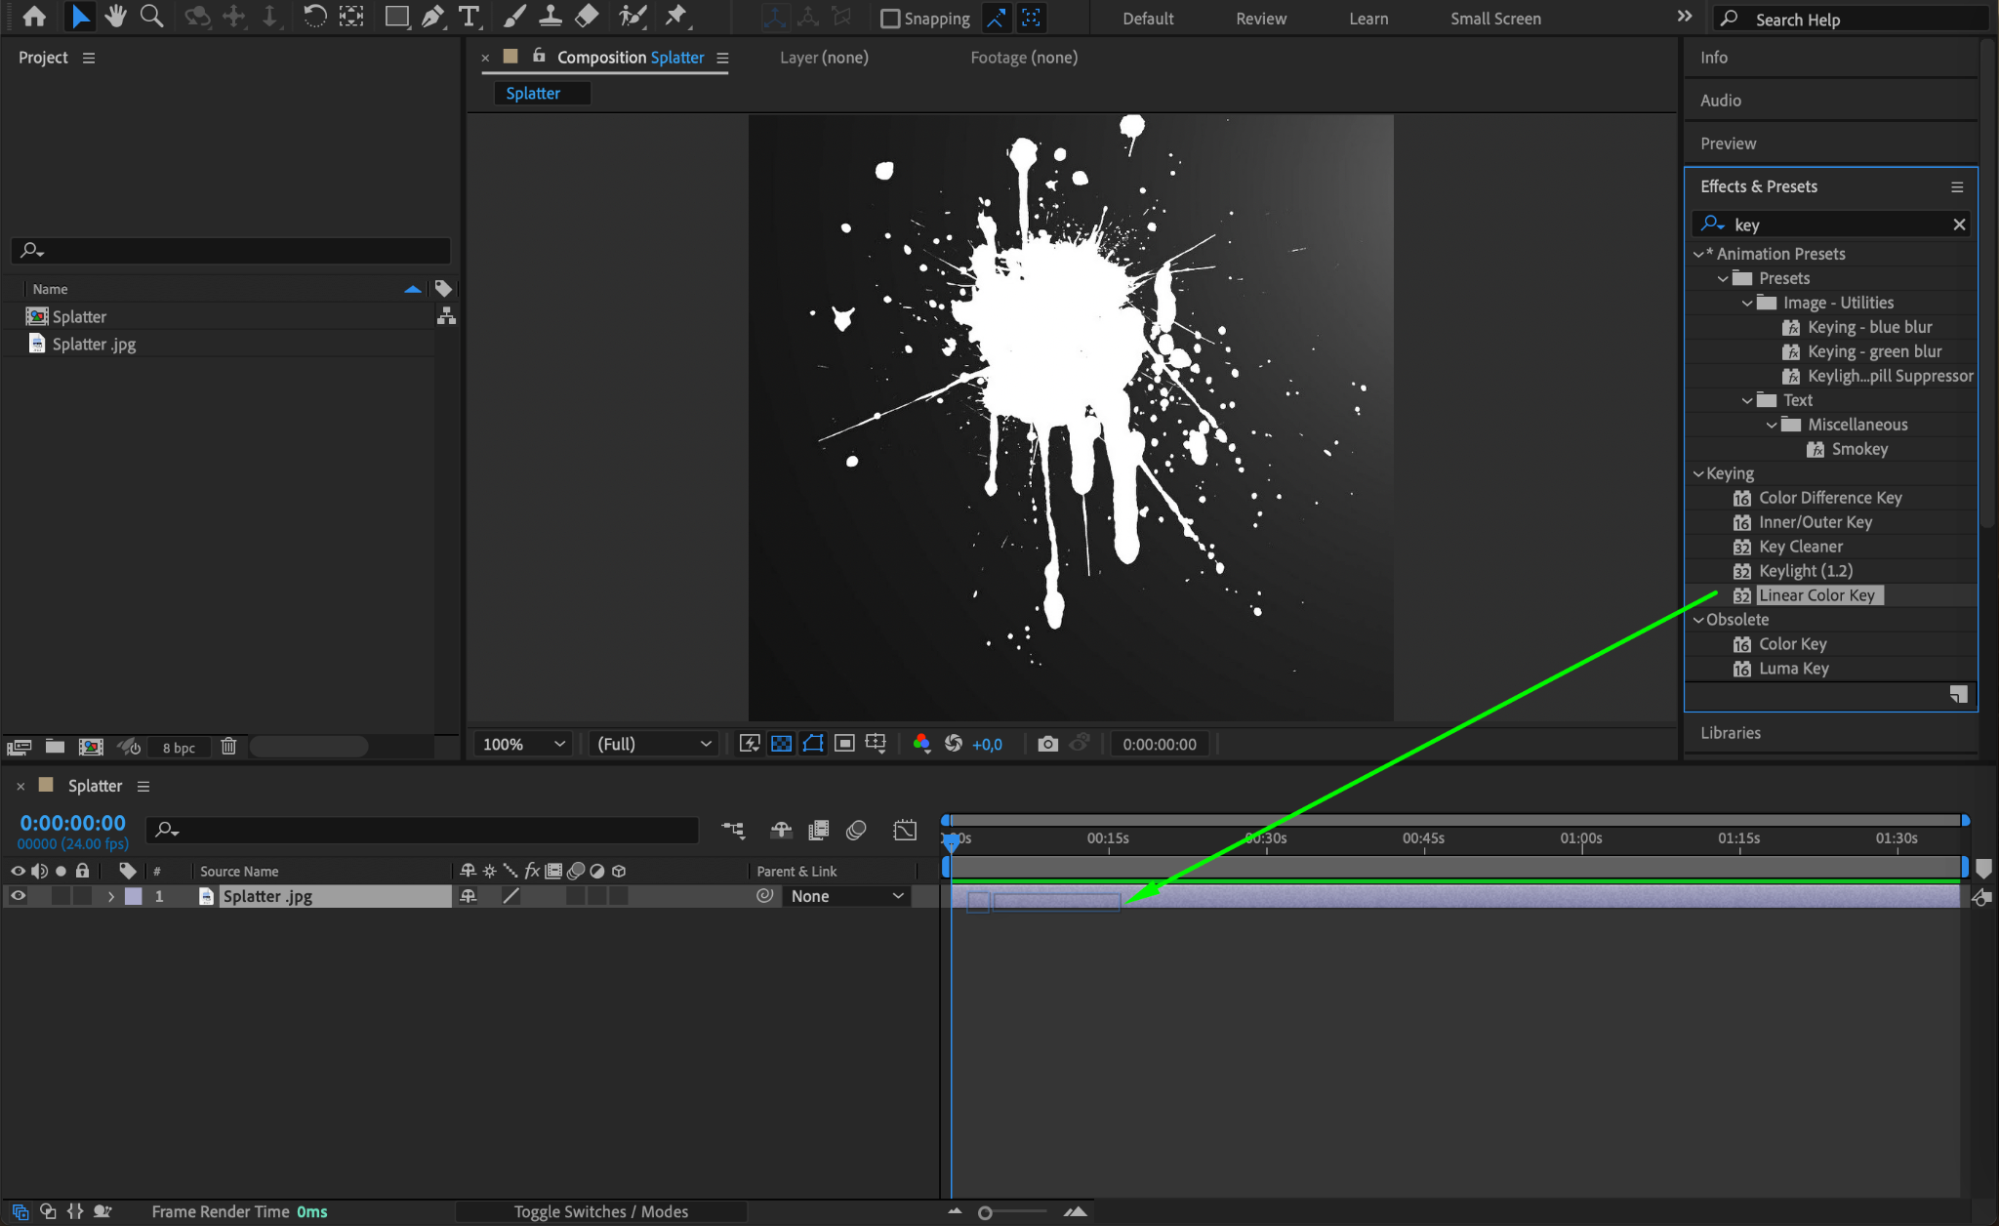
 3. Create a Black Solid Background (or Use Your Footage)
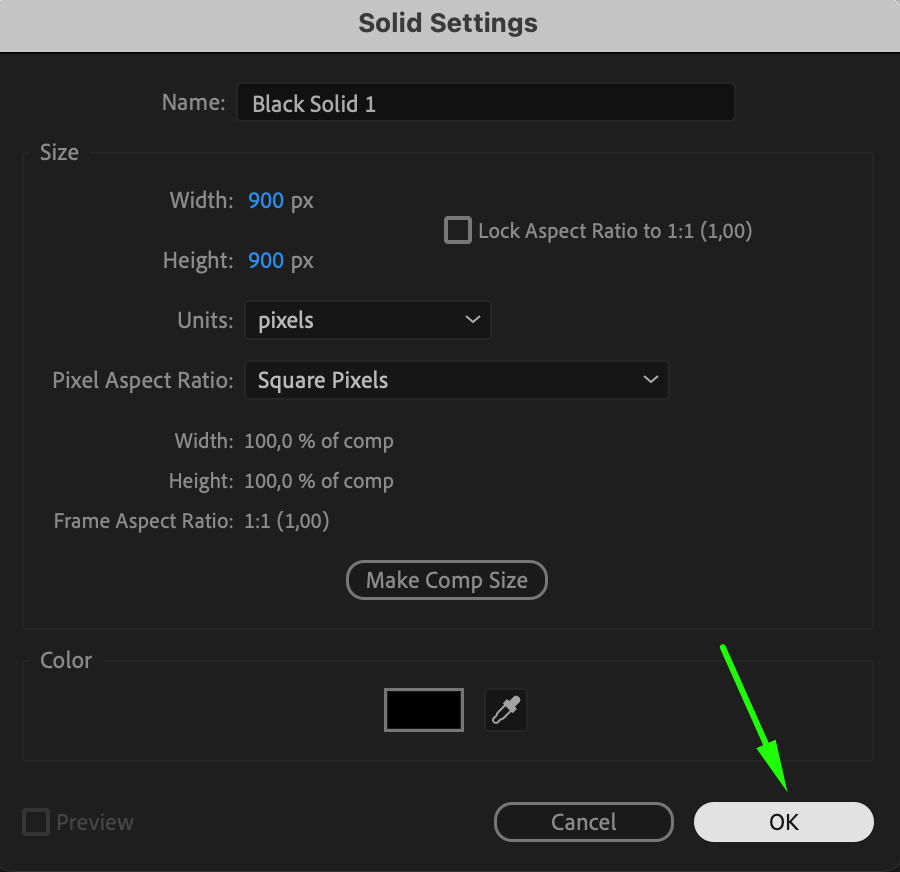
To give the blood splatter proper context, create a black solid layer through Layer > New > Solid. This can be a temporary background to visualize your splatter more clearly. Later, you can replace the solid with the actual video footage or background where you want the blood effect to appear.
 4. Apply the Fill Effect to Customize Blood Color
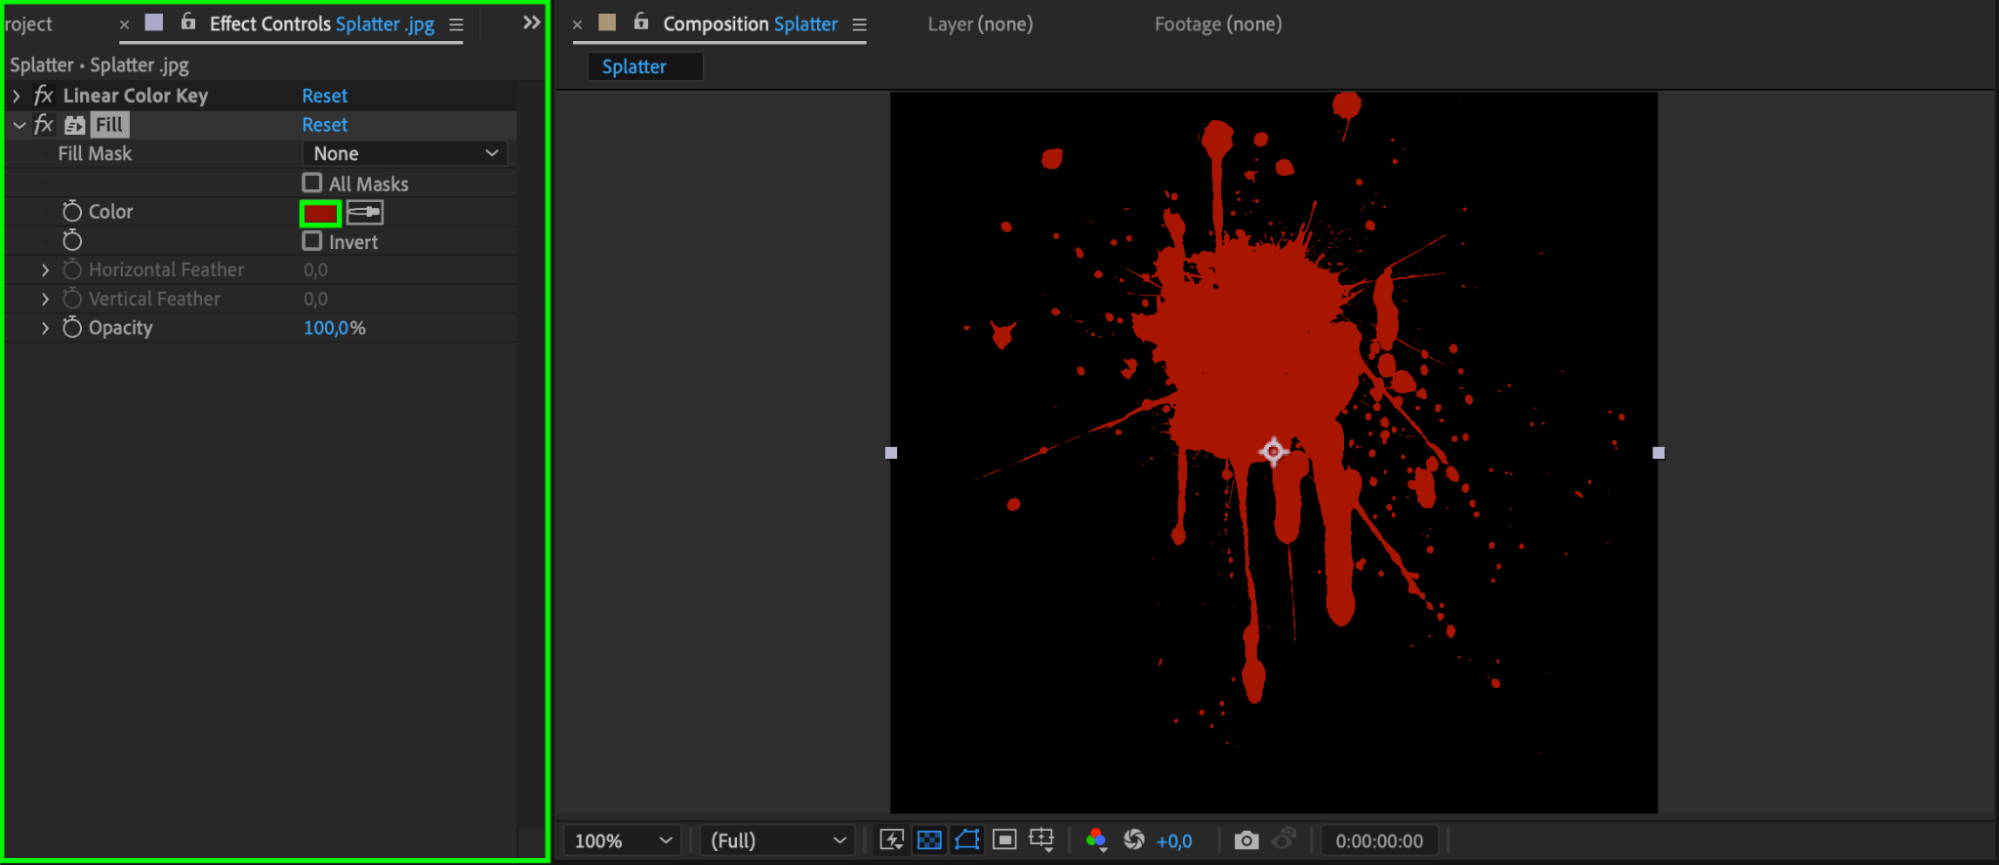
Next, apply the Fill effect to your blood splatter by searching for it in the Effects & Presets panel. Drag the effect onto the layer and adjust the color in the Effect Controls panel. Set the fill color to a dark red to resemble blood.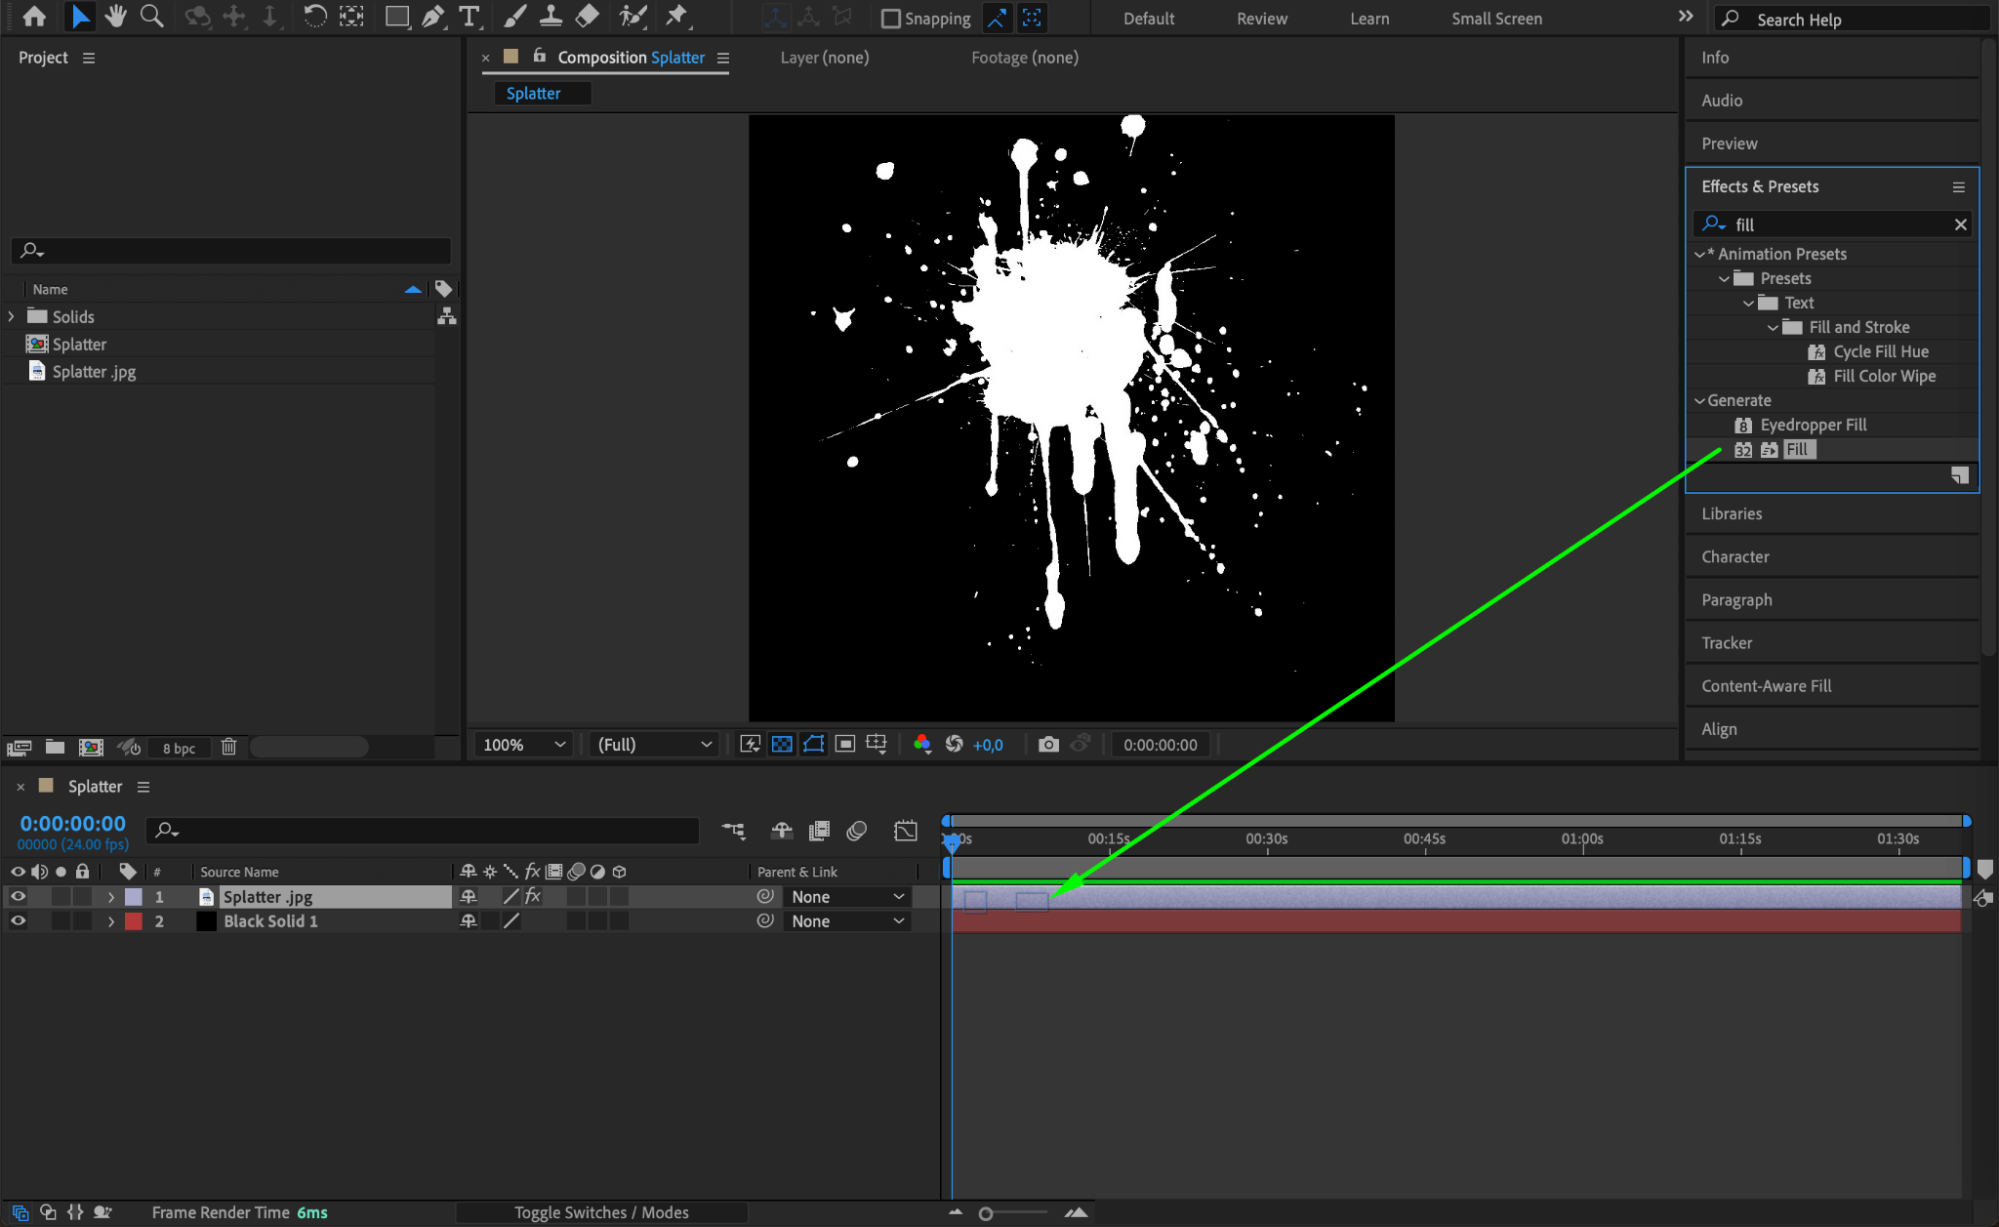
5. Create a Circular Mask with the Ellipse Tool
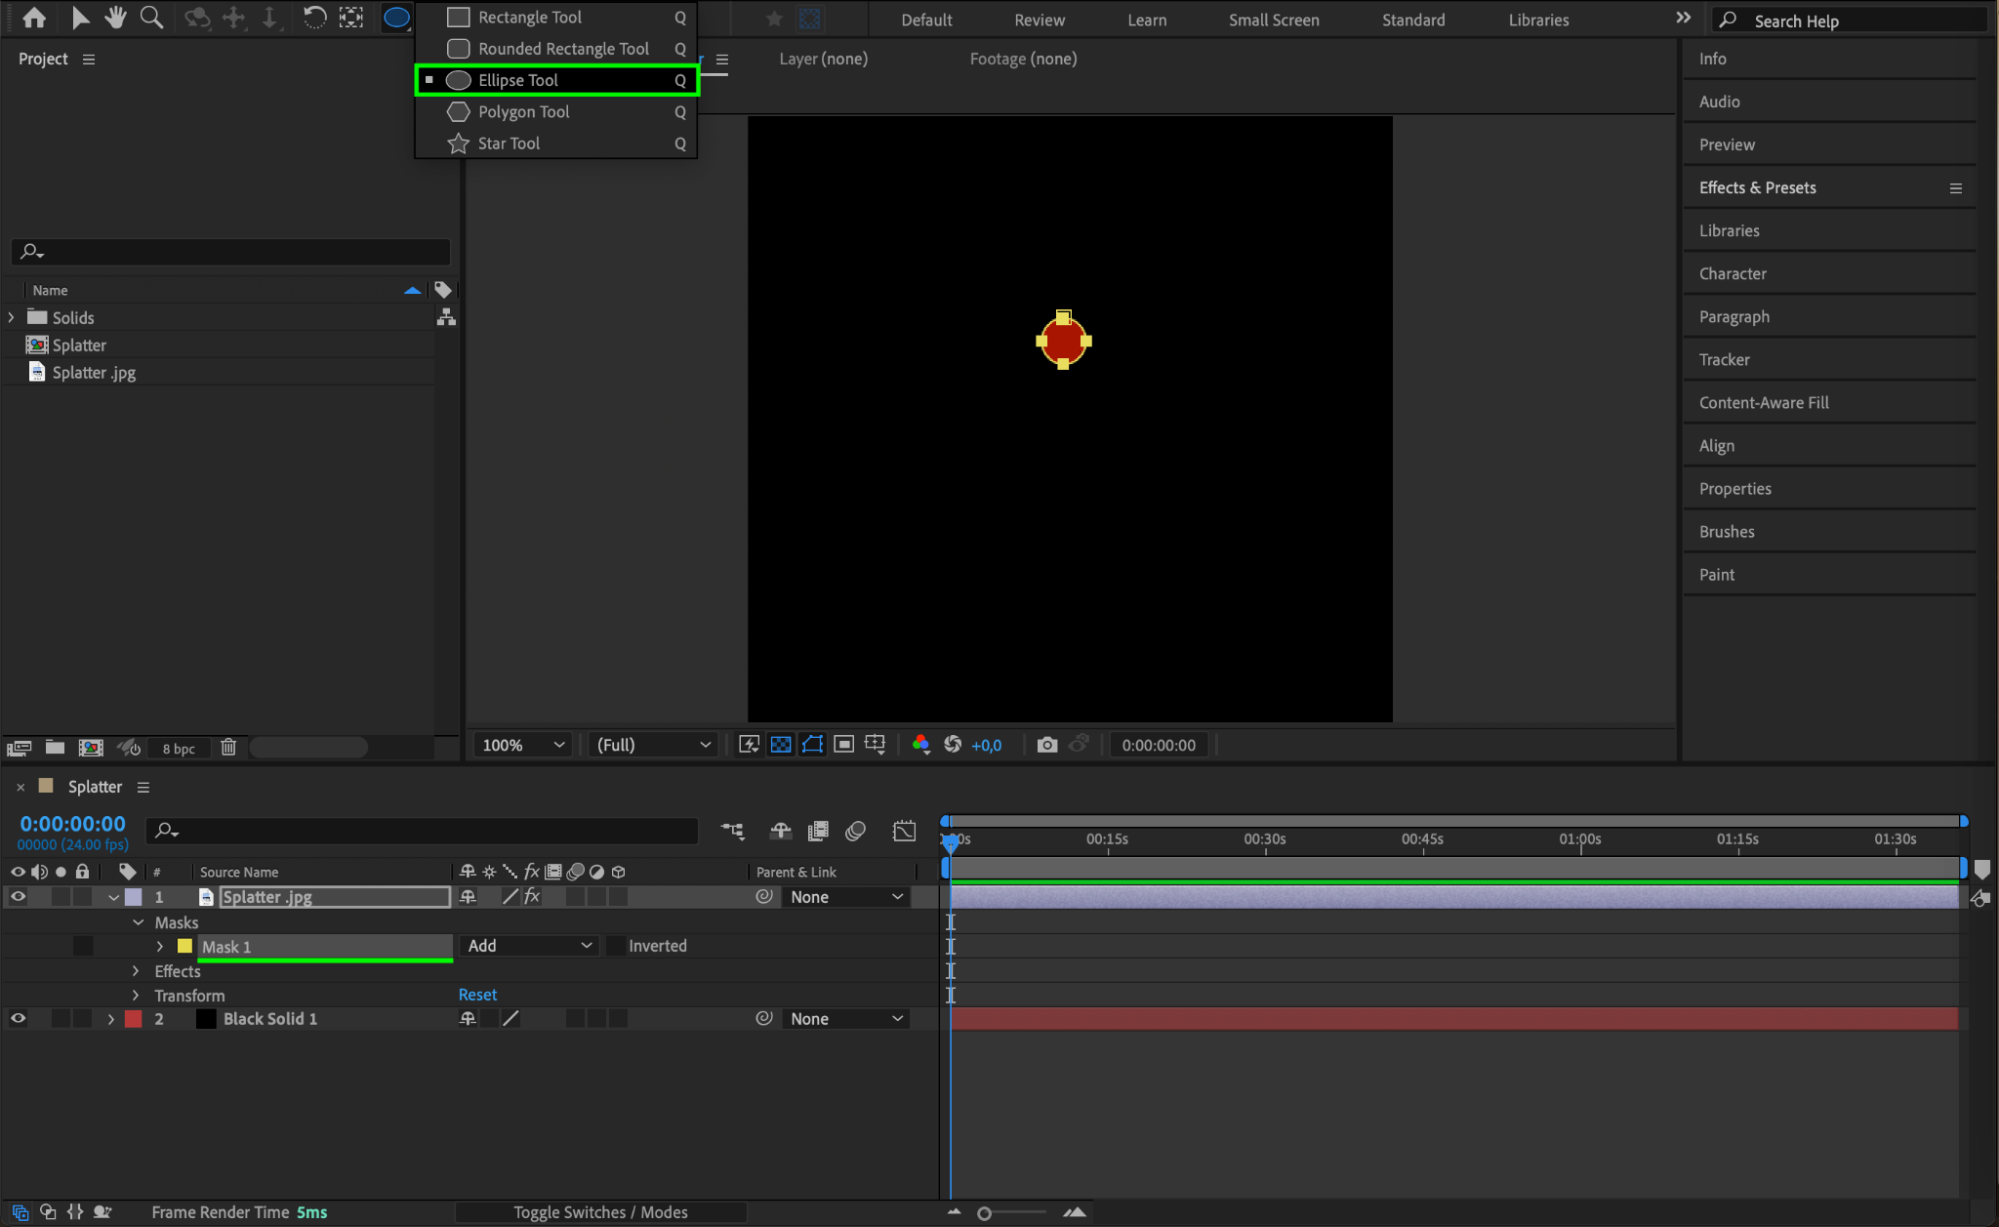
Using the Ellipse Tool (Q), draw a small circular mask in the center of your blood splatter. This mask will control the visibility and expansion of the splatter as the animation progresses.
6. Animate the Mask Expansion
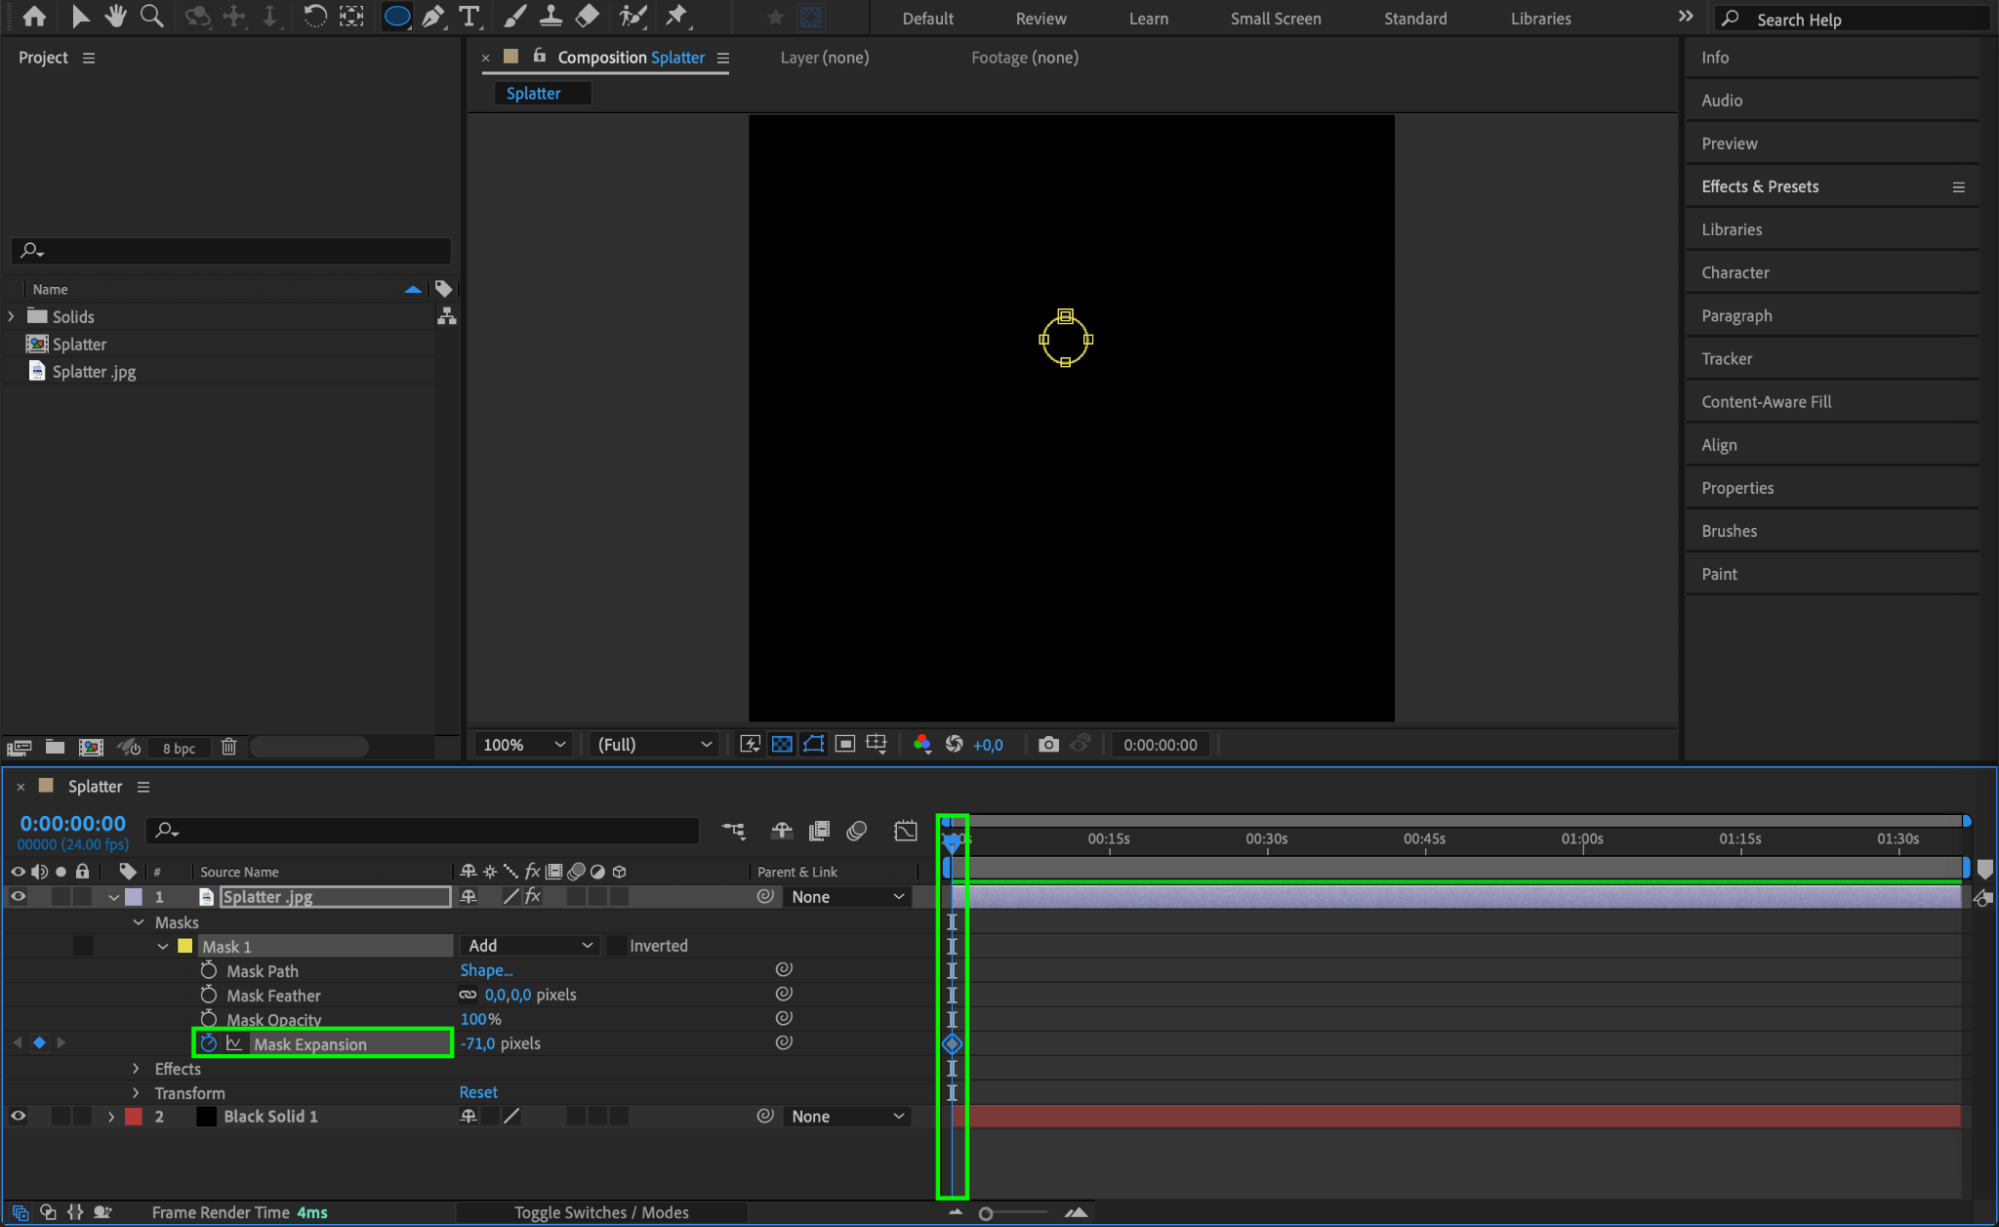
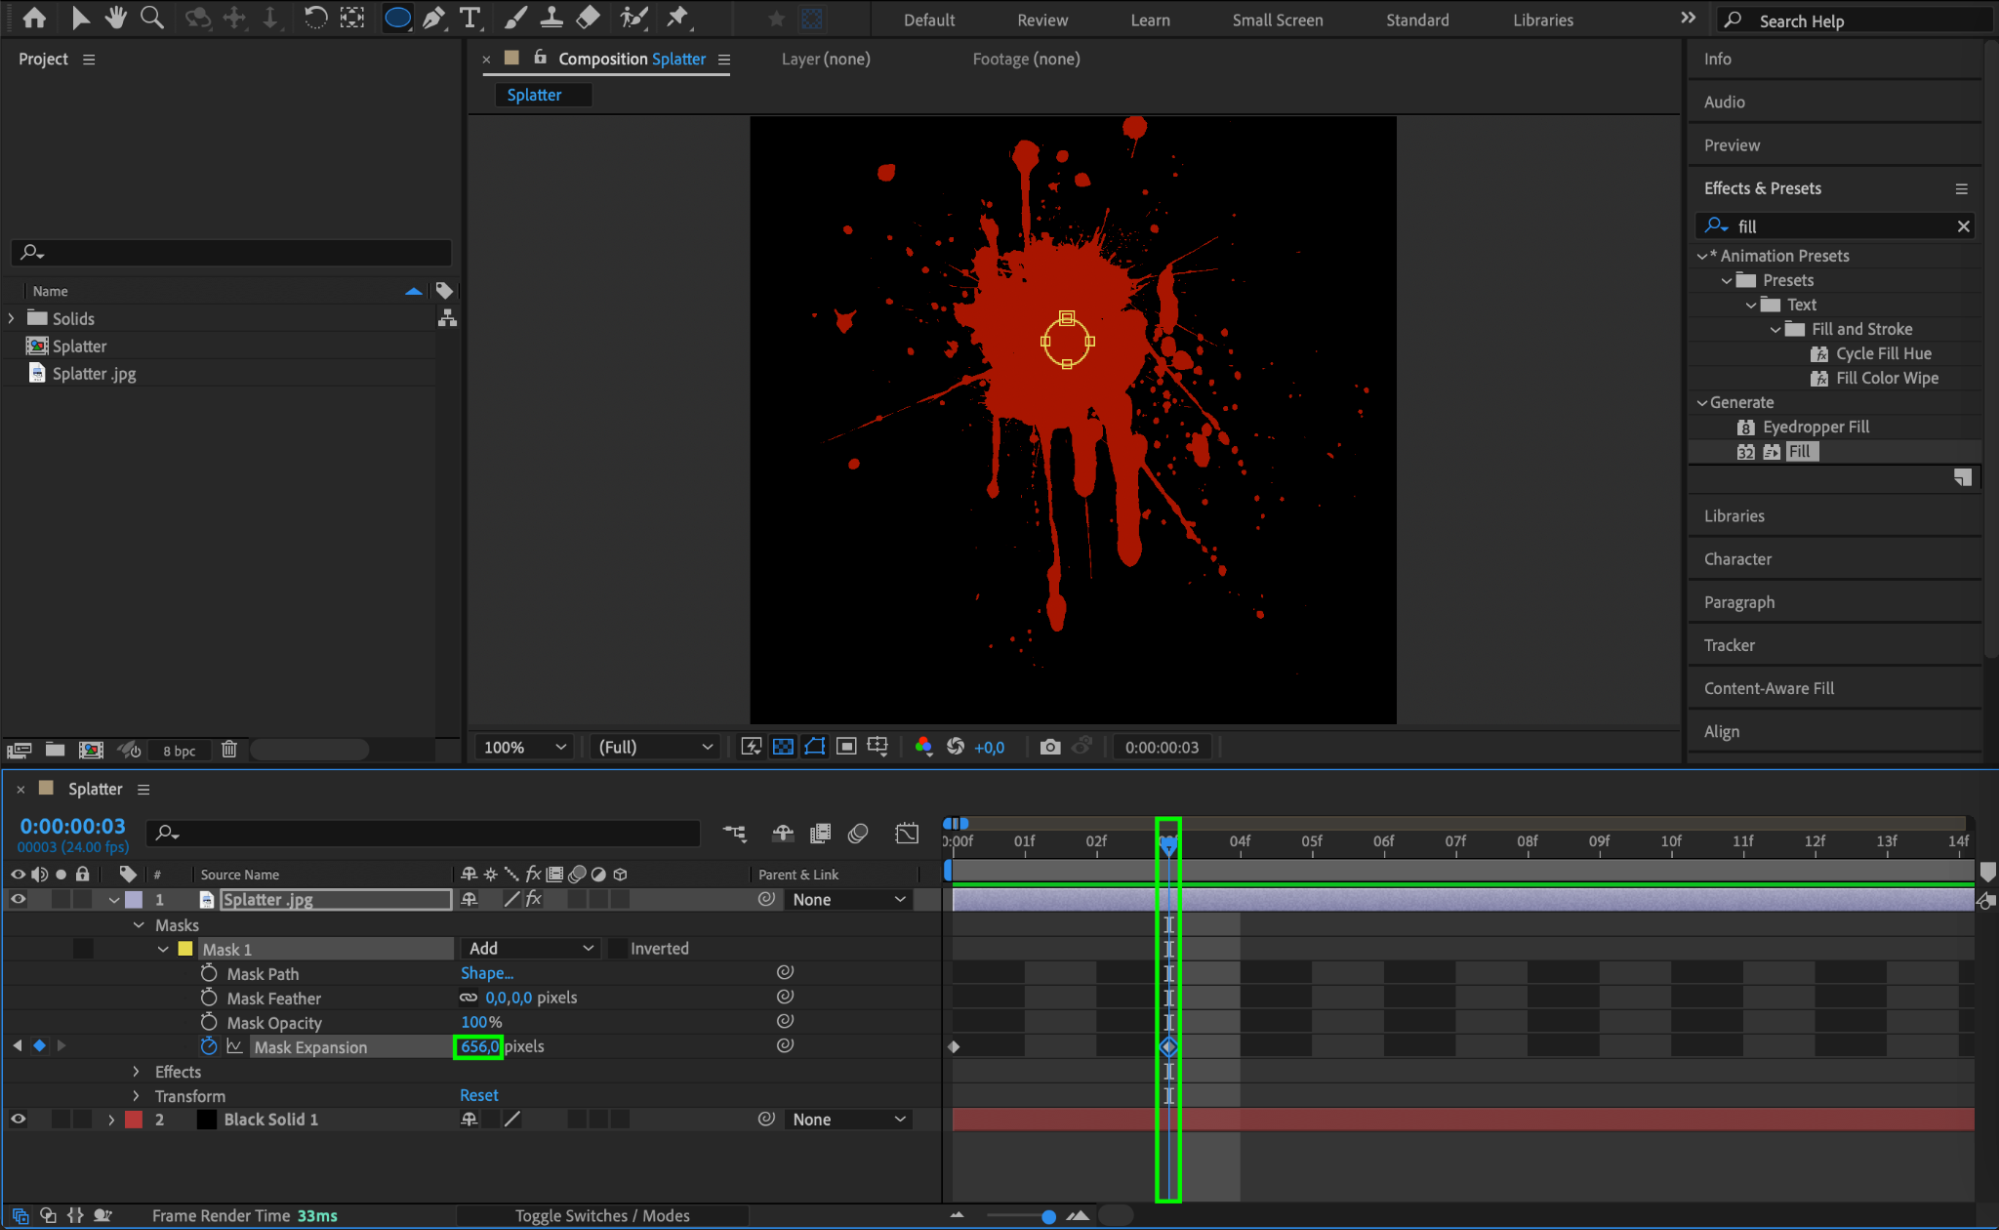
With the Mask Expansion property selected in the Timeline panel, create a keyframe at the start of your composition with a negative value so the splatter is hidden. Move forward by three frames and adjust the expansion so the entire blood splatter becomes visible.
7. Preview the Effect
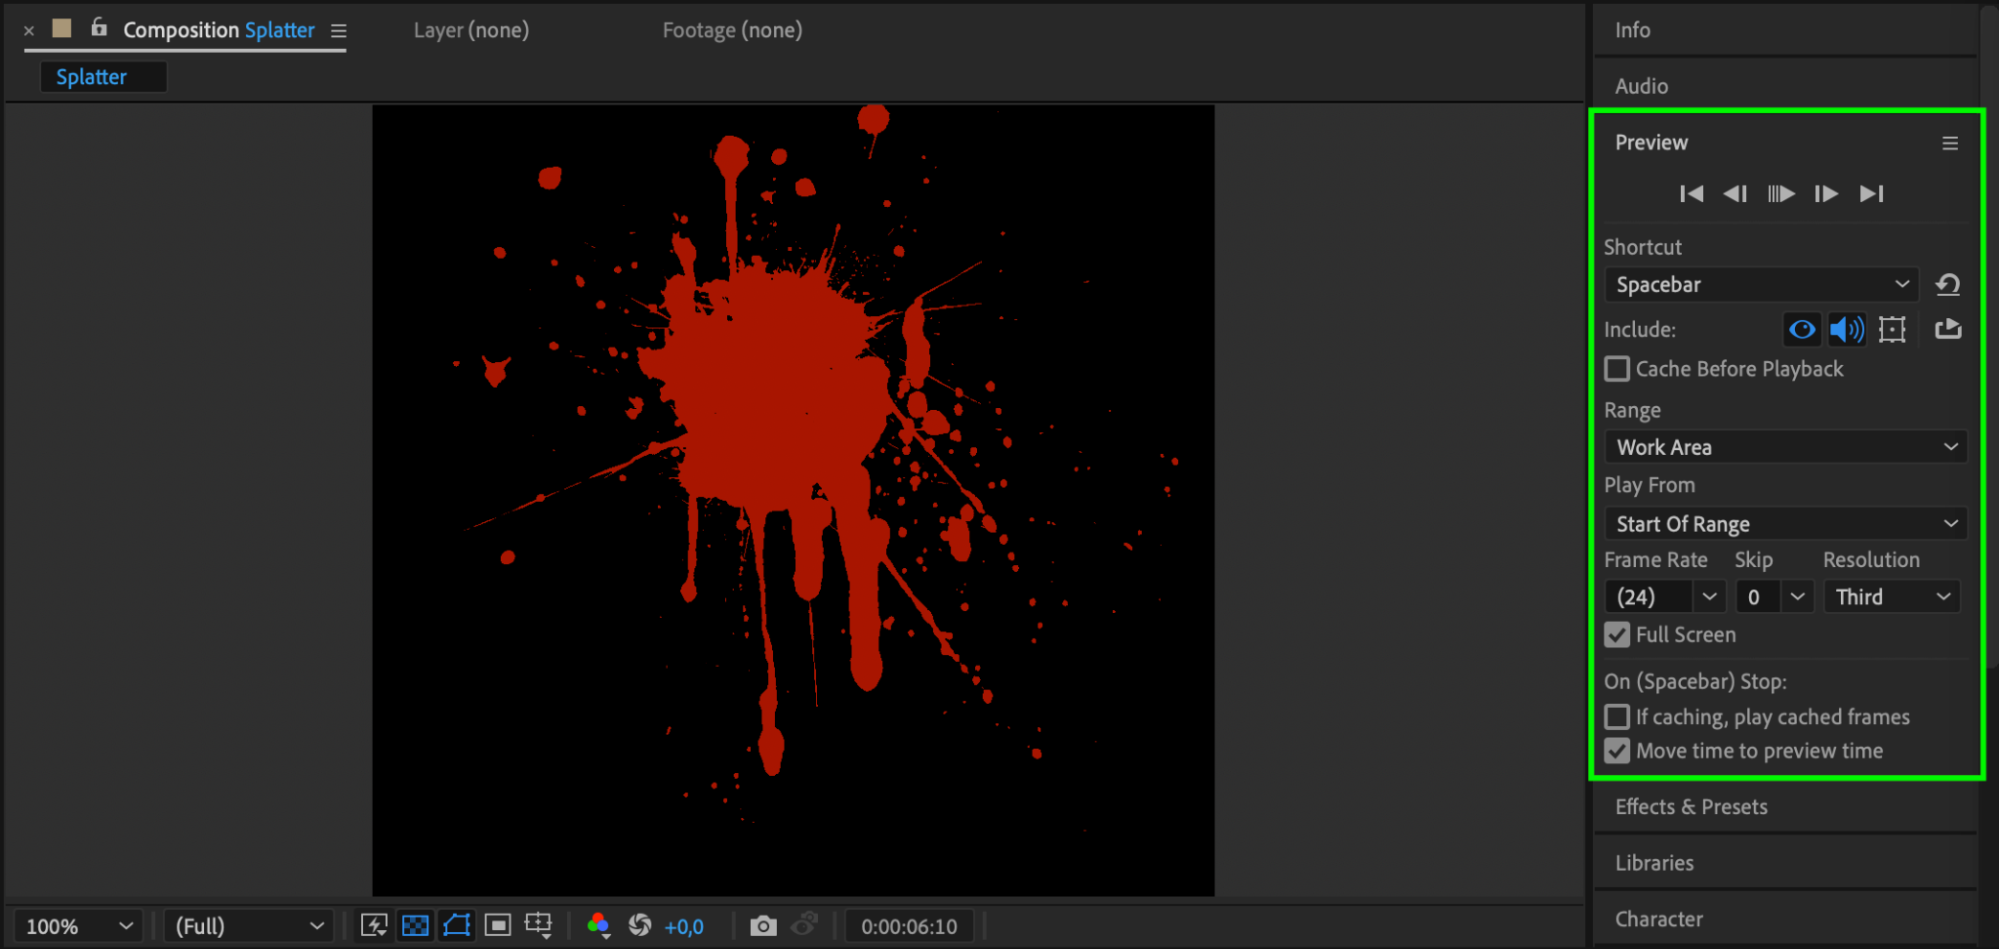
After applying the effects, use Preview to check the timing and overall look of your blood splatter effect. Make any necessary adjustments to keyframes, timing, or color to perfect the effect.
Tips for Perfecting Your Blood Splatter Effect
Creating a convincing blood splatter takes practice and attention to detail. Here are some tips to enhance your effect:
Motion Tracking: If your scene involves movement, consider applying motion tracking to your splatter so it follows the movement of the actor or object.
Sound Effects: A subtle “splash” sound effect can make the blood splatter feel more immersive and real.
Lighting and Shadows: Adjust the lighting and shadows on the blood splatter to match the overall scene lighting. This small detail can make the effect feel more integrated.
Conclusion
With these techniques, you now have the skills to create eye-catching and realistic blood splatter effects in After Effects. Whether it’s for horror films, action scenes, or any project that needs a bit of dramatic gore, blood splatter effects can significantly enhance your visual storytelling. Practice, experiment, and let your creativity flow! Happy animating!


