How to Create a Stunning Gaming Intro in After Effects
Introduction to Crafting Gaming Intros in After Effects
Are you ready to level up your gaming videos? With After Effects, you can create a dynamic and eye-catching gaming intro that grabs your viewers’ attention. This step-by-step guide will walk you through the process of designing and animating a captivating gaming intro.
Step 1: Plan Your Intro Design
Before diving into After Effects, take some time to plan out your intro. Think about the style, theme, and mood you want to convey. Do you want it to feel intense and action-packed, or calm and mysterious? Create a sketch or a mood board with references and ideas to bring your vision to life.
Step 2: Gather Your Assets
Next, collect all the assets you’ll need for your intro, including your gaming logo, any images, videos, or other graphic elements. Make sure they’re high-quality and align with your gaming brand. Once ready, import them into After Effects by going to File > Import > File.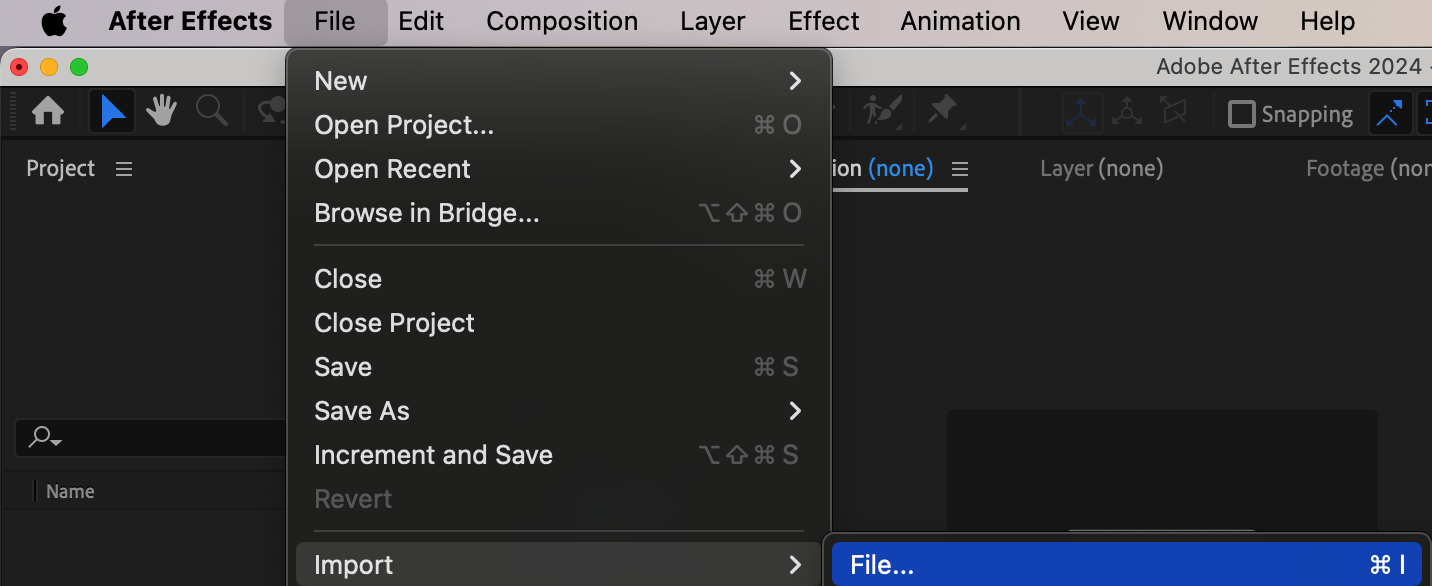
Step 3: Set Up a New Composition
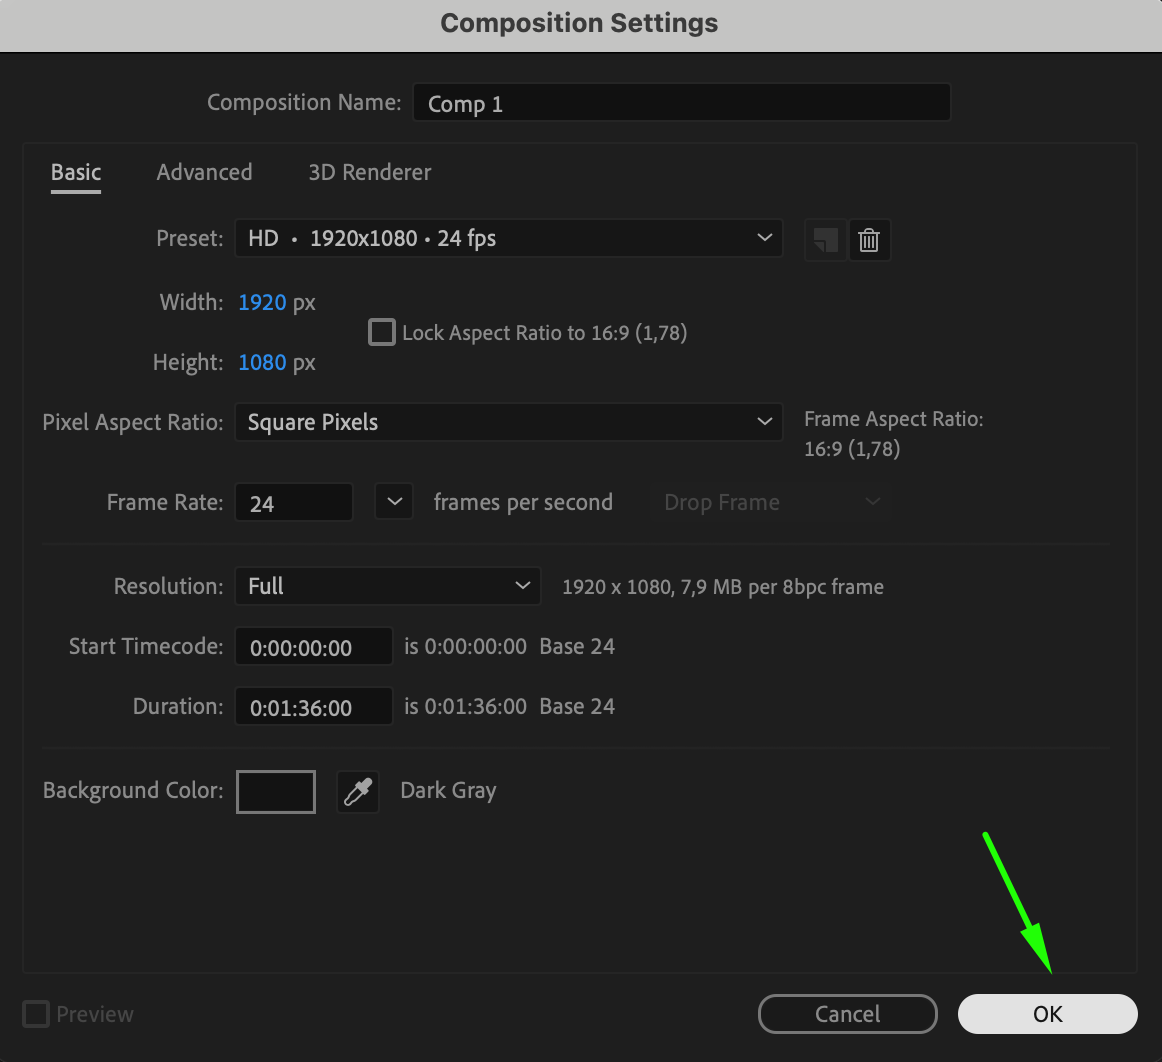
To begin creating your intro, go to Composition > New Composition. Here, you can set the resolution, frame rate, and duration of your intro. For gaming videos, a standard 1920×1080 resolution and 24fps are common choices, but adjust these based on your platform or personal preference.
 Step 4: Arrange Your Elements on the Timeline
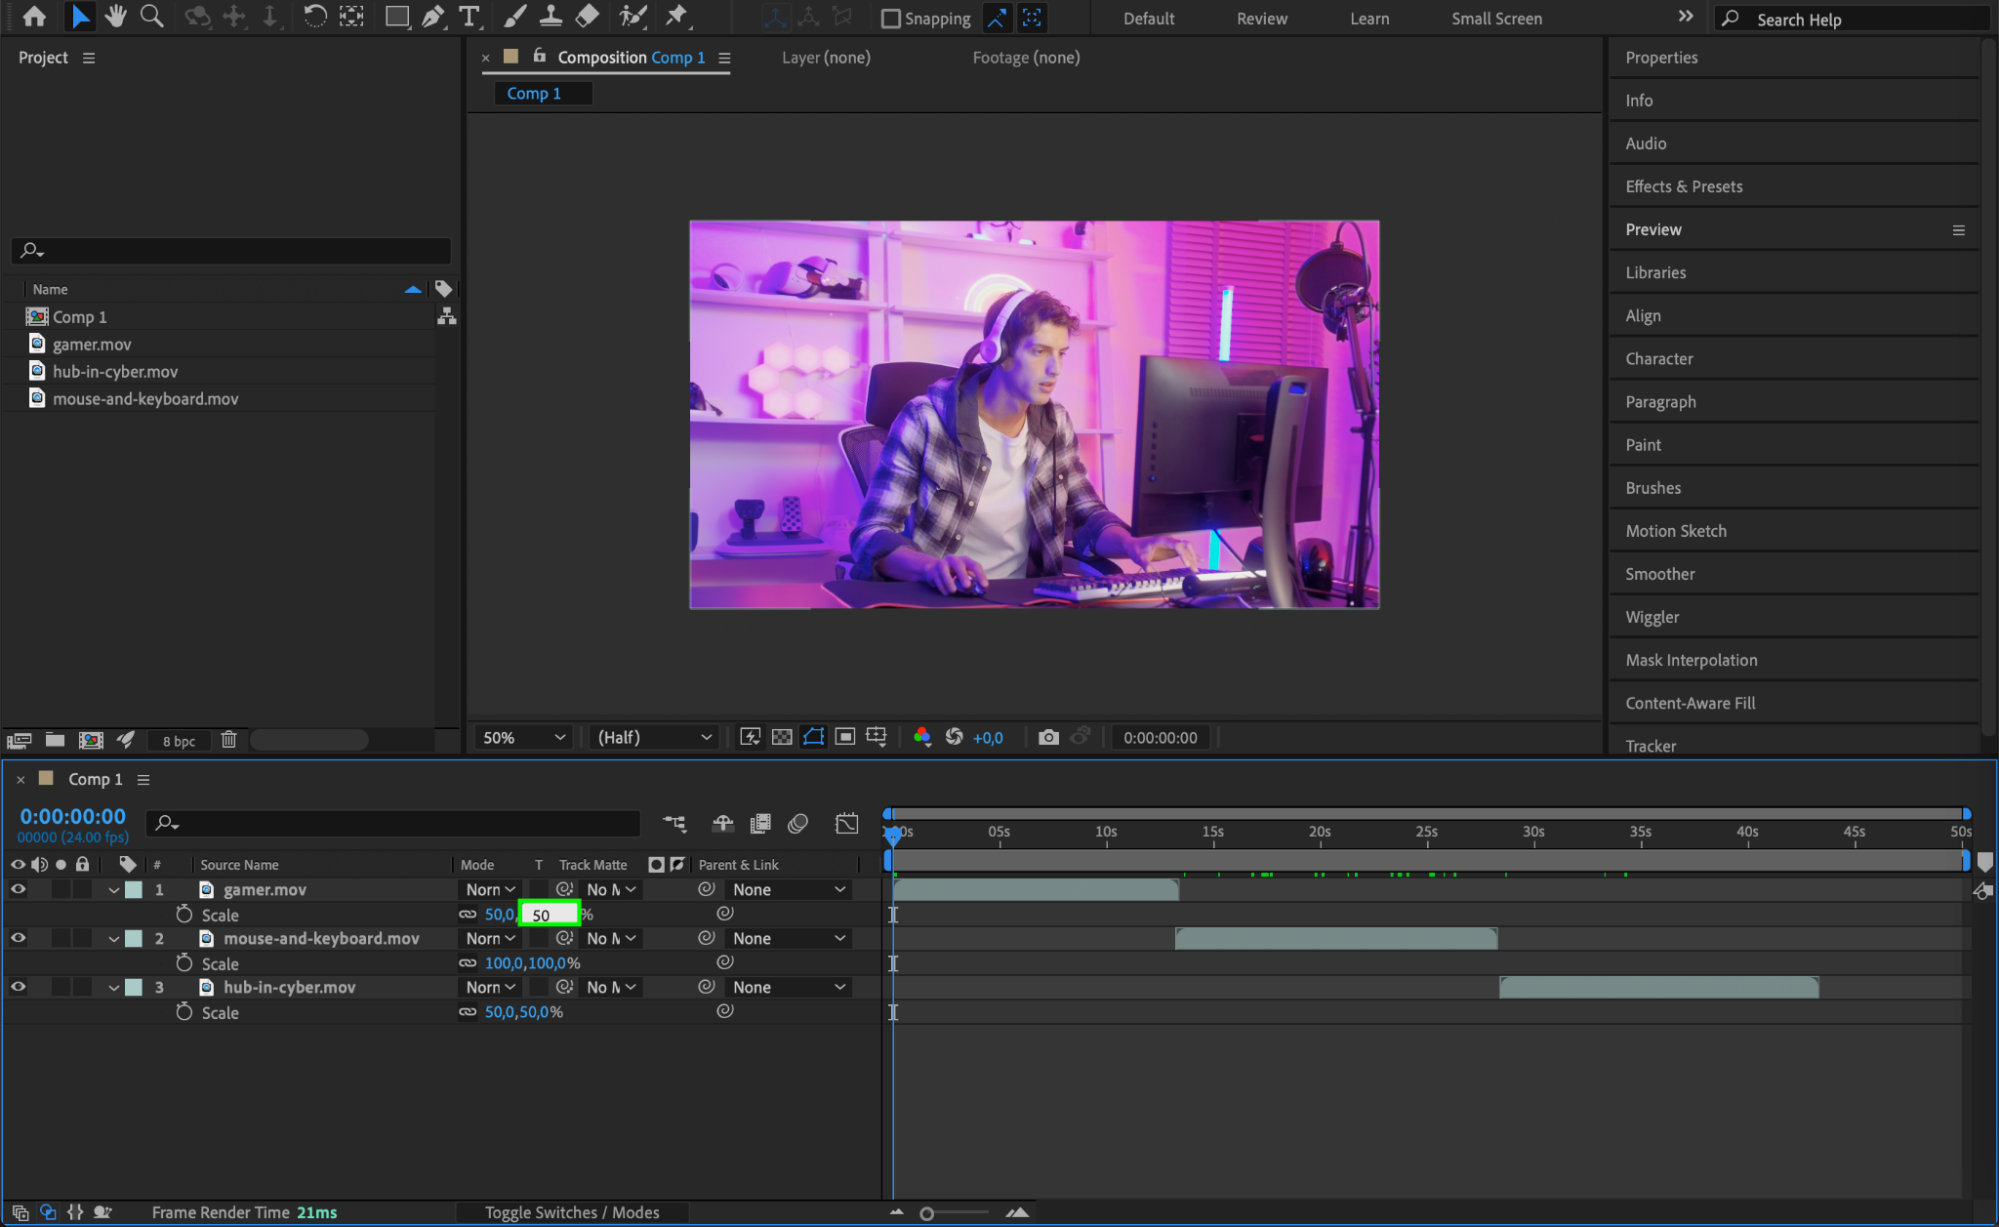
Drag your imported assets onto the timeline and arrange them in the proper order. Use the Transform properties (position, scale, rotation, etc.) to place and adjust each element. Proper organization on the timeline is essential for a clean and smooth animation process.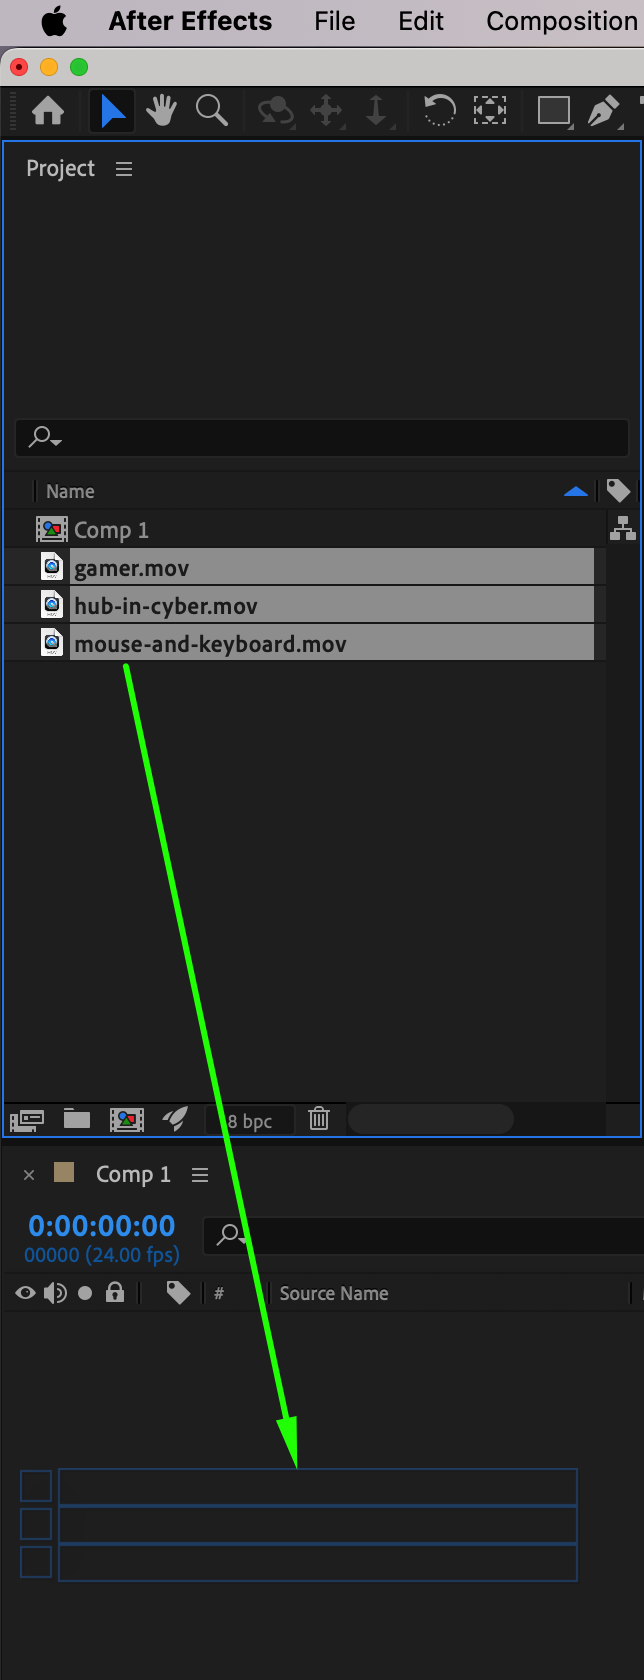
Get 10% off when you subscribe to our newsletter

Step 5: Add Smooth Transitions Between Scenes
To make your intro more dynamic, you’ll want to add smooth transitions between elements or scenes. After Effects has a variety of built-in transitions available in the Effects & Presets panel. Use keyframes to animate these transitions, making your intro flow seamlessly from one scene to the next.
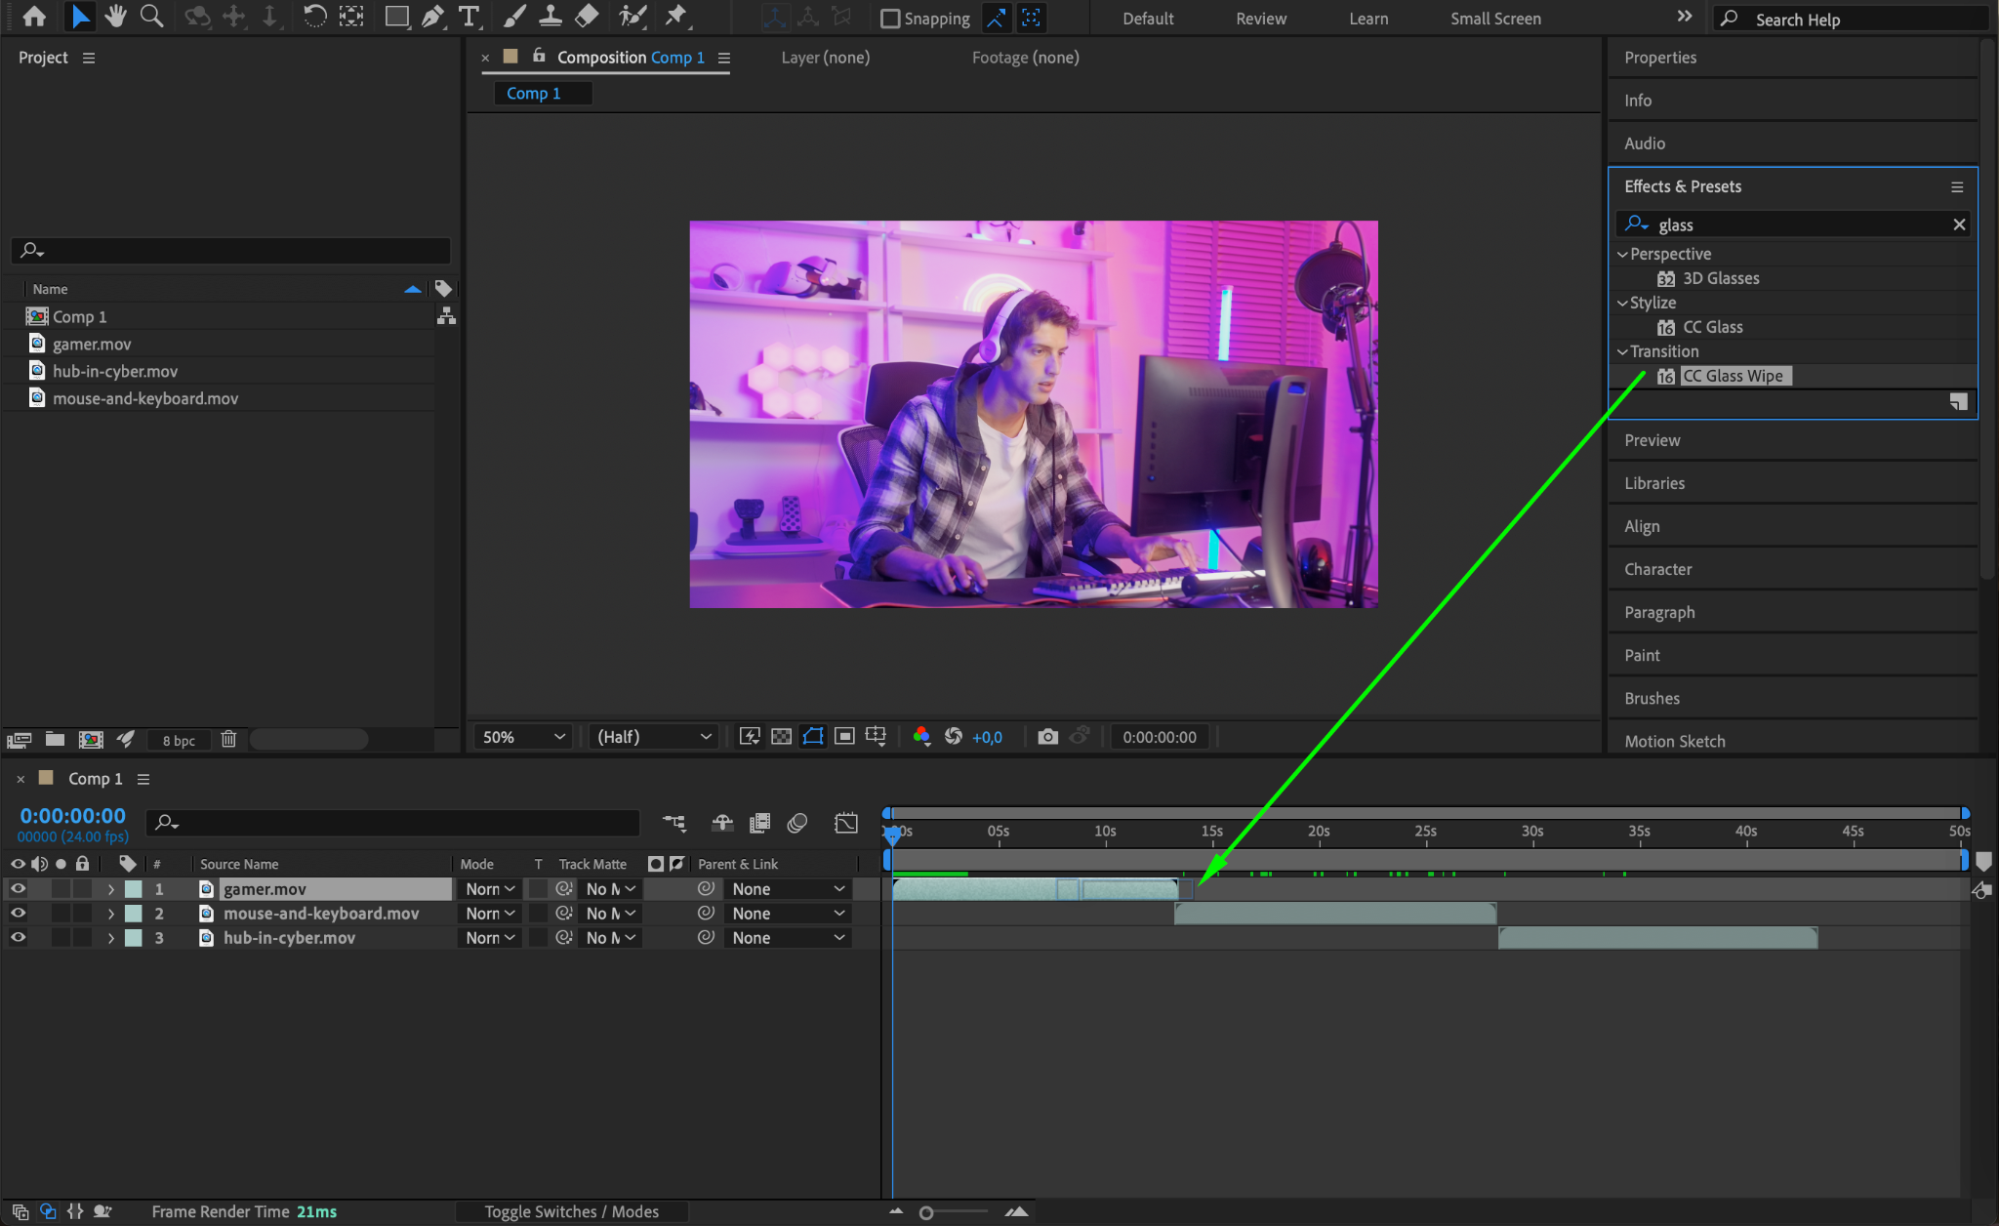
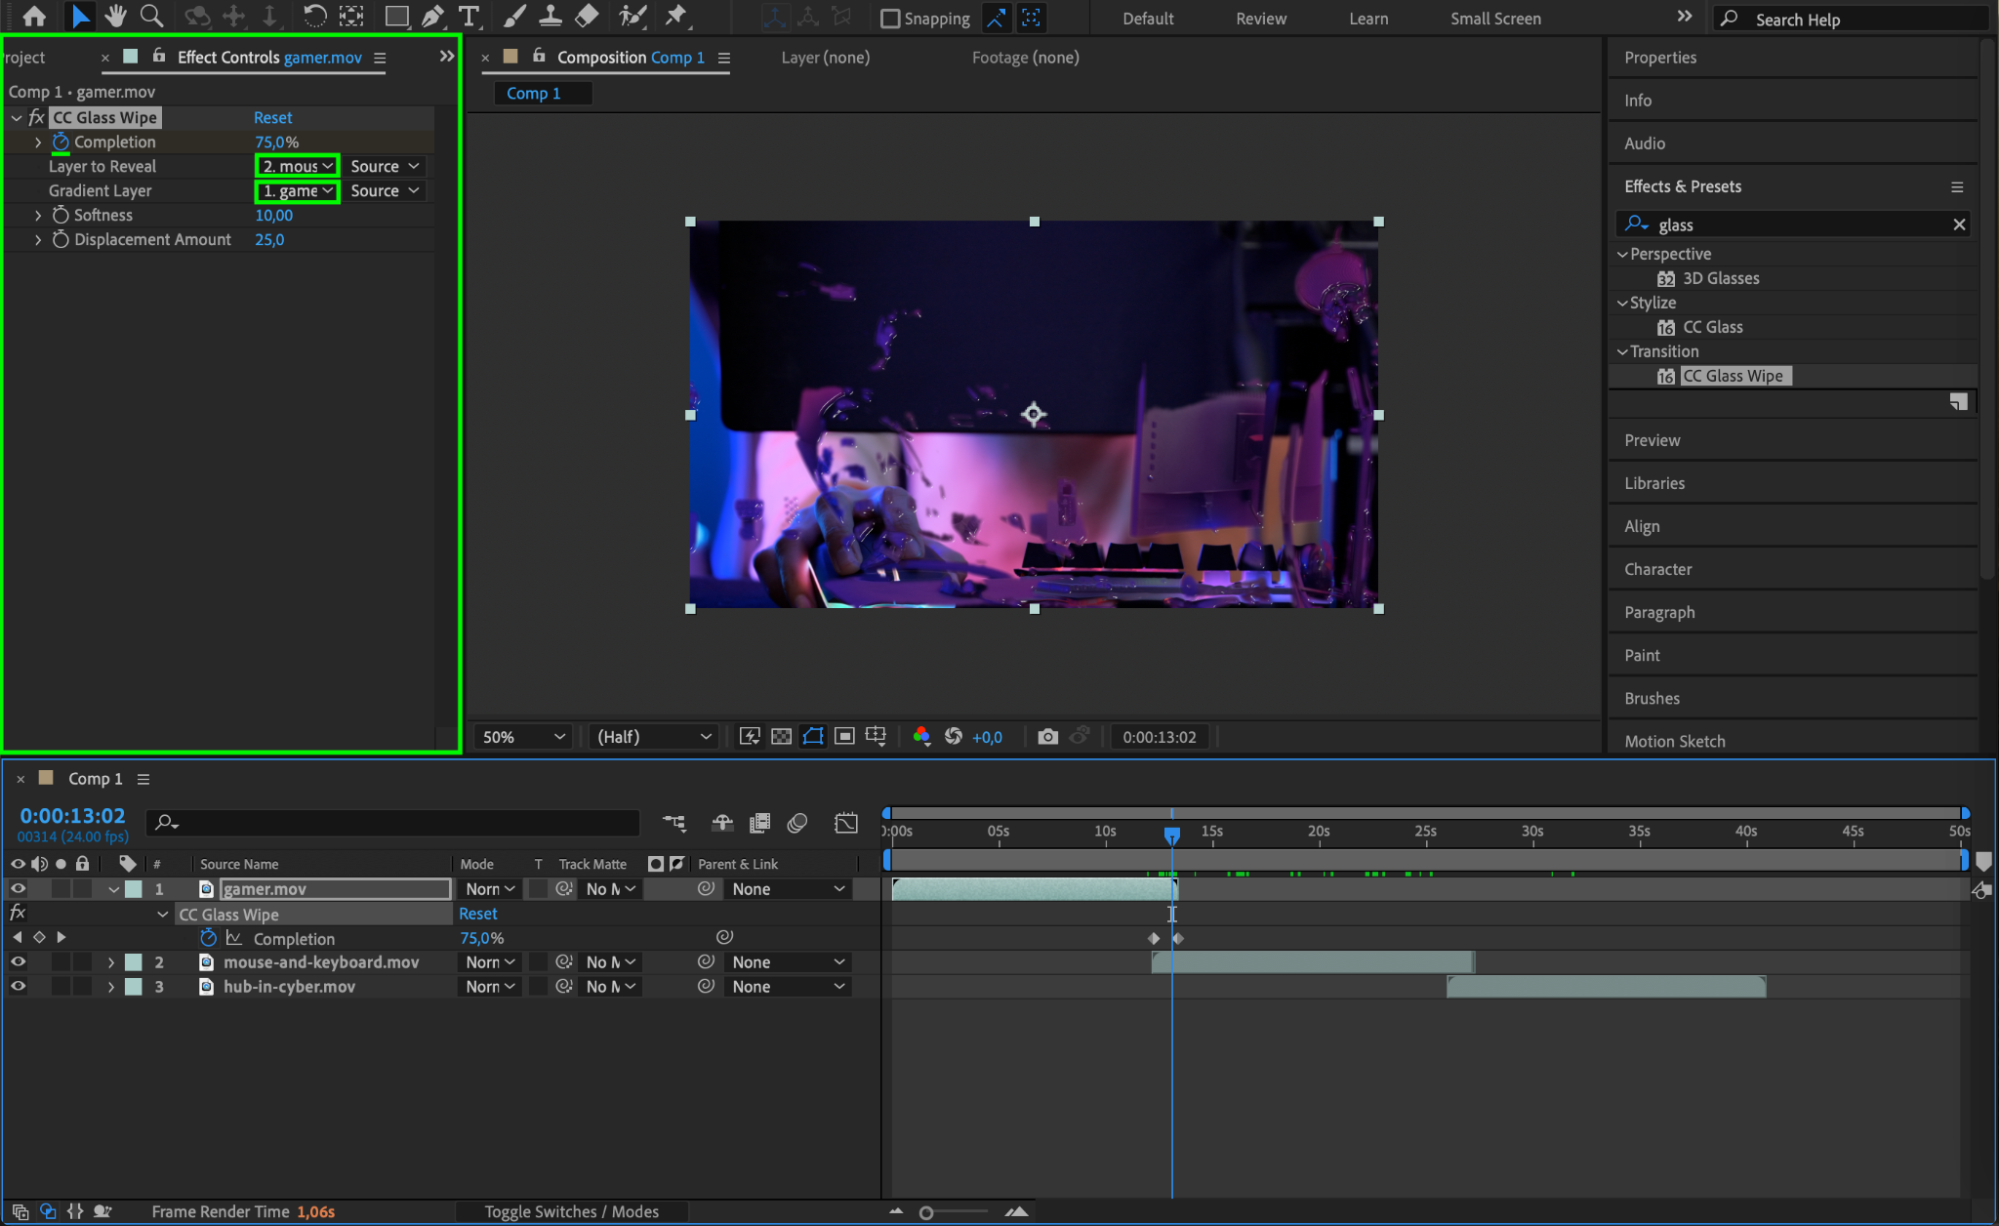
Step 6: Create Text Using the Type Tool
Add your game title or tagline using the Type Tool (Ctrl/Cmd + T). Place the text on the timeline and adjust its position, size, and color to match your theme. 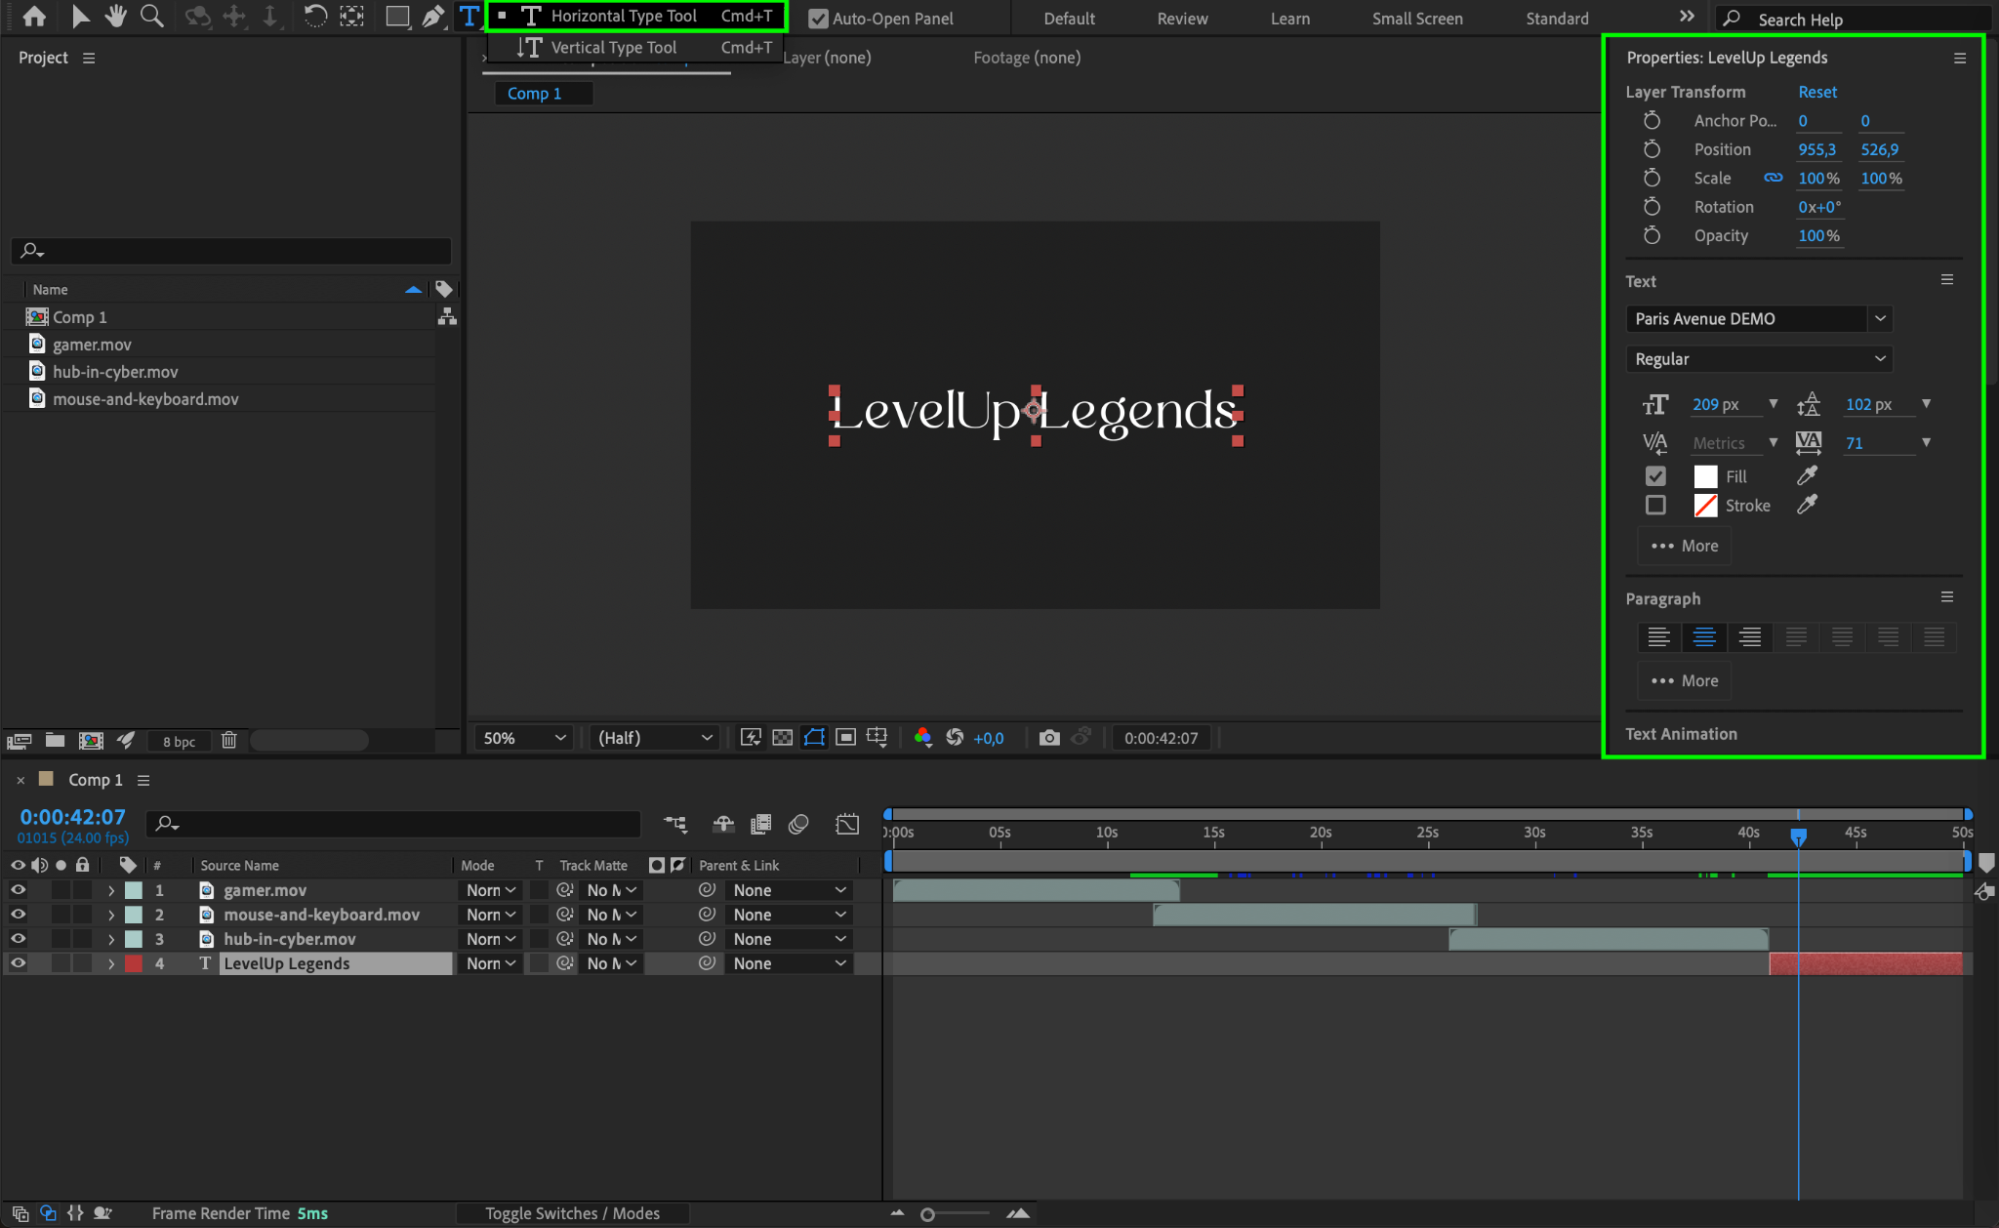
Step 7: Apply Effects to Enhance the Look of Text, Images, or Video
Get 10% off when you subscribe to our newsletter

To give your intro a polished, professional look, you can apply effects to your text, images, or video elements. Use the Effects & Presets panel to browse through various effects like glows, drop shadows, blurs, and color corrections. For example, adding a glow to your text can make it stand out, while a motion blur effect can create smooth transitions for fast-moving objects. To apply an effect, simply drag it onto your layer from the Effects & Presets panel. Adjust the settings in the Effect Controls panel to customize the look to your liking.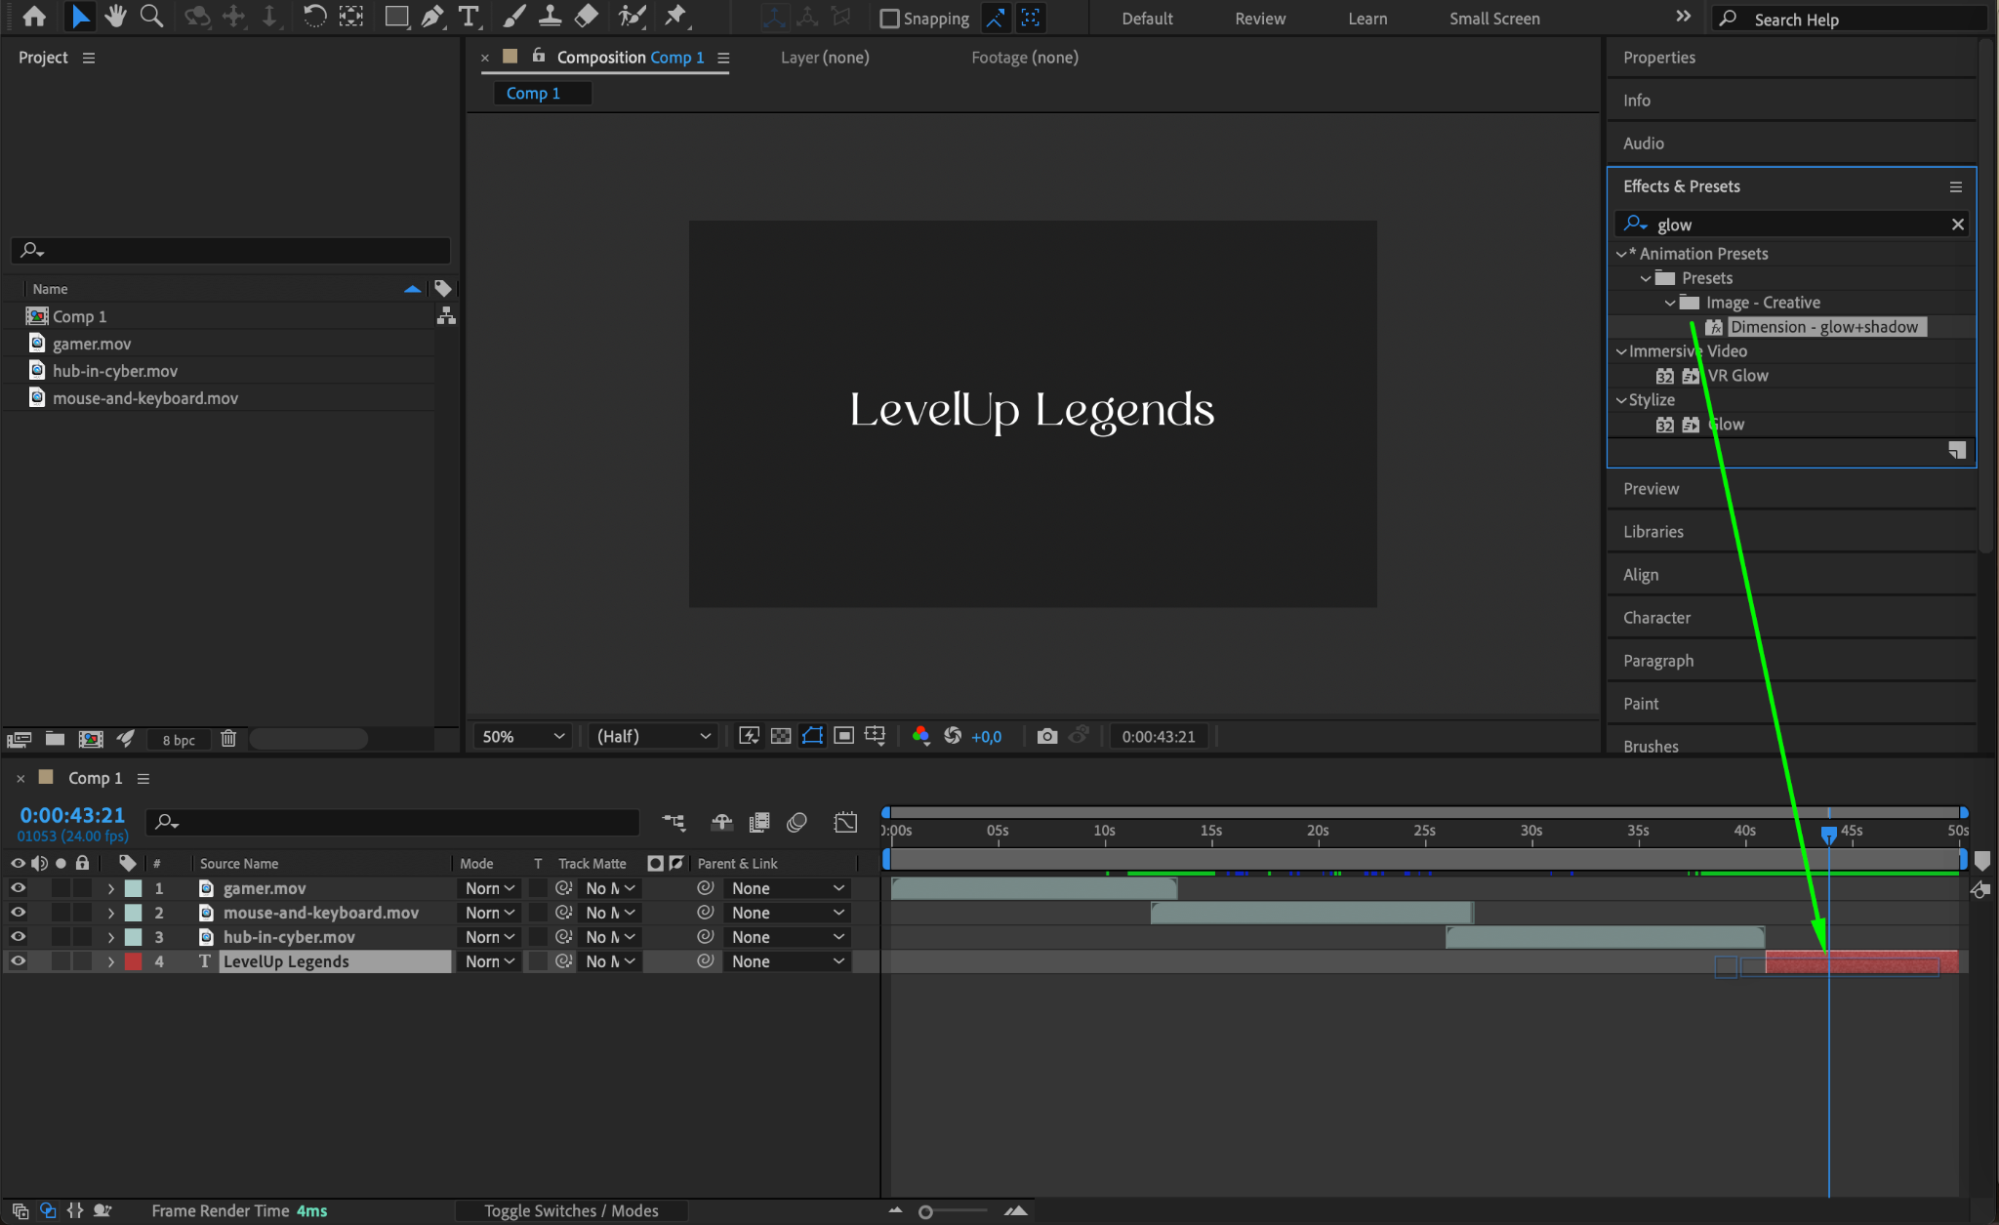
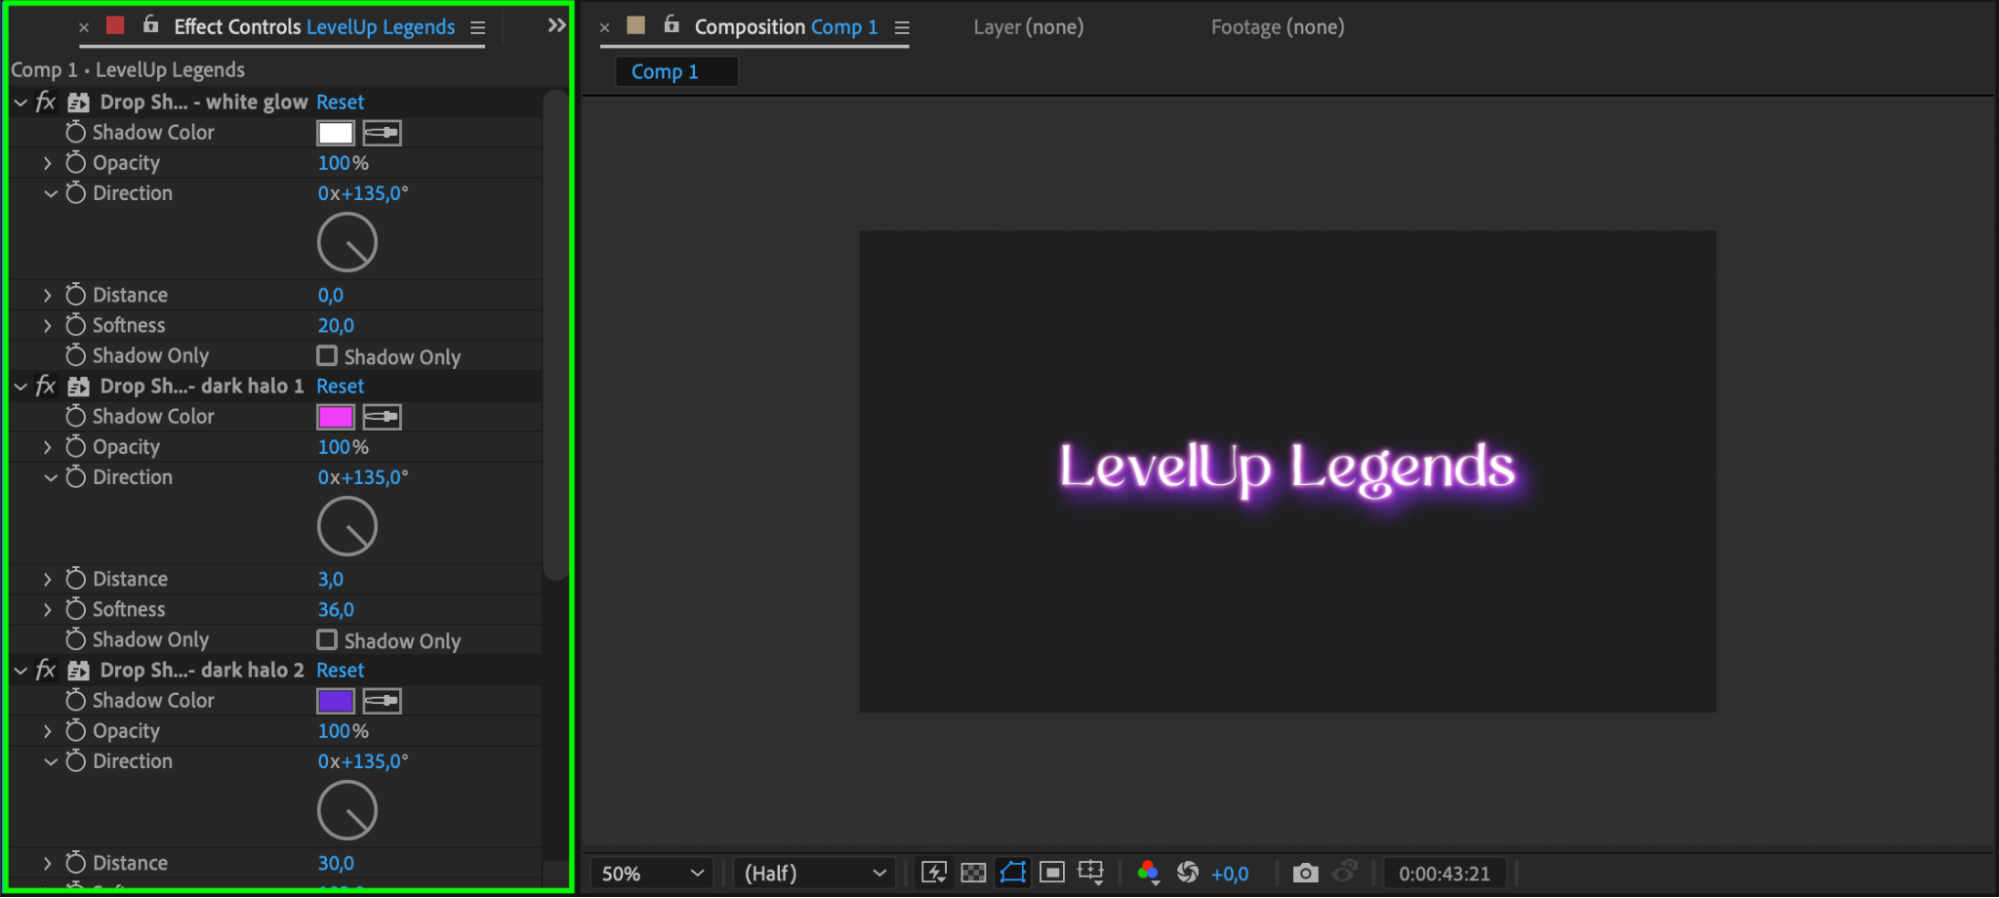
Step 8: Use Presets and Keyframes to Animate Elements
After Effects offers a variety of built-in animation presets that you can apply to instantly animate text, images, or other elements. For example, you can use text presets for a typewriter effect or an image preset to make an object fade in or zoom out. To use presets, go to the Effects & Presets panel, select your desired animation, and drag it onto your layer.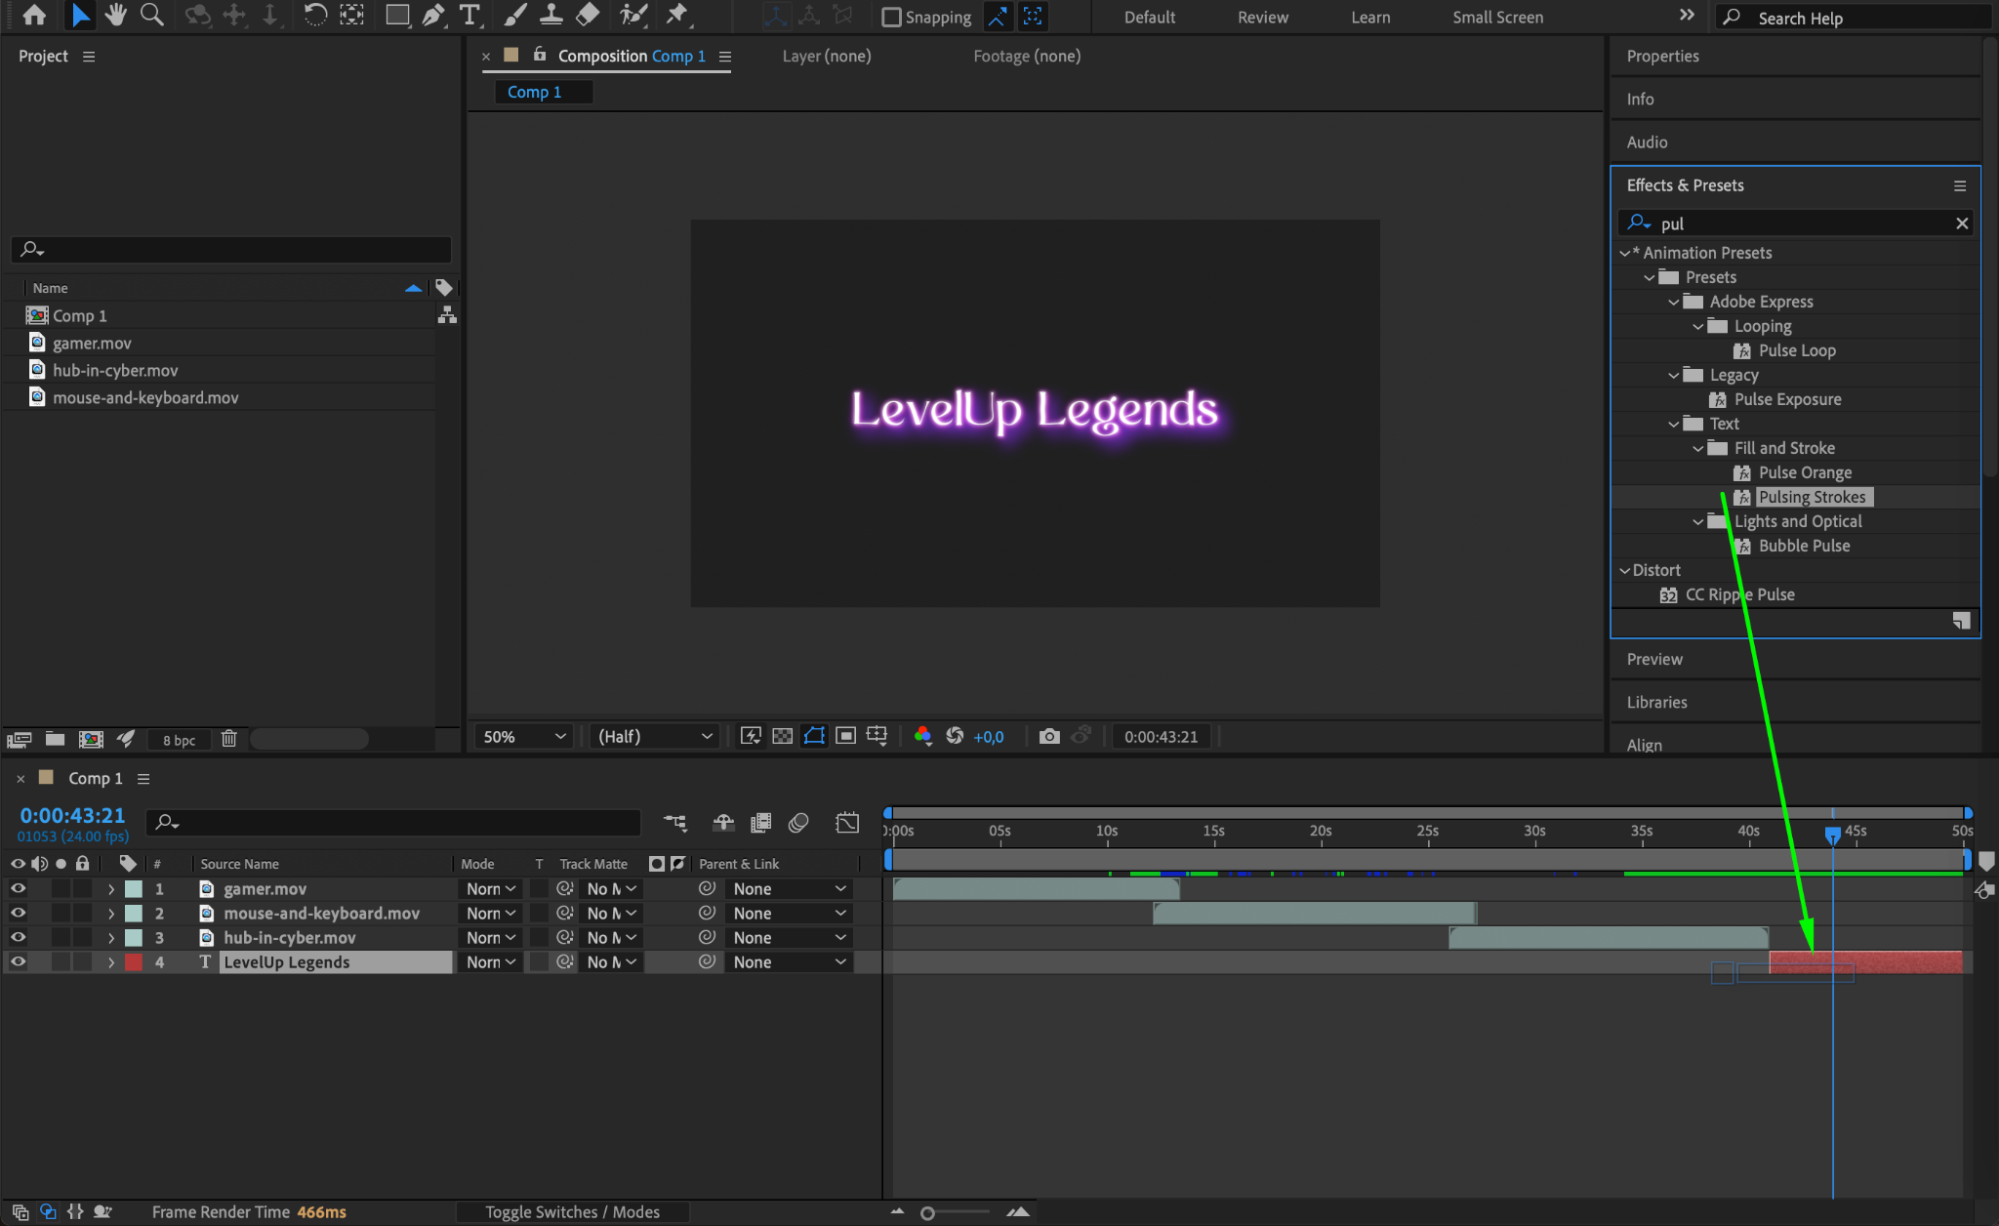
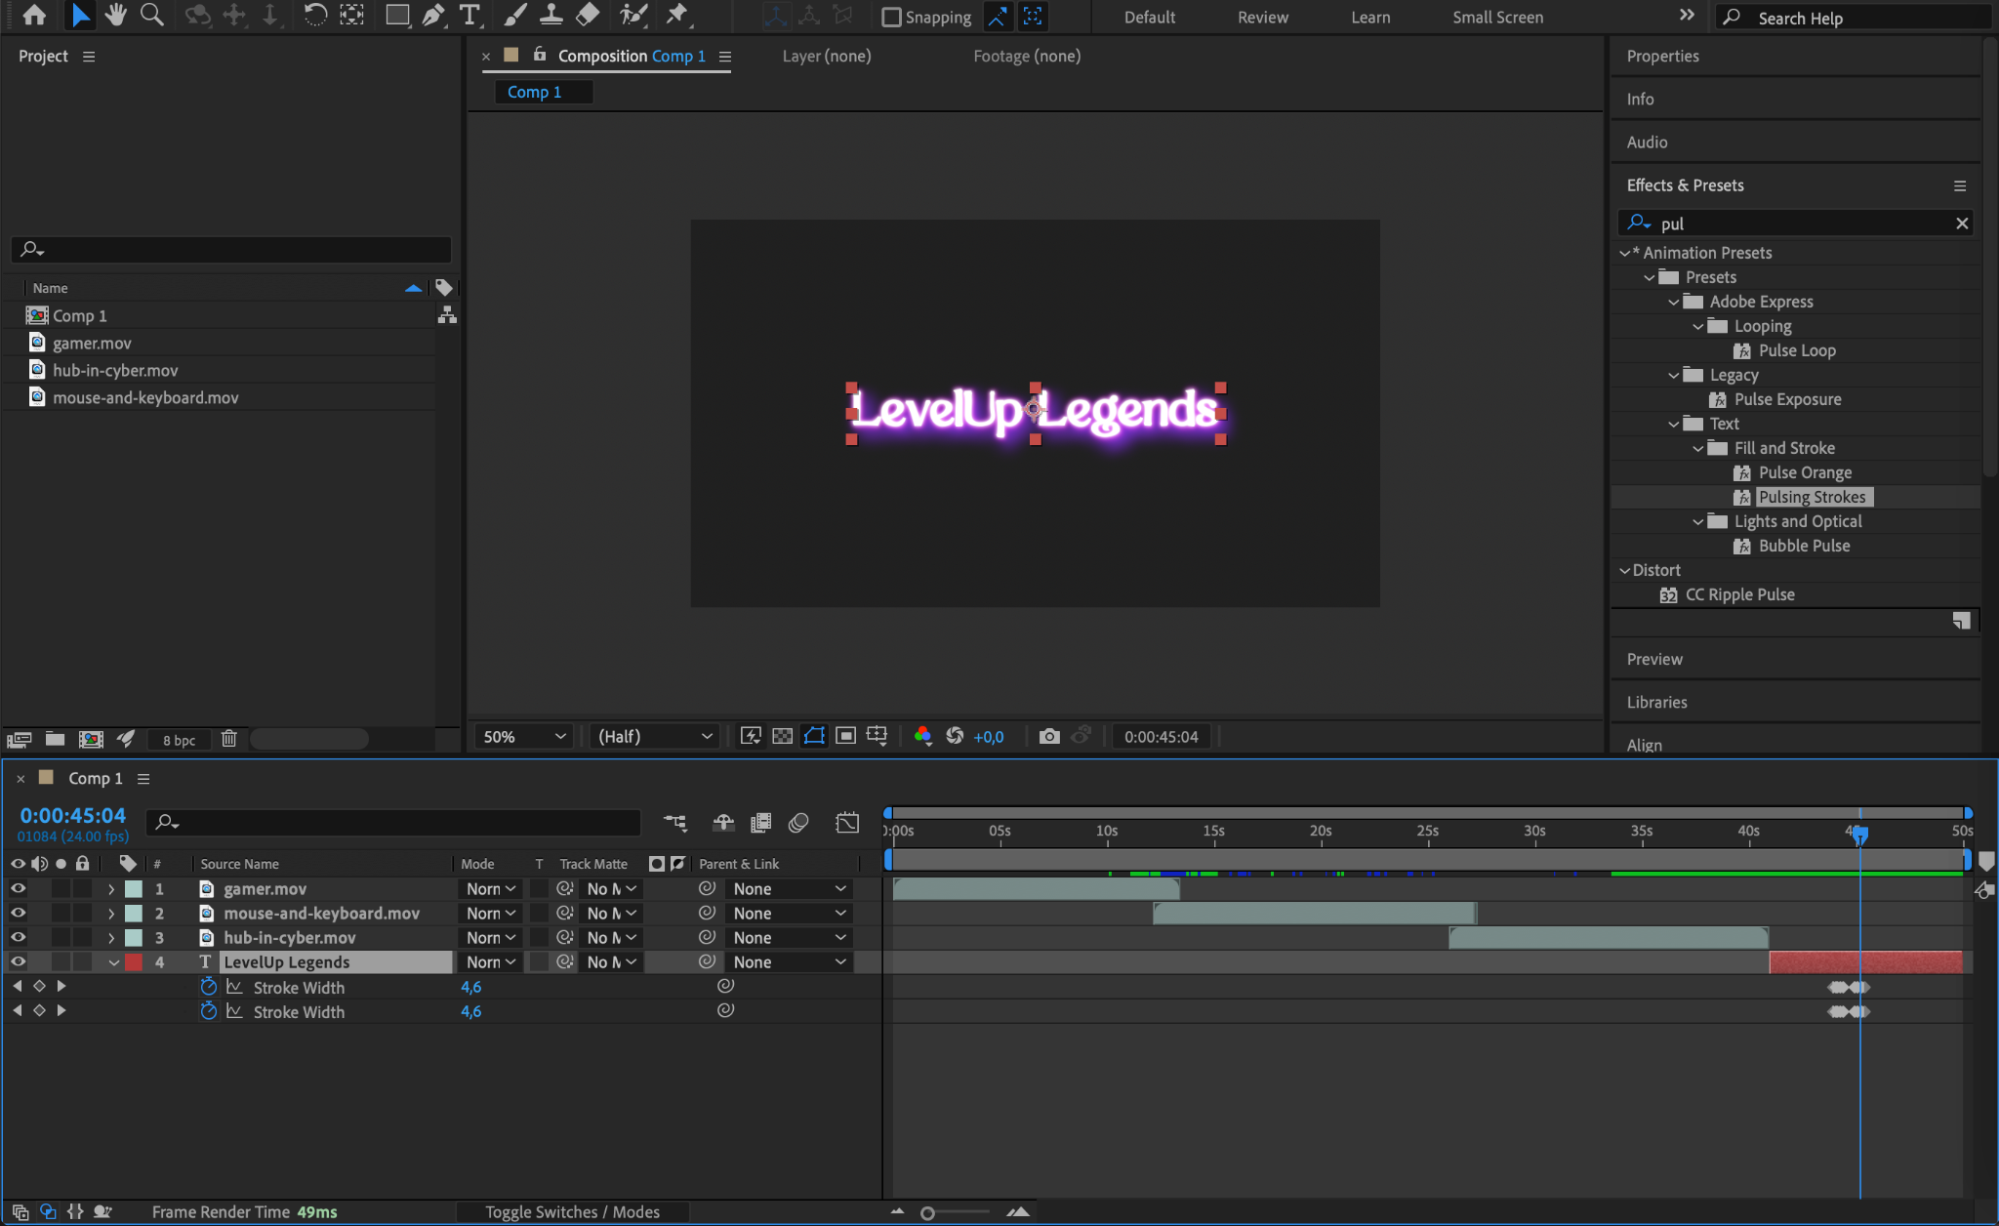
Get 10% off when you subscribe to our newsletter

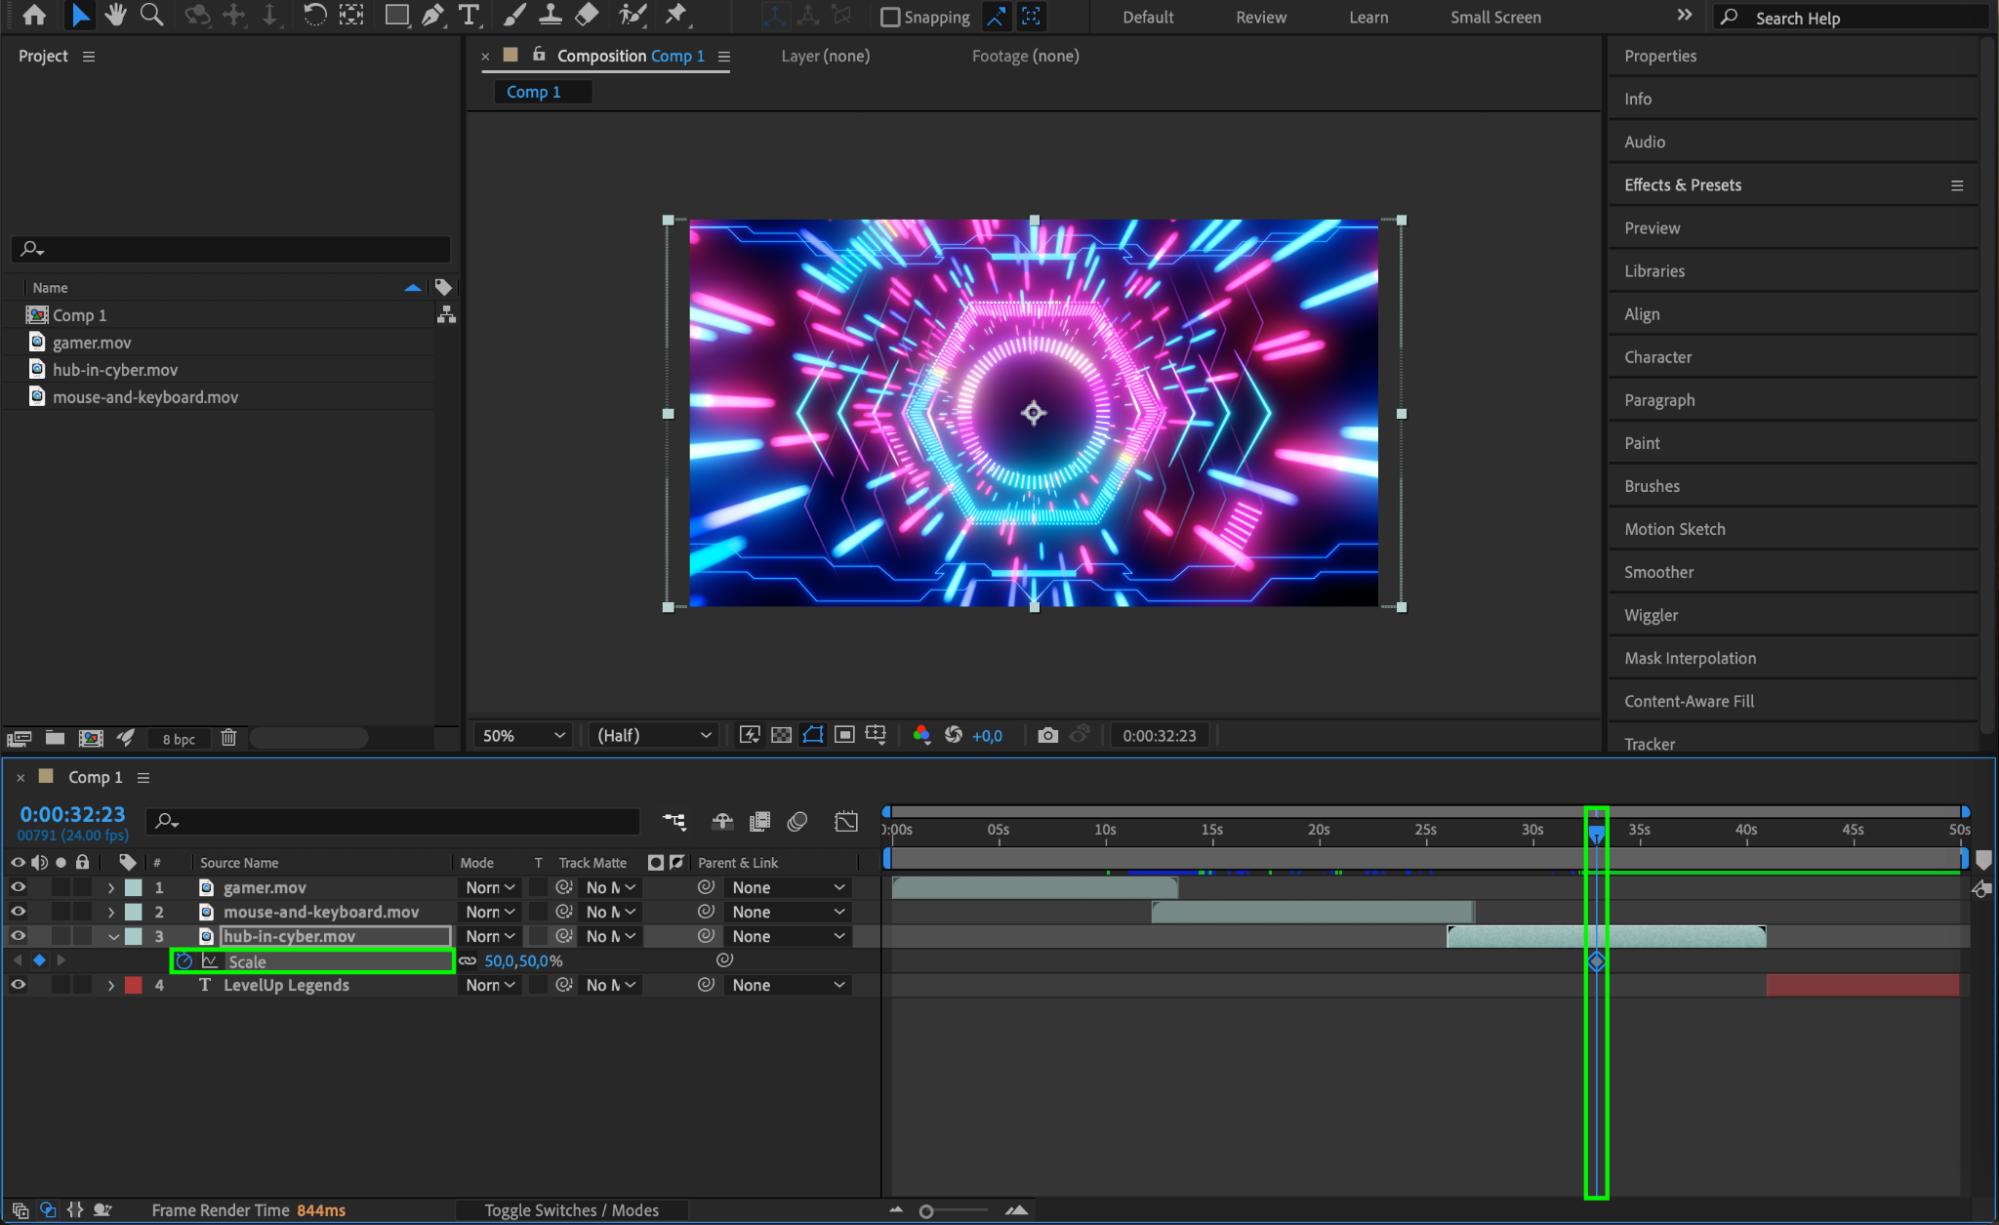
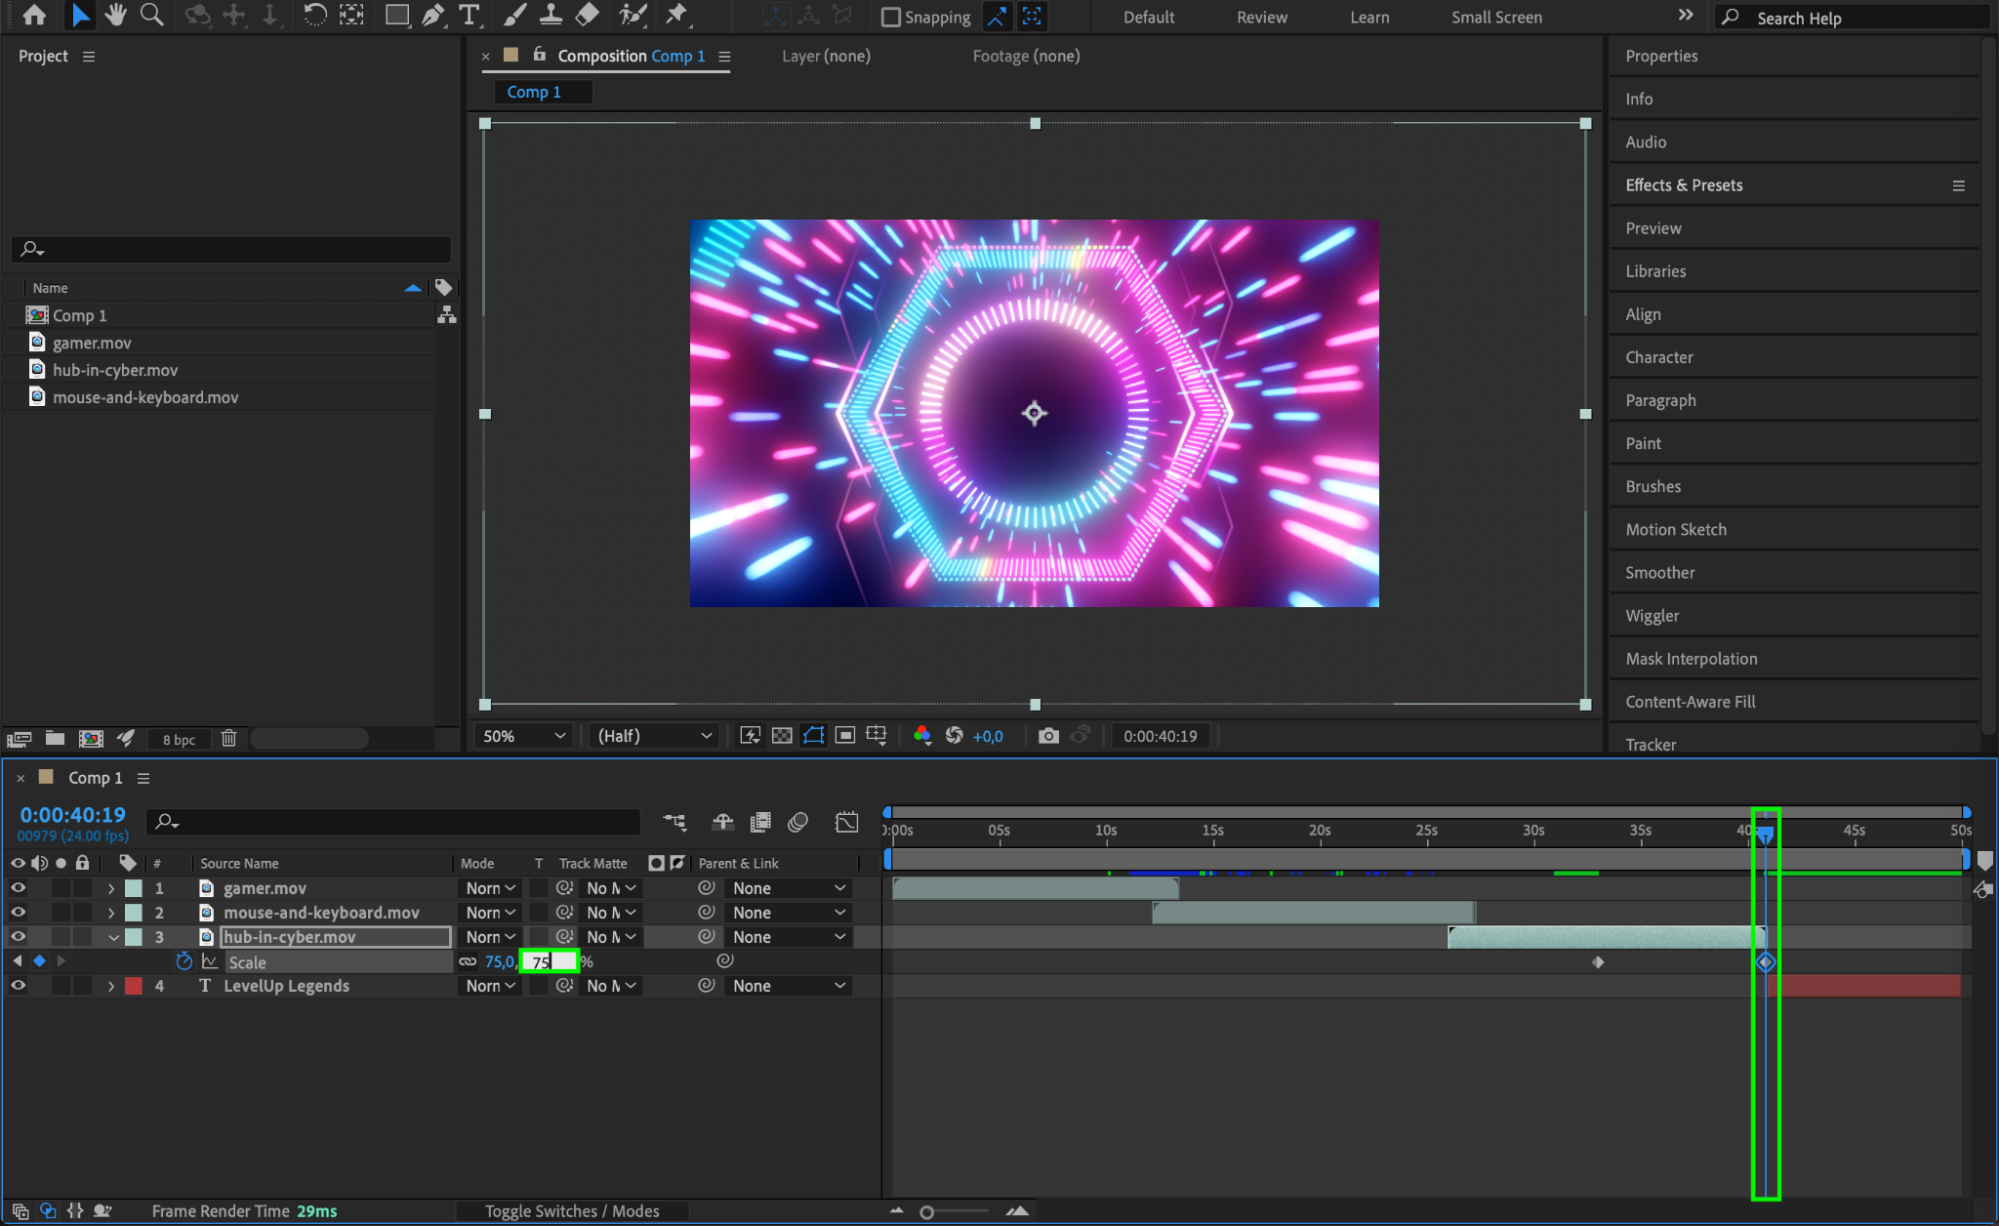
Alternatively, you can create your own animations using keyframes. To do this, open the Transform properties of any layer (by pressing P for position, S for scale, etc.), and set keyframes at different points in time to animate movements or transformations.
Step 8: Add and Sync Audio Elements
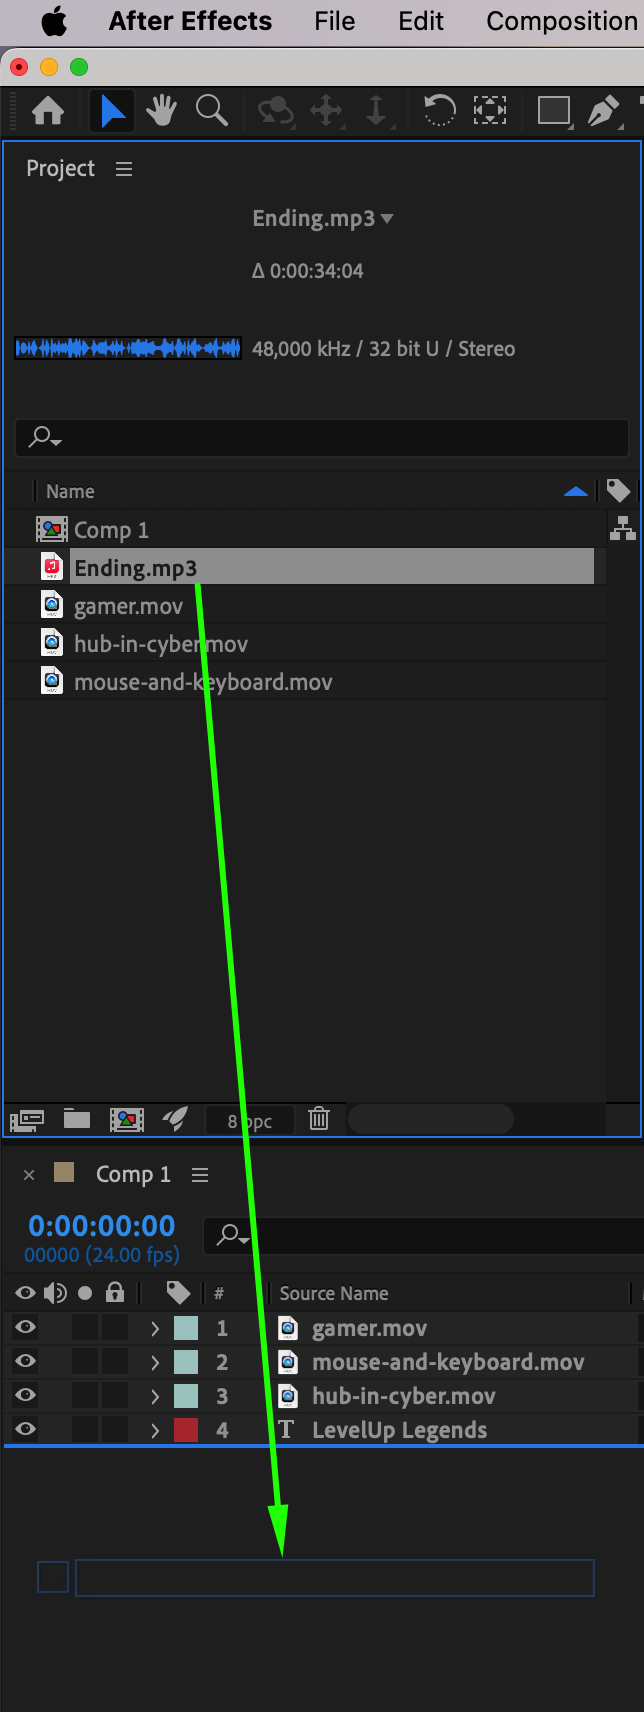
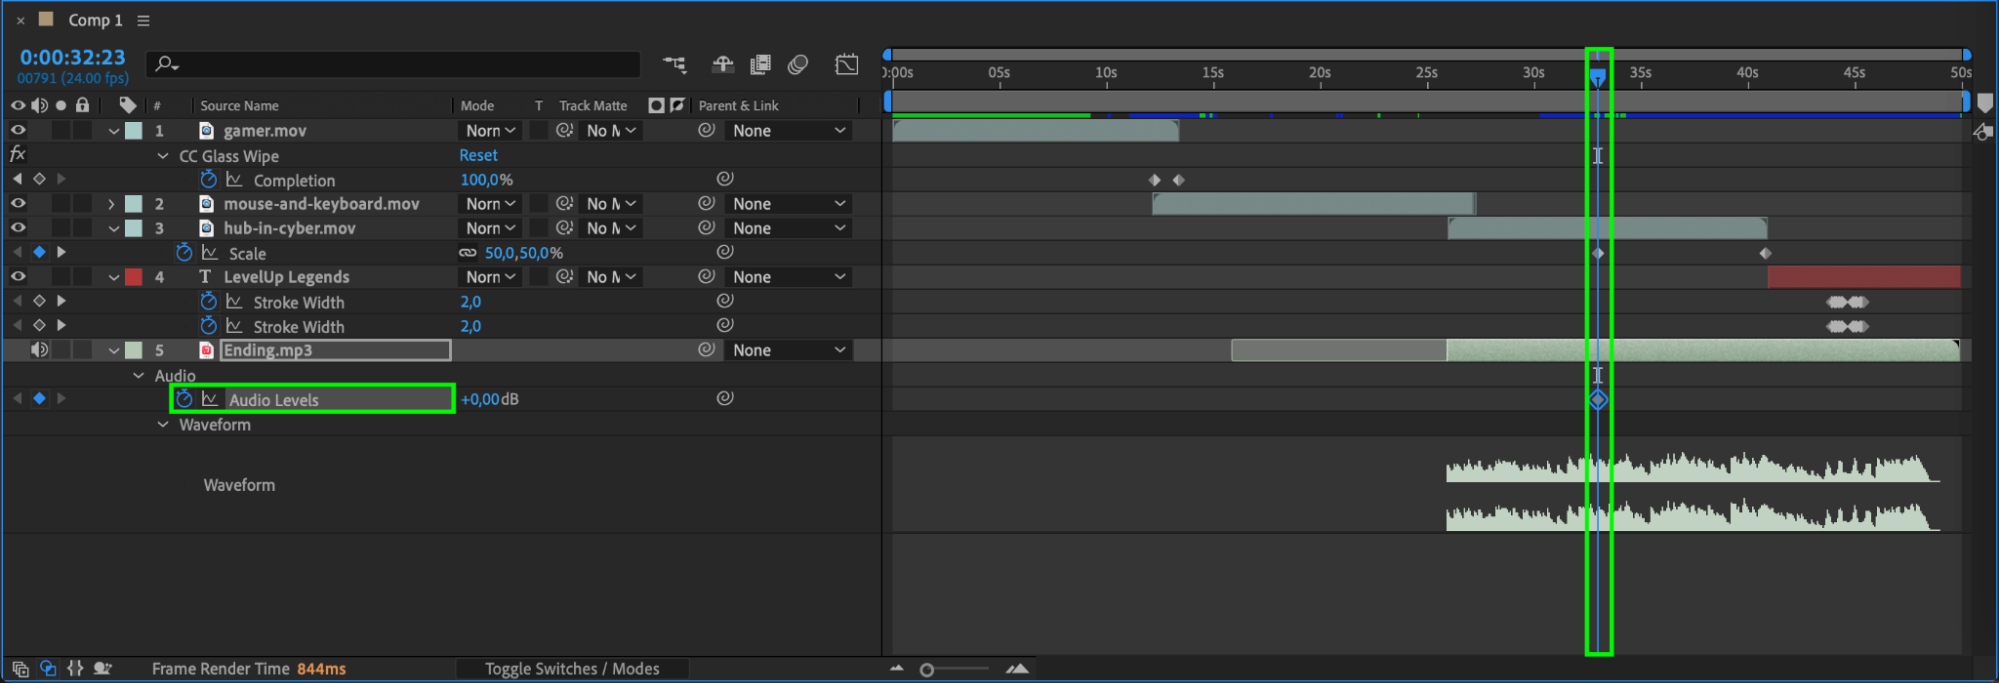
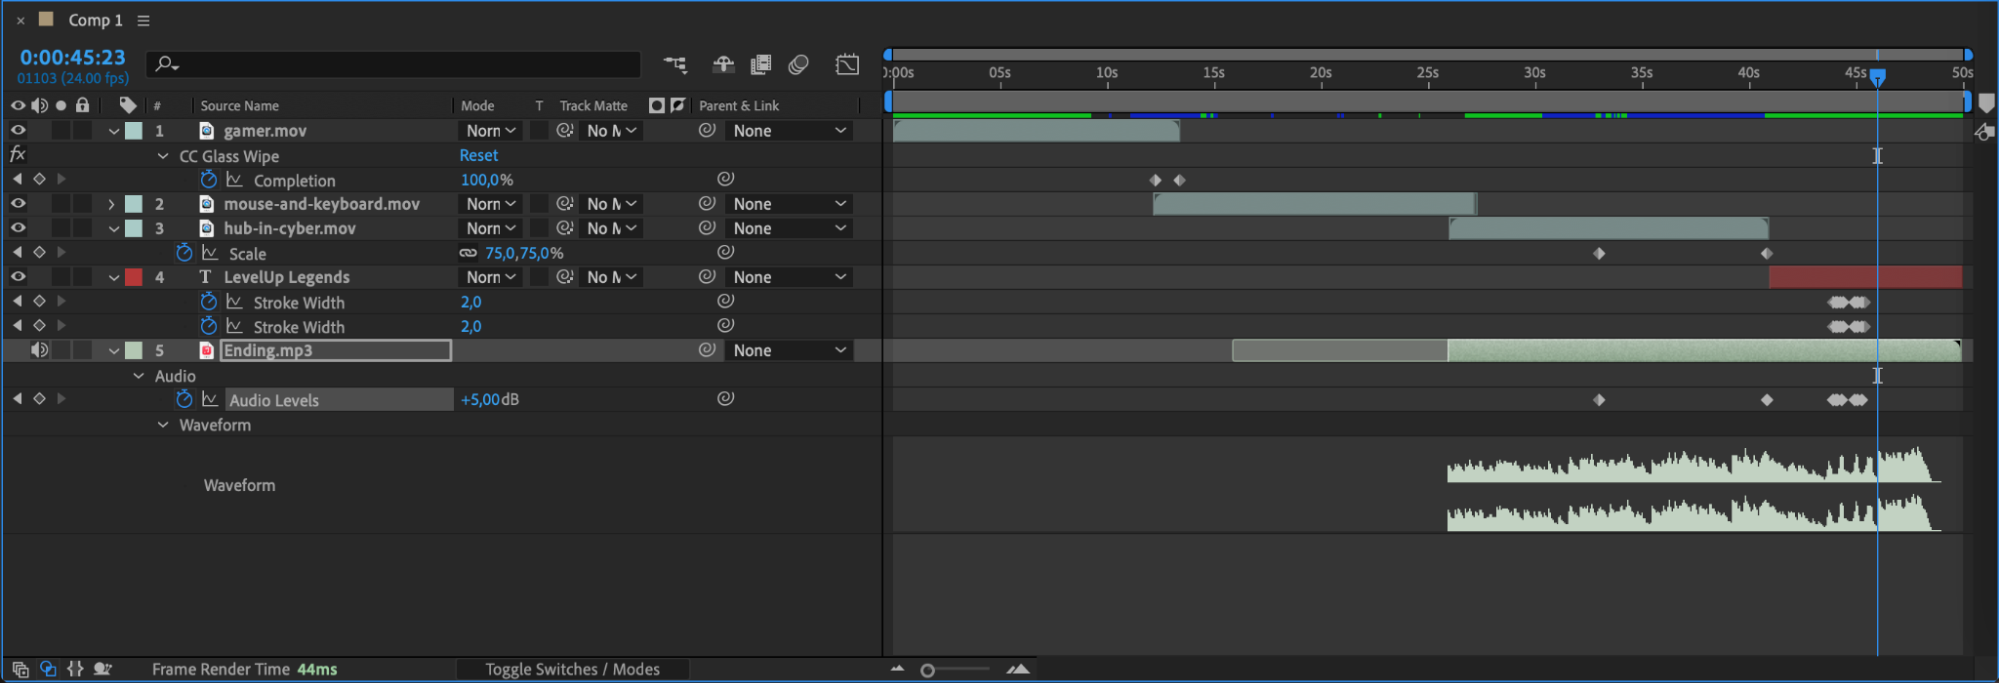
Sound design is crucial for creating an engaging intro. Import background music, sound effects, or voiceovers by dragging them onto the timeline. Adjust the audio levels by pressing “L” to control volume levels using keyframes. For a more immersive effect, sync your audio elements with key moments in the visuals.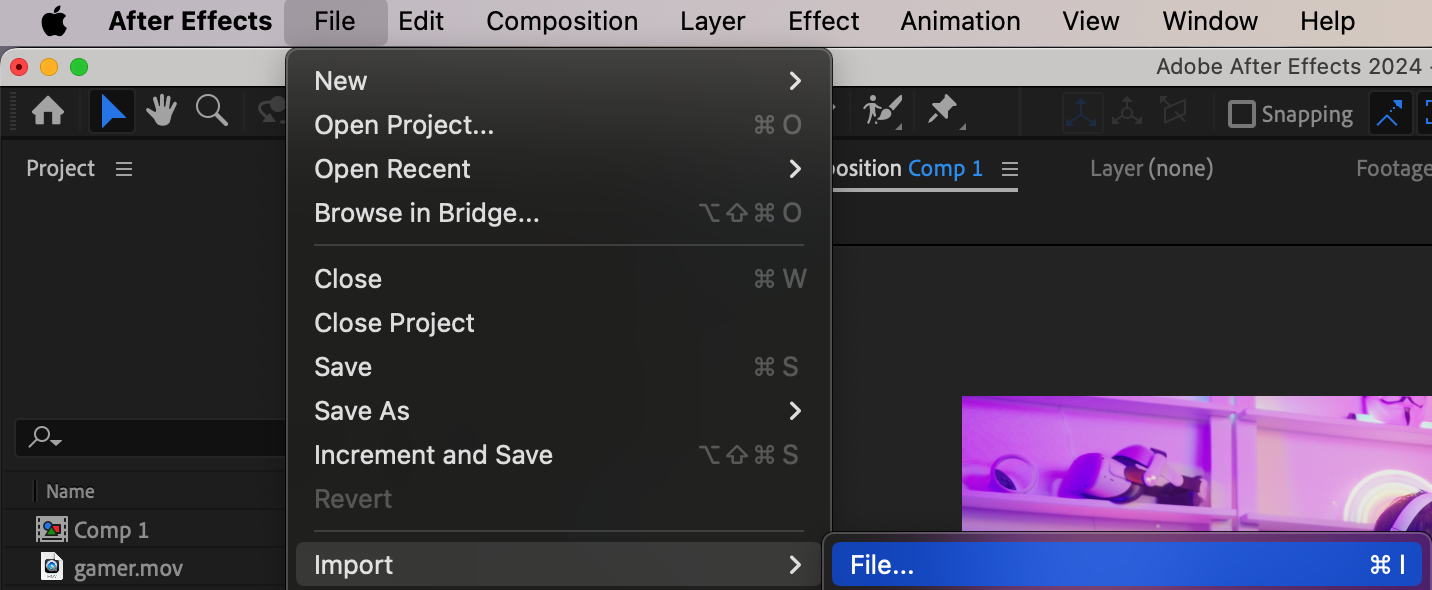
Get 10% off when you subscribe to our newsletter

Step 9: Preview Your Work
Before exporting, always preview your intro to check for smooth transitions, synced audio, and any adjustments you may need to make. Press Spacebar to play your composition in real-time and make sure everything is perfectly timed.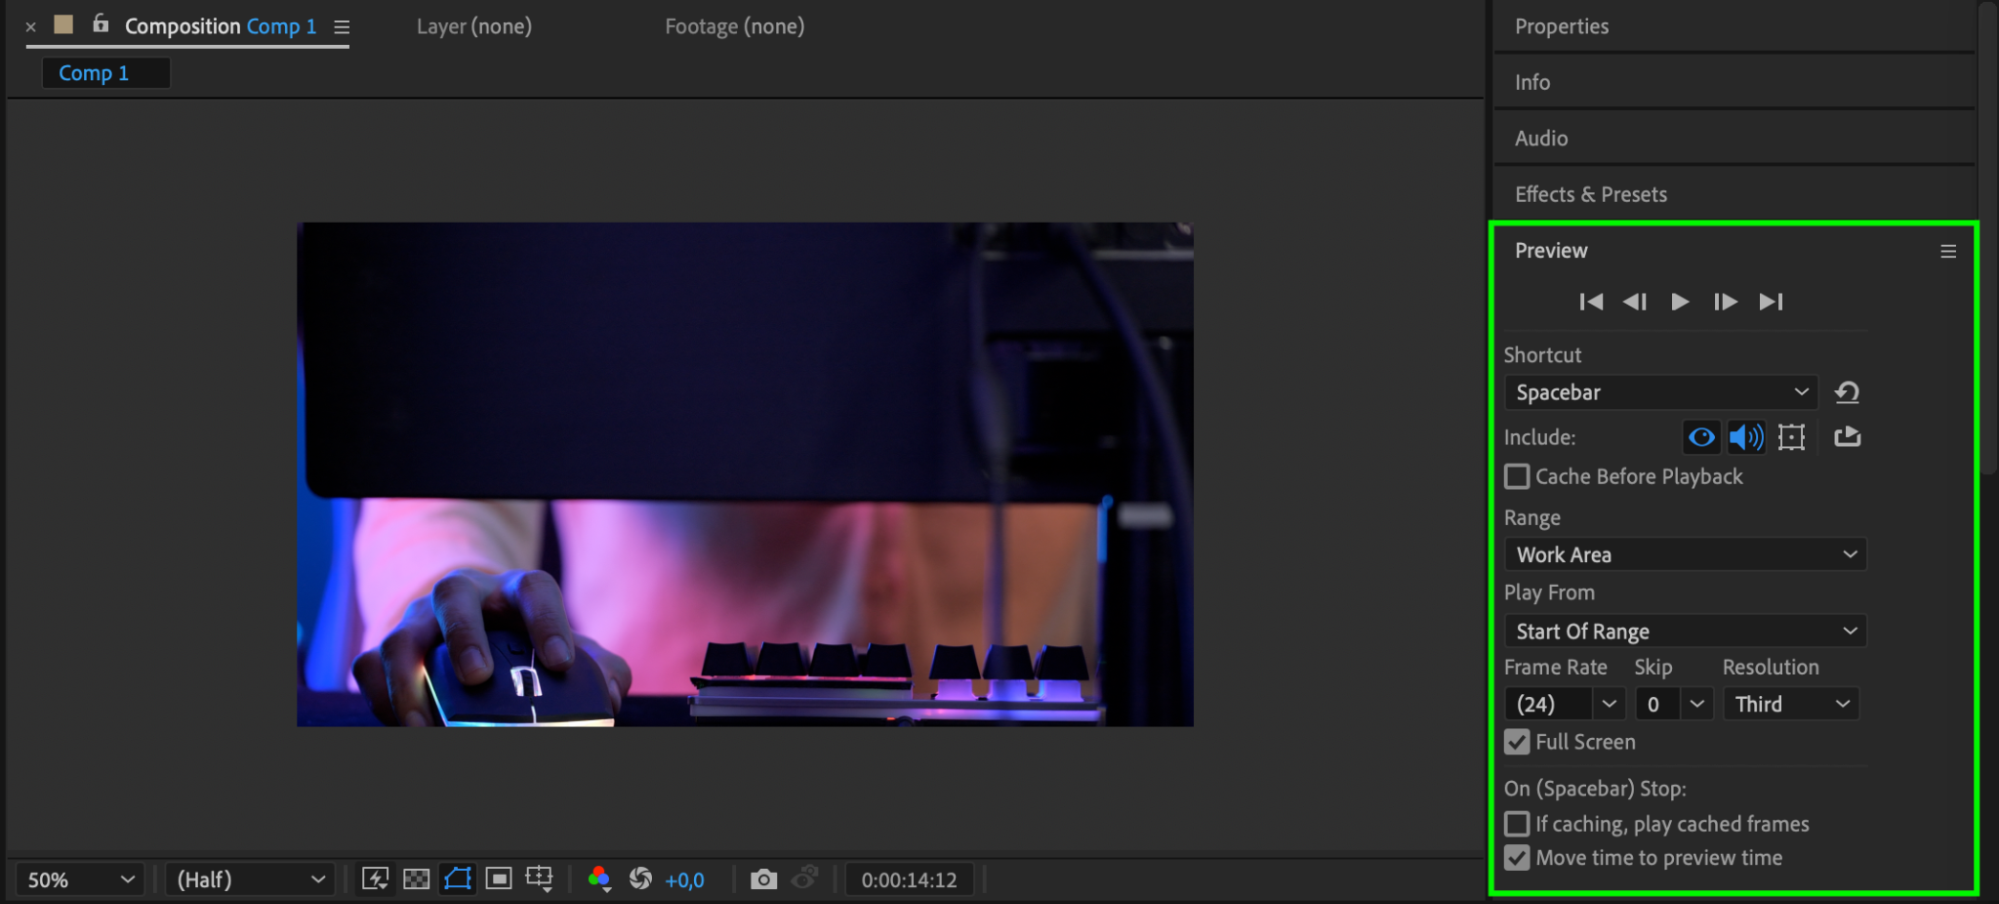
Step 10: Render and Export Your Intro
Once you’re satisfied with your intro, it’s time to export. Go to Composition > Add to Render Queue. Choose the desired output settings for your final video (such as format and quality), and render your project. You can also export directly as an MP4 for easy uploading to YouTube or other platforms.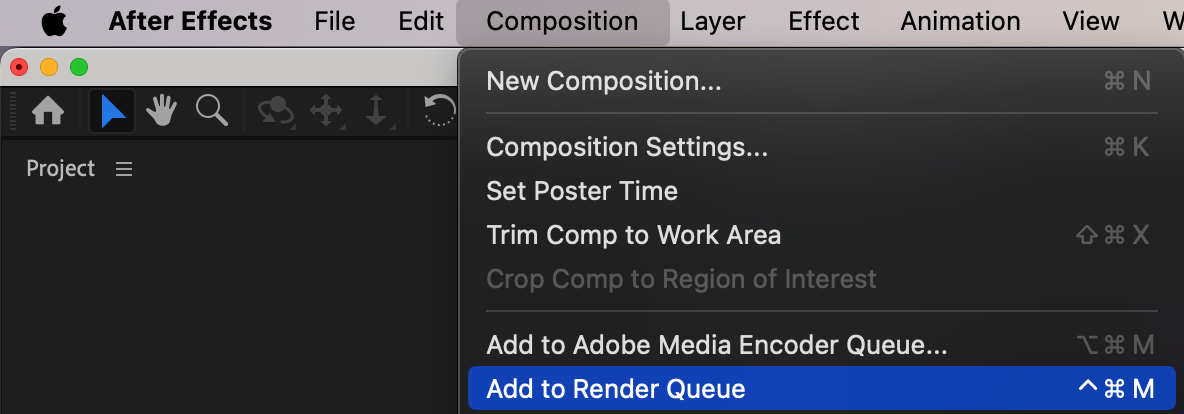

Get 10% off when you subscribe to our newsletter

Conclusion
With After Effects, the creative possibilities are endless. By following these steps, you’ll be able to create a professional-looking gaming intro that will capture your audience’s attention from the start. Unleash your creativity, experiment with different effects, and take your gaming videos to the next level!

