Step-by-Step Guide to Creating a Shining Logo Effect in After Effects
Introduction to Adding a Shine Effect to a Logo in After Effects
Adding a shine effect to your logo in After Effects can make it look professional and eye-catching. This tutorial will guide you through each step to create a dynamic shining effect, helping your logo stand out in animations, intros, or promotional videos.
Get 10% off when you subscribe to our newsletter

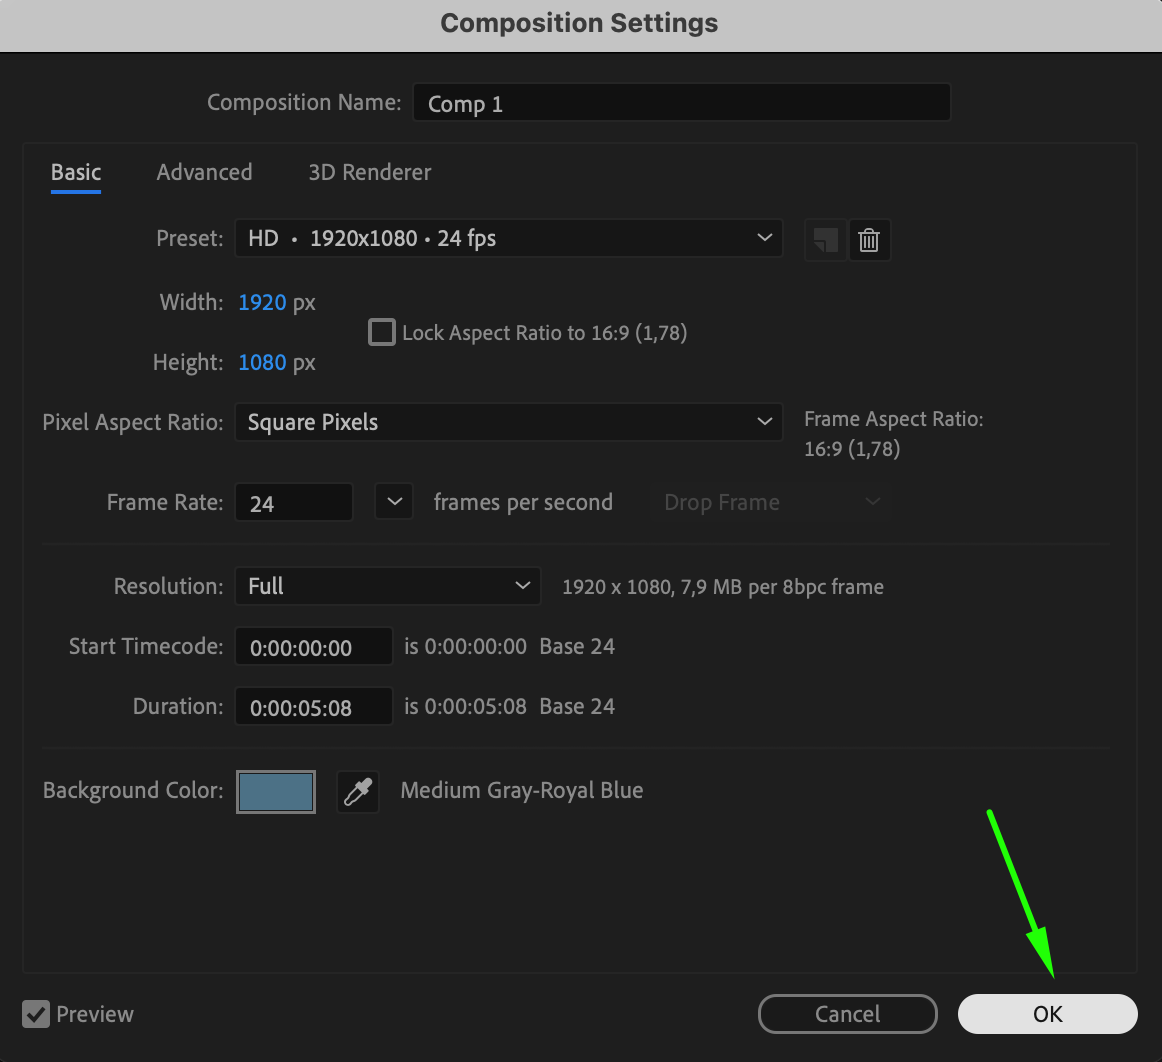
Step 1: Create a New Composition
Open After Effects and start by creating a new composition. Go to Composition > New Composition and set the desired resolution, frame rate, and duration. Make sure the composition settings match your project’s specifications for a high-quality result.

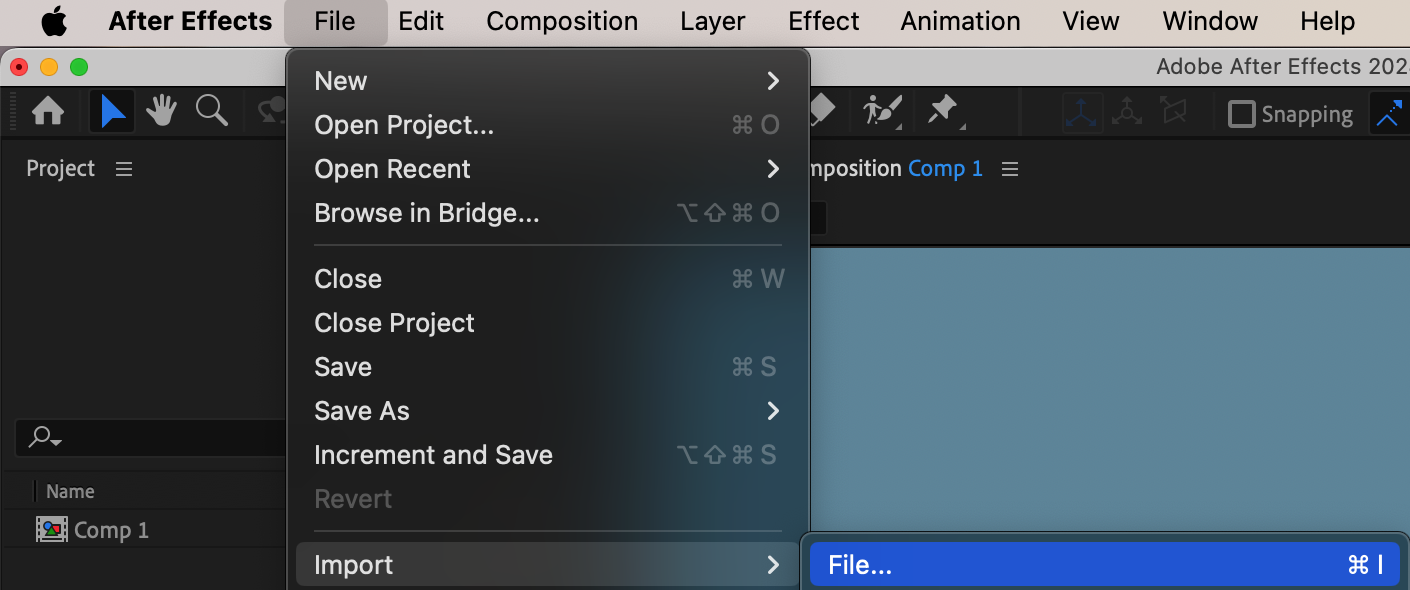
 Step 2: Import Your Logo
To bring your logo into After Effects, go to File > Import > File. Locate your logo file, select it, and click Open. Drag the imported logo onto the Timeline panel to add it to your composition.
 Step 3: Adjust the Logo’s Size and Position
Once the logo is on the timeline, adjust its Scale and Position properties as needed. Select the logo layer and press “S” to bring up the Scale property, adjusting it to fit the composition. Press “P” for Position and move the logo to the desired location.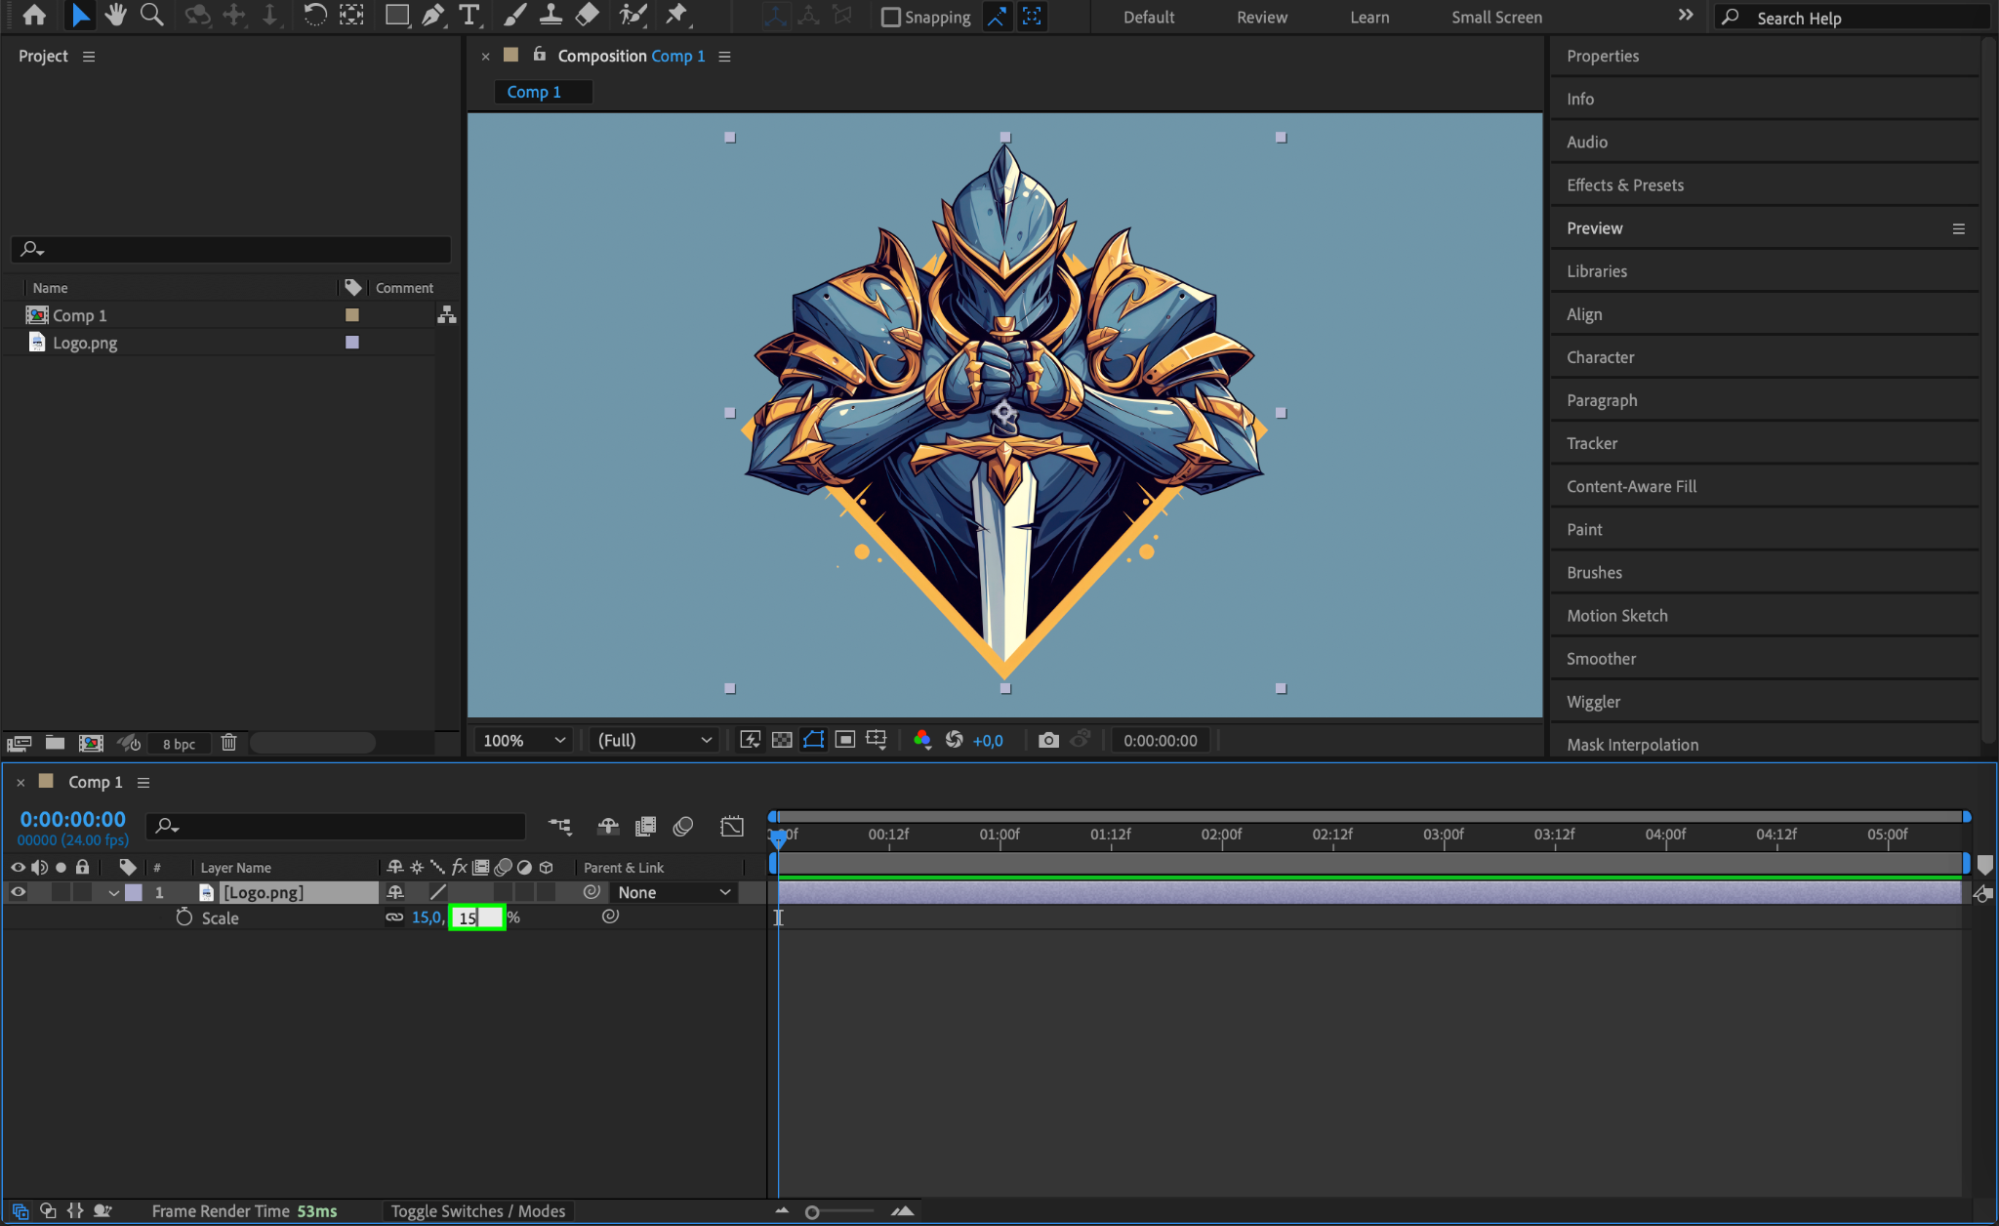 Step 4: Add the Light Sweep Effect
Go to the Effects & Presets panel and search for CC Light Sweep. Drag the CC Light Sweep effect onto your logo layer. This effect will create a realistic shine across your logo.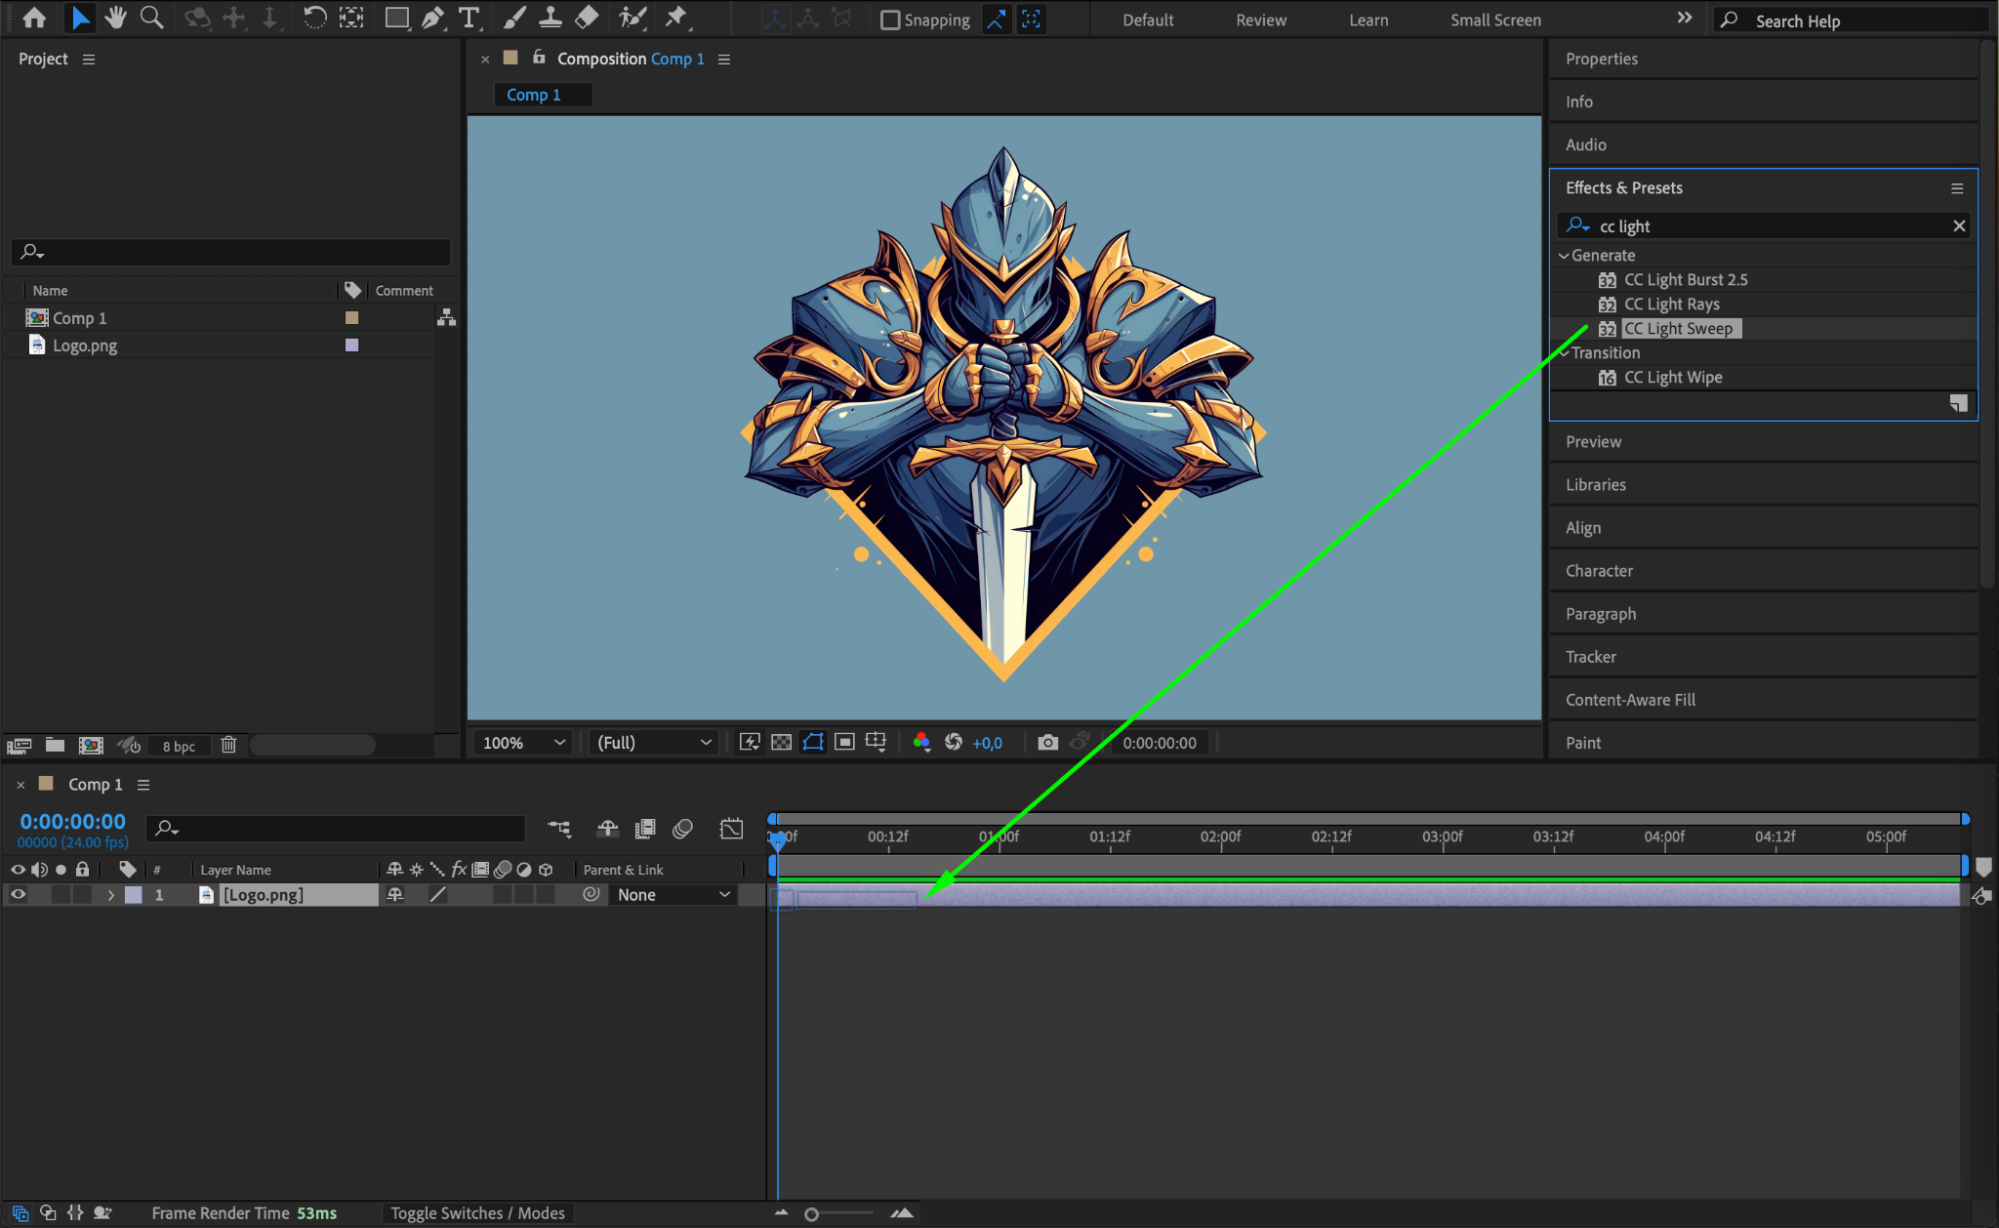 Step 5: Customize the Light Sweep Appearance
In the Effect Controls panel, fine-tune the look of the CC Light Sweep. Adjust settings like Width, Sweep Intensity, and Edge Intensity to achieve the desired shine appearance. Experiment with these parameters to create a soft or intense shine that suits your style.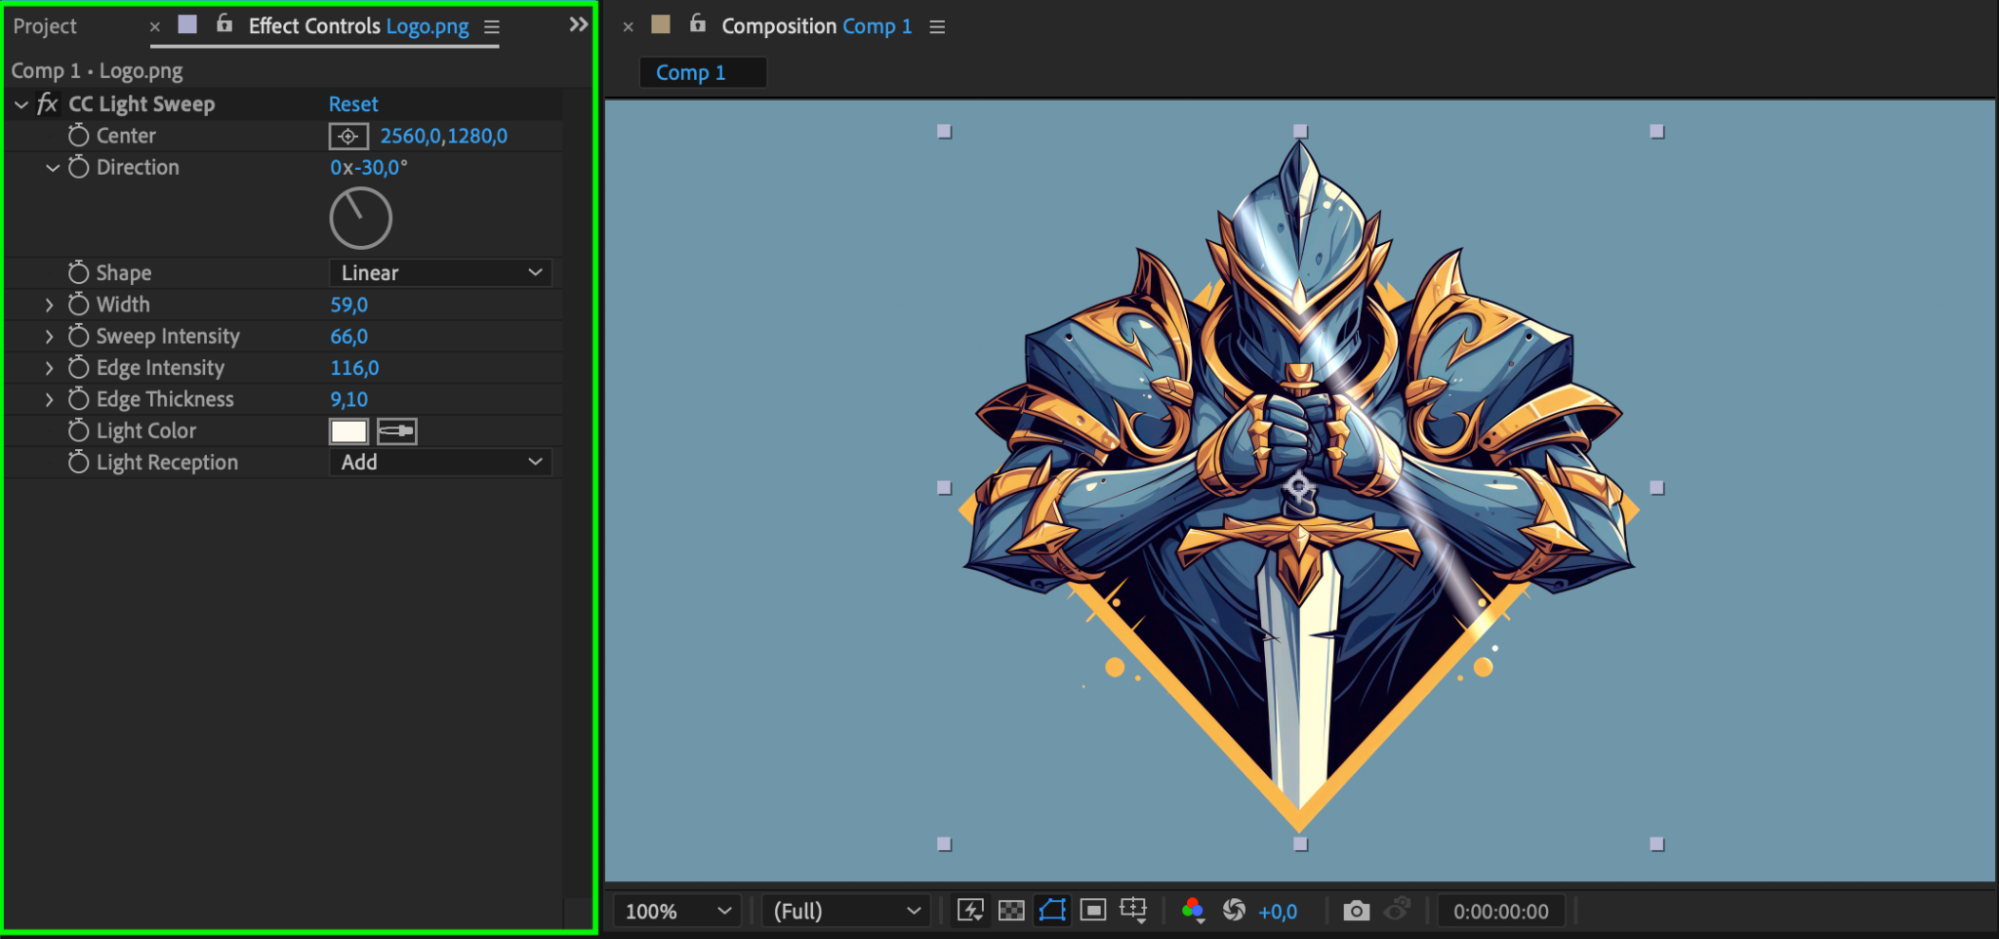
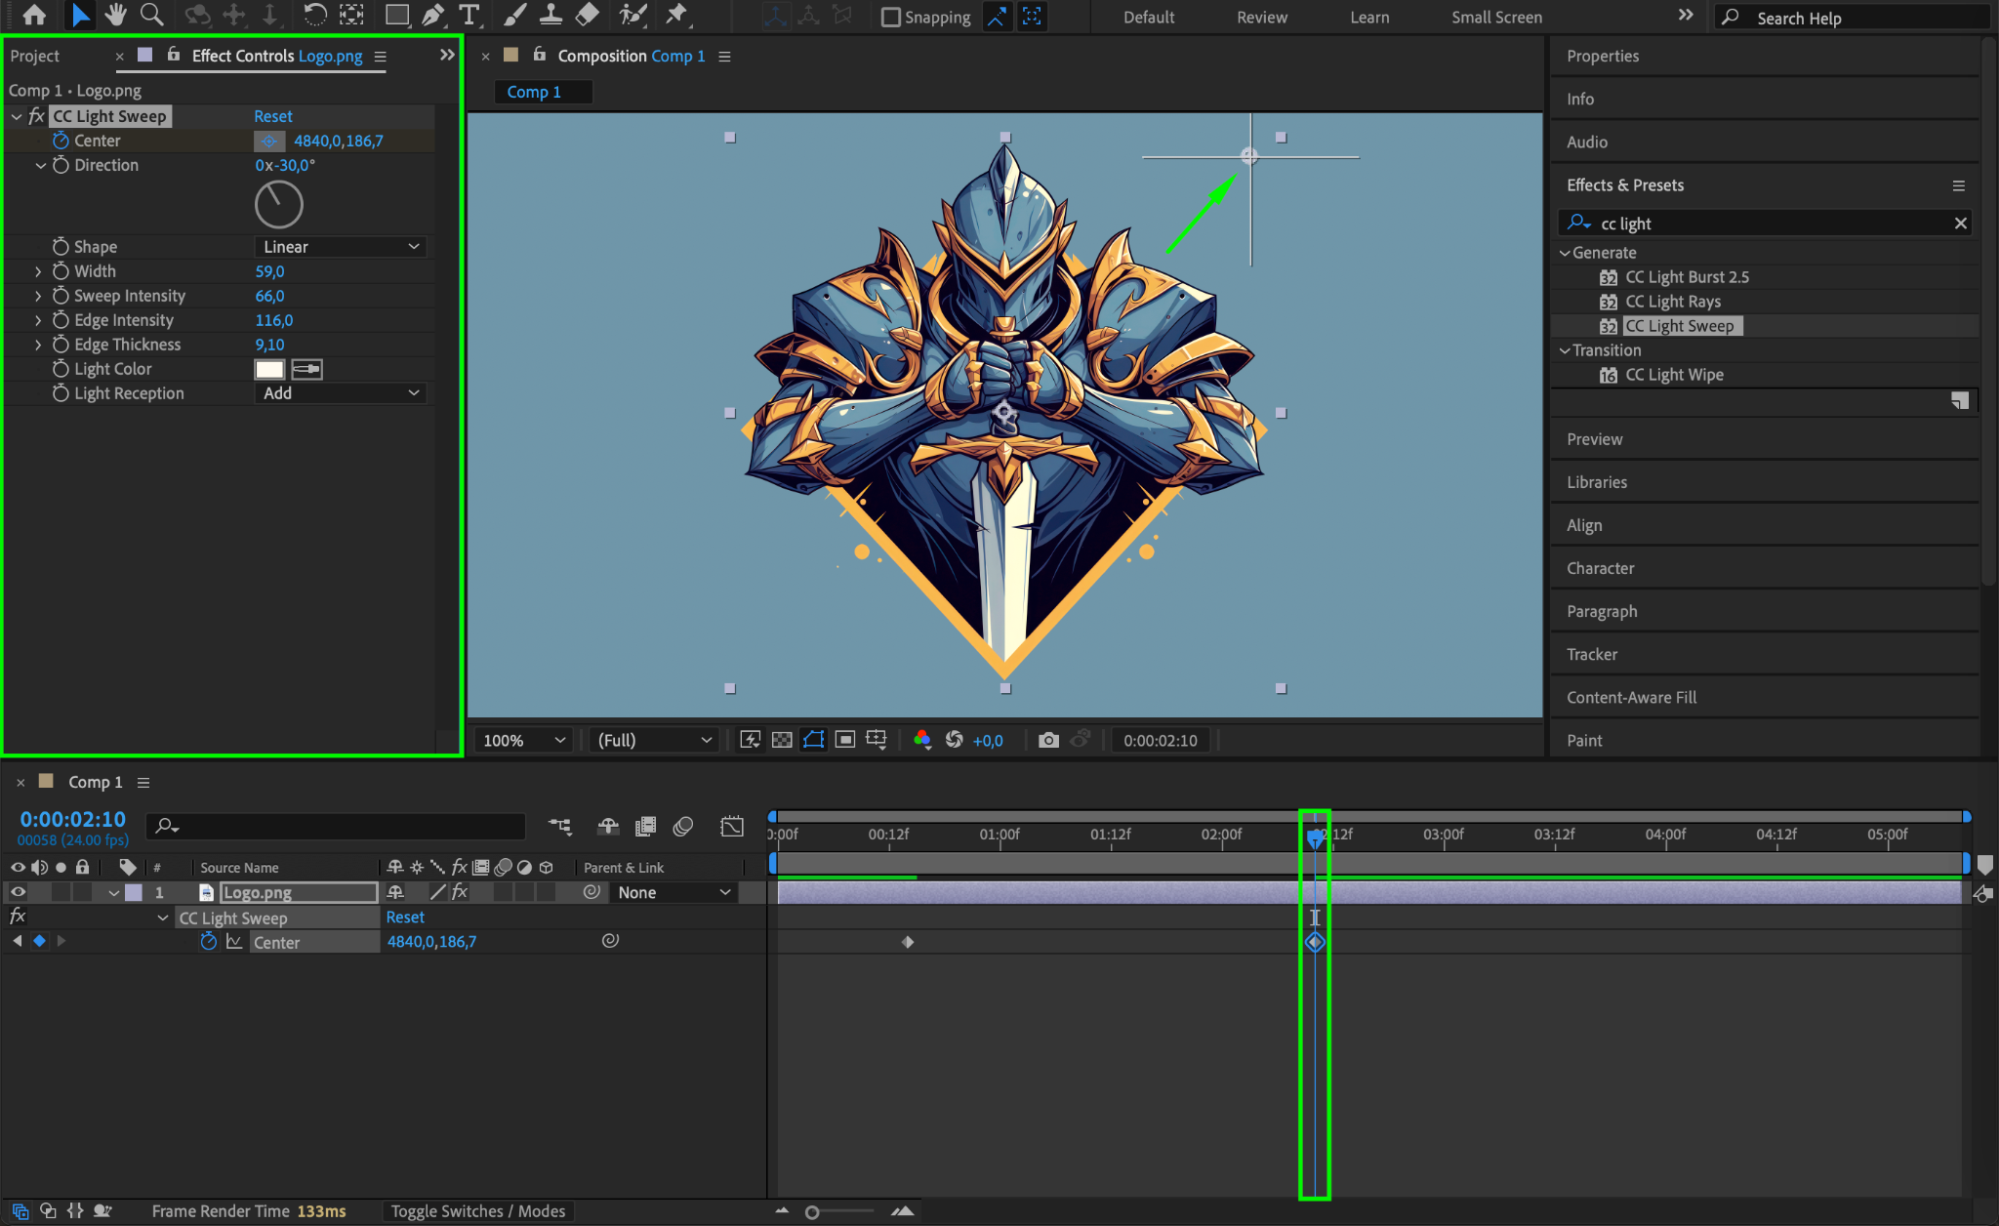
Step 6: Animate the Sweep Movement
To animate the shine, use the Center property within the Light Sweep effect. Position the Current Time Indicator (CTI) at the start of the animation. Adjust the Center to move the light sweep off the logo’s visible area (for example, starting from the bottom left). Then, move the CTI forward in the timeline and reposition the Center to make the sweep pass over the logo, creating the animated shine.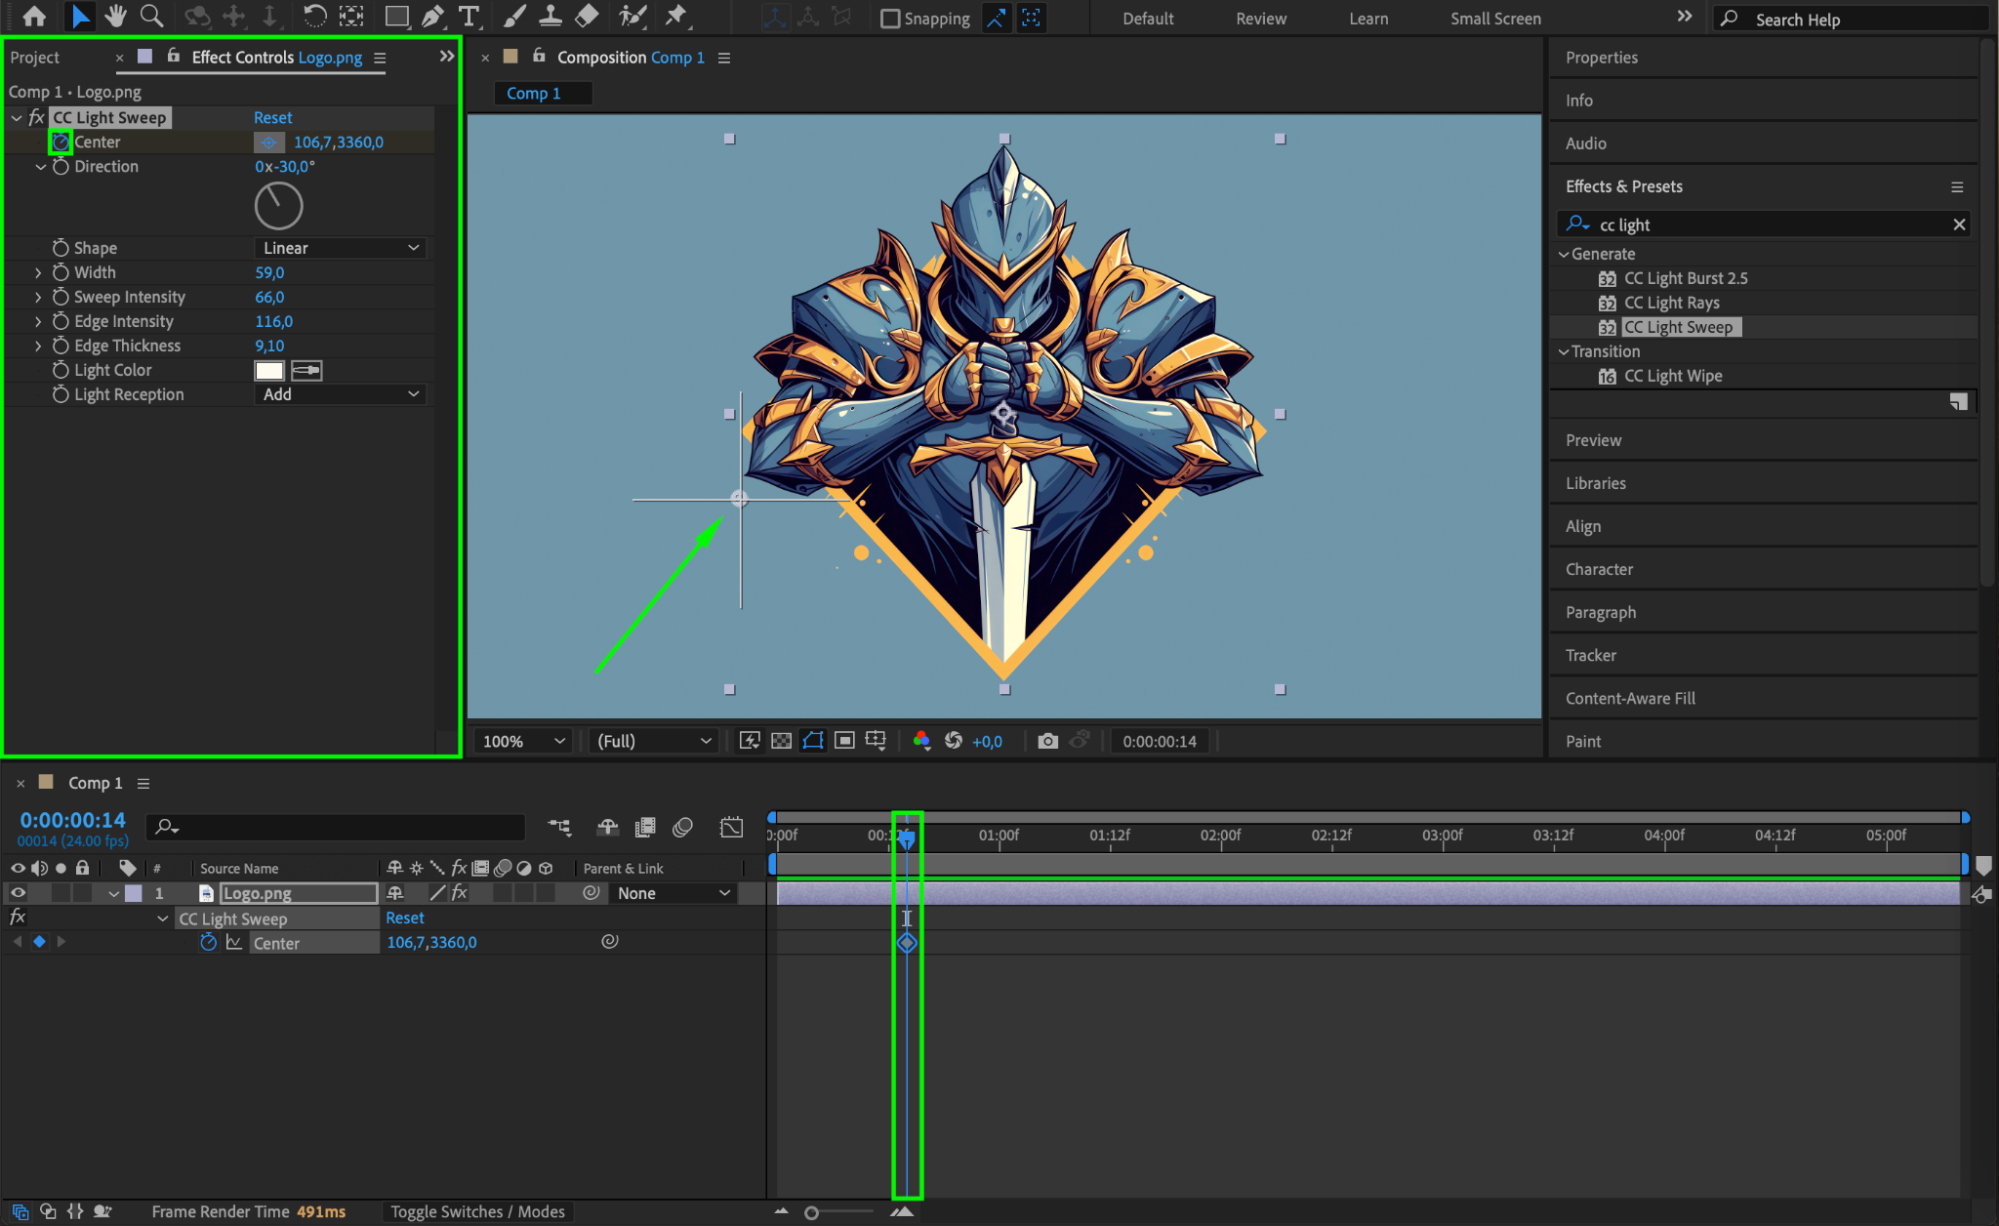
 Step 7: Add Easy Ease for Smooth Movement
Select the keyframes for the Center property, right-click, and choose Keyframe Assistant > Easy Ease. This adds a smoother, more natural motion to the shine effect as it moves across the logo, enhancing the animation’s visual appeal.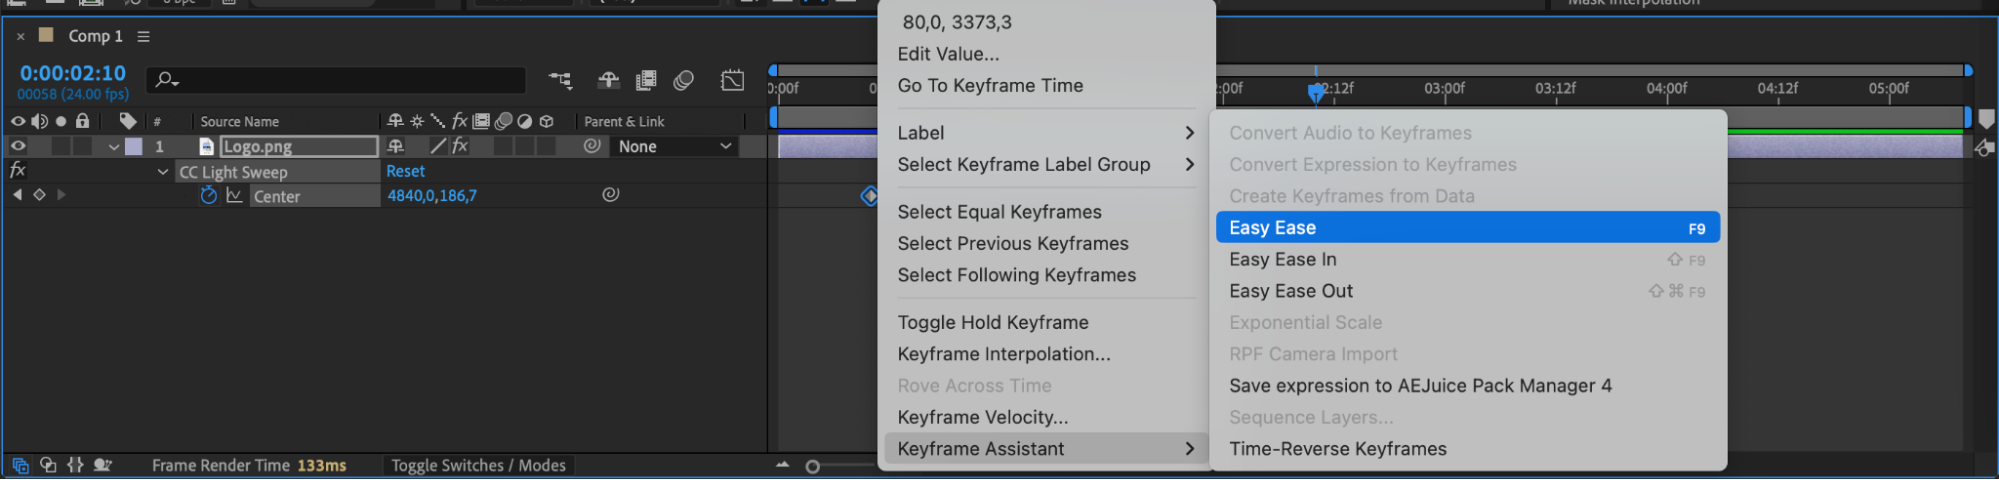 Step 8: Preview the Animation
Press the Spacebar to preview the animation. Watch to ensure the shine effect flows smoothly across your logo and makes it stand out. Make any final adjustments to the keyframes or sweep settings as needed.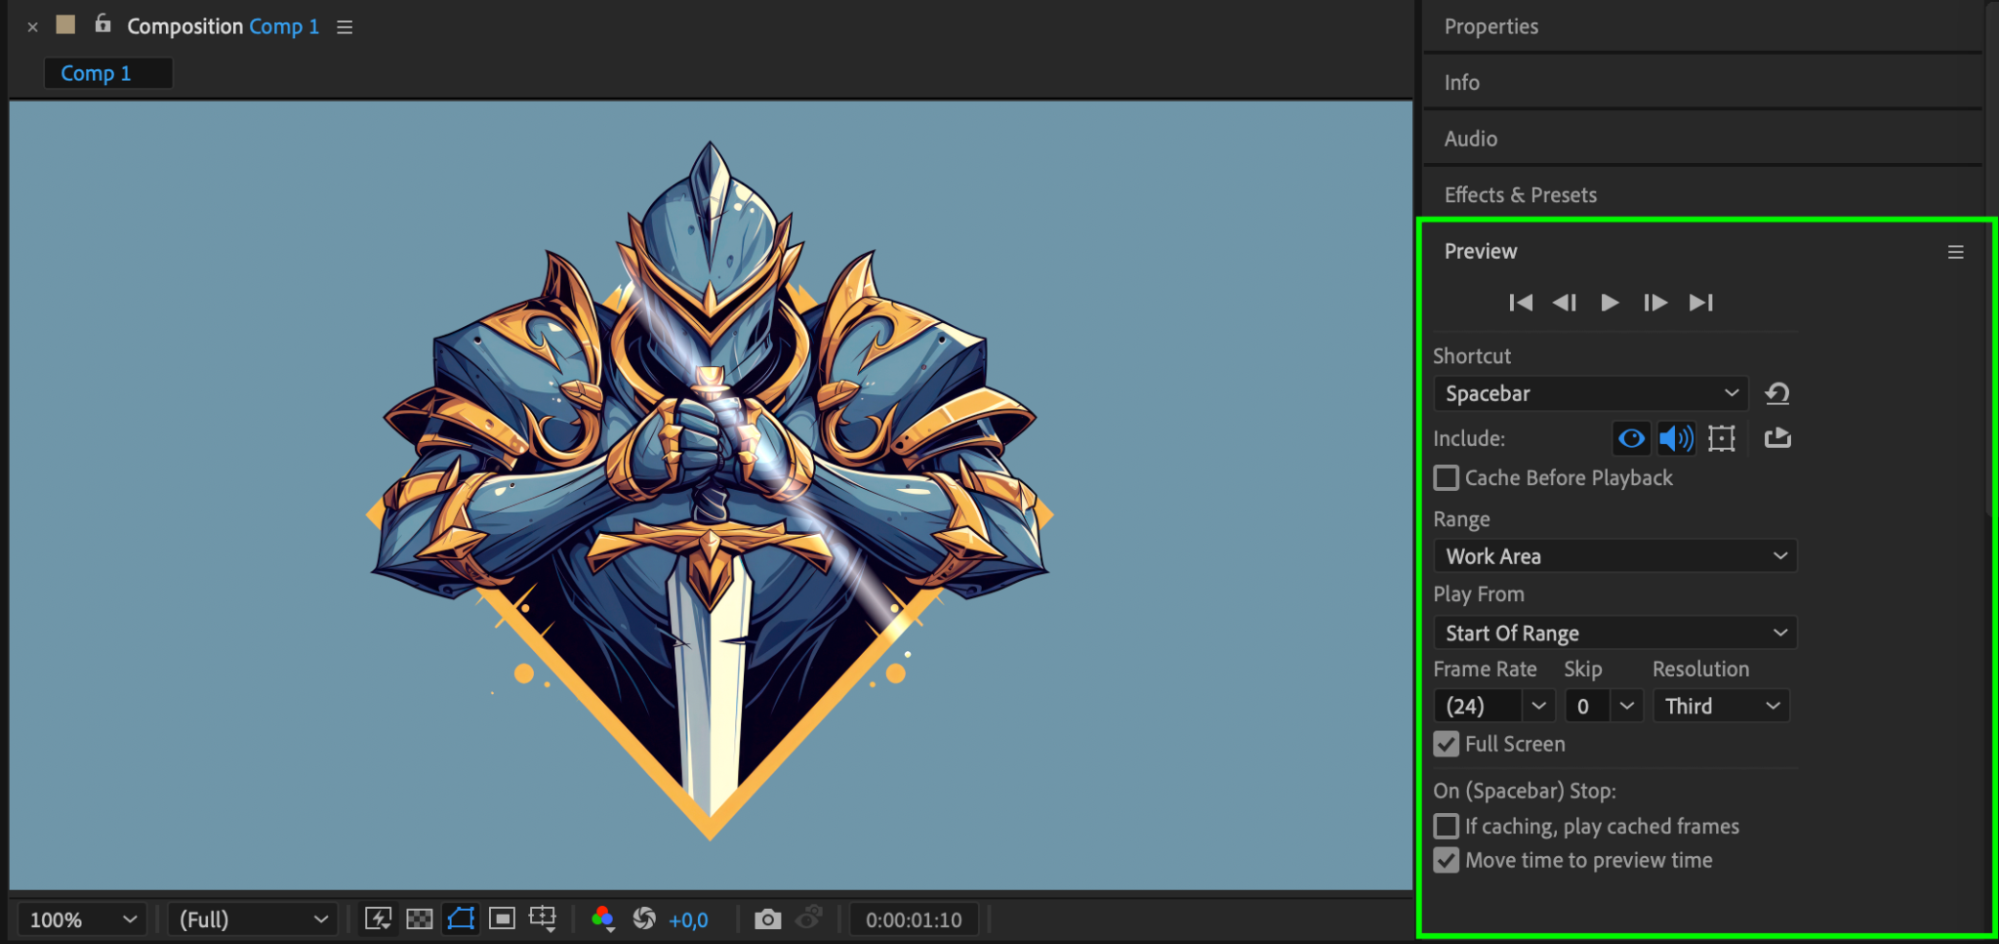 Step 9: Render the Final Video
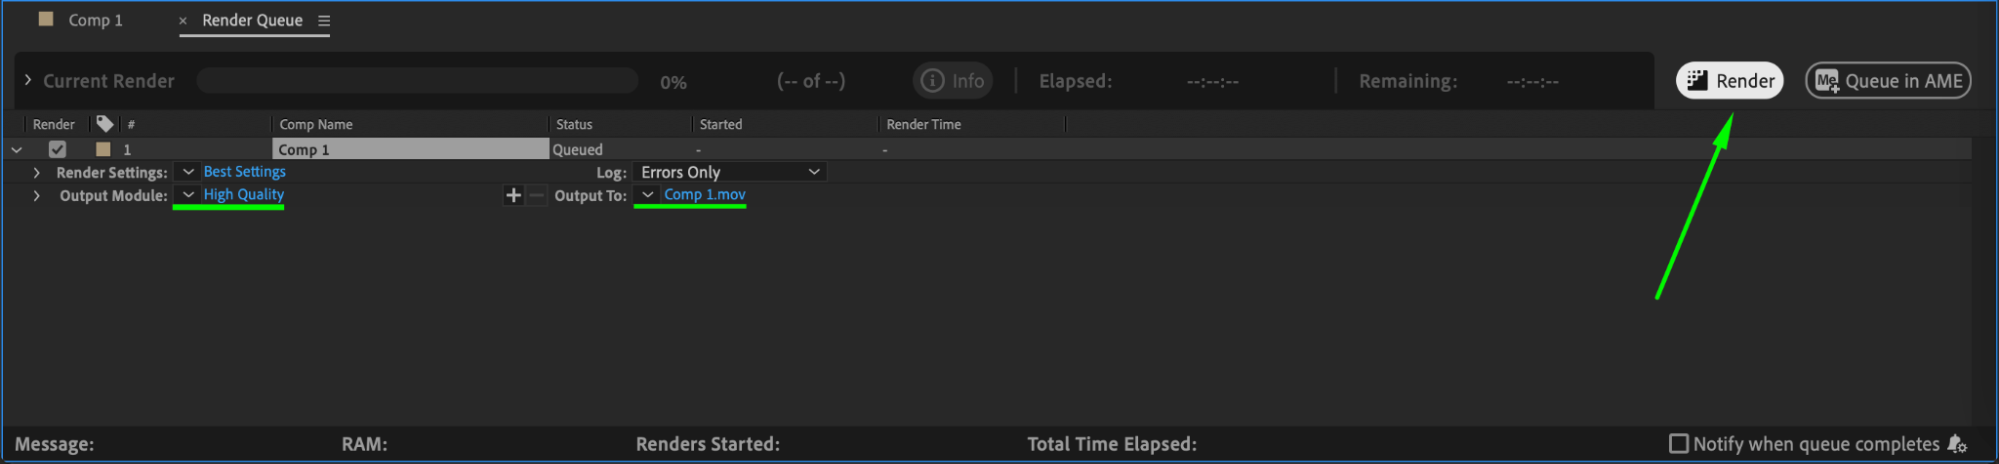
When satisfied with the animation, go to Composition > Add to Render Queue. Adjust your render settings, choosing your desired format and resolution. Click Render to export the final video with the shining logo effect.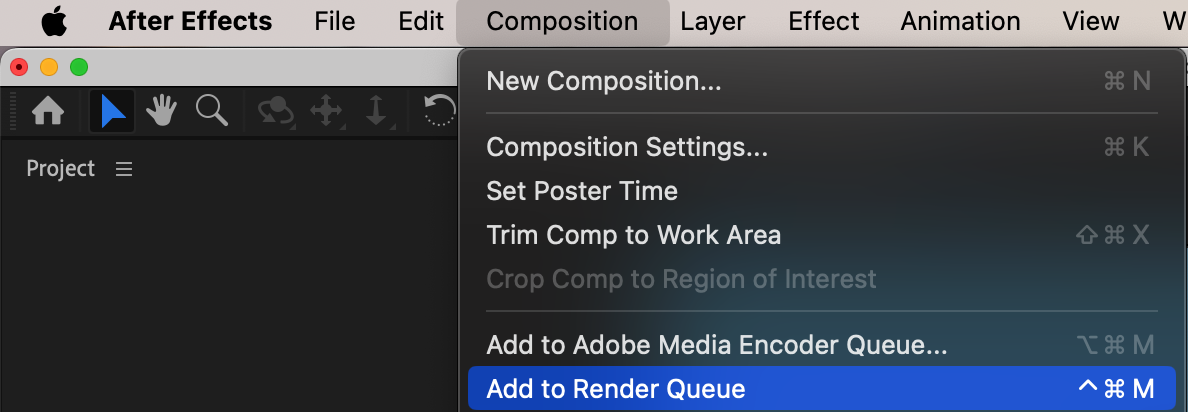
 Conclusion
Adding a shine effect to your logo in After Effects is a great way to enhance its appeal in any animation project. By following these steps, you can create a polished and professional effect that gives your logo an extra touch of visual excitement.
Our Bestsellers


