How to Create Masks in Adobe After Effects
Introduction
Creating masks in Adobe After Effects is a valuable skill that can take your video editing to new heights. By using masks, you can control and manipulate specific areas or elements within your composition, allowing for precise editing and stunning visual effects. Follow these detailed steps to easily create masks and enhance your video editing process.
Step 1: Select the Layer
To begin, select the layer on which you want to create a mask. This can be a video layer, an image layer, or any other element in your composition. Selecting the right layer is crucial as it determines the area you will be masking.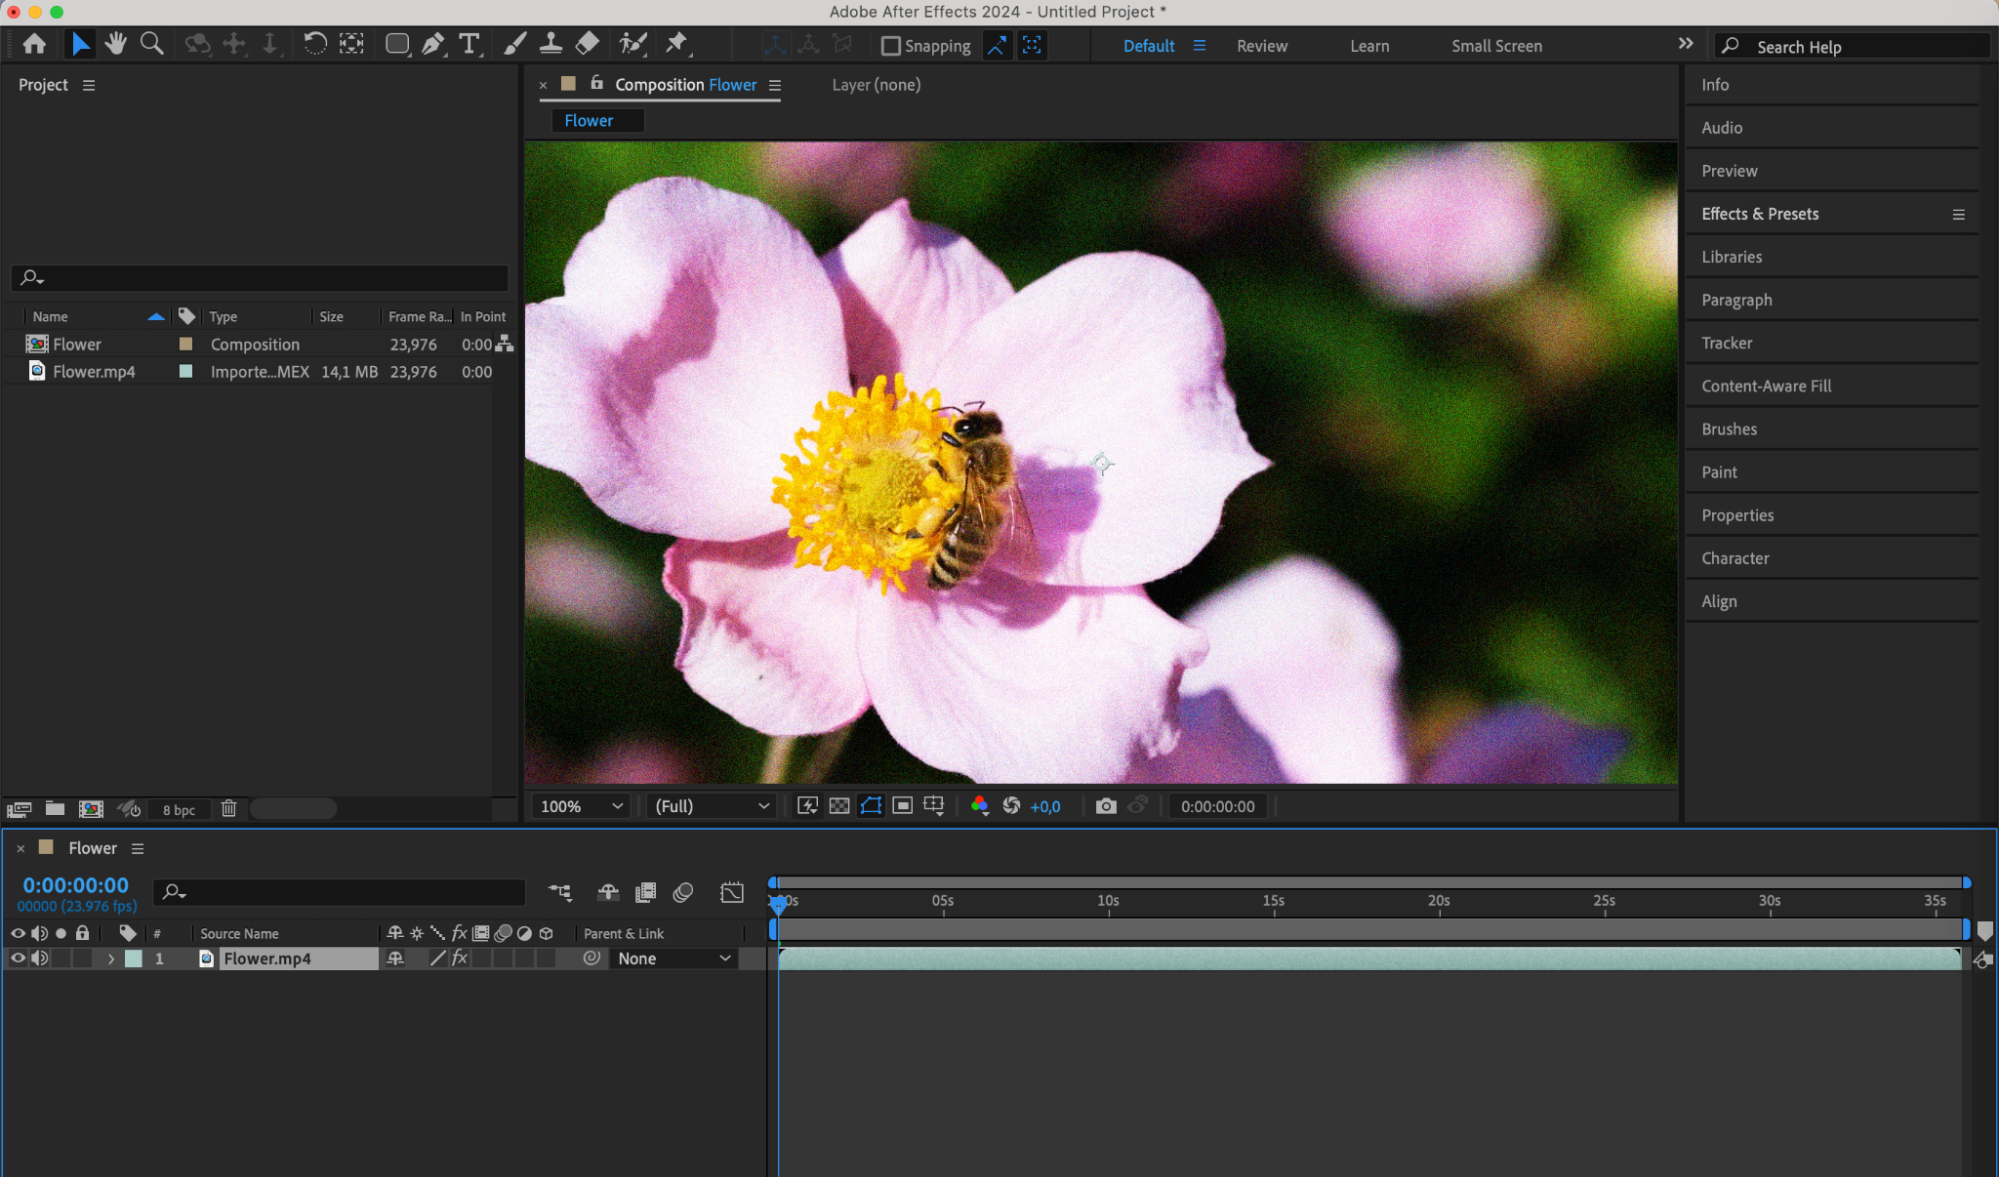 Step 2: Choose the Pen Tool
Get 10% off when you subscribe to our newsletter

Next, choose the Pen tool from the toolbar or press the “G” key on your keyboard. The Pen tool is used to draw the shape of your mask. This tool provides flexibility and precision, allowing you to create custom shapes for your mask. Step 3: Draw the Mask Shape
Click and drag the Pen tool to start drawing your mask shape. You can create straight lines by clicking once and dragging to the next point or curved lines by holding down the mouse button and dragging in different directions. Continue clicking and dragging until you have completed your mask shape. This step allows you to define the exact area you want to mask.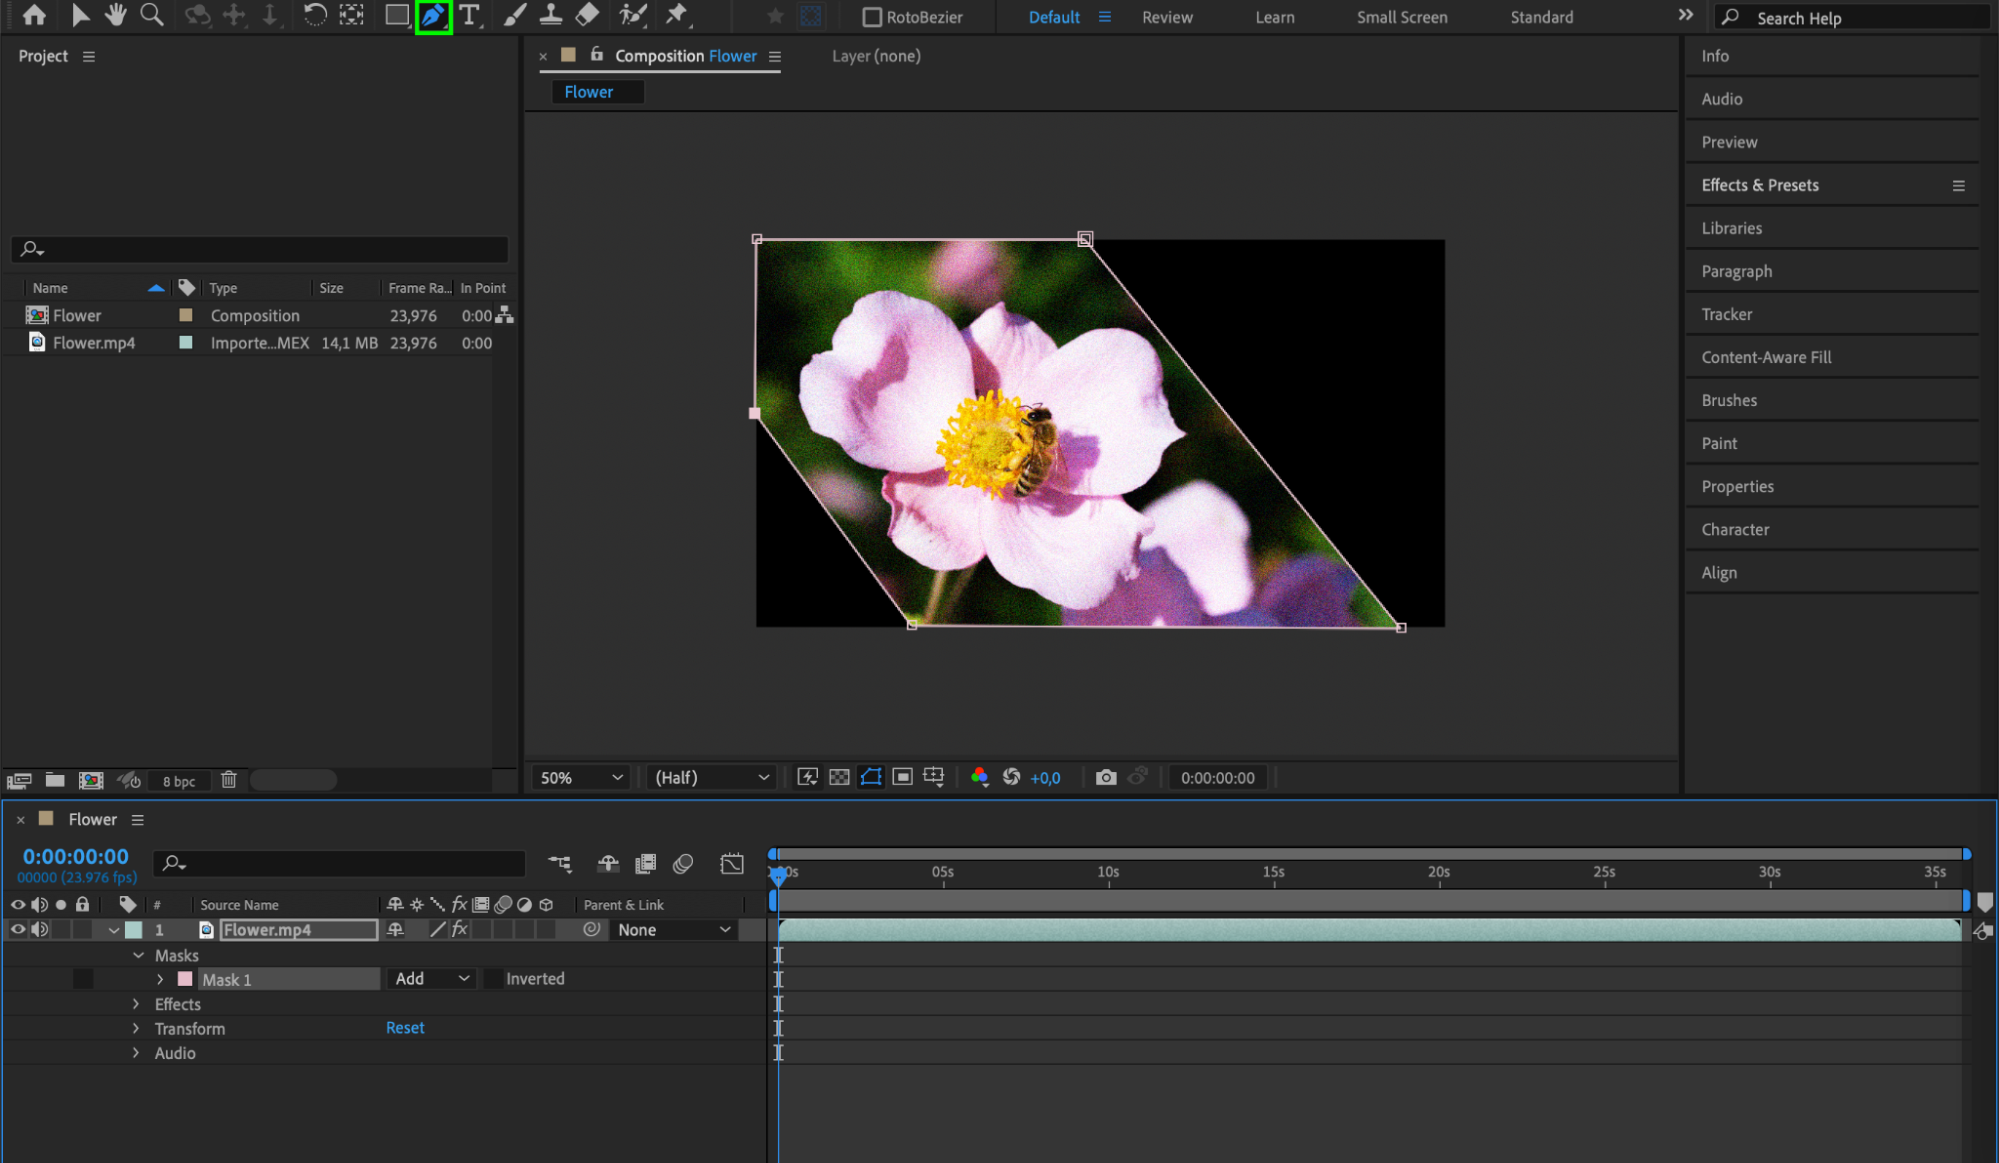
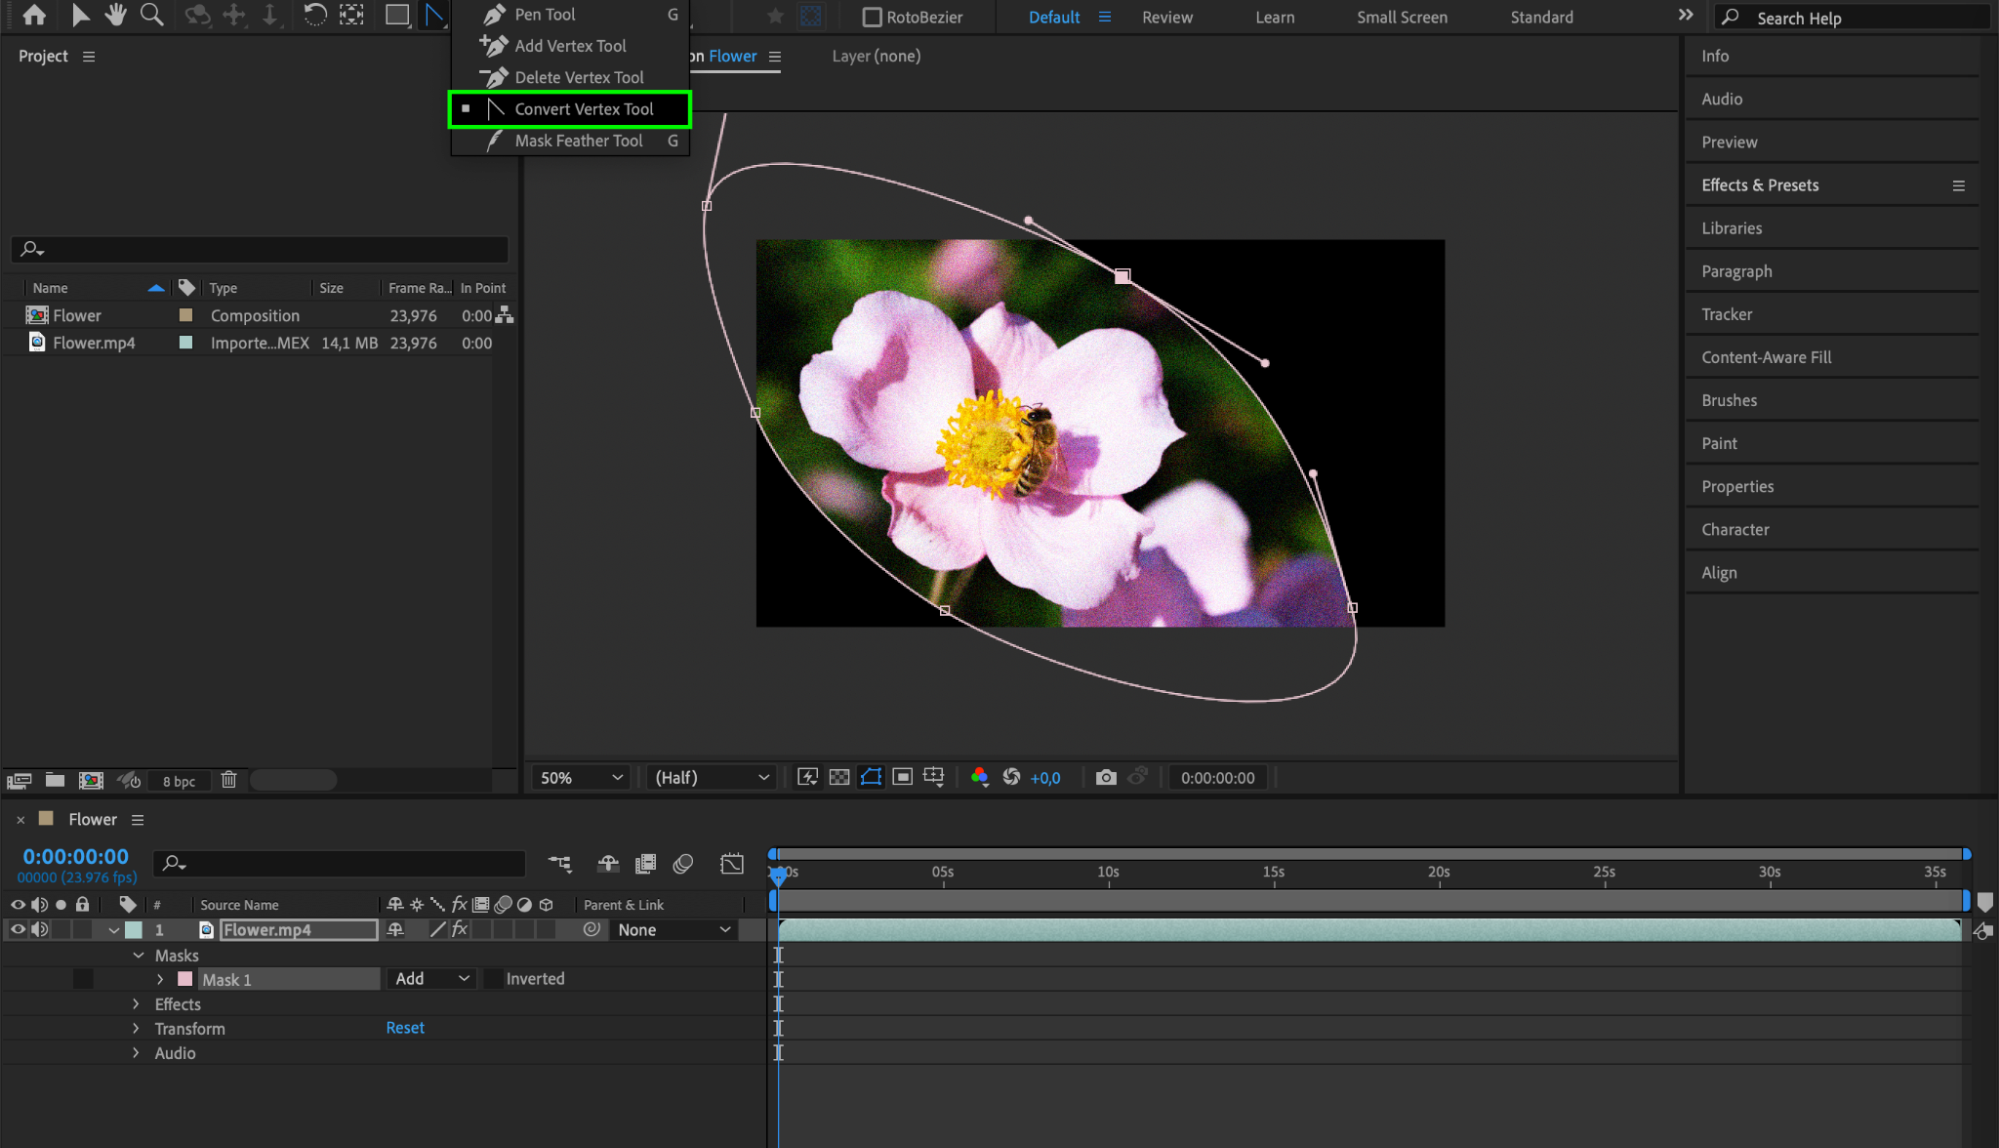 Step 4: Customize the Mask
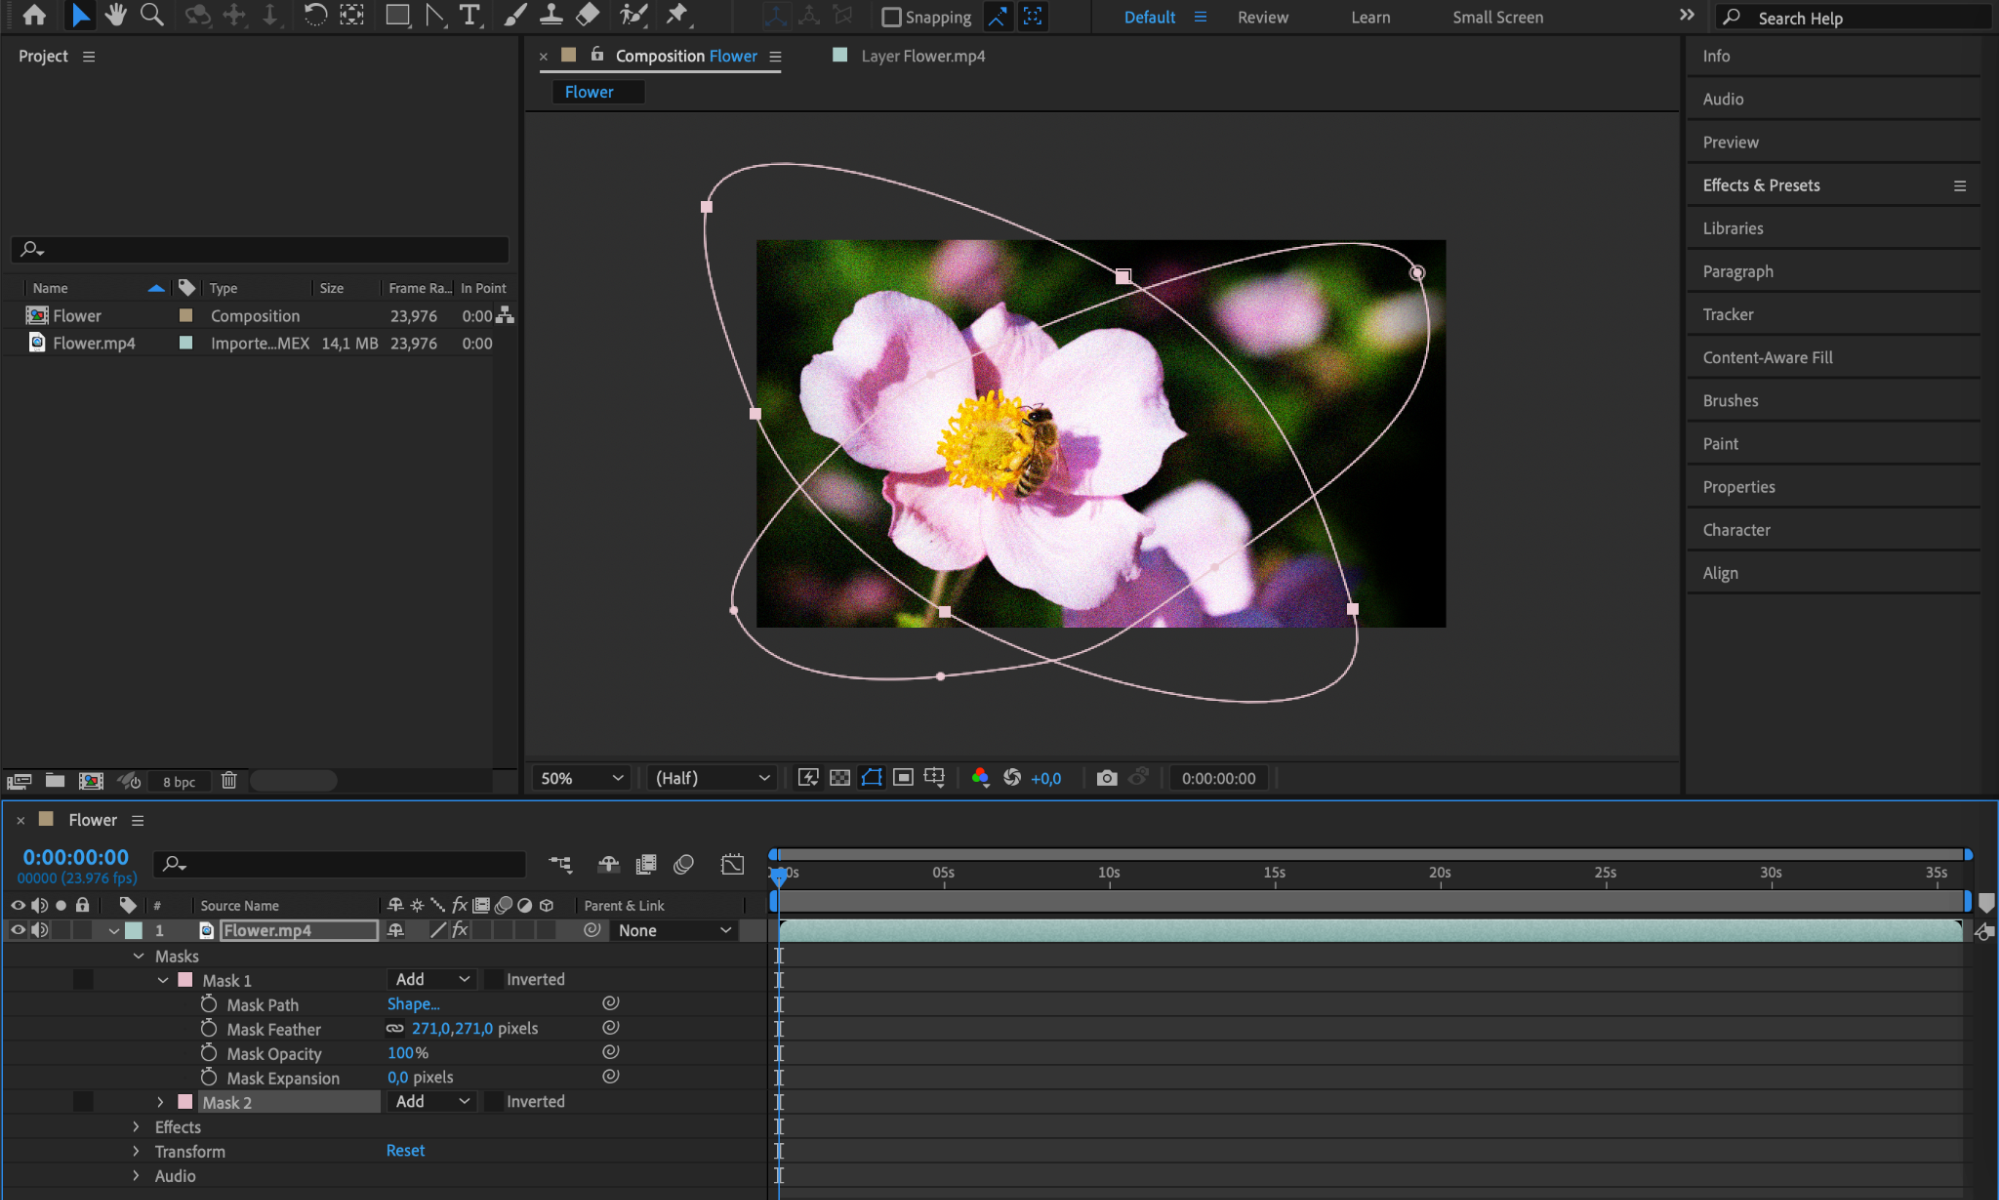
Customize your mask by adjusting feather, opacity, and expansion parameters. These options allow you to control the visibility and behavior of the masked area. Feathering softens the edges of your mask, opacity adjusts its transparency, and expansion changes its size. Fine-tuning these settings helps you achieve the desired effect.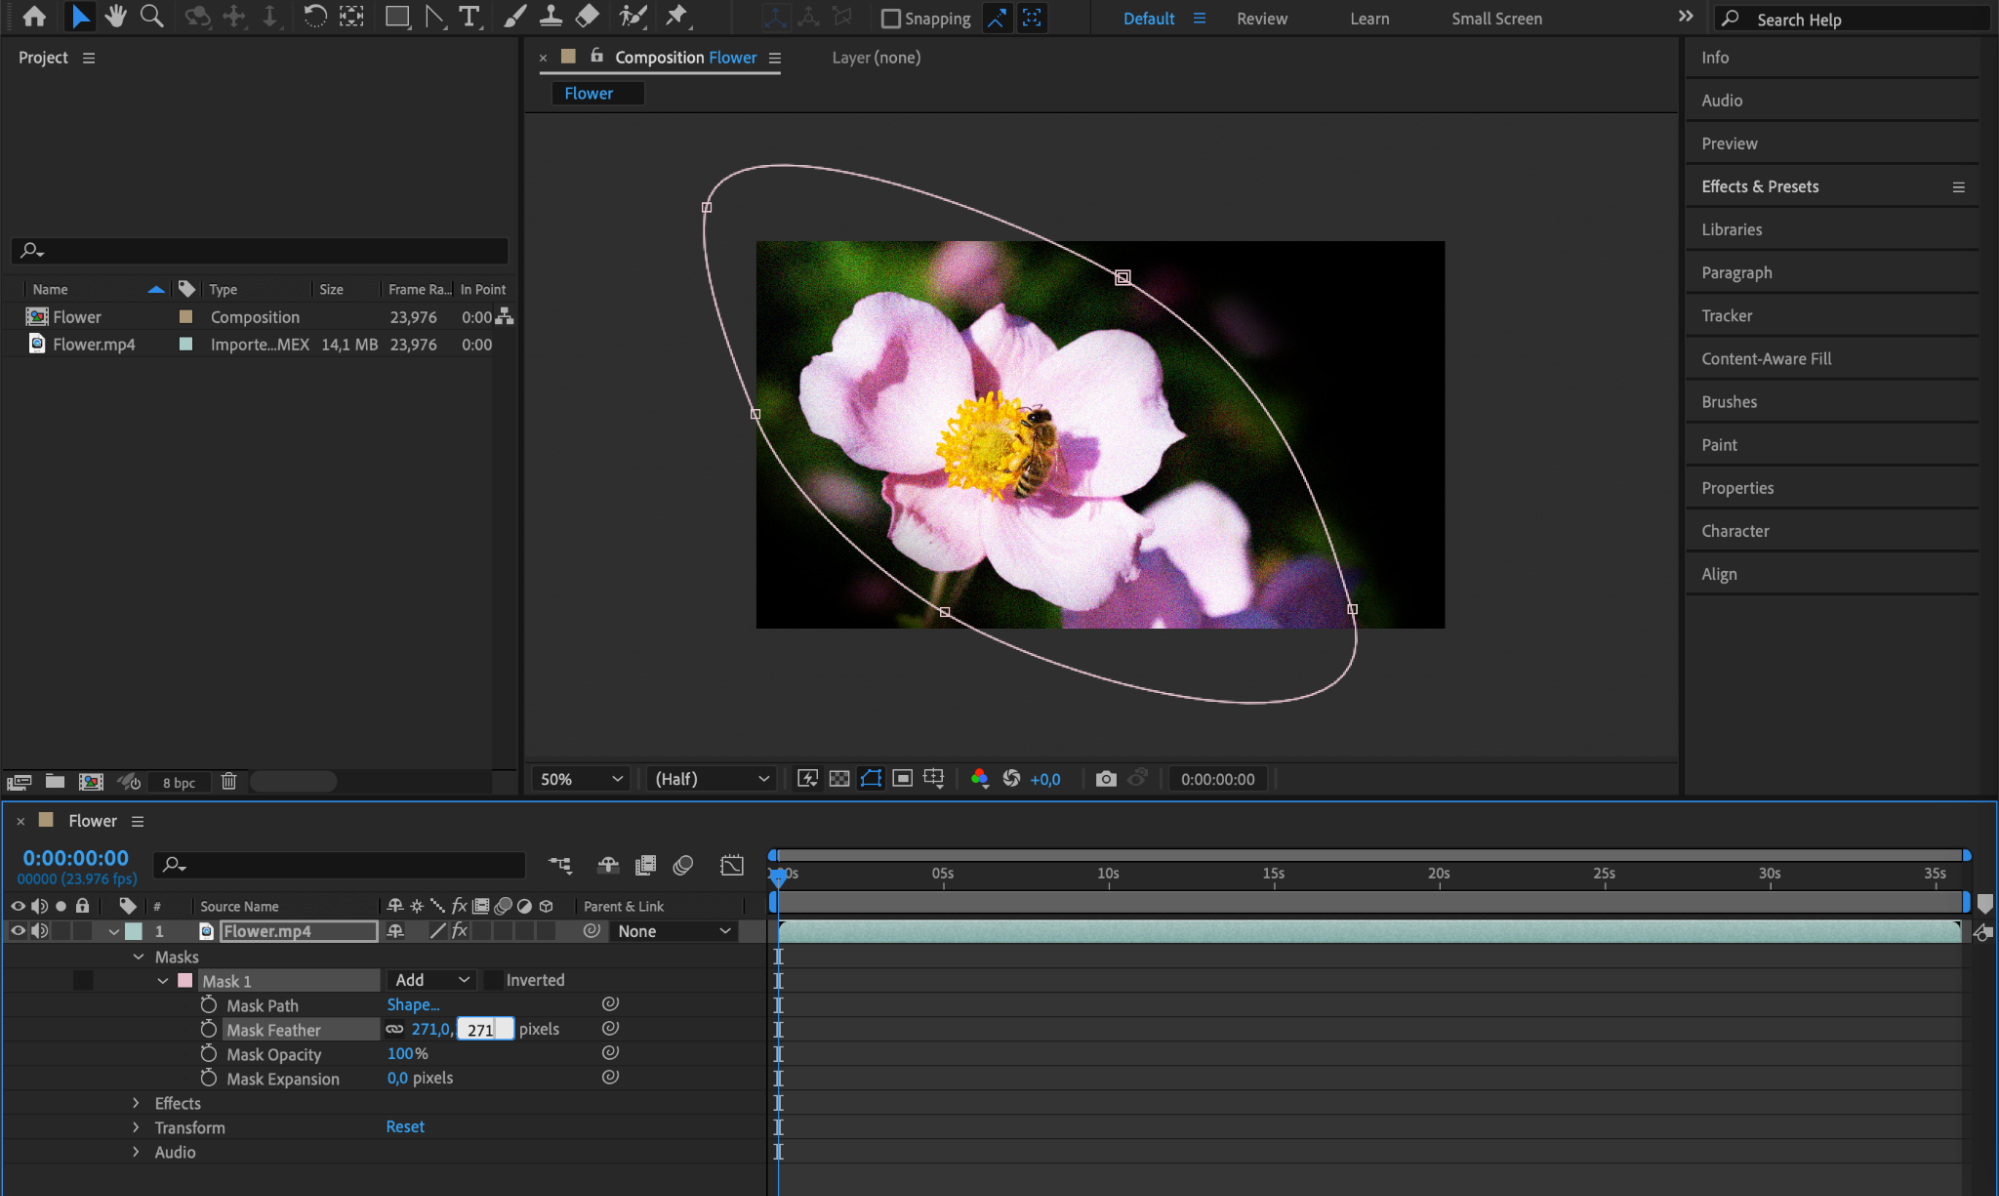 Step 5: Duplicate and Combine Masks
If necessary, you can duplicate and combine masks to create complex masking effects. Simply duplicate the mask and adjust its settings as needed. This technique is useful for creating intricate designs and enhancing specific parts of your composition. Combining multiple masks can produce sophisticated and visually appealing results.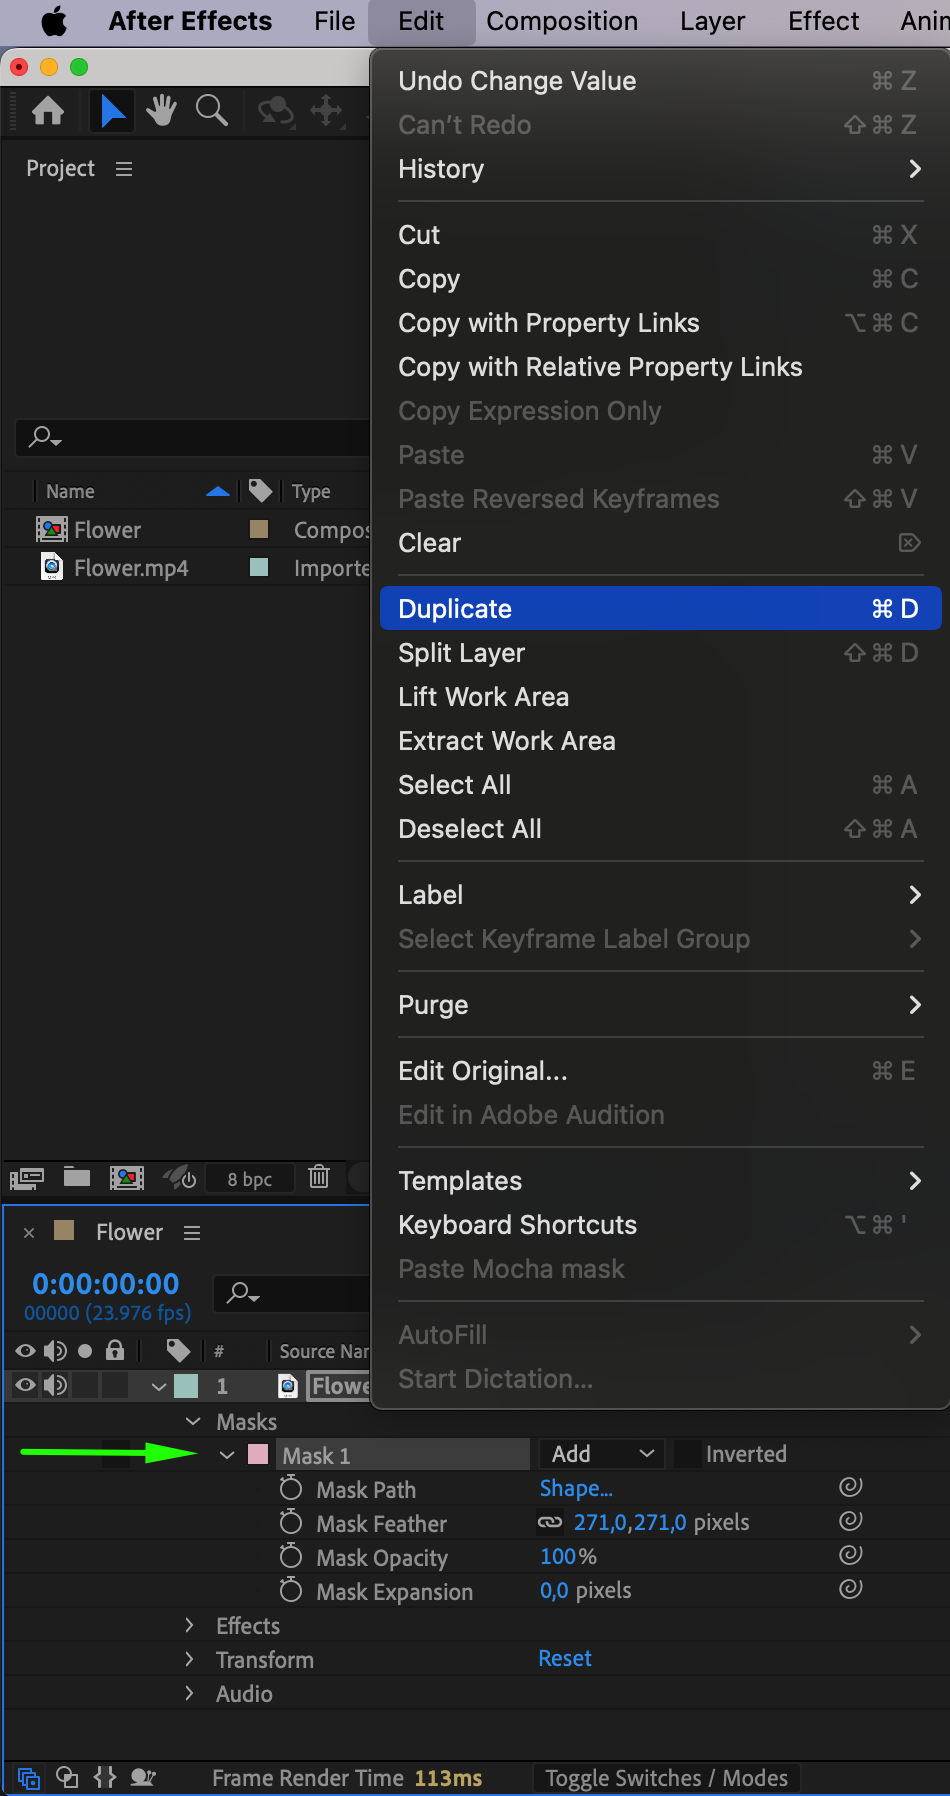
 Step 6: Apply Effects to the Masked Area
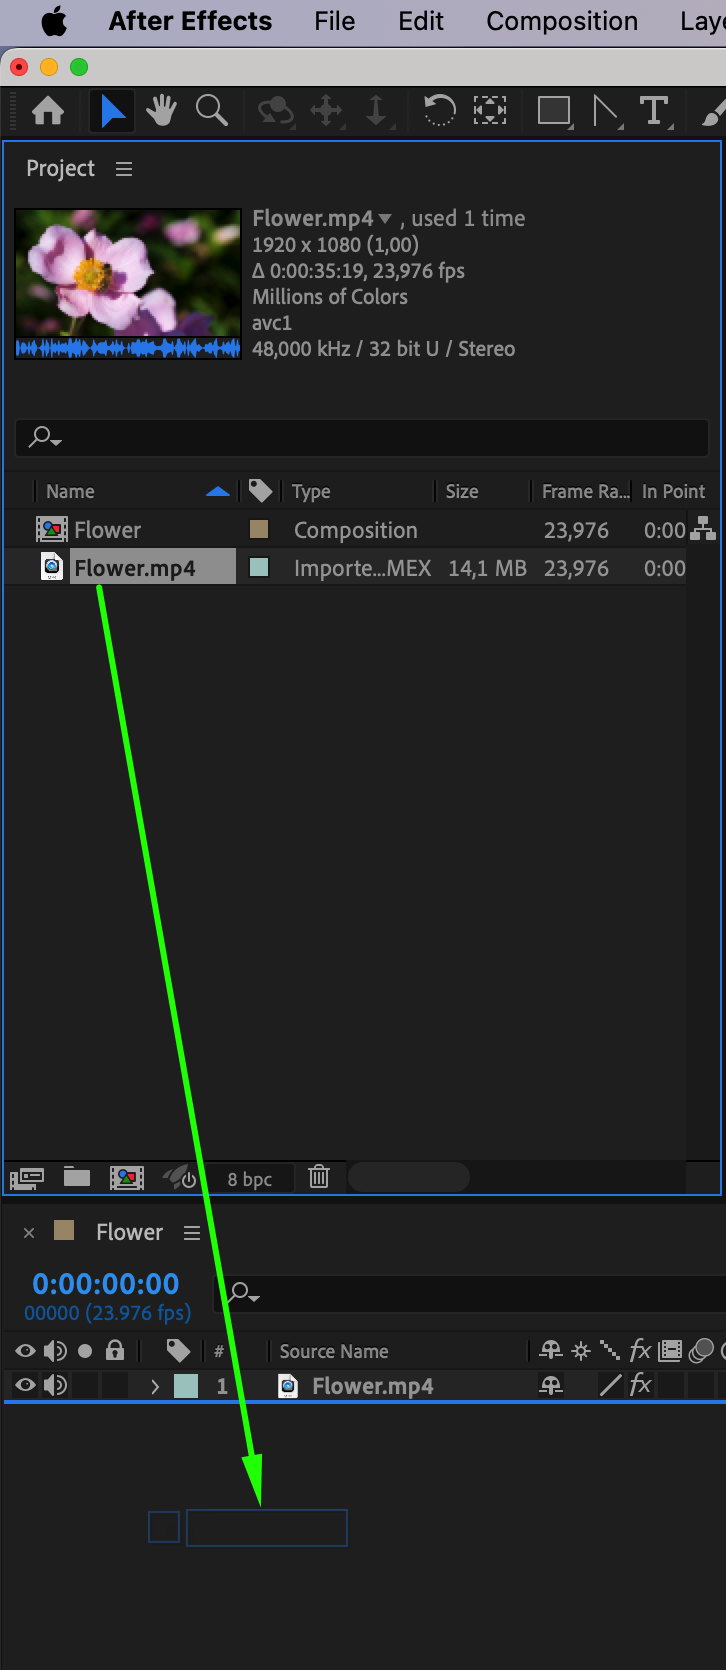
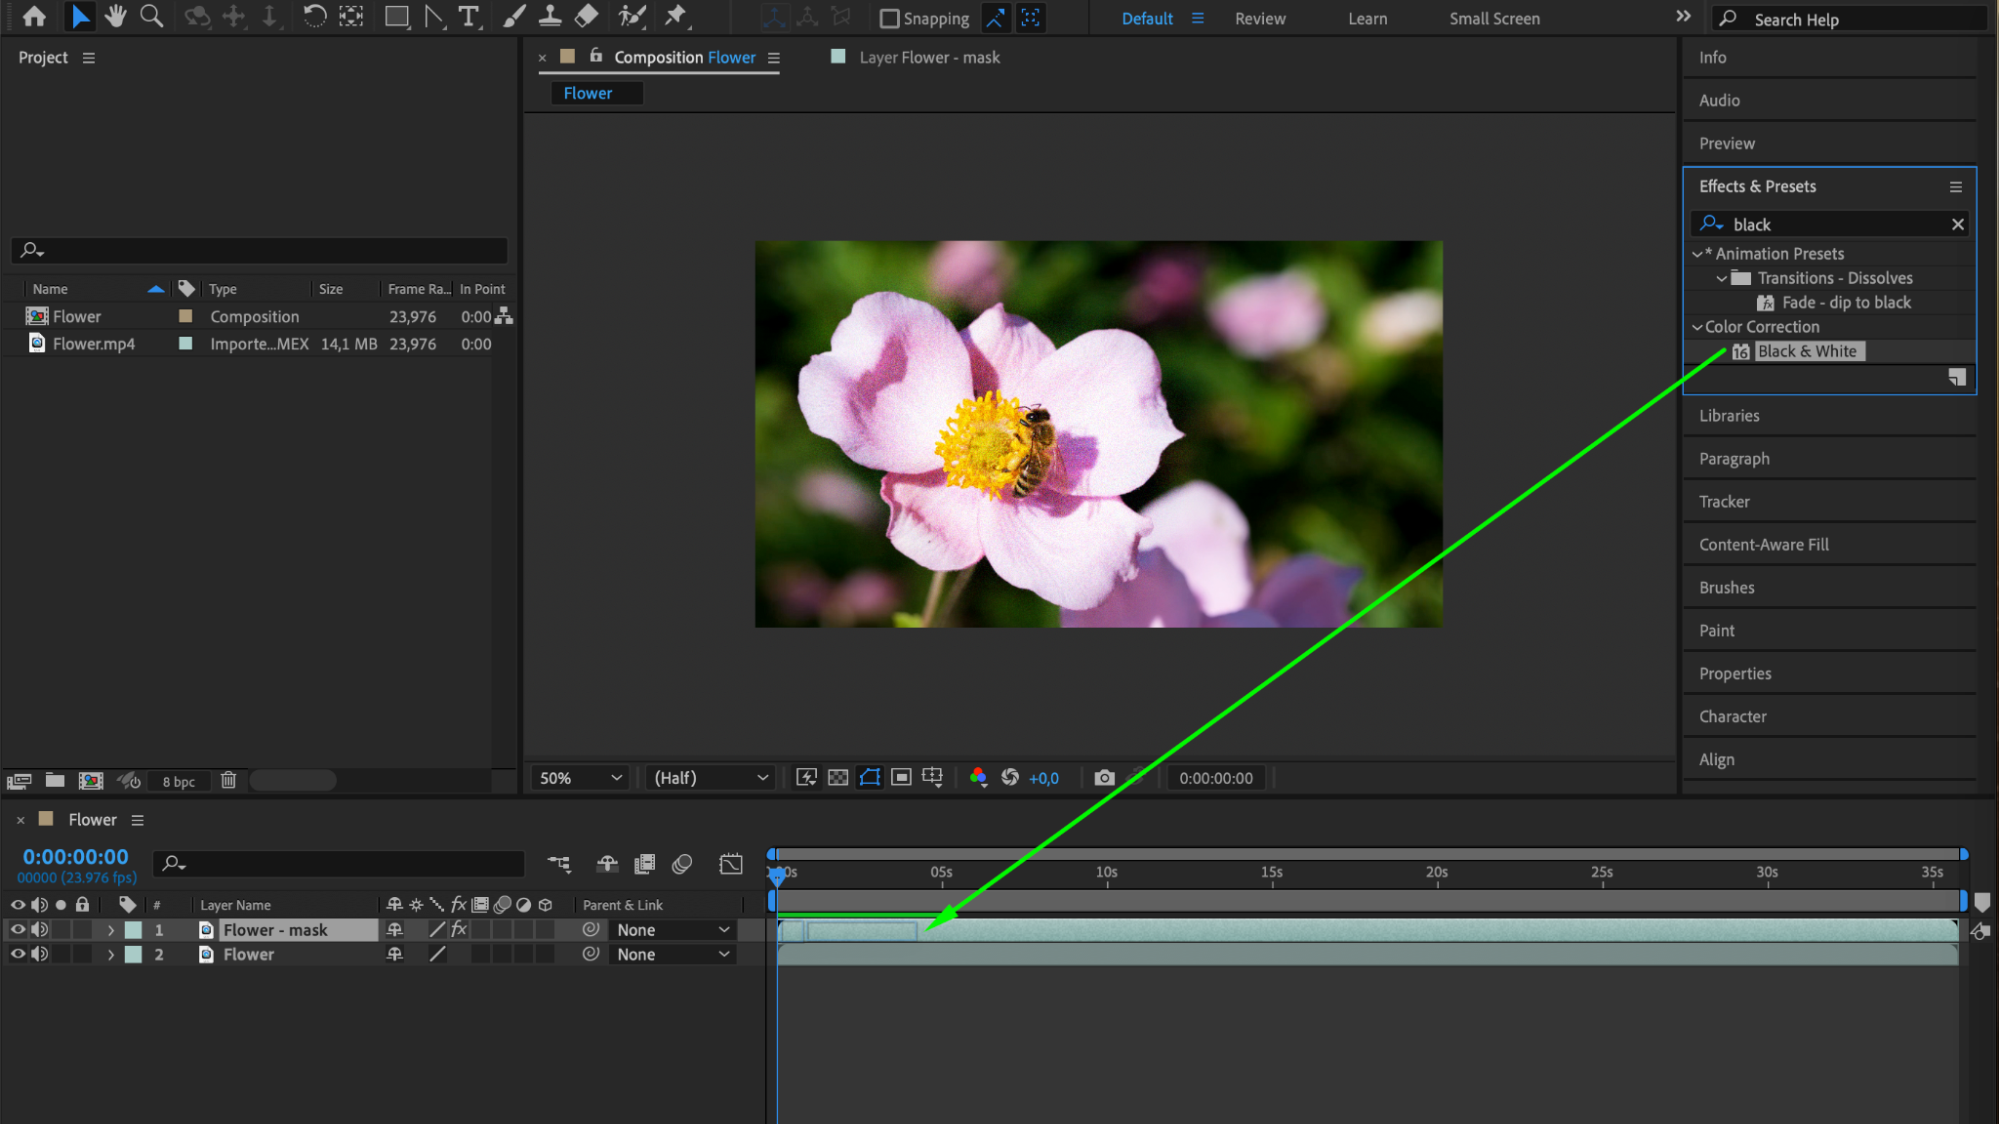
Once you have created your mask, you can apply effects or make adjustments specifically to the masked area. This gives you the ability to isolate and enhance specific regions within your composition. To ensure the area outside the mask remains unchanged, duplicate the original layer from the project panel and place it below the masked layer in the timeline. This step allows you to focus your effects on the masked area while keeping the rest of the composition intact.
Conclusion
By following these steps, you can easily create masks in Adobe After Effects and elevate your video editing projects. Don’t be afraid to experiment with different shapes, feathering options, and mask modes to achieve the desired effect. With practice, you will become proficient in masking and have more control over your visual effects.
So, give it a try! Start making masks in Adobe After Effects and take your video editing skills to the next level. Let your creativity soar and have fun exploring the possibilities of masks in your projects.


