Creating Realistic Reflections in After Effects
Introduction to Adding Reflections in After Effects
Reflections add depth and realism to your visuals, making them more polished and lifelike. In this tutorial, we will guide you through the step-by-step process of adding convincing reflections to your compositions using After Effects’ powerful tools and techniques.
Get 10% off when you subscribe to our newsletter

1. Select and Duplicate Your Footage
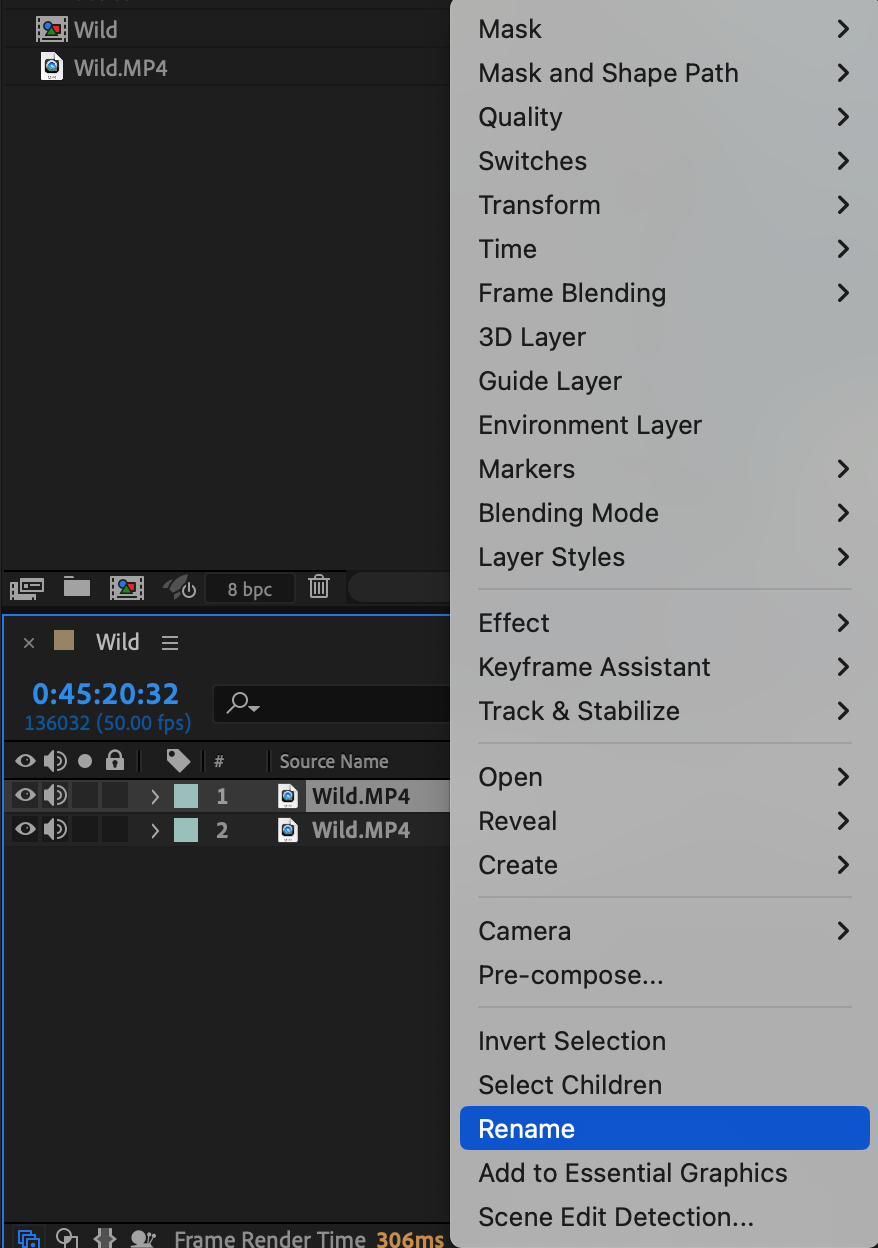
To begin, select the footage or object that you want to reflect. Choose something with clear contours and shapes to create a more believable reflection. Duplicate the layer of your chosen element by selecting it in the timeline and pressing “Ctrl/Cmd + D”. Rename the duplicated layer as “Reflection.” This duplicated layer will be used to create the reflection effect.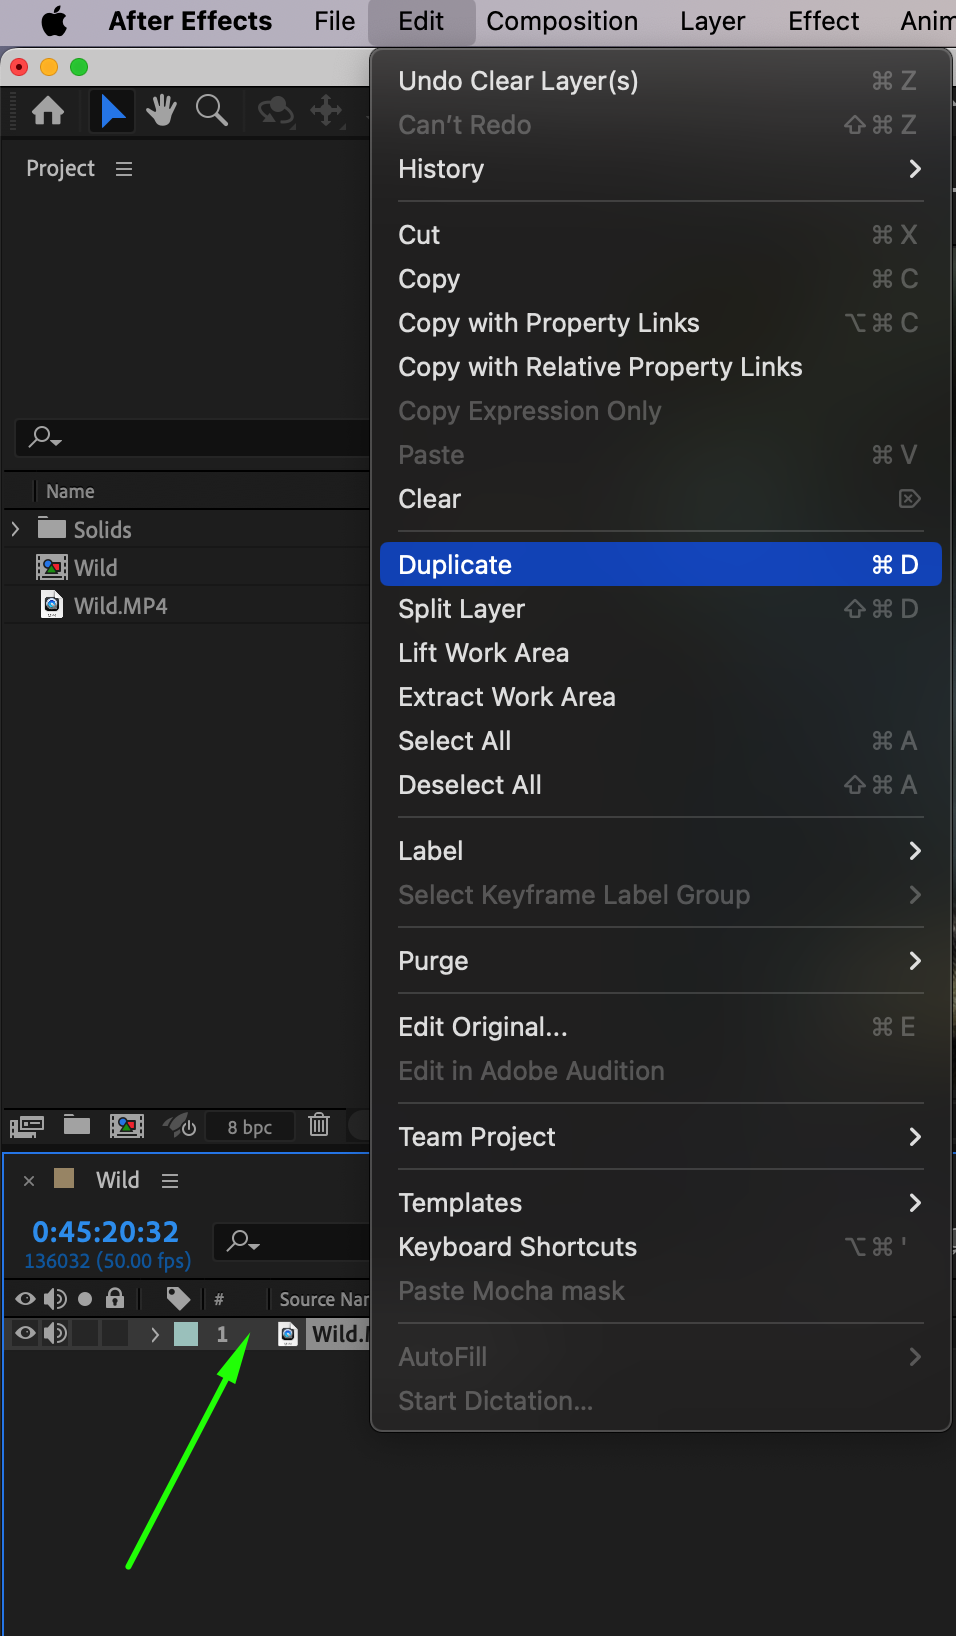
 2. Apply the “Mirror” Effect
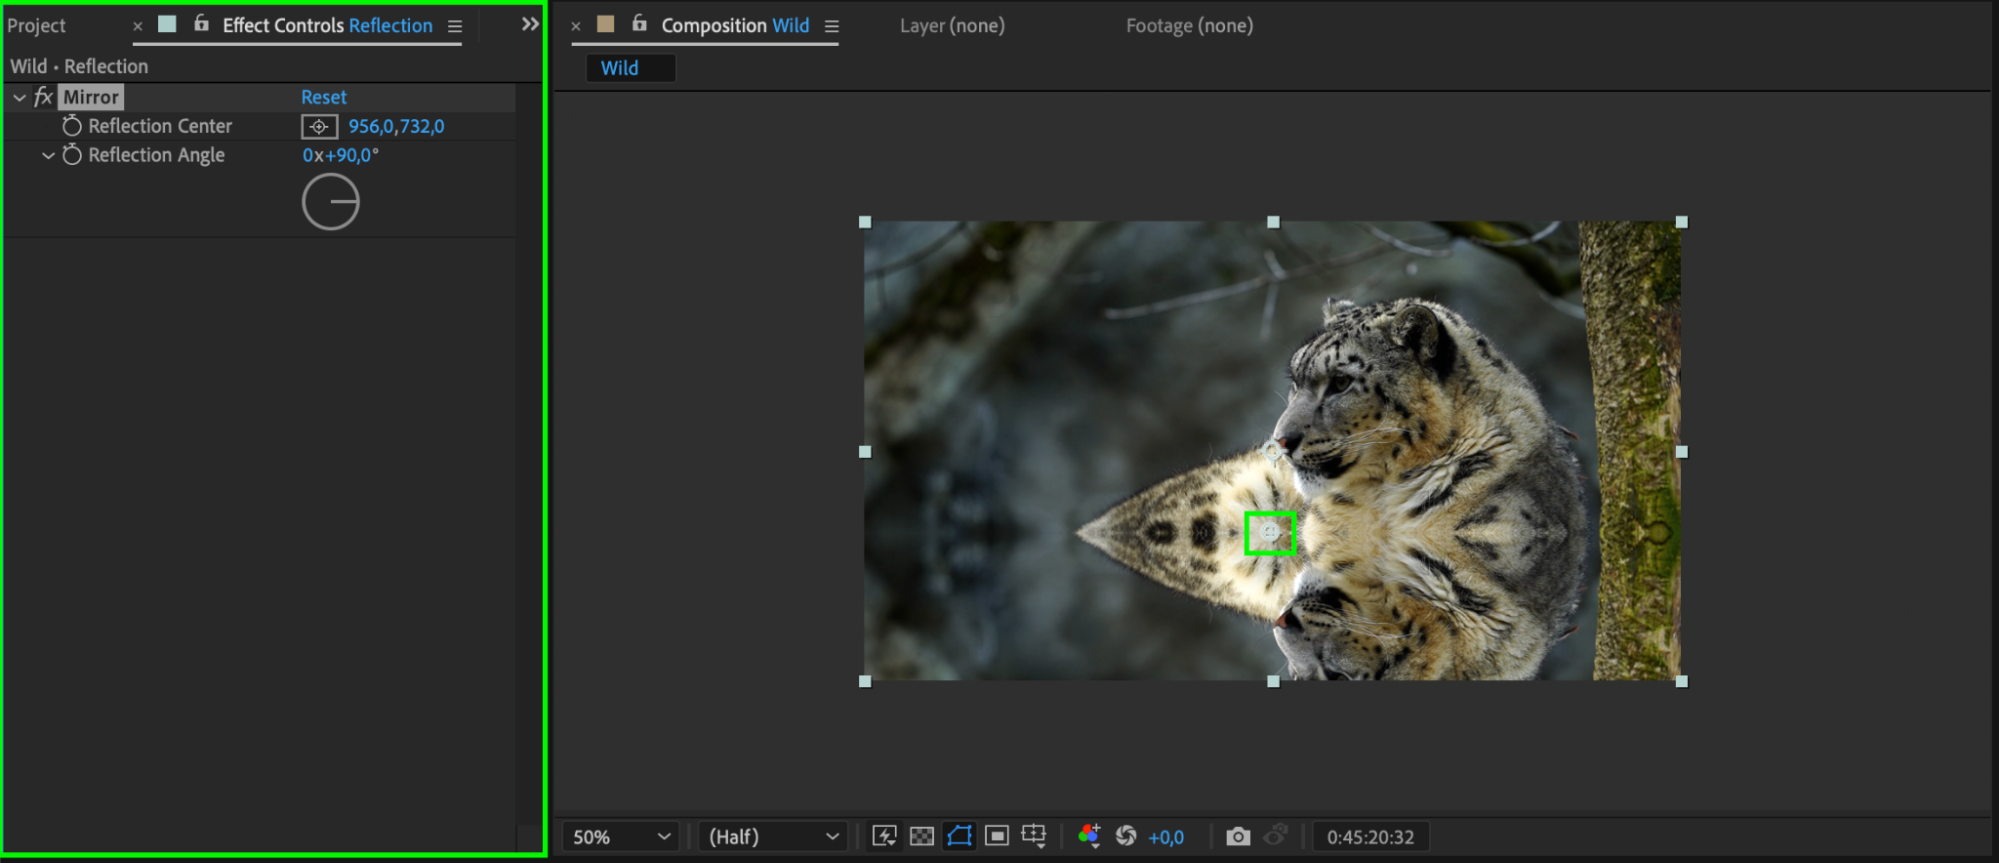
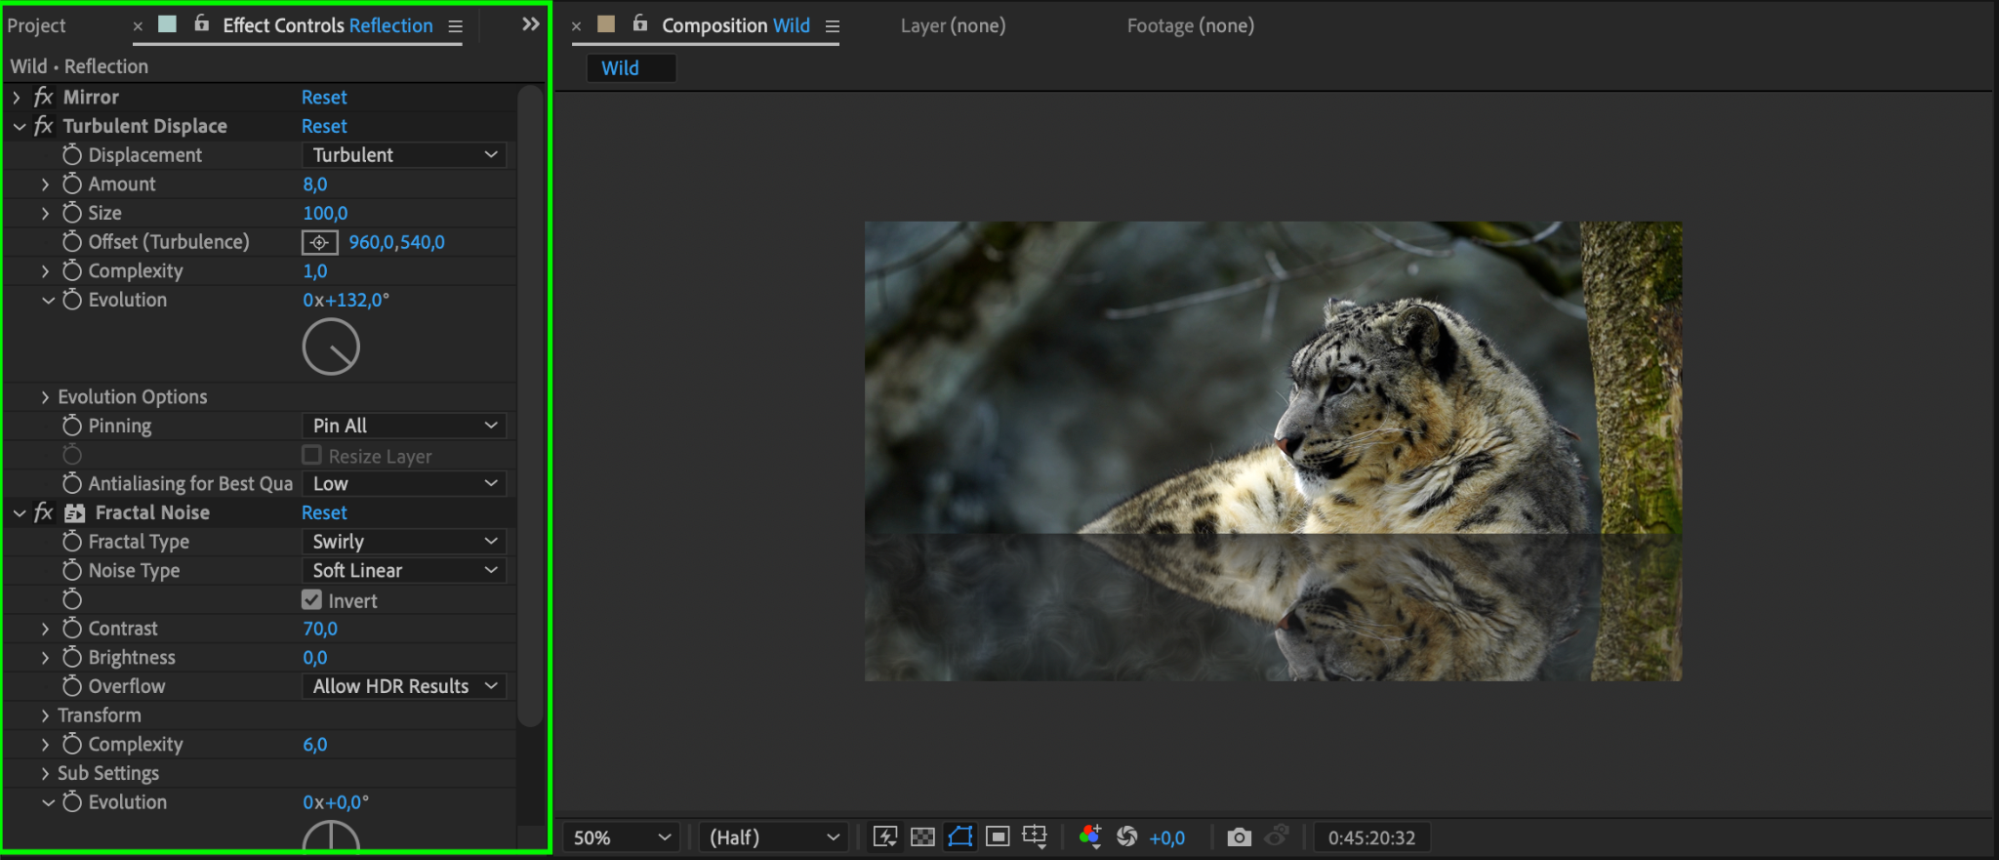
Next, apply the “Mirror” effect to the “Reflection” layer. Go to the “Effects & Presets” panel, search for “Mirror,” and apply it to the “Reflection” layer. In the “Effect Controls” panel, set the “Reflection Angle” to 90 degrees and adjust the “Reflection Center” to the point where you want the reflection to begin.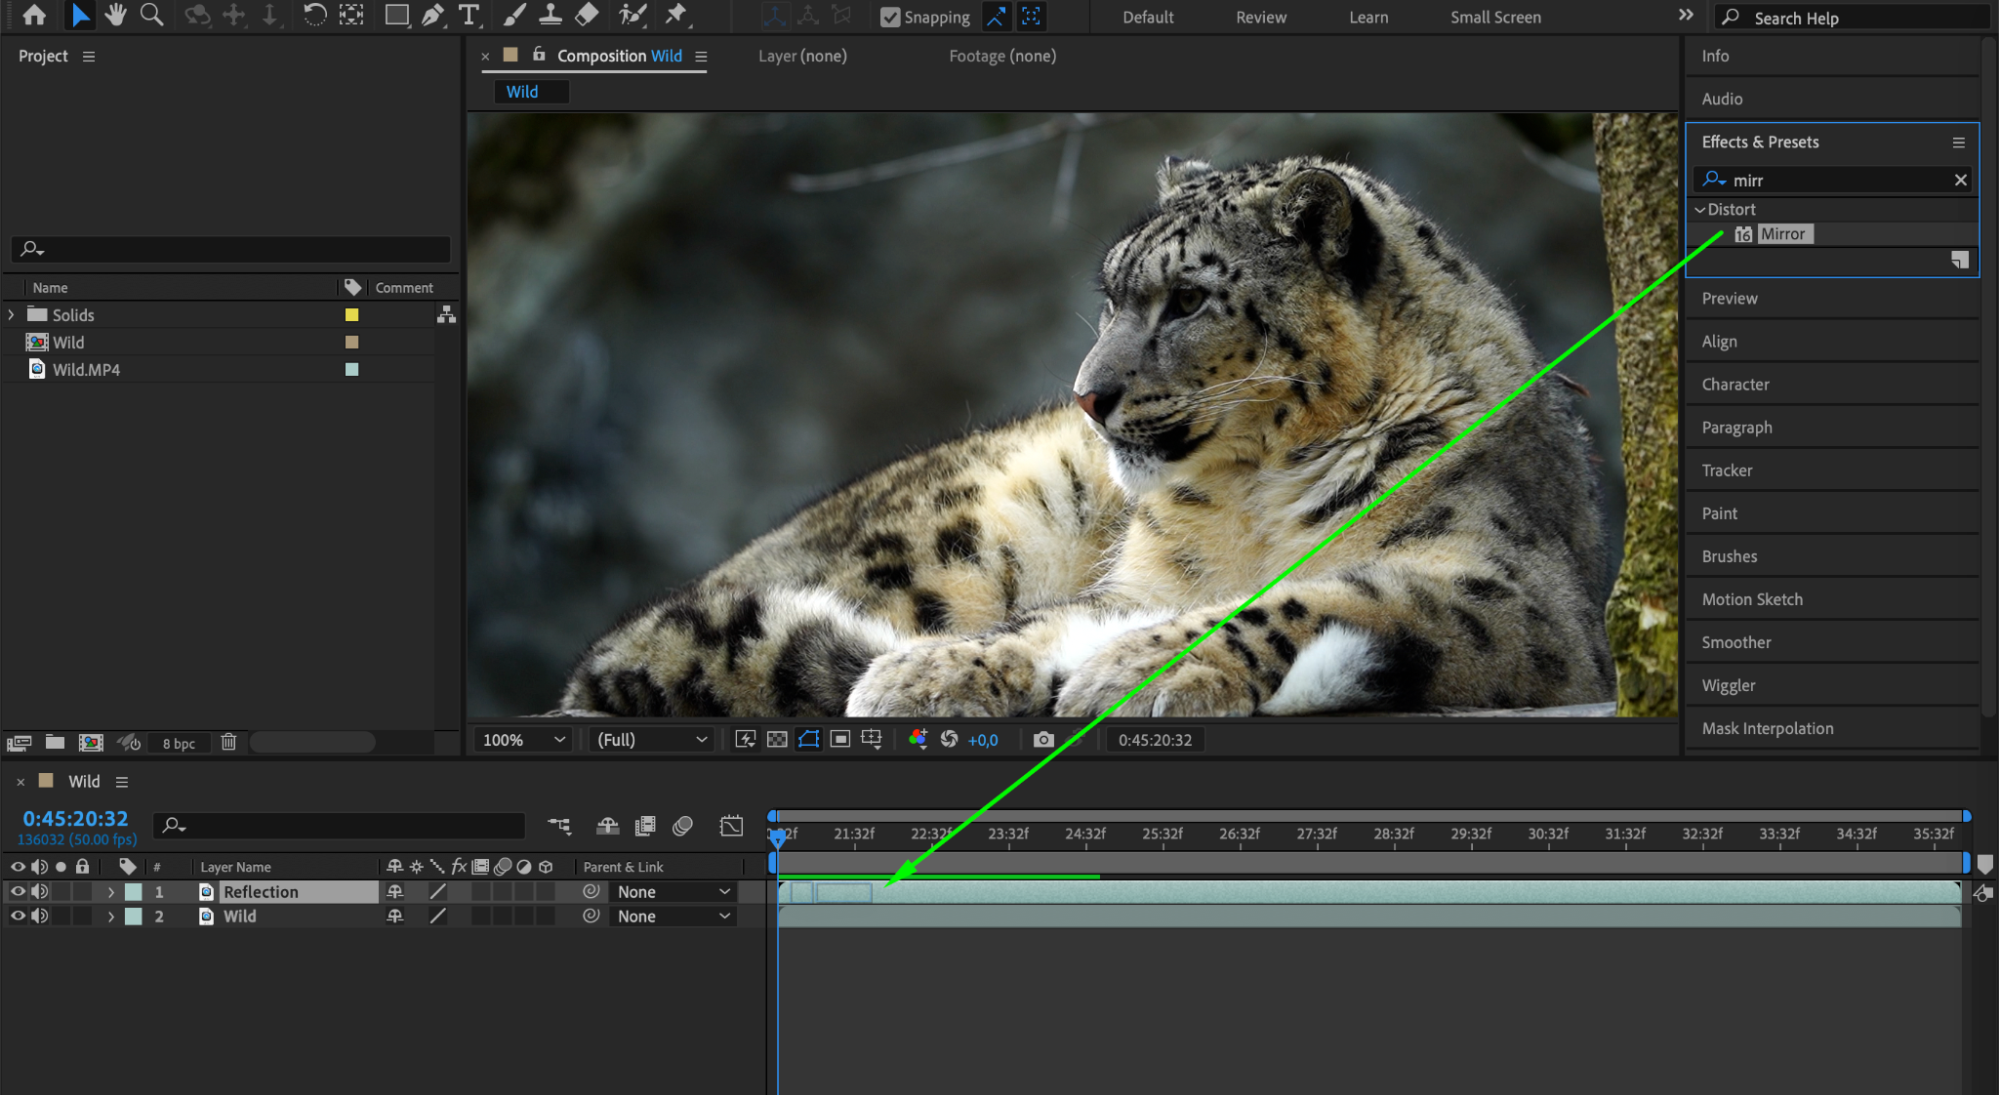
 3. Create a Mask for the Reflection Layer
Get 10% off when you subscribe to our newsletter
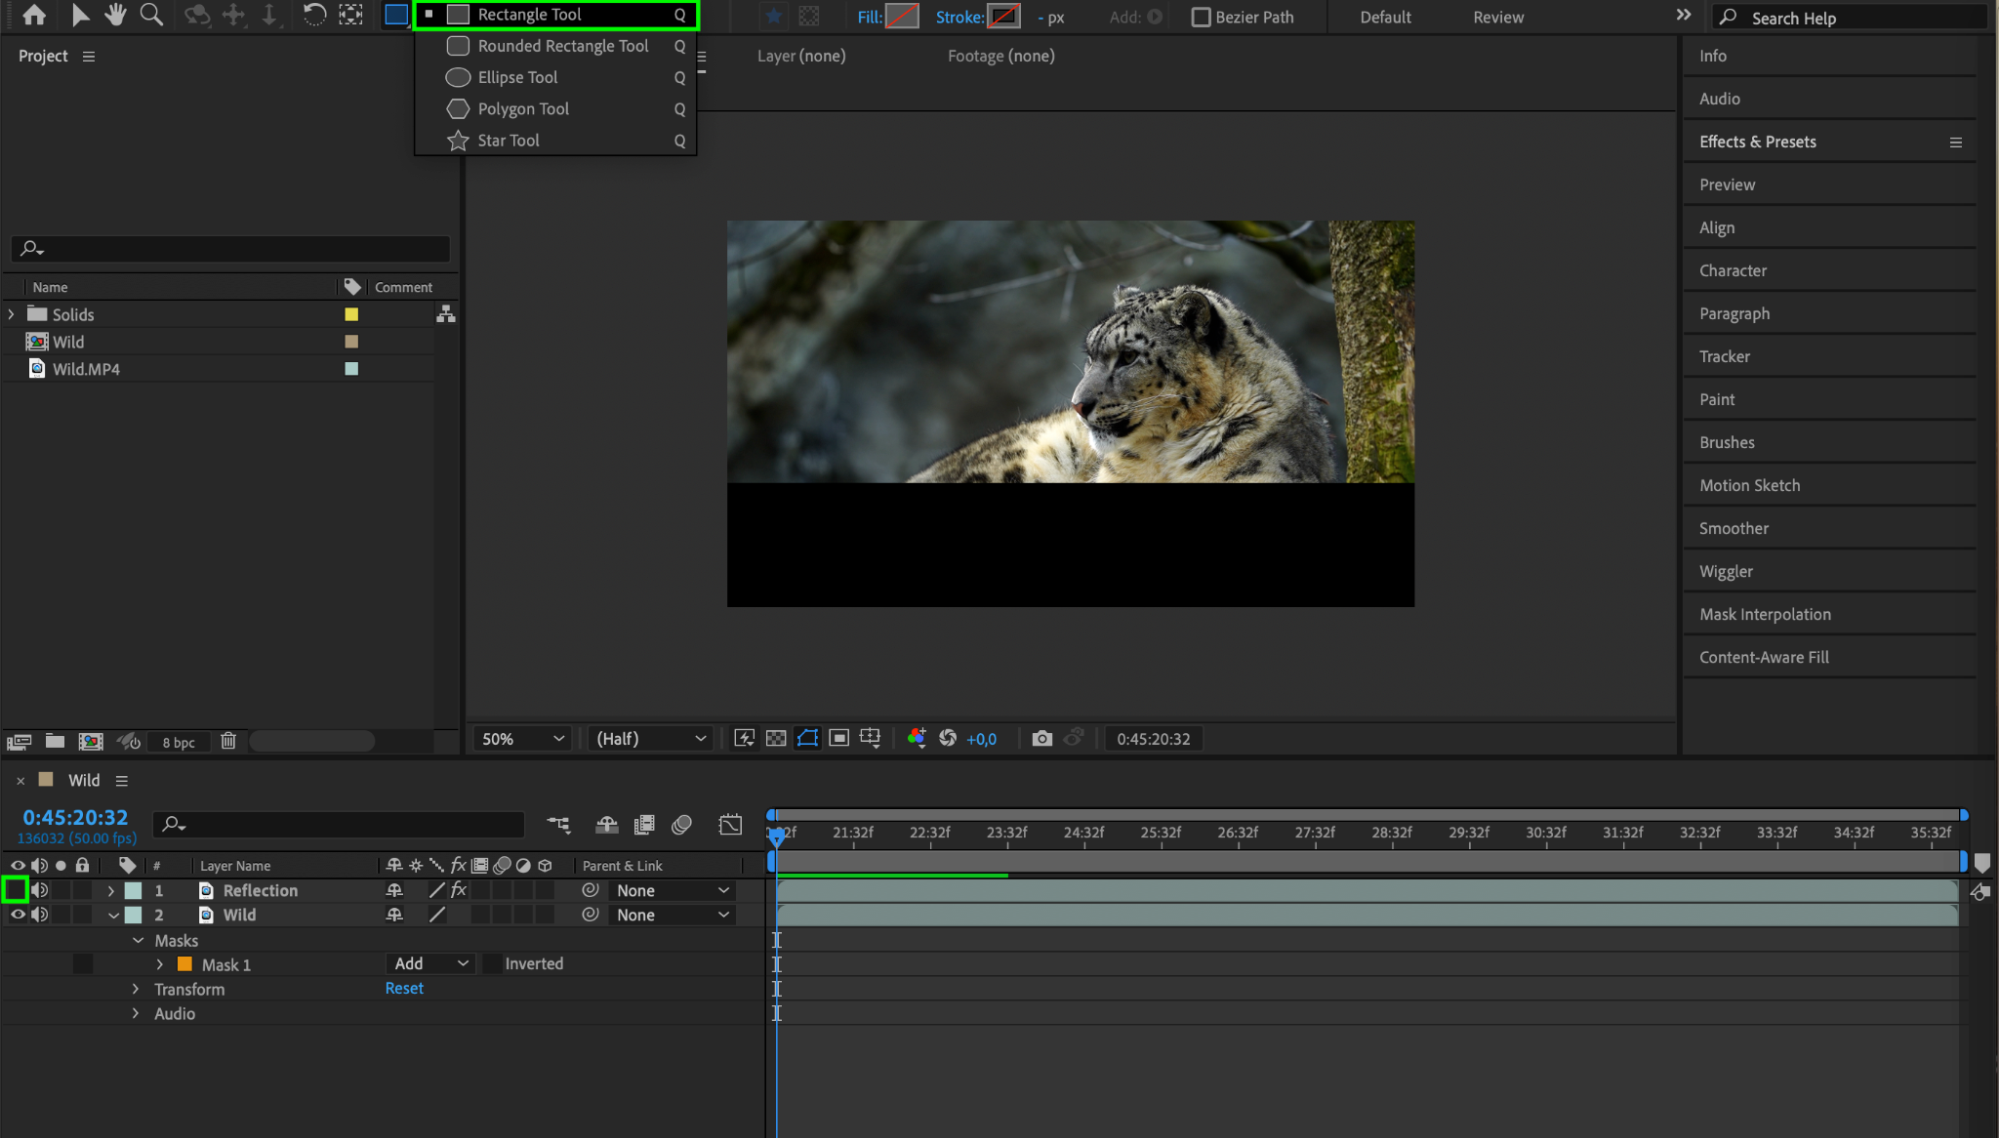
Select the “Reflection” layer and create a mask around the reflection using the Rectangle Tool (Q). Click the “Inverted” checkbox in the “Masks” section under the “Reflection” layer properties. This will mask out the area outside the reflection. Additionally, create a mask for the original layer, highlighting the part that remains unchanged.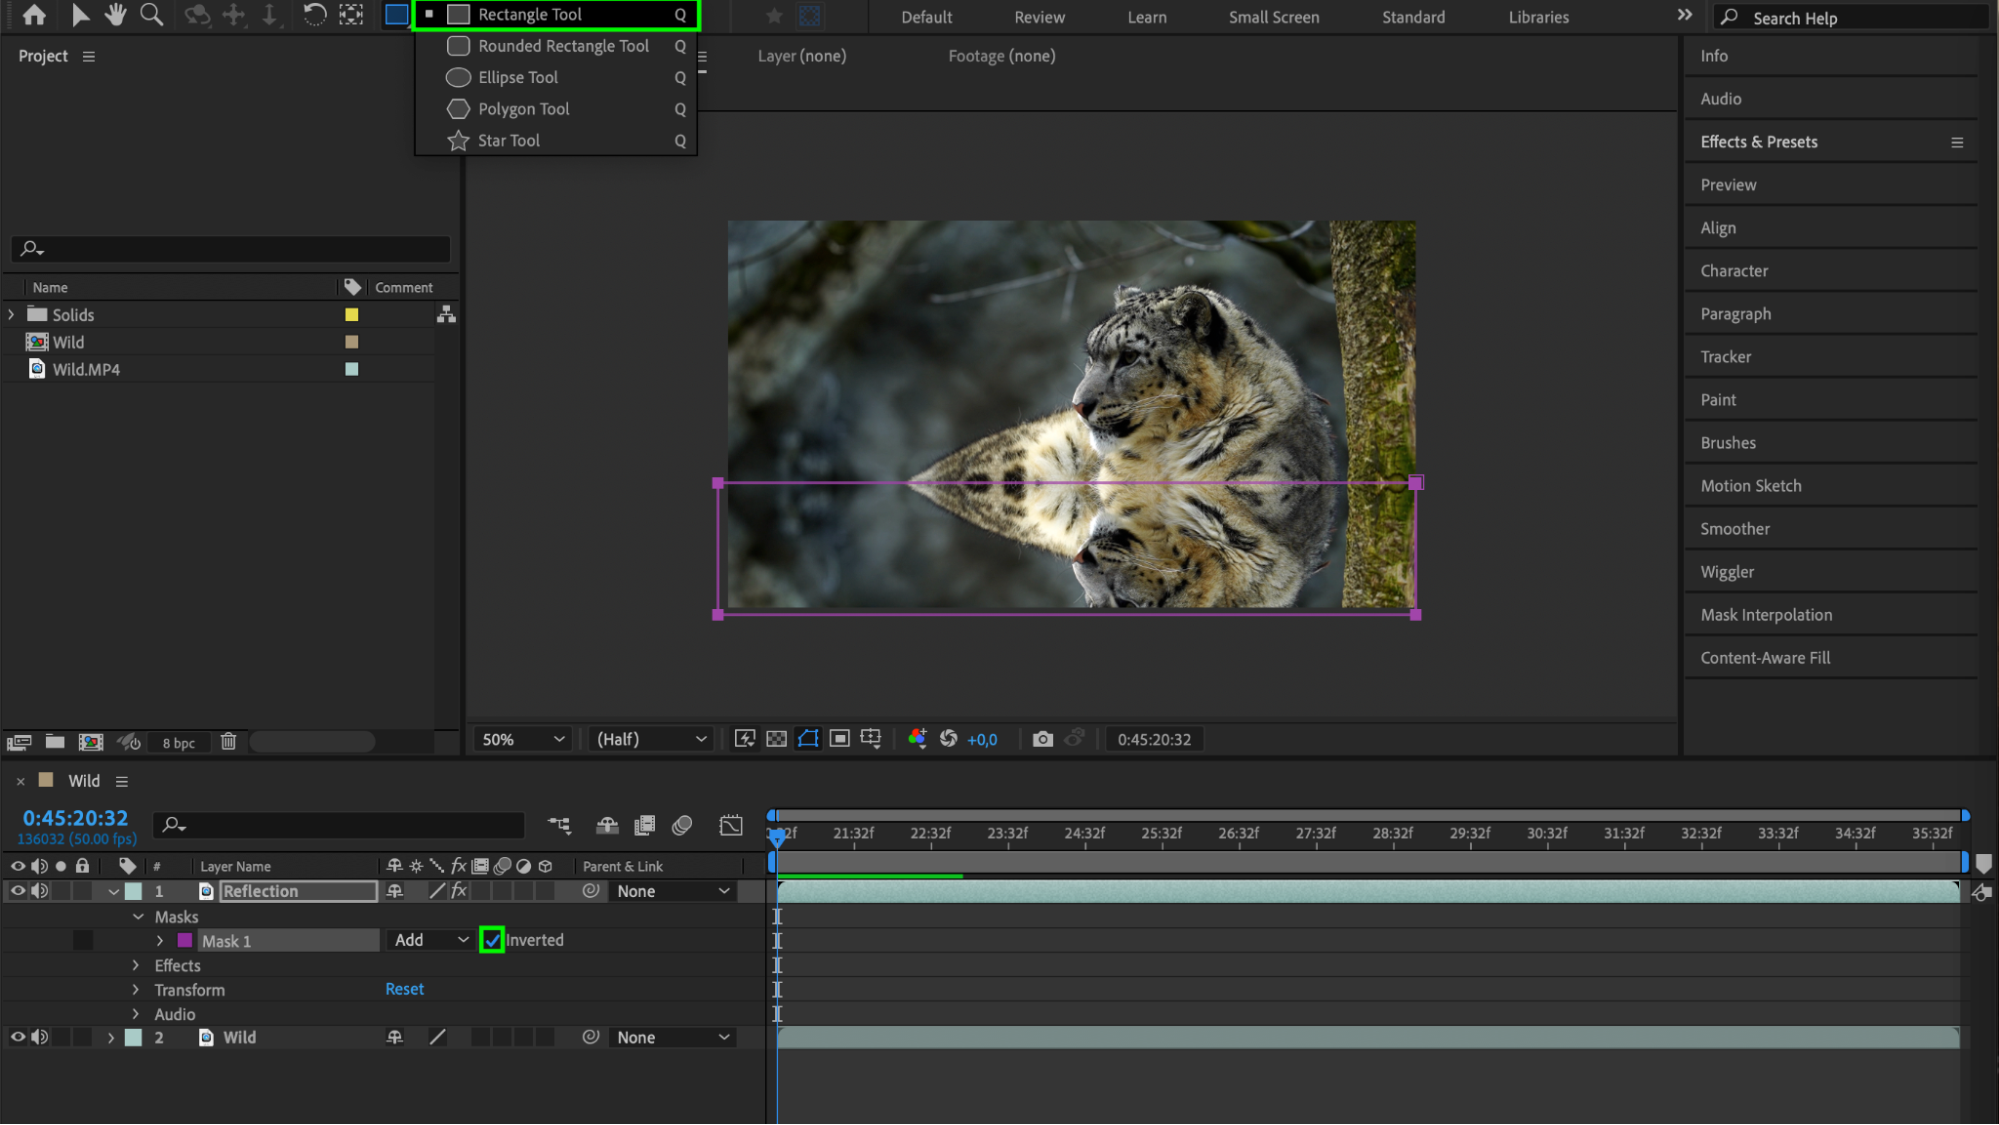
 4. Adjust the Opacity of the Reflection Layer
Get 10% off when you subscribe to our newsletter
Go to the “Reflection” layer and select the mask. In the “Masks” section under the “Reflection” layer properties, adjust the mask opacity to add realism. Lower the opacity value to make the reflection more subtle and natural. This step ensures that the reflection blends seamlessly with the original footage. 5. Position the Layers Correctly
Get 10% off when you subscribe to our newsletter
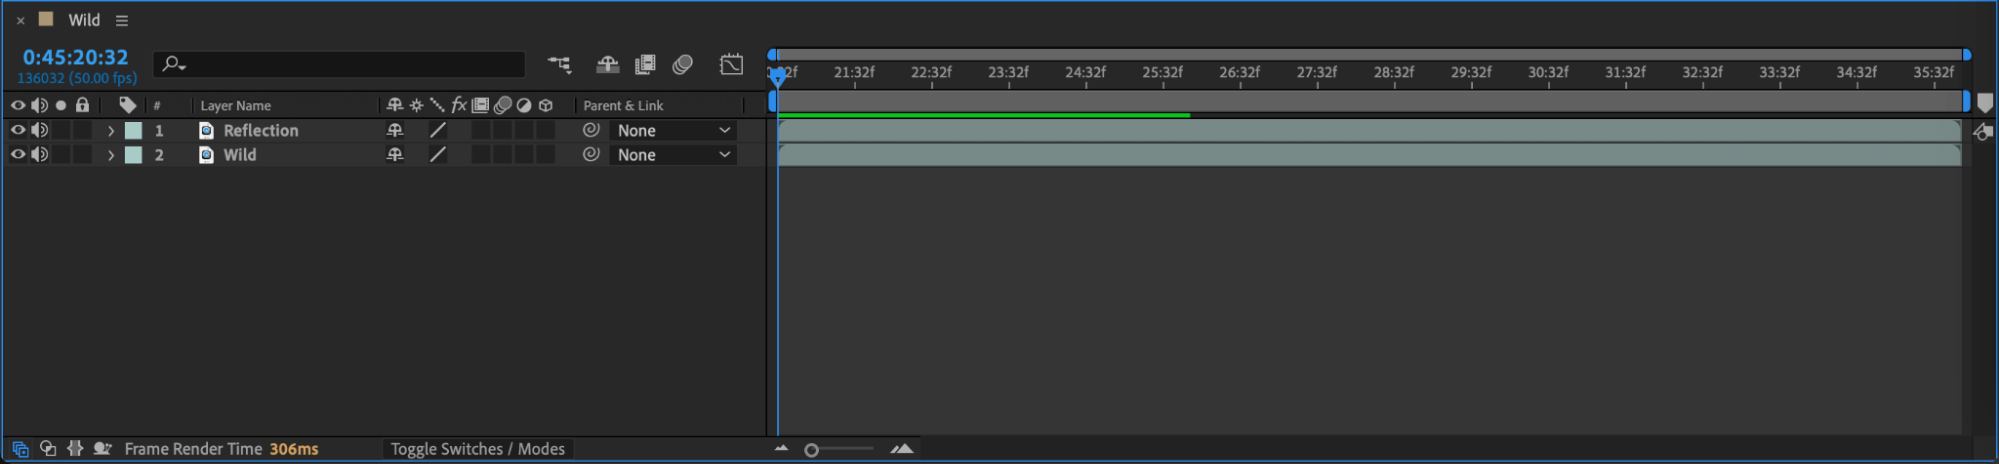
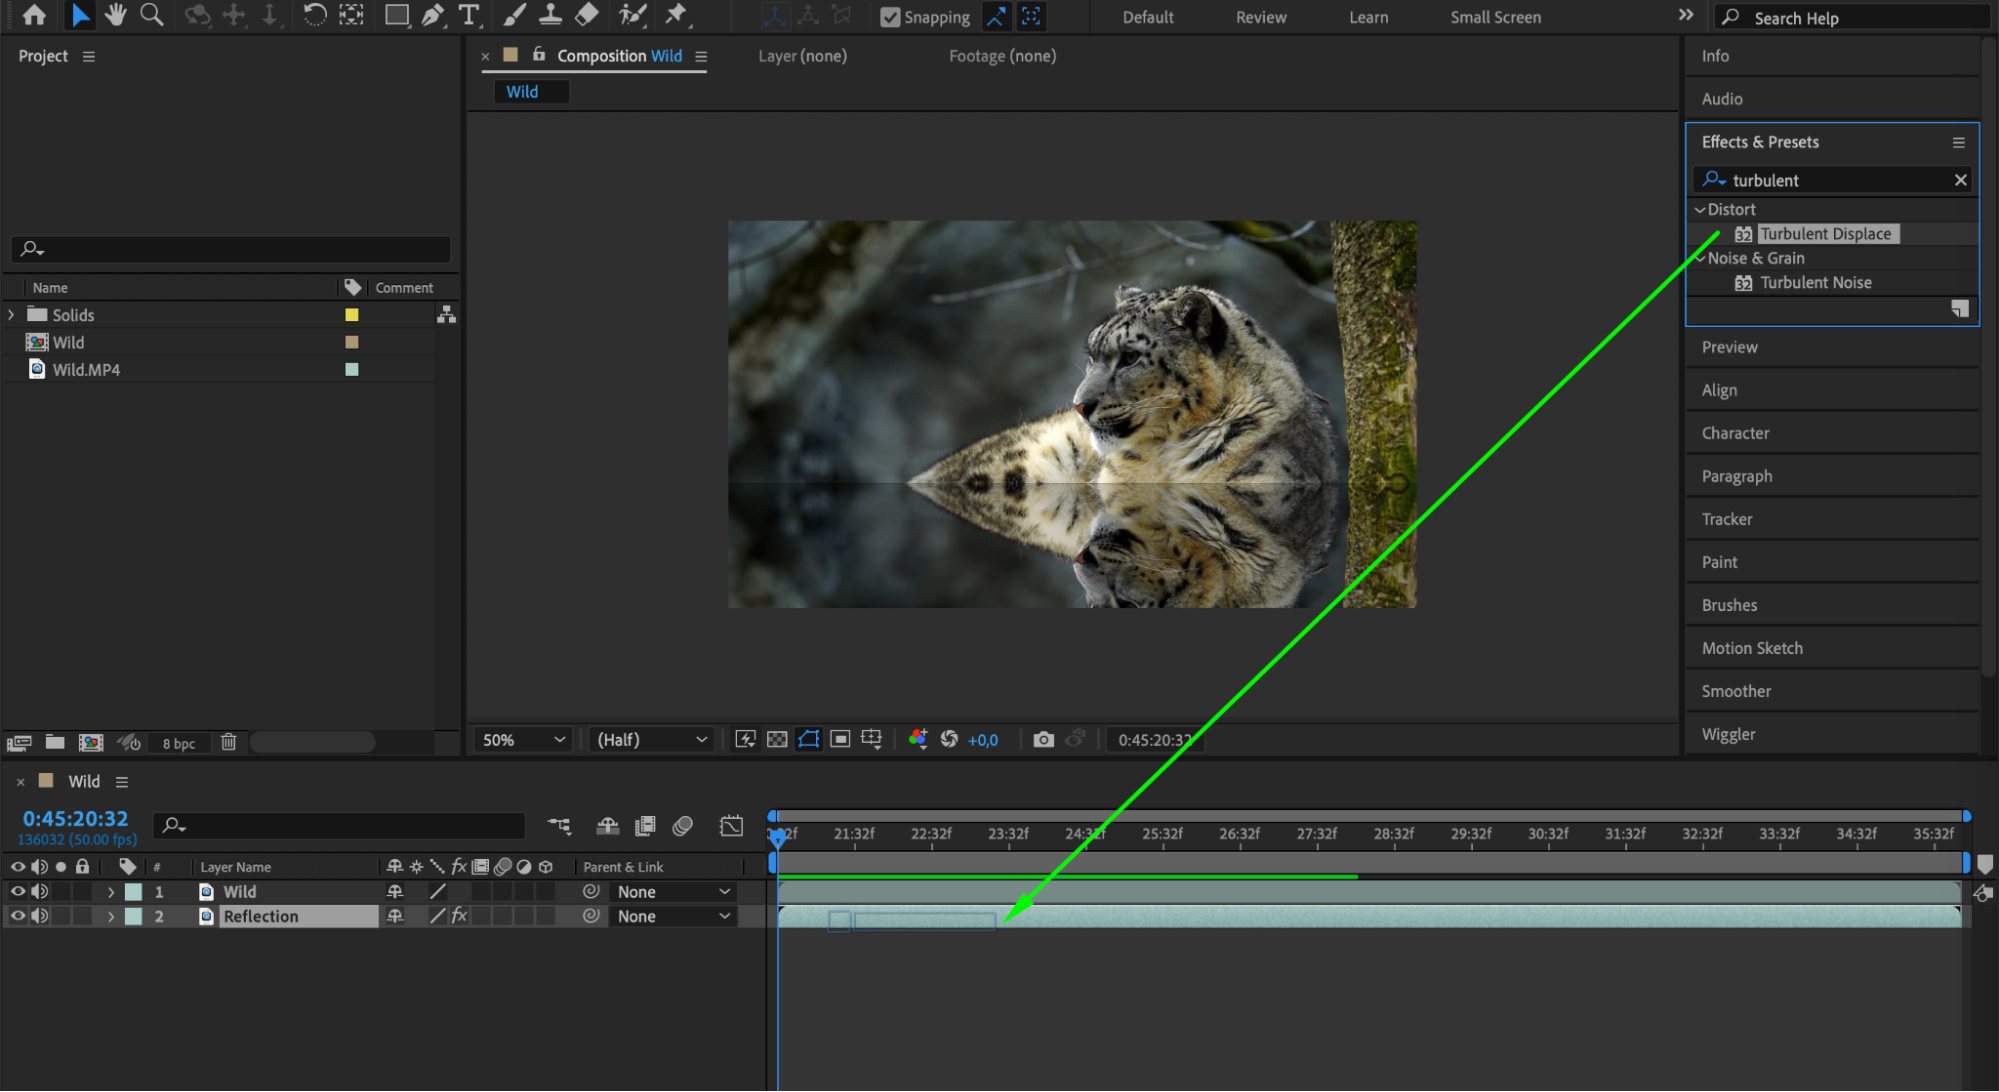
Place the original layer on top of the “Reflection” layer in the timeline. This layering order ensures that the original footage is displayed above the reflection, creating a realistic visual effect. Now, you can start adding effects from the “Effects & Presets” panel to enhance the reflection further.
 6. Smooth the Transition
Get 10% off when you subscribe to our newsletter
Expand the properties of the original layer and use the “Mask Feather” parameter to create a smooth transition between the original footage and the reflection. This step helps in blending the two layers seamlessly, making the reflection look more natural.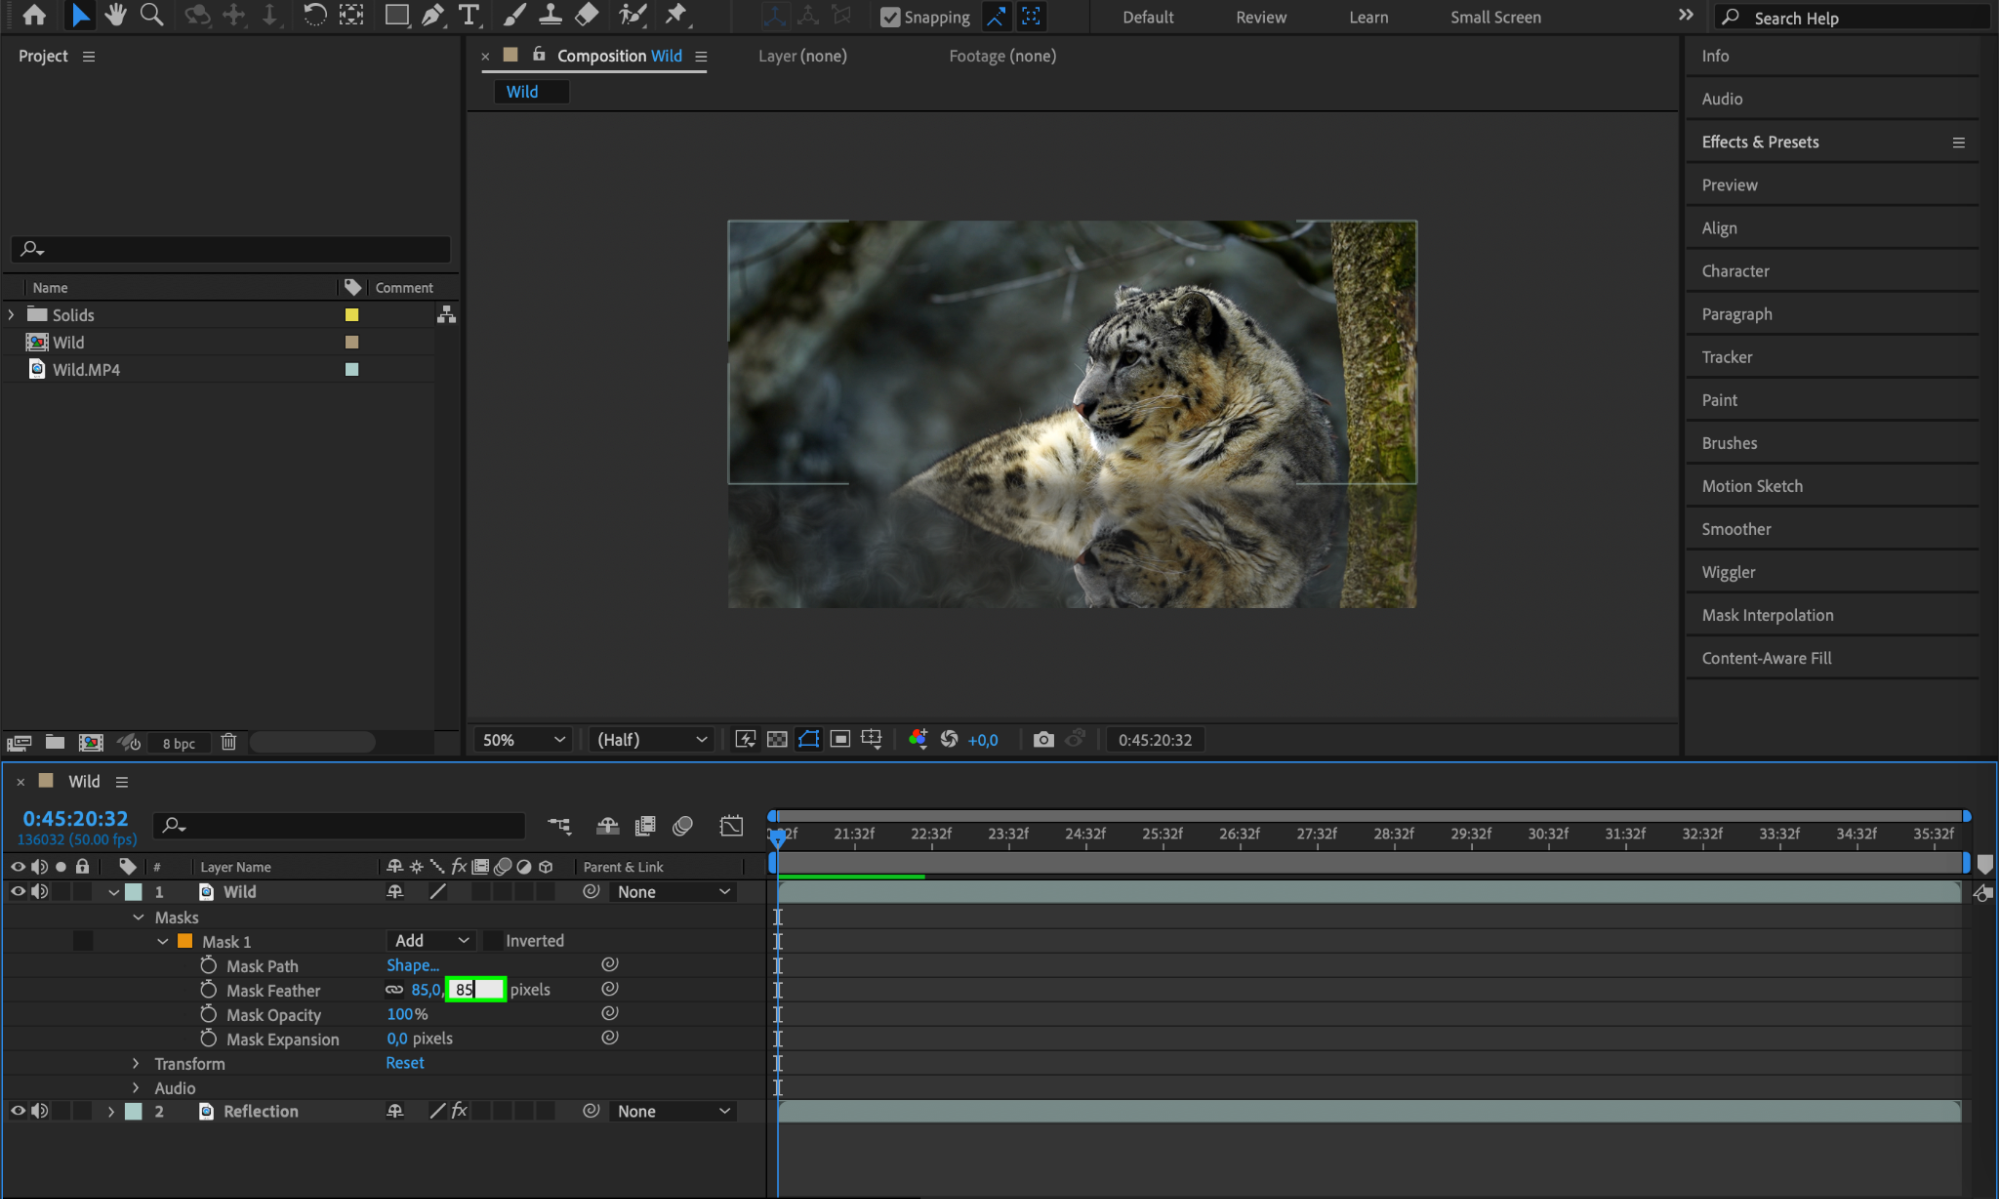 7. Preview Your Composition
Use the preview function by pressing the spacebar to see how your reflection effect looks in real-time. Make any necessary adjustments to the timing, opacity, or masks to achieve the desired effect. Conclusion
Get 10% off when you subscribe to our newsletter
By following these steps and experimenting with different settings, you can create stunning and lifelike reflections in After Effects. Whether you’re working on a commercial, a music video, or a motion graphics animation, adding reflections can greatly enhance the overall visual appeal. So, dive into the world of reflections, unleash your creativity, and watch as your videos come to life with an extra touch of realism.
Our Bestsellers


