Creating an Old-Film Effect in After Effects
Introduction
Adding an old-film effect to your video can create a nostalgic or cinematic look. By applying noise, blur, and color adjustments, you can replicate the appearance of aged footage. In this tutorial, we’ll guide you step by step to achieve this effect using simple techniques in After Effects.
Step 1: Create a New Composition
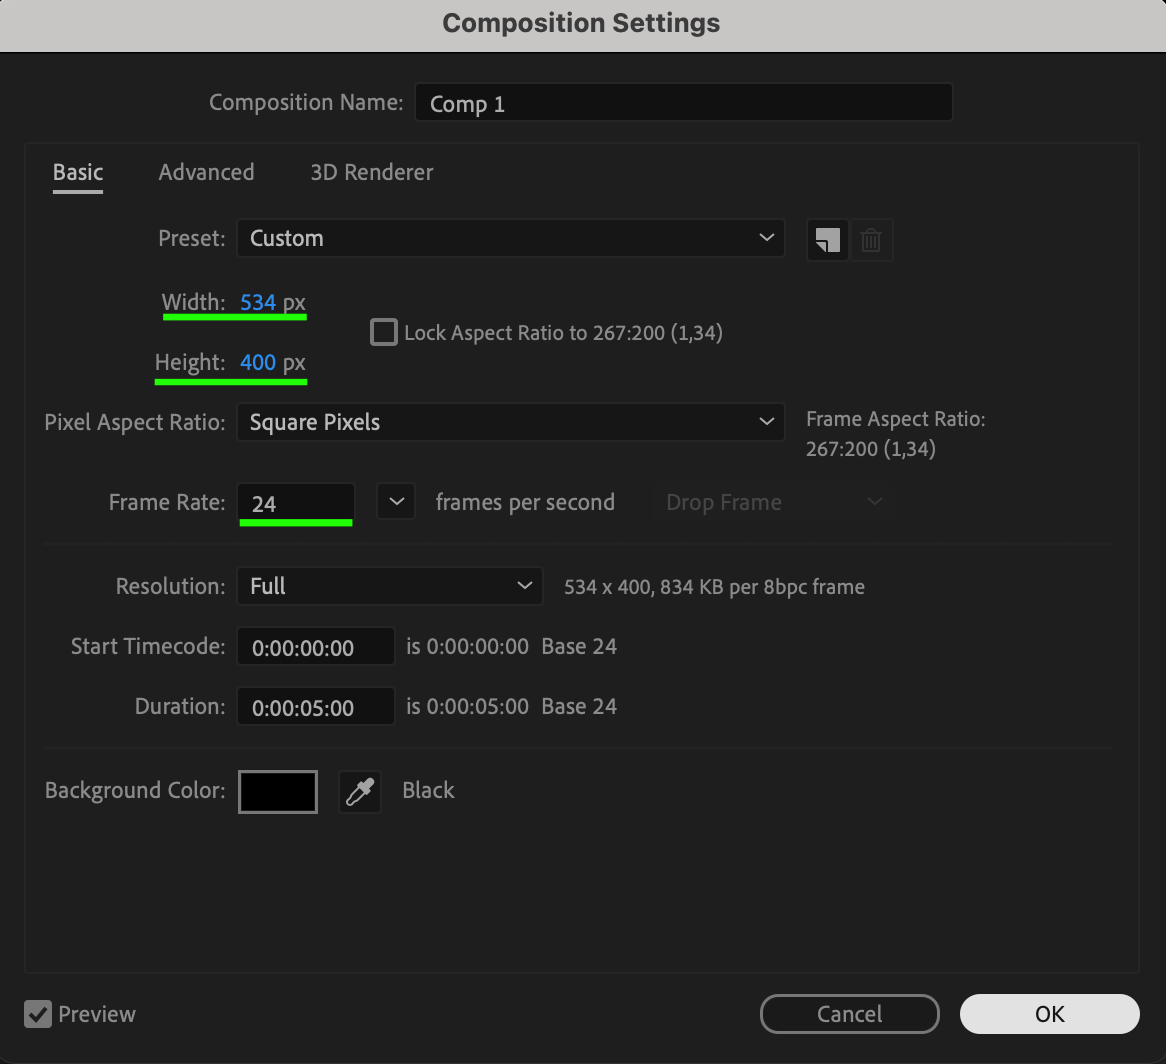
Go to Composition > New Composition and set the width to 534px, height to 400px, and frame rate to 24 fps for a classic old-film look.
 Step 2: Import Your Video
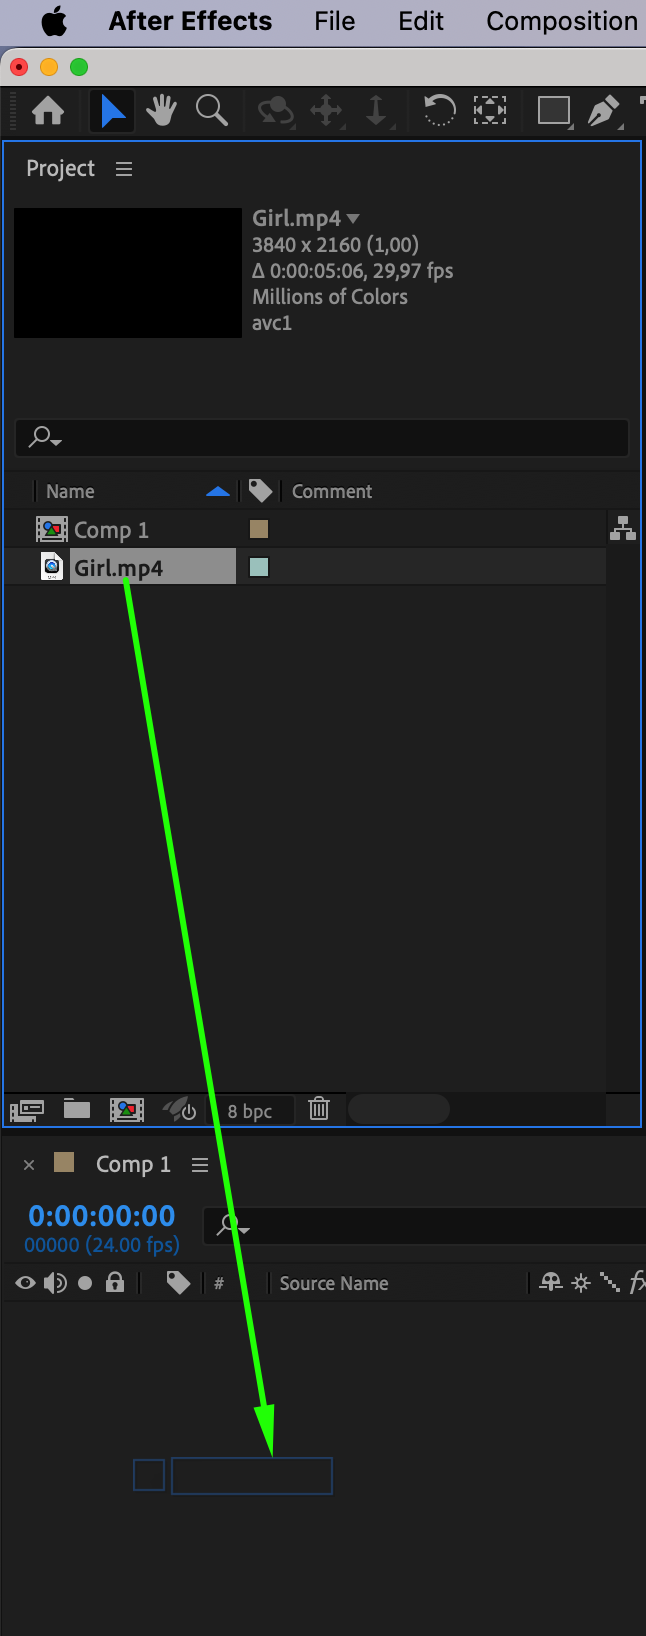
Go to File > Import > File and select your footage. Drag it onto the timeline to start working on the effect.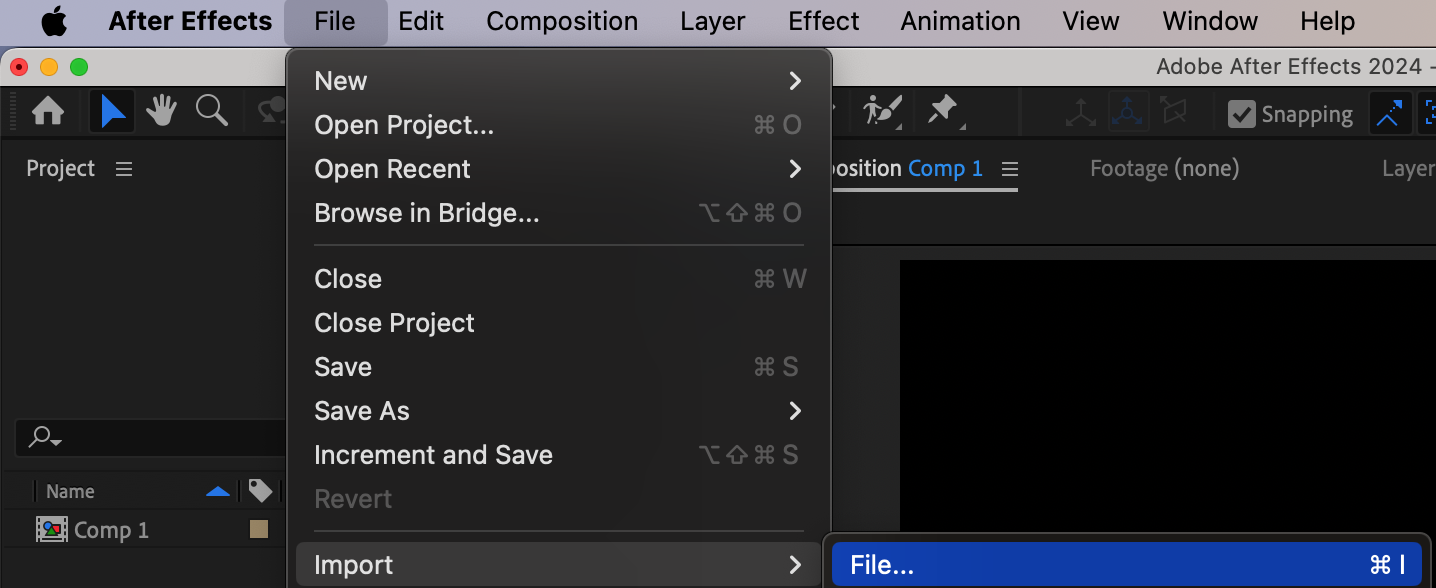
 Step 3: Fit the Video to the Composition
Right-click on the video layer, go to Transform > Fit to Comp Height or Width to ensure there are no black bars. Choose the appropriate option based on your footage’s aspect ratio. Step 4: Duplicate the Video Layer Twice
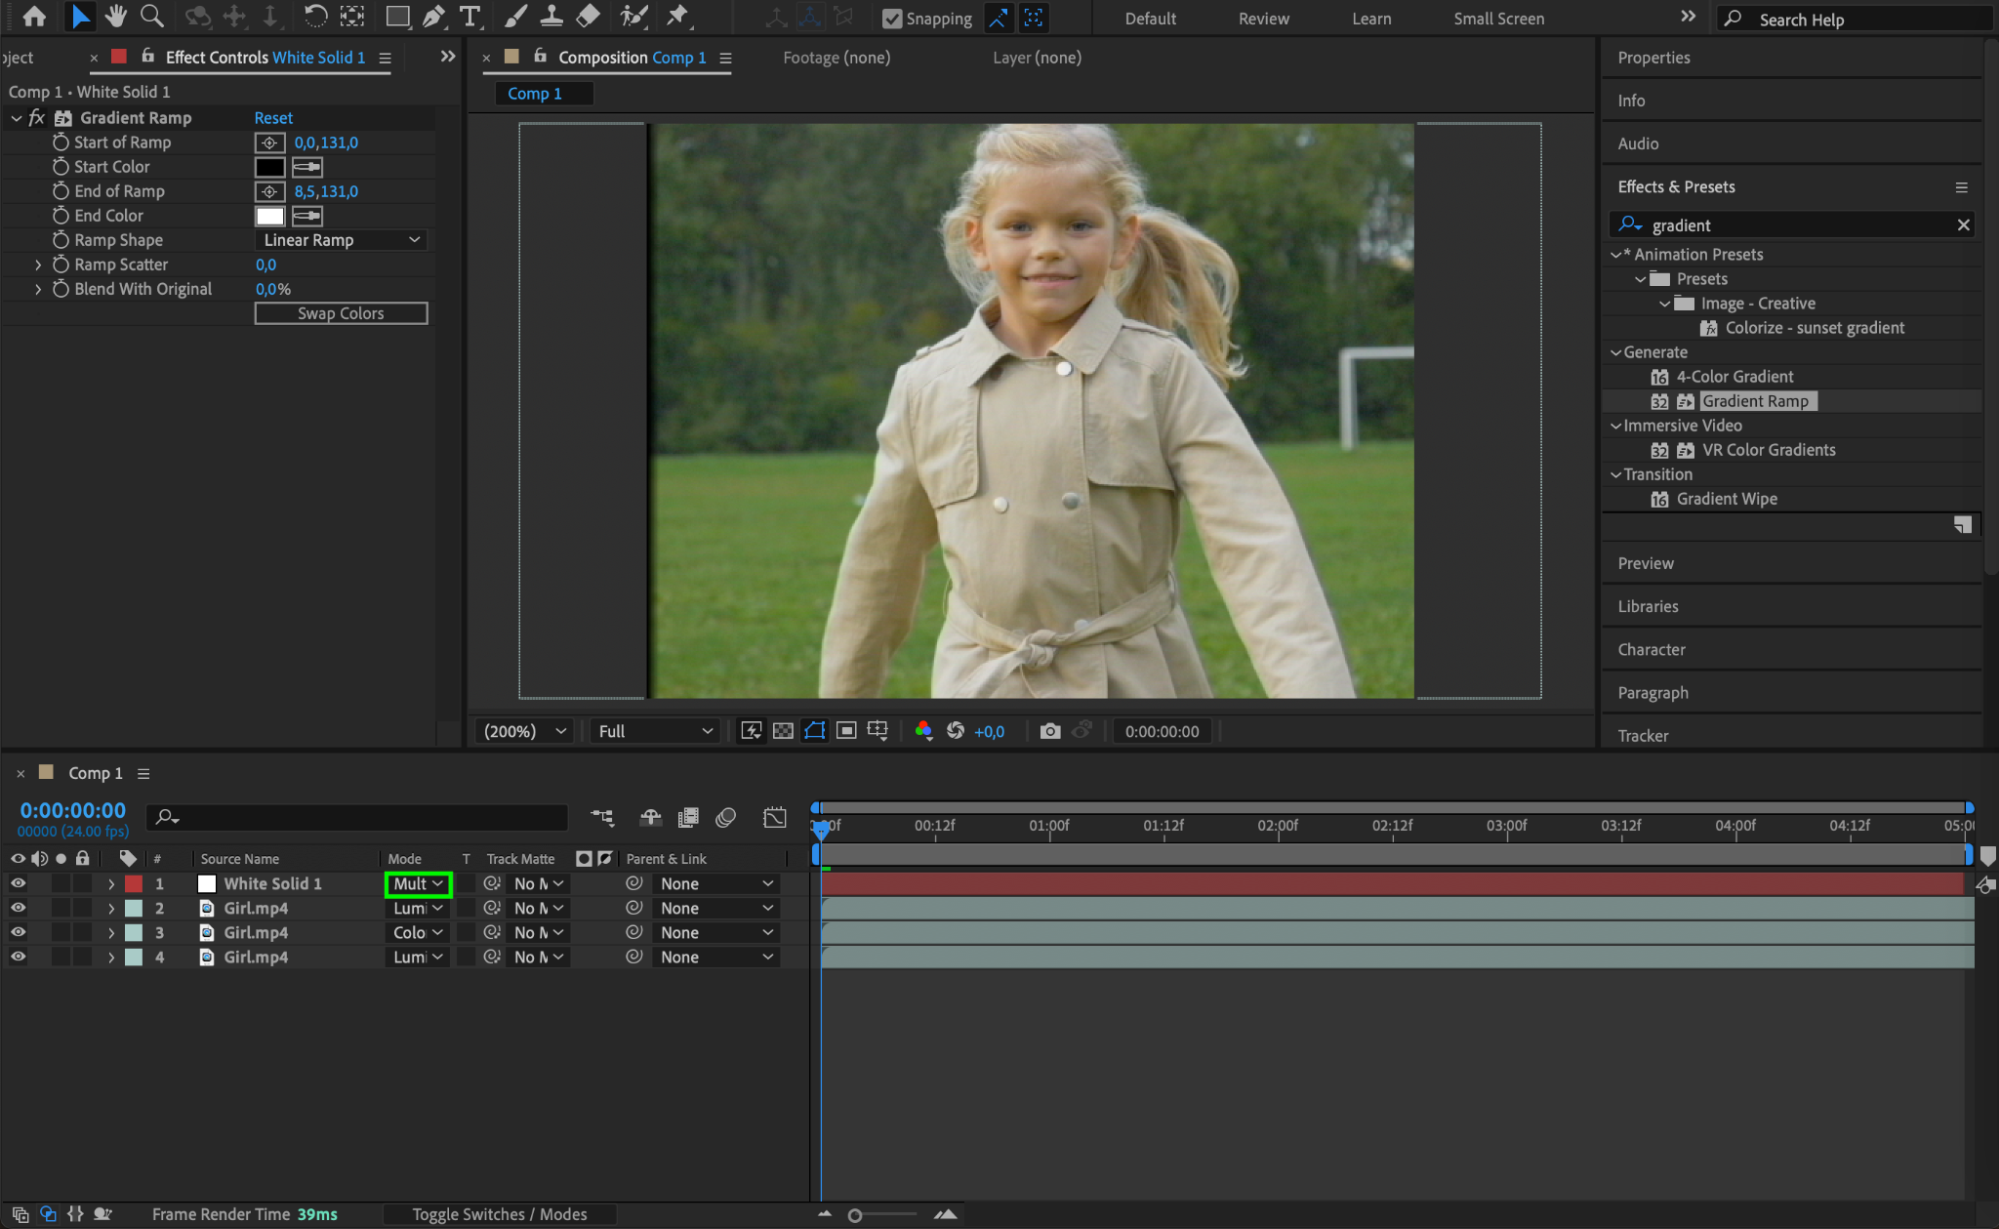
Press “Ctrl/Cmd + D” to duplicate the video layer twice, creating three layers in total.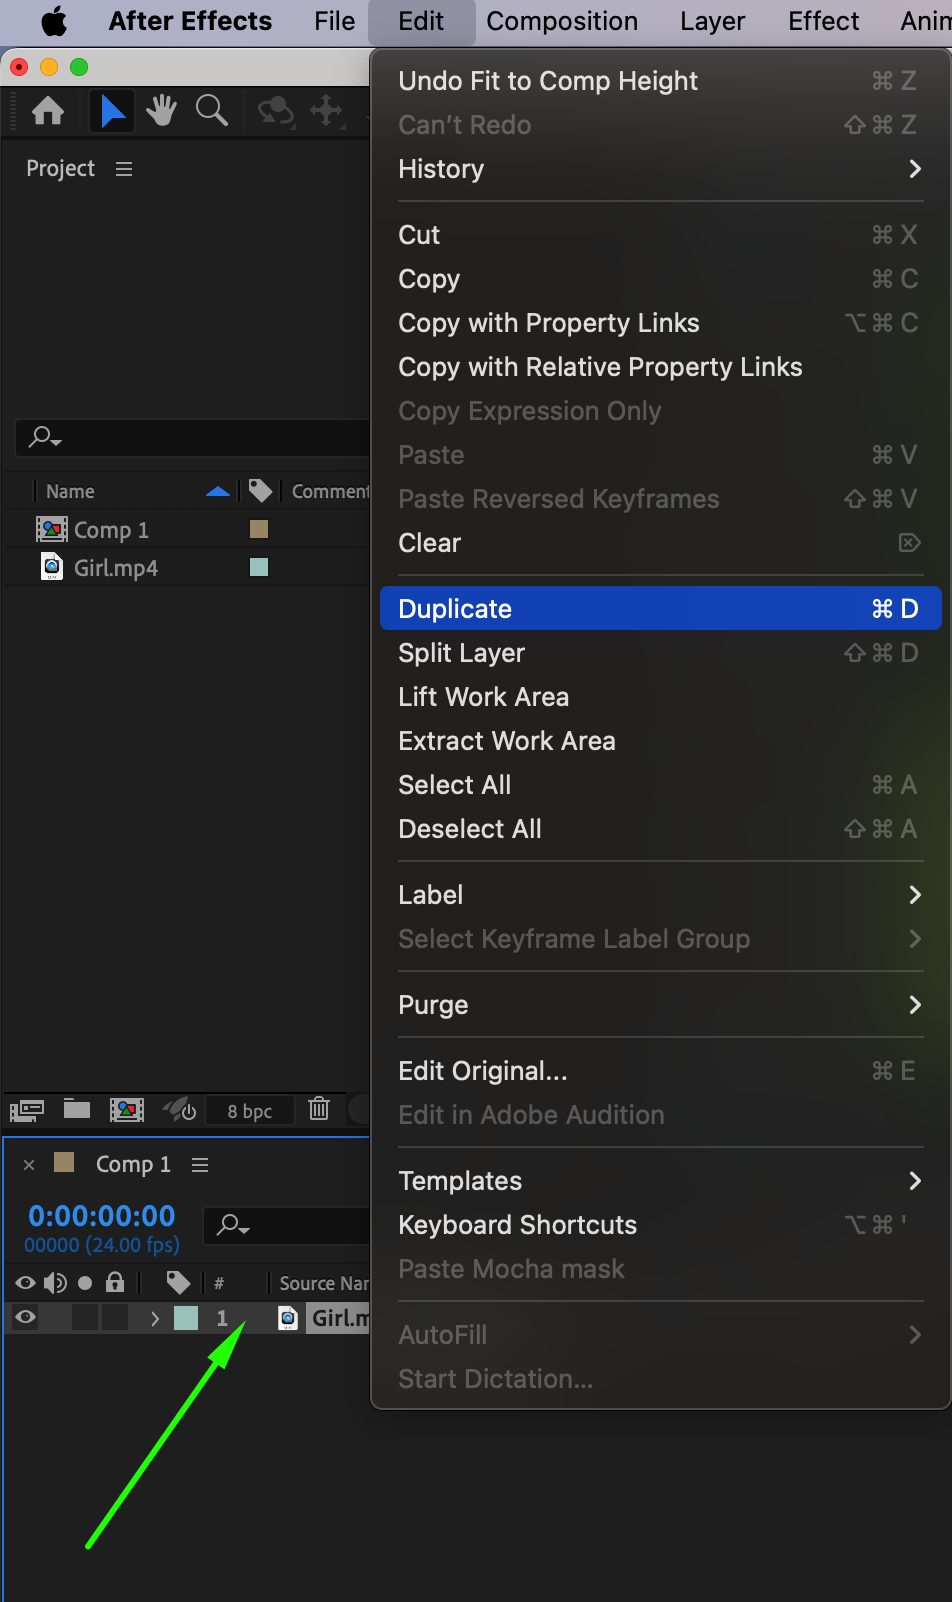 Step 5: Apply Blending Modes
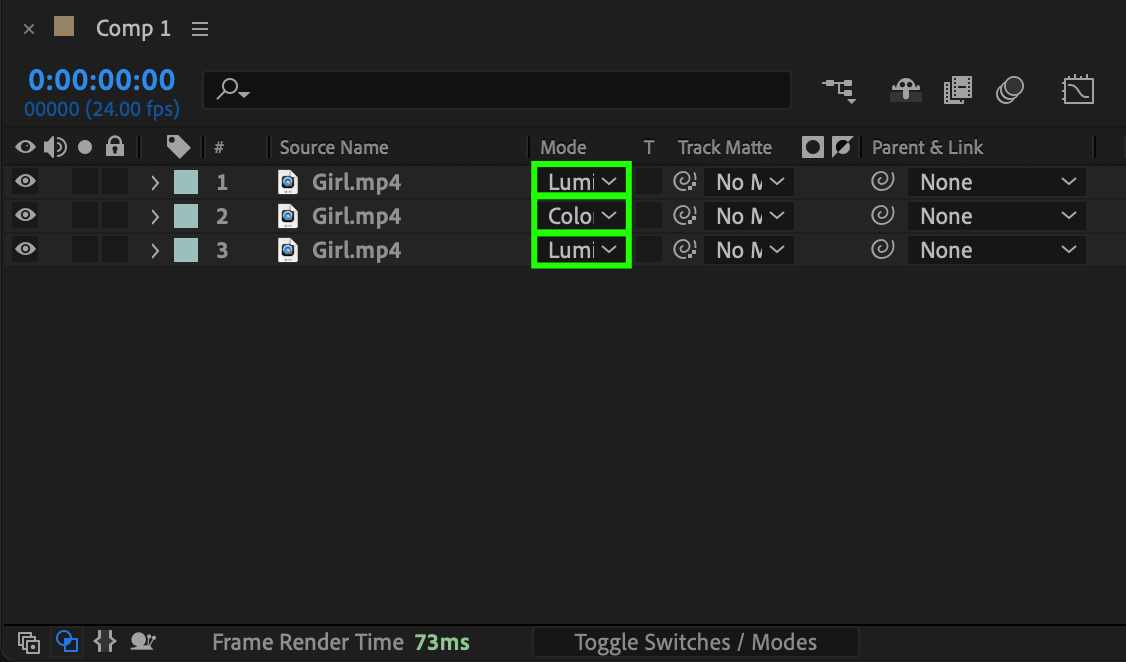
Set the blending mode of the first and last layers to Luminosity and the middle layer to Color. This helps separate brightness and color, creating a more natural old-film effect.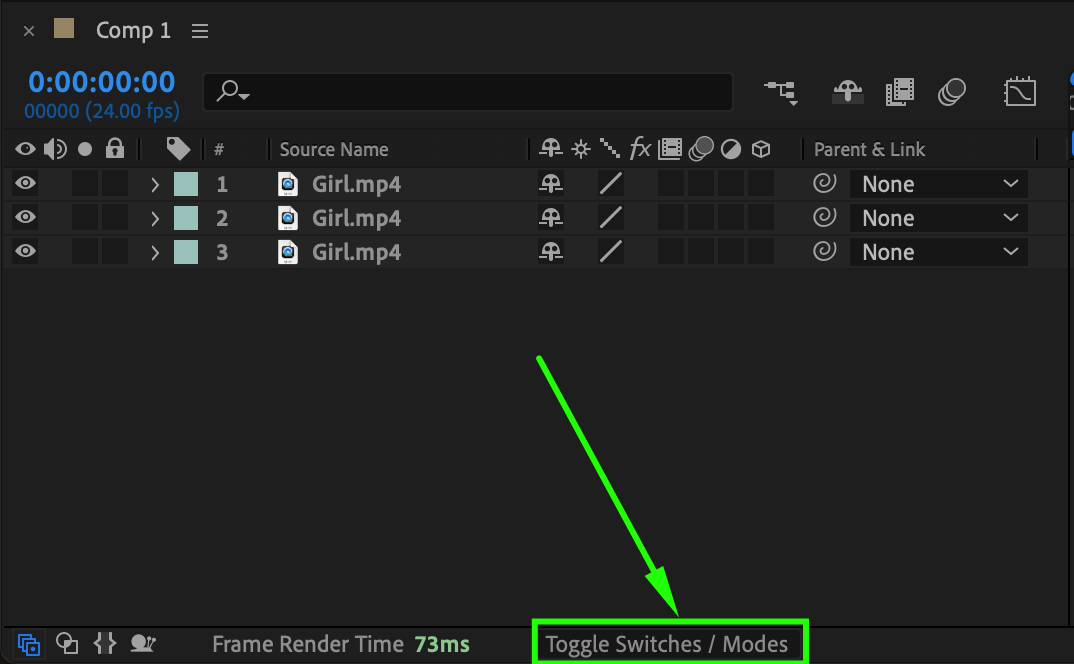
 Step 6: Add Noise and Contrast to the Middle Layer
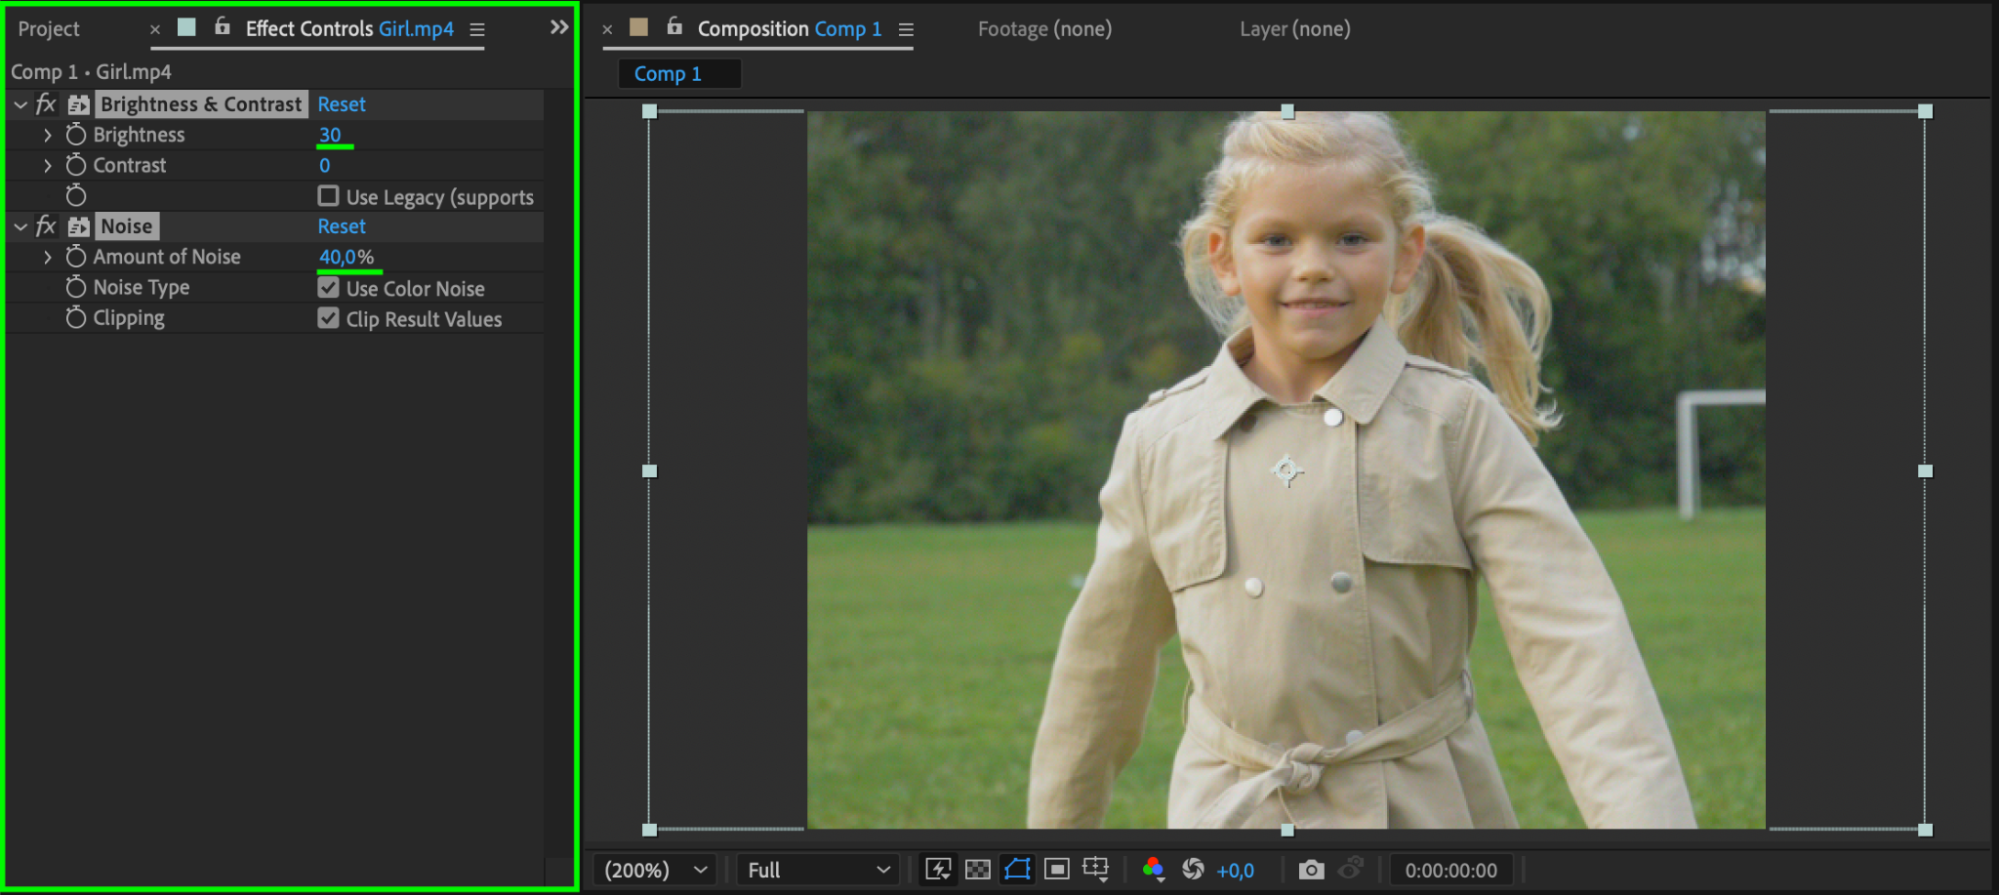
Select the middle layer and apply Brightness & Contrast and Noise from the Effects & Presets panel. Set Brightness to 10-30 and Noise Amount to 20-40 to create a grainy film texture.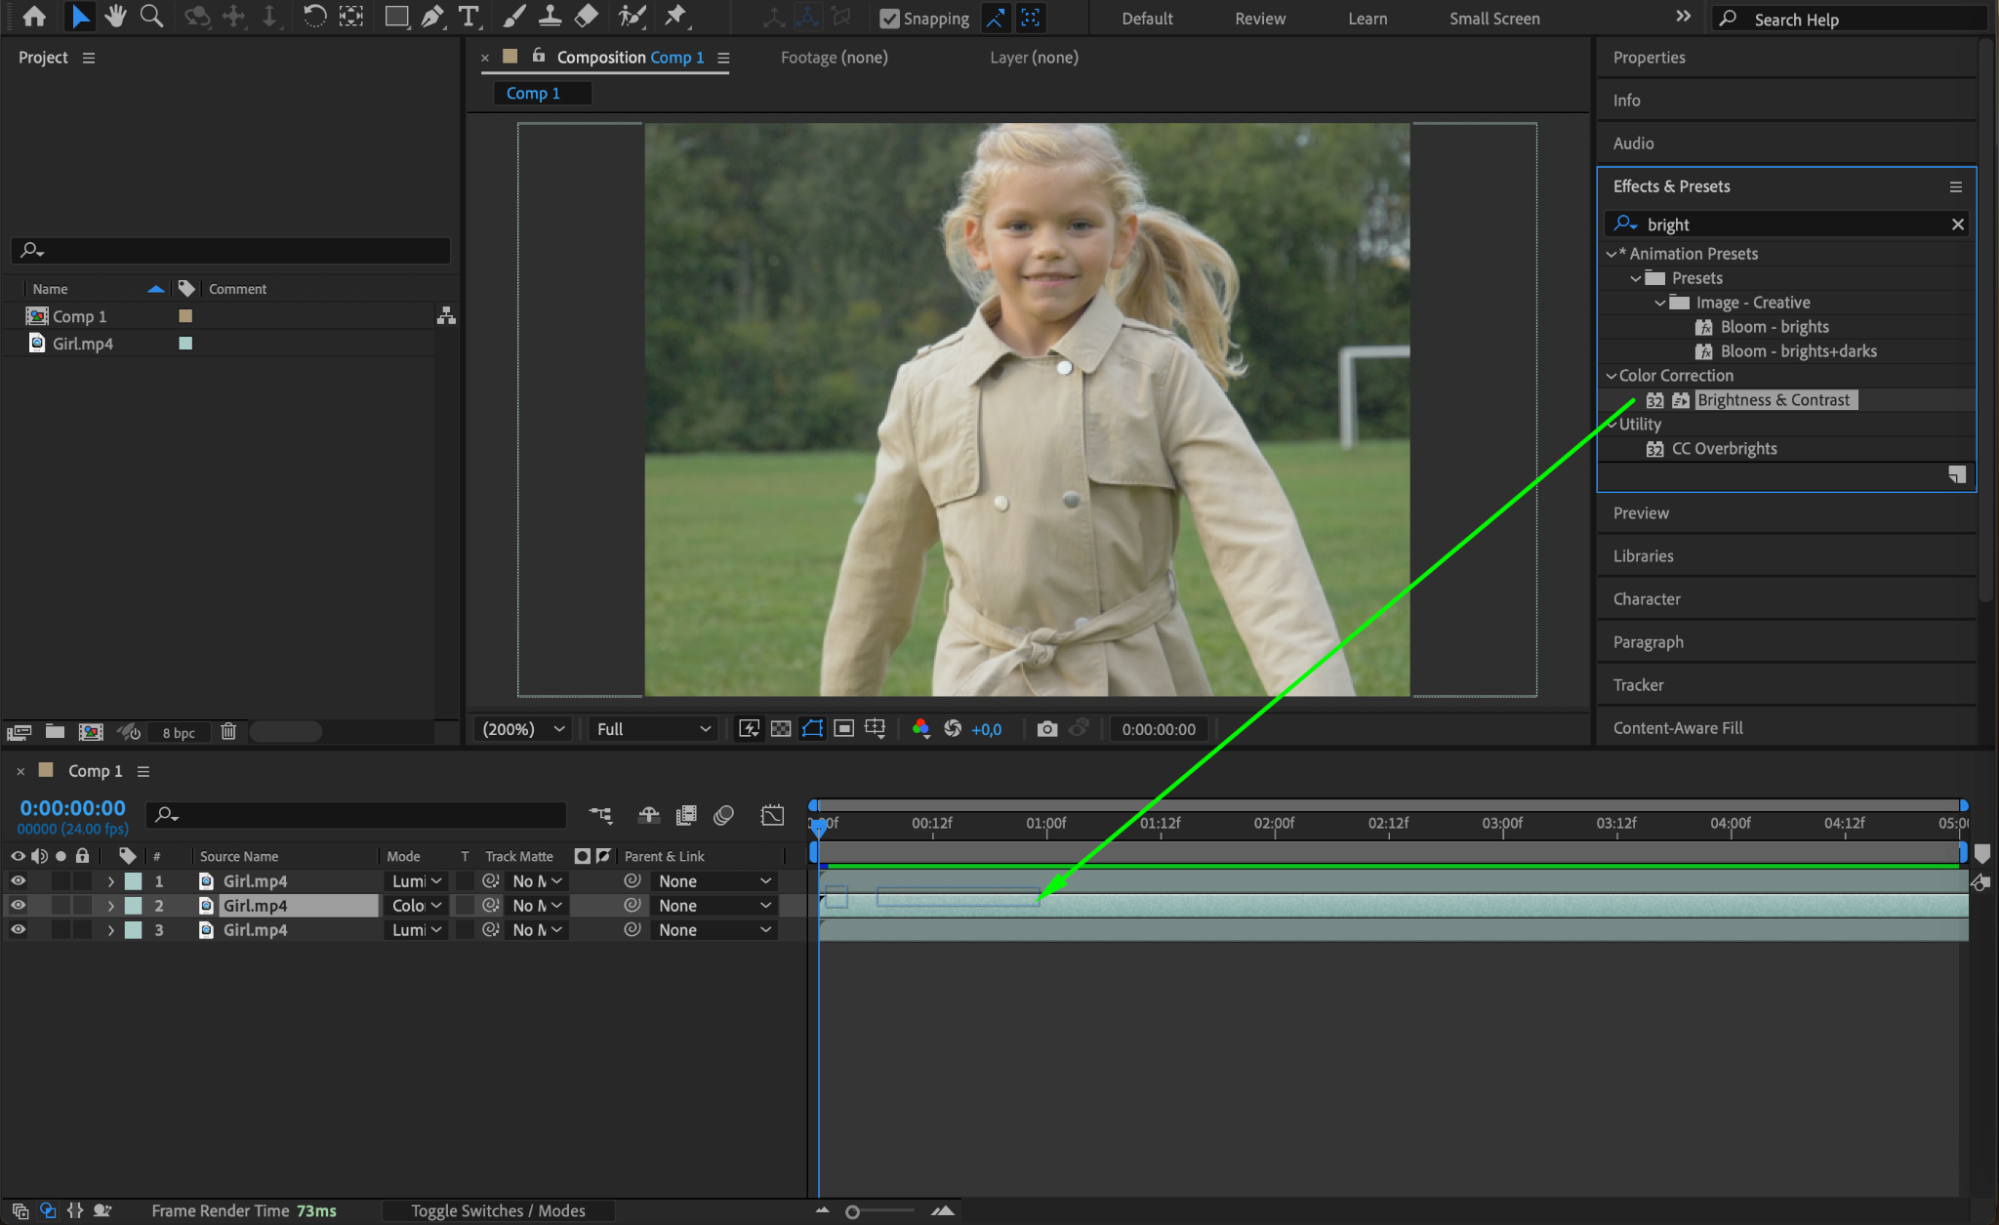
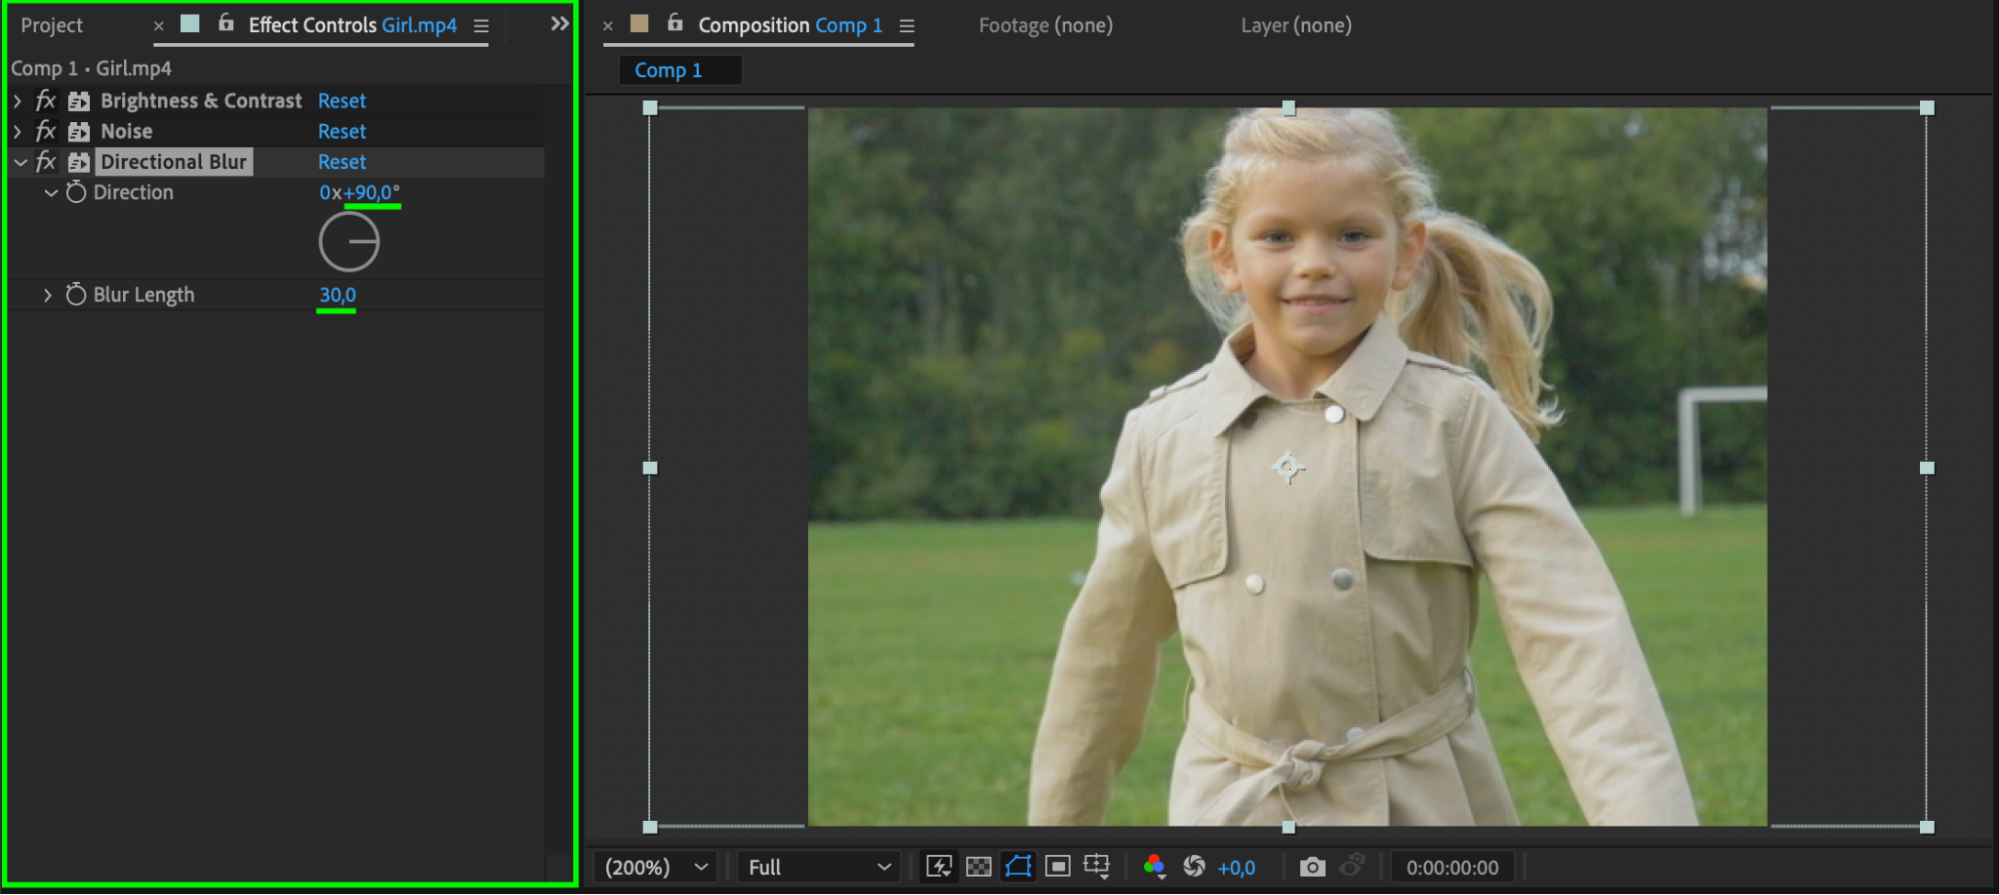
 Step 7: Add Directional Blur to the Middle Layer
Apply Directional Blur to the middle layer. Set the Direction to 90° and Blur Length to 30 to simulate vertical smearing often seen in aged footage.
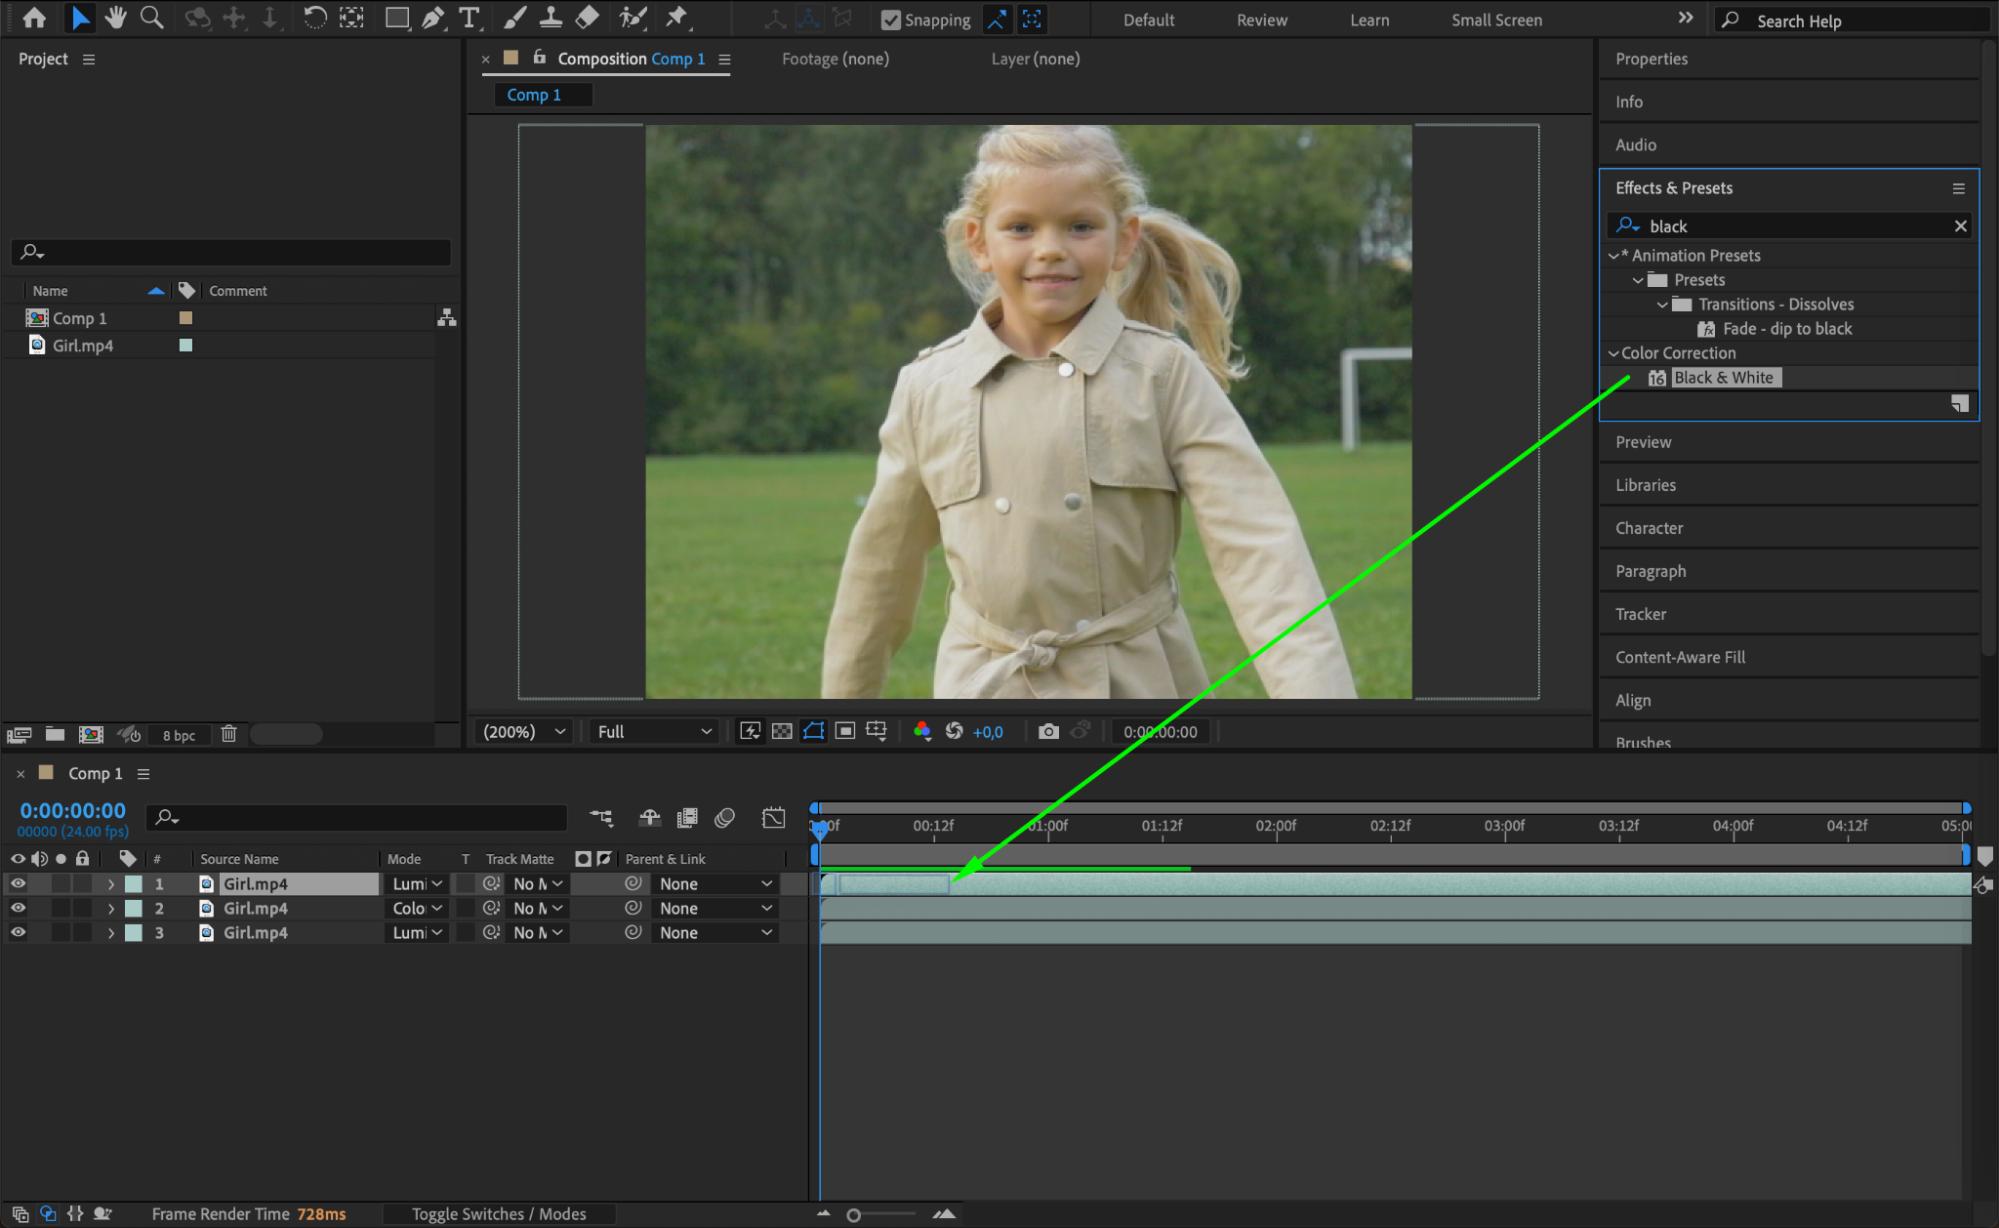
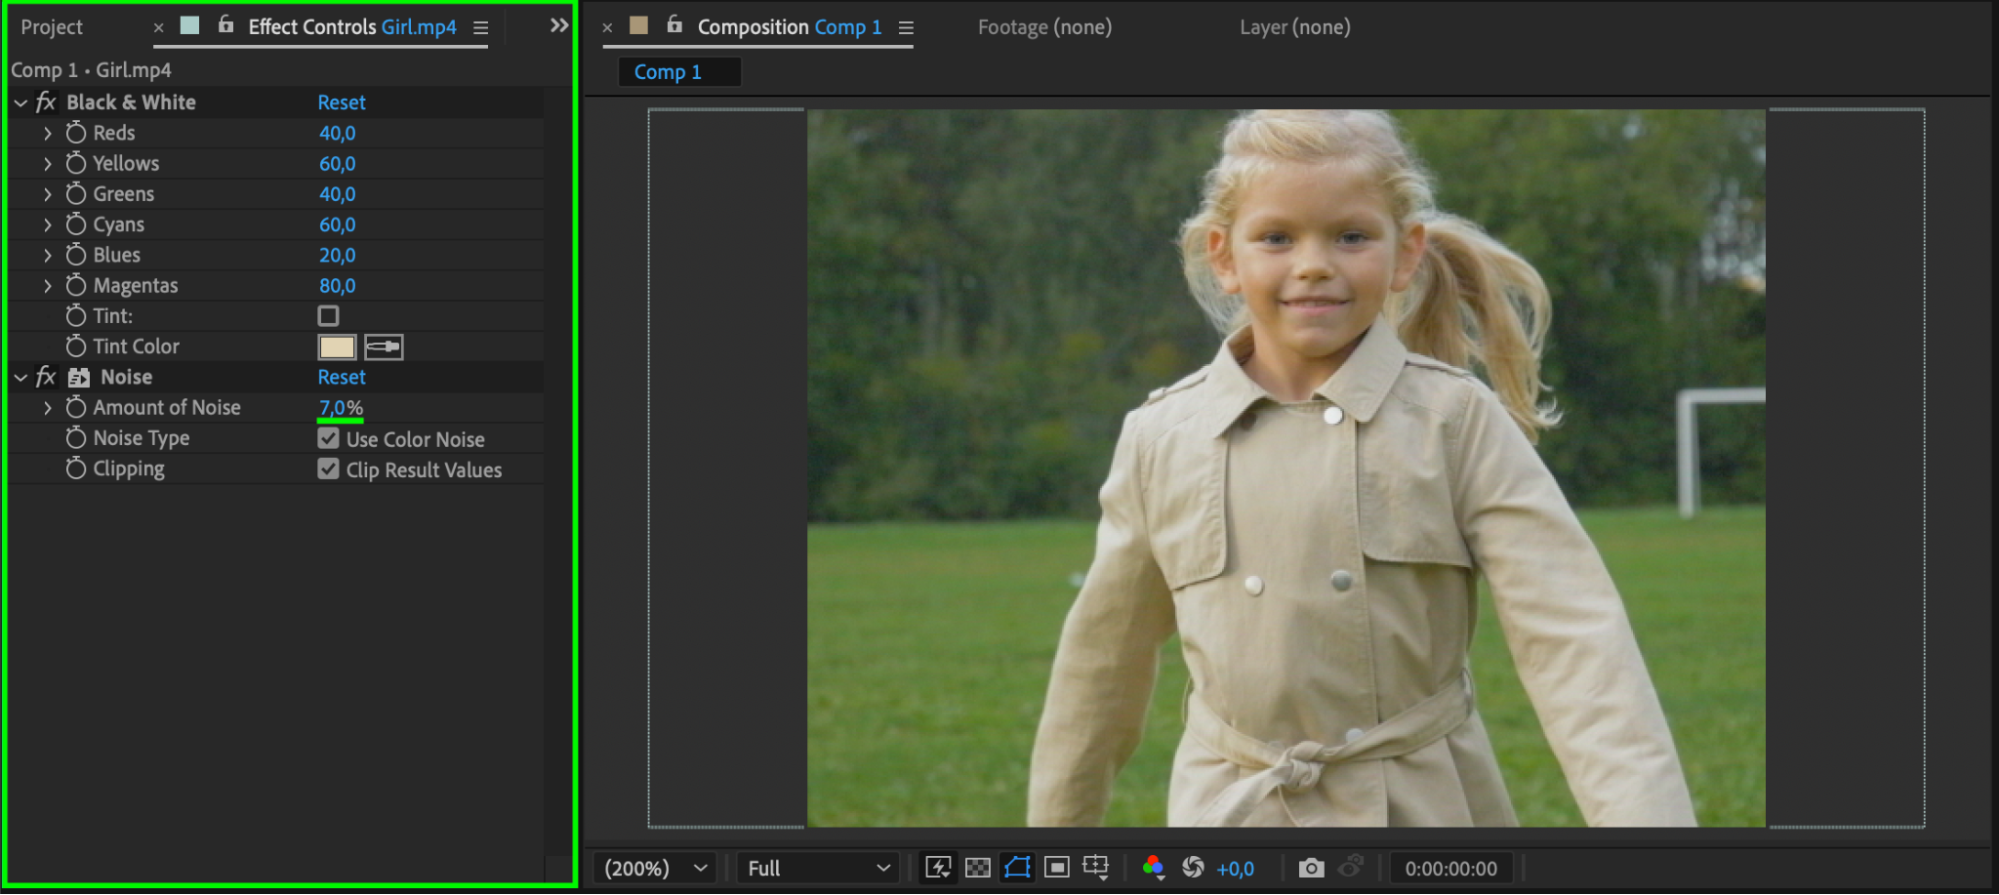
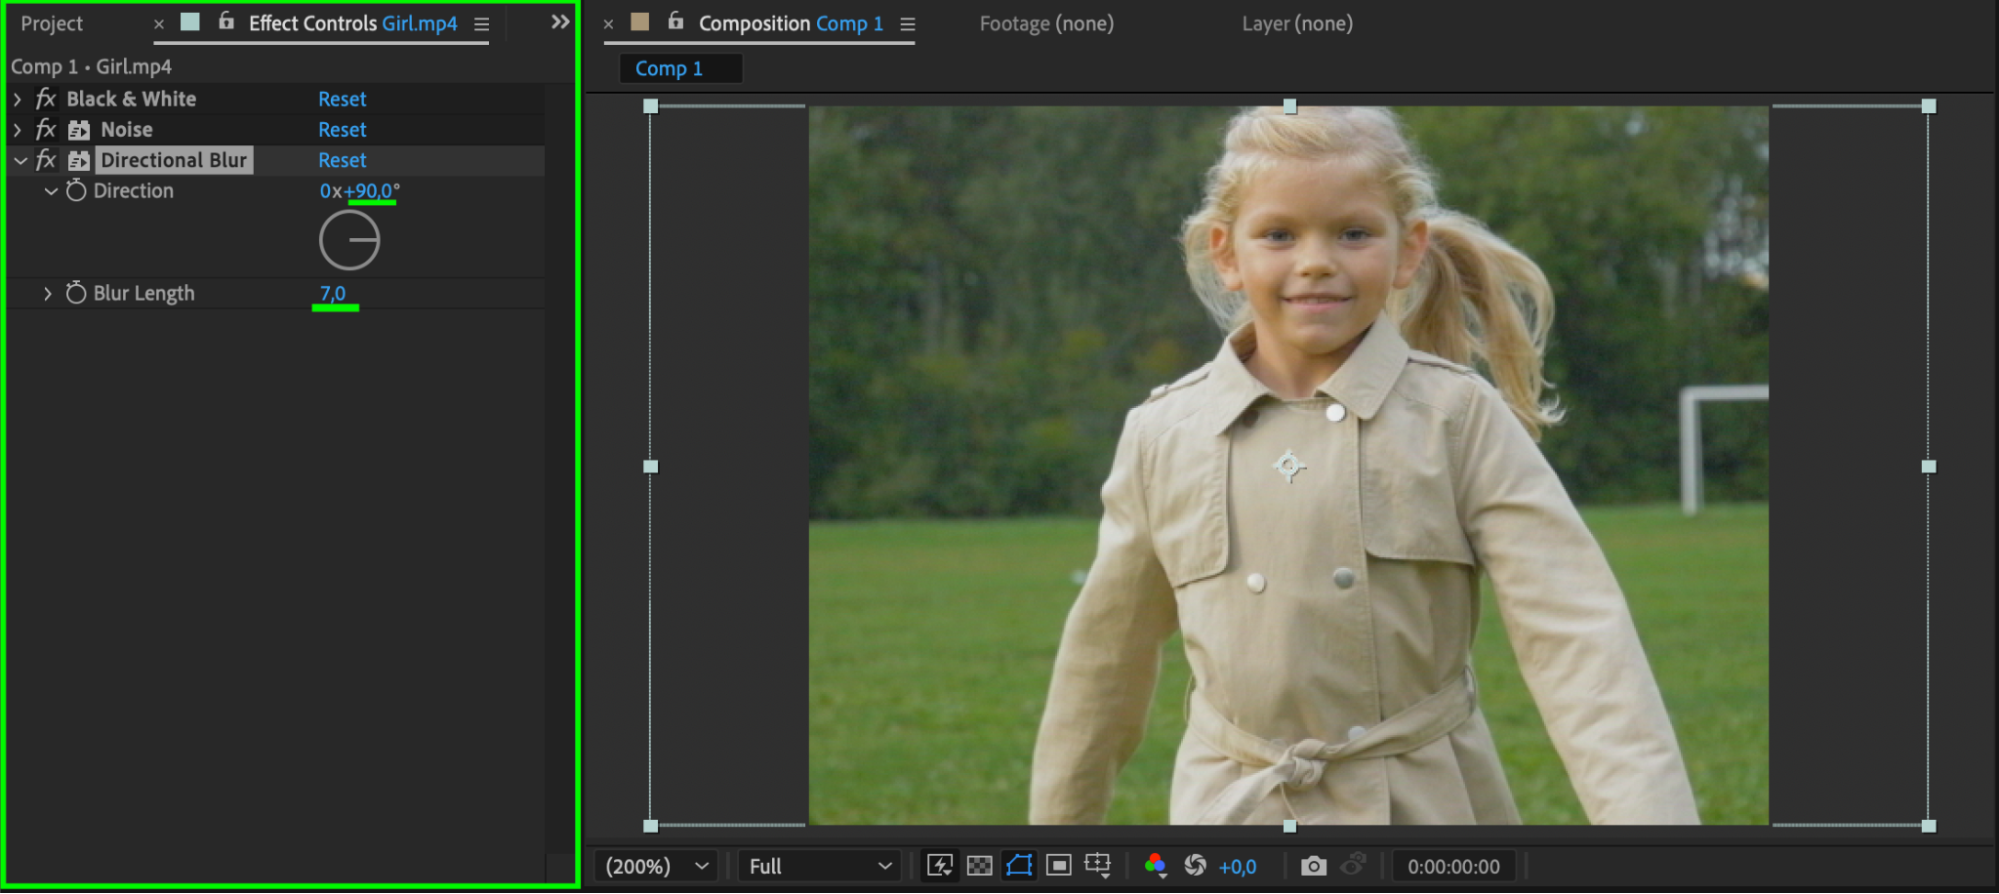
 Step 8: Apply Black & White and Noise to the Top Layer
Apply Black & White and Noise to the top layer. Set Noise Amount to 7 for subtle texture variation.
 Step 9: Copy Effects to the Bottom Layer
Copy the Black & White and Noise effects from the top layer and paste them onto the bottom layer to maintain consistency.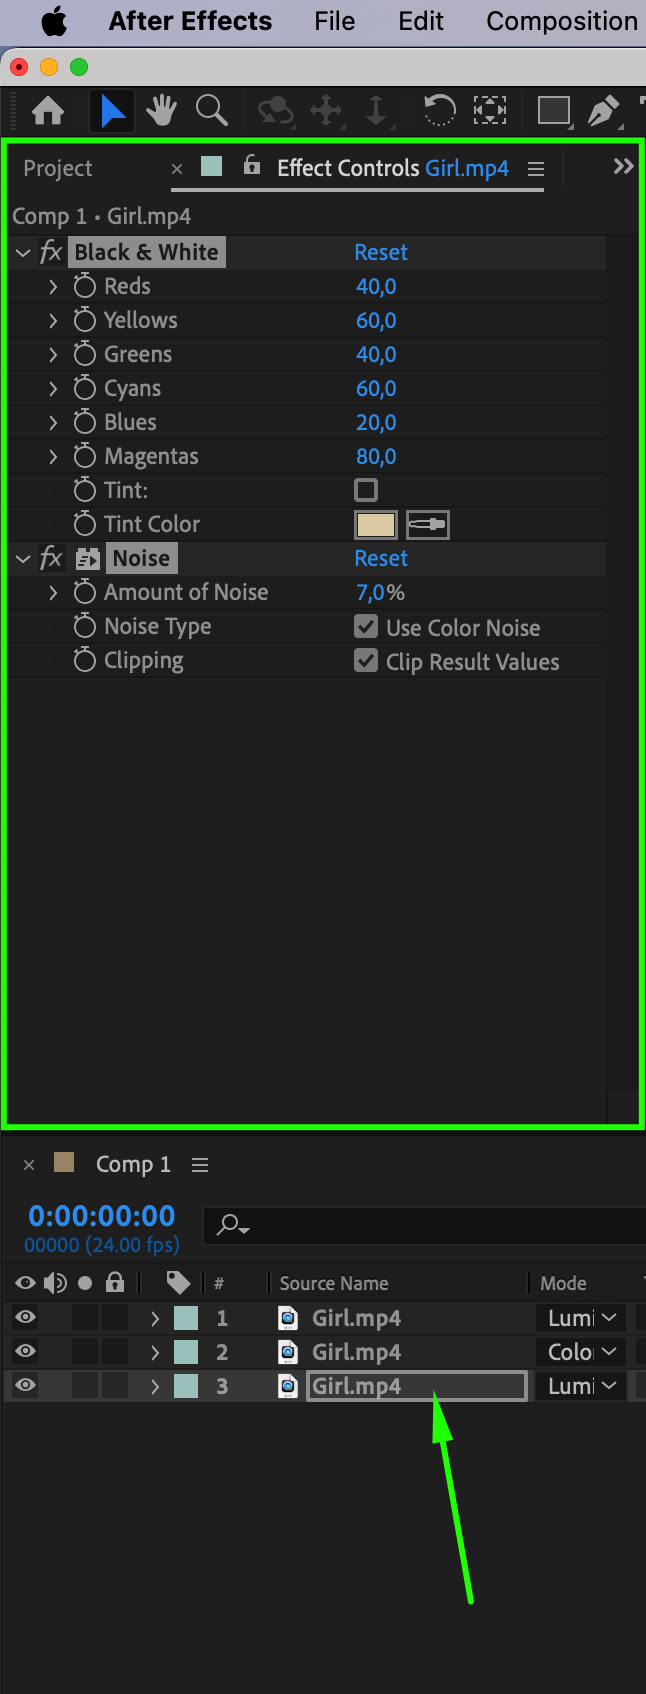 Step 10: Add Directional Blur to the Bottom Layer
Apply Directional Blur to the bottom layer. Set the Direction to 90° and Blur Length to 7 to add slight distortion.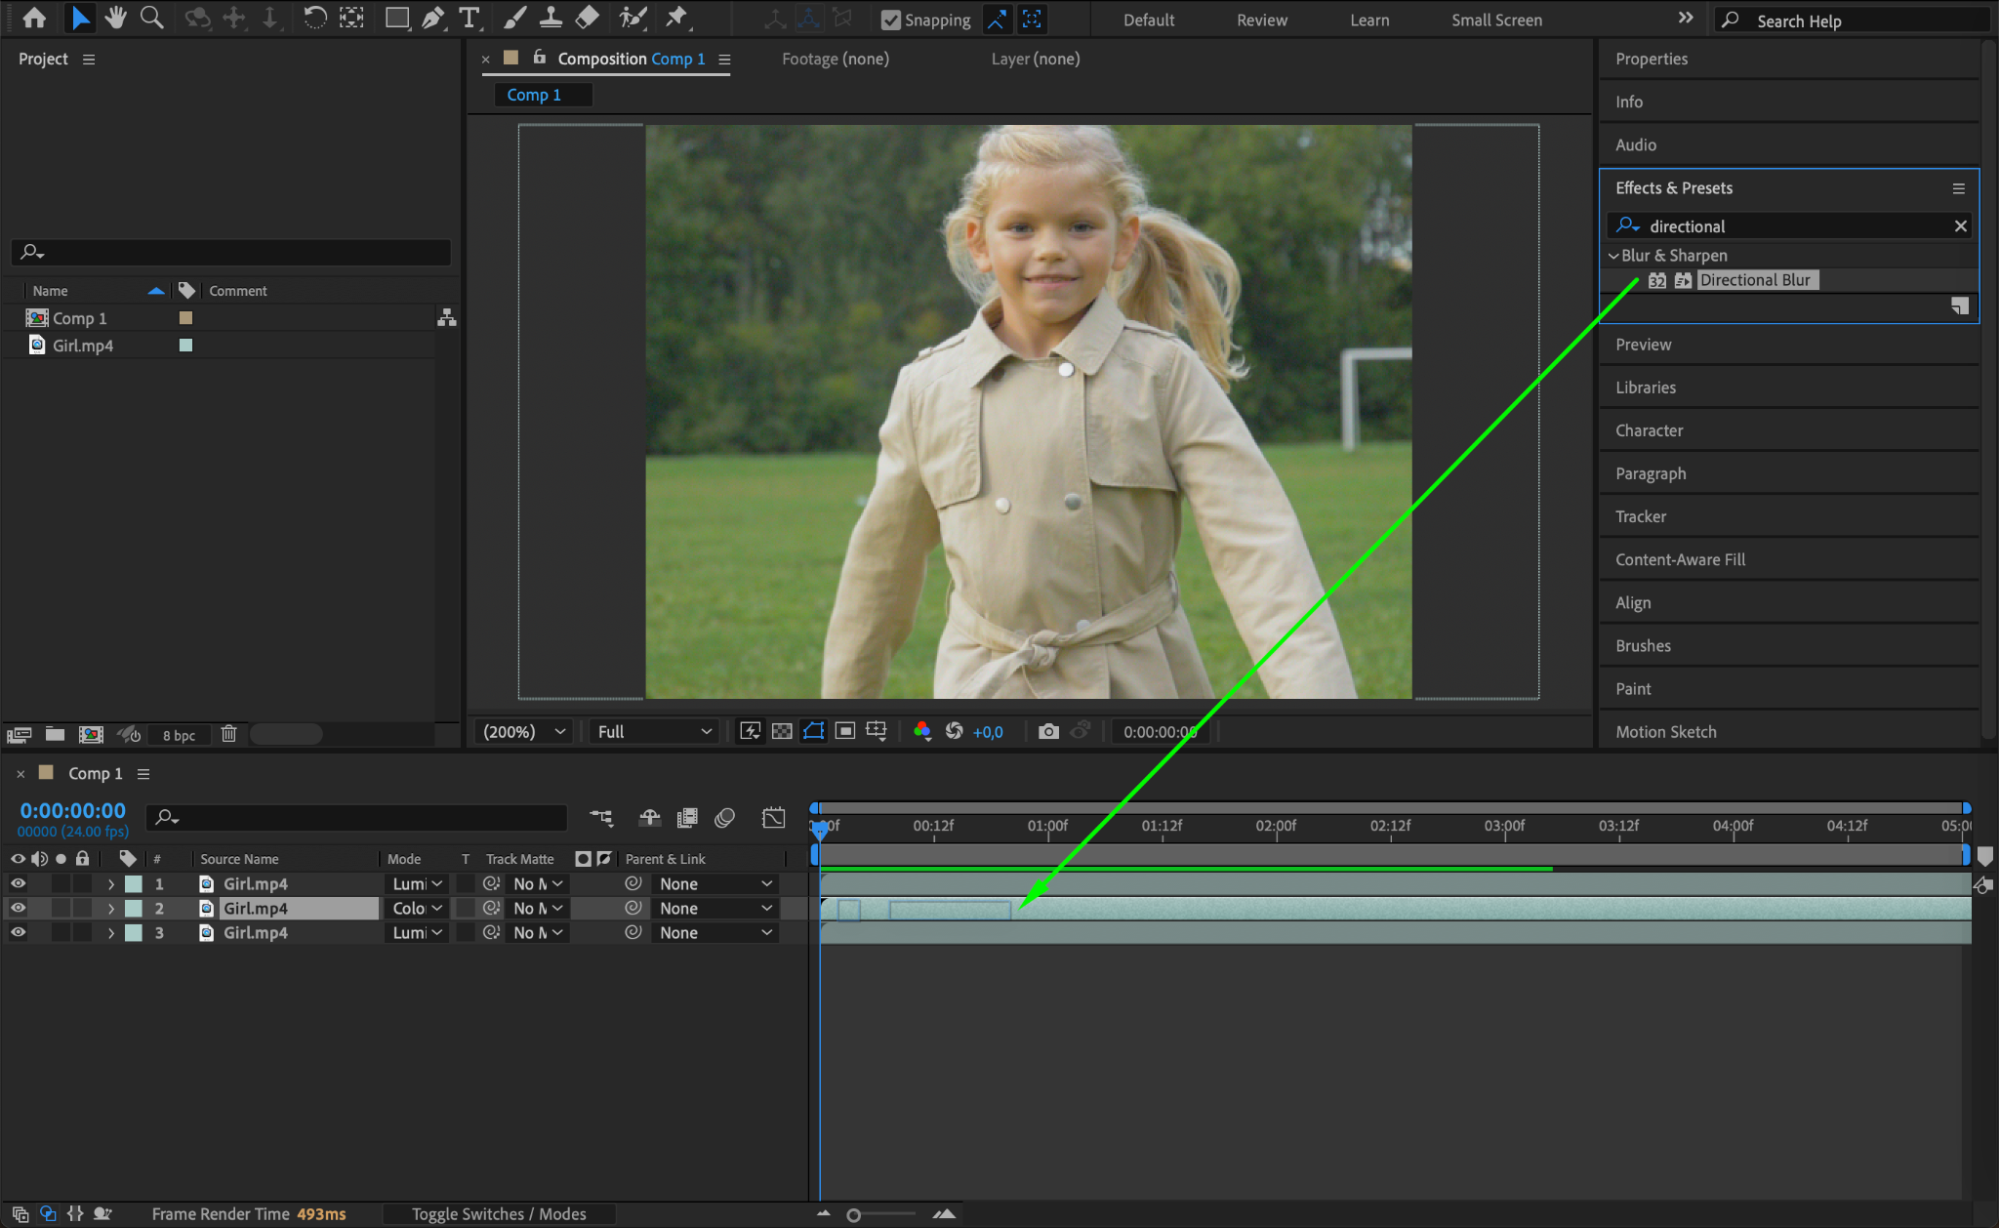
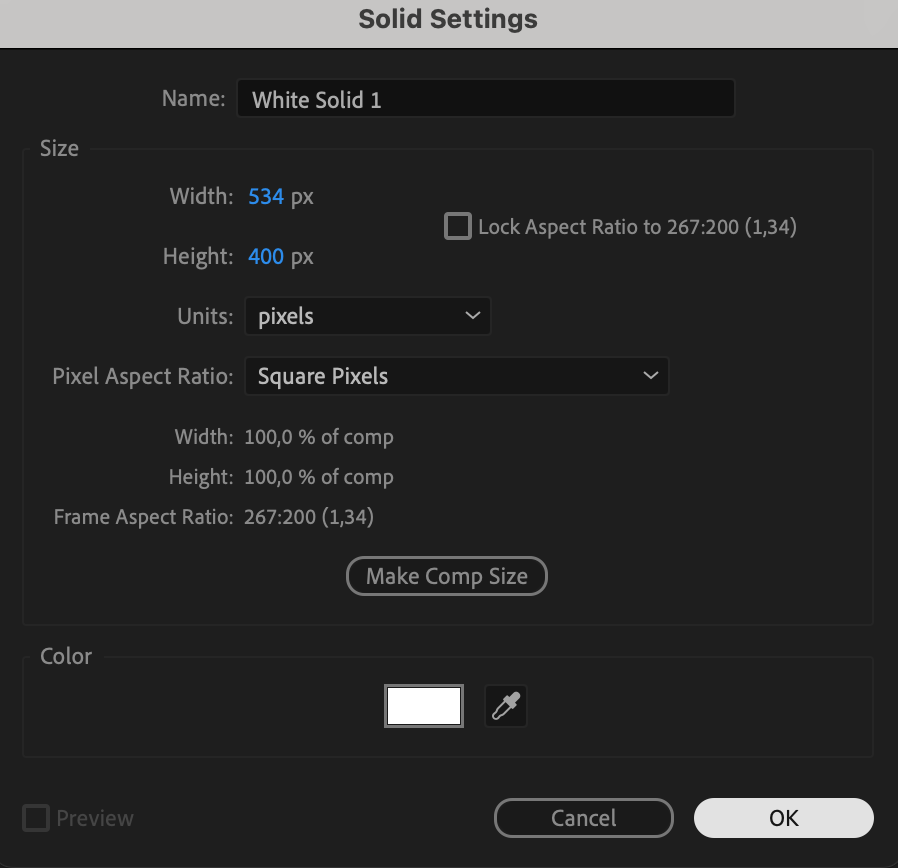
 Step 11: Create a Solid Background Layer
Go to Layer > New > Solid and choose any color to act as a background.
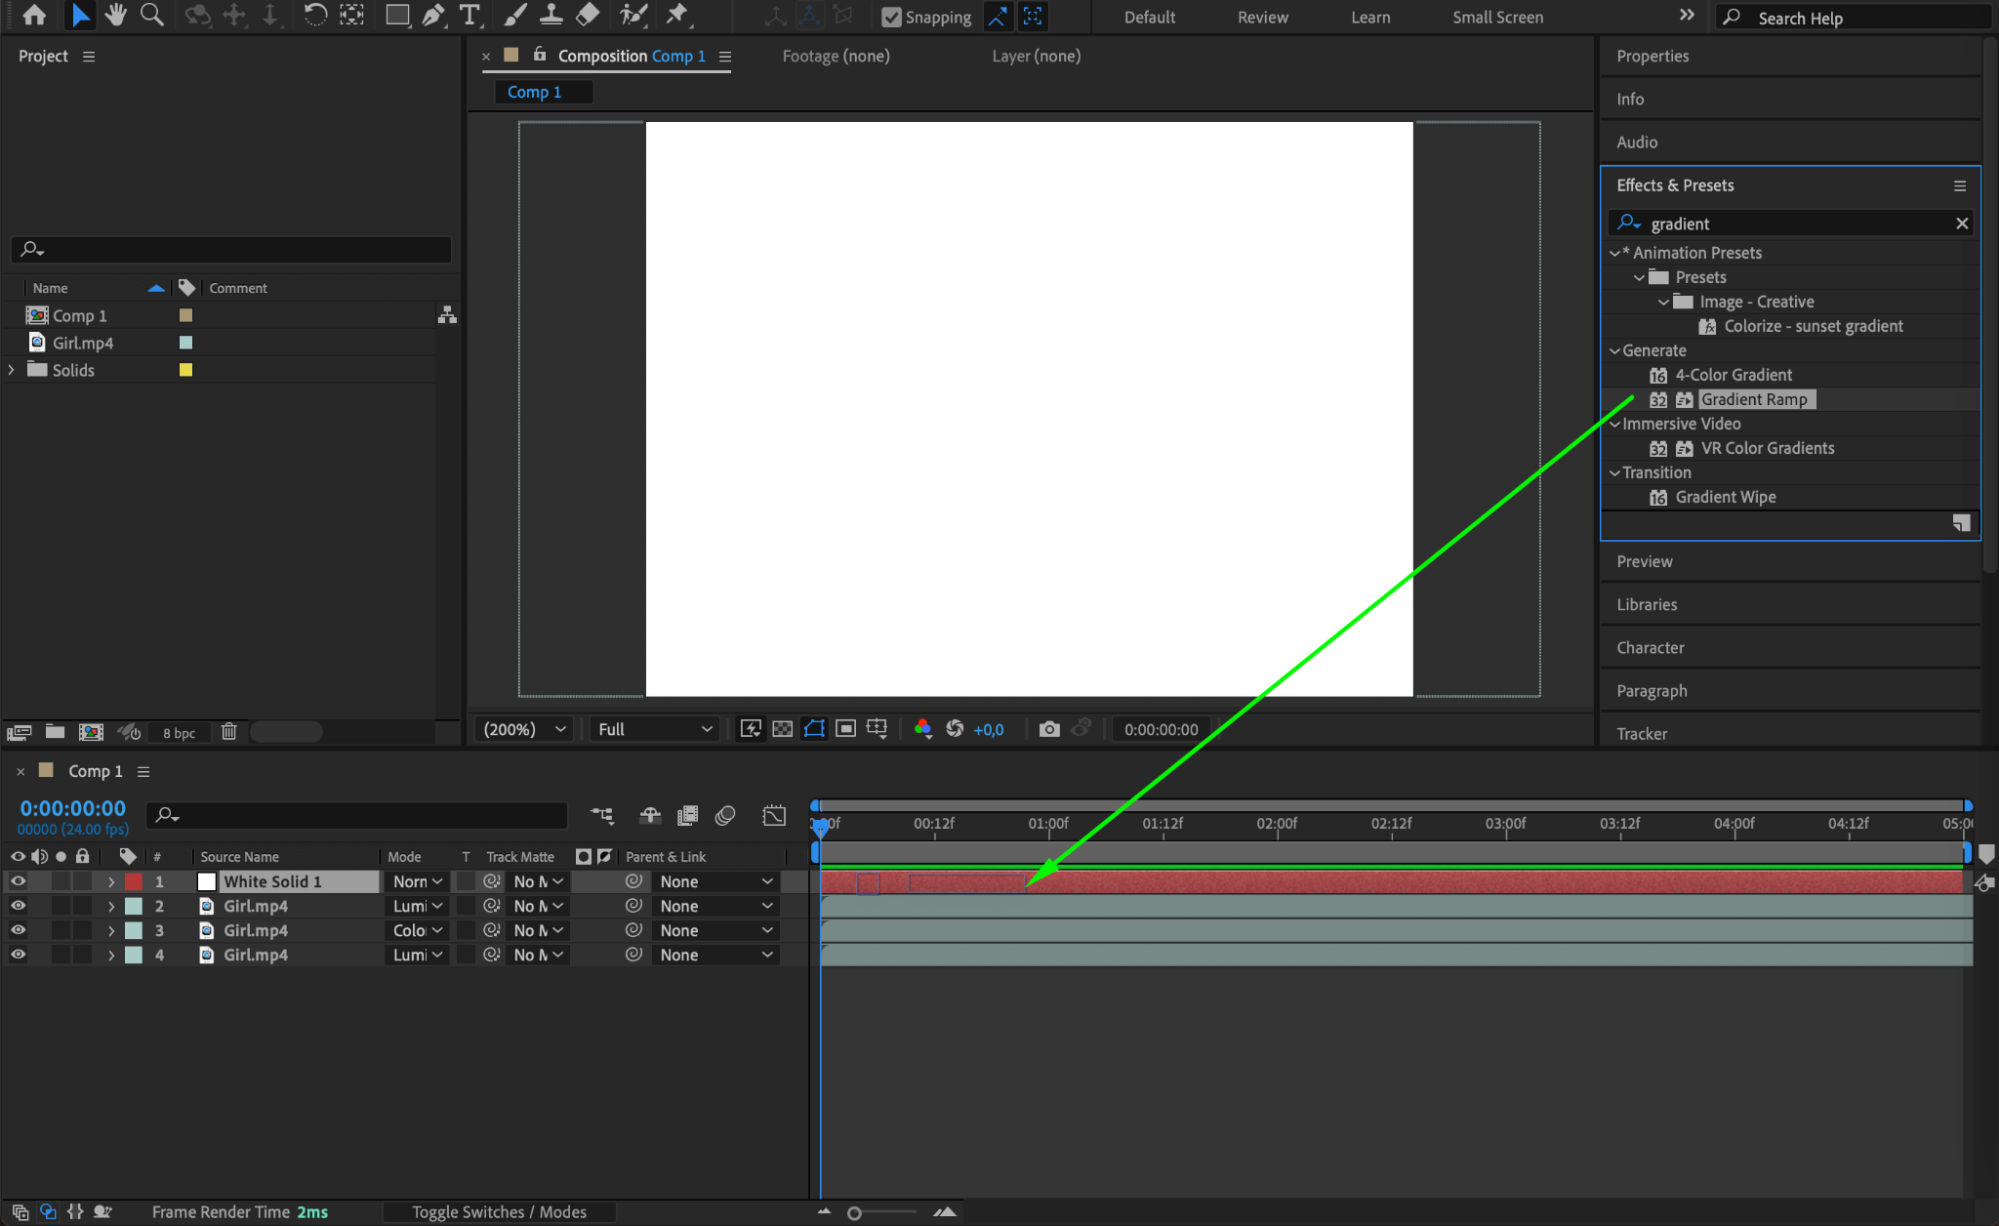
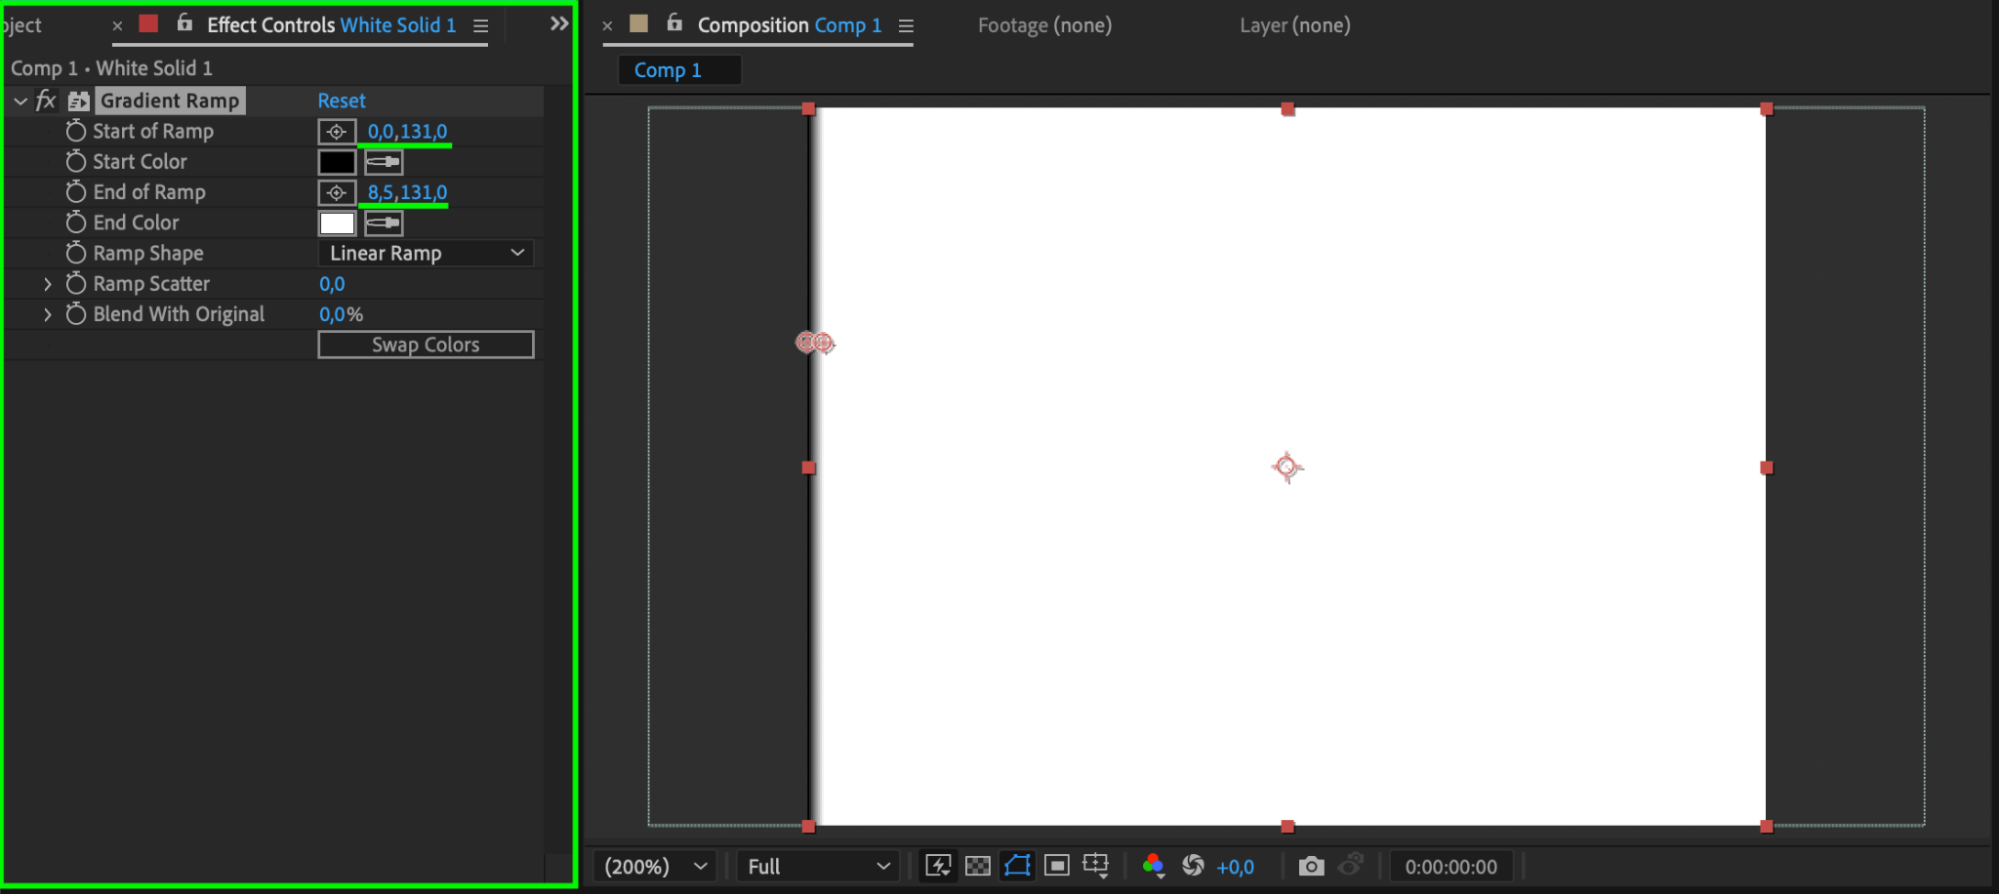
 Step 12: Apply a Gradient Ramp Effect
Apply Gradient Ramp to the solid layer. Set the Start of Ramp to (0,0;131,0) and the End of Ramp to (8,5;131,0). Change the Blending Mode to Multiply for a faded film appearance.
 Step 13: Pre-Compose All Layers
Select all layers, right-click, and choose Pre-Compose to group them into one composition.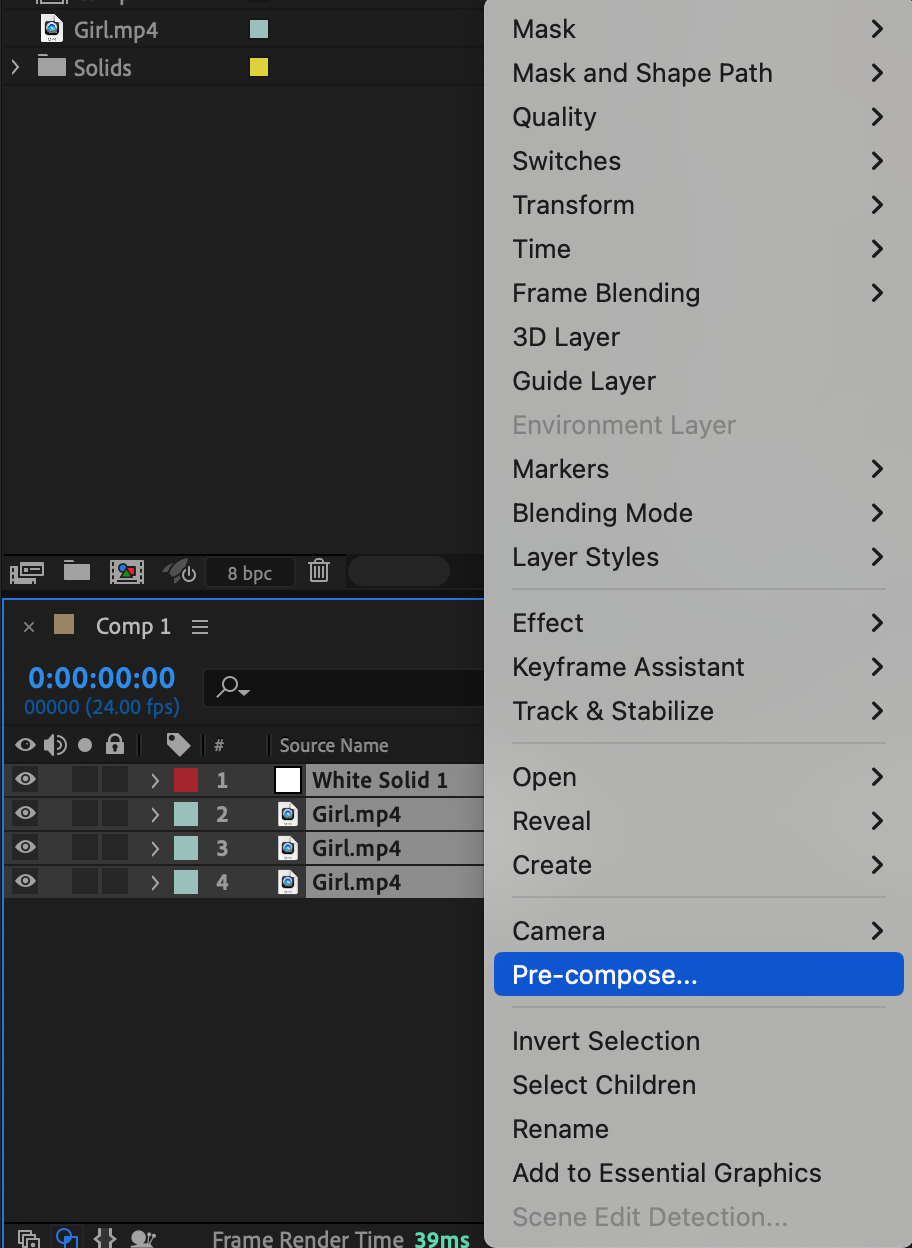
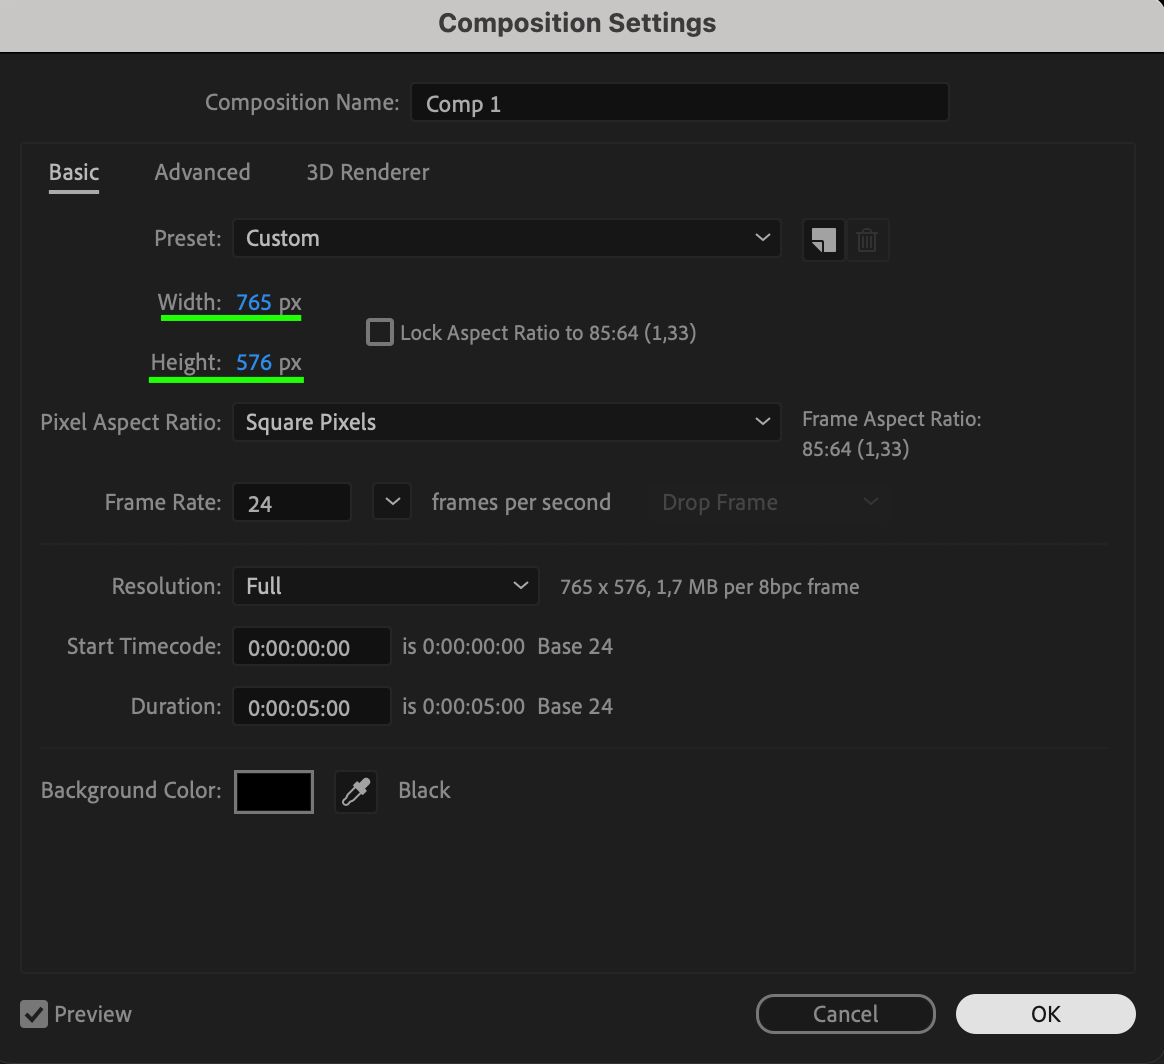
 Step 14: Adjust the Composition Size
Go to Composition > Composition Settings and change the Width to 765px and Height to 576px for a standard vintage film resolution.
 Step 15: Fit the Pre-Comp to the Composition
Right-click on the pre-comp layer and select Transform > Fit to Comp to resize it accordingly.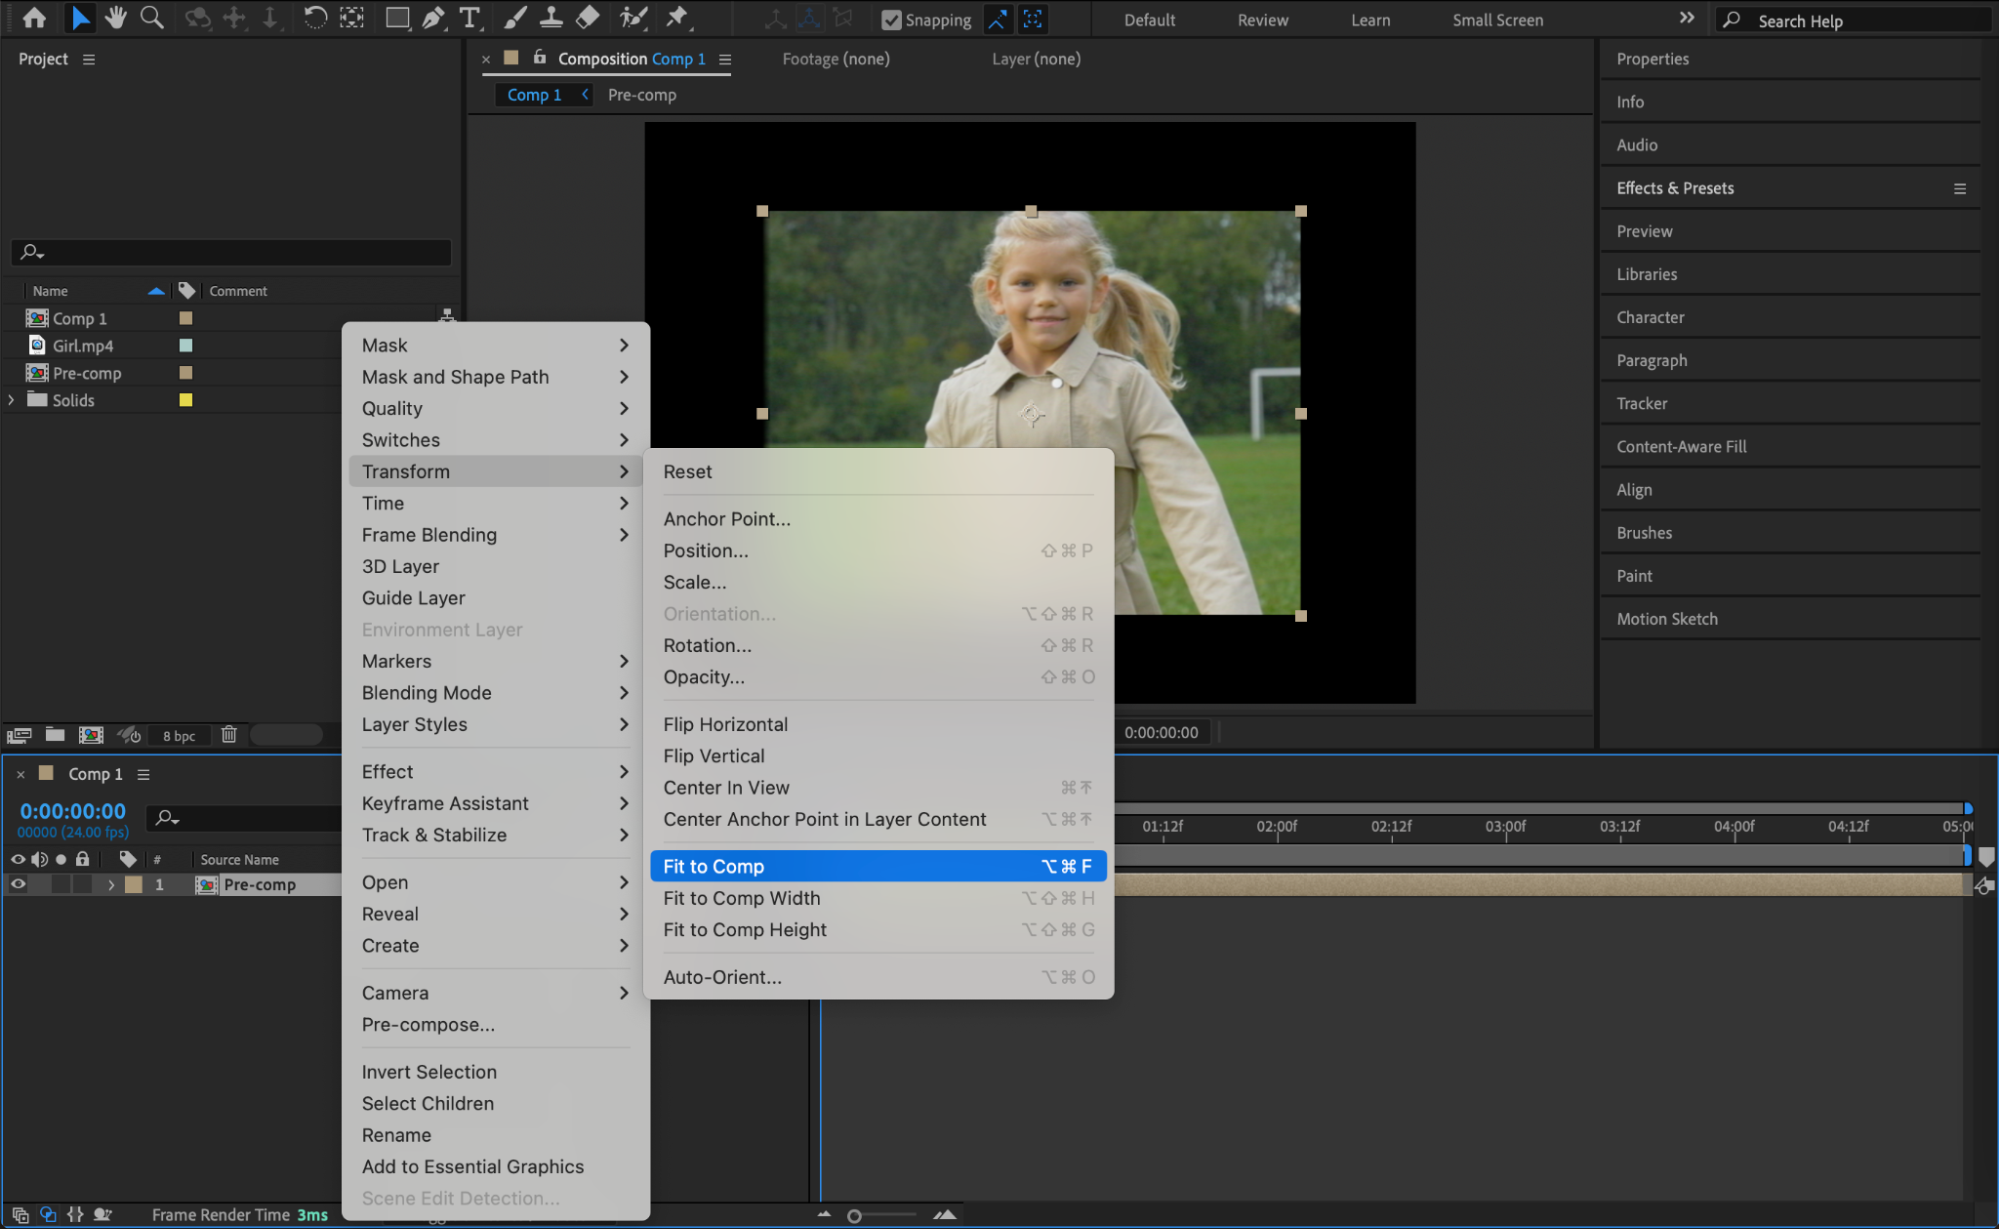 Step 16: Create an Adjustment Layer
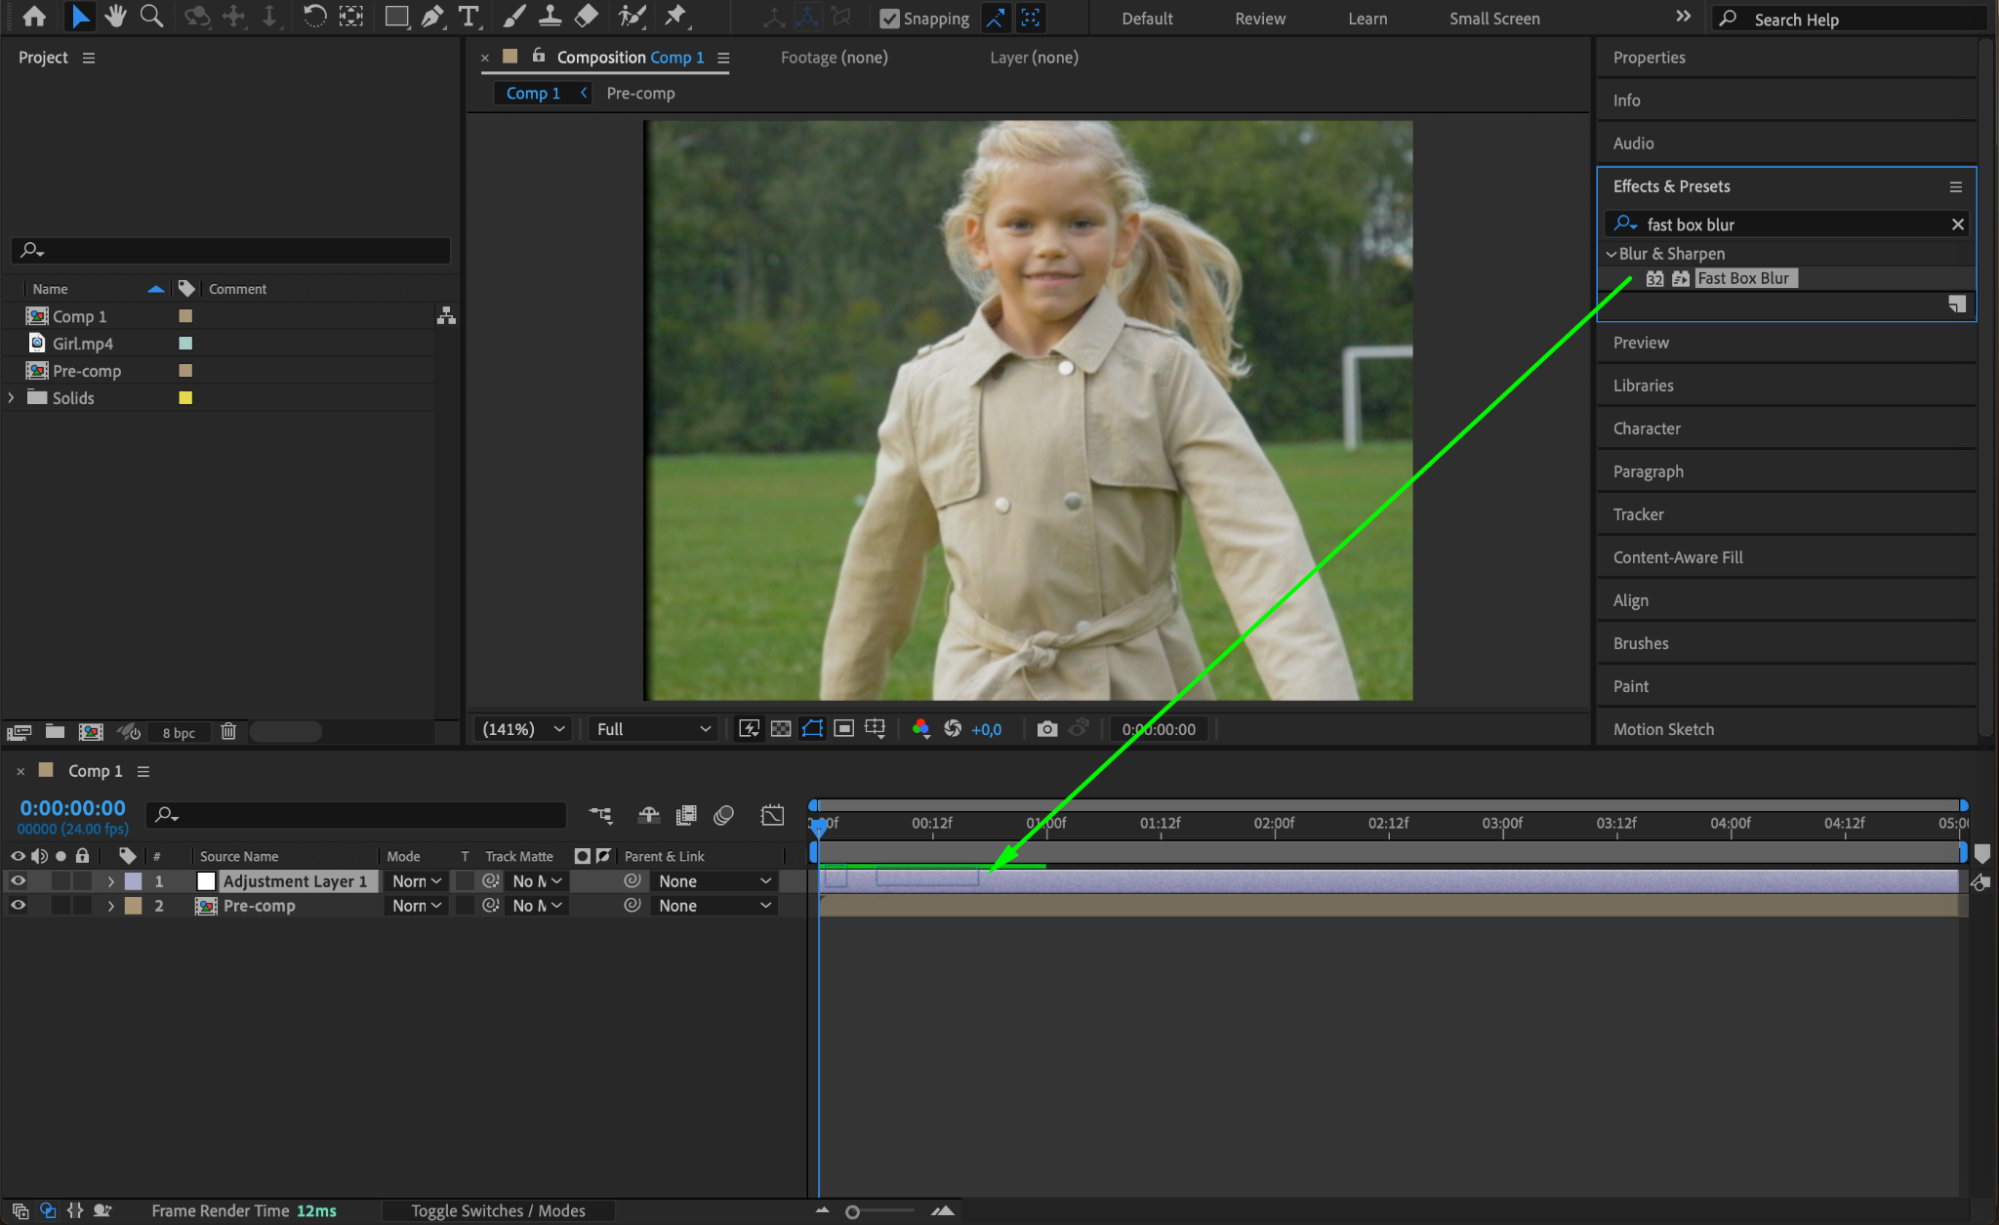
Go to Layer > New > Adjustment Layer to apply final effects.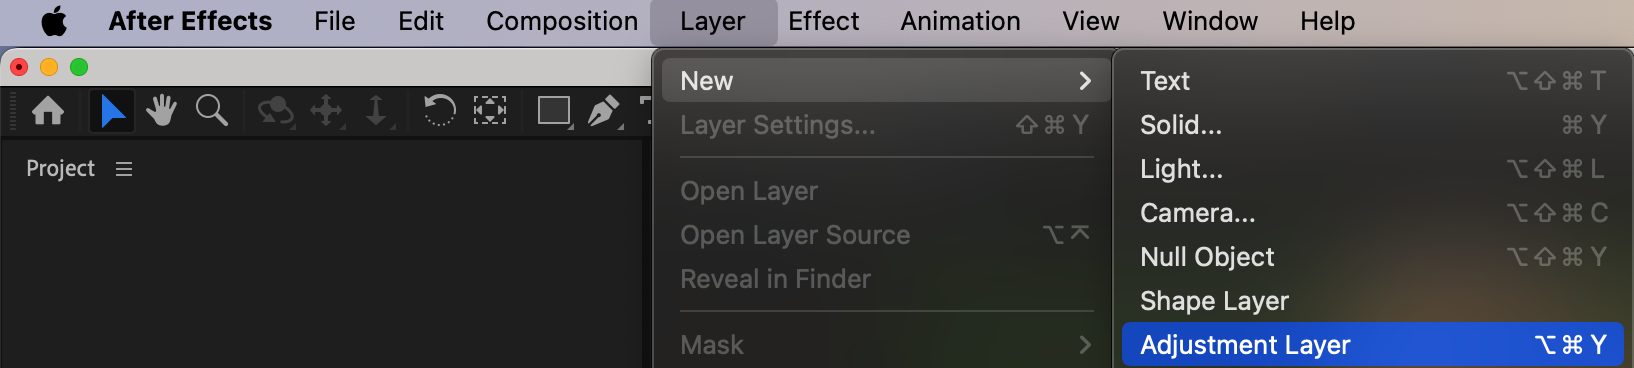 Step 17: Add Blur, Unsharp Mask, and Grain
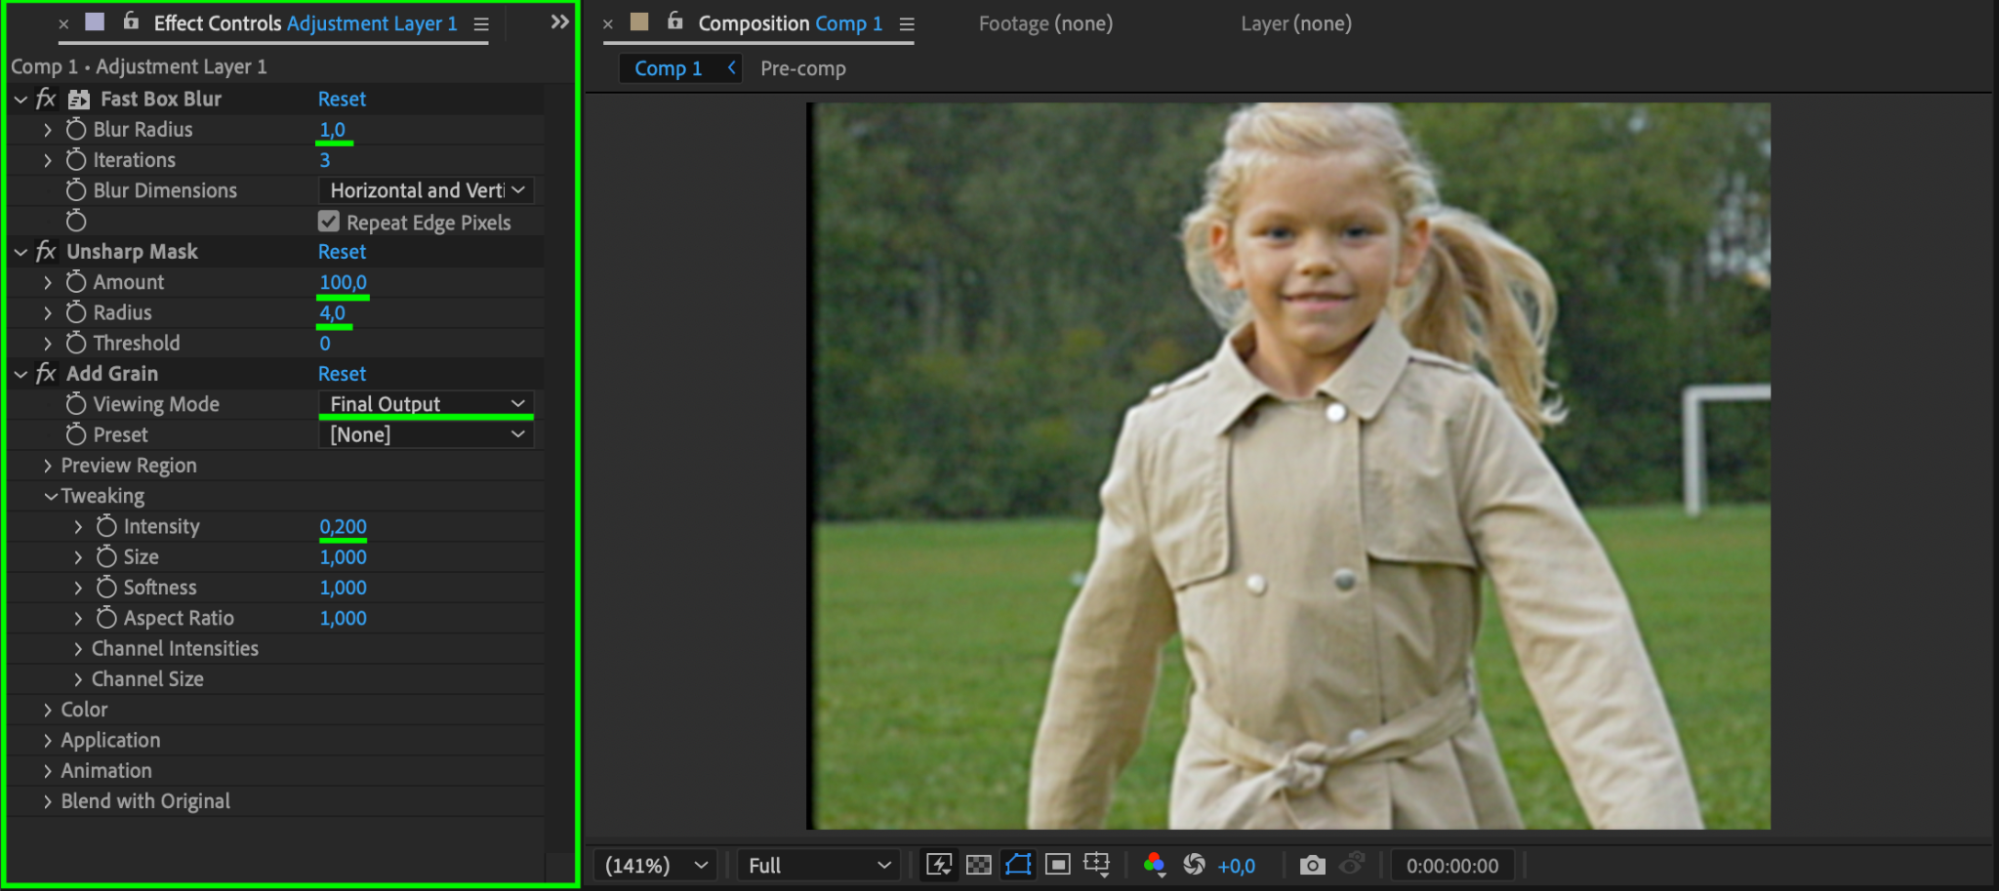
Apply Fast Box Blur, Unsharp Mask, and Add Grain to the adjustment layer. Set Blur Radius to 1, Unsharp Mask Amount to 100, Radius to 4, Grain Intensity to 0.2, and choose Final Output as the viewing mode.
 Step 18: Add Wave Warp and Glow Effects
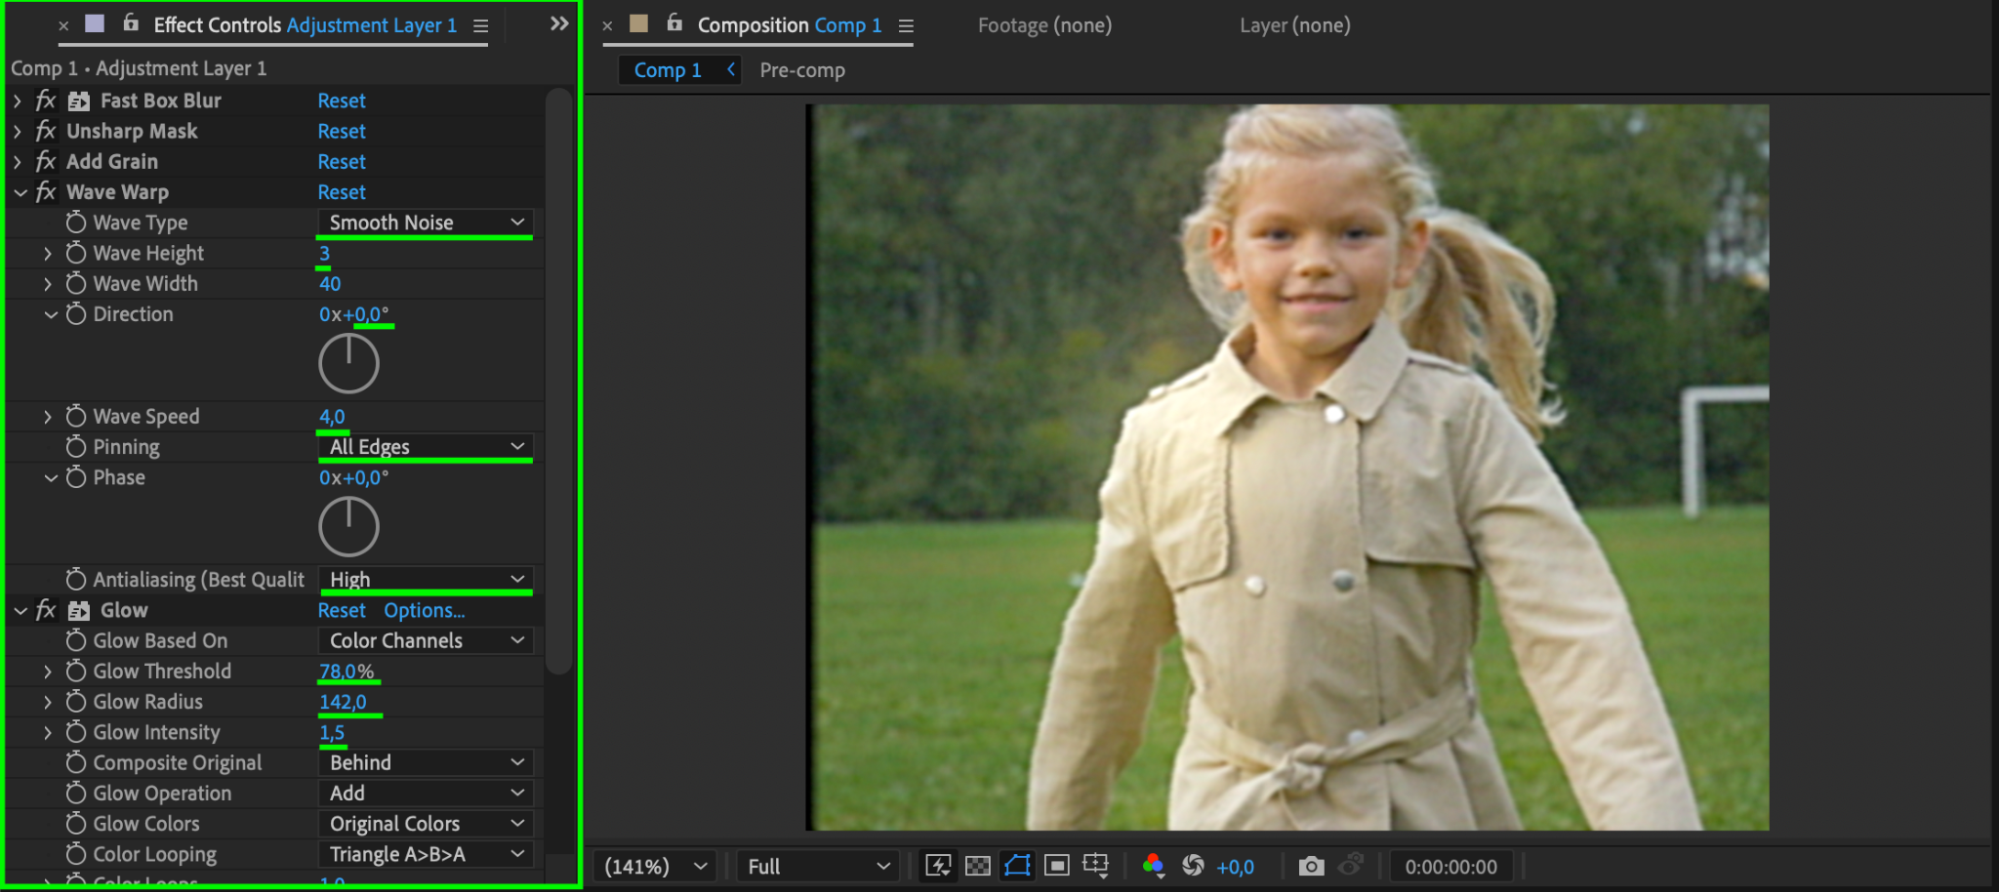
Apply Wave Warp and Glow to the adjustment layer.
Wave Warp Settings: Set Wave Type to Smooth Noise, Wave Height to 3, Direction to 0°, Wave Speed to 4, and Pinning to All Edges with High Anti-Aliasing.
Glow Settings: Set Glow Threshold to 78, Glow Radius to 142, and Glow Intensity to 1.5 for a subtle glowing effect.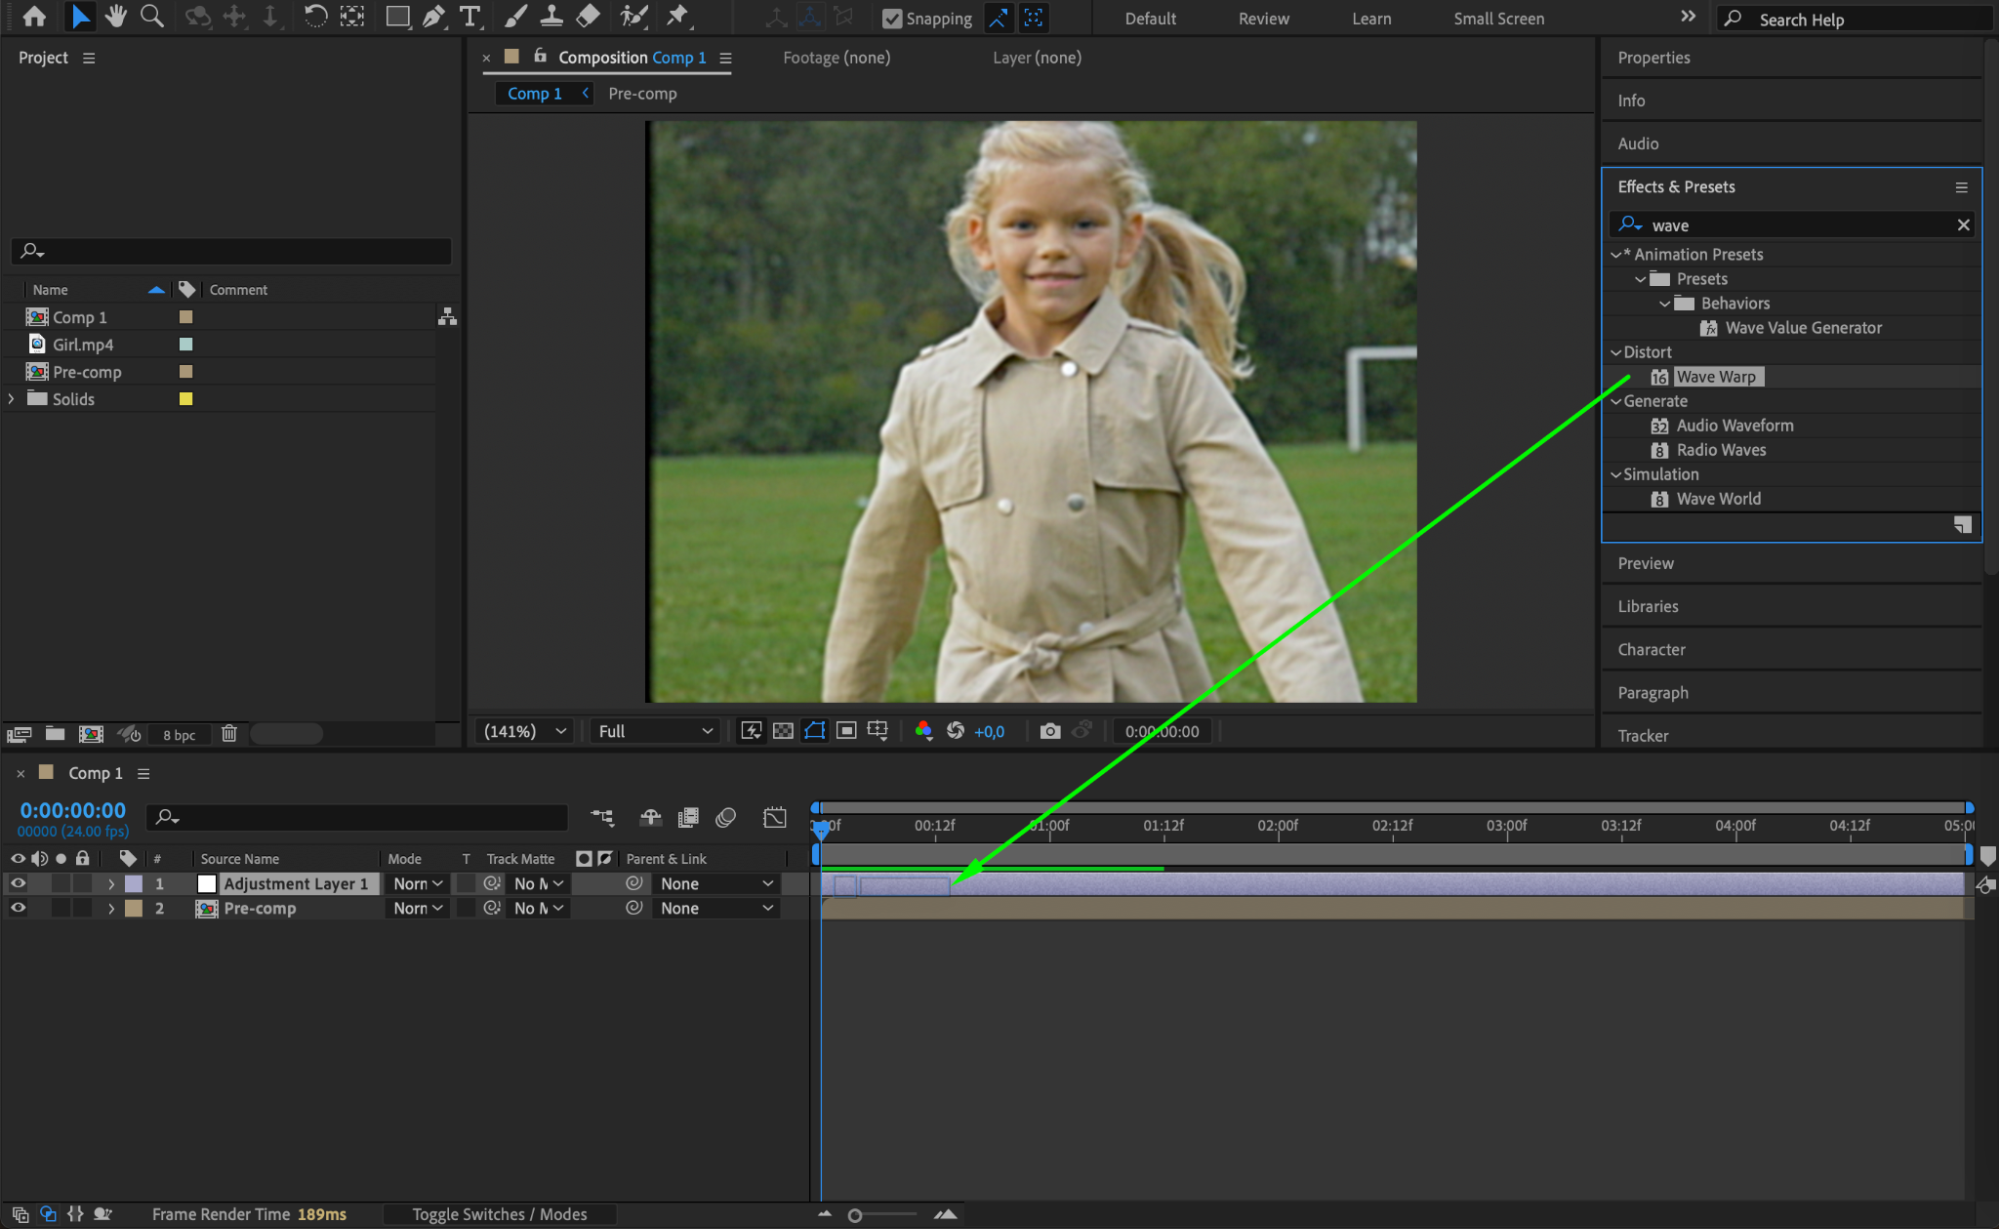
 Step 19: Preview the Effect
Press Spacebar to preview the animation and ensure the effect looks realistic. Adjust the settings if needed.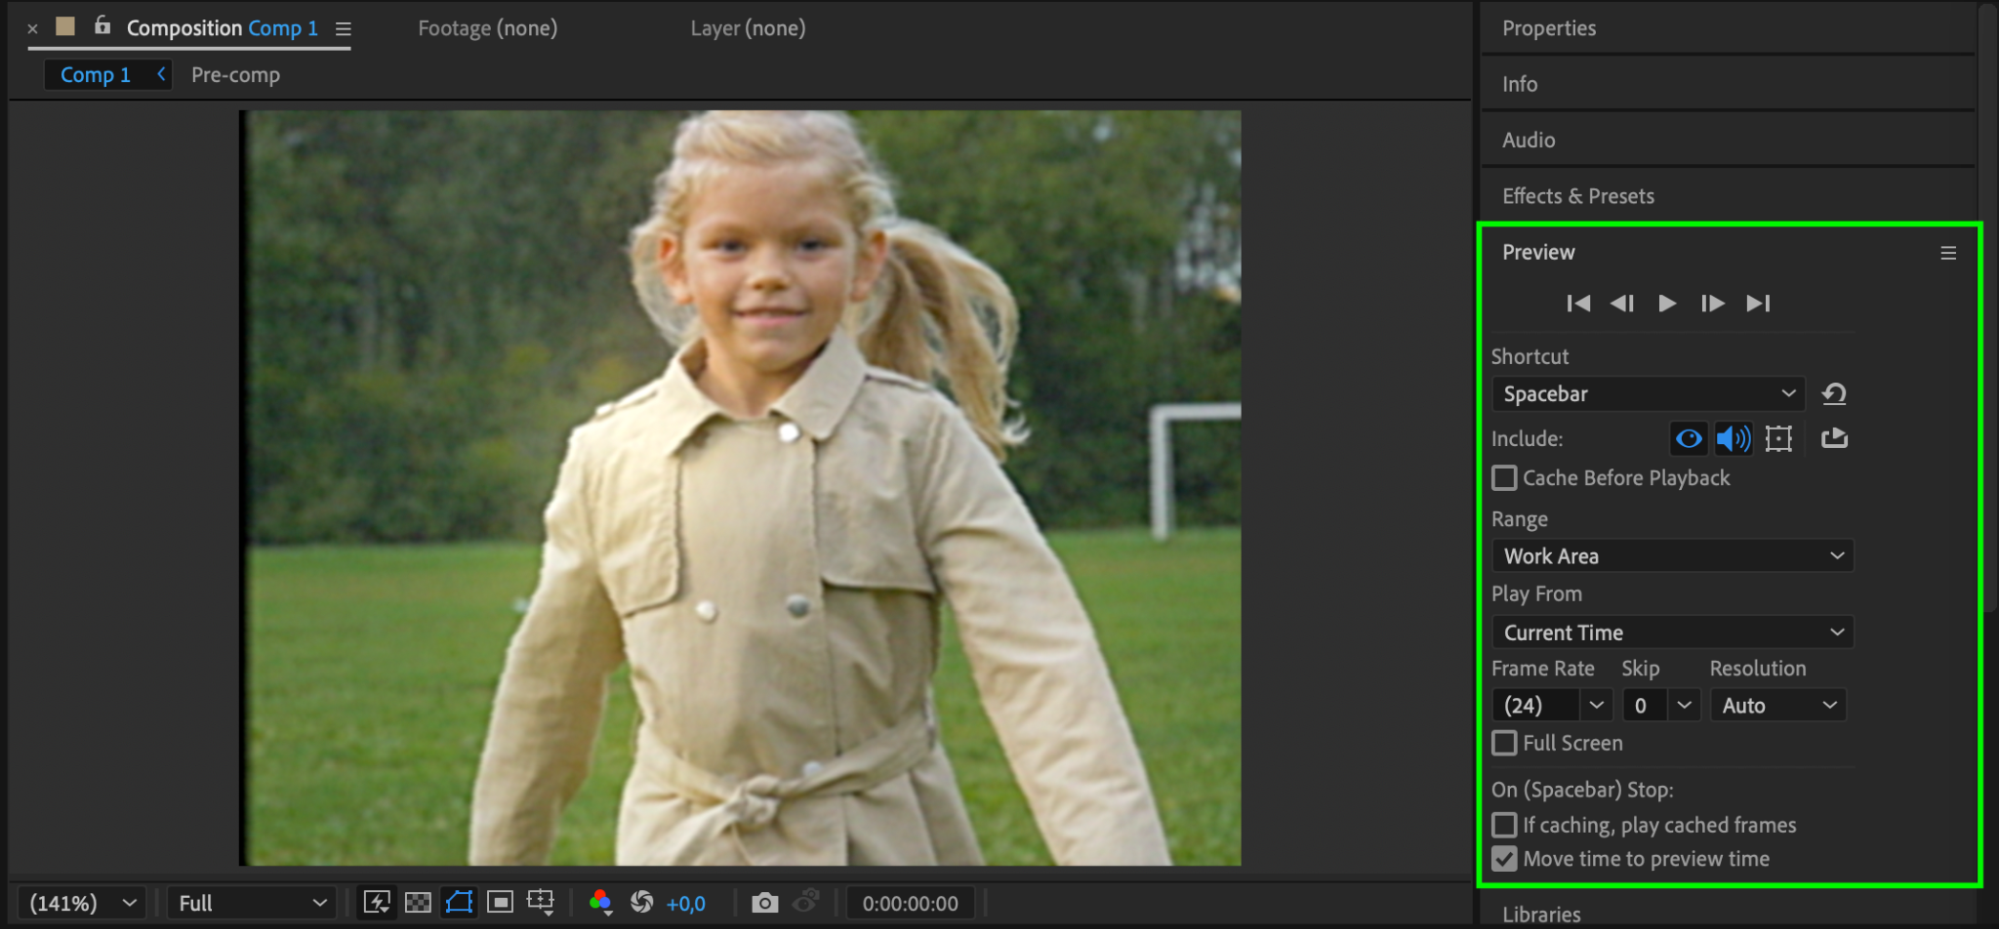
Conclusion
By following these steps, you can create a vintage film effect in After Effects with noise, blur, and color adjustments. This technique gives your footage an old-fashioned, cinematic look that works well for nostalgic or artistic projects. Experiment with different settings to achieve your desired effect.
Get 10% off when you subscribe to our newsletter

Our Bestsellers


