How to Create a Looping GIF in After Effects
Introduction to Creating Seamless GIF Animations
Do you want to add a touch of dynamism to your social media posts or website banners? Creating seamless GIF animations that loop endlessly can give your designs a professional and polished look. In this step-by-step tutorial, we will guide you through the process of making a GIF loop in After Effects.
Get 10% off when you subscribe to our newsletter

After Effects is a widely-used video editing and motion graphics software that provides the necessary tools and features to create captivating animations. Whether you’re an experienced graphic designer or a beginner, this guide will equip you with the knowledge and skills to produce eye-catching GIF loops.
Let’s dive in and unleash your creativity with After Effects!
Step 1: Import Your Footage
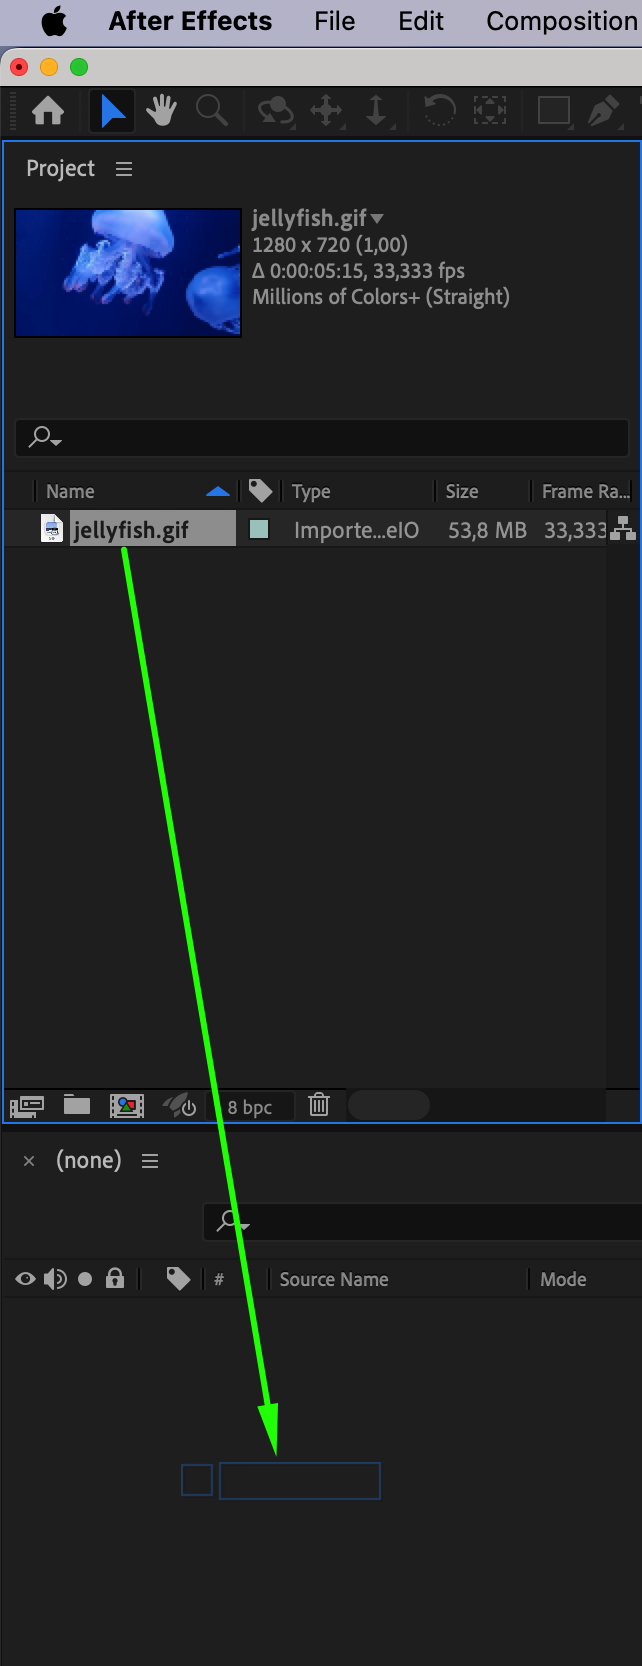
Start by importing the GIF you want to create a GIF loop from. Go to the File menu, select Import > File, and choose your file. Once your file appears in the Project panel, drag it onto the Timeline panel. This will automatically create a new composition with the same settings as your file, allowing you to quickly start editing.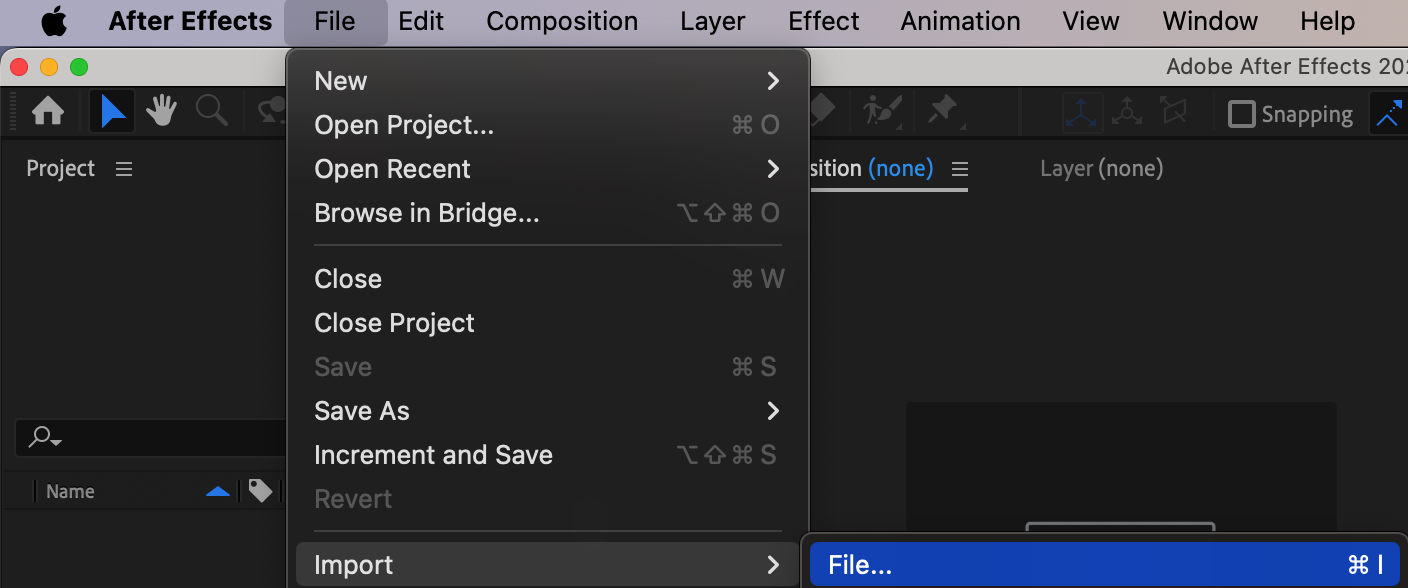
 Step 2: Pre-compose the Layer
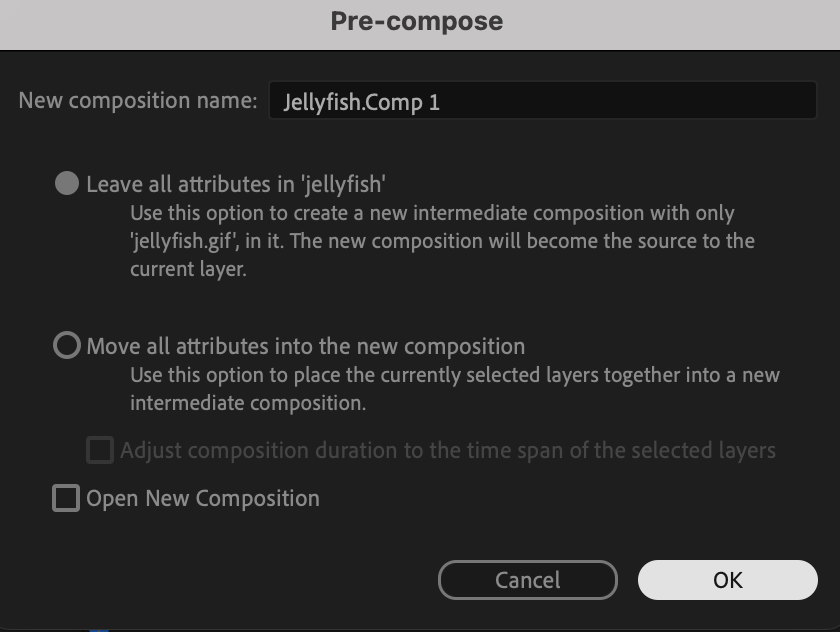
Once your file is on the Timeline, right-click on the selected layer and choose Pre-compose. Give it a meaningful name.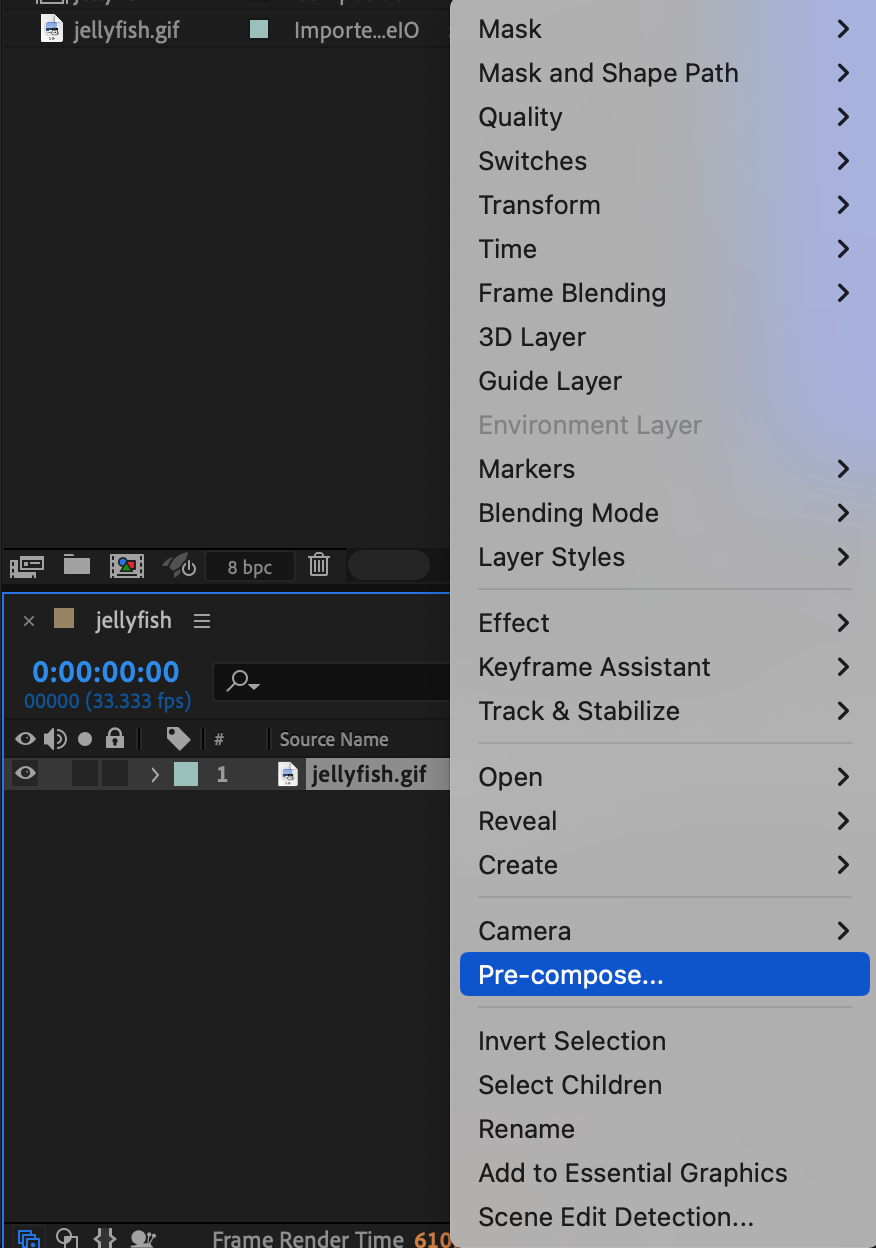
 Step 3: Enable Time Remapping
Get 10% off when you subscribe to our newsletter

With the pre-composed layer selected, right-click on it, go to Time, and select Enable Time Remapping. Enabling time remapping gives you control over the timing and duration of your animation, which is essential for creating a smooth loop.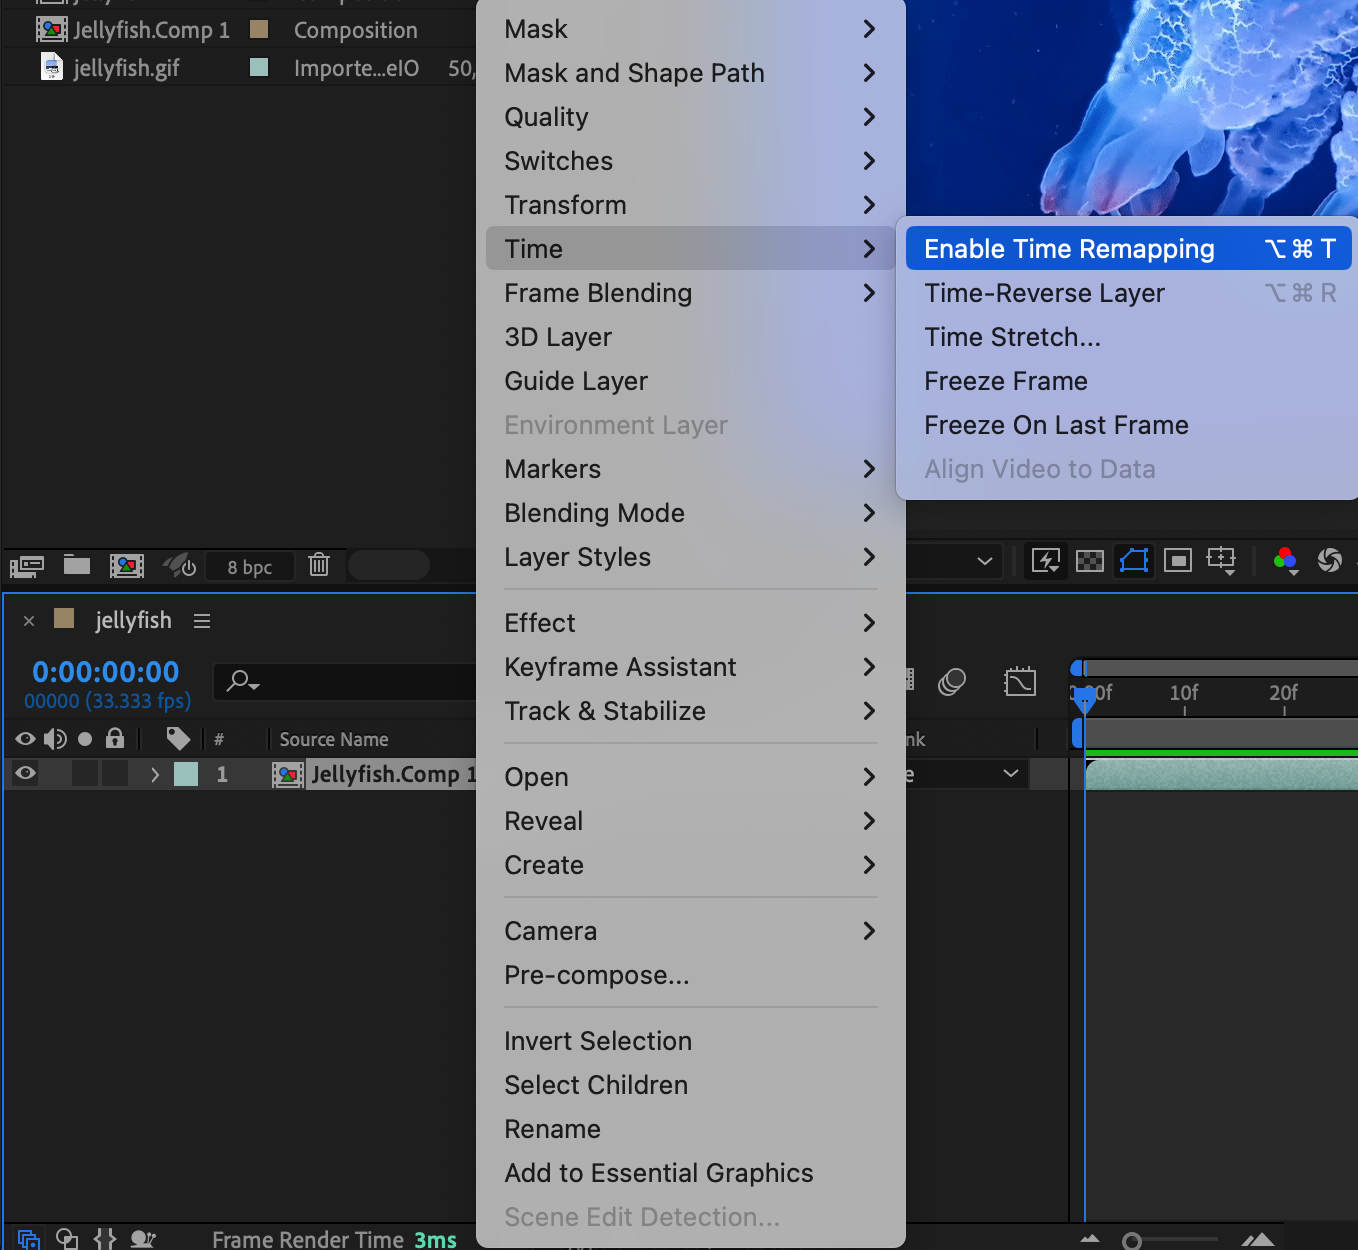 Step 4: Create a Keyframe for the Loop
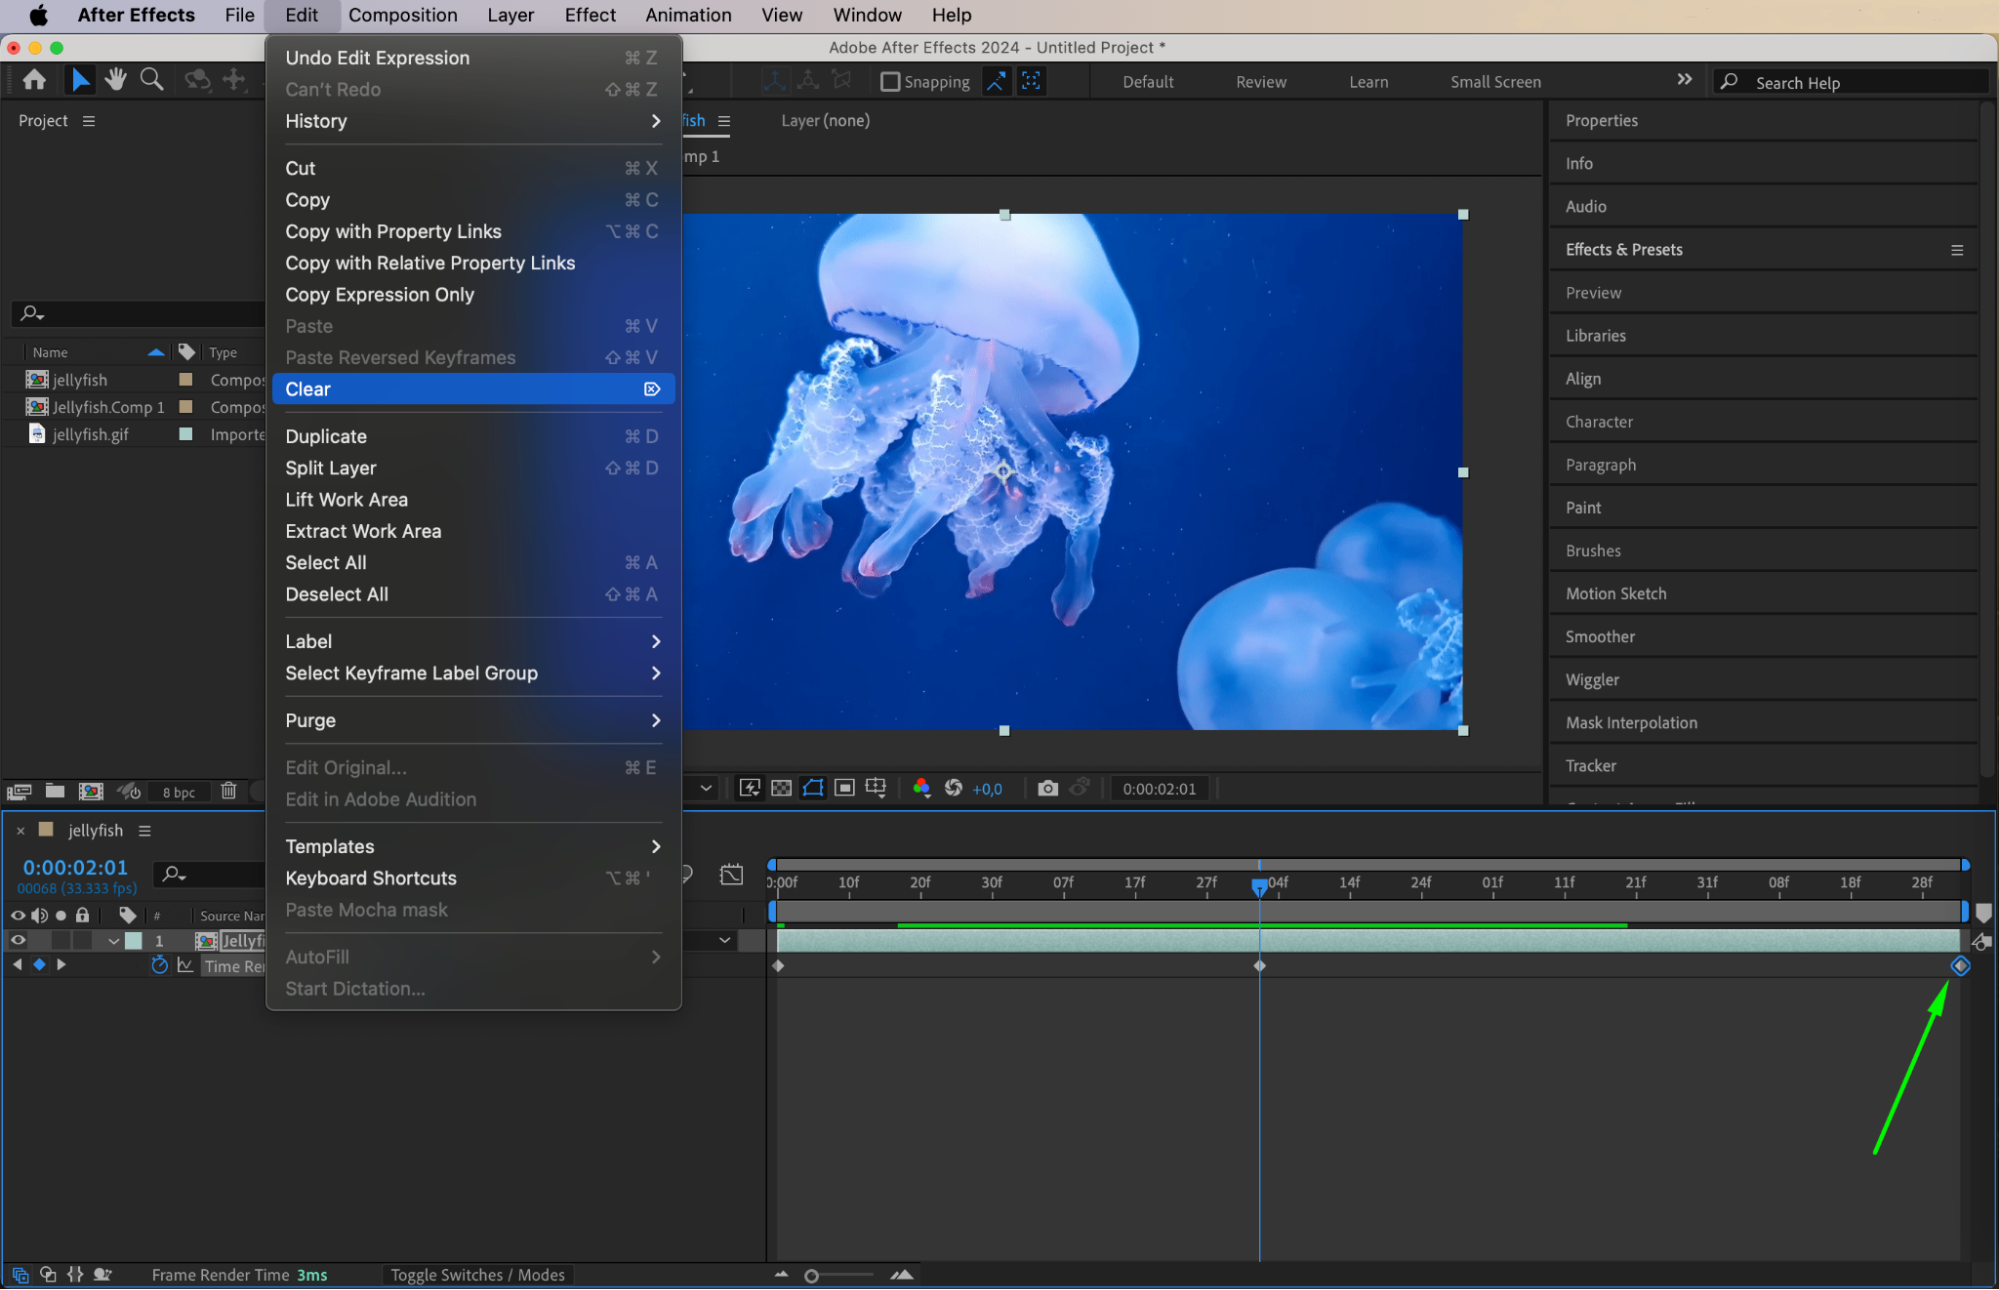
To define the point where you want your GIF to loop, place the Current Time Indicator at the desired position in the Timeline. Click the diamond-shaped icon next to the Time Remap parameter to create a keyframe. This keyframe marks the start of the loop. Delete the second keyframe that was automatically created to ensure your loop starts and ends at the correct points.
 Step 5: Add a Looping Expression
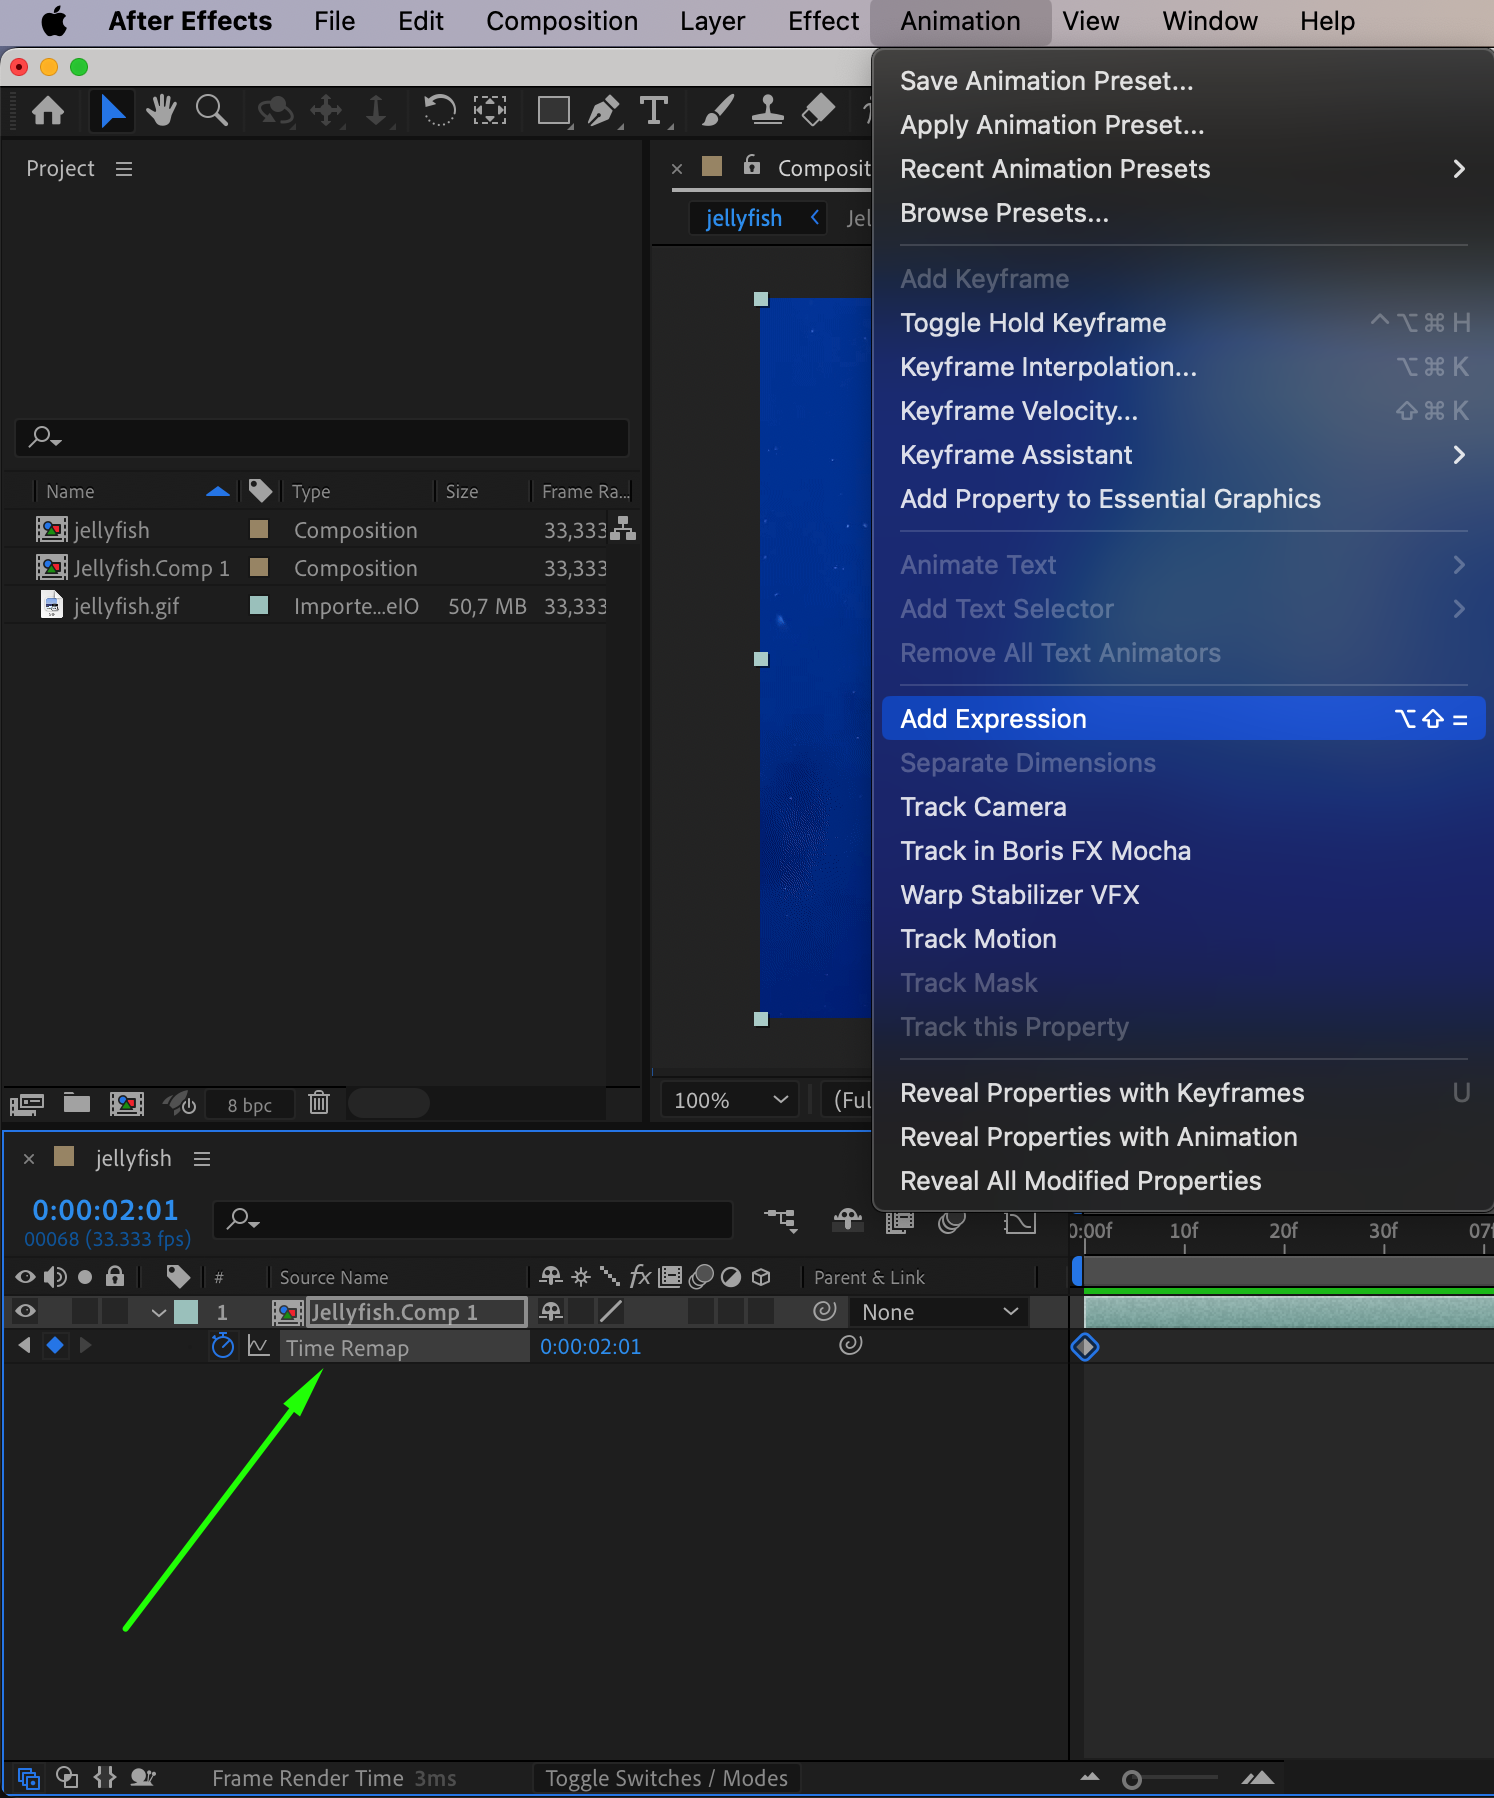
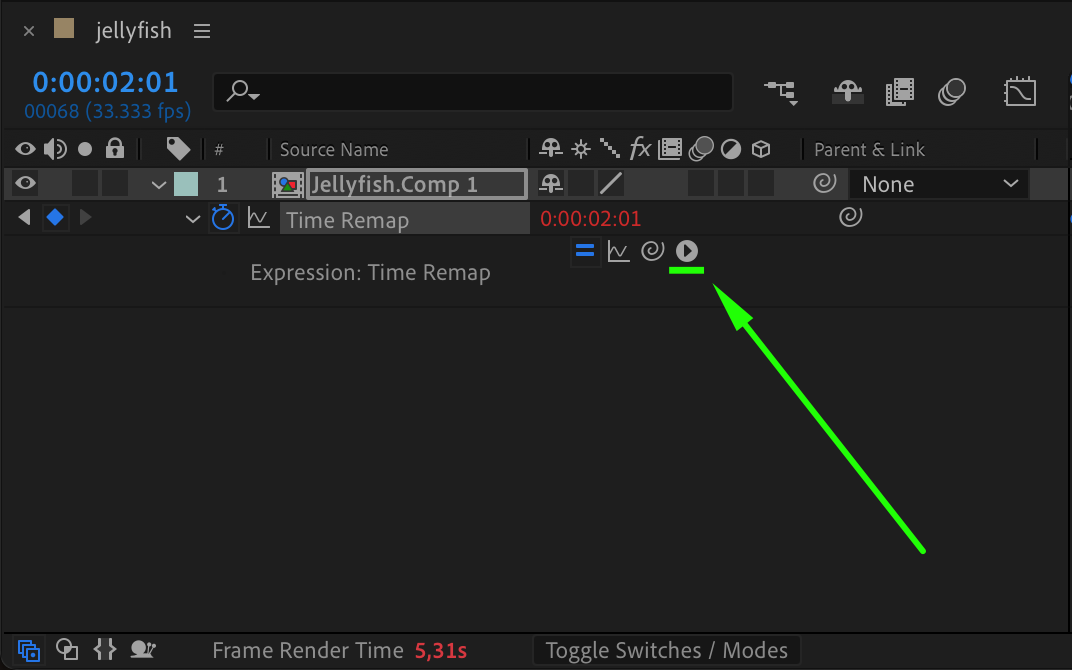
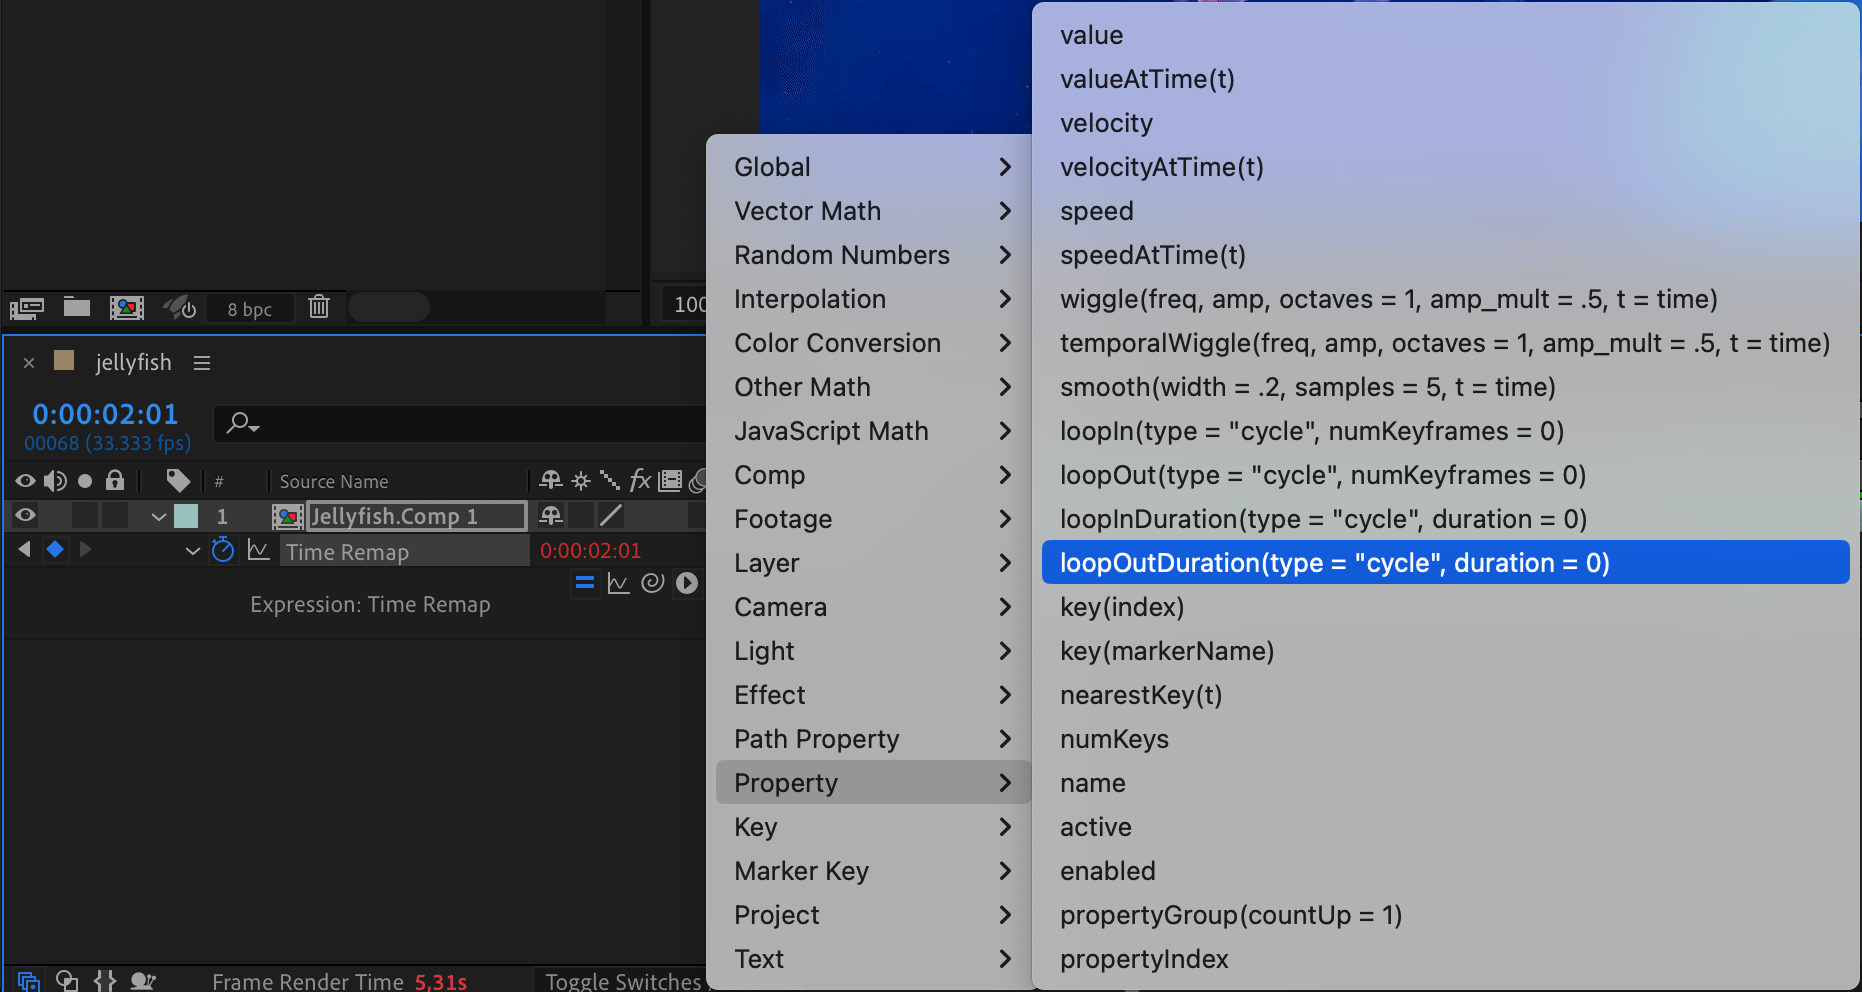
To make your animation loop seamlessly, you’ll need to add an expression to the Time Remap property. Click on the Time Remap parameter, then go to the Animation menu and select Add Expression. Click the small arrow next to the expression input box, choose Property > loopOutDuration from the menu. Press Enter to apply the expression. This expression will ensure your animation loops continuously.
Get 10% off when you subscribe to our newsletter


Step 6: Preview Your GIF Loop
Before exporting, it’s essential to preview your GIF loop to ensure everything looks smooth. Press the spacebar or use the Preview option to play the animation. Check for any glitches or timing issues and make adjustments as necessary.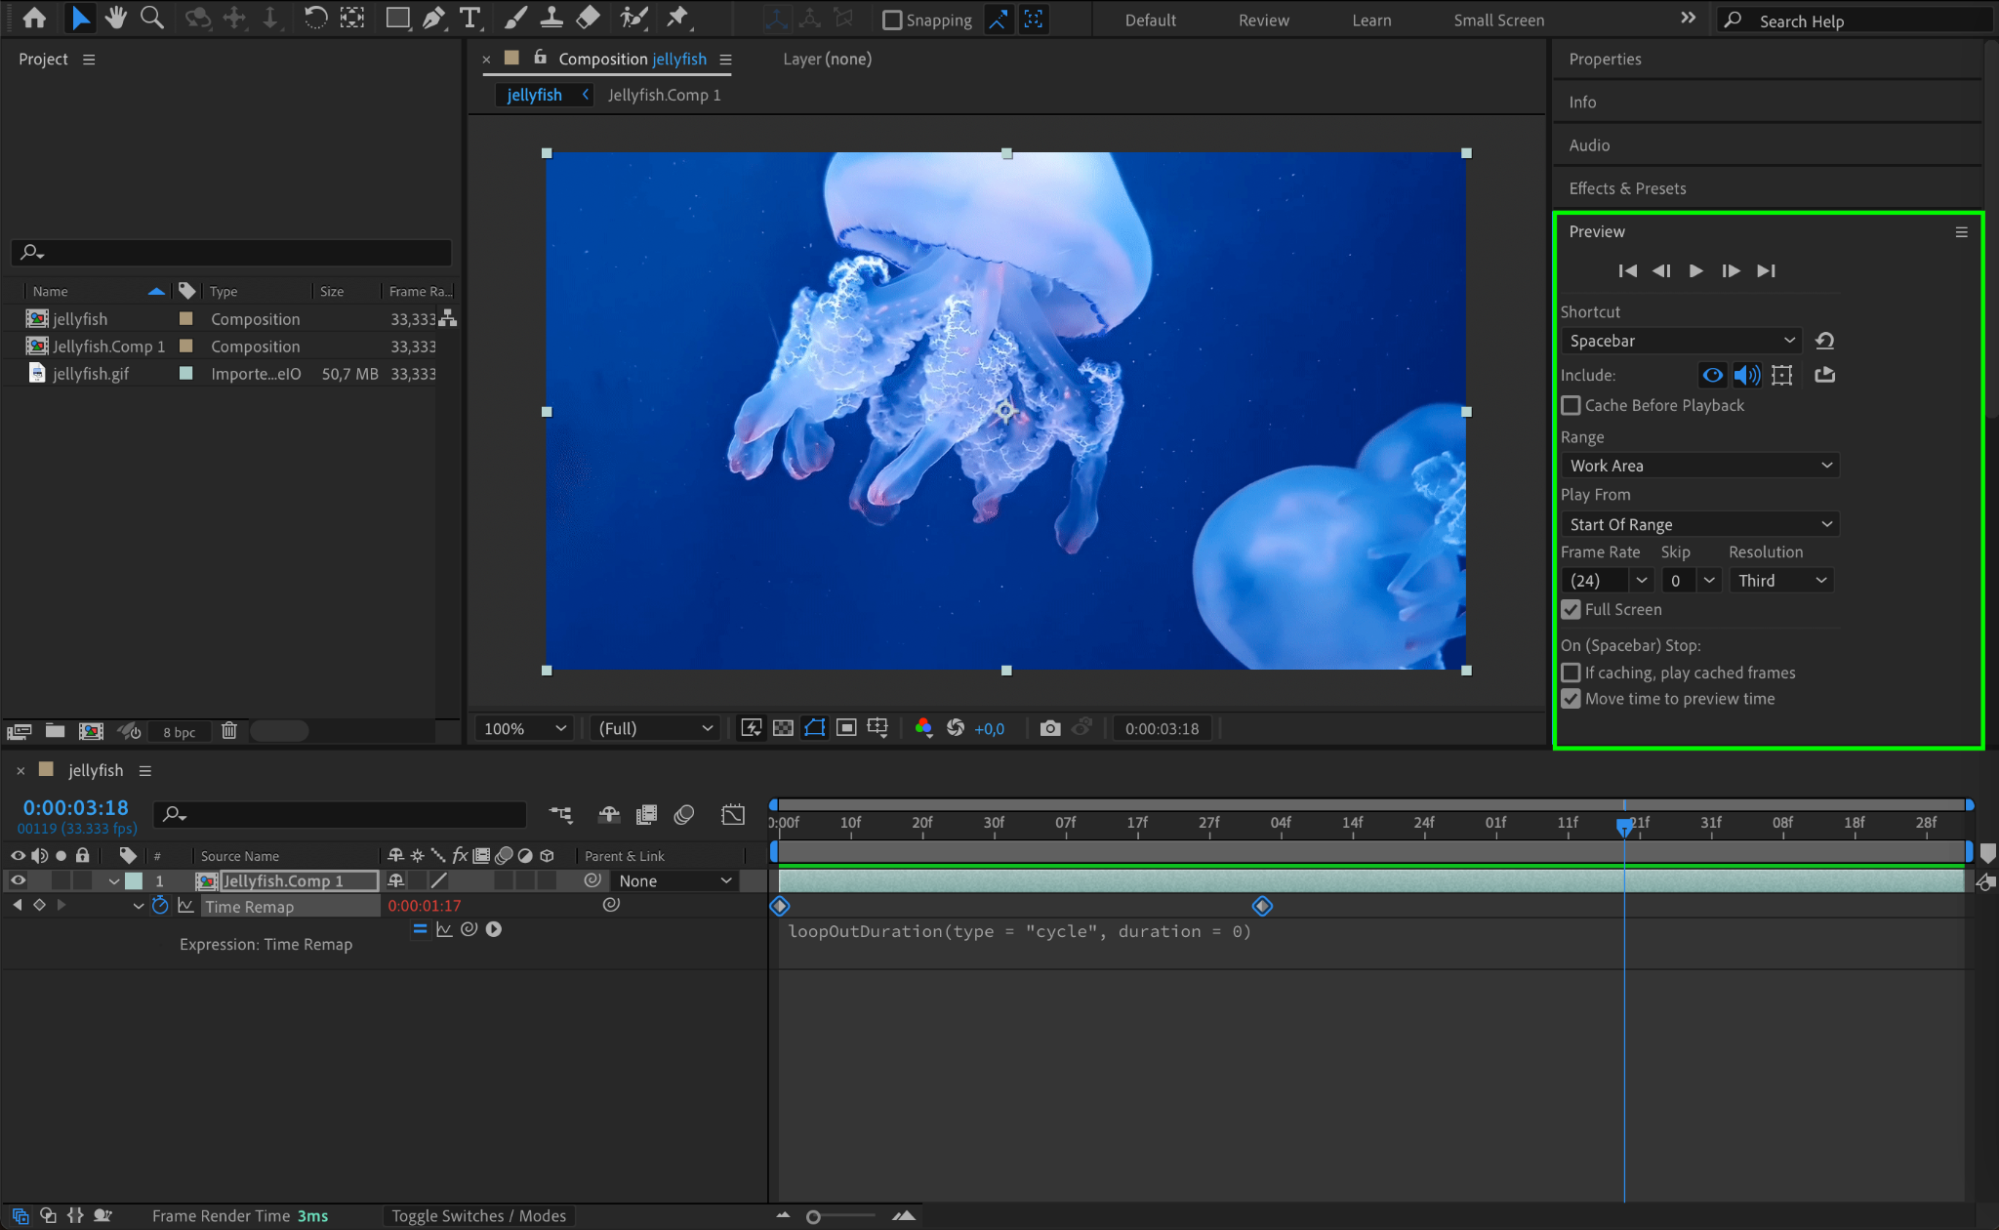
Step 7: Export Your GIF
Get 10% off when you subscribe to our newsletter

If you’re satisfied with the result, it’s time to export your GIF. Go to the Composition menu, select Add to Render Queue. In the Render Queue panel, adjust the output settings as needed. Choose the GIF format if available, or export as a video file first and convert it to a GIF using a third-party tool. Once your settings are in place, click on the Render button.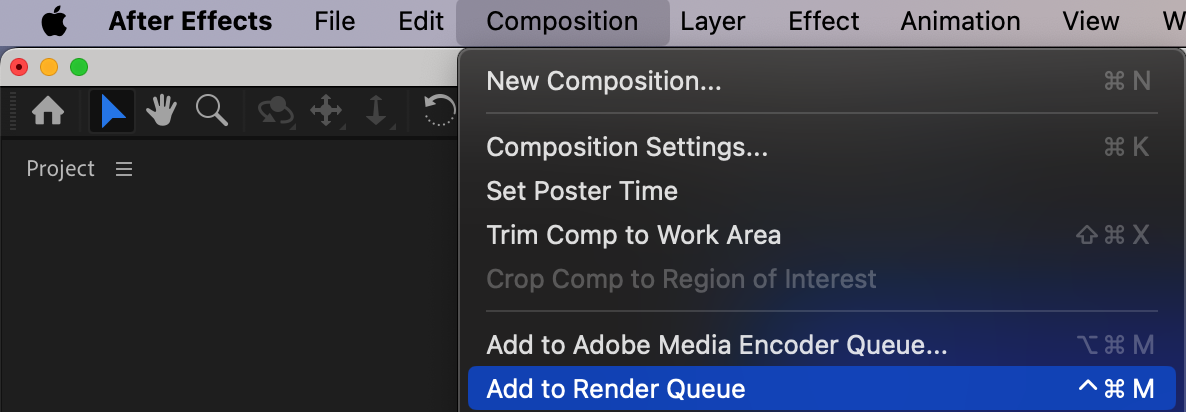

Step 8: Share Your GIF
After your GIF loop is exported, you can share it across various platforms, including social media, websites, and messaging apps. GIFs are versatile and can be used to grab attention or convey information in a fun and engaging way.
Conclusion
By following these simple steps, you can easily create captivating GIF loops in After Effects. Let your designs stand out with seamless animations that leave a lasting impression on your audience. So, get creative and start making your GIF loops today!

