A Complete Guide to Creating Instagram Edits in After Effects
Introduction: Create Eye-Catching Instagram Edits with After Effects
Adobe After Effects is one of the most powerful tools available for creating visually stunning Instagram edits. Whether you’re a seasoned editor or just starting, this step-by-step guide will teach you how to use After Effects to make your Instagram content shine. From setting up your composition to adding creative effects and transitions, this tutorial covers everything you need to know. Let’s dive in and start making your Instagram posts stand out from the crowd!
Step 1: Set Up a New Composition
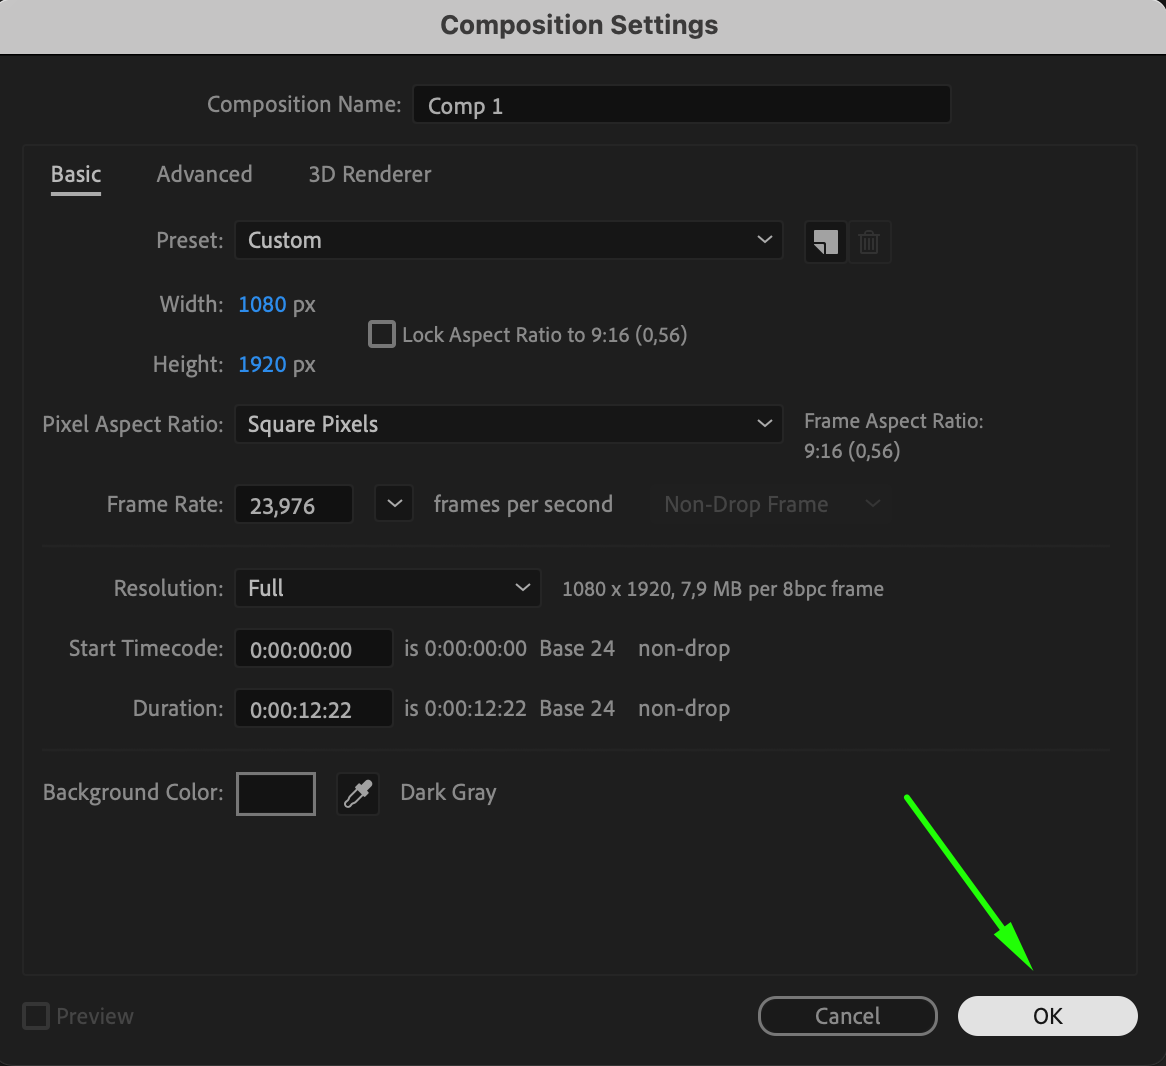
To begin, open After Effects and create a new composition that fits Instagram’s preferred dimensions. Navigate to Composition > New Composition, then set the Width and Height. For vertical Instagram stories or reels, use 1080 x 1920 pixels (9:16 aspect ratio), or for square posts, use 1080 x 1080 pixels. Adjust the Frame Rate (typically 30 fps) and Duration according to the length of your video. Click OK to create your composition.
 Step 2: Import Your Video Files
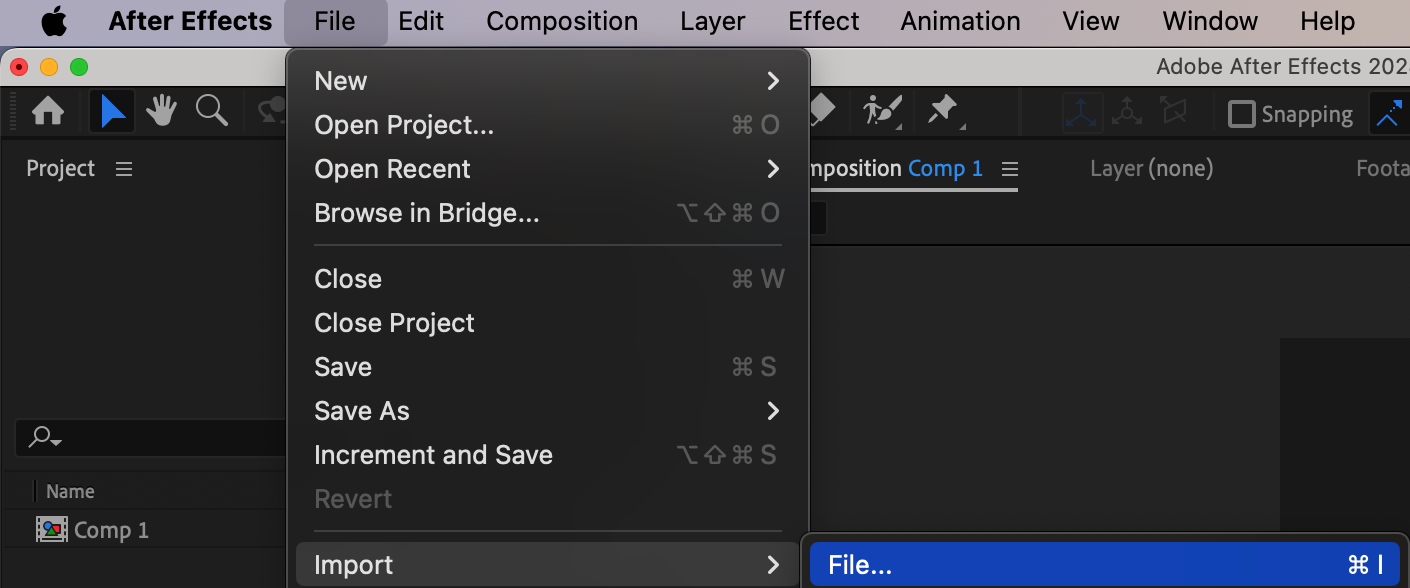
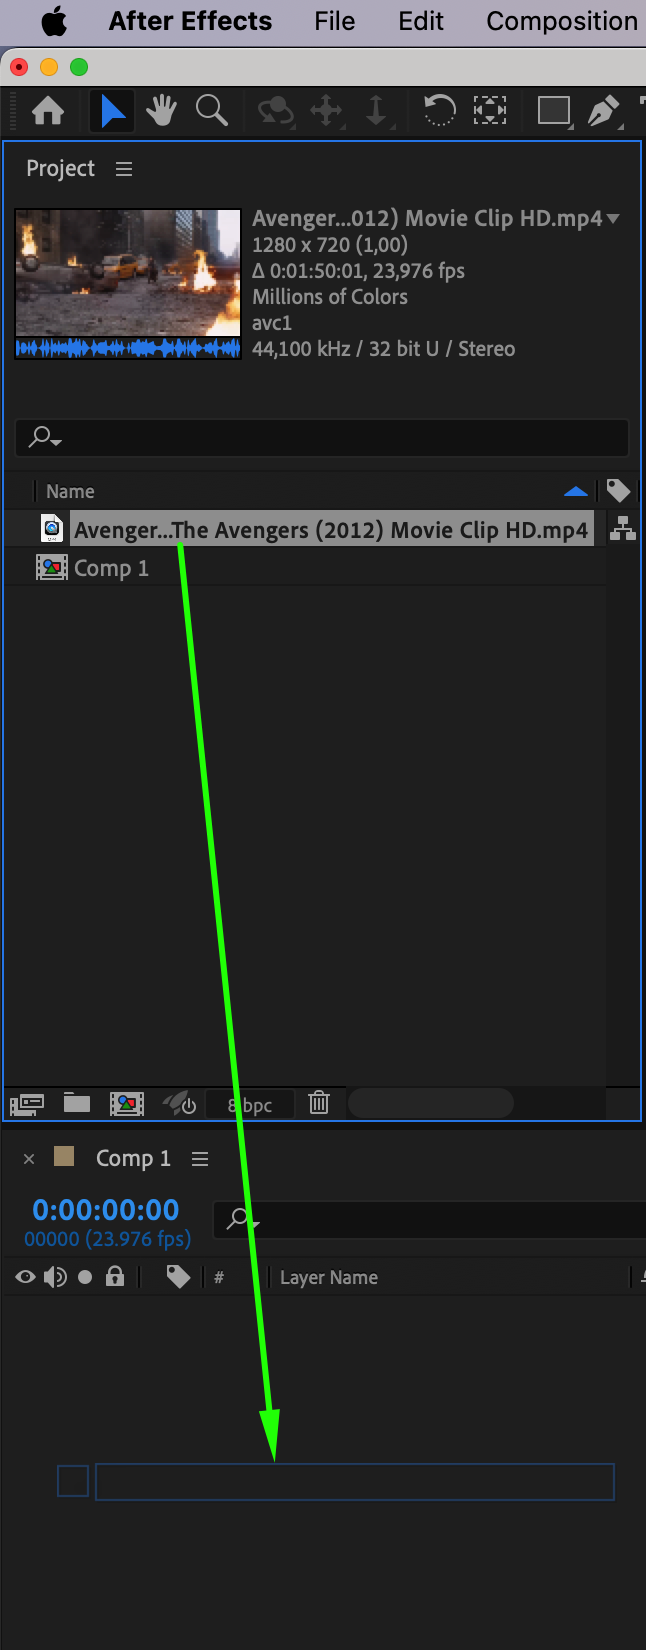
Next, import the video files you’ll be using. Go to File > Import > File, locate the videos on your computer, and click Open. The imported videos will appear in the Project Panel. Drag them from the Project Panel onto the Timeline, where you’ll be able to edit them in your composition. Make sure all footage is in the correct order before proceeding.
 Step 3: Adjust Video Scale and Position
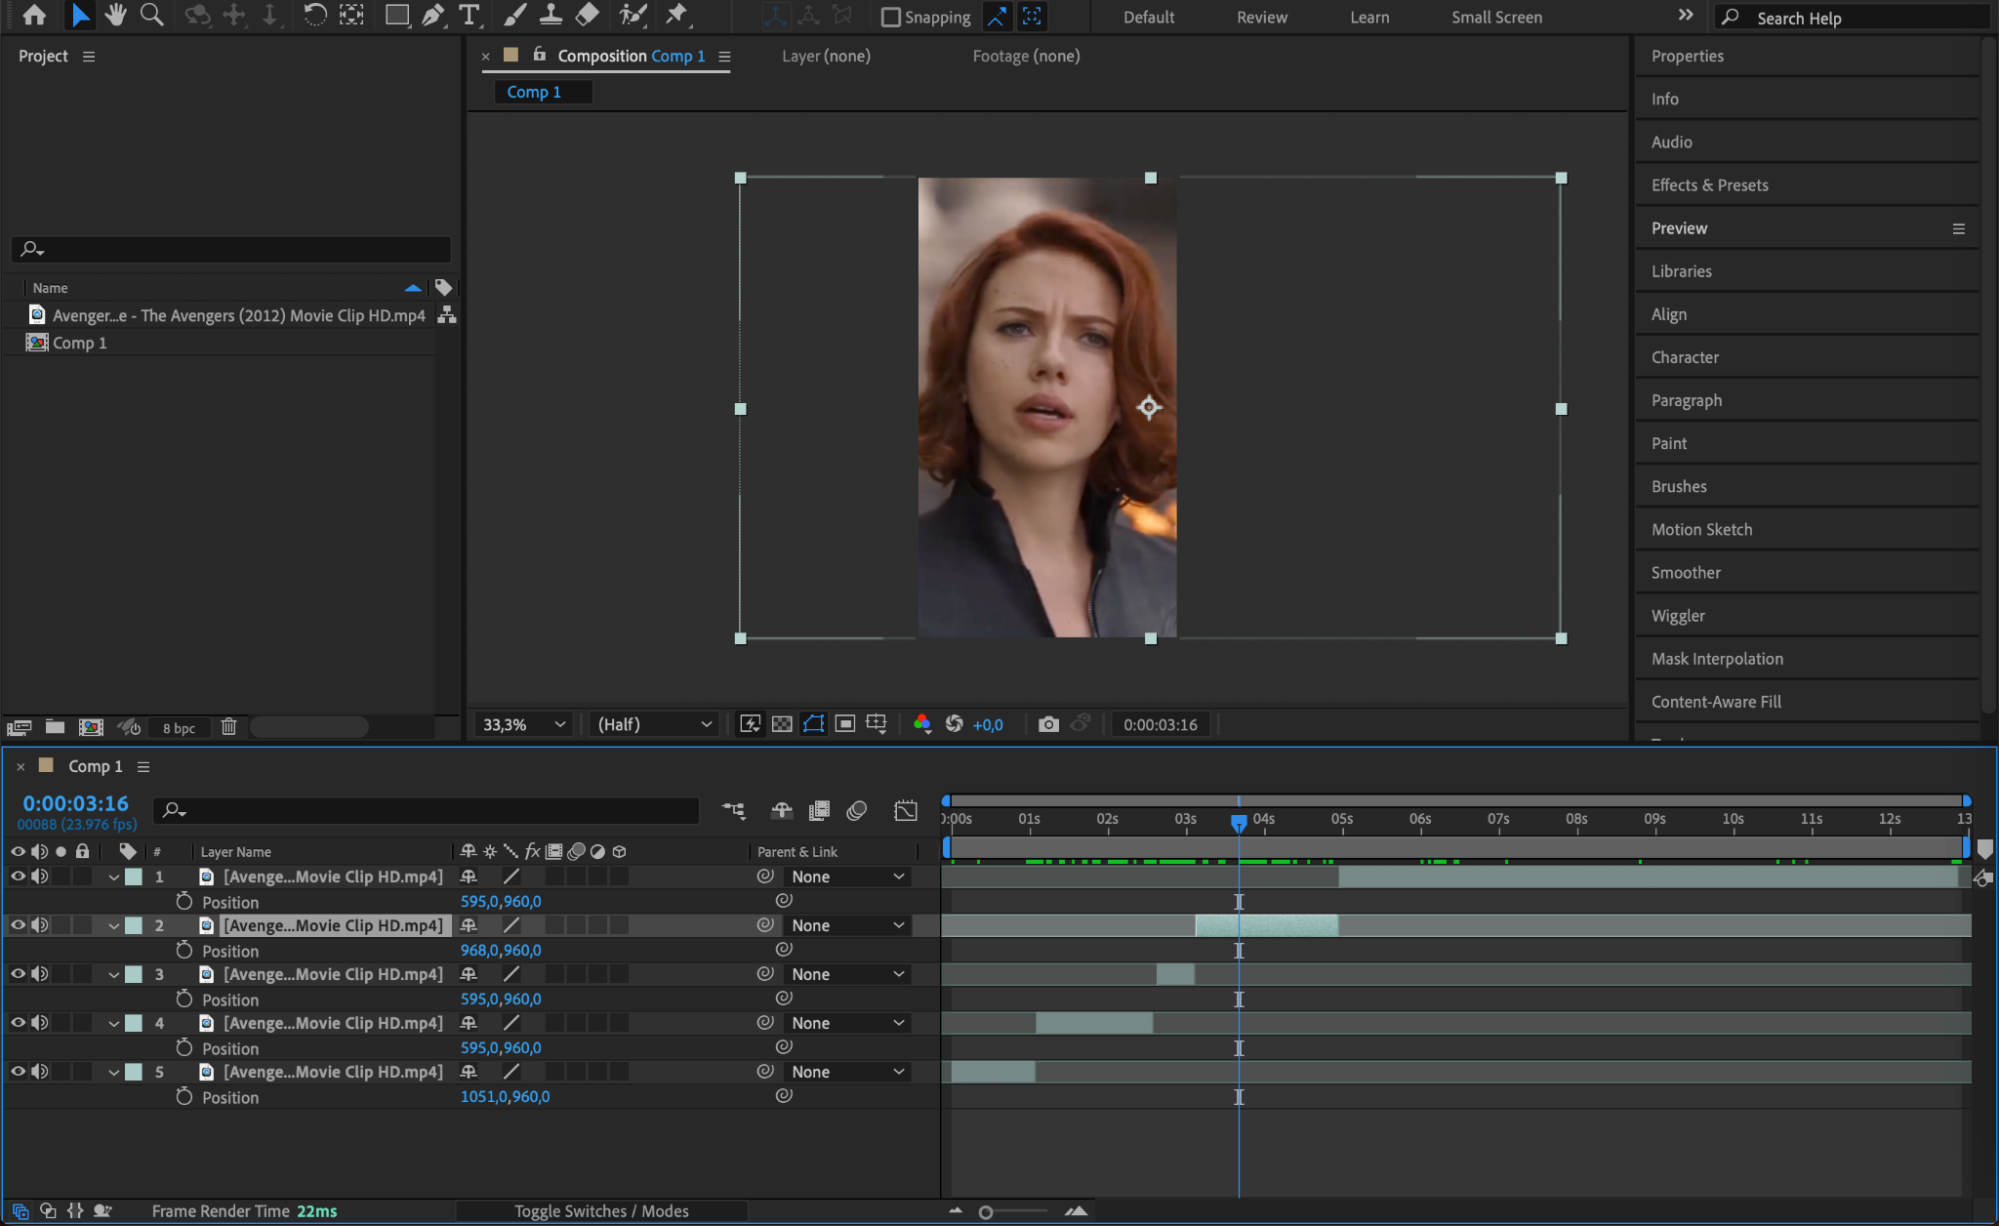
Once your footage is on the Timeline, you may need to adjust how it fits within the composition frame. To do this, expand the video layer’s properties by clicking the small arrow next to the layer name. Then, under the Transform section, use the Scale and Position properties to resize and reposition your footage, making sure it fits properly within the frame. This step is essential for maintaining a polished look, especially when working with footage in different resolutions or aspect ratios.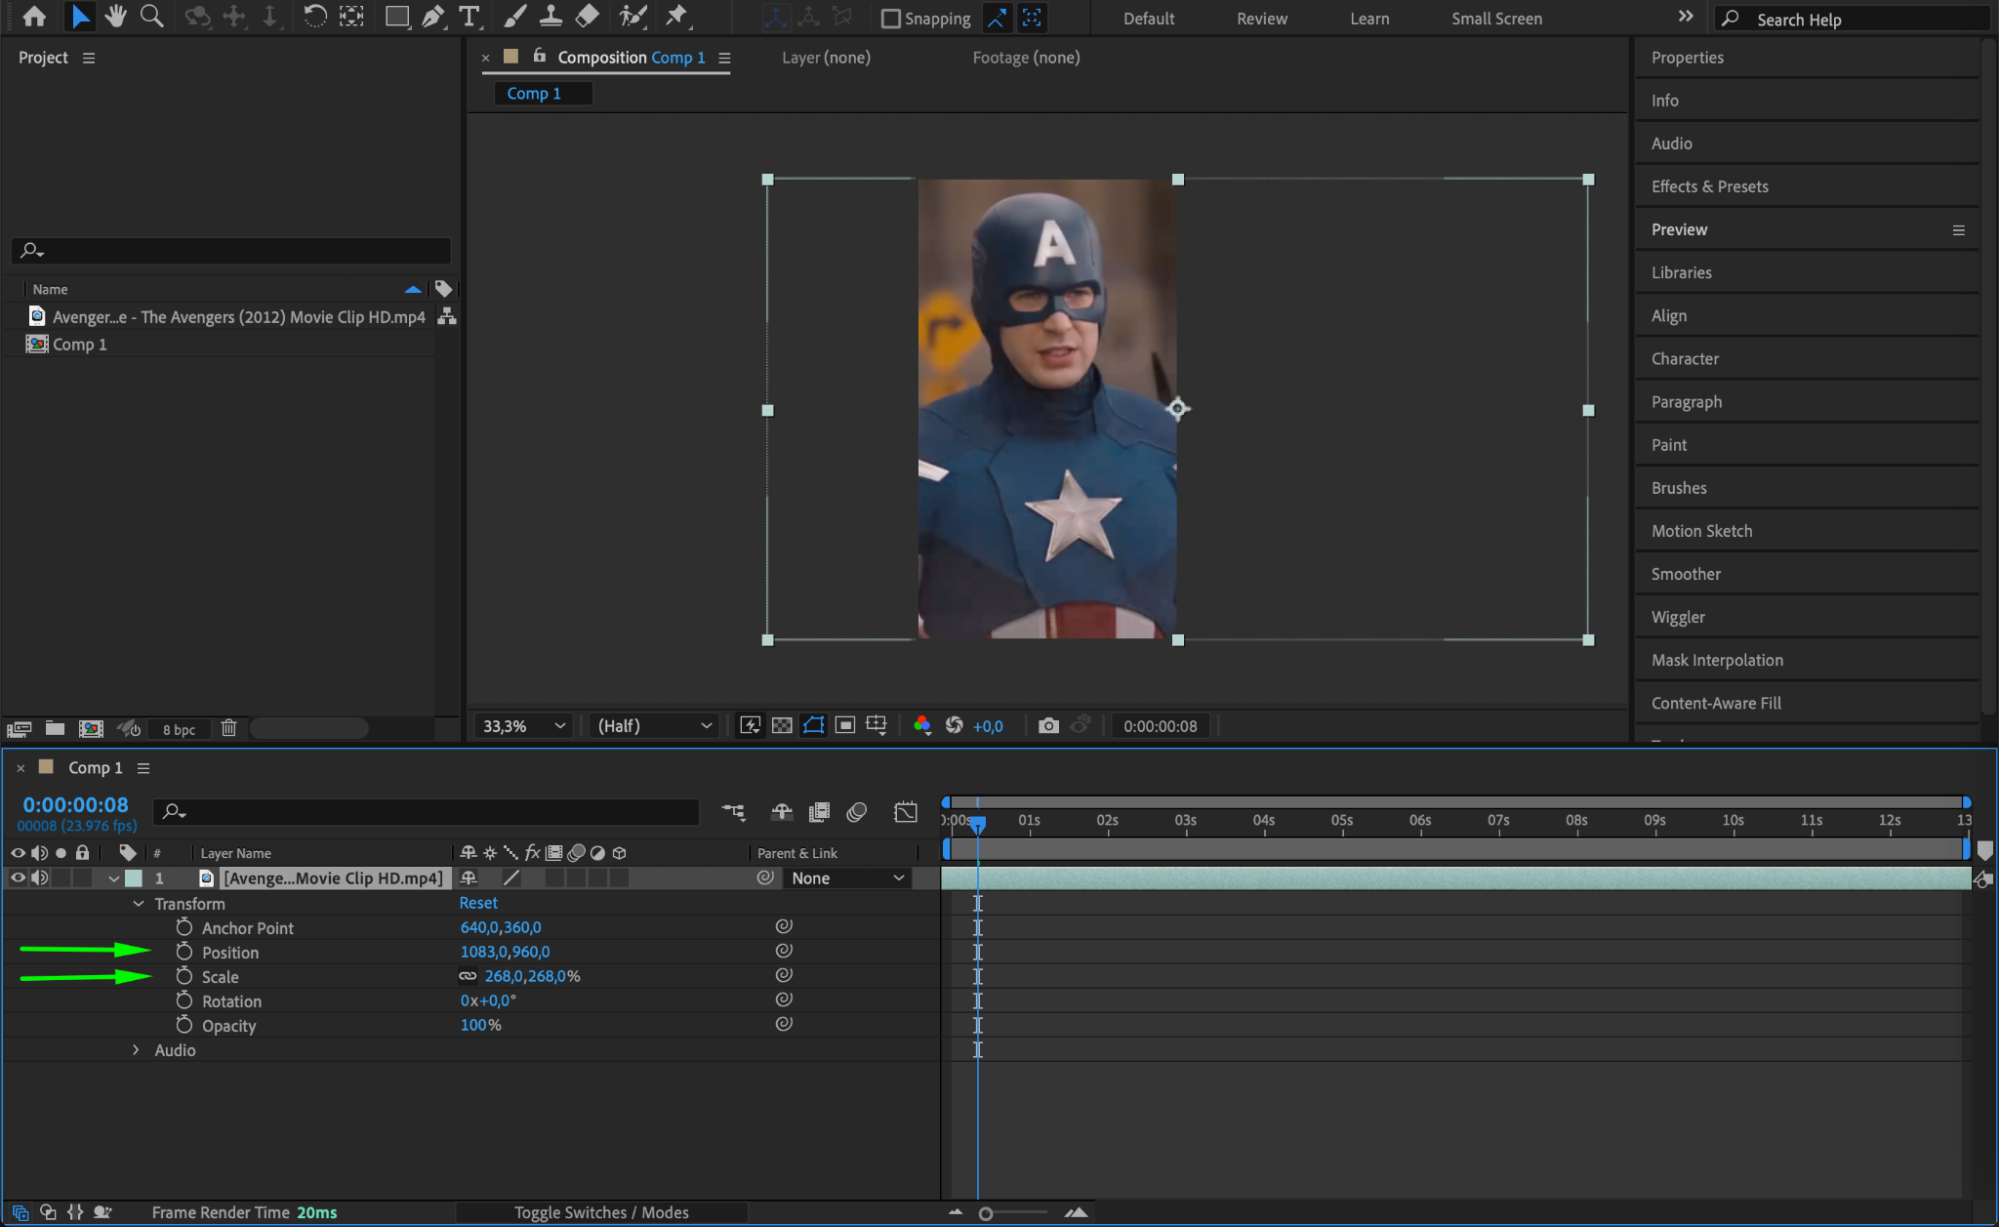 Step 4: Split and Trim Your Clips
Get 10% off when you subscribe to our newsletter

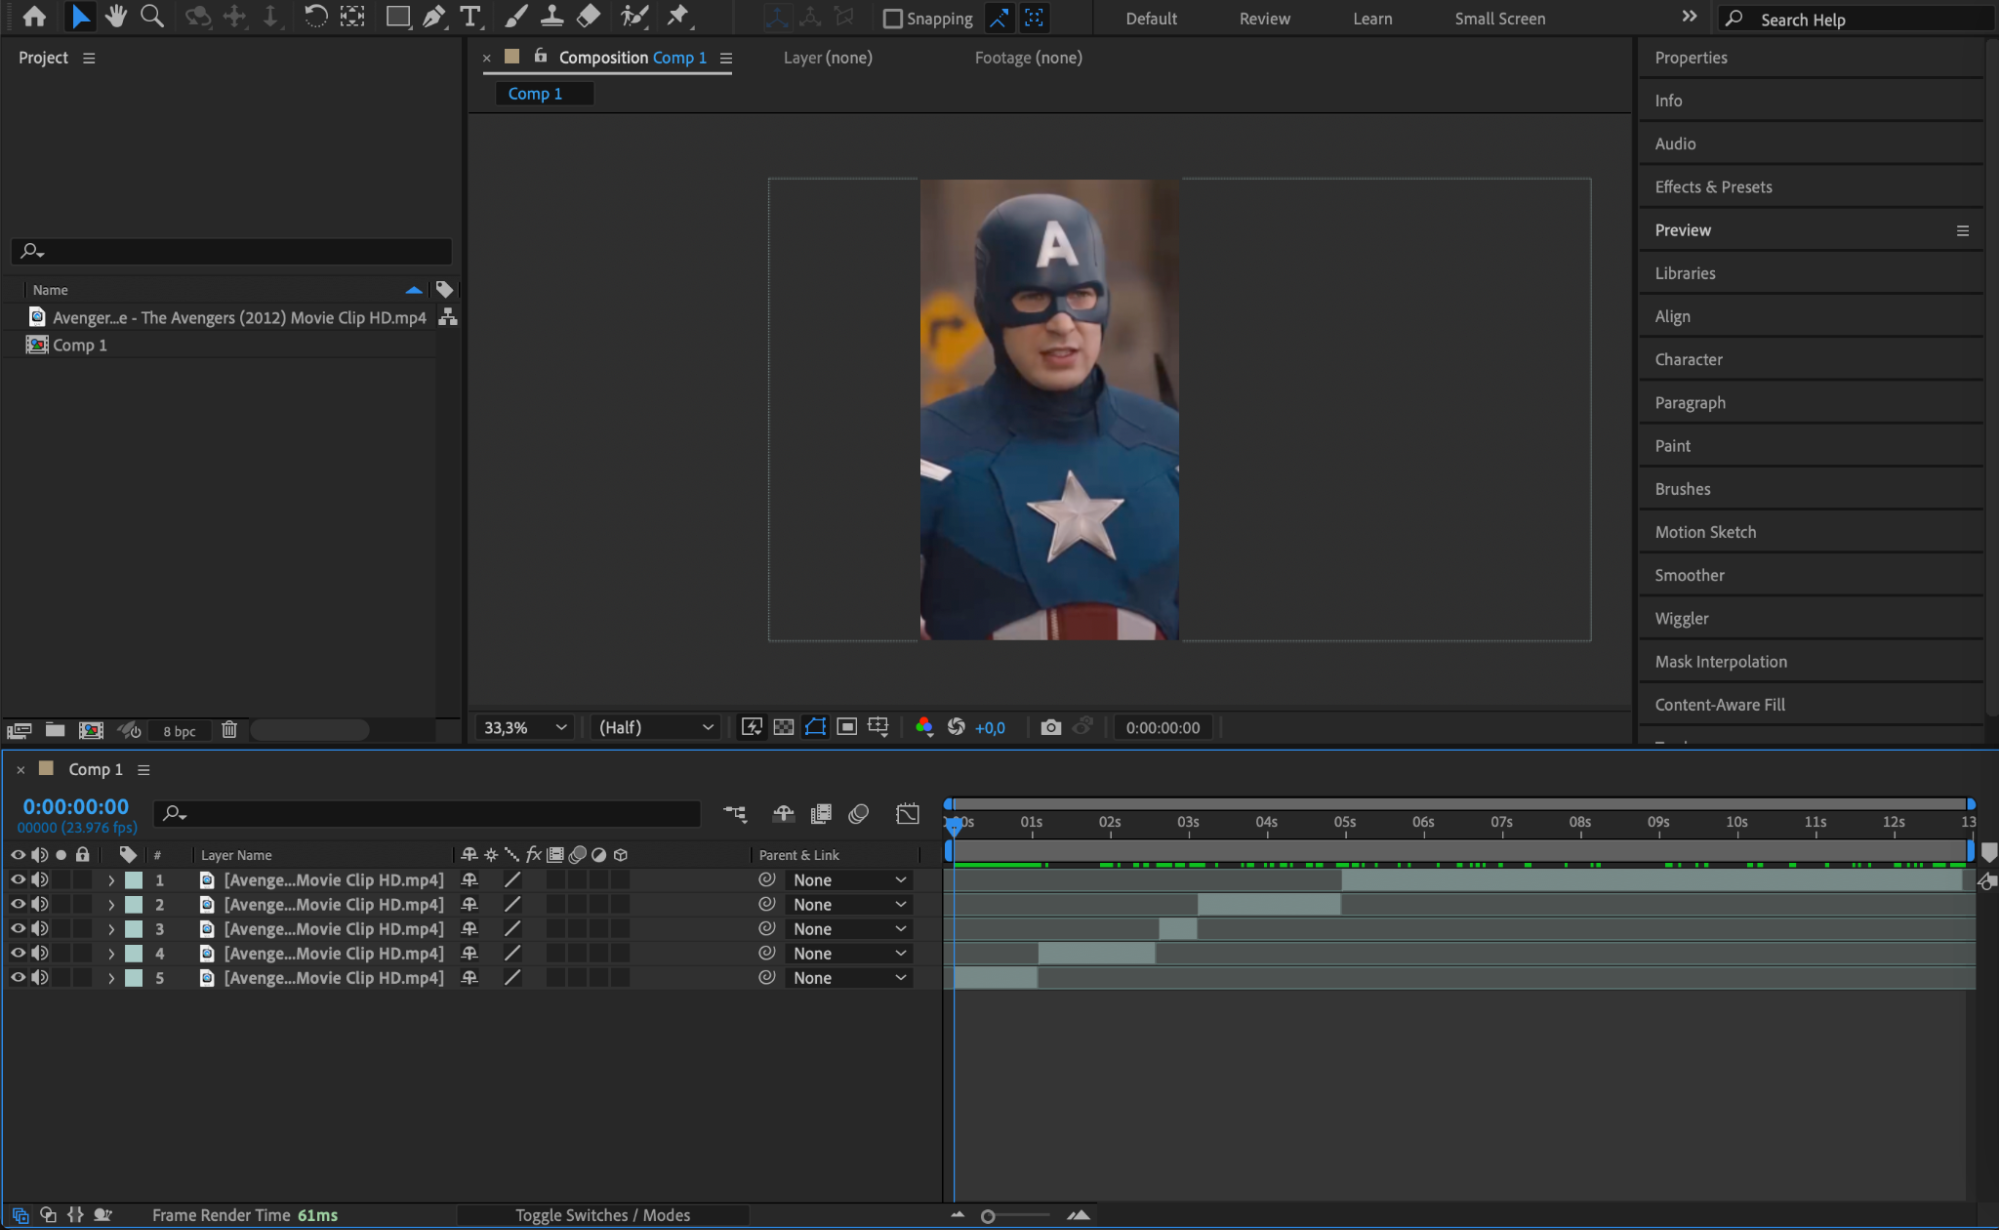
To remove unnecessary parts of the video, you’ll need to split the layers at specific points. Move the Current Time Indicator to the desired split point, then press “Ctrl/Cmd + Shift + D” to split the layer. You can then delete any unwanted sections by selecting the layer and pressing Delete. After trimming your clips, ensure each segment is positioned correctly on the Timeline to maintain the flow of your edit.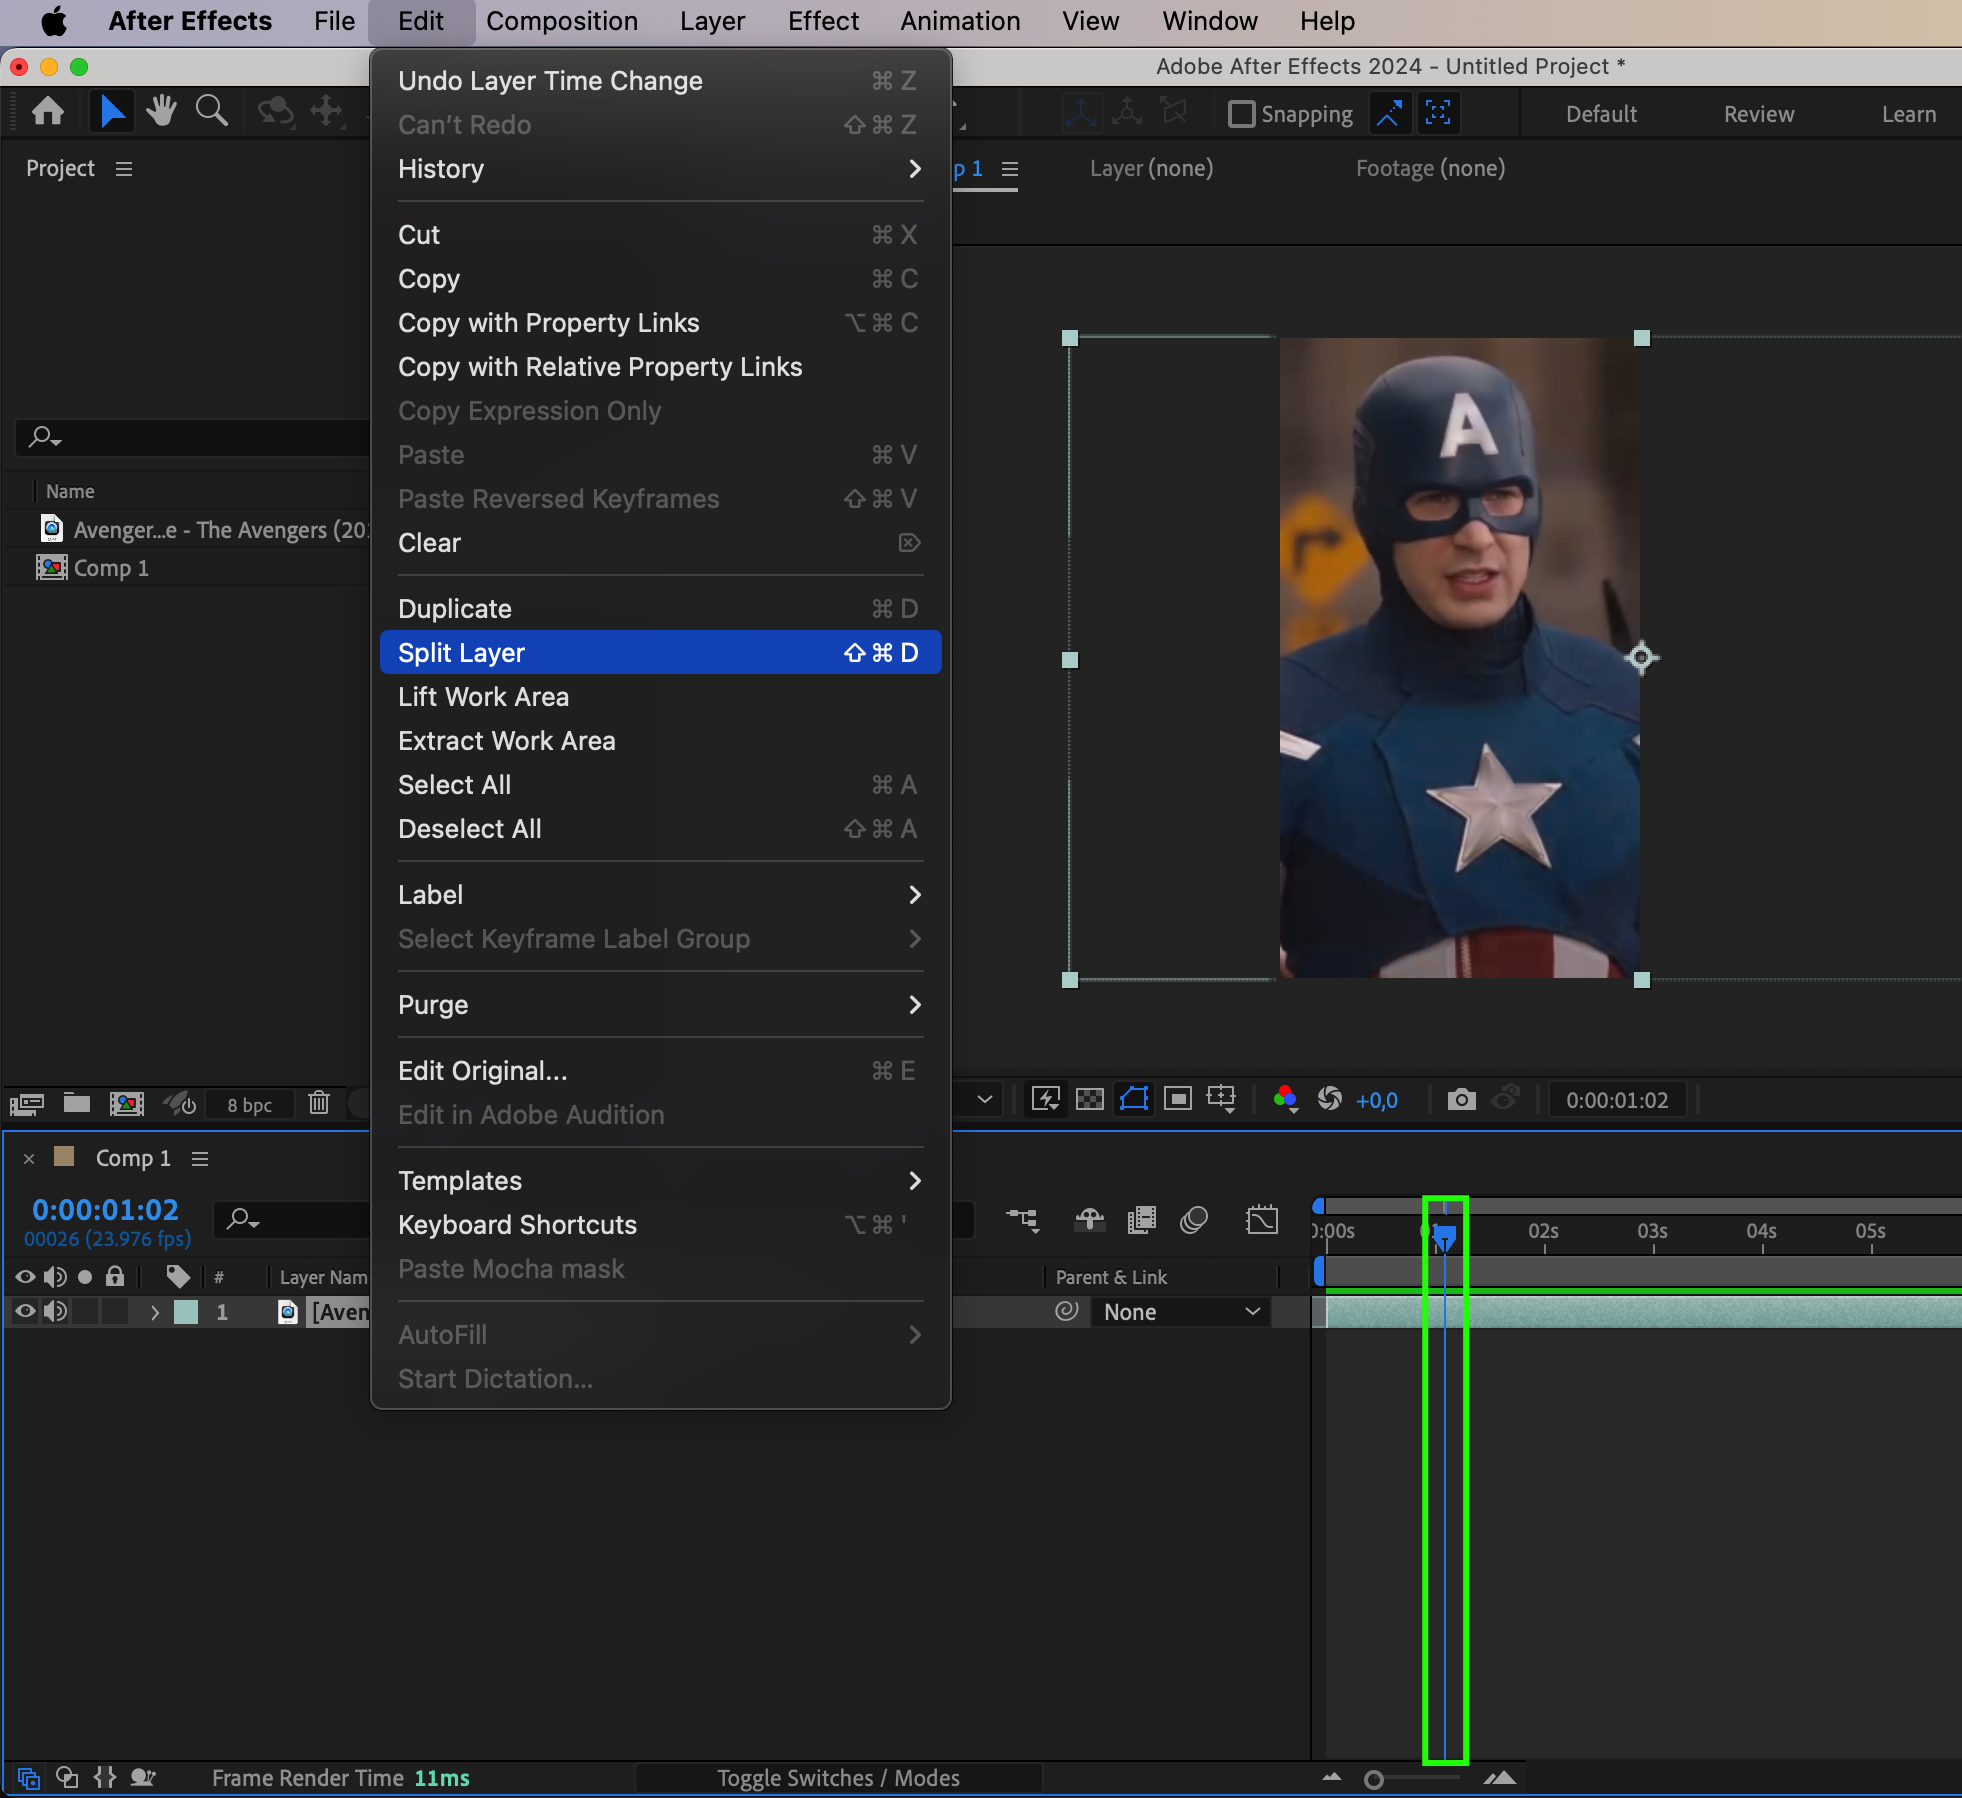
Step 5: Apply Color Correction and Effects
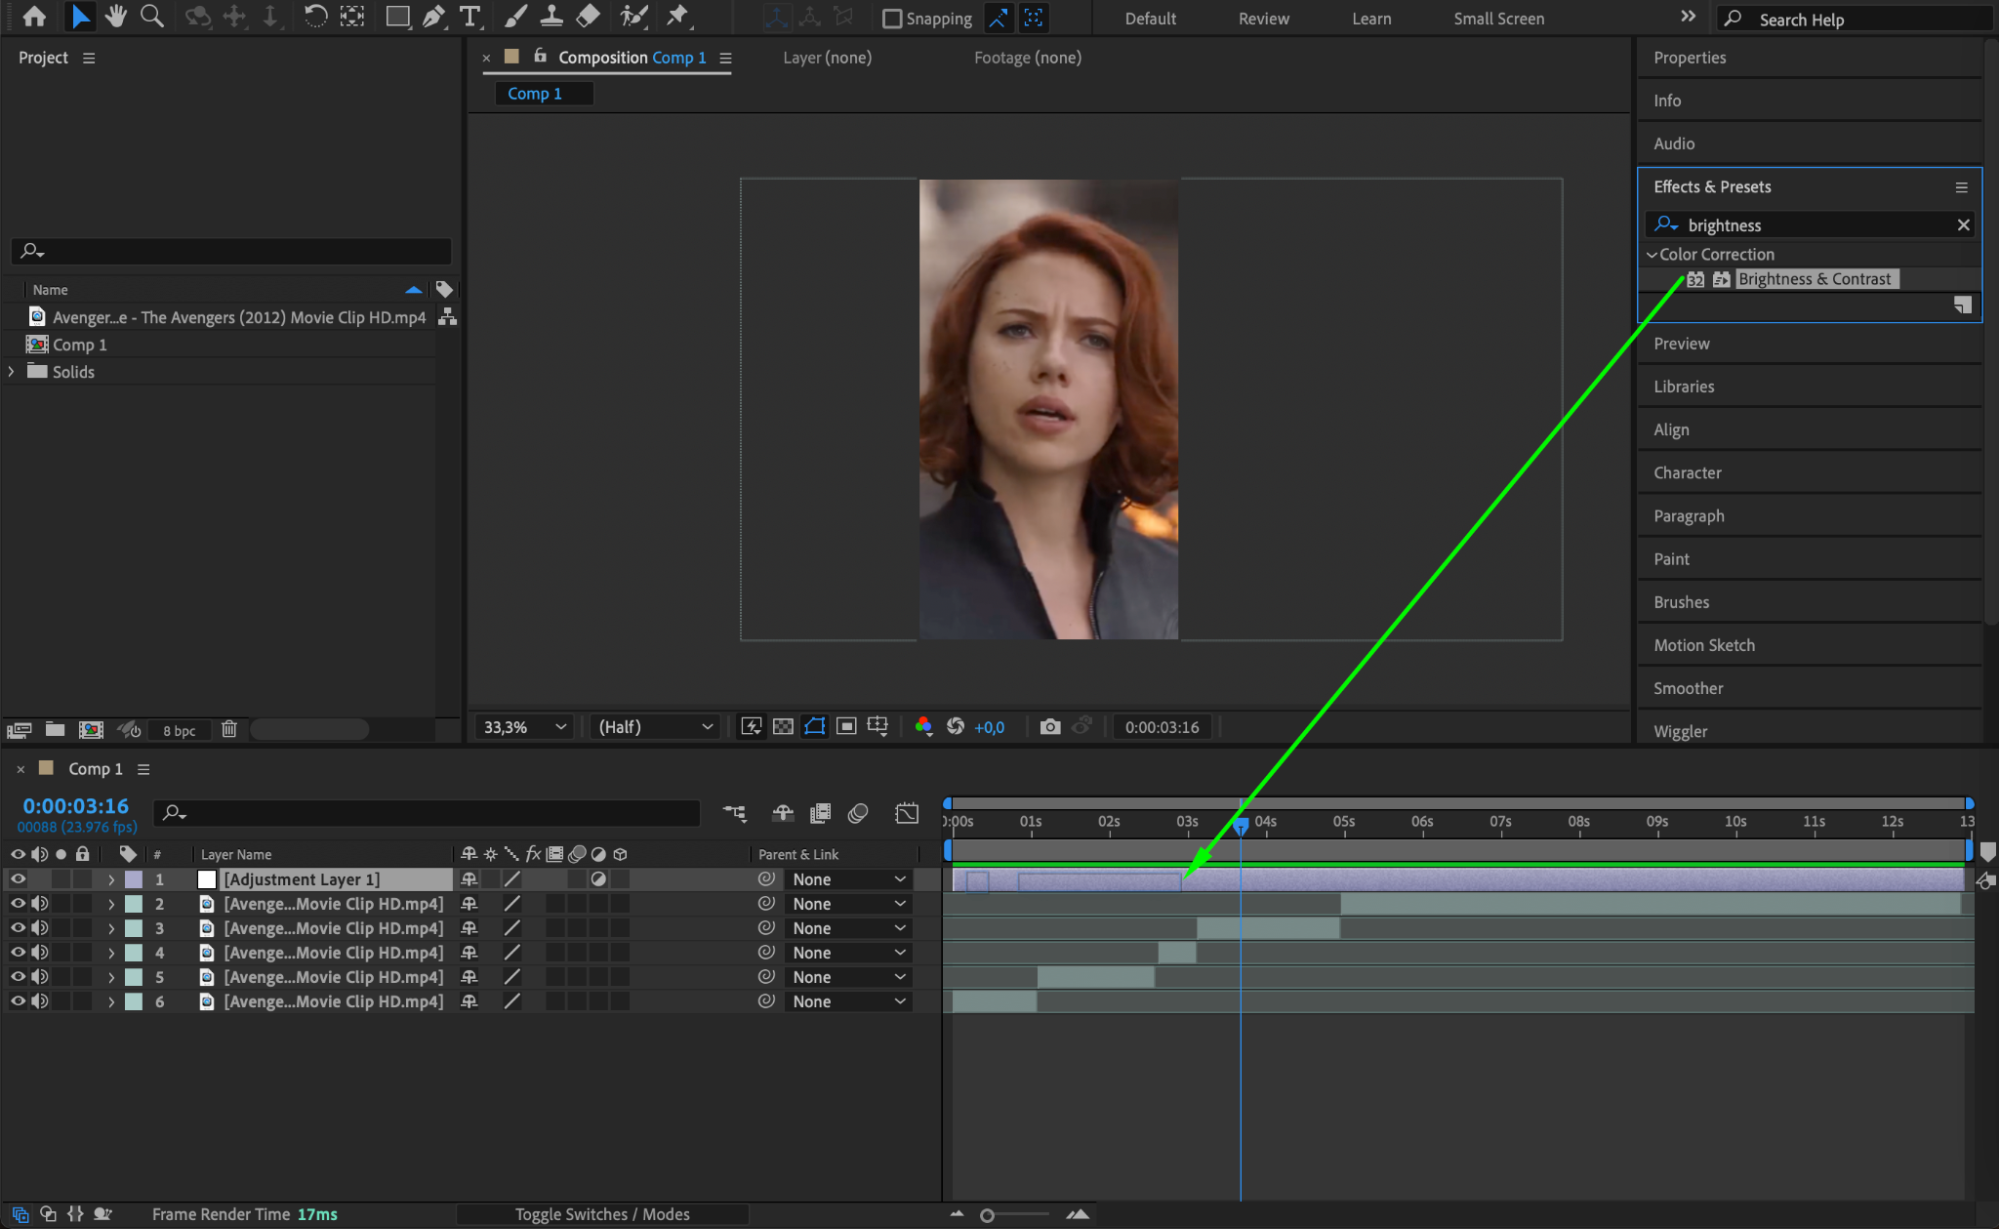
Color correction can significantly enhance the visual quality of your Instagram edits. To apply effects, navigate to the Effects & Presets panel and search for color correction tools like Brightness & Contrast or Curves. For more comprehensive adjustments, create an Adjustment Layer by going to Layer > New > Adjustment Layer. This will allow you to apply effects to multiple layers at once, ensuring consistency across your entire composition and giving your edit a more cohesive, polished look.
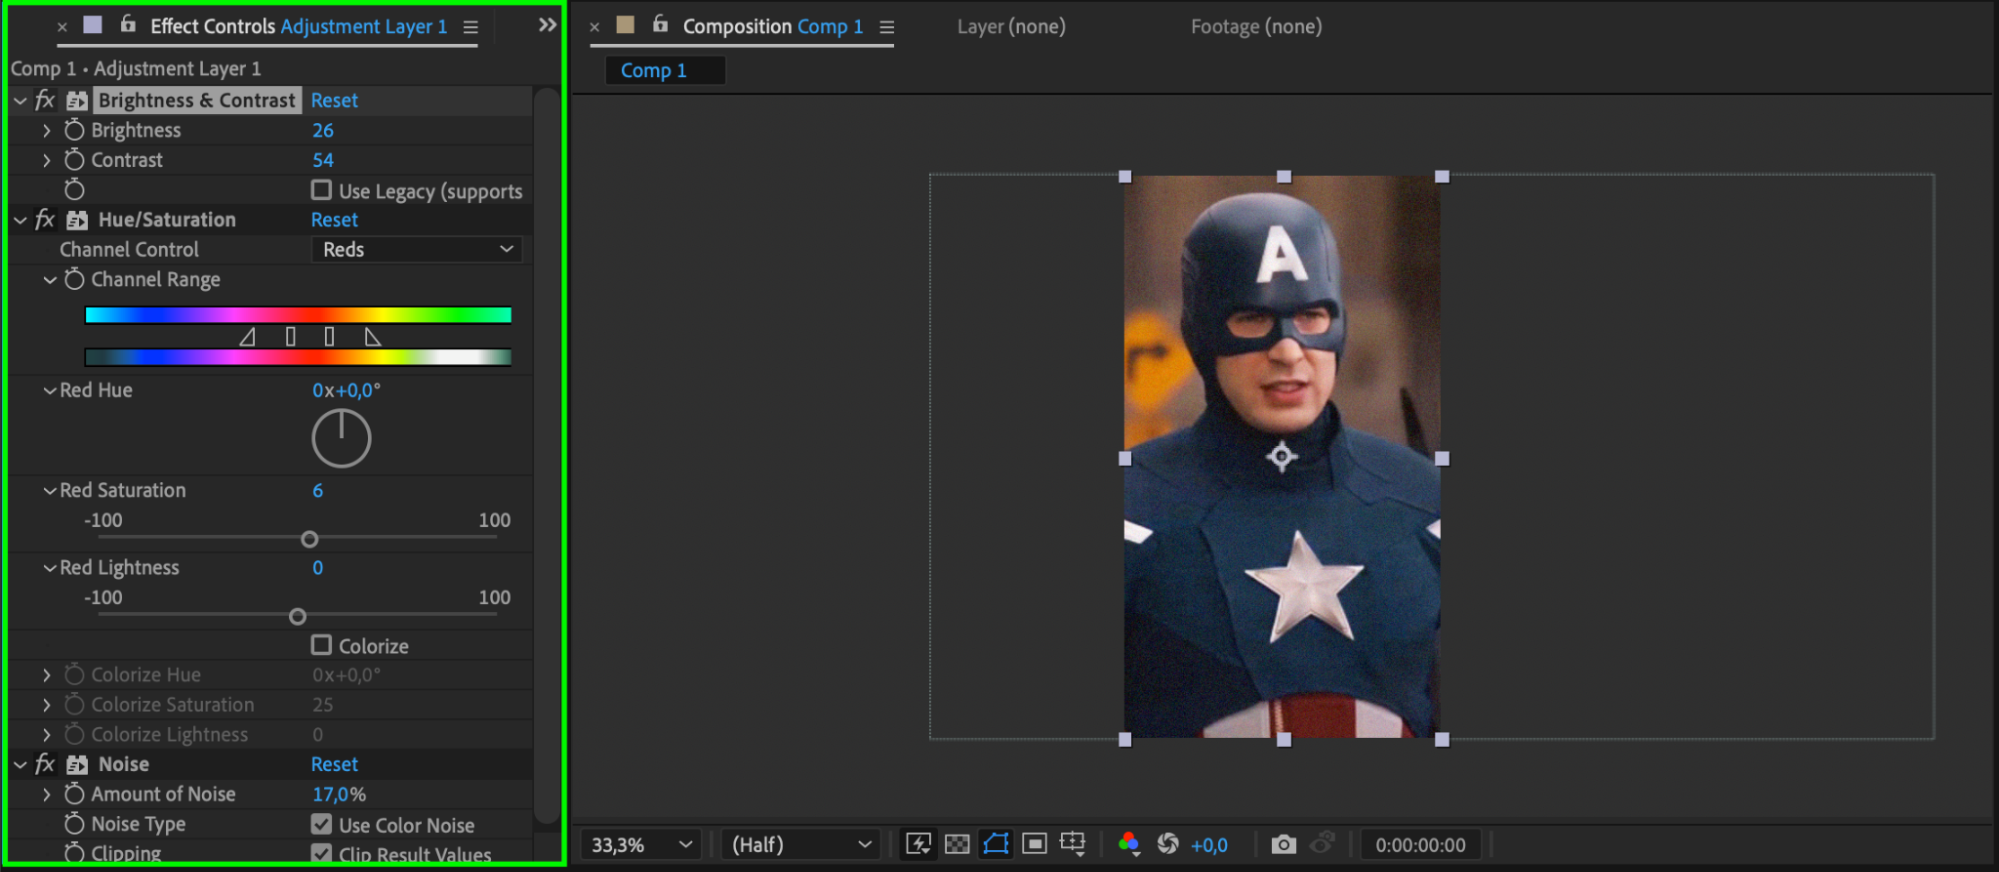
Step 6: Add Transitions and Animations
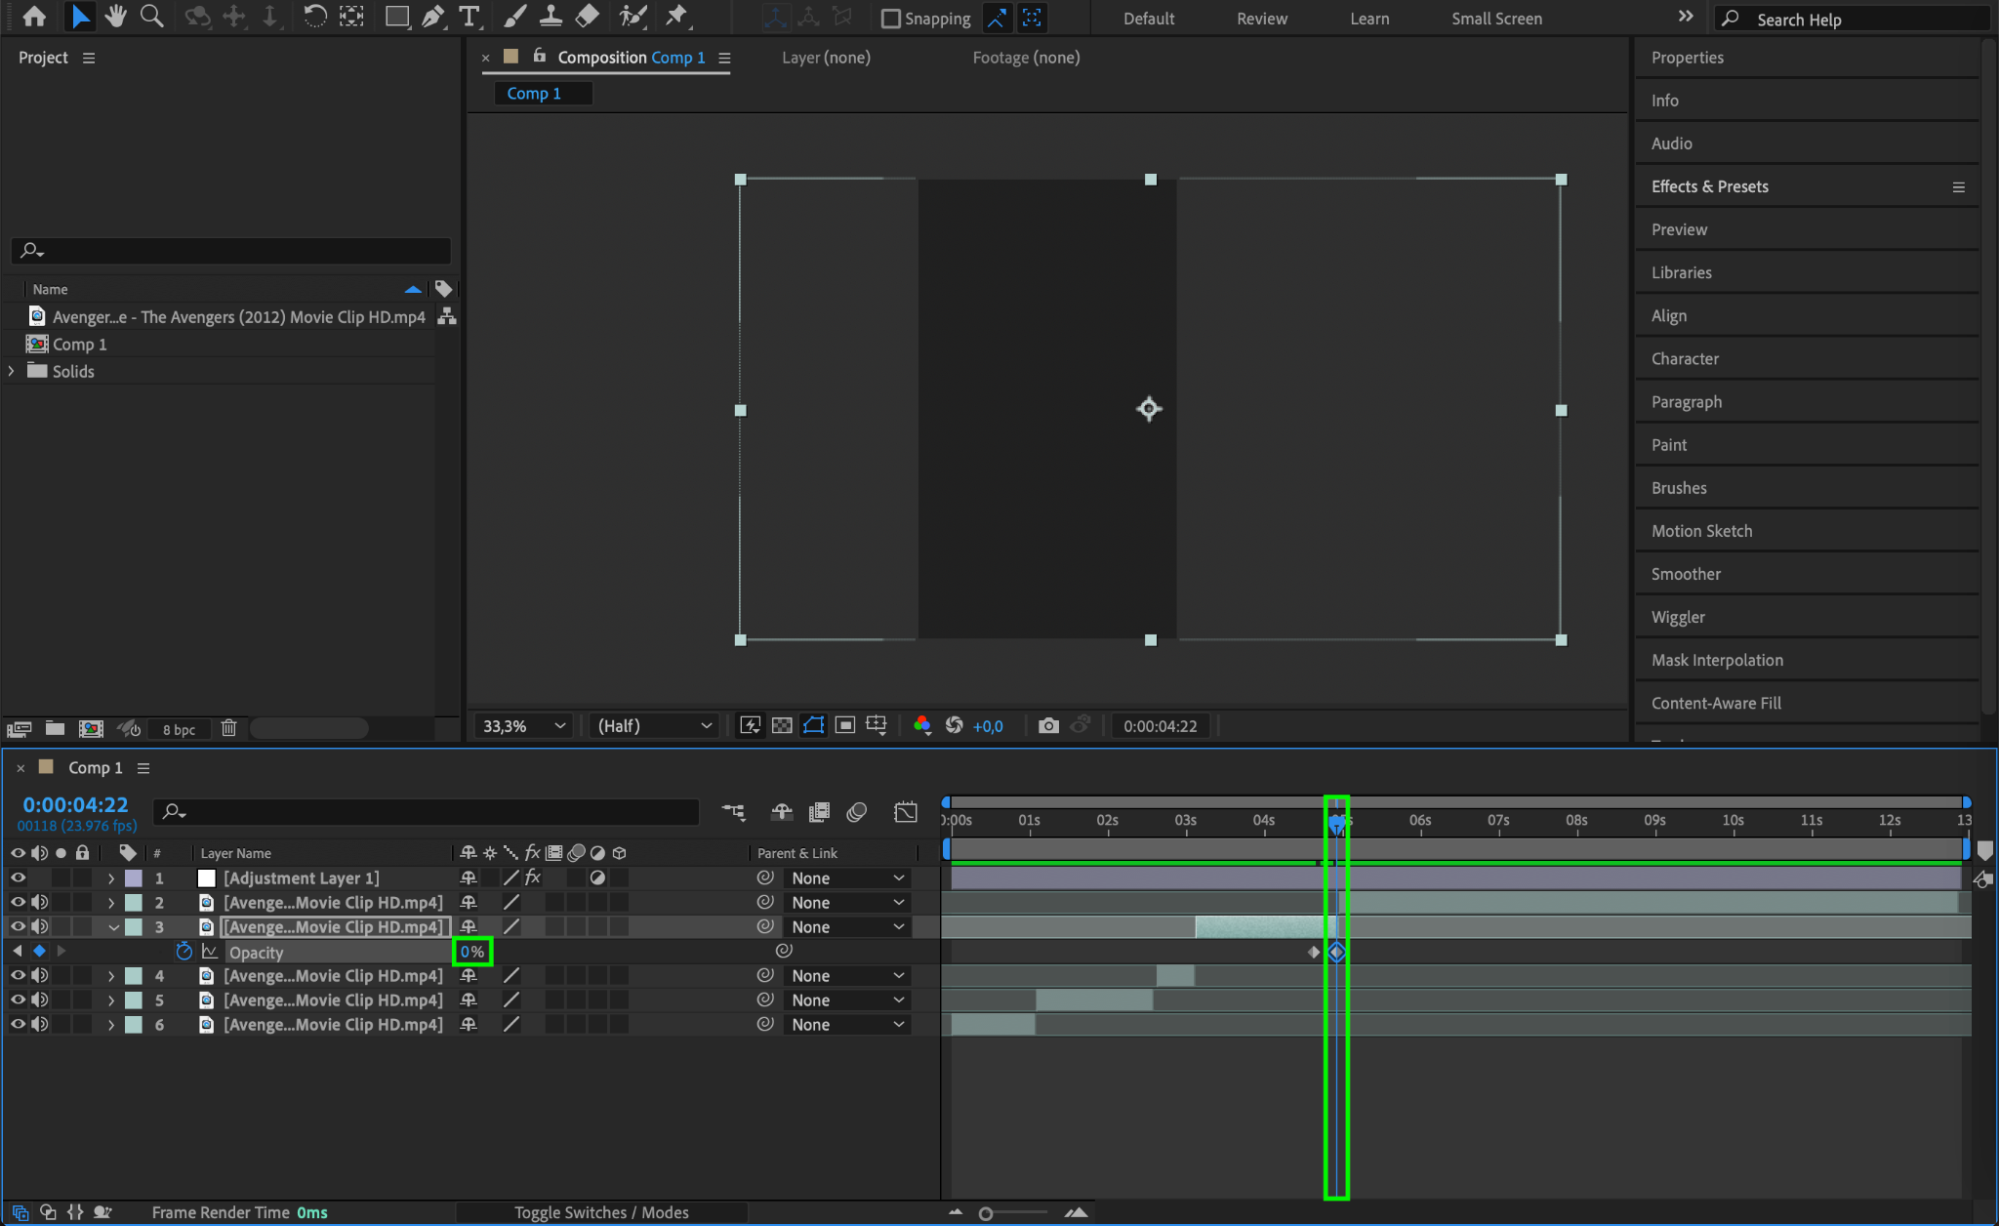
Transitions and animations are key elements in making Instagram edits more dynamic. Use keyframes to animate properties such as Position, Scale, and Opacity. For example, you can create smooth transitions between clips by adjusting the Opacity or Scale at the beginning and end of each layer. Additionally, you can explore ready-made transitions and animations available in the Effects & Presets panel, making the process even quicker.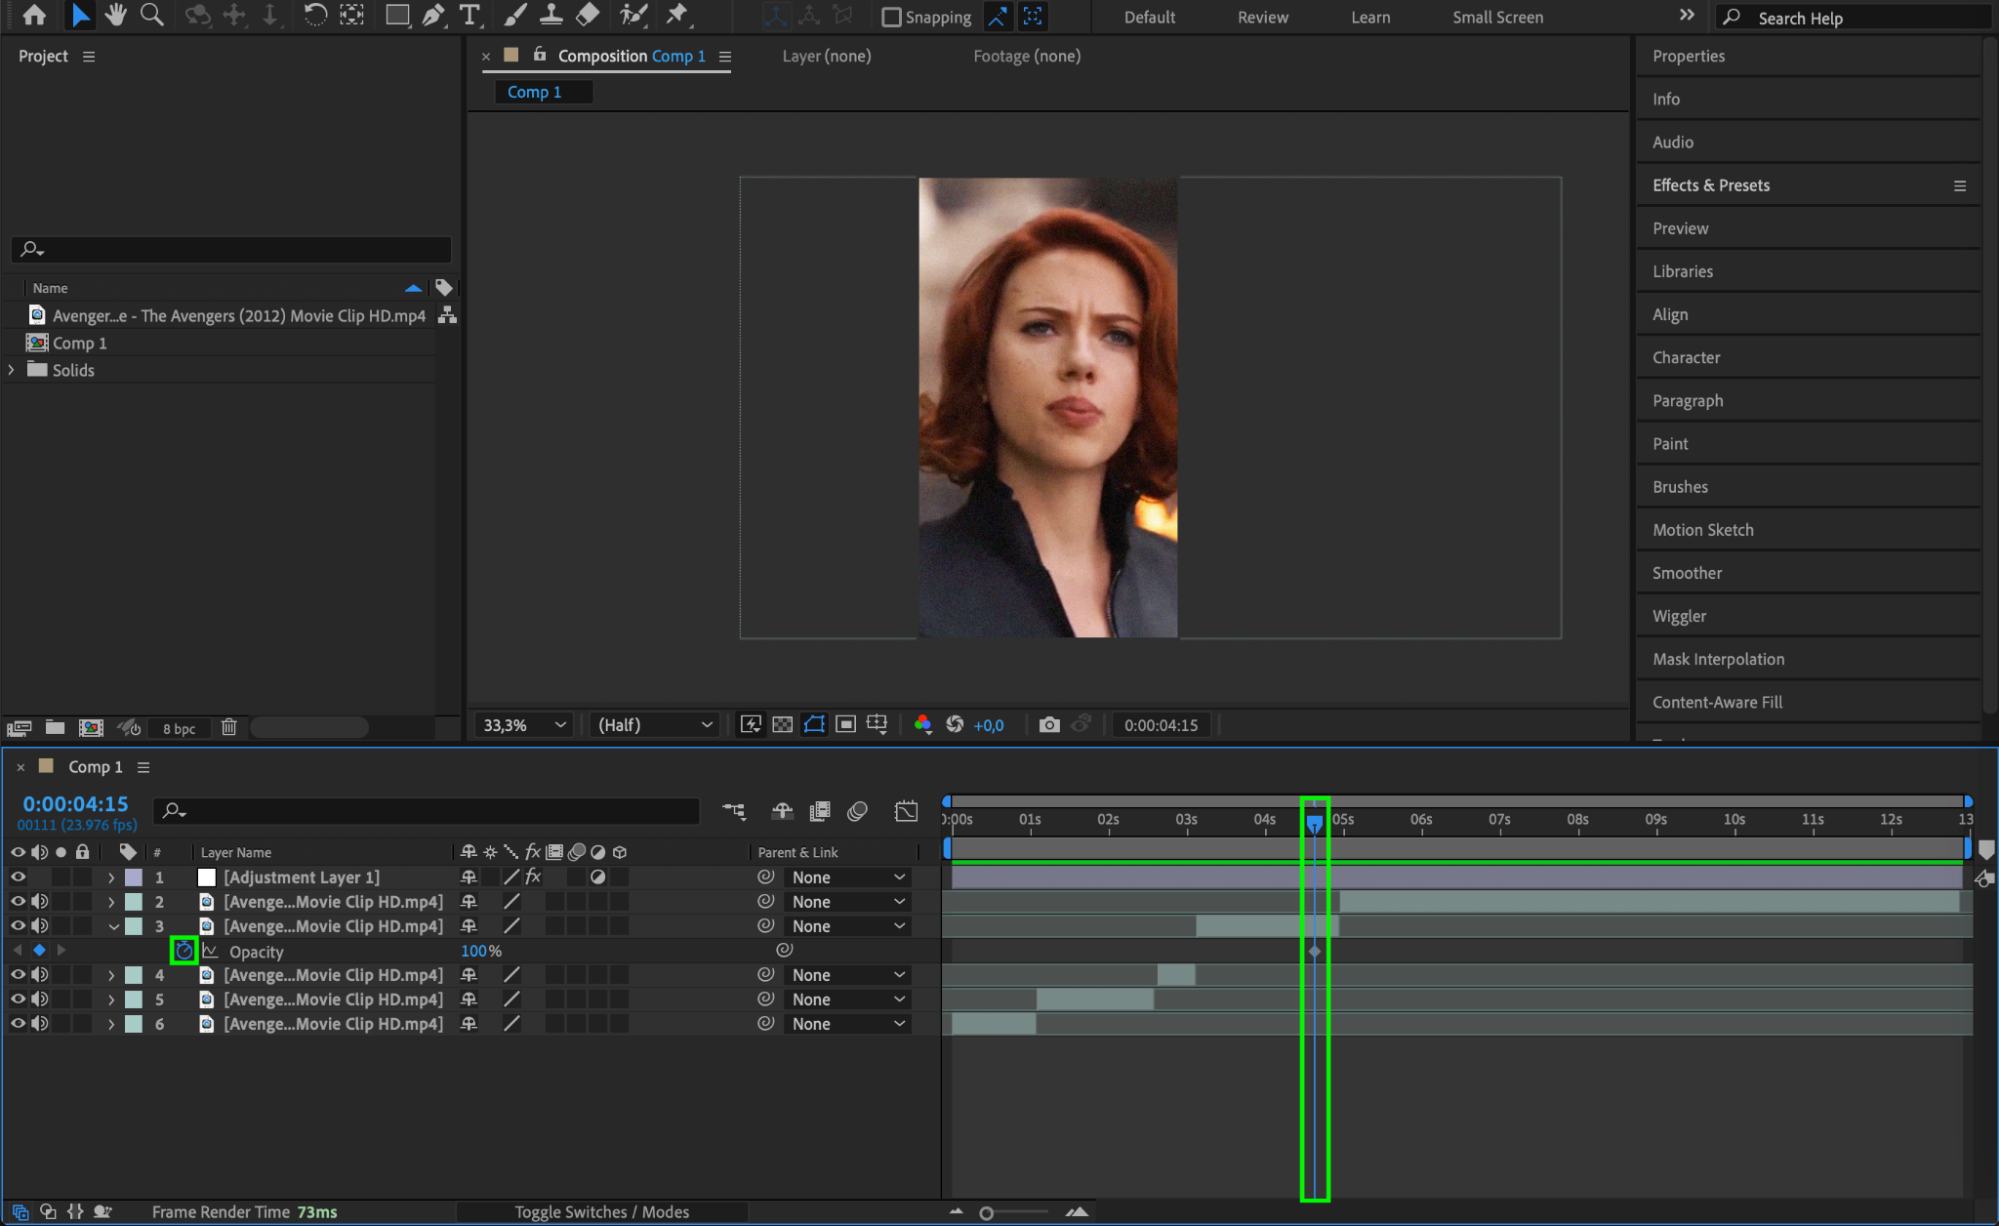
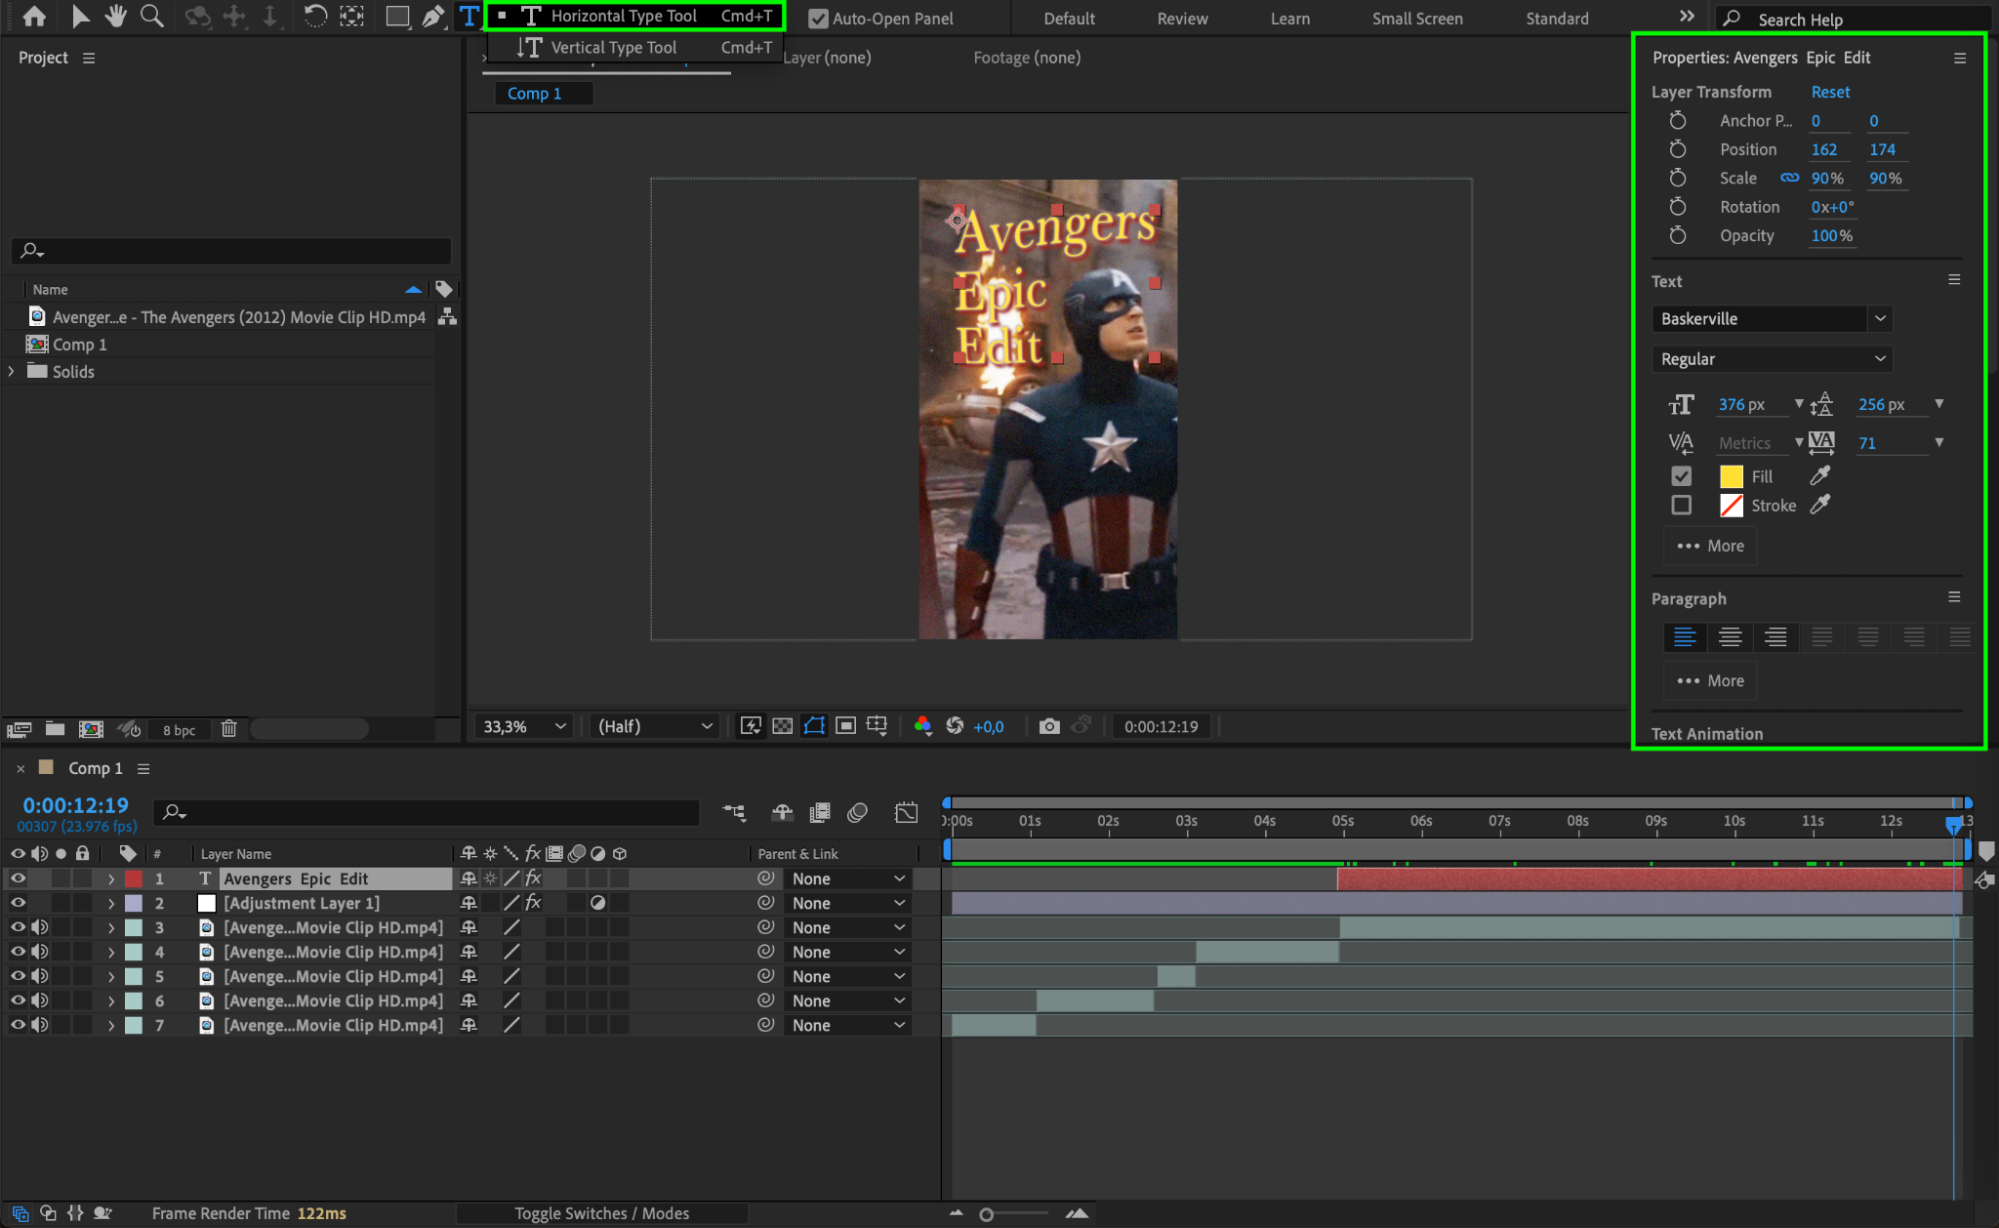
 Step 7: Add Text with the Type Tool
Text can enhance your Instagram edits by delivering messages or captions to your audience. Use the Type Tool by pressing “Ctrl/Cmd + T” to create and customize your text. You can adjust font size, color, and style, or apply animation to make your text appear more dynamic. Position your text layer on the Timeline, ensuring it complements the visuals of your edit without overpowering them.
 Step 8: Preview Your Edit
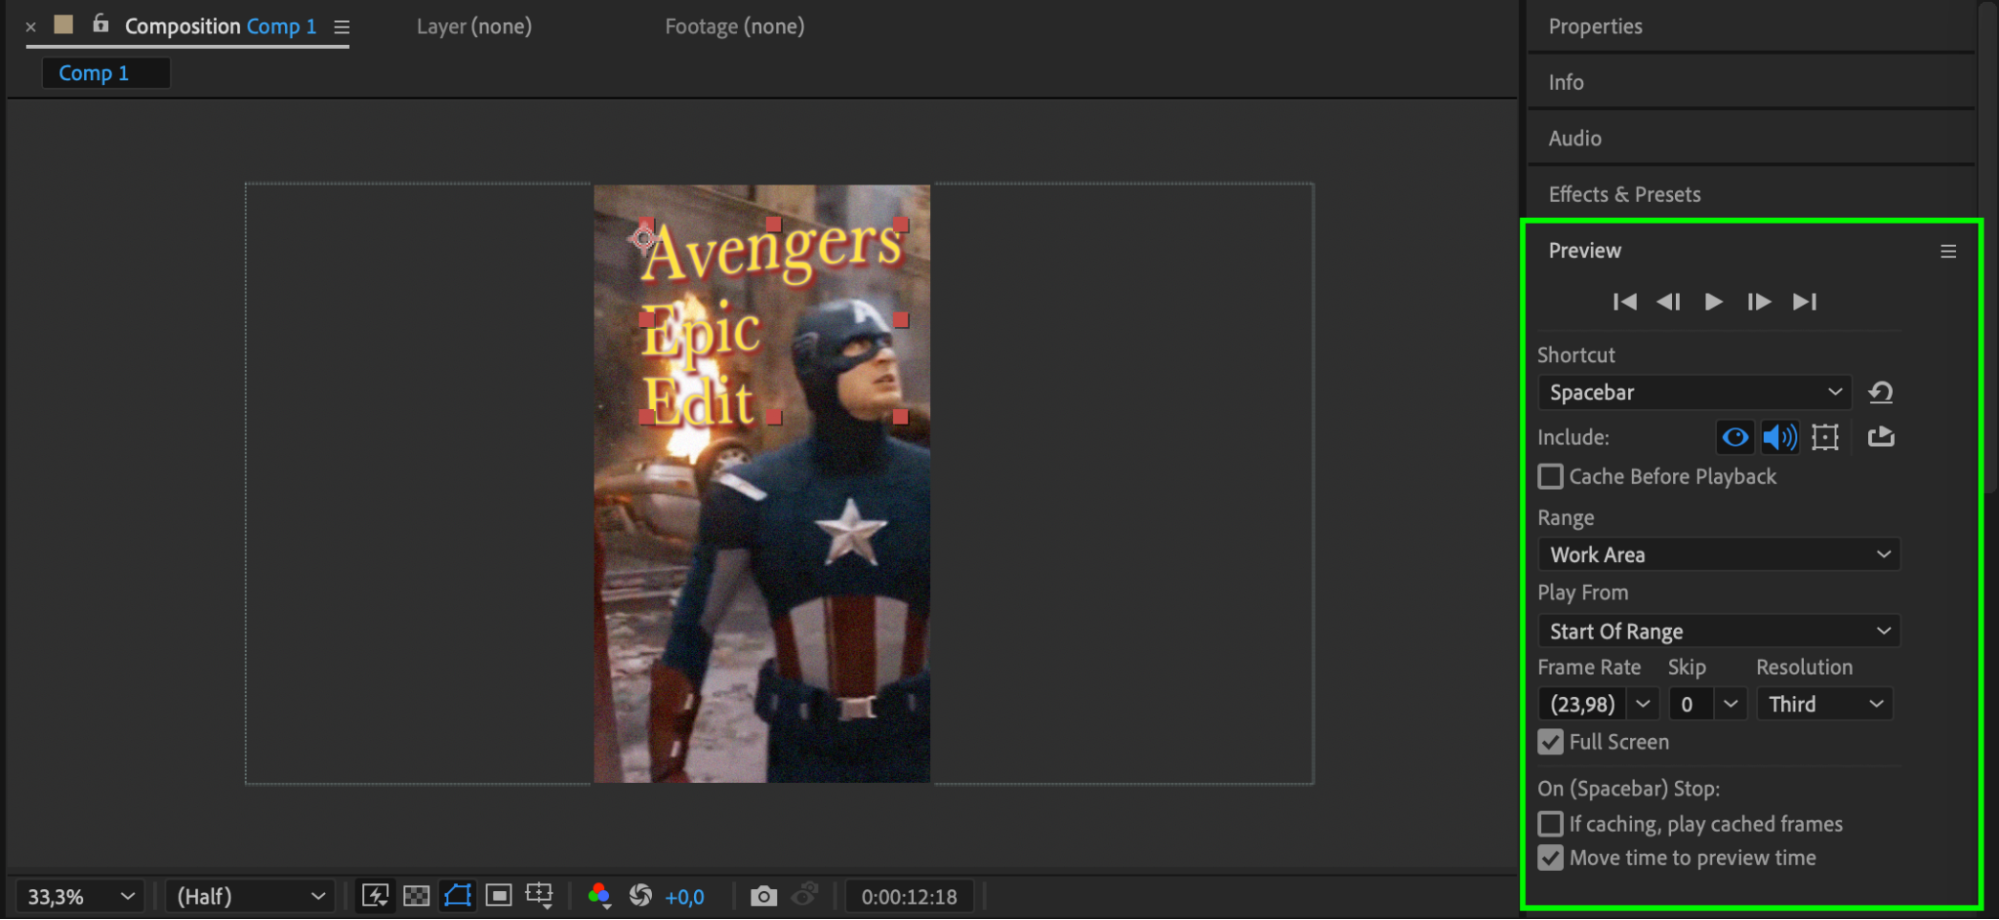
Before rendering, preview your entire composition to ensure everything looks good. Press Spacebar to play through your edit and check for any mistakes or areas that need adjustment. You can also adjust the Work Area in the Timeline to focus on specific sections if needed. Make any necessary changes to effects, timing, or transitions before finalizing your project.
Step 9: Export Your Instagram Edit
Once you’re satisfied with your Instagram edit, it’s time to export. Go to Composition > Add to Render Queue. In the Render Queue, adjust the Output Module settings, choosing H.264 as the format for Instagram-ready videos. Once your settings are correct, click Render to export the video.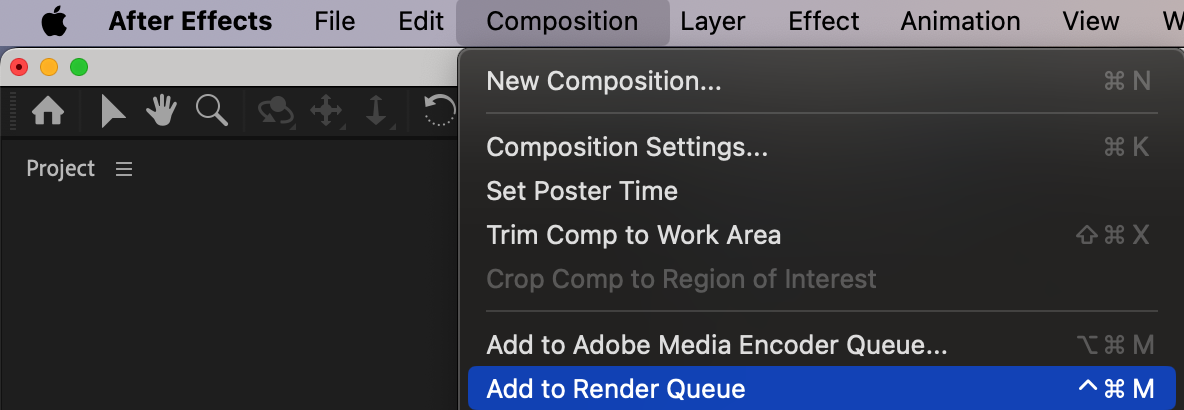

Conclusion
Now that you’ve completed your Instagram edit, it’s time to share it with the world! Open the Instagram app on your phone, select the video from your camera roll, and upload it. You can even apply additional filters and make tweaks within Instagram itself. Don’t forget to write an engaging caption and add relevant hashtags to boost visibility.
Creating Instagram edits in After Effects is a fun and creative process. Experiment with different effects, transitions, and animations to keep your content fresh and exciting. With these steps, you’ll be able to craft stunning edits that stand out in the fast-paced world of Instagram. Happy editing!


