Creating Eye-Catching Neon Text in After Effects
Illuminate Your Projects: A Step-by-Step Guide to Crafting Neon Text in After Effects
Creating neon text in After Effects is an exciting way to add a vibrant and electrifying touch to your videos and motion graphics projects. It instantly grabs attention and gives a stylish edge to any project. In this tutorial, we will guide you step-by-step on how to achieve realistic and eye-catching neon text in After Effects.
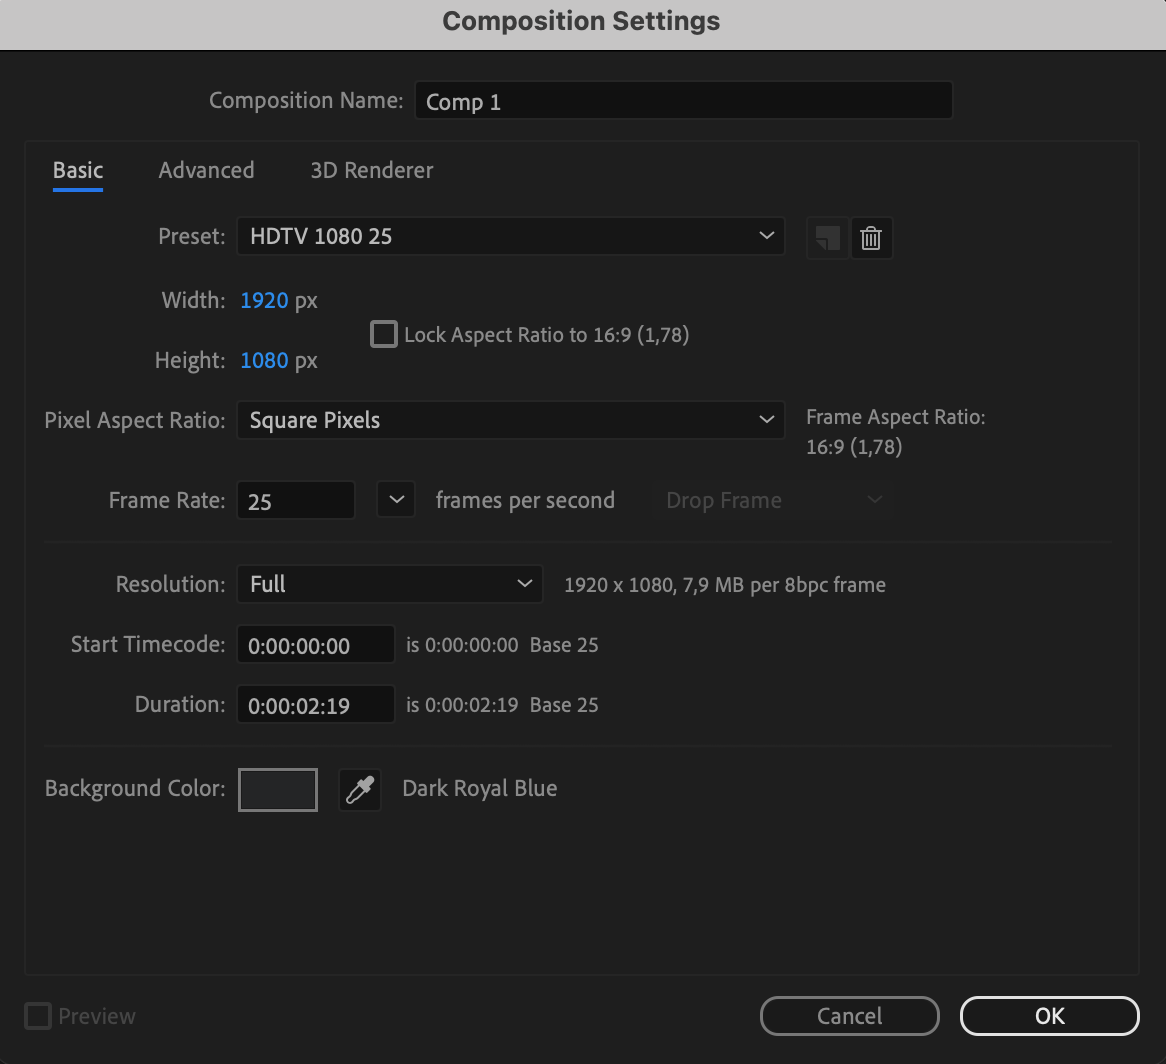
Step 1: Setting Up Your Composition
First, start by creating a new composition in After Effects with your desired dimensions and duration. 
 Step 2: Adding Text Layer
Get 10% off when you subscribe to our newsletter

Next, add a new text layer to the composition and type in your desired text. Select a bold font that will amplify the impact of the neon effect. Adjust the size and position of the text to your liking.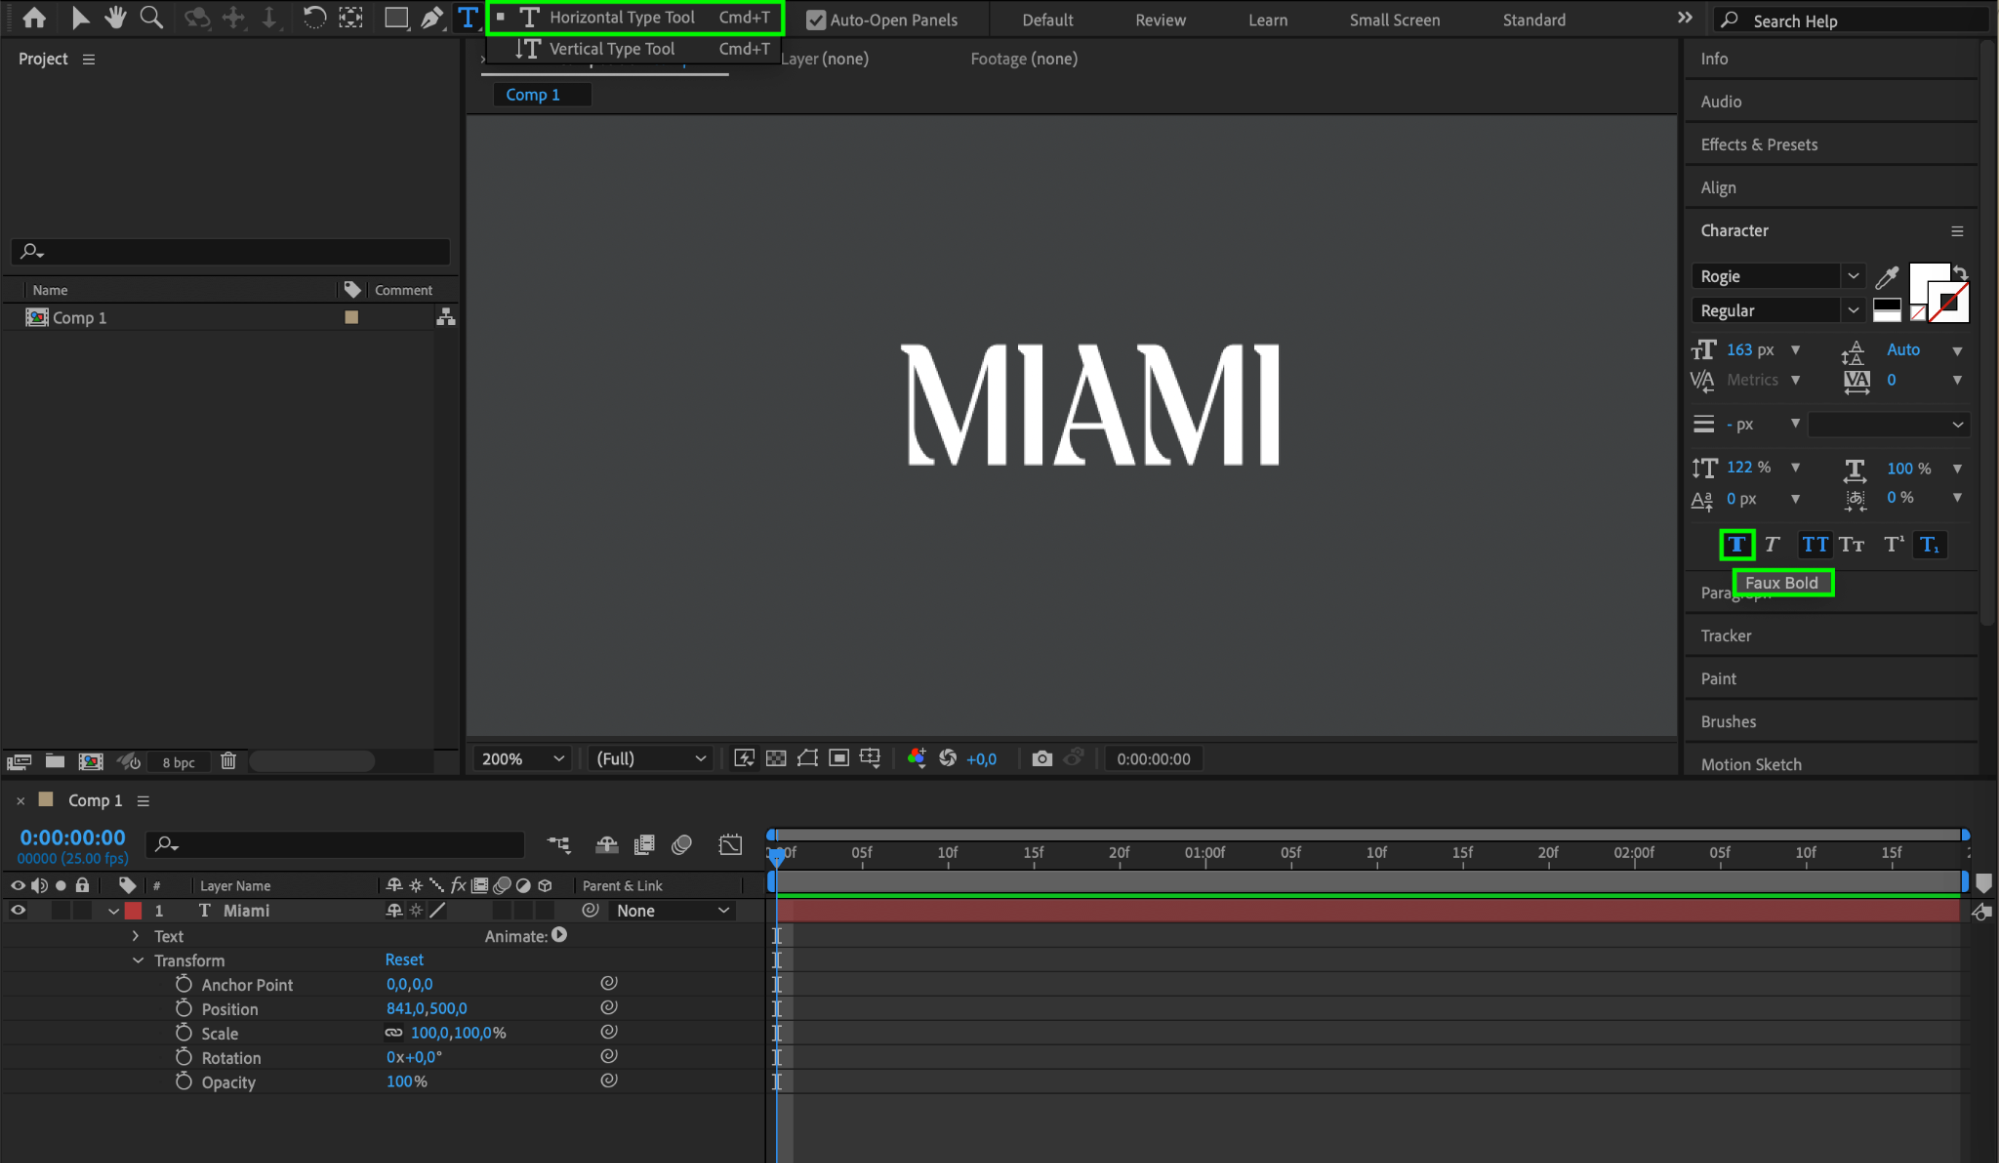 Step 3: Applying Fill and Stroke
To create the neon effect, select the fill option in the Character panel and choose a bright color for your text. Additionally, apply a stroke to your text layer to mimic the outline of neon signs. Experiment with different stroke colors and thicknesses until you achieve the desired effect.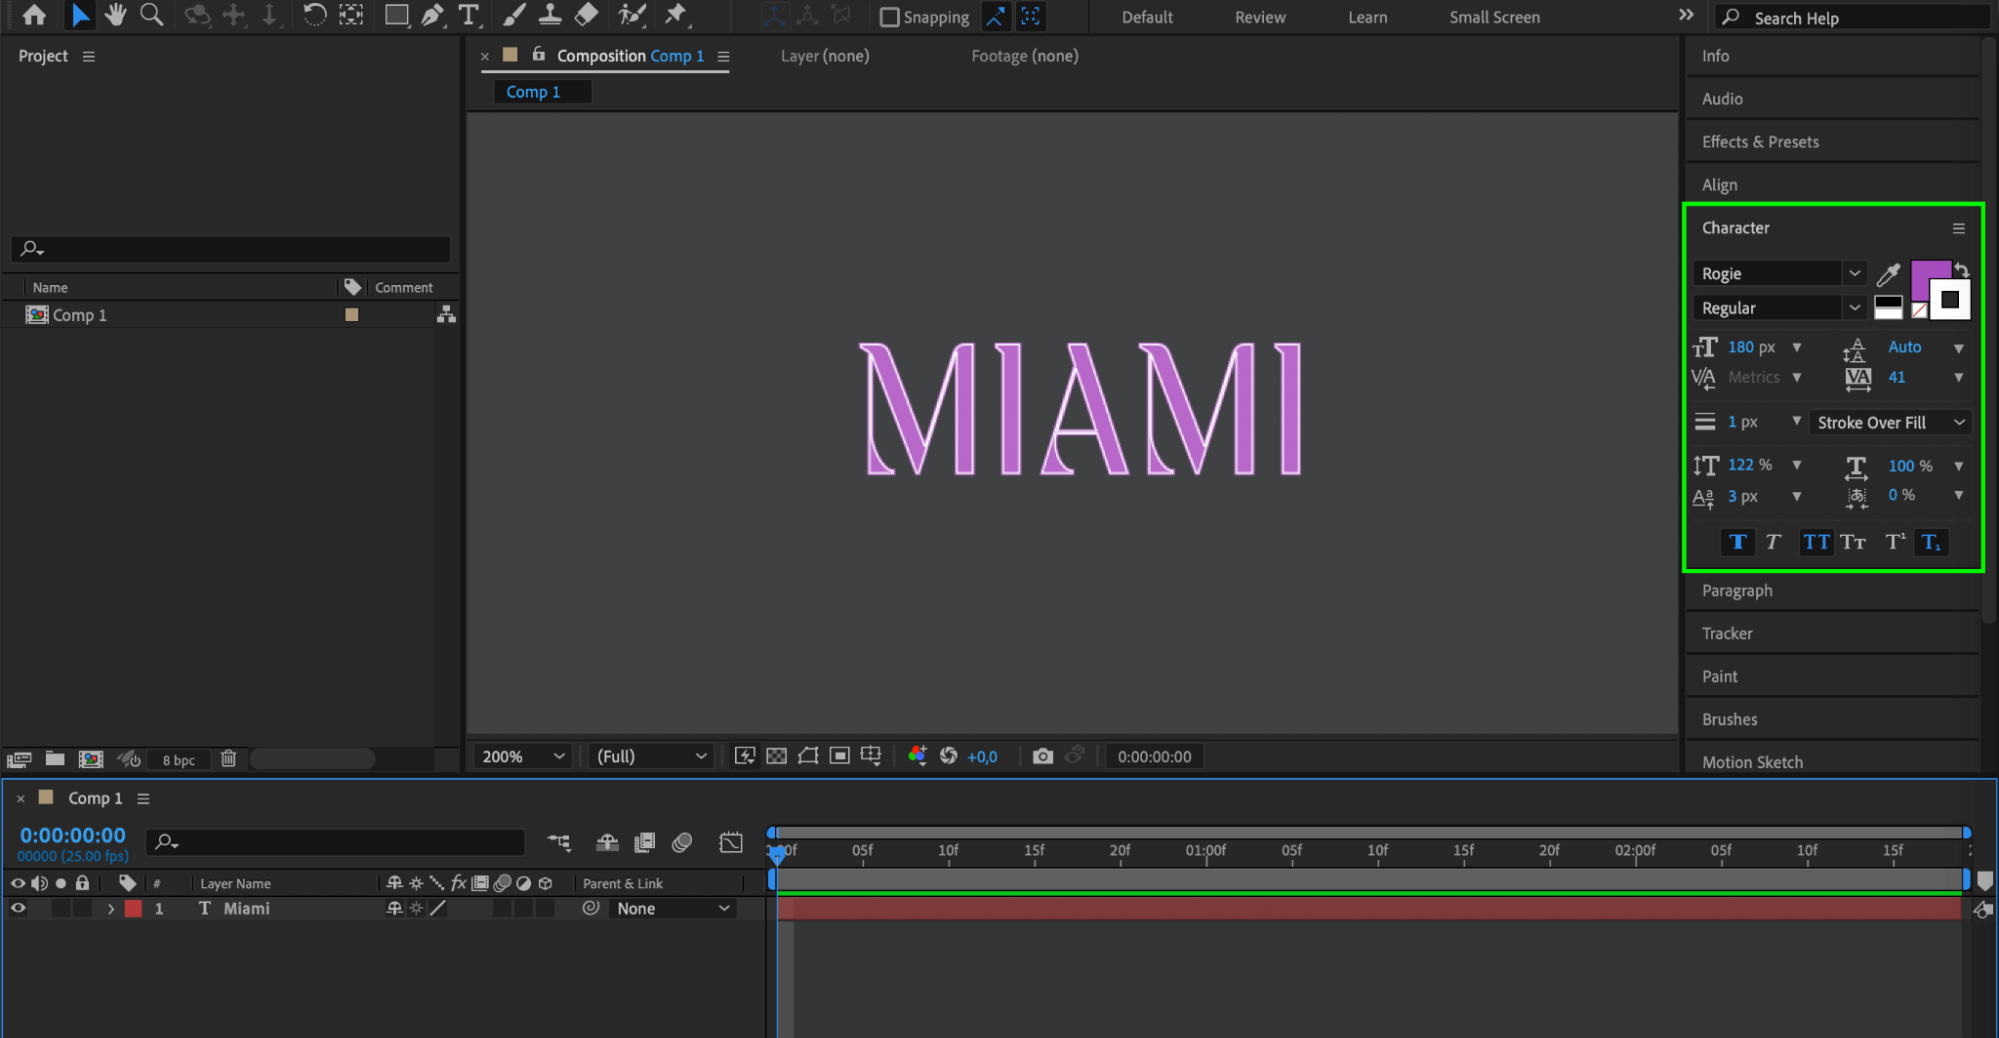 Step 4: Adding Soft Glow
Get 10% off when you subscribe to our newsletter
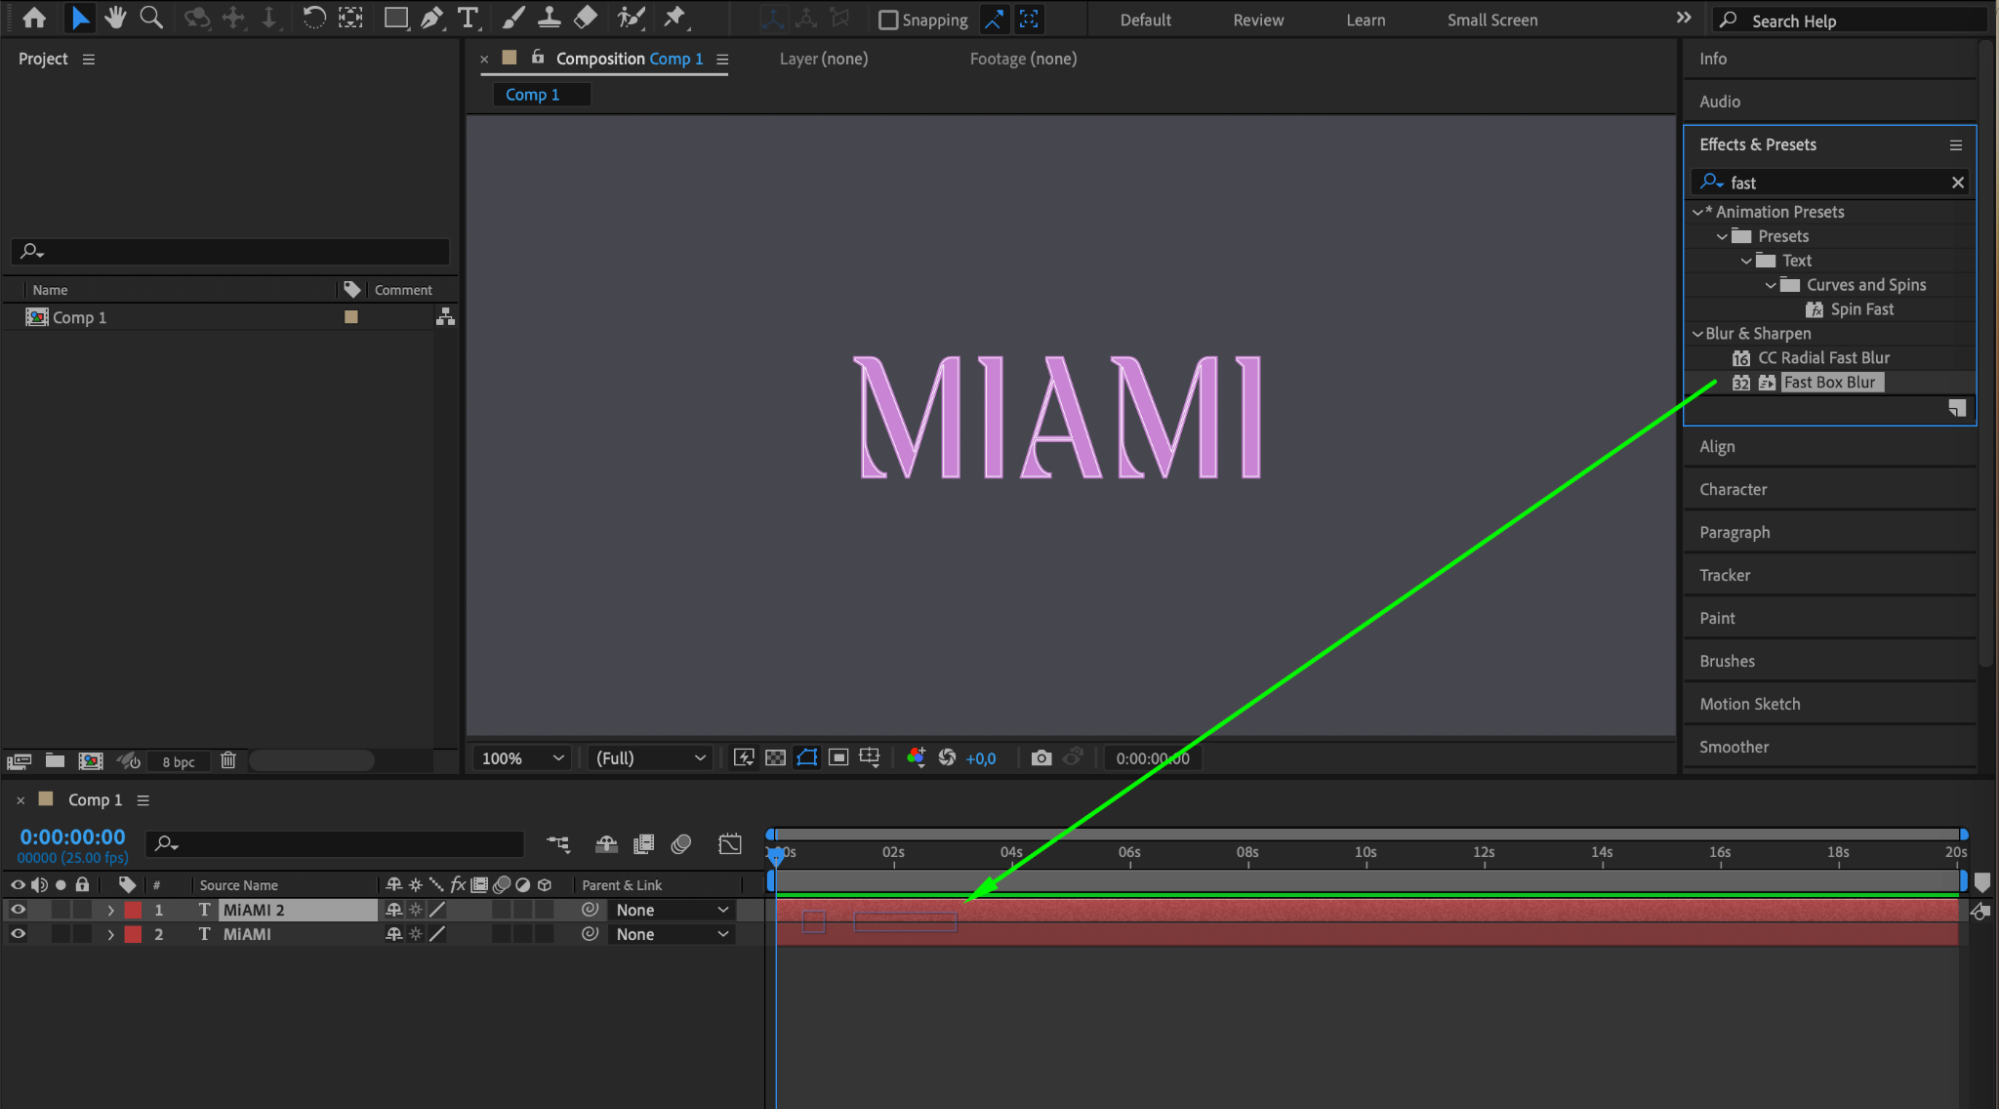
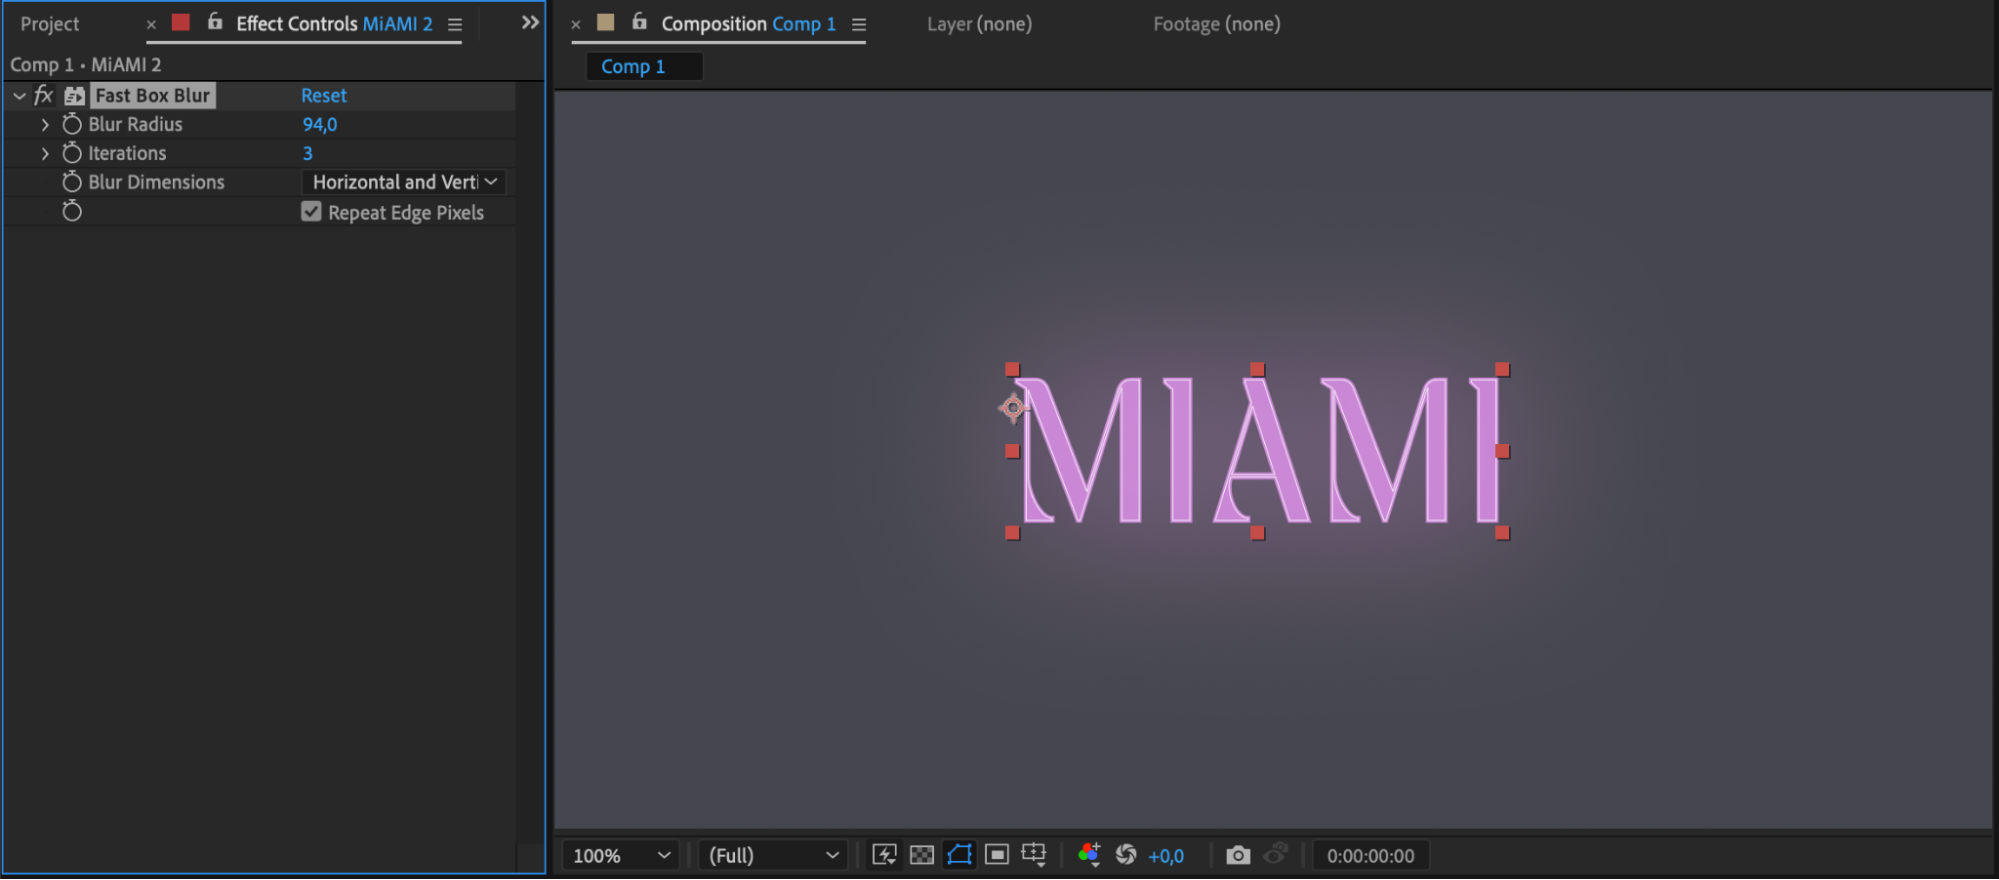
To make the text truly shine, duplicate the text layer. Apply the Fast Box Blur effect to the duplicated layer, adjusting the settings to create a soft glow around the text.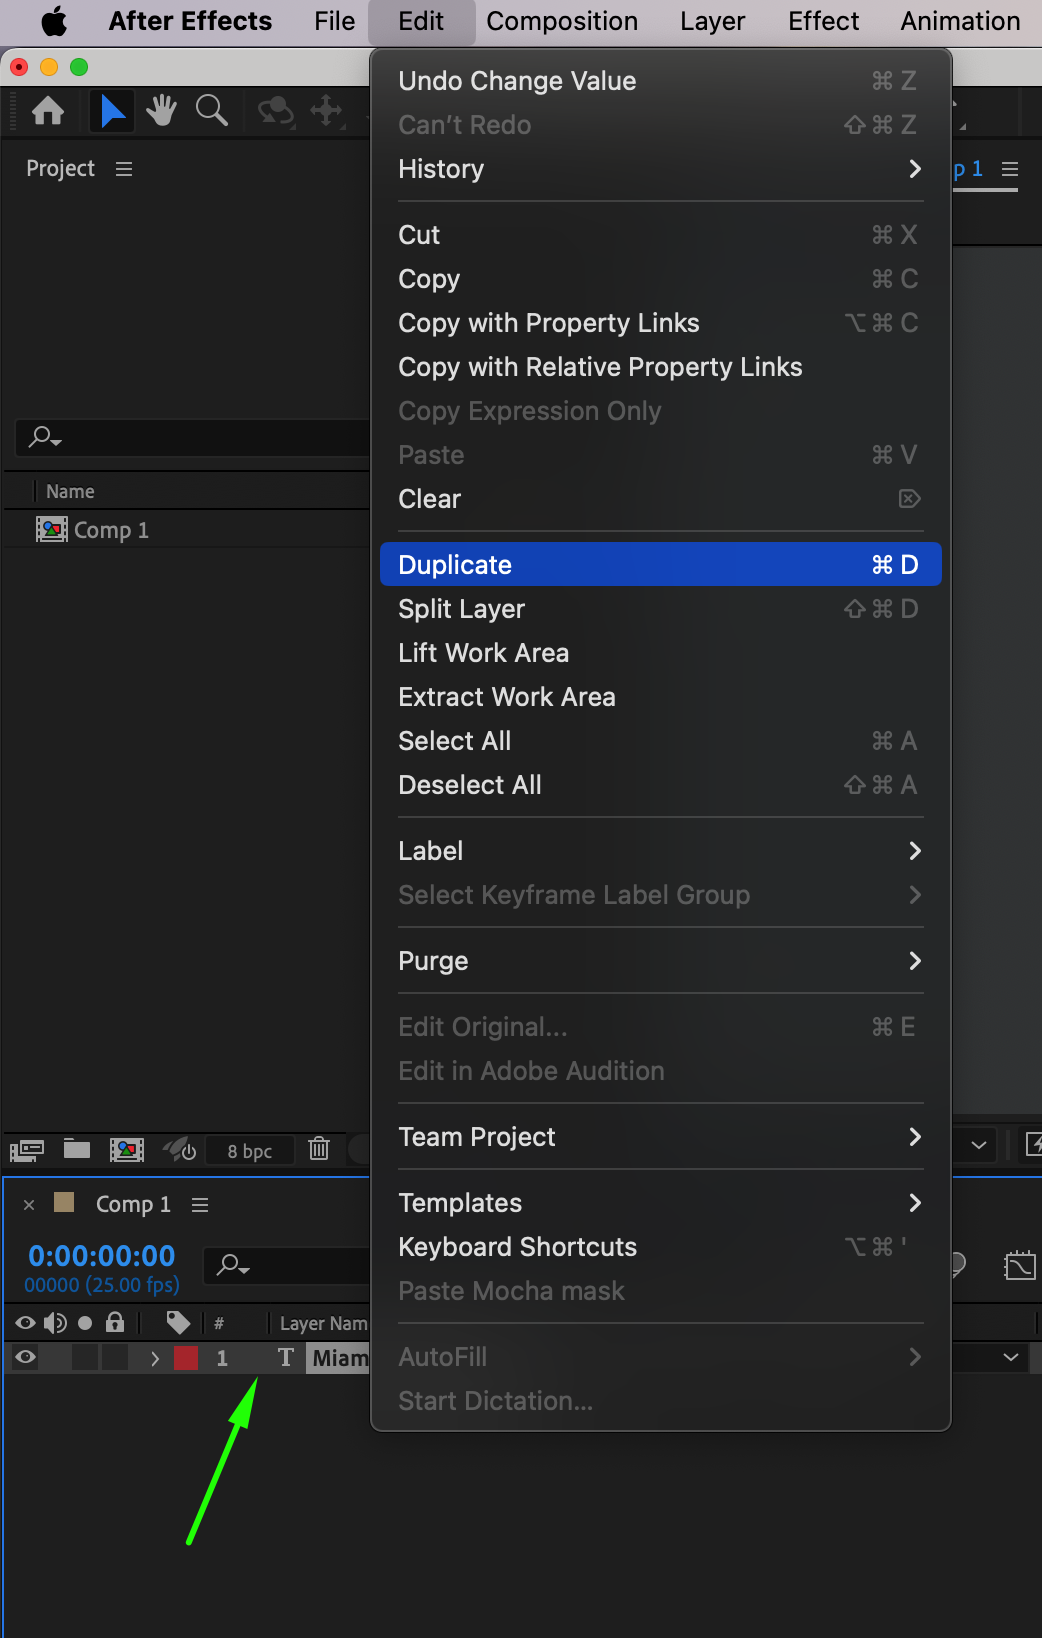
Get 10% off when you subscribe to our newsletter
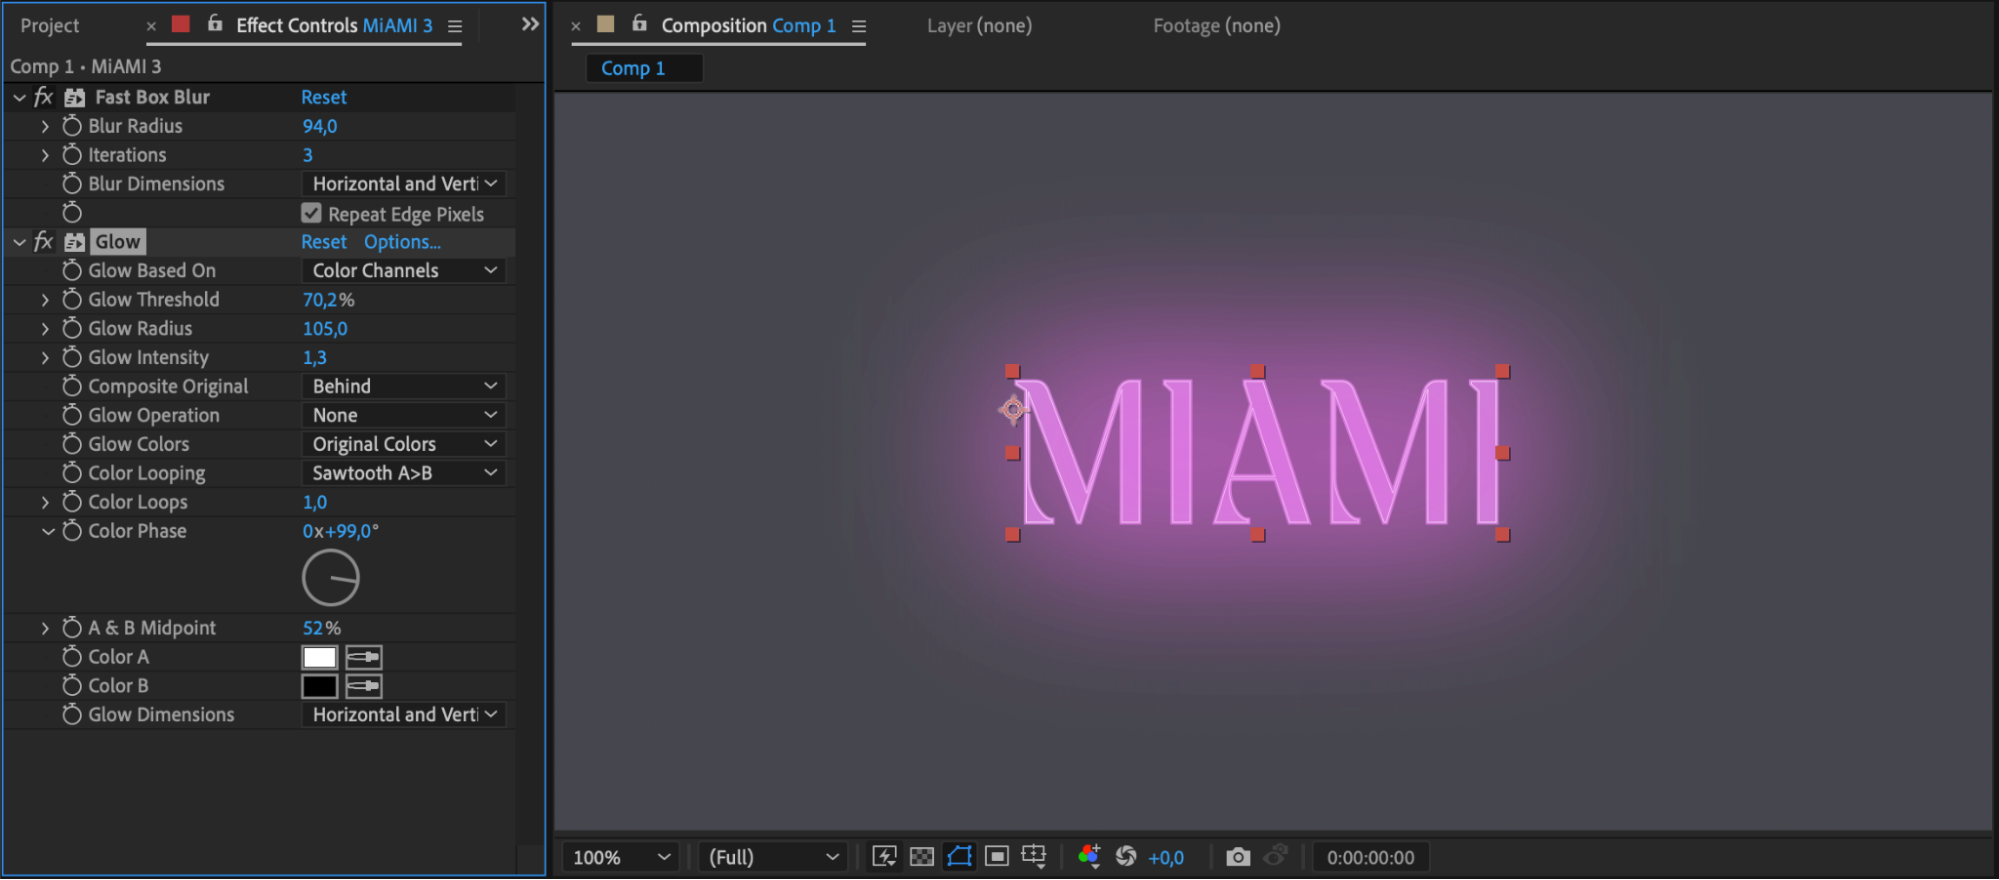
Step 5: Enhancing with Glow Effect
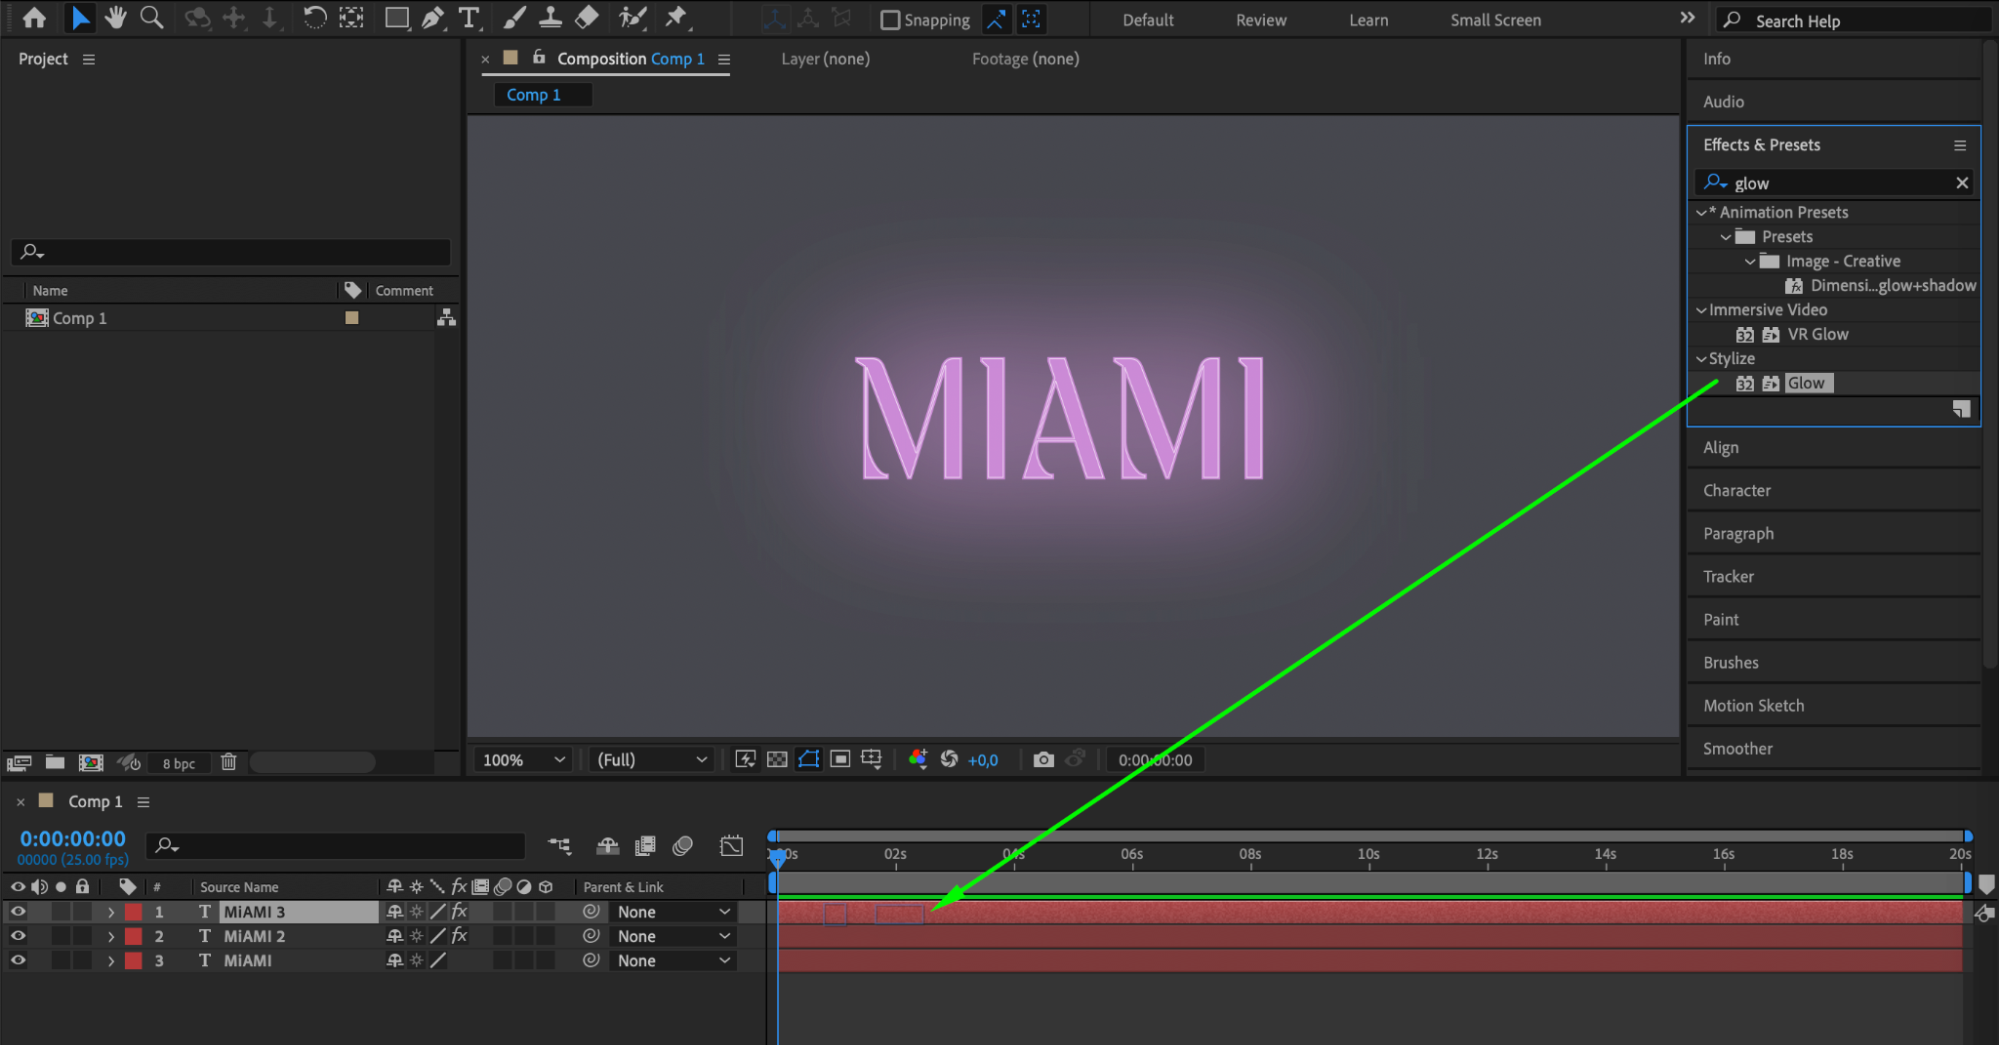
To enhance the neon effect even further, duplicate the duplicated layer again and apply the Glow effect to this duplicated layer. Customize the glow settings, such as intensity, radius, and color, to make the text glow in a way that captures attention.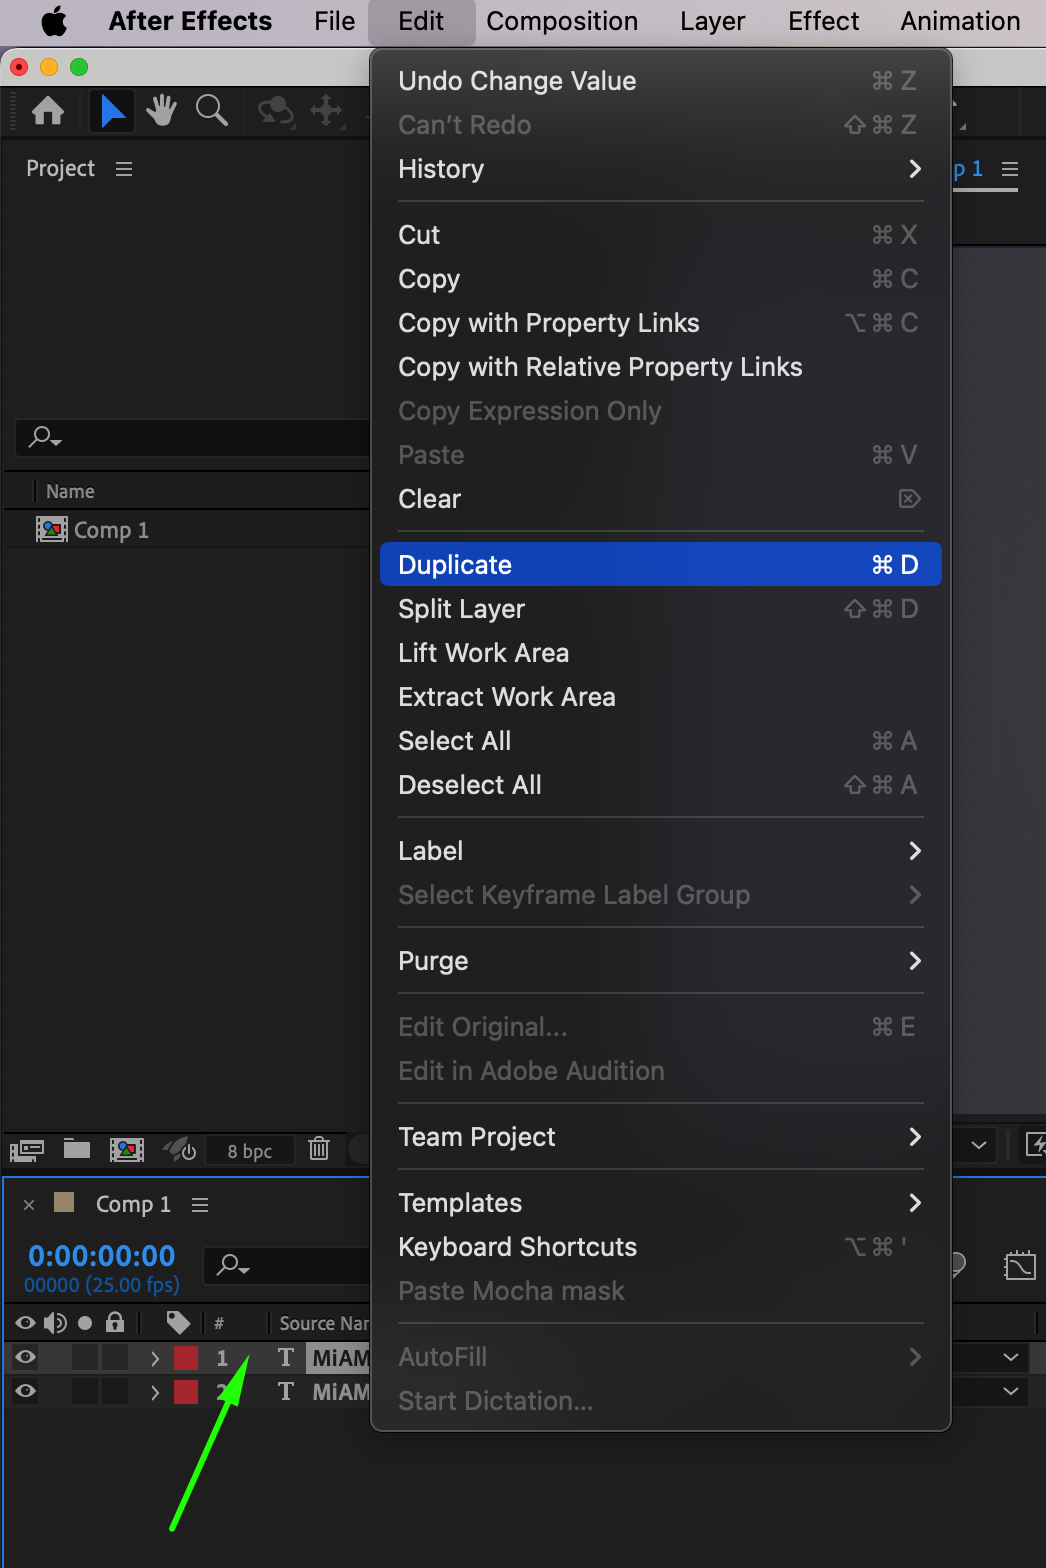
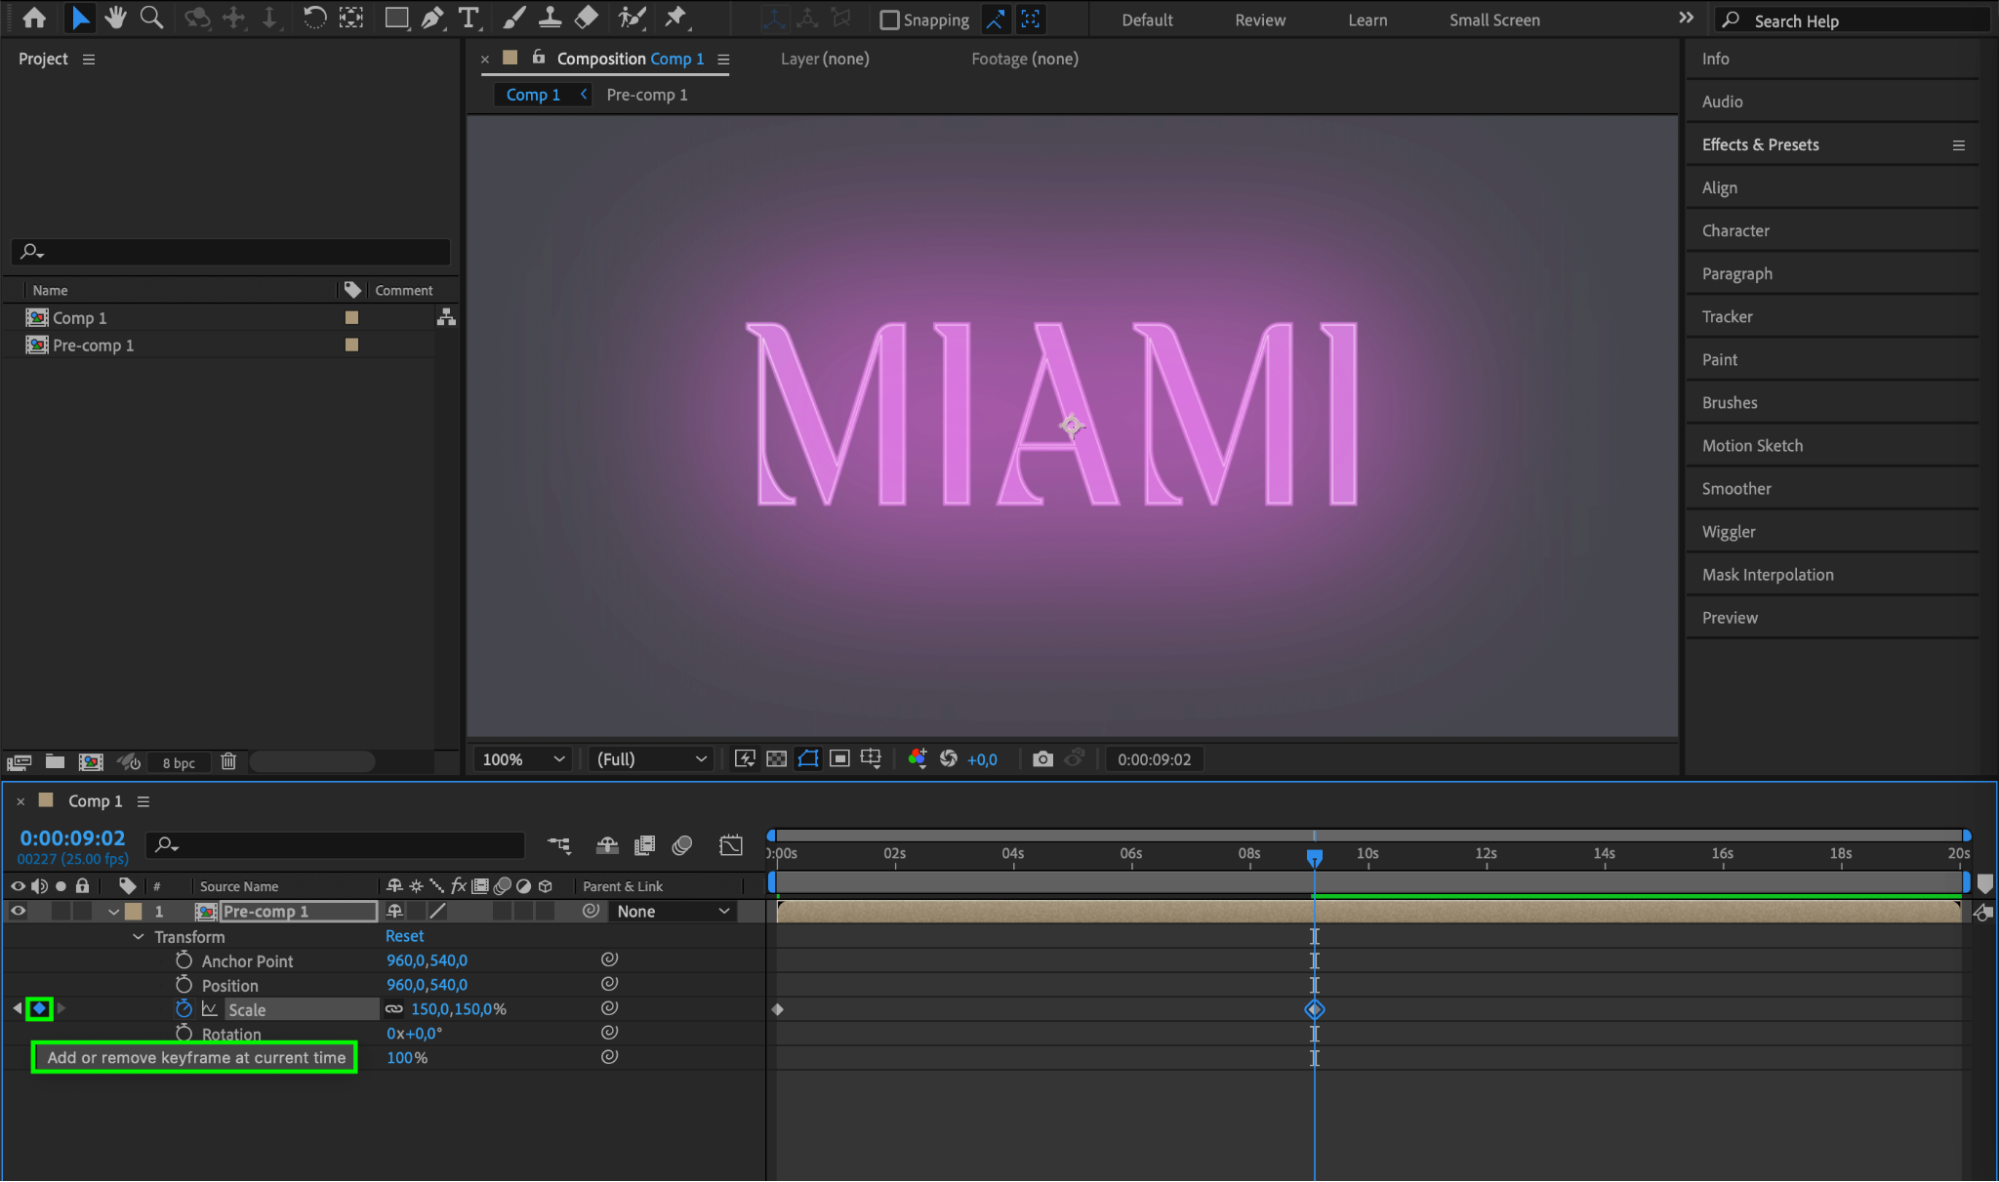
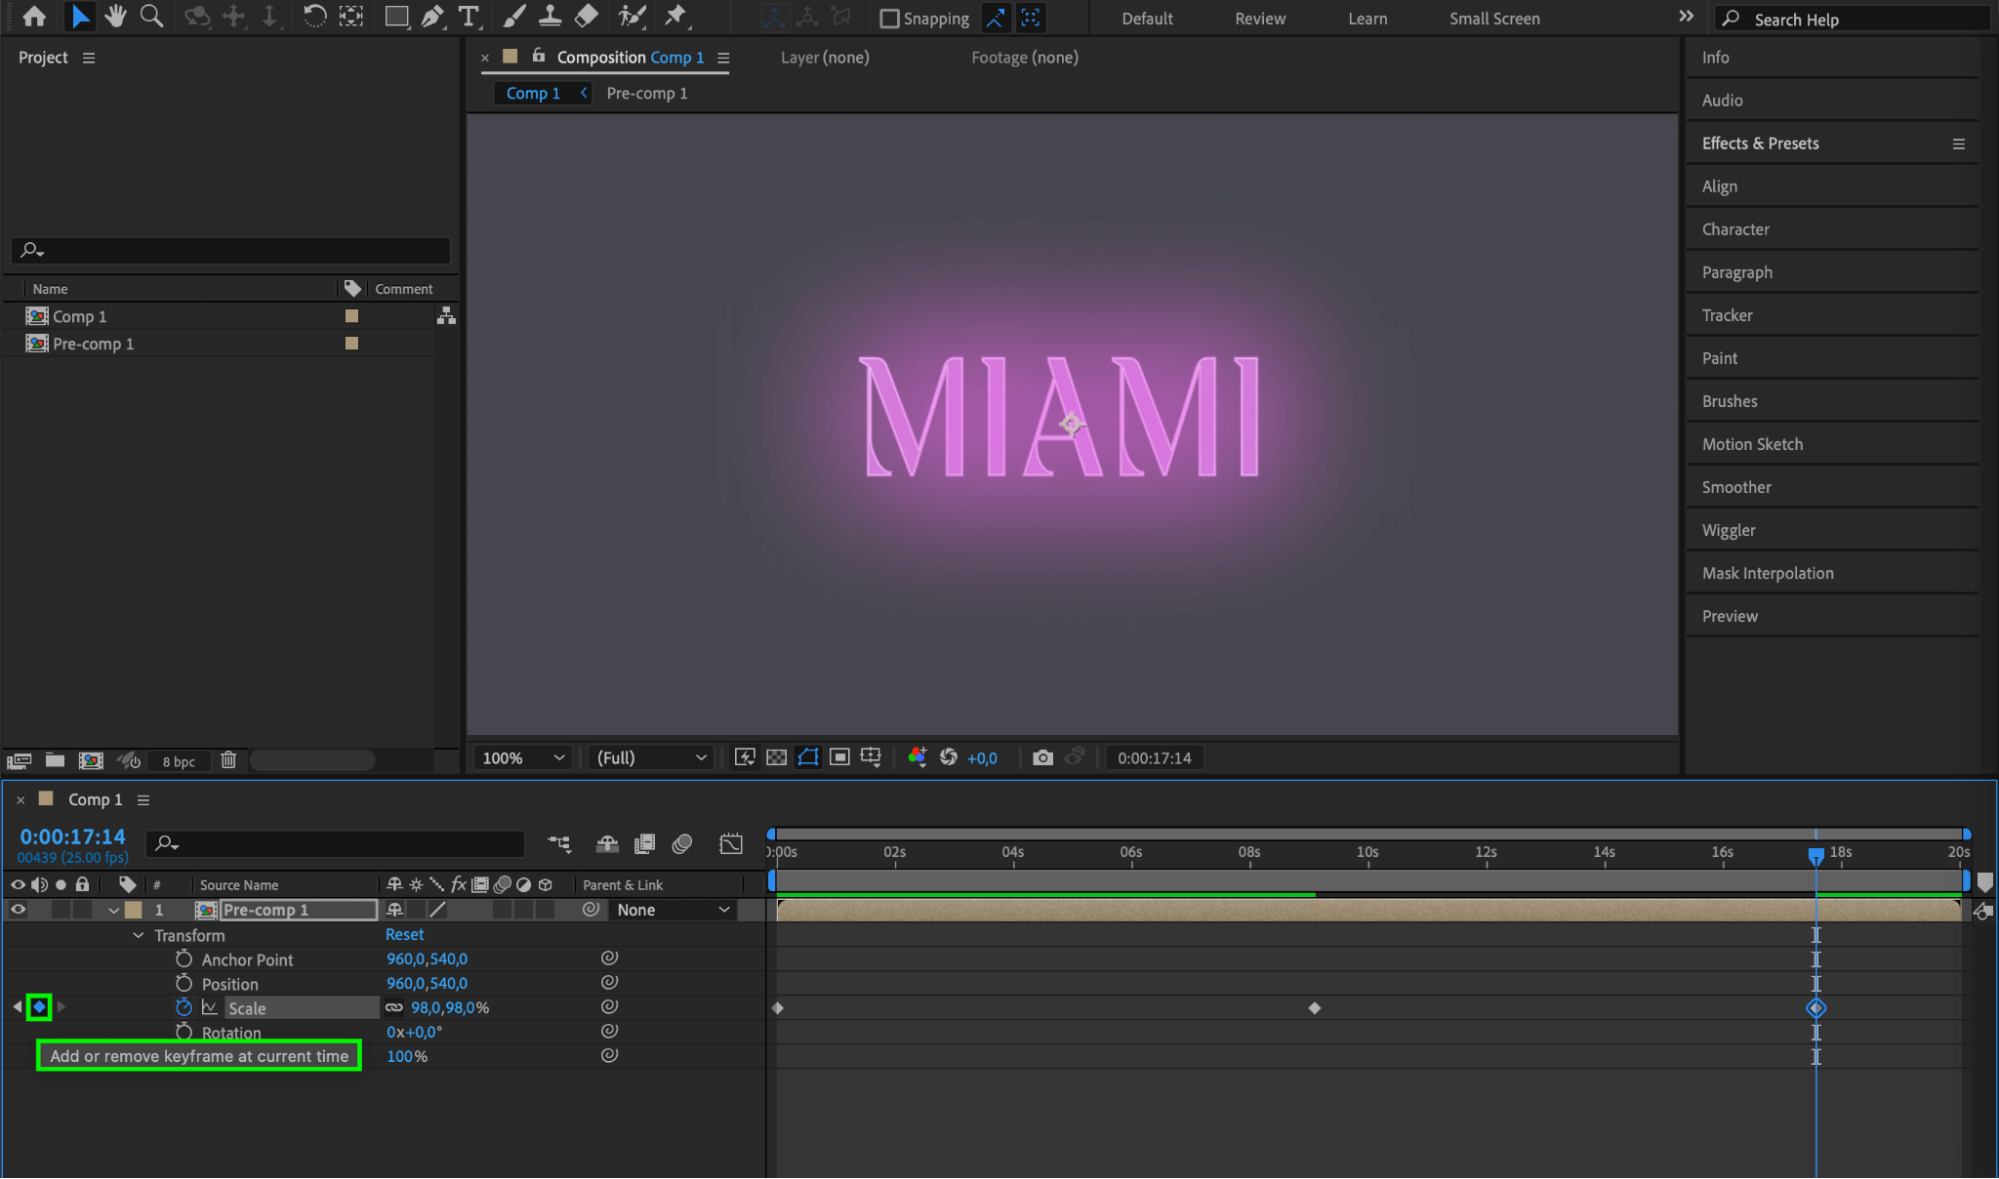
Step 6: Animating Your Text
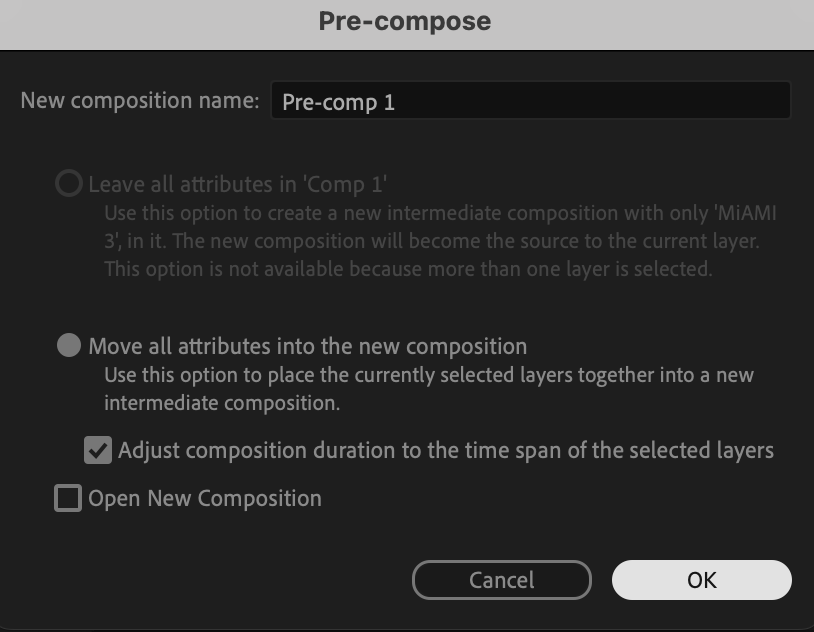
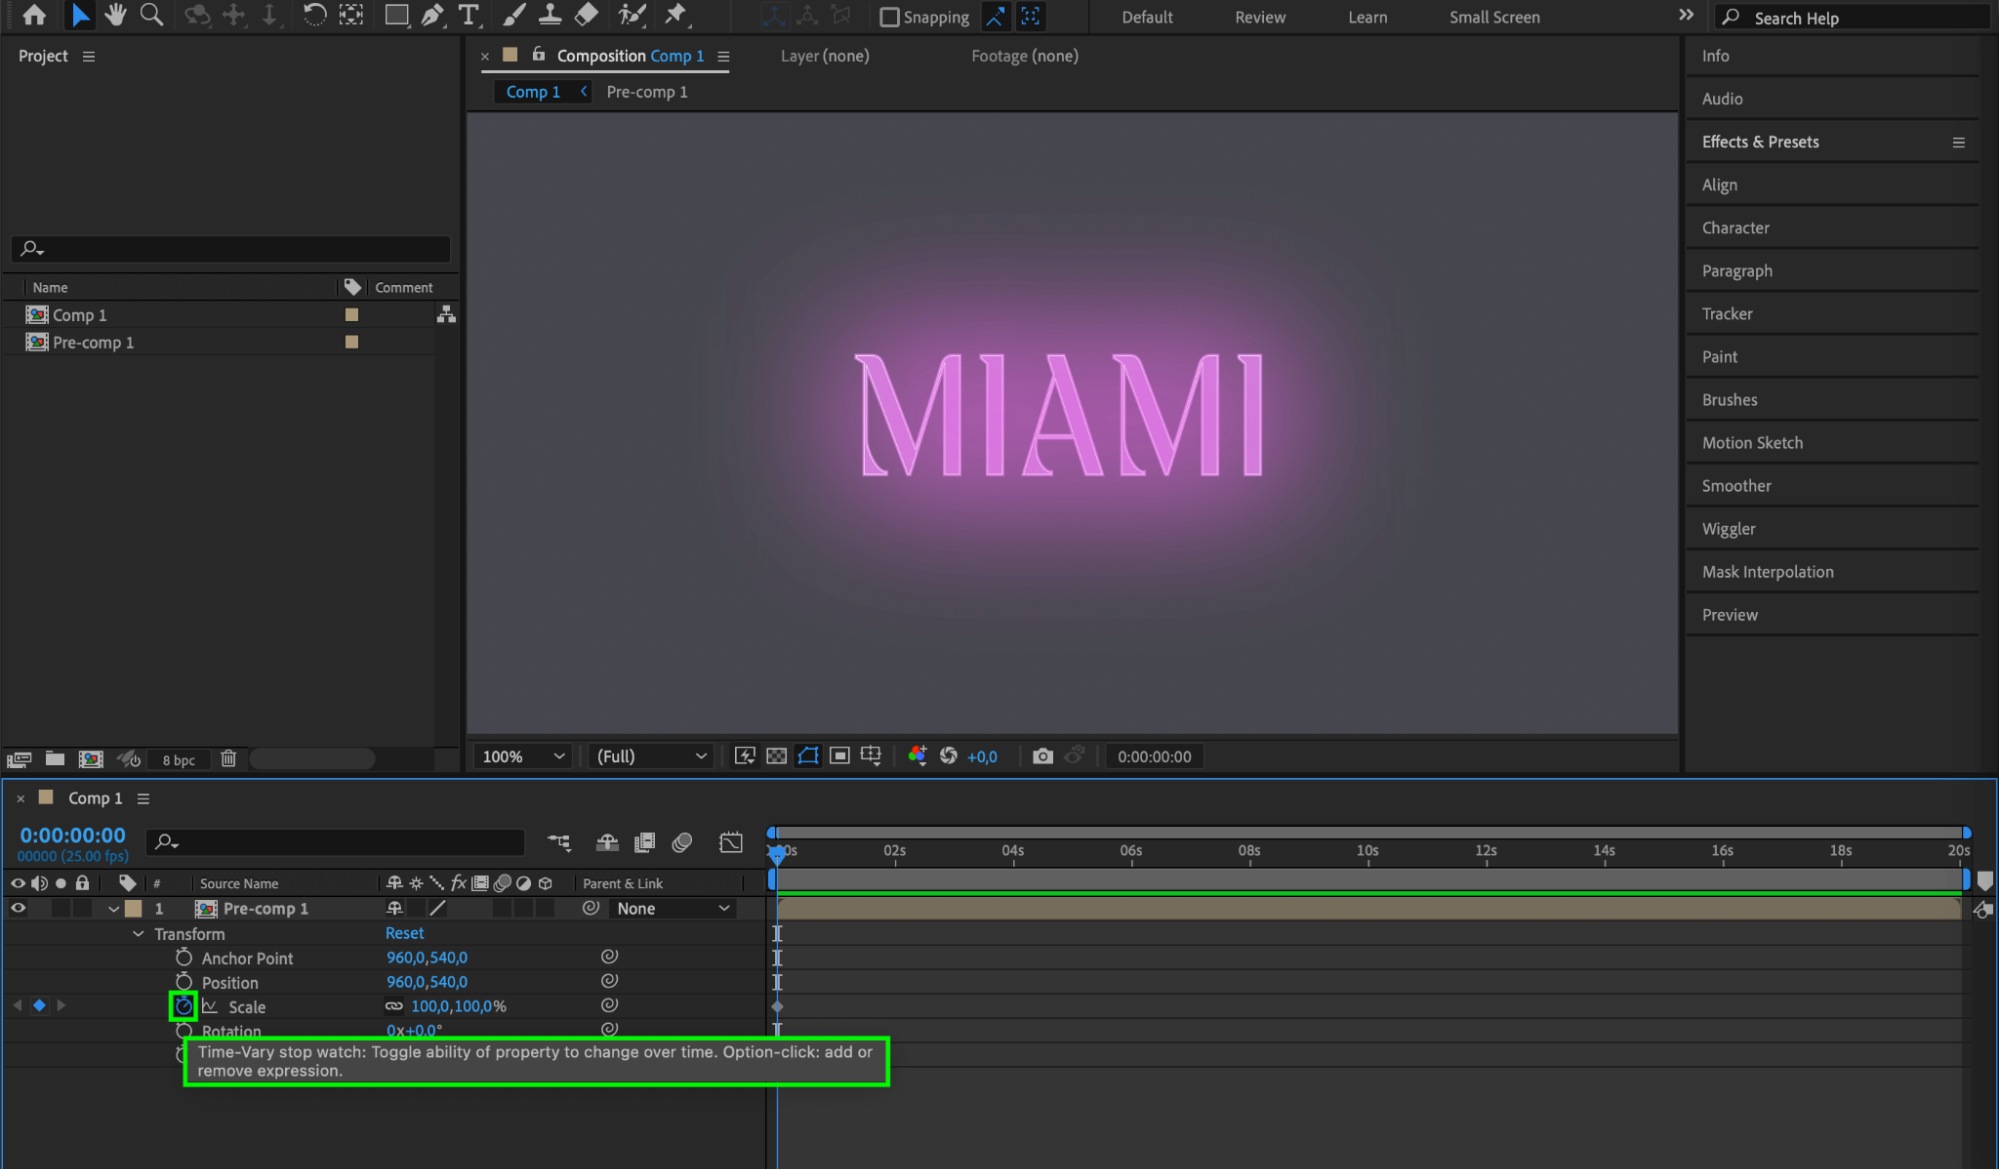
To bring your neon text to life, add keyframes to animate it. Experiment with properties like position, scale, rotation, and opacity to create dynamic movements. You can also use the Text Animator feature to add exciting animation presets to your text. Also, utilize pre-composition for easier layer management.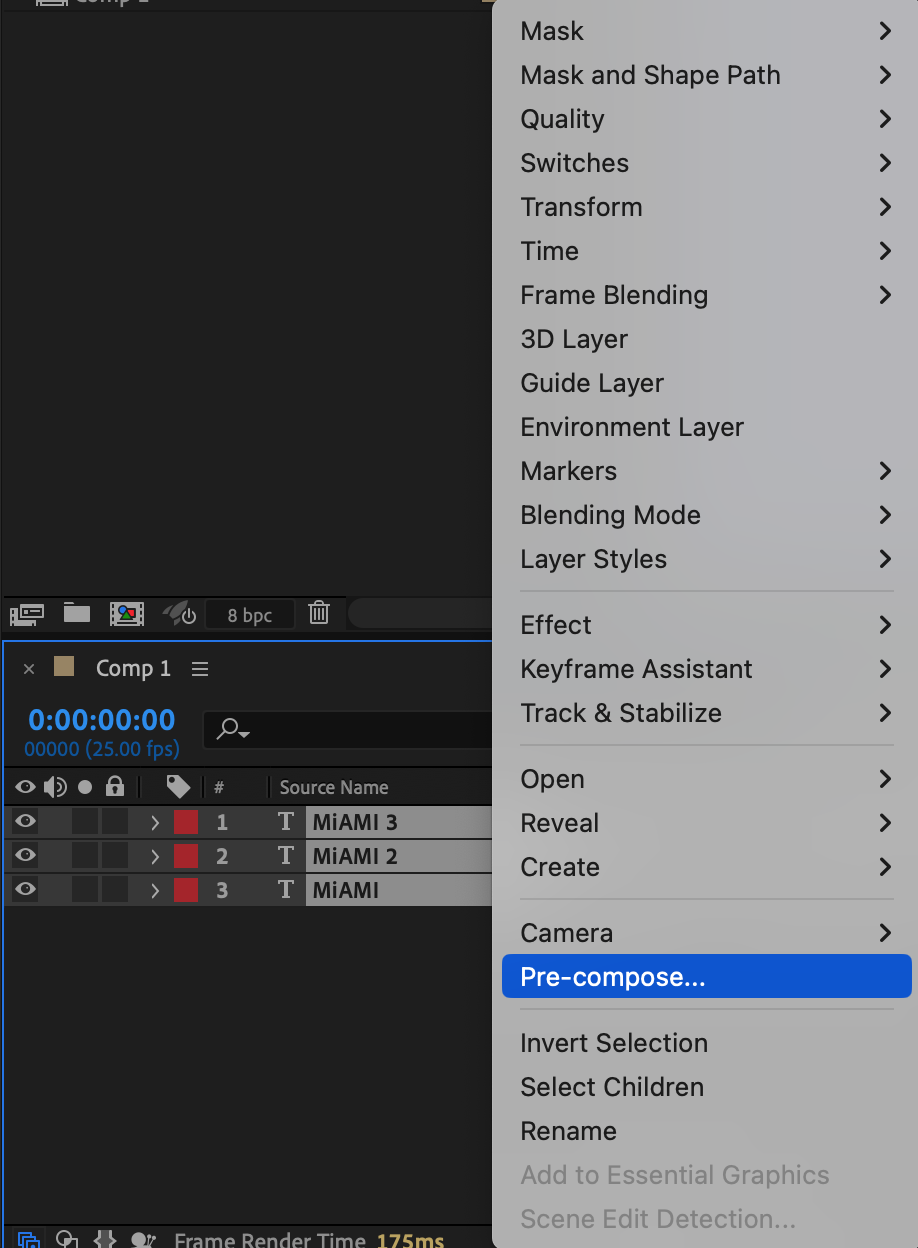
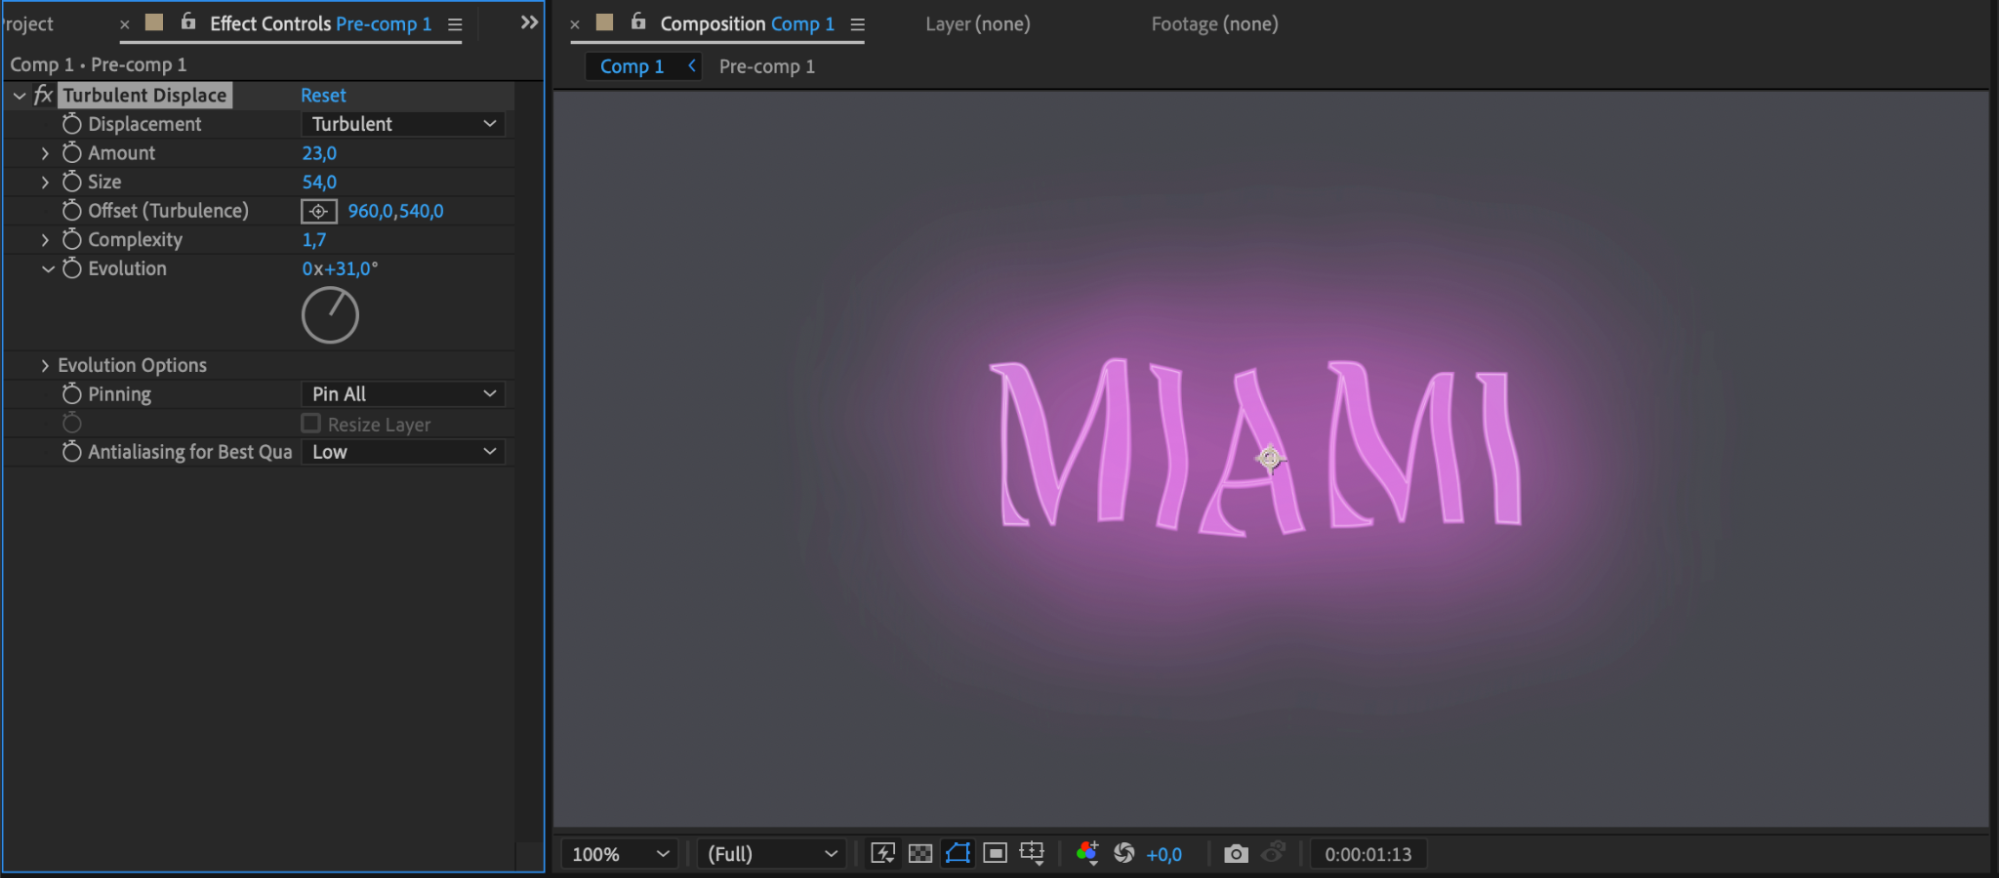
 Step 7: Refining with Additional Effects
To perfect the neon look, you can apply additional effects like Turbulent Displace or CC Glass to add texture and dimension to your text. Play around with blending modes, adjust the overall brightness and contrast, and add any additional elements to enhance the composition.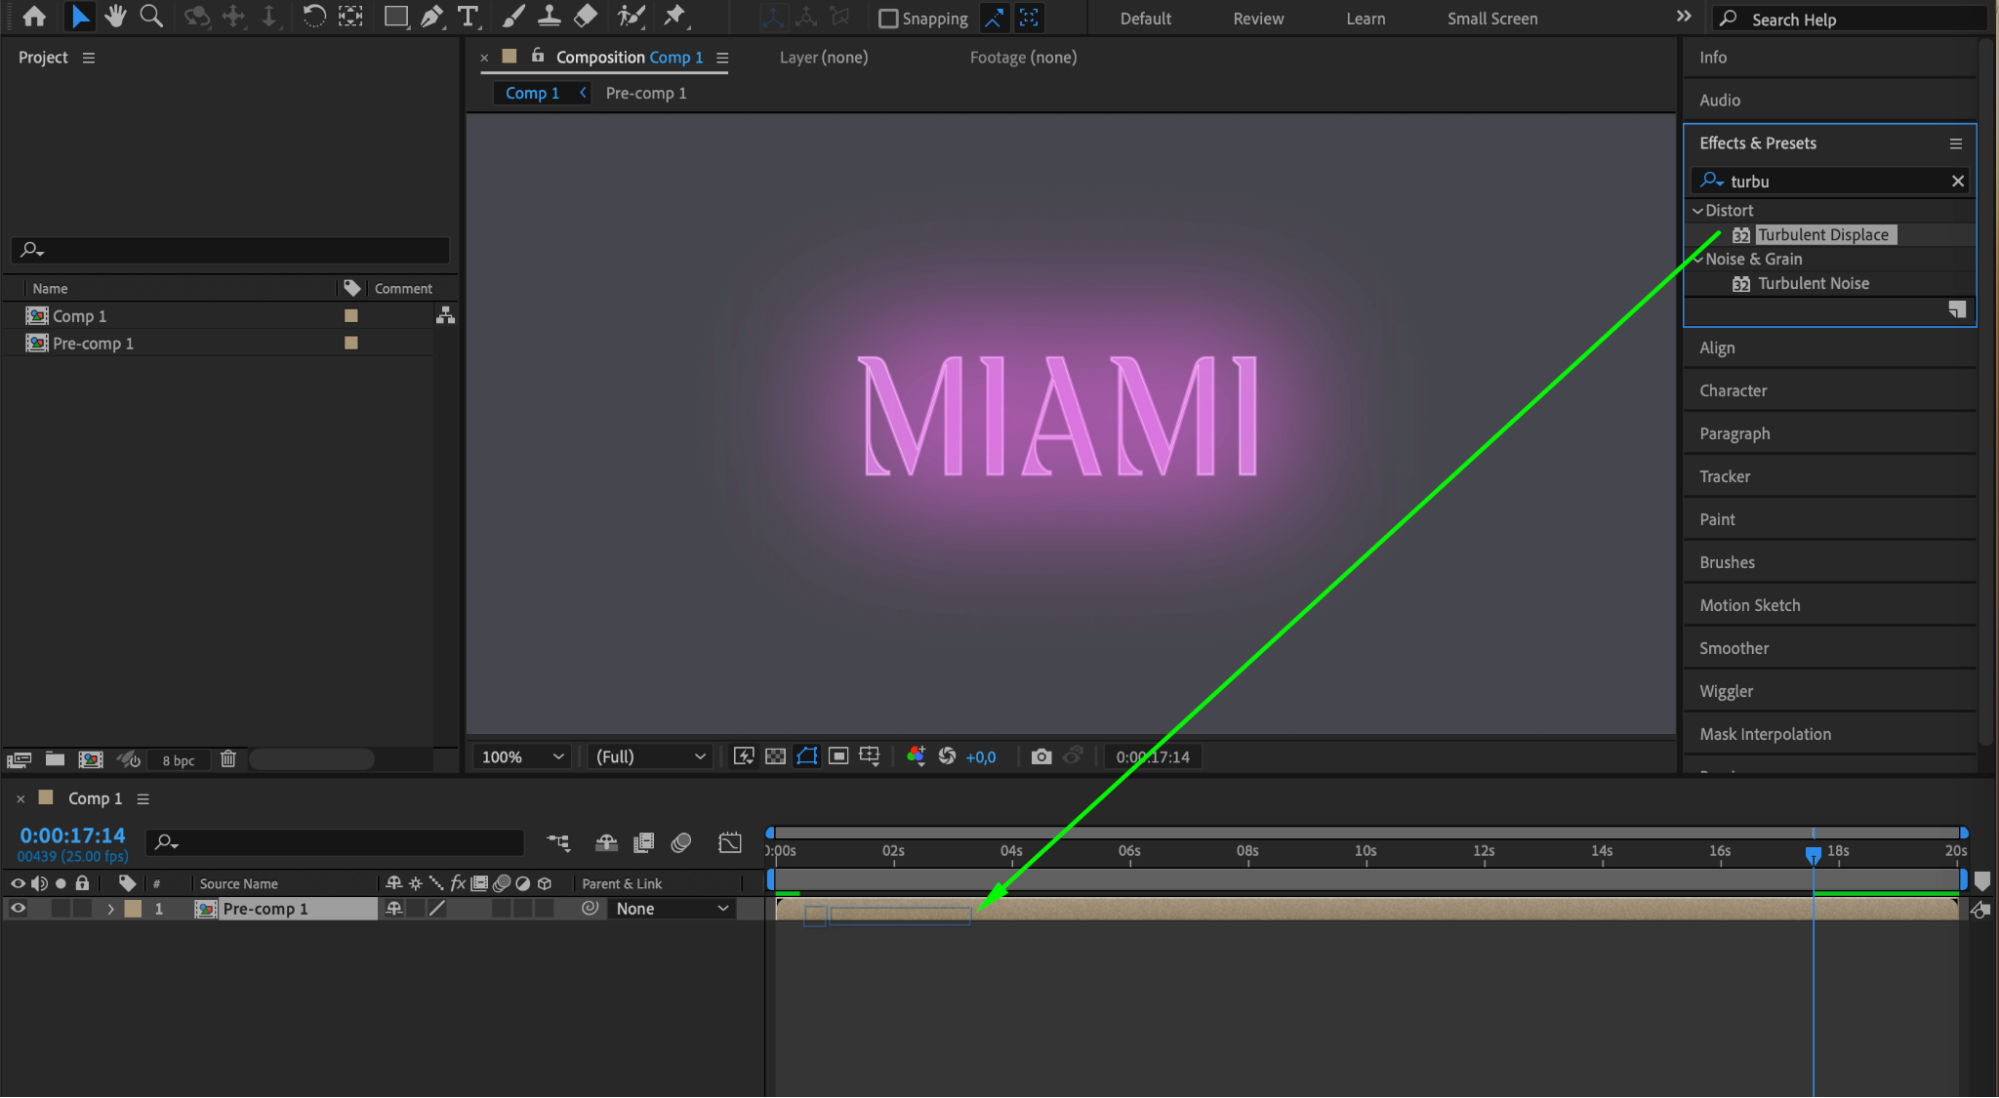
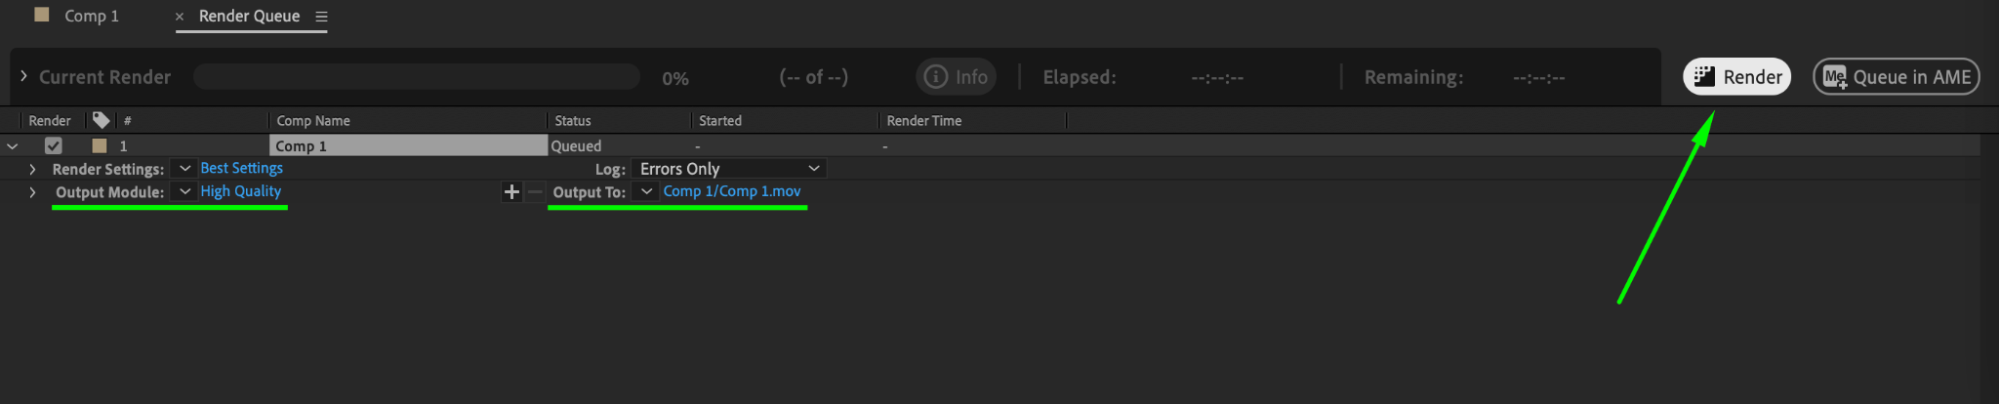
 Step 8: Exporting Your Composition
Get 10% off when you subscribe to our newsletter
Once you’re satisfied with your neon text animation, it’s time to export your composition. Choose the desired file format and settings, considering rendering with an alpha channel so you can easily overlay your neon text on other footage.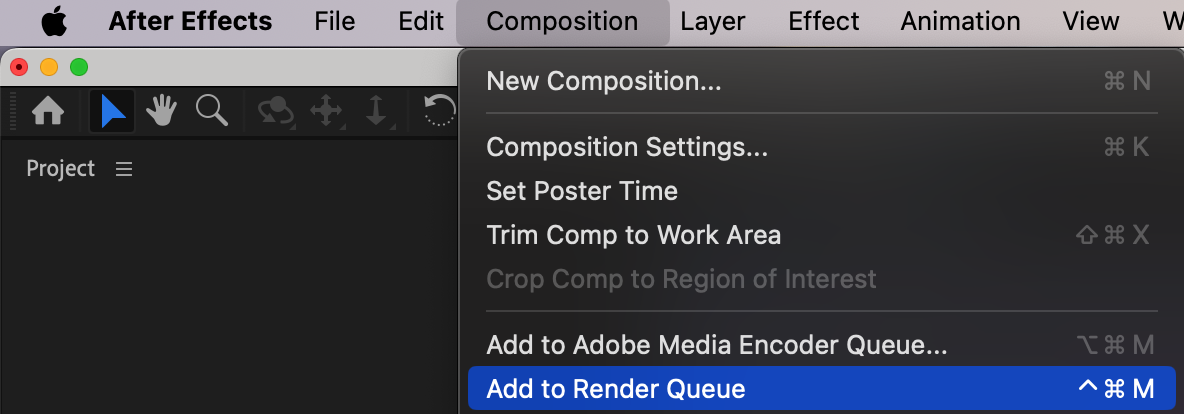
Get 10% off when you subscribe to our newsletter
Conclusion
By following these steps, you’ll be able to create stunning neon text in After Effects that will captivate your audience and add a striking visual element to your projects. So, grab your creative hat and let your imagination shine as you bring your text to life with the electrifying neon effect! Have fun creating and don’t be afraid to experiment and add your unique touch.
Our Bestsellers


