A Step-by-Step Guide to Creating a Text Shatter Effect in After Effects
Introduction to Text Shatter Effects in After Effects
Creating a text shatter effect in Adobe After Effects can add a dramatic and professional touch to your videos. This effect makes your text appear as if it’s breaking into pieces and scattering, which can be used to create powerful visual transitions or to emphasize certain moments in your project. Whether you’re working on a cinematic title sequence or a creative intro, this tutorial will walk you through the process of making your text shatter with precision.
Before we start, it’s helpful to have a basic understanding of After Effects. If you’re new to the software, consider spending some time getting acquainted with its interface and controls. Once you feel comfortable, let’s dive into creating this exciting effect.
Step 1: Create a New Composition
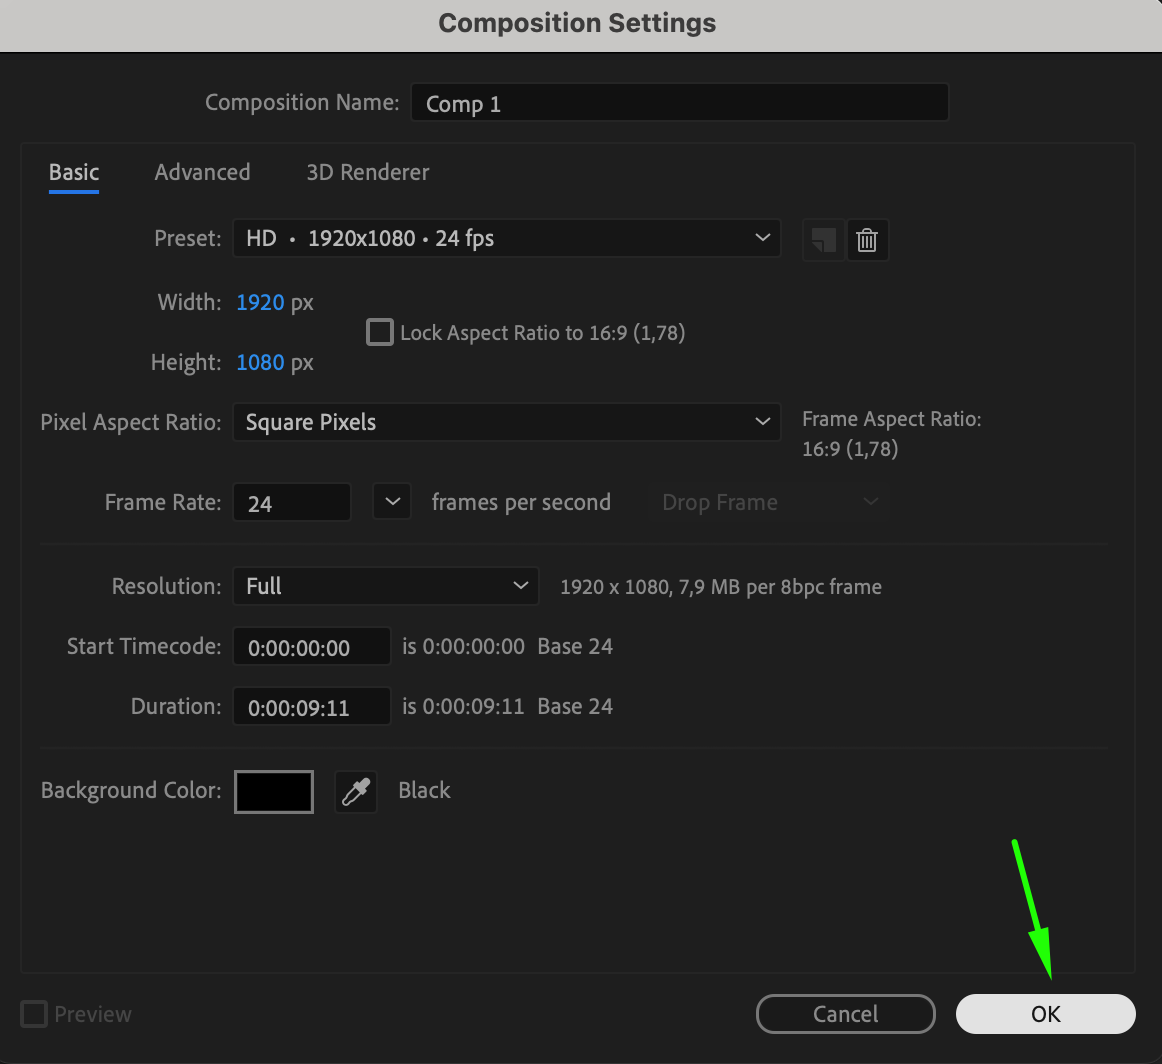
Begin by creating a new composition where you’ll build your text shatter effect. To do this, go to the “Composition” menu and select “New Composition.” Set the desired width, height, and duration according to your project requirements. This composition will be the canvas where you design your shattering text.
 Step 2: Create a Text Layer
Get 10% off when you subscribe to our newsletter

Next, create a text layer that will serve as the basis for your shatter effect. Click on the “T” icon in the Toolbar to activate the Text Tool, then click and drag on the composition area to create a text box. Type the text you want to shatter. You can customize the font, size, and color of your text to fit your design vision.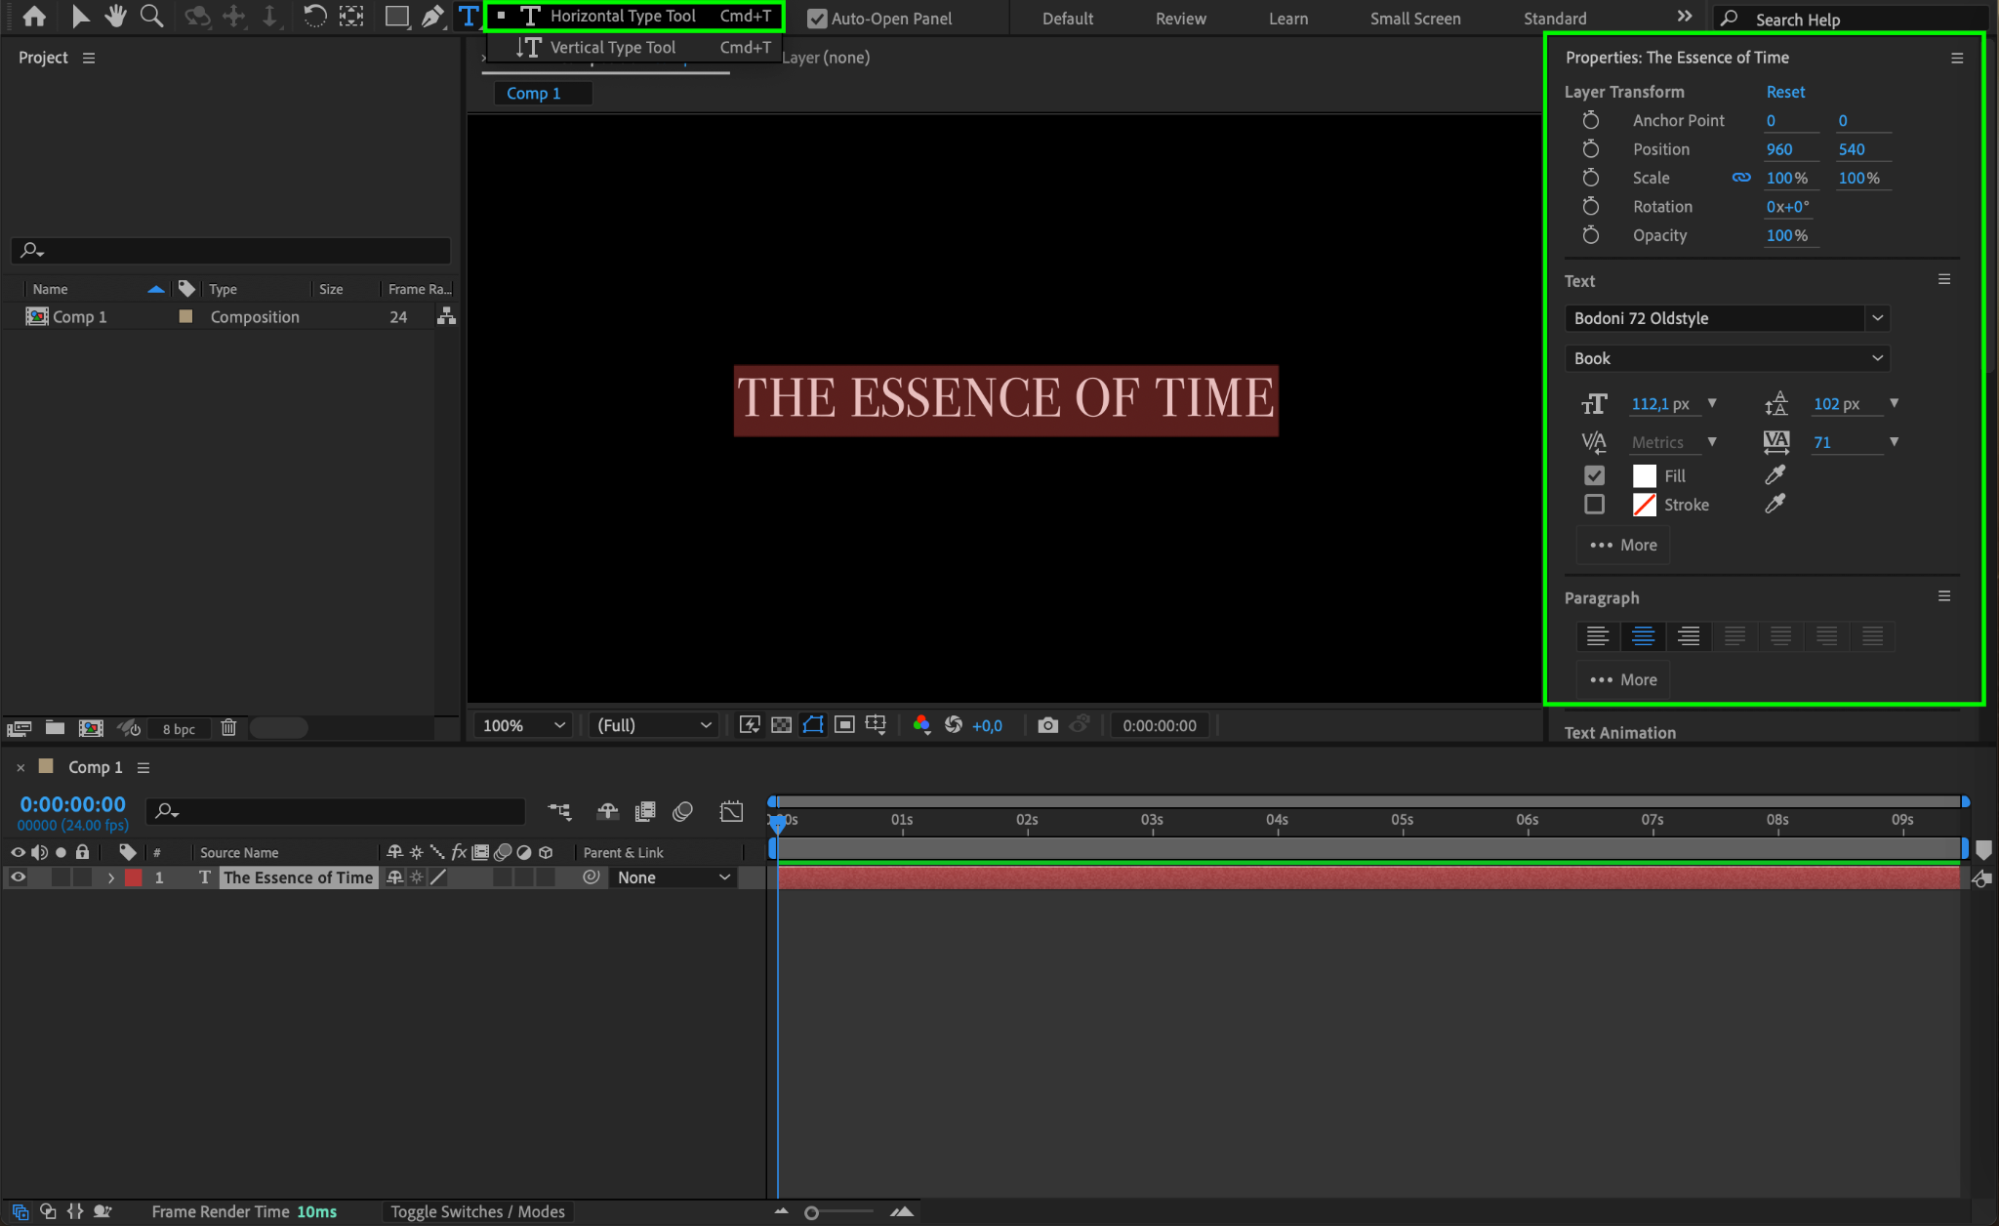 Step 3: Apply the Shatter Effect
Get 10% off when you subscribe to our newsletter

With the text layer selected, navigate to the “Effects & Presets” panel on the right side of the screen. In the search bar, type “Shatter,” and find the effect under the “Simulation” category. Double-click “Shatter” to apply it to your text layer. This effect will allow you to break your text into pieces and animate the shattering process.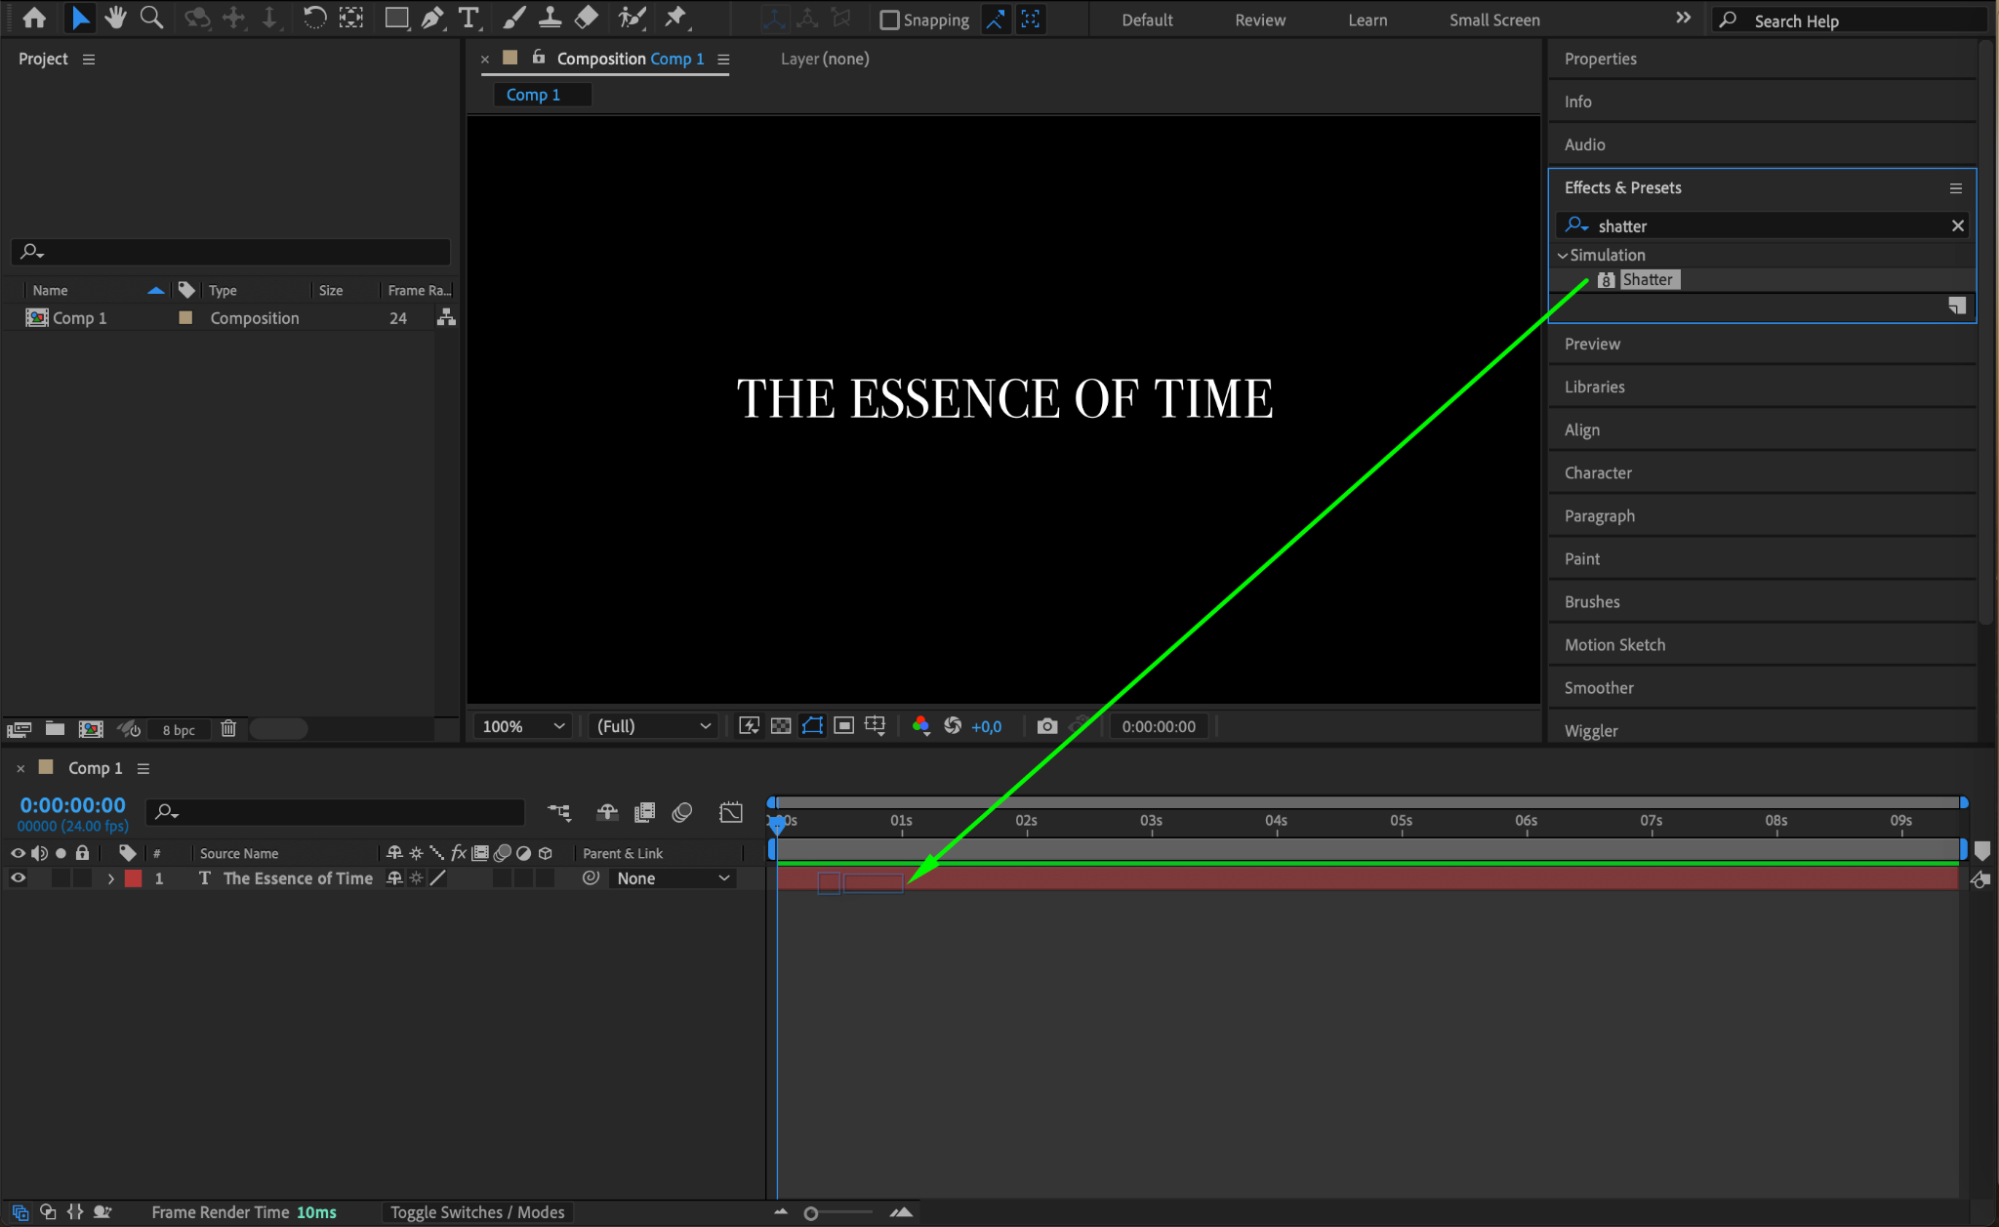 Step 4: Adjust the Shatter Effect Settings
Once the Shatter effect is applied, it’s time to fine-tune the settings to achieve the desired look. In the “Effect Controls” panel, set the “View” option to “Rendered” so you can see the final output as you adjust the parameters. Next, choose “Glass” as the “Pattern” type for a sharp, clean break. Set the “Strength” to 0.05 to control how forcefully the text shatters, and adjust the “Rotation Speed” to 0.4 to give the shards a slight spin as they break apart.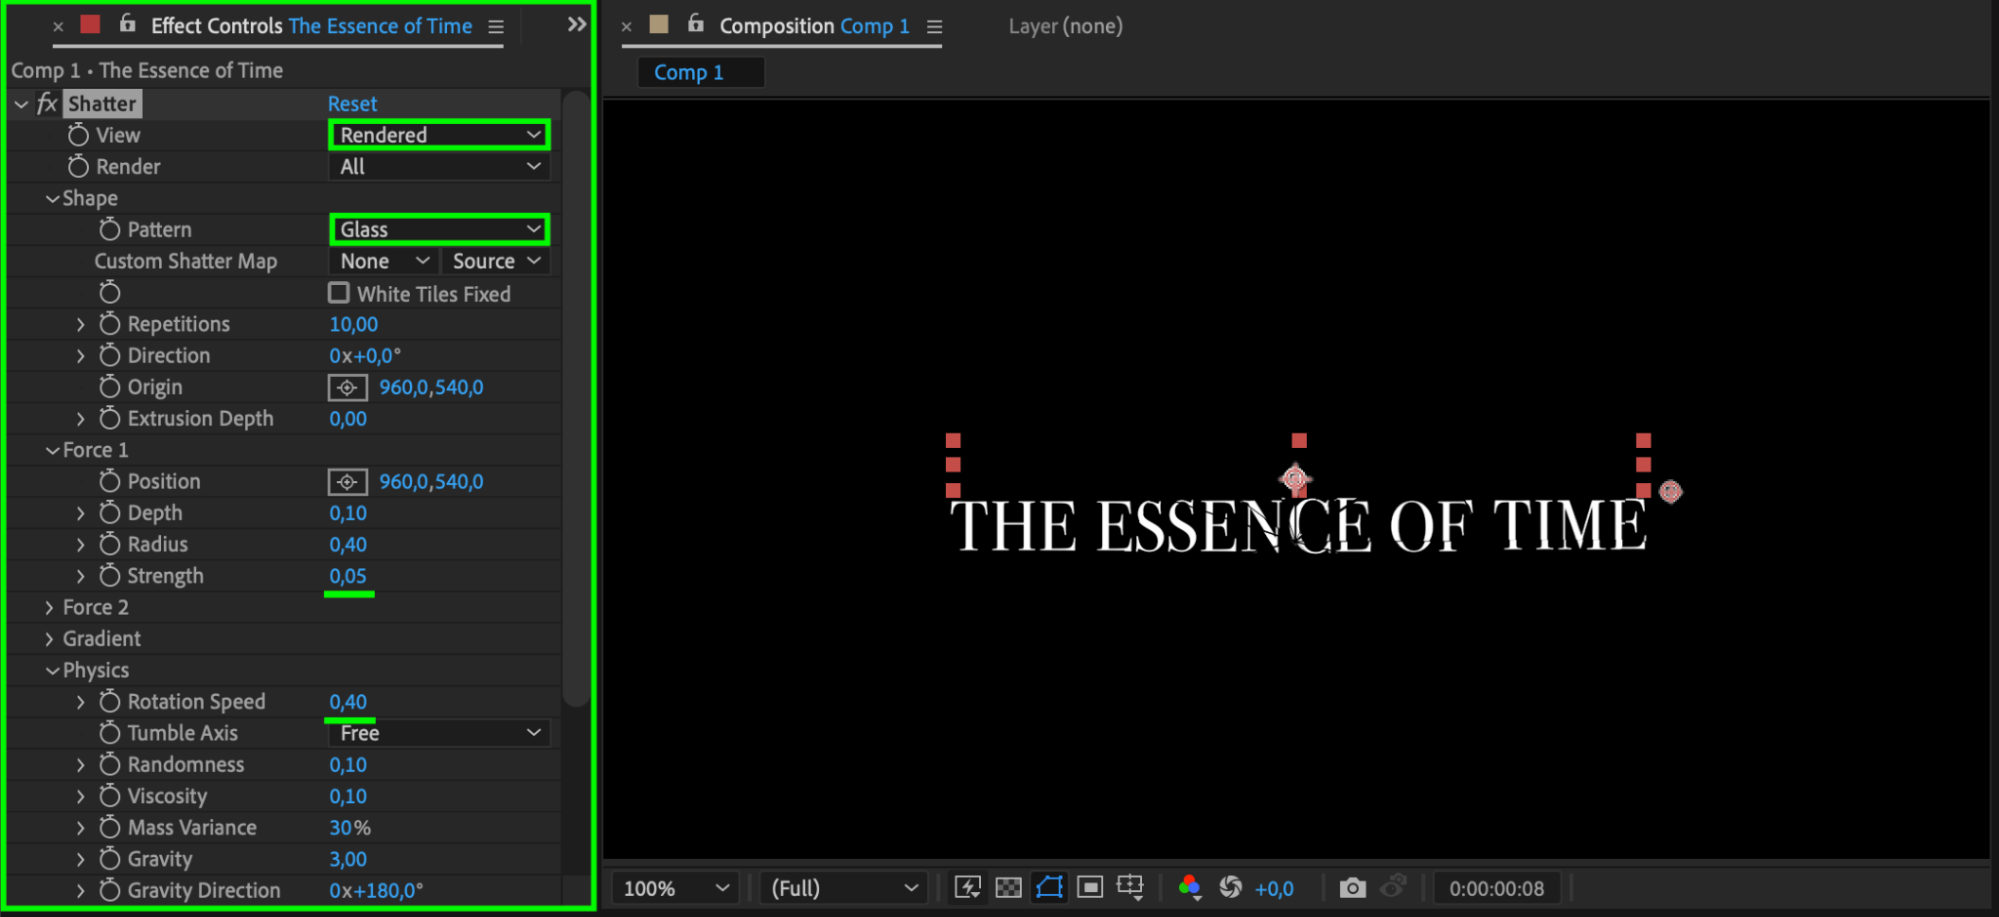
Get 10% off when you subscribe to our newsletter

Step 5: Enhance Realism with Textures or Materials
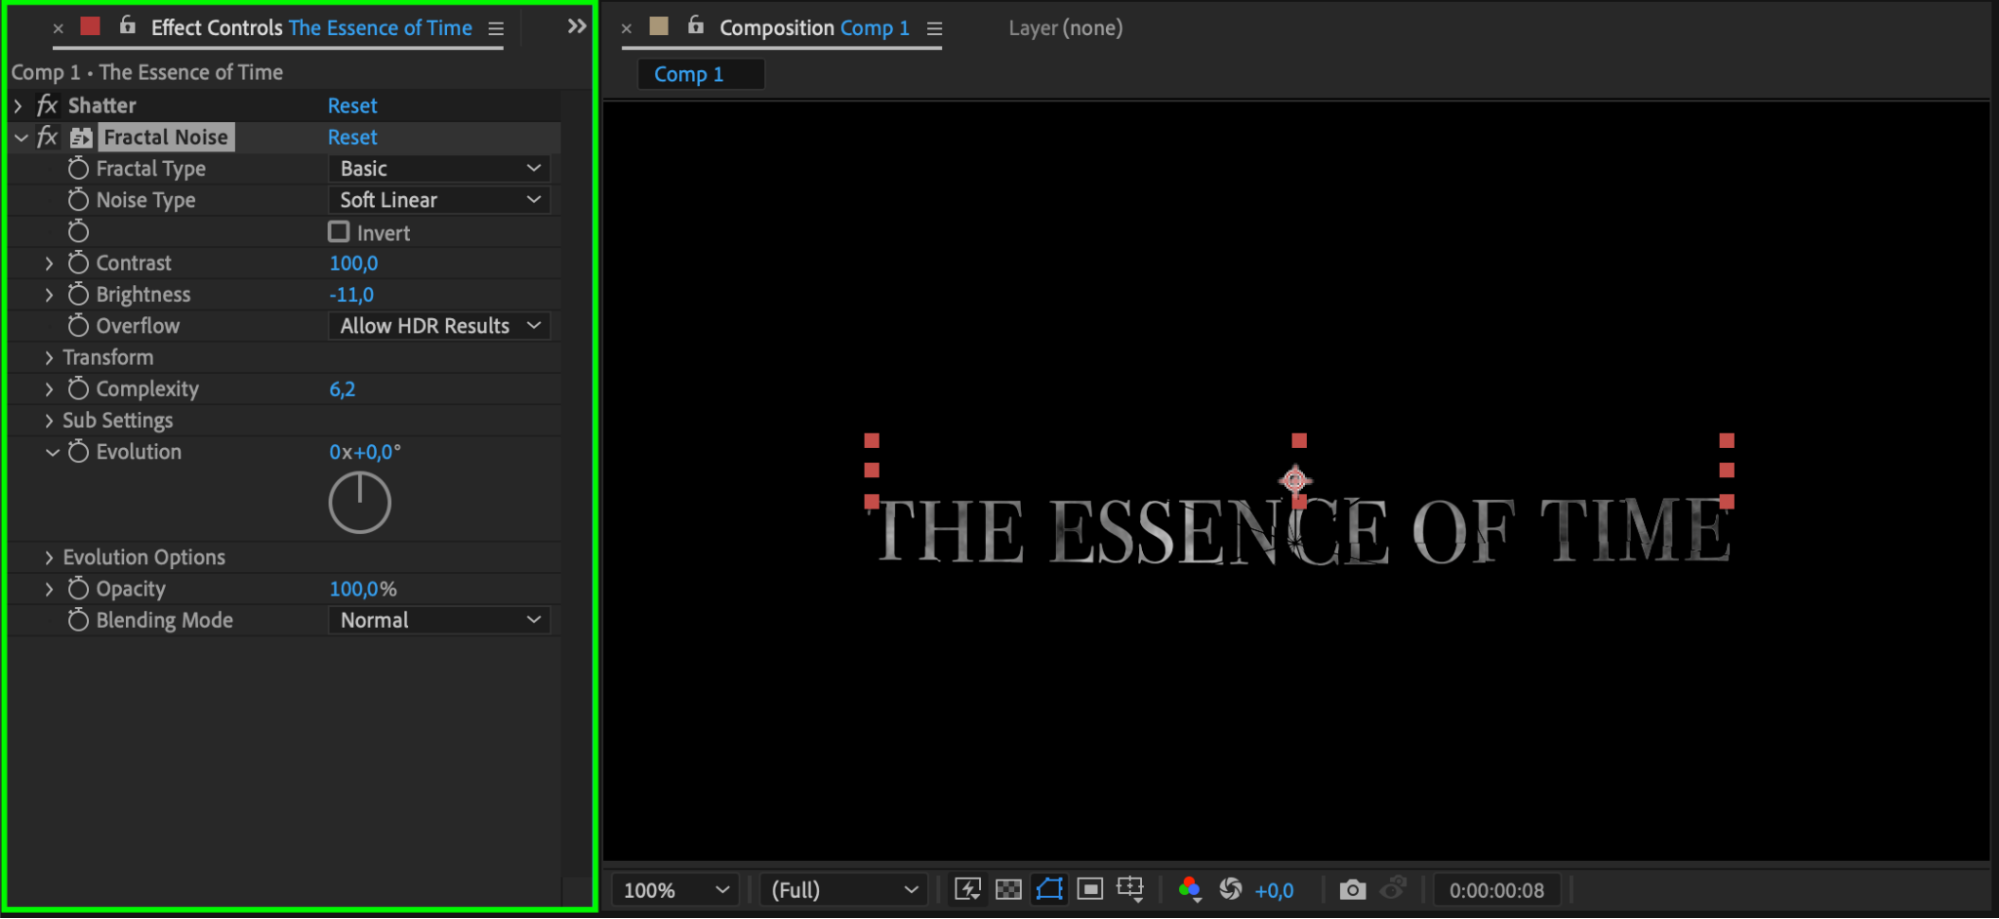
To add more realism and depth to your shatter effect, consider applying textures or materials to your text. This can make the pieces look more like real fragments. For instance, you can add a “Fractal Noise” effect to your text layer to create an interesting texture that will be applied to the shards as they break apart. Experiment with different textures to find the look that best suits your project.
 Step 6: Preview and Fine-Tune the Effect
After configuring your settings, it’s important to preview the shatter effect to ensure it looks the way you want. Press the spacebar to preview the animation. If the effect doesn’t meet your expectations, return to the “Effect Controls” panel and tweak the parameters until you’re satisfied with the result. 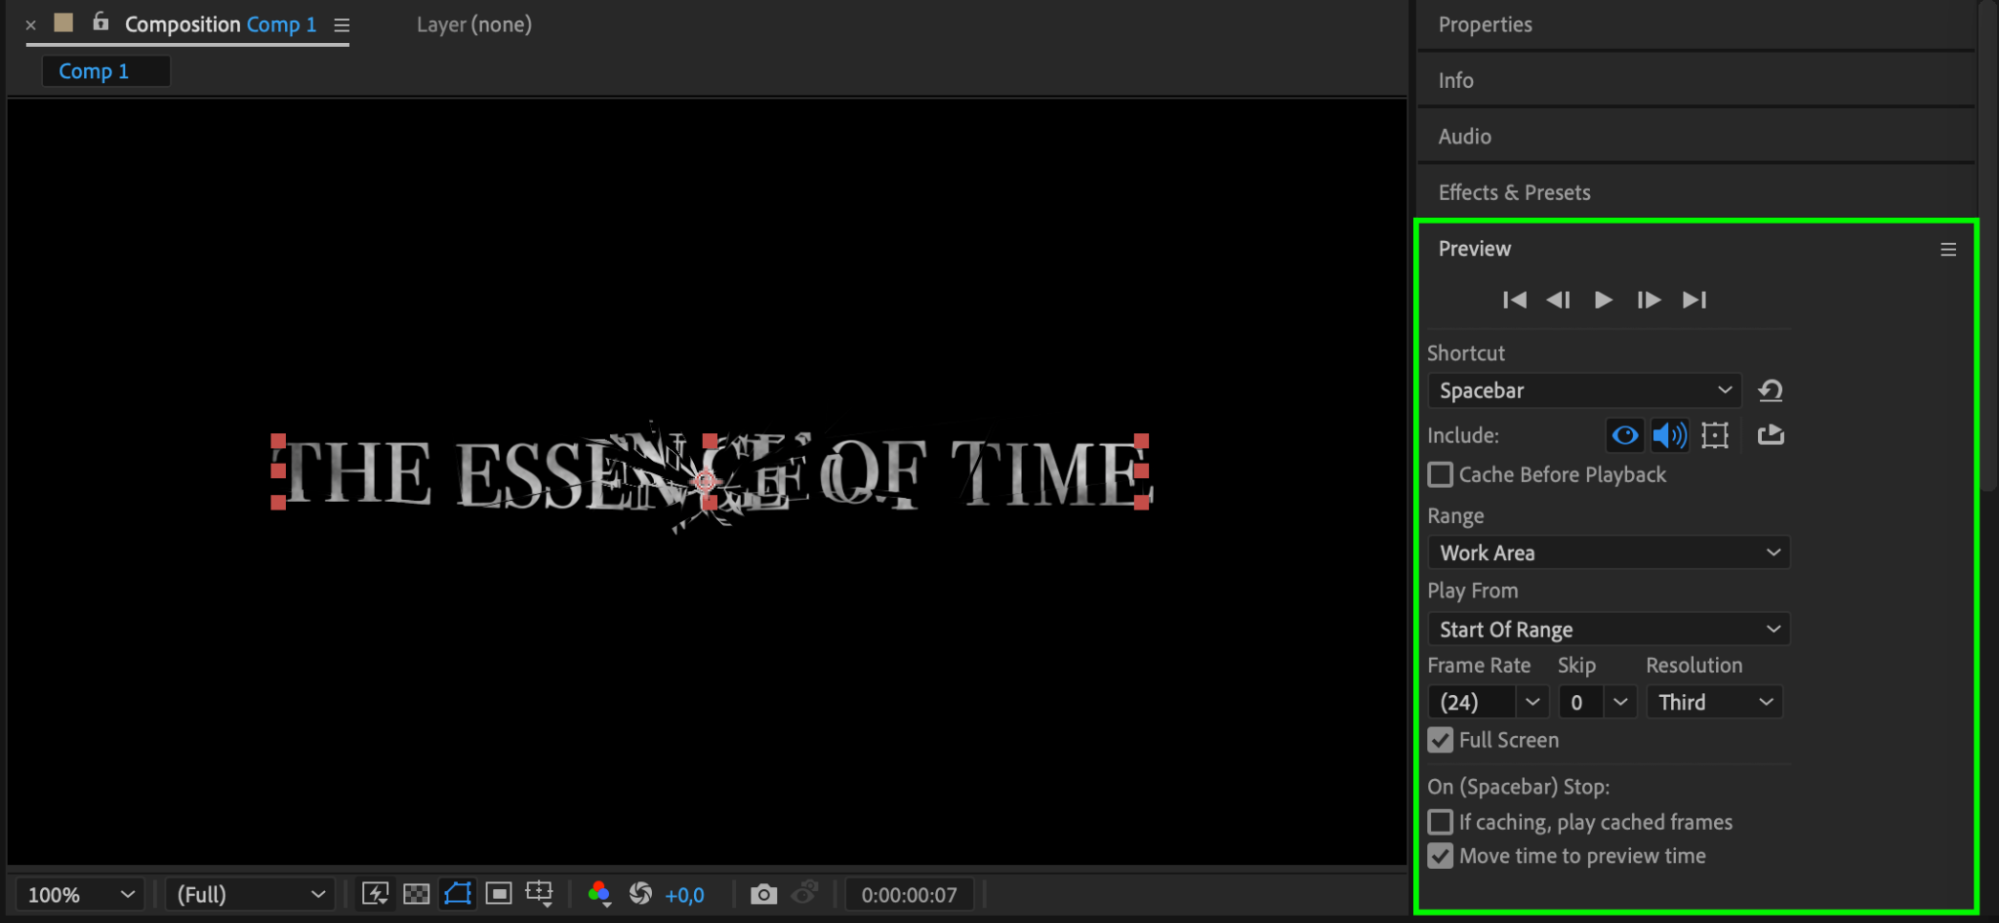 Conclusion
Get 10% off when you subscribe to our newsletter

Creating a text shatter effect in After Effects can elevate your video projects by adding dynamic and visually striking elements. By following these steps and experimenting with different settings, you can customize the effect to match your creative vision. Whether you’re aiming for a subtle breakup or a dramatic explosion, the text shatter effect is a versatile tool that can enhance your storytelling. Give it a try and watch your text come to life in a whole new way!


